by Matthew Wiley | Oct 20, 2026 | Architectural Millwork
The right historic restoration builder in Charlottesville is rarely a single firm. Most successful projects pair a general contractor or architect with a specialist who can repair or replicate the original woodwork: sash, doors, trim, stairs and casework. The difference between the two matters because Charlottesville’s design review and Virginia’s tax credit program both judge the physical fabric of a building, and fabric is mostly millwork. This guide compares the kinds of builders you will meet, explains what the review bodies look at, and shows where a specialist shop such as ours fits.
Gepettomillworks
Match Millwork to Historic Buildings
Explore custom millwork from Gepettomillworks for historic building projects, alongside your search for the right restoration builder.
TL;DR
Table of Contents
Why Charlottesville raises the bar for restoration work
Few American towns concentrate as much early architecture in so small a radius. Monticello, Highland, Montpelier, the Rotunda and Central Grounds at the University of Virginia, Michie Tavern (ca. 1784), the Paramount Theater and the Jefferson School African American Heritage Center represent very different periods, builders and building types. Behind them stands a much larger stock of ordinary historic buildings: Federal and Greek Revival farmhouses in Albemarle County, brick rowhouses and Victorian frame houses near the Downtown Mall, early twentieth-century bungalows, and the schools, churches and community buildings of neighborhoods such as Vinegar Hill and Starr Hill.
That inheritance shapes local expectations. Reviewers, neighbors and preservation-minded buyers are accustomed to seeing true divided-light sash with proper muntin profiles, paneled doors with correct mouldings, and porch work that reads as original. A builder who treats these as interchangeable catalog parts will find the review process unforgiving.
What the review process actually examines
Before comparing builders, it helps to know what they will be measured against. Two systems apply, and a project may involve both.
Local design review
In Charlottesville, owners in Architectural Design Control districts must obtain a Certificate of Appropriateness from the Board of Architectural Review for exterior alterations, additions or new construction. Historic Conservation Districts use simpler guidelines and allow more flexibility for small renovations, although visible street-side changes still need BAR approval. The city’s Historic Preservation Program staff, reachable at (434) 970-3130, answer design review questions, and speaking with them before you hire anyone is inexpensive and clarifying.
The Board’s decisions on windows show how seriously materials are taken. In one recent case, the BAR approved replacement windows at a West Main Street building on conditions that excluded vinyl and required retention or replication of exterior trim. The lesson is general: reviewers look for the right material and profile, and they prefer salvaging original sash where it can be saved.
State and federal tax credit review
The Virginia Historic Rehabilitation Tax Credit equals 25% of eligible rehabilitation expenses for properties listed on or eligible for the Virginia Landmarks Register. Owner-occupied residences must spend at least 25% of the assessed value excluding land, and income-producing properties at least 50%. The statute caps the credit at $7.5 million per taxpayer per year starting in 2025, and unused credits carry forward for ten years. Verify the current figures with the Department of Historic Resources and a tax professional before you commit, since statute and program rules can change.

The work must meet the Secretary of the Interior’s Standards for Rehabilitation. The National Park Service stresses that these are regulatory criteria for the incentive programs and not merely aesthetic guidance: repair of original features is preferred over replacement, and new work should be compatible with the old yet distinguishable from it.
The most demanding step is usually the Part 2 application. The Department of Historic Resources describes the program and its application stages, and the Part 2 narrative must account for every significant feature and each proposed treatment. DHR publishes a sample Part 2 narrative and photographic standards that are worth reading before you select a builder, because a good builder should be able to contribute directly to that documentation.
Three kinds of builder, compared
When homeowners, architects and contractors search for a historic restoration builder in Charlottesville, they usually find one of three types. None is wrong in itself; each fits a different scope.
| Criterion |
General home builder or remodeler |
Restoration-minded general contractor |
Specialist millwork and restoration shop |
| Best at |
Additions, kitchens, baths, new construction |
Whole-building coordination, structure, envelope, trades |
Fabricating and restoring windows, doors, trim, stairs, casework |
| Historic millwork |
Usually ordered from catalogs or outsourced |
Often outsourced to a shop |
Made or restored in-house to documented profiles |
| Tax credit familiarity |
Varies widely |
Often strong on process |
Strong on the physical details the reviewers examine |
| Exact replication of lost features |
Limited |
Depends on subcontractors |
Core capability |
| Typical role |
Prime contractor |
Prime contractor |
Specialist subcontractor or direct to owner or architect |
| Main risk |
Standard products that fail review |
Subcontractor quality and lead times |
Needs a prime contractor for full-building scope |
The table shows why the choice is often “and” rather than “or.” A whole-house project needs a prime contractor to schedule trades, manage structure and meet code. The same project needs someone who can take a rotted 1850s sash, record its profile and either rebuild it or fabricate a faithful replacement. Asking one firm to do both is where quality commonly slips.
Questions that separate the types
Put the same questions to every candidate:
- Which Charlottesville or Virginia projects have you taken through BAR or DHR review, and which elements did you supply?
- Do you repair existing sash and doors, or primarily replace them?
- Who makes the custom elements, and where? Can I visit the shop?
- What species and joinery do you use, and can you match the original?
- How do you document existing conditions so the architect can write a Part 2 narrative?
- What lead time should I plan for on custom windows or doors, and how does it affect the schedule?
Vague answers to the third and fifth questions are the most telling.
Why windows and doors decide so many projects
Windows carry disproportionate weight in review. The NPS explains that restoration is favored over replacement under the Standards, and that when replacement is unavoidable the new units must match the original in visual qualities, materials and profile. Practitioners warn that seemingly small errors, such as improper glazing, can jeopardize both historical integrity and credit eligibility.
This is not fussiness. A Palladian or elliptical fanlight, a sash with slender muntins carrying true putty-glazed panes, or a six-panel door with applied mouldings owes its character to dimensions measured in fractions of an inch. A stock unit with a snap-in grille flattens that vocabulary immediately, and a trained reviewer sees it from the street.
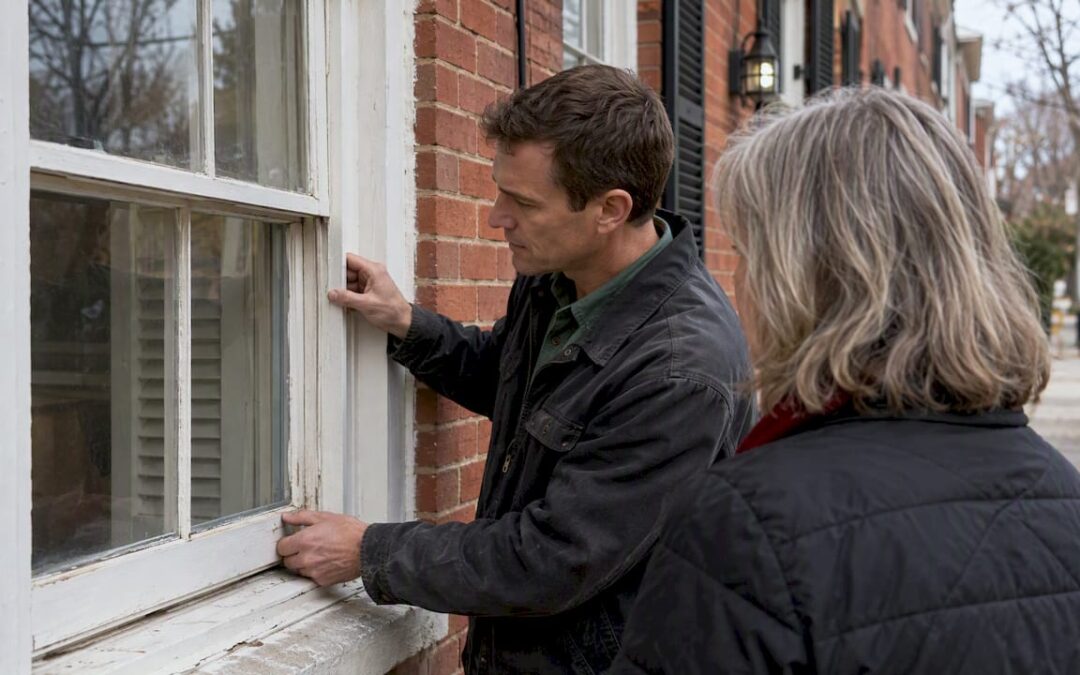
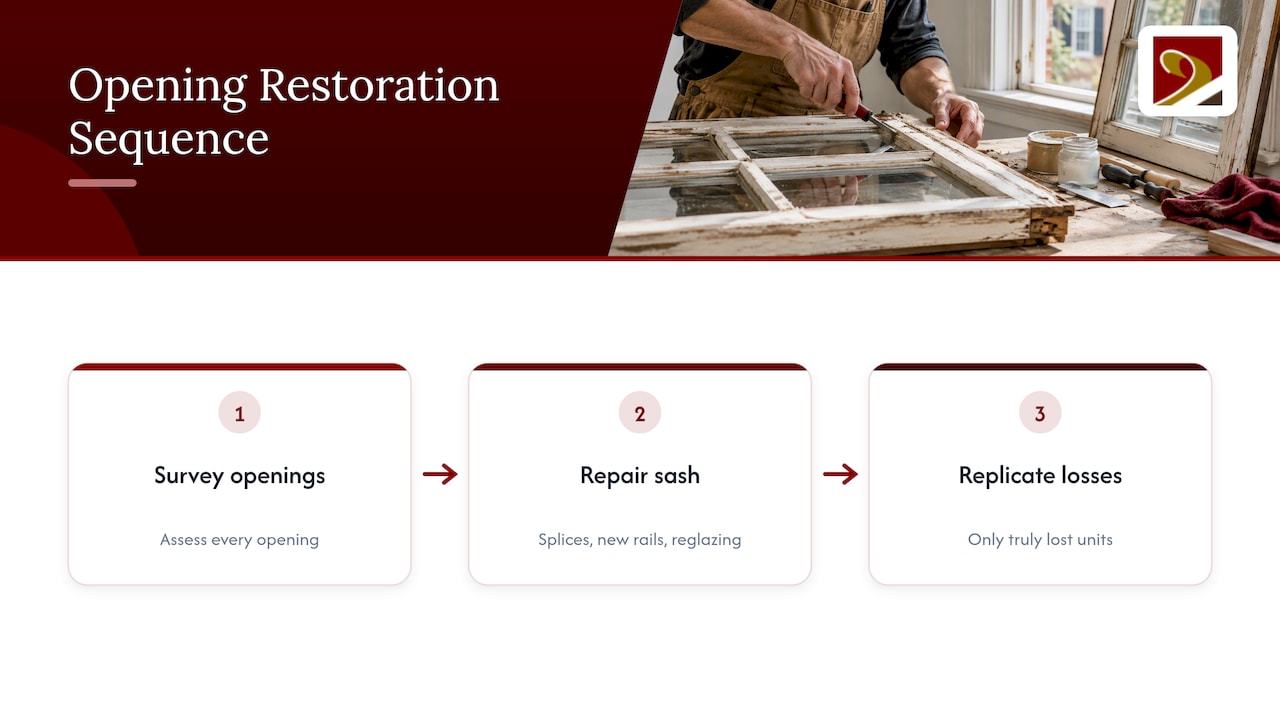
For owners, the practical consequence is to start with a conditions survey of every opening. Many sash that look beyond help can be repaired with dutchman splices, new meeting rails or reglazing, and only the truly lost units need replication. That sequencing also keeps costs rational, because restoration of what survives is often less expensive than fabricating everything new.
Where a specialist shop fits
Gepetto Millworks designs, fabricates and restores wood windows, doors, trim, cabinetry, staircases and architectural millwork for historic buildings, including replication of period features and matching for historic tax credit eligibility. We work with architects, general contractors, builders and historic homeowners, and we take on complex, architecturally significant requests that other shops decline.
For Charlottesville projects, the relevant starting points are our Charlottesville restoration services and our broader historic window restoration work. We also serve the wider region, including Richmond and Roanoke, and our service area includes Virginia, West Virginia, North Carolina, South Carolina, Maryland and the District of Columbia.
Our perspective: match the original, then document it
We approach every historic job from one premise: the building is the specification. Before drawing anything, we study what survives, which means the profile of a bead on a stile, the thickness of a rail, the pitch of a sill, the species, and the evidence of earlier repairs. Replication then uses authentic materials and period techniques, because the Standards ask that new work match in material, profile and visual quality, and because reviewers can tell when it does not.
Two habits matter most. First, we prefer to repair before we replace. A restored original sash keeps the building’s physical record intact and is consistent with how the NPS frames the Standards. Second, we treat documentation as part of the product. Measured drawings, photographs keyed to the plans and a clear description of each treatment make the architect’s Part 2 narrative stronger and shorten conversations with reviewers.
We are not the right firm for every scope. We do not replace your general contractor, and we will tell you when a project needs one. What we offer is the part many prime contractors find hardest to source: millwork that looks and performs as the original did, delivered to a schedule the rest of the trades can plan around.
— Gepetto
What our work covers
The elements most often requested on historic buildings fall into a few families:
- Windows: restoration of existing sash and frames, and new wooden windows built to documented profiles.
- Doors: historic and solid wood entry doors, including solid wood door manufacturing to match period designs.
- Stairs and balustrades: period staircases, newels, rails and balusters, along with wood turning for spindles and columns.
- Casework and interiors: built-in libraries, custom casework and kitchens, trim and mouldings, and shutters made to order, all described on our custom fabrication page.
- Commercial projects: commercial millwork for offices and restaurants, including early manufacturability consulting.
Prices depend on the scope, species, quantity and complexity, so we do not publish them. Send drawings or photographs of the openings and features involved, and we can discuss what restoration and fabrication would involve.
A sensible sequence for your project
A workable order of operations, whether you are an owner or an architect, looks like this:
- Confirm the designation. Find out whether the property sits in an ADC district, a Historic Conservation District, or is individually listed or eligible for the Virginia Landmarks Register.
- Talk to preservation staff early. The city’s Historic Preservation Program can explain what the BAR will expect, and DHR can explain the credit process.
- Survey existing conditions. Record every window, door, stair and piece of trim with photographs that meet the DHR standards, keyed to a plan.
- Decide repair versus replication, opening by opening. Put the reasoning in writing, because it becomes part of the application narrative.
- Assemble the team. Choose a prime contractor for coordination and a millwork specialist for the elements reviewers scrutinize. Bring both in before drawings are final.
- Submit, then build. Do not begin work that requires approval before it is granted, and do not substitute materials mid-project without checking with reviewers.
Tax credit rules are technical, and a mistake can cost eligibility. Consult a Virginia tax professional and DHR staff on your specific property before you start construction.
Frequently asked questions
Do I need a Certificate of Appropriateness for window or door work in Charlottesville?
If the building is in an Architectural Design Control district, exterior alterations require a Certificate of Appropriateness from the BAR. Conservation districts follow simpler guidelines, though visible street-side changes still need approval. Call the Historic Preservation Program at (434) 970-3130 to confirm your address before ordering anything.
Can replacement windows qualify for the Virginia historic tax credit?
Sometimes, but restoration is preferred. The National Park Service says that where replacement is unavoidable, the new windows must match the original in visual qualities, materials and profile. Check your specific units with DHR before you order.
Should I hire a general contractor or a millwork specialist?
Usually both, with different roles. A general contractor coordinates structure, systems and trades, while a specialist fabricates or restores the windows, doors, stairs and trim that review bodies examine most closely. On smaller projects focused on a few openings, going directly to a specialist can be enough.
How early should a millwork specialist join the project?
During design, before the application narrative is written. Early involvement lets the architect describe each treatment accurately, and it allows for the lead time that custom fabrication requires.
Sources
Recommended
by Matthew Wiley | Oct 19, 2026 | Architectural Millwork
Maryland has no single rulebook for historic buildings. Three layers apply: the federal Secretary of the Interior’s Standards for Rehabilitation, the Maryland Historical Trust (MHT) when state tax credits are involved, and the design guidelines of a local historic district commission, such as those in Baltimore or Hagerstown. A project in a locally designated district may answer to all three, and the strictest layer governs the millwork you can specify.
This guide sets out how the layers fit together, what reviewers look for in windows, doors, trim and stairs, and how to sequence a project so that approval precedes construction.
Gepettomillworks
Preserve Historic Millwork with Care
Gepettomillworks creates custom millwork for historic building projects, supporting owners and project teams working to preserve historic character.
Visit Gepettomillworks
TL;DR
- Maryland preservation review is layered: federal Standards, MHT review for state credits, and local commission guidelines for designated districts.
- The core principle is consistent everywhere: repair deteriorated historic features rather than replace them, and match the original when replacement is unavoidable.
- The state’s Historic Revitalization Tax Credit offers 20% of eligible rehabilitation expenses, with separate homeowner, small commercial and competitive commercial tracks.
- All work, even minor exterior repair, must be approved by MHT before construction begins if you intend to claim the credit.
- Document existing conditions first, and bring your millwork fabricator into the design phase, not after permits.
Table of Contents
The three layers of review
Federal: the Secretary of the Interior’s Standards
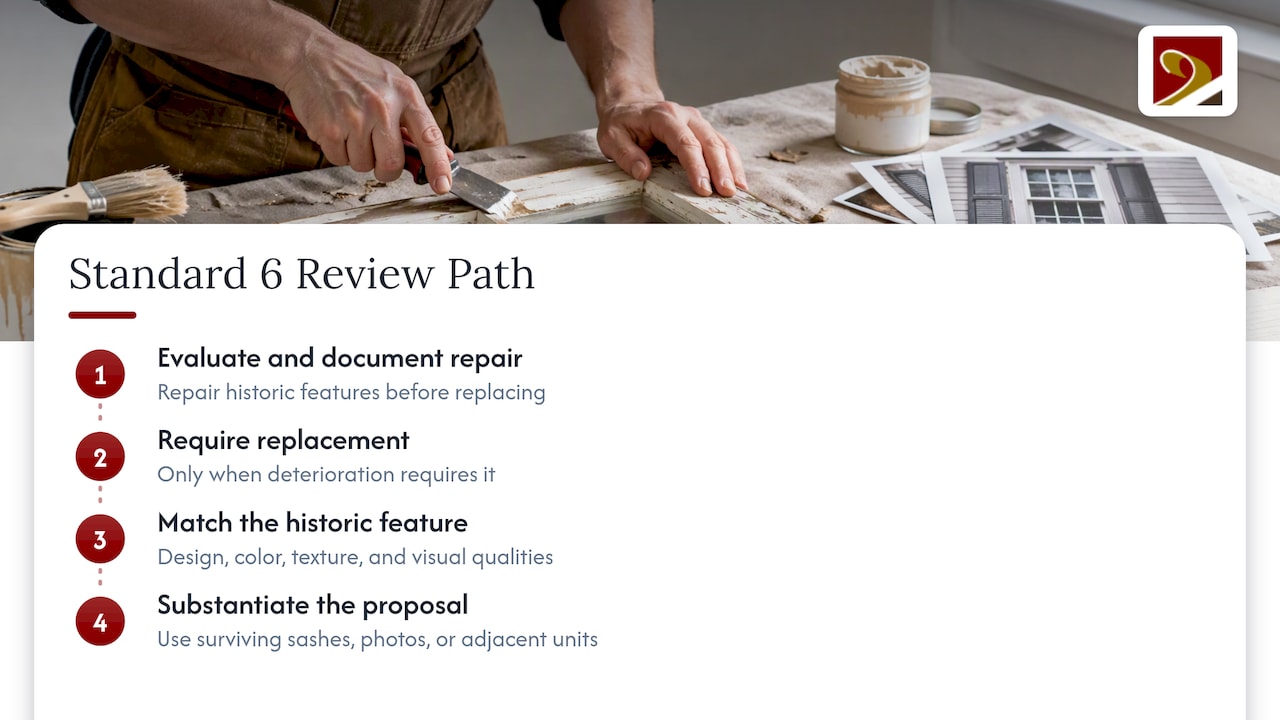
The Standards for Rehabilitation are the measure that MHT and most local commissions borrow. Standard 6 is the one that most often governs millwork. The National Park Service frames it as a requirement that deteriorated historic features be repaired rather than replaced, and that where severity of deterioration requires replacement, the new feature match the old in design, color, texture and other visual qualities. Replacement must also be substantiated by documentary, physical or pictorial evidence, not by taste.
In practice, a reviewer reading your window schedule asks three questions. Was repair evaluated and documented? If not repairable, does the replacement reproduce the original profile, muntin dimensions, glazing and operation? And is there evidence, such as surviving sashes, photographs or adjacent units, for what you propose?
State: the Maryland Historical Trust
MHT administers the Maryland Historic Revitalization Tax Credit Program. Its tax credit overview describes a 20% state income tax credit on eligible rehabilitation expenses, divided into three categories:
| Category |
Credit |
Minimum expense |
Notes |
| Homeowner |
20%, capped at $50,000 in a 24-month period |
$5,000 |
Rolling applications |
| Small commercial |
20%, capped at $50,000 in a 24-month period |
$5,000 |
For smaller income-producing projects |
| Competitive commercial |
Up to $5,000,000 |
Greater of $25,000 or adjusted basis |
Annual competitive round, typically with an August 31 deadline |
The homeowner program accepts applications year-round, and MHT states that review typically takes 30 to 45 days once a complete application arrives, though complexity can lengthen it. MHT also announced that the FY27 application became available on June 1, 2026. Confirm current deadlines and forms with MHT before you plan a schedule, since they can change from year to year.
Local: the historic district commission
Most day-to-day design review in Maryland happens at the municipal or county level. Local commissions regulate exterior changes in designated districts and on individual landmarks, and each publishes its own guidelines.
- Hagerstown. The city adopted a preservation ordinance in 1987 that frames its program, and its effects of designation page explains what locally designated districts and landmarks mean for owners.
- Baltimore. The city’s Commission for Historical and Architectural Preservation (CHAP) maintains design guidelines. The chapter on historic buildings, in a draft revision available from the city, states that deteriorated historic fabric should be repaired rather than replaced and notes that wood has always required regular maintenance. Check CHAP for the version currently in force.
A local approval does not substitute for MHT approval, and the reverse is also true. Owners who plan to claim the state credit in a local district should treat the two reviews as parallel tracks.
The rule that sinks projects: approval before construction
MHT’s homeowner credit page states that all work must be approved by MHT, and the practical corollary is blunt. Starting work before MHT review can disqualify a project from the credit. The same discipline applies to commercial applicants.
That has scheduling consequences:
- Order matters more than speed. Do not authorize demolition, sash removal or even exterior repair until approval is in writing.
- Emergency repairs need a call first. MHT asks homeowners who want to use the credit for emergency work to contact tax credit staff before beginning.
- Long-lead items belong in the design phase. Custom sash, entry doors and stair components take weeks to build. Drawings and profile sections should be ready for the application, even though fabrication waits for approval.
MHT’s own guidance also stresses early consultation and the stage-by-stage application process. The distinction between eligible and ineligible expenses is applied strictly, so itemize your budget accordingly.
What reviewers expect from historic millwork
Windows
Windows draw more scrutiny than any other element, because they define a facade’s rhythm and are so often replaced for energy reasons. The National Park Service notes that only 10% to 20% of a building’s energy loss typically occurs through windows, with air infiltration at the joints responsible for much of it. The standard-compliant path is therefore repair, weatherstripping and a compatible storm window, not wholesale replacement.
Two practices help at review:
- Survey each opening. Record the condition of sash, stiles, rails, muntins, sills and glazing with photographs and notes. A reviewer cannot approve replacement of a window that was never shown to be beyond repair.
- Run a sample repair. Restoring one representative window lets the owner, the design team and the reviewer judge the feasibility, appearance and cost before committing to the whole building.
When replacement is unavoidable, the NPS also publishes an interpreting bulletin on selecting new windows to replace non-historic windows, which ties the decision to Standards 2 and 6. The question is whether the new unit reproduces the character of the historic opening, including its sightlines and proportions.
Doors, trim and shutters
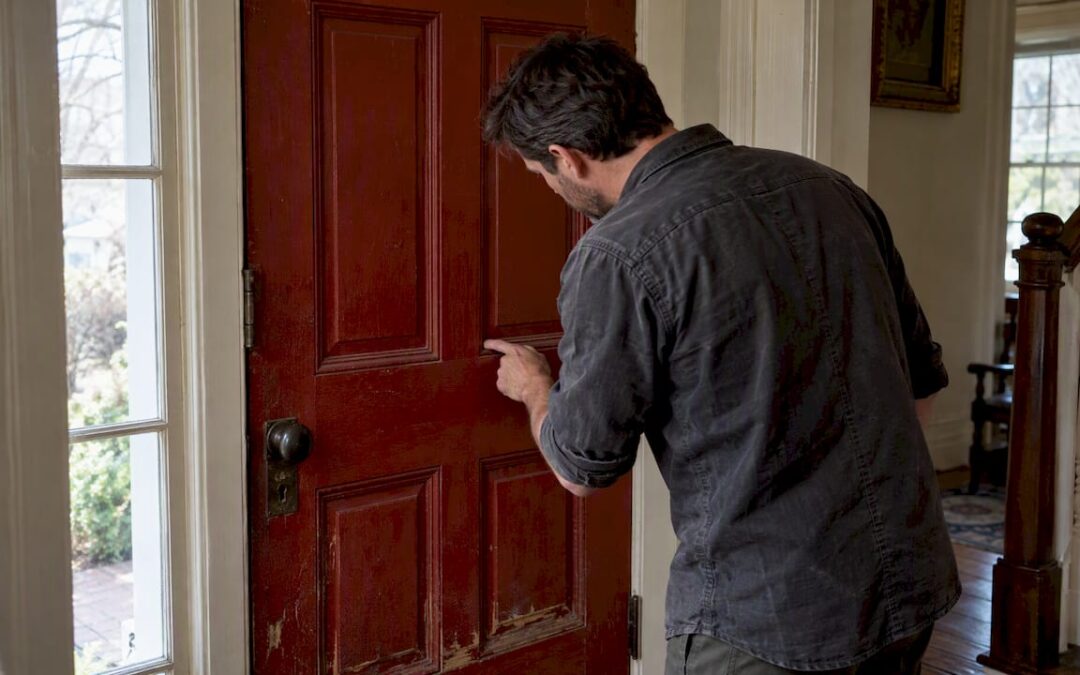
Entrance doors, surrounds, transoms and sidelights carry much of a building’s historic identity. Reviewers generally want to see the original panel layout, stile and rail proportions, and moulding profiles preserved or replicated, and they scrutinize stock replacements that flatten those details. Shutters are a common sticking point: operable louvered or paneled shutters sized to the opening are historically credible, while fixed, undersized ones are not.
Stairs, balustrades and interior woodwork
Interior work is reviewed by MHT when it falls within the credit application, and by local commissions rarely, since most only regulate exteriors. Where an original newel, handrail or balustrade survives, repair it. Where a missing section must be reproduced, use evidence from surviving components to establish the turning profile, baluster spacing and rail section.
Materials
Material substitution is the other recurring problem. The NPS treats materials that mimic original historic materials with caution, particularly in projects seeking tax credit certification. A wood window should generally be replaced in wood, with glazing, profile and finish consistent with the original, and that is where the guidelines meet the workshop.
A practical sequence for owners, architects and contractors
- Confirm designation. Determine whether the property sits in a local historic district, is individually landmarked, or is listed on the National Register. Each triggers different review.
- Contact MHT early if you plan to claim state credits, especially on complex projects.
- Document existing conditions with measured drawings, photographs and a condition survey of every window, door and major woodwork feature.
- Test with a sample repair before committing to full restoration.
- Prepare millwork drawings showing profiles, joinery, species and finish, so that reviewers can see precisely what will be installed.
- Secure written approvals from MHT and the local commission before any construction starts.
- Build, install and photograph the completed work, since credit documentation closes with proof of what was done.
Once construction wraps, a specialist crew handles the final turnover. Commercial projects often schedule a post-construction cleanout in Maryland before tenants or visitors arrive, so that fine dust from milling and sanding does not settle on newly finished wood.
Our perspective

We build and restore millwork for historic buildings, and the pattern we see is consistent: projects succeed when the shop is consulted before the drawings are final. A reviewer’s objection is rarely about taste. It is almost always about evidence, a profile that was guessed, a muntin that is thicker than the original, a replacement approved without a documented attempt at repair.
Our work centers on exact replication with authentic materials and techniques, so that new components can meet the matching requirements that tax credit reviewers apply. We also take on complex, architecturally significant projects and unusual custom requests. Our advice to architects is to send us the survey photographs and the sash you hope to match, and let us tell you what can be repaired, what must be rebuilt, and what the evidence will support. We have written a separate guide on millwork documentation for Maryland’s 20% credit.
— Gepetto
Where Gepetto Millworks fits
If your project involves original sash that can be saved, our historic window restoration service addresses repair first, in line with the Standards. Where a window cannot be saved, we fabricate wooden windows to replicate the original. Doors, shutters, casework, period staircases and balustrades are covered under our custom fabrication offering. Pricing is by project, so send drawings or photographs through our main site and we will review the scope with you.
FAQ
Does Maryland have one set of historic preservation guidelines?
No. The Secretary of the Interior’s Standards apply to federally certified or state credit projects, MHT administers the state credit program, and each local commission publishes its own design guidelines. Start by finding which of these apply to your address.
Can I begin repairs while my tax credit application is pending?
Not if you intend to claim the credit. MHT requires approval of all work before it begins, and starting early can disqualify the project. If a repair is an emergency, contact MHT tax credit staff before you start.
Do I have to keep my original windows?
The Standards prefer repair over replacement for deteriorated features. If a window is truly beyond repair, a replacement that matches the original in design, color, texture and visual qualities, supported by evidence, is the accepted route.
How large is the Maryland historic tax credit?
It is 20% of eligible rehabilitation expenses. Homeowner and small commercial projects are capped at $50,000 in a 24-month period, while the competitive commercial track can provide up to $5,000,000. Check MHT for the current year’s rules before applying.
Sources
- Tax Credits for Historic Revitalization, Maryland Historical Trust
- Homeowner Tax Credit, Maryland Historical Trust (program page)
- Homeowner Tax Credit, Maryland Historical Trust
- FY27 Application Now Available, Maryland Historical Trust
- Evaluating Historic Windows for Repair or Replacement, National Park Service
- ITS Number 23: Selecting New Windows to Replace Non-Historic Windows, National Park Service
- Historic Preservation, Hagerstown, MD
- Effects of Designation, Hagerstown, MD
Recommended
by Matthew Wiley | Oct 18, 2026 | Architectural Millwork
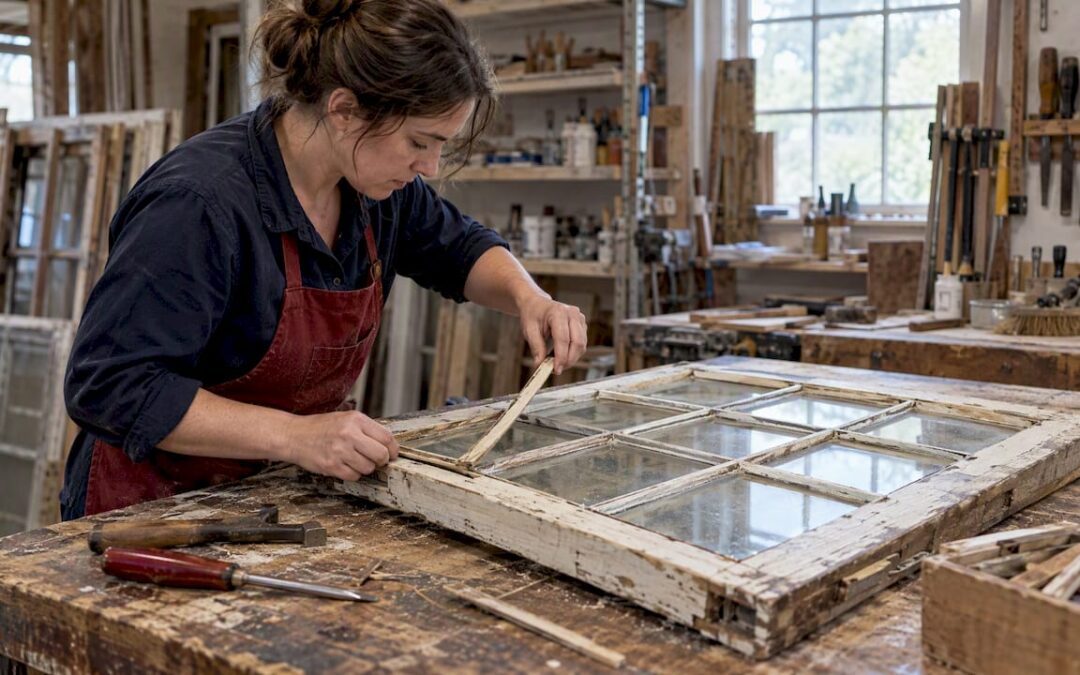
Preserve and repair original wood windows whenever feasible. If replacement is required, commission built-to-order windows that match the original design, material and profiles, and document the work for a Certificate of Appropriateness (COA) and tax-credit eligibility. Start by photographing the condition, then contact Winchester Planning, then ask a qualified millwork shop such as ours for an assessment.
TL;DR:
- Drafts often come from worn sash cords, weights, or weatherstripping, so tune hardware and add storm windows before considering removal.
- Replace only when decay cannot be stabilized or function cannot be restored; specify matching wood, dimensions, pane layout, muntin profiles, and operating style.
- Contact Winchester Planning before exterior work, since maintenance may not need a COA but replacements typically require approval and can affect tax incentives.
- Project costs depend on window count, wood damage, profile complexity, glazing, and installation; larger projects can spread setup and tooling costs across more openings.
- Before hiring a specialist, ask for historic project references, matched profile drawings or mockups, COA coordination experience, insurance, and clear warranty terms.
Gepettomillworks
gepettomillworks.com
Preserve Your Historic Windows
Gepettomillworks creates custom millwork for historic building projects, supporting window work that respects a building’s original character.
Visit Gepettomillworks
Table of Contents
Why preservation comes first for historic windows
Preservation guidance rests on a simple premise: the original fabric is the asset. Preservation Brief 9 recommends retaining and repairing original wooden windows whenever possible, and the Secretary of the Interior’s Standards for Rehabilitation, which govern most historic tax incentives, follow the same logic. Replacement is the exception that must be justified, not the default.
Winchester applies that principle locally. Properties in the city’s designated historic districts must comply with architectural standards, and the planning department requires documentation to justify replacing a severely deteriorated feature. Several points shape most decisions:
- Original old-growth wood, joinery and glass often outlast modern substitutes when they are maintained.
- Drafts usually trace to worn cords, weights and weatherstripping, not to the window itself.
- Storm windows and weatherization can close most of the efficiency gap without removing a single sash.
That last point deserves emphasis. Our own energy efficiency resources explain how interior or exterior storm units, tuned hardware and new weatherstripping preserve the historic fabric while improving comfort. A repair-first plan also tends to cost less than the alternative, as a repair specialist in another market explains.
What a full historic window restoration includes
A proper restoration is a sequence of deliberate steps, not a quick caulking job. Preservation Brief 9 documents the common tasks, and we follow the same order on our own projects.
- Assess and document. We photograph each opening, measure it and record the paint layers, so the scope and the COA paperwork rest on facts.
- Strip paint and putty. Failed coatings come off the sash and frame so we can see the true condition of the wood.
- Remove the sash and inspect the balance. We check cords, pulleys and weights, then rebalance the system so the window moves smoothly.
- Repair the wood. Sound wood is consolidated, and decayed sections are spliced or replaced with matching profiles. Muntins that cannot be saved are duplicated at the mill.
- Reglaze. Glass is reset in fresh glazing compound, retaining original panes wherever they survive.
- Weatherstrip and reinstall. New weatherstripping goes in and the sash is returned to a tuned frame.
- Finish and protect. Priming and repainting seal the wood, and storm windows are added if the owner wants them.
Some work happens on site: glazing, weatherstripping and minor repairs. Rot in a sill, a failed joint or a lost muntin pattern calls for removing the sash and working at the bench.
Pro Tip: Photograph every window before anyone touches it, with a ruler in frame for scale. Those images double as COA documentation and as the reference for any shop drawings.

When replacement is justified and how to specify built-to-order windows
Replacement is justified when a component cannot be stabilized, or when function cannot be restored despite competent repair. Even then, the new unit has to read as the old one. The NPS maintenance guidance for Isle Royale says replacement windows should match the original material, dimensions and pane configuration, and notes that manufacturers can custom-size units to duplicate originals when instructed.
A sound specification covers these points:
- Material: the same wood species or a close equivalent, not vinyl or fiberglass.
- Dimensions and sightlines: rail and stile widths, sash thickness and frame depth that match the original, so the facade keeps its rhythm.
- Pane configuration and muntin profiles: the same lights and the same muntin shape, ideally with true divided lights.
- Operation: the original style, such as double-hung with counterweights, rather than a tilt-in substitute.
Reproduction comes in degrees. An exact custom reproduction duplicates every profile and joint. A reasonable facsimile matches the visible character but simplifies hidden construction. Aluminum-clad wood trades a lower maintenance burden for different exterior profiles and finishes, which reviewers may question on a contributing building. Our wooden windows are built to order from drawn profiles, so the specification starts with your window, not a catalog.
Permits, COAs and tax credits in Winchester
Before any exterior window work, confirm what approval you need. Winchester’s planning guidelines clarify district designations and administrative COA options, and they advise contacting the Planning Department to determine required approvals. Routine maintenance that does not change form or materials may not need a COA, but replacements typically involve permits.
- Confirm first. Call or visit Planning with your address and a short description of the work.
- Know the two paths. Some projects qualify for administrative approval, while others go before the Board of Architectural Review. General design guideline procedures describe both pathways and the documentation they involve.
- Bring documentation. Expect to submit photographs, measurements, and drawings or mock-ups of replacement units.
- Never skip approval. In the Historic District, working without a required COA can jeopardize tax abatements and create legal problems.
The city also posts real estate tax exemption and credit materials, including an application for rehabilitated historic property. Those incentives generally depend on following the Secretary of the Interior’s Standards, and an improper replacement can disqualify a project. Confirm current eligibility with the city and the state preservation office before you commit.
Timeline and cost drivers for restoration versus custom fabrication
Neither restoration nor custom fabrication has a flat price, because the variables differ from house to house. Primary cost drivers include:
- The number of windows in the project.
- How much splicing or new sash the wood requires.
- The complexity of the muntins and profiles.
- The glazing type, including whether original glass is retained.
- Shop fabrication, shipping, installation and finishing.
Projects usually move in this order: assessment, then COA and permits, then shop work and repairs, then installation, then finishing. Permit review often sets the pace, so we start paperwork early and keep fabrication parallel where we can.
Scale matters. Setup, profile tooling and mobilization get spread across more openings, so larger projects often lower the per-window cost. A single failed sash can still be worth repairing on its own, since Preservation Brief 9 treats repair as the preferred course even for individual windows.
Repair, not replace, is the starting point: Preservation Brief 9 recommends retaining and repairing original wooden windows whenever possible, which is why the cheapest compliant path is usually the most conservative one.
How to choose a restoration specialist
A good specialist can show you their work, not just describe it. Use this checklist when you compare shops:
- A portfolio of historic projects, with references you can call.
- Documented mock-ups or shop drawings before fabrication begins.
- Working knowledge of the Secretary of the Interior’s Standards.
- Experience coordinating with preservation officers on COA submissions.
- Current insurance and clear warranty terms for both repairs and new windows.
Then ask direct questions. Can you show examples of matched profiles? Which past projects involved a COA? Will you provide sample drawings or a mock-up before building? How long does fabrication take? What does the warranty cover, and for how long?
Watch for red flags: no historic examples, reluctance to document how profiles will be matched, and an inability to supply references or explain COA coordination. Specialist shops exist across the country, and some, as a preservation league contractor listing shows, restore windows with traditional methods and ship them back for specialized repairs.
Pro Tip: Ask each shop to describe, step by step, how they would handle your worst window. A vague answer is a warning, and a detailed one shows real experience.
Our perspective on restoring and fabricating historic windows
We believe a window is a kinetic system, and that restoration succeeds only when appearance and operation both come back. We replicate with authentic materials and techniques, coordinate with preservation staff, and keep photographs, drawings and profile records for your COA and tax-credit documentation. You can see examples of our approach in our restoration archive.
— Gepetto
Start your Winchester window project with us
Most owners want the same thing: windows that look original and work properly. We deliver both through restoration and custom fabrication.

- Historic window restoration, from assessment through reinstallation.
- Wooden windows made to order, with matched profiles and muntins.
- Installation support and COA-aware documentation.
Send us photos and measurements, and ask for sample mock-ups and references. Begin with our Historic Window Restoration page, or review our wooden windows and request an estimate.
FAQ
Should I repair or replace historic windows in Winchester?
Repair them whenever feasible. Preservation guidance favors retaining original wooden windows, and replacement should follow only when decay cannot be stabilized or function cannot be restored.
Do I need a COA to replace windows in Winchester’s historic district?
Often yes. Confirm with the Winchester Planning Department before starting, because routine maintenance may be exempt but replacements typically require approval.
Can old windows be made energy efficient?
Yes. Rebalanced sash, new weatherstripping and storm windows address most drafts without replacement. Solar control options such as installer-applied window films can add further comfort while leaving original sash in place.
What should custom replacement windows match?
They should match the original material, dimensions, pane configuration, muntin profiles and operating style. This keeps the facade’s character intact and protects tax-credit eligibility.
Sources
Recommended
by Matthew Wiley | Oct 17, 2026 | Architectural Millwork
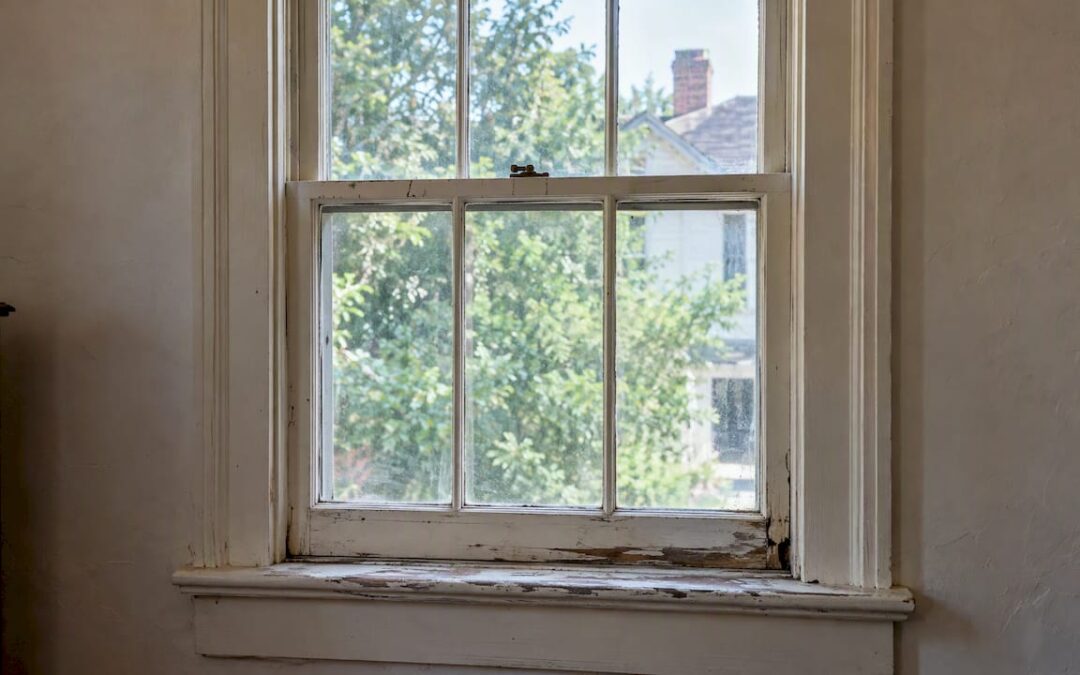
Restore and retrofit historic wood windows whenever feasible, and replace them only when the original fabric is irreparably deteriorated, as the Secretary of the Interior’s Standards and NPS guidance direct. We perform condition assessments, shop repairs, and made-to-order wooden windows that match historic profiles. Your first step is a window-by-window condition assessment, which we can begin with a site visit.
TL;DR:
- Create a window schedule with IDs, locations, interior and exterior photos, condition notes, operating hardware, and a repair or replacement recommendation for every opening.
- NPS reports that repaired windows with weatherstripping and storm panels can match the thermal performance of modern double glazed units.
- Specify matching wood, measured profiles, sightlines, glass dimensions, and original operation for replicas, and retain photos plus schedule notes explaining each replacement.
- Costs depend on wood loss, custom moulding tools, quantity, and installation complexity; simple repairs take days, while shop batches take multiple weeks.
- Confirm Abingdon’s review board and submission requirements before work begins; applications may need photos, measured profiles, replica drawings, and material specifications.
Gepettomillworks
Preserve Historic Window Character
Gepettomillworks creates custom millwork for historic building projects, including made-to-order wooden windows that match historic profiles.
Explore custom millwork
Table of Contents
What preservation standards require before you replace anything
Review boards in historic districts apply a consistent logic, and it begins with the Secretary of the Interior’s Standards for Rehabilitation. Windows in repairable condition are retained, and replacement is appropriate only when original fabric is extensively deteriorated. Any replacement must match the original in appearance, material, profile, and dimensions. Preservation Brief 9 reinforces this, urging you to evaluate each window’s significance and physical condition individually.
In practice, three principles shape acceptable outcomes:
- Original sash and frames are character-defining features, so repair takes precedence over substitution.
- Splicing in new wood and reproducing a failed part are accepted techniques when documented.
- A full replica is the fallback, never the starting assumption.
The economics rarely contradict the rule. The National Park Service notes that historic wood windows often survive more than 100 years with regular maintenance, and that replacement windows rarely pay back their cost in a reasonable timeframe.
Start with a window-by-window condition assessment and schedule
A formal window schedule is the document that makes every later decision defensible, whether it goes to a review board, a lender, or a tax-credit reviewer. Build it in this order:
- Assign each window an ID and record its location on the elevation.
- Photograph the window inside and out, including any failed joints or glazing.
- Record the sash and frame condition, noting rot, open joints, and prior repairs.
- Note the glazing type, such as original wavy glass or later replacement lights, and the state of the putty.
- Test operation and document hardware: cords, weights, locks, and lifts.
- Assign a recommended treatment, either repair or replace, with a reason.
Boards read this schedule as proof that replacement was considered last. Abingdon’s local boards and public packets are where you confirm what a given application must include.
Pro Tip: Shoot each window with a raking side light and a tape measure in frame; shadow reveals soft wood that a flat photo hides.
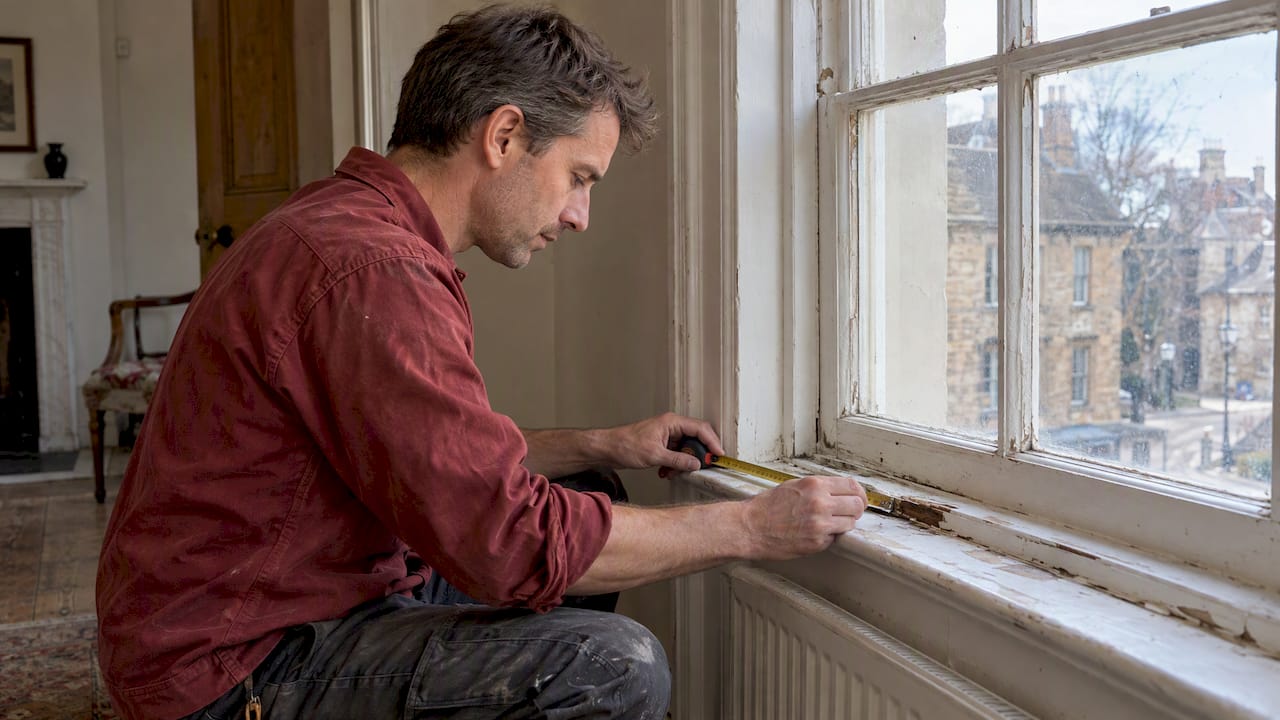
An owner can complete a first pass, but a preservation consultant or millwork contractor should take over when rot reaches the sill or when more than a few sash show structural loss. We carry out these assessments as part of our historic window restoration work.
Repair techniques and retrofits that keep original fabric
Most failures are mechanical or localized, which is why repair succeeds so often. Methods a specifier can expect from a competent millworker include:
- Cutting paint seals so over-painted sash move freely again.
- Dutchman splices, which replace a rotted section with matching new wood.
- Reglazing with fresh putty and, where possible, retaining the original glass.
- Repairing or replacing hardware to restore balance and operation.
- In-shop sash stabilization, with joints tightened and reglued.
Thermal performance is addressed without changing the window’s face. Spring bronze weatherstripping and air sealing cut leakage at the meeting rails and jambs. Storm panels complete the upgrade, and NPS reports that repaired windows paired with weatherstripping and storms can reach thermal performance comparable to modern double-glazed units. NPS’s Colcord Building case shows recessed interior piggyback storm panels proving a cost-effective alternative to wholesale replacement while keeping the historic appearance. Our own energy-efficient work follows the same approach.
Remove sash to the shop when joints, glazing, and wood need work together, and repair in place for hardware and weatherstripping. Never pry against historic fabric; score paint lines first.
When made-to-order replica windows are the right choice
Replacement is justified after assessment shows extensive loss of original fabric, structural failure, or a life-safety issue. Even then, NPS guidance requires the new unit to match the original. The Abingdon architectural survey identifies double-hung types such as 6/6 and 9/6 sash and multi-light transoms as character-defining, so they should anchor your specification.
A replica specification should state:
- The wood species and grain quality matching the original.
- Muntin, rail, and stile profiles, with moulding replicated from a measured sample.
- Sightlines and glass dimensions identical to the existing sash.
- Operation, meaning double-hung with weights if that was original.
- Glass type and finish, such as restoration glass where appearance calls for it.
- Fit within the existing opening with no alteration to the masonry or frame.
Keep photographs and the schedule entry that justifies each replacement, since boards and tax-credit reviewers will ask for them. Our wooden windows are built to such specifications, and our handmade windows archive shows finished examples.
Approvals, review boards, and the Abingdon submission process
For work that affects a property’s historic character, check with the Town about which board reviews the project and what approvals are required before work begins. The Town’s public works page lists the boards and packets, and its Planning Commission pages show how applications are scheduled.
Submission requirements vary, so confirm what the local review board requests. A submission may include:
- The window schedule with a treatment for every opening.
- Photographs of each affected window.
- Measured profiles of sash, muntins, and sills.
- Sample drawings of any proposed replica.
- Material specifications for wood, glass, and finish.
Other jurisdictions publish plain guidance too. NYC’s Landmarks fact sheet notes that many repairs and retrofits need no permit while replacements on protected façades require approval, a useful benchmark for questions to ask staff in Abingdon. If your project touches masonry as well, this repair-first guide to historic brick helps you prepare sample panels for the same review.
Pro Tip: Ask for a pre-submission meeting with staff and bring a mockup; a physical sash profile settles questions drawings cannot.
Timeline, phasing, and cost: a restoration practice view
Our view is that budgets go wrong when owners price windows as a commodity. Restoration is a labor trade, so schedule and cost follow the extent of wood replacement, not the window count. Simple repairs take days per window, shop repairs run in multi-week batches, and custom runs wait on profile knives and glazing.
- Cost drivers: how much wood is replaced, custom tooling for mouldings, quantity, and installation complexity.
- Phasing: prioritize the failing units first and batch fabrication to lower per-unit cost.
- Contingency: hold a reserve for hidden deterioration, which surfaces only once sash come apart.
NPS notes in Windows Number 8 that a well-planned retrofit can cost substantially less than full replacement. We point readers to our site for current pricing details.
— Gepetto
How we handle Abingdon window restoration and replicas
We offer a single path from assessment to installation. Our team surveys each opening, prepares your formal window schedule, repairs sash in our shop, and fabricates replicas to match historic profiles where repair cannot succeed. Our lead is exact replication using authentic materials and techniques, guided by the project’s preservation requirements. Start with our Historic Window Restoration service, and browse our restoration archive for past projects.
- Request a site visit or quote and send photos or a draft schedule.
- Ask for references and documented case studies.
- Request a proposal for your project.
Contact us through the service page to book your assessment.
FAQ
How much does it cost to restore an old window?
Cost depends on how much wood must be replaced, whether glazing and hardware need work, and whether sash go to the shop. We point readers to our site for current pricing details.
Is window restoration cheaper than replacement?
Often it is. NPS reports that replacement windows rarely pay back their cost in a reasonable timeframe, and a well-planned retrofit can cost substantially less than replacement. A 2013 pilot study found that comprehensive rehabilitation and like-for-like replacement can have similar total costs in many cases.
Is reglazing old windows worth it?
Usually yes, when the sash wood is sound. Reglazing can preserve original glass where possible and help restore weather resistance. Pair it with weatherstripping and a storm panel for better thermal performance.
When do made-to-order replacement windows make sense?
They make sense when assessment shows extensive loss of original fabric or structural failure. The replica must match the original’s material, profile, and dimensions, and you should document why repair was not feasible.
Sources
Recommended
by Matthew Wiley | Oct 16, 2026 | Architectural Millwork
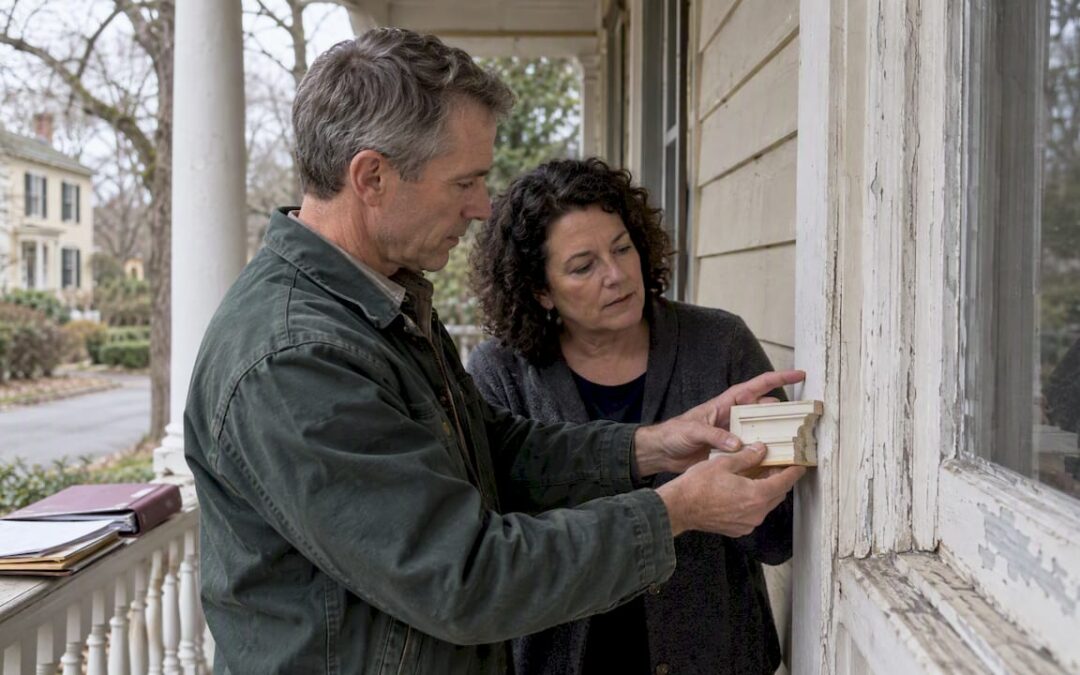
If your property sits in a local historic district, exterior work may require a Certificate of Appropriateness (COA) in addition to a building permit, because Code of Virginia §15.2-2306 lets localities require one. Confirm your designation and the local COA rules with city preservation staff or the Virginia Department of Historic Resources before you order materials or schedule a crew.
TL;DR:
- National Register listing alone usually does not trigger design review; local designation does, and an approved COA remains separate from any building permit.
- Guidelines favor repair, then replacements matching original material, dimensions, and detail; rear elevations hidden from the street often receive more flexibility.
- Tax credit certification has three stages: establish significance, submit the rehabilitation plan before work begins, then document completed work for final certification.
- Minor, in kind work may qualify for administrative approval, while major alterations and demolition usually go to a board; ask staff before scheduling.
- Photograph every elevation, window, and door opening before work, and include existing and proposed drawings plus an element by element treatment narrative.
Gepettomillworks
Plan Historic Millwork With Care
Gepettomillworks creates custom millwork for historic building projects, supporting owners and professionals planning restoration work.
Visit Gepettomillworks
Table of Contents
What do Virginia local historic district design guidelines cover?
Local guidelines regulate how a building looks from the public realm, not how it functions inside. Reviewers on an architectural review board (ARB) or historic preservation commission (HPC) concentrate on exterior character, and the guideline manual is their yardstick. Many of these manuals, Lynchburg’s residential review guidelines among them, pair element-by-element rules with illustrated examples and definitions, which is why reading yours before you draw anything can help you plan.
Elements most guidelines address:
- Street-facing facades and their composition
- Windows, including sash, muntin layout and glazing
- Doors, surrounds and hardware
- Porches, columns, railings and steps
- Roof form, pitch and visible materials
- Siding and exterior finishes
- Storefronts and signs
- Fences and walls
- Demolition and relocation
The philosophy is preservation first. Repair is preferred over replacement, and where replacement cannot be avoided, the standard is “replace in kind,” meaning the new piece matches the original in material, dimensions and detail. Character-defining features get the closest scrutiny. Rear elevations, out of sight from the street, usually enjoy more flexibility, though you should confirm that in your own manual rather than assume it.
When do you need a Certificate of Appropriateness, and how does review work?
Start with a distinction that trips up many owners: National Register listing is largely honorary, while only local designation typically triggers design-guideline compliance, as DHR’s explanation of the registers makes clear. A building permit is also not a substitute. Loudoun County’s guidance notes that an approved COA is a legally distinct prerequisite, obtained in addition to building permits.
Major alterations, material changes and demolition routinely go to the board. Minor, in-kind work, such as like-for-like roofing, shutters or small signs, is often eligible for administrative approval where local code allows, as Leesburg’s COA process illustrates.
A typical review runs like this:
- Contact preservation staff and share a concept before you submit.
- Confirm whether staff can approve the work administratively.
- File a complete application by the posted submission deadline.
- Staff prepares a report, and public notice goes out for board cases.
- The ARB or HPC hears the case and approves, conditions, defers or denies it.
- Appeals follow the process your local ordinance sets out.
Meeting cycles drive your schedule, so work backward from the next deadline. Demolition carries an extra wrinkle.
Demolition stay: Under state code, a locality may stay a razing or demolition permit for up to 30 days following a final local decision on a historic building.
How do local guidelines relate to the Secretary of the Interior’s Standards and the DHR tax-credit process?
Many Virginia localities build their guidelines on the Secretary of the Interior’s Standards for Rehabilitation, which Virginia codifies as ten principles governing the treatment of historic materials and features. Local manuals then adapt those principles to neighborhood character, so a COA reviewer and a tax-credit reviewer often ask similar questions in different formats.
The tax-credit path is separate and runs through the state. To qualify, a project must be certified by DHR in three parts through its Historic Rehabilitation Tax Credits program, and some state filings still require hard copies. DHR’s Detailed Application Process notes that Part 2 is the most complex and that submitting early can be critical to a project’s success.
| Stage |
What it establishes |
Timing |
| Part 1 |
Significance and contributing status |
Before design is locked |
| Part 2 |
Description of the proposed rehabilitation |
Before work begins |
| Part 3 |
Certification of the completed work |
After construction |
What this means in practice:
- File Part 1 and Part 2 before major work starts. Starting early protects eligibility and avoids the risk of recapture.
- Local approval and tax-credit approval are independent. A COA does not certify your project, and DHR certification does not replace a COA.
- DHR publishes a sample Part 2 narrative that shows the format reviewers expect.
What should a COA application package include?
A complete package can make the review process smoother; check the local requirements to avoid delays. The checklist below follows DHR’s application checklist, which many local reviewers resemble, though your city’s form controls.
- Photographs. Color prints showing context and every elevation, tied to a photo key.
- Narrative. An element-by-element description of existing conditions and proposed treatments, modeled on DHR’s sample narrative.
- Drawings. Existing and proposed elevations, plus floor plans where the work touches the layout. Check whether your locality accepts not-to-scale drawings.
- Maps. An aerial or site map locating the property.
- Administrative items. Fees and the required number of copies. For tax credits, the state program asks for one copy and federal submissions generally two.
- Part 3 extras. Completed-work documentation, following the program’s requirements.
Pro Tip: Photograph every elevation and every window and door opening before you touch anything. Taking photographs before work begins can help document existing conditions.
What do guidelines typically require for windows, doors, porches, signs, fences and demolition?
Requirements differ by city, but the patterns are consistent enough to plan around.
- Windows: Repair first. If replacement is unavoidable, match profiles, muntin layout and visible materials. Some localities permit storm windows, so check yours. Our pages on solid wood historic replica windows and wooden windows show what profile matching looks like in the shop.
- Doors: Preserve primary historic doors. A matched replacement should mirror material, paneling, glazing and hardware wherever it is visible from the street. If you are weighing a modern interior door for comfort, a partner’s article on door upgrades and energy efficiency in older homes covers tradeoffs, though exterior doors in a district follow the review rules above.
- Porches and rooflines: Keep the scale, columns and roof form. Additions should read as compatible and generally subordinate to the original.
- Signs and fences: Expect controls on size, placement and material. Rear-yard mechanicals and landscaping often get more latitude.
- Demolition: Expect strong documentation and public review. Check your locality’s rules and potential consequences before undertaking demolition.
How can you work with preservation staff and boards to speed approval?
Staff are your best resource, not your gatekeepers. Call before you draw, present a concept, and ask which concerns the board is likely to raise. Verify whether your scope qualifies for administrative approval, because practitioner guidance suggests that route can significantly shorten timelines compared with a full board hearing.

If tax credits are a goal, write your narrative in DHR’s sample format and attach thorough pre-rehab photos. Thin documentation is a common cause of denial. And never start visible exterior work before the COA is in hand; doing so invites remedial orders and penalties that cost far more than the wait.
Pro Tip: Bring product samples, profile drawings and a one-page scope summary to your pre-application meeting. Showing staff the material can help clarify questions.
A millworker’s perspective: why accurate millwork eases approvals
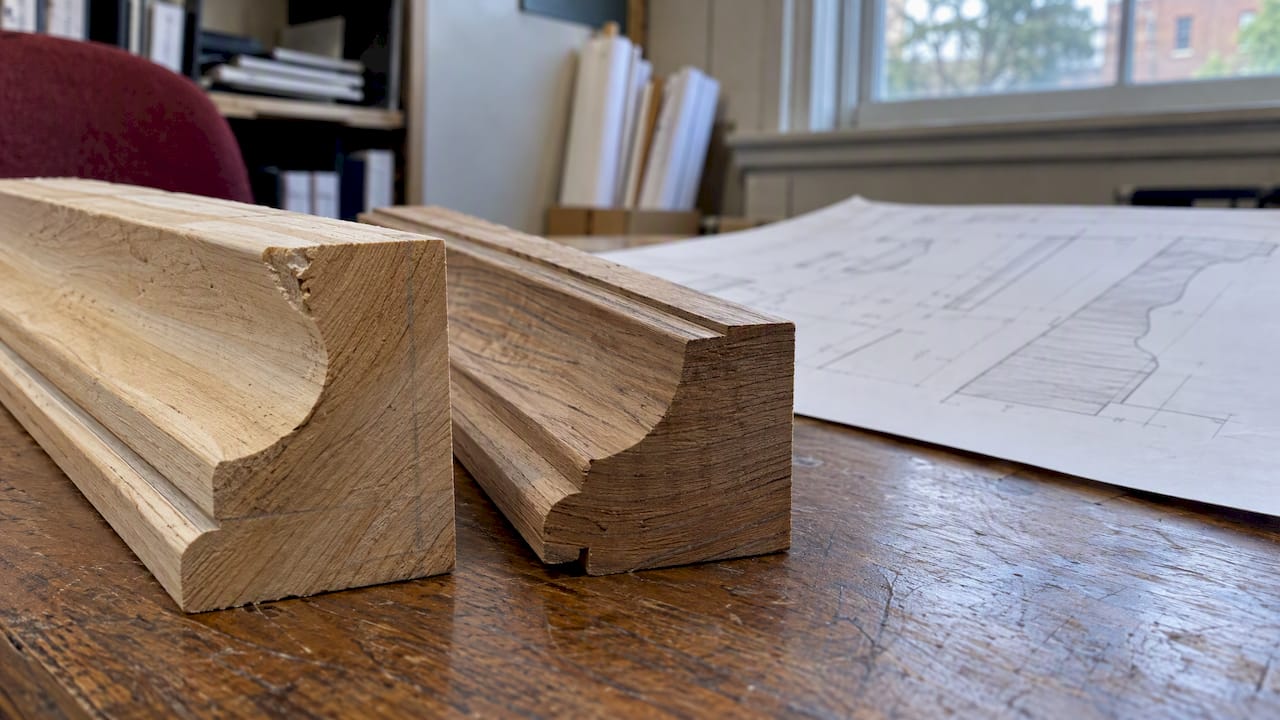
Boards rarely reject a project because it is historic enough. They reject it because the details are vague. Exact profiles, correct species, and a repair-first plan documented in measured drawings and shop mockups answer most objections before they are raised, and those same drawings feed a Part 2 narrative. Our own historic wooden windows show that accuracy and performance are not a tradeoff.
— Gepetto
How we support COA-ready restoration
If you would rather hand off the millwork side of a COA or tax-credit project, we can manage it with you. Our Historic Window Restoration service supports restoration of historic windows and millwork.
Request a consult through our Historic Window Restoration page, or browse our Virginia restoration projects to see work similar to yours.
FAQ
What does a local historic district regulate?
A local historic district regulates exterior changes that affect the character of the district, such as windows, doors, porches, roofs, signs, fences and demolition. Authority comes from Code of Virginia §15.2-2306, and each locality sets its own details in its guidelines.
Do I need a COA if my home is on the National Register?
Not necessarily. National Register listing is largely honorary, and local designation is what typically triggers design review. Check your parcel’s local status with city preservation staff.
What are the best historic towns to visit in Virginia?
That depends on your interests, but towns with active local districts, such as Lynchburg, Danville and Leesburg, publish design guidance that explains why their streetscapes look the way they do. Their guideline manuals double as a field guide to local architecture.
Do deck stairs need to meet building code in a historic district?
Check with your locality about applicable building-code requirements as well as historic-district review. Visible deck or porch work may need a COA and a building permit, so confirm both with your locality.
Sources
Recommended
by Matthew Wiley | Oct 15, 2026 | Architectural Millwork
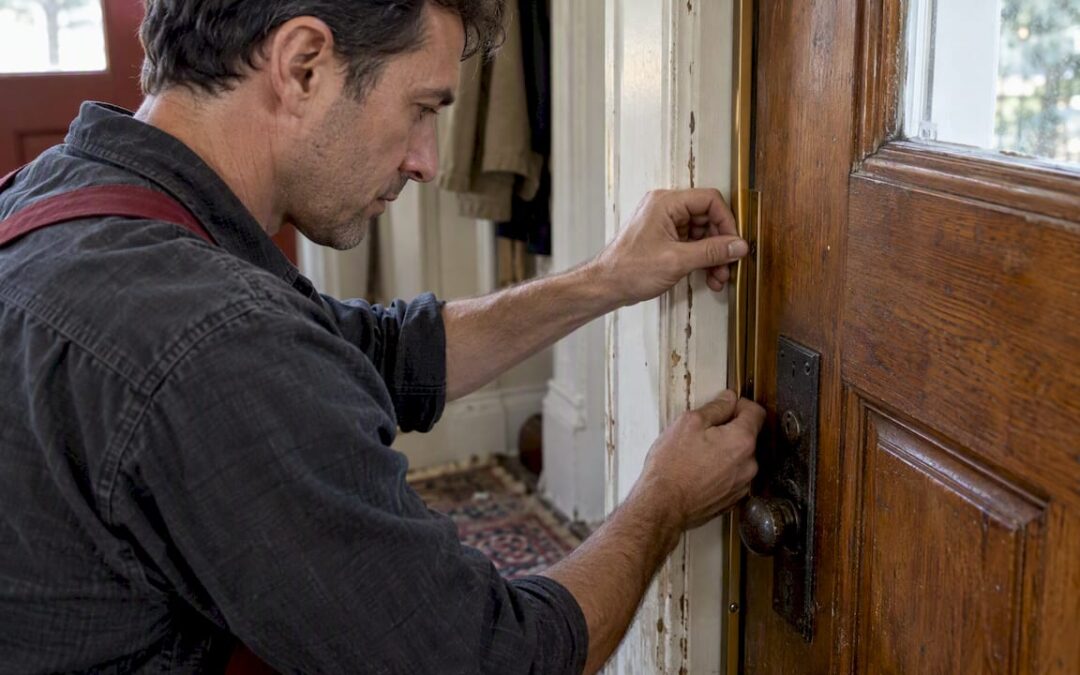
For many exterior wood doors, kerf-in silicone or vinyl weatherstripping paired with a durable, adjustable door sweep can provide a reliable long-term seal. Before installing anything, measure the gaps at the sides, head, and bottom, and check that hinges and strike plates hold the door square in its frame. Sealing the rough opening behind the jamb matters just as much as the visible weatherstripping, since both work together to cut drafts and protect the wood from moisture.
TL;DR:
- Measure the widest gap at the sides, head, and bottom; choose a seal that contacts the full jamb while allowing seasonal wood movement.
- Kerf in strips need a 1/8 inch groove, while loose hinges or a shifted strike plate should be corrected before installation.
- Seal the hidden gap between the jamb and rough opening with caulk, low expansion foam, or backer rod; fibrous insulation alone will not block drafts.
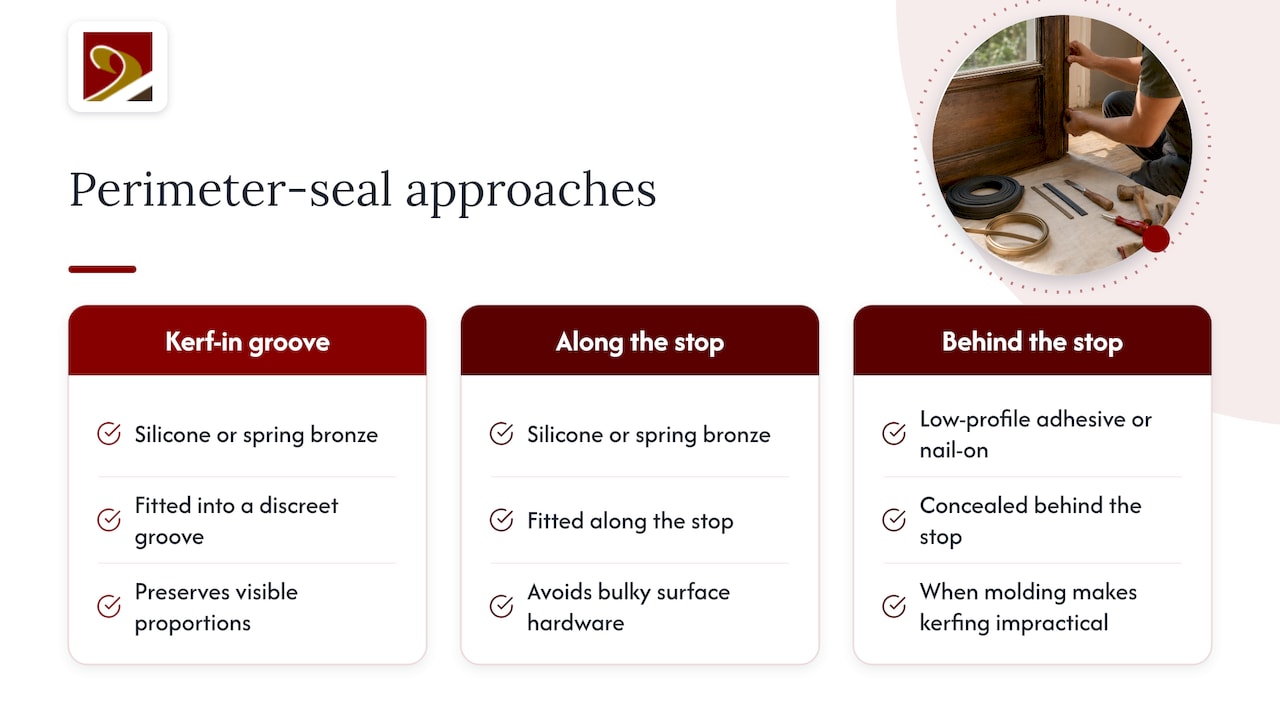
- For historic doors, choose discreet silicone or spring bronze seals, and place alternatives behind the stop when molding makes a groove impractical.
- Use an adjustable sweep or door shoe at the bottom, then set its glides to stop daylight without making the door drag.
Gepettomillworks
Preserve Character While Improving Door Fit
Gepettomillworks creates custom millwork for historic building projects, supporting careful work on doors where details matter.
Explore custom millwork
Table of Contents
Types of weatherstripping and where each works best on wood doors
Wood doors move with the seasons, and the right weatherstripping material accounts for that movement rather than fighting it. Kerf-in strips, made of silicone, vinyl, or nylon, insert into a milled groove along the jamb and can be a durable option for exterior wood doors because they stay anchored under repeated opening and closing. Tubular and bulb-style seals, often rubber, vinyl, or silicone, compress against the door face and suit both jambs and door bottoms, though their lifespan depends on how much daily compression they absorb.
For period-appropriate or especially durable sealing, V-strip tension seals and spring bronze or metal-leaf options are frequently recommended for wood doors and windows, since they hold up over decades with minimal visible profile. Adhesive-backed foam has its place too, but mainly on small, even gaps in interior applications, where exposure and movement are limited. When a jamb cannot be kerfed, whether due to existing trim profiles or structural limits, nail-on or screw-on mechanical strips offer a workable alternative.
- Kerf-in silicone, vinyl, or nylon: best for exterior wood doors with milled jamb grooves.
- Tubular or bulb seals: flexible compression fit for jambs and bottoms.
- V-strip, spring bronze, or metal-leaf: durable, low-profile options suited to historic finishes.
- Adhesive-backed foam: acceptable for small, even interior gaps only.
- Nail-on or screw-on strips: a practical fallback when kerfing isn’t possible.
How to choose by gap size, wood movement, and door location
Measure the largest gap at several points along each side, the head, and the bottom rather than relying on a single reading, since wood doors rarely sit perfectly parallel to their frames. The widest gap you find determines which profile will actually make contact across the full length of the jamb.
Kerf-in weatherstripping typically relies on a 1/8-inch kerf cut into the jamb; check whether your door already has this groove from the factory or whether a kerfing tool will be needed to create one. Because wood expands in humid months and contracts in dry ones, choose a compression range with enough give to seal in winter without binding in summer.
- Measure gaps at the top, middle, and bottom of each side and the head jamb.
- Confirm or cut a standard 1/8-inch kerf before ordering kerf-in strips.
- Select a compression range that accounts for seasonal wood movement.
- Consider adjustable screw-slot strips or threshold systems when kerfing isn’t practical.
Pro Tip: Cut a test kerf on a scrap piece of matching wood before committing to the jamb itself, especially on a historic or custom door.
Step-by-step installation for kerf-in, adhesive, and nail-on methods
A durable seal starts with the door itself, not the weatherstripping. If hinges are loose or the strike plate has shifted, tighten or reset them first, since weatherstripping cannot compensate for a door that isn’t hung square in its frame. Plane or shim as needed to create an even gap all the way around.
- Remove any old or deteriorated weatherstripping and clean the jamb surface.
- For kerf-in strips, cut or confirm the 1/8-inch kerf, then insert the strip without stretching it, working from one end to the other.
- At the head jamb, notch the side pieces to create a tight butt joint rather than overlapping them.
- For adhesive-backed strips, clean the surface thoroughly, press firmly along the full length, and avoid gaps caused by wrinkled or stretched material.
- For nail-on or screw-on strips, drill pilot holes to avoid splitting the wood and use slotted holes where available so the strip can be adjusted later.
- For a door sweep or shoe, rout a shallow dado if a recessed fit is desired, finish any exposed wood to match the door, then install the channel and attach the sweep with its glides loose.
- Close the door and check for daylight along every edge, then adjust glides, fasteners, or strip position until contact is even and the door still swings freely.
A well-sealed exterior door requires weatherstripping along both sides and the top, plus a sweep across the bottom, with full contact against the threshold confirmed before the job is considered finished. Even a 1/8-inch gap left unsealed around an entry door is roughly equivalent to a 5 1/2-inch-diameter hole cut straight through an exterior wall, which makes the final daylight check worth the extra few minutes.
Door bottoms and thresholds: sweeps, shoes, or gasketed systems
Air and water can get through the bottom of a wood door, so this is not a spot to treat as an afterthought. Inswing and outswing doors call for different threshold approaches, since the sweep or shoe must clear the threshold on the swing side while still sealing against it when closed.
Measure the clearance between the door bottom and the threshold, using roughly 1/2 inch as a common reference point when sizing a shoe or adjustable threshold, then adjust from there based on your actual gap. If you’re routing a dado for a recessed sweep, finish or paint any exposed wood before installing the channel and end caps to protect it from moisture.
- Choose a door shoe or gasketed threshold for high-traffic exterior doors with uneven wear.
- Size clearance against the threshold using a 1/2-inch reference, then fine-tune to the actual gap.
- Finish exposed wood before installing channels, sweeps, or end caps.
- Adjust sweep glides until daylight disappears without creating excessive drag on the door.
- In wet climates, pair the threshold choice with adequate roof or porch overhang to limit standing water at the sill.
Sealing the rough opening before the weatherstripping goes in
Weatherstripping only seals what’s visible, so the gap between the door jamb and the rough opening behind it deserves attention first. Building Science Education guidance recommends sealing this gap with caulk, low-expansion foam, or backer rod, and cautions against relying on fibrous insulation alone to block air movement there.
This hidden layer works alongside the visible jamb weatherstripping rather than replacing it, closing off drafts that would otherwise bypass even a perfectly installed strip. A simple smoke pencil test near the trim can reveal leaks you can’t feel by hand, and for a fuller picture of whole-house air leakage, a professional blower-door test is worth considering.
- Seal the rough opening gap with caulk, low-expansion foam, or backer rod.
- Avoid relying on fibrous insulation alone to stop air infiltration at this joint.
- Use a smoke pencil for a quick visual check of hidden drafts near the trim.
- Call in a professional for blower-door testing if drafts persist after sealing.
Maintenance schedule and signs it’s time for a fix
Inspect weatherstripping at least once a year for compression set, tears, and fasteners that have worked loose, ideally before the coldest months set in. A damp cloth clears dirt and debris, while a light lubricant on metal strips like spring bronze keeps them flexing smoothly instead of cracking.
Visible daylight or a draft that persists after adjustment usually means the strip has lost its memory and needs full replacement rather than another tweak. If the door binds or contacts unevenly right after installation, recheck hinge alignment before assuming the weatherstripping itself is at fault.
- Check seals annually for compression set, tearing, or loose fasteners.
- Clean with a damp cloth and lubricate metal strips periodically.
- Replace strips once daylight or drafts return despite adjustment.
- Recheck hinges and strike plates first if a new installation binds unevenly.
Pro Tip: Keep a small offcut of your installed weatherstripping on hand. It makes matching replacement material years later far easier.
Why precise millwork makes weatherstripping work better
A door that’s been fabricated or restored with accurate joinery may need less aggressive weatherstripping, and what’s installed may perform better for longer. Custom and restored wood doors can hold their fit through seasonal movement, helping the seal stay consistent. Preserving historic fabric and sealing it well aren’t competing goals. For a door with real architectural significance, consulting a specialist on fit and finish before reaching for weatherstripping products is worth the conversation.
— Gepetto
Weatherstripping historic wood doors without losing their character
Historic wood doors call for a different calculus than a standard exterior replacement, since the goal is sealing performance without disturbing original material, period hardware, or finishes that carry the building’s history. Kerf-in strips in silicone or spring bronze tend to suit these doors well, since both can be fitted into a discreet groove or along the stop without altering visible proportions or requiring bulky surface-mounted hardware.
When a historic door’s casing or molding profile makes kerfing impractical, a low-profile adhesive or nail-on strip set behind the stop, rather than across a visible face, keeps the original lines intact. Finishing any new wood or hardware to match existing patina also goes a long way toward keeping the seal invisible. For doors tied to historic restoration work or museum-quality preservation standards, matching weatherstripping choices to the original material palette protects both the building’s character and its eligibility for preservation-related considerations.
Seal your doors well, then let craftsmanship do the rest
Weatherstripping only performs as well as the door it’s attached to, which is why we focus on getting the fit right before a single strip goes in. Our Historic Wooden Doors work includes replicating period profiles and joinery for historic buildings. For entryways that call for a new solid wood door rather than a repair, our Solid Wood Entry Doors are made to order.
If your current sealing struggles trace back to a door that’s warped, out of square, or simply reaching the end of its service life, reach out through our Historic Doors page to talk through restoration or replacement options suited to your building.
FAQ
What is the best way to seal an exterior wood door?
Kerf-in silicone or vinyl weatherstripping on the sides and head, combined with an adjustable door sweep or gasketed threshold at the bottom, can provide a durable seal on a wood exterior door. Before installing any of it, confirm the door is square and the hinges and strike plate are tight, since weatherstripping cannot fix a poorly hung door.
What are the three types of door weather stripping?
Door weatherstripping commonly falls into tension seals like V-strip, compression seals like tubular or bulb styles, and kerf-style strips set into a milled groove. Felt and spring bronze are also widely used, with felt offering a lower cost but a shorter service life compared to the others.
How can I weatherproof my wooden door?
Start by measuring gaps at the sides, head, and bottom, then choose weatherstripping sized to the widest gap you find so it seals without binding the door shut. Seal the rough opening behind the jamb with caulk or low-expansion foam as well, since that hidden gap can leak air even after the visible weatherstripping is installed.
What to use instead of weather stripping?
There isn’t a true substitute for weatherstripping on an exterior door, since it’s the layer that seals the moving joint between door and frame. A storm door or well-fitted threshold can reduce the load on the primary seal, but sealing the door itself still does most of the work in cutting air infiltration and protecting the wood from moisture.
How often should I replace door weatherstripping?
There’s no fixed replacement interval, since wear depends on climate, material, and how often the door is used, but an annual inspection catches compression set, tears, and loosened fasteners before they cause drafts. Visible daylight around the door or a draft that persists after adjustment is the clearest sign it’s time to replace the strip rather than continue adjusting it.
Sources
Recommended