by Matthew Wiley | Nov 18, 2026 | Architectural Millwork
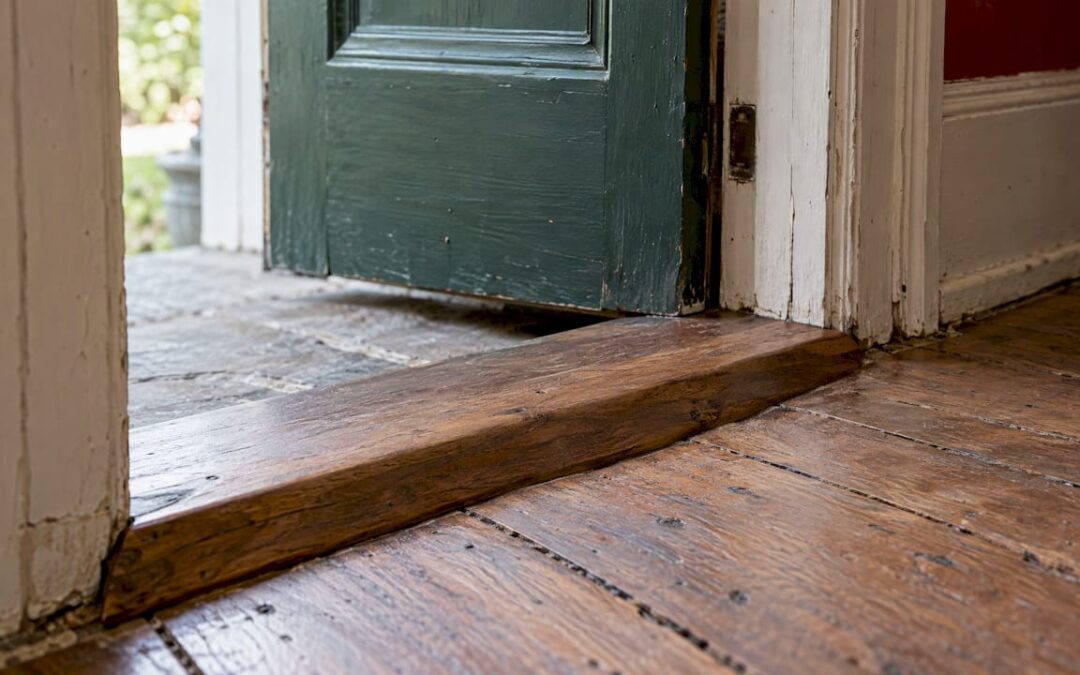
In a historic building, the best door threshold is one made for that opening. It is cut to the existing jamb profile, built from a species and section that suits the exterior, and detailed so water drains out and the original sill and subfloor are left intact. Stock aluminum thresholds rarely meet those conditions. They also tend to fight the character of a period entrance. We build historic doors and trim and replicate period features, and the threshold is where the door, the floor and the weather meet, so it deserves the same drawing-level attention as the door itself. For a closer look at profiles, fit and approval, see our page on custom historic door thresholds.
Gepettomillworks
Fit Historic Thresholds to Their Openings
Gepettomillworks creates custom millwork for historic building projects, including thresholds shaped to suit period doorways.
Visit
TL;DR
- A threshold is the piece you step over and the door seals against. The sill is the framing member beneath it, and a sill pan is the separate flashing under both.
- On weather-exposed historic exteriors, bronze, stainless steel or a laminated hardwood such as oak serve better than a generic mill-finish extrusion.
- Water control depends on the sill pan and the slope, not on the visible threshold alone.
- Under the ADA Standards, accessible doorways allow thresholds of 1/2 inch, or 3/4 inch for exterior sliding doors, with bevels no steeper than 1:2. Qualified historic buildings have an alternative route where compliance would destroy significance.
- Measure from the inside of the casing and take a template of the jamb profile before anything is cut.
Table of Contents
What a threshold does, and how it differs from a sill
The words are used loosely on job sites, and the confusion causes real errors in drawings and orders. The threshold is the component at the bottom of the doorway that the closed door meets, and it typically works with the door’s bottom seal or sweep. The sill is the lower supporting member of the frame. A Fine Homebuilding discussion describes the sill as the wooden framing piece set against the slab, beveled downward to shed water, while the threshold holds the weatherstripping the door rests on. On a pre-hung metal unit the threshold is the aluminum piece in the frame, and the sill is the member the frame sits upon.
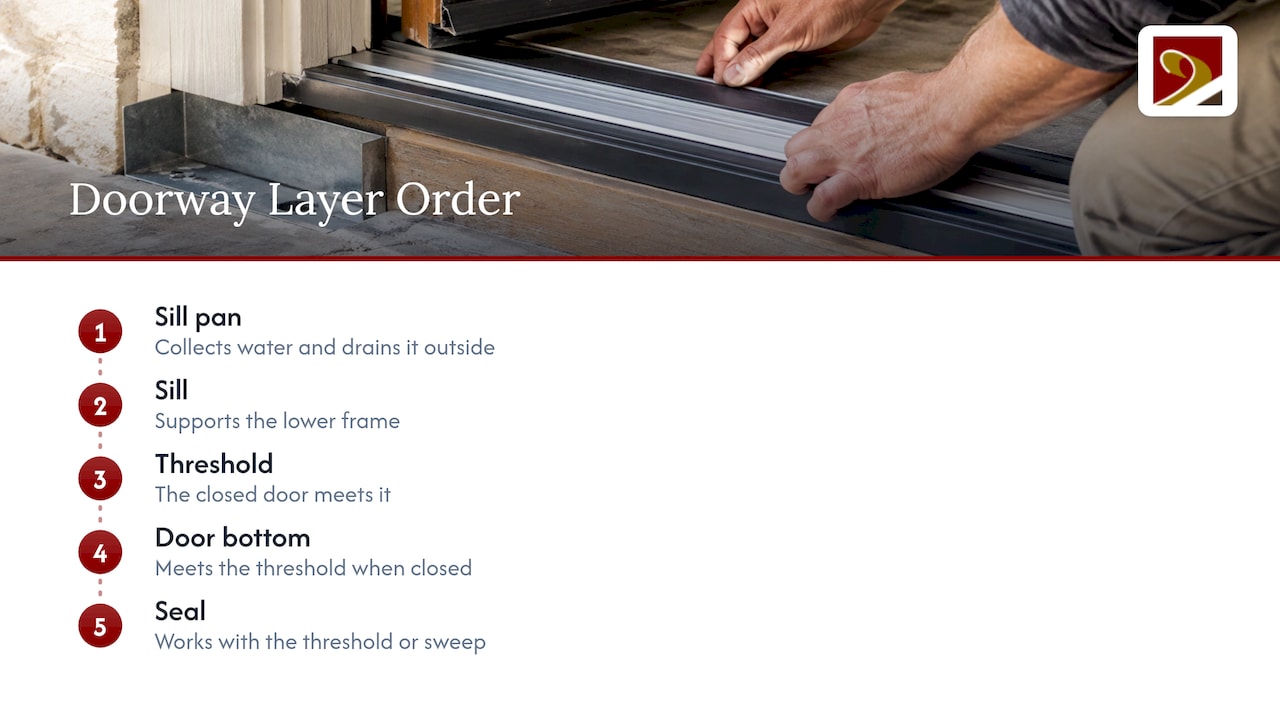
A third layer matters just as much. The IIBEC field guide to window and door flashing explains that ASTM E2112-07 recommends sill pan flashing under all windows and doors in low-rise residential and light commercial buildings. A pan has upturned legs at the interior edge and the ends, so it forms a three-sided tray that collects water and drains it toward the exterior.
When you order a custom threshold, you are therefore specifying one part of a stack: pan, sill, threshold, door bottom and seal. If any layer is left to chance, the others cannot compensate.
Why historic openings rarely suit off-the-shelf thresholds
Older doorways are seldom square, level or standard. Floors have settled, wood frames have moved with the seasons, and successive owners have raised or lowered the interior finish. A stock threshold is made to a catalog width and a fixed profile, so installers trim it, shim it and caulk the gaps. That is how water finds the subfloor.
The preservation standard points the other way. The Secretary of the Interior’s Standards for the Treatment of Historic Properties say wood features important to historic character, doorway surrounds among them, should be identified, retained and preserved. Repair should be by patching, piecing in or limited replacement in kind where surviving prototypes exist. A threshold that is cut to the opening, rather than an opening cut to the threshold, follows that logic. The jamb, casing and sill stay as they are, and the new piece is made to meet them.
This is also where a project’s review file is won or lost. If the work is part of a rehabilitation seeking historic tax credits, the reviewer looks at whether visible new elements are compatible with the historic entrance. We replicate period features and match them for historic tax credit eligibility, and a threshold that echoes the profile of its neighbors is part of that picture.
Choosing material and profile
For street-level entrances, Facilities Management Insights cites Richard W. Off in recommending bronze or stainless steel, or at least traffic-grade powder coatings on steel or aluminum, because deicing salts attack street-level hardware. The Secretary of the Interior’s guidelines note that bronze weathers well and appears historically on entrance doors and storefronts. For commercial or storefront-style entries in a historic district, a bronze or stainless saddle with a period-appropriate profile is usually the right conversation to open with.
Wood: laminated oak
On residential entries, a wood threshold looks right under a wood door and meets the floor without a visual break. In a This Old House walkthrough, general contractor Tom Silva explains that laminated oak responds better to weather than a single solid piece because it is more dimensionally stable and wears just as well. The same project builds the threshold from 3/4-inch-thick laminated oak.
Three-piece water-return assemblies
For openings with some protection, Fine Homebuilding contributor Gary M. Katz reports that a three-piece water-return threshold is the safest bet. It consists of a threshold, a drain pan and an interlocking sill cover. The sill cover is the visible, replaceable part, which suits historic work because the finish element can be made to a period profile while the drain pan does the hidden work.
| Situation |
Material and profile to discuss |
Why |
| Exposed street-level commercial entry |
Bronze or stainless saddle |
Resists deicing salts and weathers well |
| Residential front door, original wood sill retained |
Laminated oak threshold on a pan |
Stable, matches wood floors and casing |
| Protected porch or vestibule entry |
Three-piece water-return assembly |
Drains water outward, replaceable cover |
| Accessible route into a listed building |
Low, beveled or interlocking profile |
Reduces the level change visually and physically |
Sizing a custom threshold for the opening
Sizing is where custom work earns its name. The sequence below applies whether the threshold is wood or metal.
- Measure the opening from inside the casing, not from the floor finish. Katz’s threshold replacement guide measures the clear opening between the casings and adds a small allowance, for example 1/16 inch, for touch-up fitting.
- Take the jamb profile off the building. The same guide transfers the jamb profile to the threshold ends with a template. In a historic opening the profile may be molded or irregular, so a physical template beats a dimension.
- Record the floor heights on both sides. Note the finished interior floor, the subfloor, and the exterior landing or porch deck. The difference sets the threshold’s height, the slope of the top, and whether the underside needs a rabbet to overlap the flooring.
- Check the door bottom. Scribe the door at threshold height plus 1/8 inch, as the This Old House method does, and decide whether the door will close on a threshold insert or a sweep. Katz notes that a threshold without a rubber insert should have a smooth, low-profile top and a slightly concave underside for good floor contact, and that an insert is for doors lacking a weather-sealing sweep.
- Verify the subfloor. The sill area has to be flat, level and solid before any threshold goes down. Rot beneath an old sill is common and should be repaired before the finish piece is made.
- Measure more than once. Old wood frames and floors move seasonally, so a second measurement at a different time of year is a sensible check on a long project.
On a project with architects, builders and a restoration contractor involved, one person should own the template and the floor-height record. When we fabricate doors and trim for a historic opening, the threshold is drawn against those same measurements.
Making the threshold: what the method looks like
For a wood threshold, the method published by This Old House is a useful baseline. The door is scribed and cut, and the exposed grain on the door bottom is sealed. The threshold is cut to length against the casing, its top edges are beveled at 45 degrees, and a rabbet is cut in the underside to overlap the existing flooring. After fitting the ends, sanding and sealing, it is set in construction adhesive, nailed and finished with a door sweep.
The weak point on historic jobs is the ends. Where the threshold meets a molded jamb or a plinth block, a square cut leaves a gap. This is why the template step matters, and why a cabinetmaker’s fit is better than a field trim.
Keeping water out: the pan matters more than the threshold
A threshold is not a waterproofing system by itself. Silva recommends waterproofing the exposed sill and subfloor with self-adhesive rubberized membrane as flexible flashing, because water splashes up in front of the door, gets under the threshold and rots the sill. His installation guide adds a bead of caulk under the threshold so no water weeps beneath it, a step he calls easy to overlook but critical to protecting the subfloor. Katz runs silicone under the sill cover and a second bead on top of it, beneath the drain pan and kept clear of the pan’s front edge.
The IIBEC guide singles out one performance factor: the height of the pan’s rear leg, which resists wind driving water uphill. It also notes that a low-performance door can be backed by a sill pan with a higher rear leg. On an exposed historic elevation, that is worth specifying on the drawing.
A practical way to diagnose a leak is to separate its causes. Water pooling at the door may mean the threshold is pitched the wrong way or a drip detail is missing. Drafts, by contrast, usually come from worn weatherstripping rather than from the threshold. Fix the cause before you order a replacement.
Accessibility and historic fabric
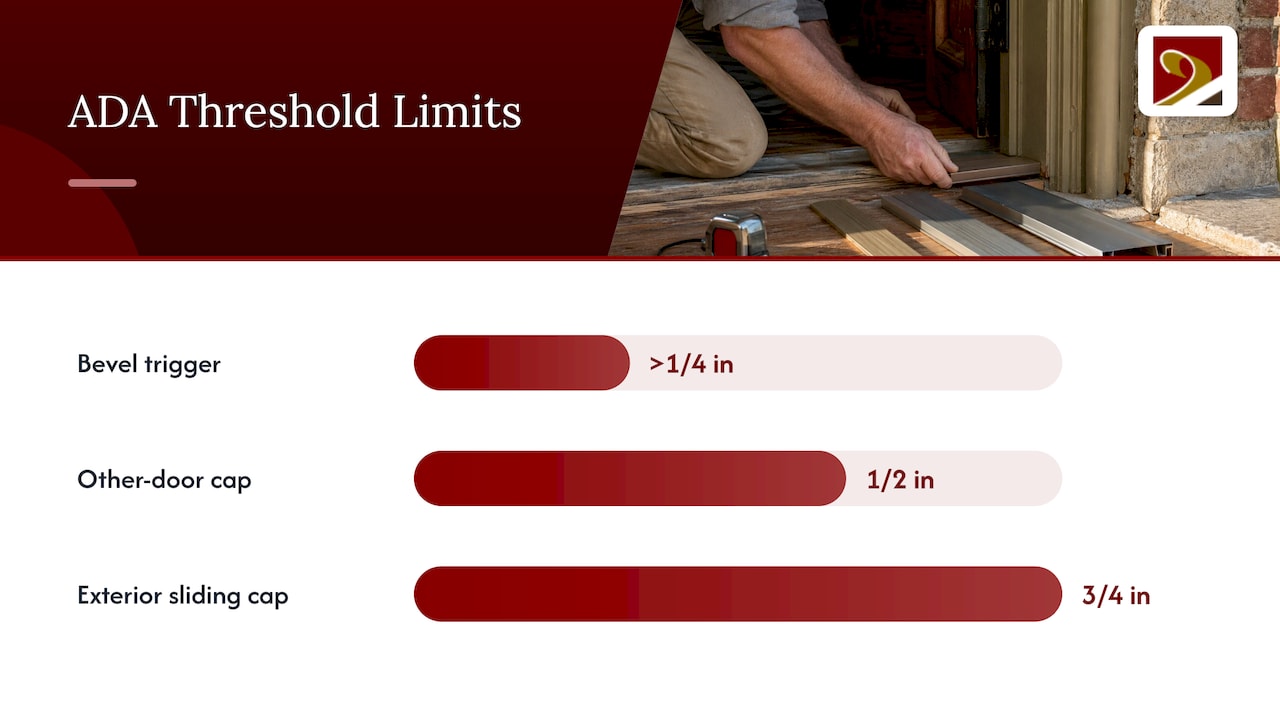
Most public and commercial buildings, and many rehabilitated residences that are open to the public, have to deal with thresholds under the ADA. The ADA Standards excerpt (Section 4.13.8) caps thresholds at 3/4 inch for exterior sliding doors and 1/2 inch for other doors at accessible doorways, with bevels no steeper than 1:2. Any threshold taller than 1/4 inch generally needs that bevel, as UpCodes’ guidance summarizes.
For historic buildings, Section 4.1.7, reproduced in a municipal ADA manual, says alterations to a qualified historic building, meaning one listed or eligible for the National Register or designated under state or local law, must comply unless it is determined that compliance would threaten or destroy historic significance. In that case alternative requirements may be used.
NPS Preservation Brief 32 is specific about thresholds. If one exceeds the generally allowable 1/2 inch, it can be altered or replaced with a threshold that meets accessibility requirements. If the existing threshold is significant, a bevel can be added to each side to reduce its height, or it can be replaced with an accessible threshold that is visually compatible with the historic entrance.
That is precisely the brief for a custom piece. UpCodes also notes that even a code-compliant 3/4-inch beveled threshold is very hard for some wheelchair users, and suggests a low interior rise of at most 1/4 inch with the drop taken outside, or an interlocking threshold that brings the exterior surface up to interior floor level while still managing water.
Codes are adopted and amended locally, and a state or local jurisdiction may differ from the model codes. Confirm the enforced edition with the building official, and for tax-credit projects, with the State Historic Preservation Office, before drawings are finalized. The California Building Code, for example, changed its accessibility provisions effective January 1, 2026, so a project there is not governed by the same text as one in Virginia or the Carolinas.
Where custom threshold work goes wrong
- Specifying by catalog width. The opening is never the catalog dimension. Template first, order second.
- Treating caulk as flashing. Sealant joints age. The drainage path must work without them.
- Ignoring the door bottom. A threshold sealed to a door whose bottom grain is bare will fail from the door side.
- Raising the threshold to solve a floor problem. It creates an accessibility and tripping issue and often a review comment.
- Replacing a significant original. Bevel or retain first, as Preservation Brief 32 advises, and replace only with a compatible profile.
Working with us on the threshold and the door together
A threshold decision rarely stands alone. It is tied to the door’s bottom rail, the casing, the sill condition and sometimes the stair or porch beyond. We design and fabricate custom wood doors, windows, trim and period stairs for historic buildings, and our work includes replicating period features and matching for historic tax credit eligibility. Architects and contractors can bring us the opening, the drawings or the review comments, and we will build the door and its surrounding millwork as one coordinated set. Start with our historic doors offer or our custom fabrication services.

For a historic wood door that needs restoration rather than replacement, see our restoration of solid wood doors, and for entries in Richmond and the surrounding area, our historic wooden doors.
Our view on thresholds in historic work
We treat the threshold as part of the door, because that is how the building was made. In a period entrance the sill, the casing and the door bottom were fitted to one another by hand, and the best replacement work repeats that logic.
Our approach is to start from the opening as it stands: the template, the floor heights, the condition of the sill beneath. From there we can make the door, the trim and the threshold to the same drawing, in materials and profiles that suit the period and that reviewers can read as compatible. Because we replicate period features and match work for historic tax credit eligibility, we write the threshold into the same documentation as the rest of the entrance.
Architects and builders who bring us the door and the threshold together get one fit rather than three trades meeting at a gap. That is the case for custom work in a historic building: nothing in the entrance has to be forced.
Gepetto
FAQ
What is the difference between a door threshold and a sill?
The threshold is the piece at the bottom of the doorway that the closed door meets and that you step over. The sill is the framing member beneath it, often wood against a slab, sloped to shed water. A sill pan is the separate flashing below that collects and drains any water that gets through.
What is the best material for a historic exterior threshold?
On exposed street-level entries, bronze or stainless steel hold up against deicing salts, and bronze has a long history on entrance doors. For a residential wood door, laminated oak is more dimensionally stable than a single solid piece. The right choice depends on exposure, the door and the review requirements.
How do you size a custom threshold?
Measure the opening from the inside of the casings, take a template of the jamb profile, and record the floor heights on both sides. Check the door bottom and the sweep or insert it will close against, and confirm the subfloor is flat and sound. Then allow a small margin for final fitting.
How high can a threshold be under the ADA?
At accessible doorways the ADA Standards allow 1/2 inch for most doors and 3/4 inch for exterior sliding doors, with a bevel no steeper than 1:2 on anything above 1/4 inch. Qualified historic buildings may use alternative requirements where compliance would threaten or destroy historic significance. Confirm local rules with the building official.
Sources
Recommended
by Matthew Wiley | Nov 17, 2026 | Architectural Millwork
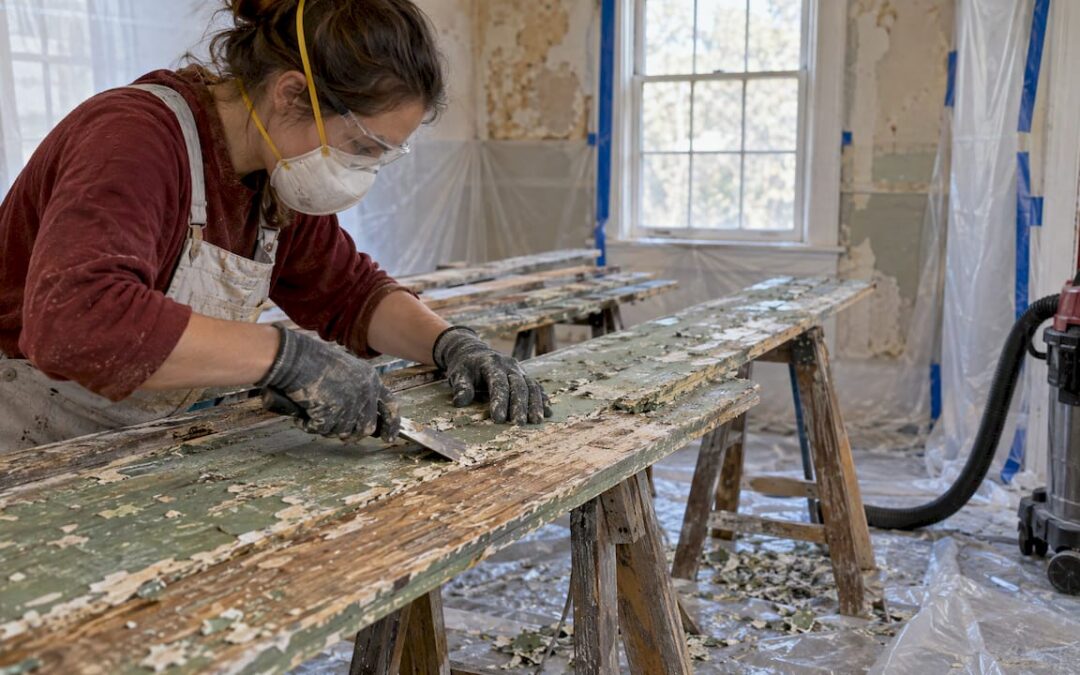
The best paint removal on historic wood removes the least paint possible. The National Park Service’s guidance is to take coatings off only to the next sound layer, with the gentlest means available, and to strip to bare wood only when a surface is painted shut or new wood is being pieced in. Before any stripper or heat gun comes out, two questions decide the job: is removal necessary at all, and is there lead in the paint? When the wood itself has gone past saving, the answer is repair, restoration or an exact replica, which is the work we do at Gepetto Millworks on windows, doors, trim and stairs.
Gepettomillworks
gepettomillworks.com
Restore Historic Woodwork with Care
When paint removal reveals wood that cannot be saved, Gepettomillworks creates custom millwork for historic building projects.
Visit
TL;DR
- Classify the paint failure first. Minor blemishes need no removal, a failing top layer needs limited removal, and only multiple-layer failure justifies stripping the whole surface.
- In a pre-1978 building, treat the paint as lead-based until a certified inspector, or a certified renovator using an EPA-recognized method, shows it is not. Contractors working for pay must follow the EPA’s lead-safe rules.
- Never use open flame, dry sanding, or a heat gun above 1100°F. Favor hand scraping, wet methods, low heat, and chemical strippers other than methylene chloride.
- Clean up with HEPA vacuuming and wet washing, then prime and repaint promptly so the bare wood is protected.
- If scraping reveals rot, broken joints or missing profiles, the job has moved from paint removal to restoration or replication.
Table of Contents
First decide whether the paint needs to come off
Historic woodwork usually carries a century or more of coatings, and those layers are part of the building’s record: early color schemes, tool marks, and the original surface itself. Preservation Brief 10, published by the National Park Service, states that paint removal from historic buildings should be avoided unless absolutely essential, apart from cleaning, light scraping and hand sanding as routine maintenance.
The Brief gives a practical way to judge each element of painted woodwork. Confirm first that the surface really is wood and that the wood is not decayed. Then sort what you see into three classes:
| Condition |
What it looks like |
What it calls for |
| Class I |
Minor blemishes |
No paint removal |
| Class II |
Failure of the top layer only |
Limited removal, to the next sound layer |
| Class III |
Substantial failure through multiple layers |
Total removal |
The National Center for Preservation Technology and Training adds that the Secretary of the Interior’s Standards recommend against removing paint without paint-surface deterioration, favor repairing deteriorated wood over replacing it, and do not advocate sanding weathered wood back to bare wood. It recommends a survey of both paint and substrate conditions to set the level of intervention.
For an architect or contractor, that survey is the document that protects the project. It records why each element was treated as it was, which matters for reviewers on a historic tax credit project as well as for the owner.
If the existing finish is sound and the only issue is a stain that no longer matches, our guide on matching stain on old trim without stripping sound finishes covers that case.
Test for lead before you touch anything
Old paint on historic wood is likely to contain lead. The EPA states that 87% of homes built before 1940 and 24% of homes built from 1960 to 1978 have some lead-based paint. Its advice is to assume lead is present in any pre-1978 building or to hire a certified lead-based paint inspector or risk assessor.
Three terms matter here:
- Inspection: locates lead-based paint, using a portable X-ray fluorescence (XRF) machine and laboratory tests of paint samples, according to the EPA’s Protect Your Family booklet.
- Risk assessment: samples deteriorated paint, dust near painted surfaces and bare soil to identify current hazards.
- Recognized test kit: the EPA has recognized three kits, but recognition applies only to use by Lead-Safe Certified renovators.
Virginia’s Department of Historic Resources notes that qualified inspectors or laboratories can confirm lead with an on-site sodium sulfide test or a mobile XRF analyzer, and that commercial laboratory analysis gives the most accurate results, including percentage of lead by weight.
What the federal rule asks of contractors
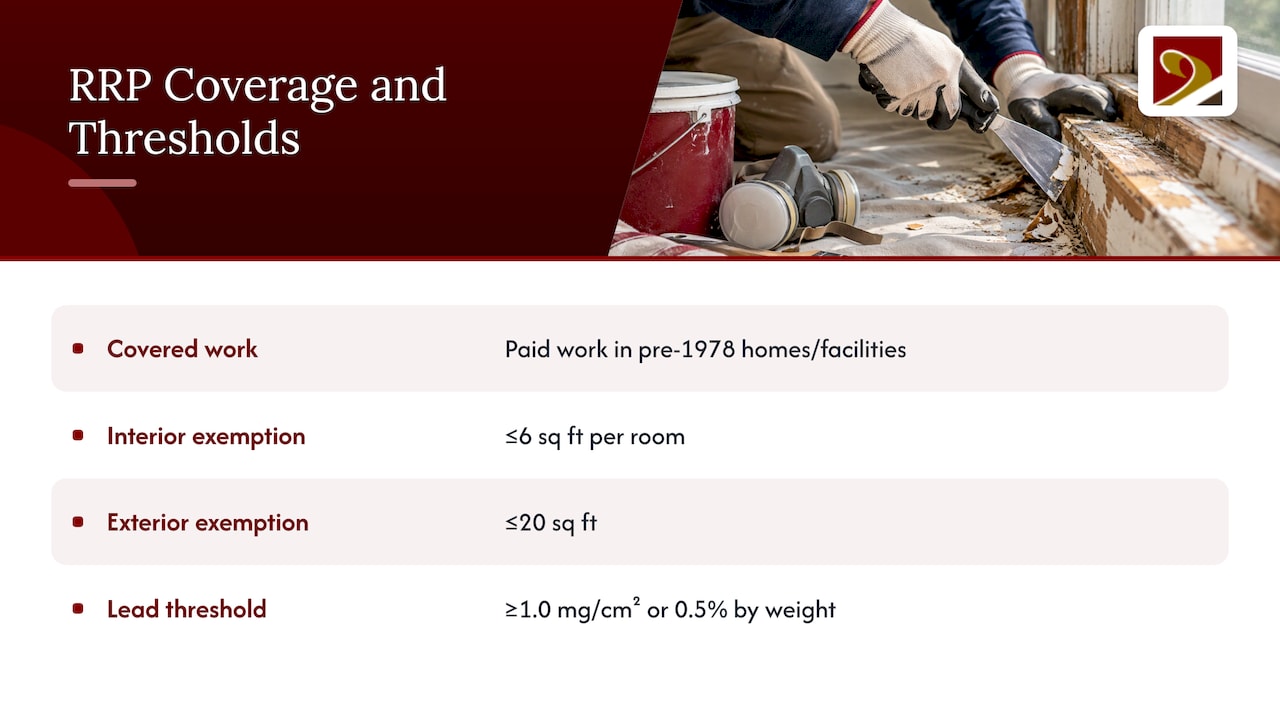
The EPA’s Renovation, Repair and Painting (RRP) rule covers paid work in houses, apartments and child-occupied facilities built before 1978, including paint preparation, window replacement and remodeling. It exempts, among others, minor work disturbing six square feet or less of painted surface per room inside, or 20 square feet or less outside. Testing is not itself required, but the rule applies unless every affected component is determined to be free of paint containing lead at or above 1.0 mg/cm² or 0.5% by weight.
The EPA’s 2026 Steps booklet says every surface affected by a covered renovation must be tested or presumed to contain lead, including surfaces under wallpaper if they will be disturbed. It also notes that HUD’s Lead Safe Housing Rule permits only certified inspectors or risk assessors to make that determination.
In practice that means a certified firm, a trained renovator, a contained work area with posted signs, and cleaning verification at the end. For the four practices that are banned on these jobs, see our summary of lead paint rules for renovation on historic projects.
The regulatory ground has been moving. The EPA’s final rule on lead dust, 89 FR 89416 of October 2024, lowered the dust and hazard thresholds used in lead-paint work, so confirm the current figures with the EPA before you set clearance criteria.
Virginia DHR adds a preservation point: removing lead paint from significant historic features should be considered only when the features are contaminated above regulated levels and the contamination is reasonably accessible to occupants. The cheapest abatement methods are usually not appropriate for older buildings.
Choosing a method that spares the wood
No single method suits every element. Flat clapboard, a carved bracket, a six-over-six sash and a paneled door each behave differently. The table pulls together what HUD, the National Park Service and Historic New England say.
| Method |
Where it fits |
Cautions |
| Hand scraping to the next sound layer |
Failing paint on flat or moulded surfaces |
Preferred by Historic New England; keep surfaces misted when lead is present |
| Wet sanding of peeling paint |
Deteriorated, loose paint |
Keep wet but not running |
| HEPA-shrouded mechanical sander |
Finish sanding |
Shroud held against the surface; not on wood with needle guns or vacuum blasting |
| Low-heat stripping (heat gun) |
Multiple layers on siding and trim |
Never above 1100°F; lowest effective setting; fire extinguisher at hand |
| Chemical stripper |
Mouldings, carving, windows, brackets |
Not methylene chloride; test a small area; ventilate |
| Off-site stripping |
Removable doors, sashes, mantels, balusters |
Heat or chemical, done where containment is easier |
HUD’s chapter on lead-based paint and historic preservation recommends exactly these approaches: wet sanding of deteriorated peeling paint, finish sanding with HEPA-vacuum mechanical sanders, low-heat stripping, chemical strippers except methylene chloride, and off-site stripping. It also says to avoid harsh abrasive cleaners that can damage historic materials, and never to use open flame, high-heat removal or dry sanding.
Heat guns, with limits
An NPS technical note on paint removal from wood siding explains why a heat gun was chosen over a radiant plate: the heat is controllable, the working surface stays in view, and every layer can be softened and lifted down to the original surface in one pass without mechanical damage. Chemicals and scrapers were kept for complex areas such as porch ceilings, soffits, windows and brackets.
Historic New England is more conservative, advising that heat guns never be used on elements still in place and always at the lowest setting, and that infrared strippers be left to trained professionals. Take the stricter reading for fragile or glazed elements. Glass putty, glazing and old joinery suffer most from heat.
What to leave out
Abrasive blasting and power or pressure washing do not belong on historic wood, according to Historic New England. Open-flame burning, and machine sanding or grinding without HEPA exhaust, are prohibited on lead jobs under HUD’s abatement chapter. Dry scraping is allowed only for limited areas.
Working with a chemical stripper, step by step
Chemical strippers earn their place on profiles that scrapers cannot reach without rounding the edges. Here is the routine, with where it tends to go wrong.
- Test a small, inconspicuous area. HUD directs workers to try an on-site stripper on a small patch first. This shows how many layers lift and whether the wood grain reacts. Water-rinsable methylene chloride products, for instance, raise the grain more than regular strippers, as Preservation Brief 10 notes.
- Prepare the area. Contain the floor or ground with sheeting, ventilate, and keep ignition sources away. The Brief warns that solvent-based stripper vapors can be highly toxic if inhaled or absorbed through skin, and that many are flammable.
- Protect yourself. Wear gloves, a face shield and a respirator with organic-solvent filters. Caustic dip-stripping should be left to professional companies, because the solutions can dissolve skin and permanently damage eyes.
- Apply and wait the full period. Follow the manufacturer’s directions and let the product sit as long as the label requires. Dwell time varies by product and by the number of layers, so the label is the authority. Lifting a stripper early is the commonest cause of repeat applications and extra scraping.
- Lift with plastic or dull tools. A blunt putty knife or a plastic scraper protects the surface. Use fine abrasive pads and picks on the moulded areas. Keep wet-scraped debris moist.
- Neutralize or remove residue as the label directs. Gummy residue left on the wood interferes with the new primer.
On lead-containing paint, add the requirements above: containment, certified personnel where the RRP rule applies, and no stripping with volatile products in poorly ventilated spaces.
Cleanup and preparation for repainting
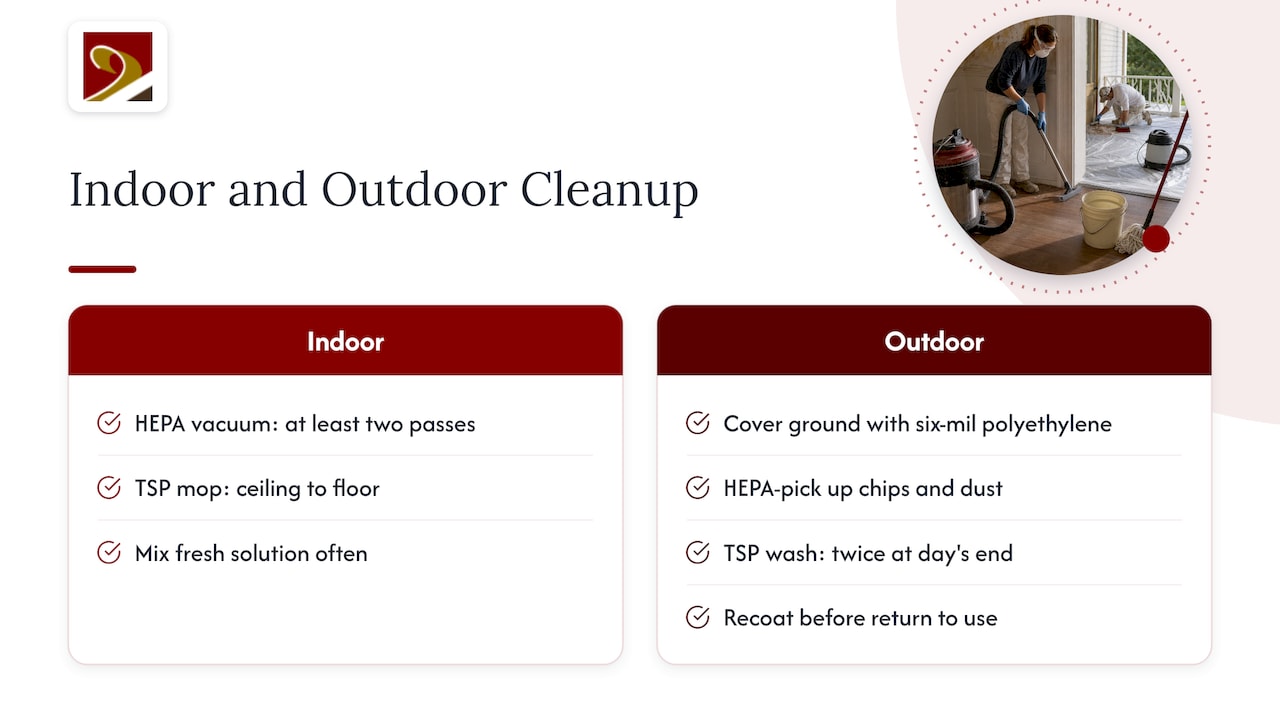
Cleanup carries as much weight as removal on lead jobs. Virginia DHR recommends at least two passes of HEPA vacuuming and wet mopping with a trisodium phosphate (TSP) solution indoors, working from ceiling to floor with fresh solution mixed often. Outdoors, it recommends masking the ground with six-mil polyethylene, HEPA-vacuuming chips and dust, washing surfaces twice with TSP at the end of each work day, and recoating abated surfaces before the spaces return to use.
The EPA’s Small Entity Compliance Guide requires HEPA vacuuming, damp-cloth wiping and mopping that keeps wash water separate from rinse water, followed by cleaning verification.
Preparation then follows Preservation Brief 47: remove loose paint to a sound substrate, rough the surface gently for adhesion, wipe it clean, and repaint with a compatible primer and topcoats within the manufacturer’s temperature range. For washing, use non-abrasive cleaning and low-pressure water from a garden hose rather than high-pressure water.
Bare historic wood should not wait. Prime it while it is dry and clean.
When the stripping reveals more than paint
Stripping often exposes what paint was hiding: soft sill sections, split rails, failed mortise-and-tenon joints, or mouldings worn through. Preservation Brief 10 makes decay the first question for a reason. Paint cannot hold on wood that is failing underneath, and the guidance favors repair over replacement wherever the material allows it.
This is where the work moves from paint removal to millwork:
- Painted-shut sash and failed windows: Our historic window restoration service is built for these.
- Elements beyond repair: A missing or rotted element can be replicated from the original profile. Our wooden windows and custom fabrication cover doors, trim, casework, stairs and balustrades.
- Tax credit projects: We claim expertise in exact replication with authentic materials and techniques, supporting projects aiming at historic preservation tax credit eligibility. Our notes on the historic tax credit go further.
The decision between saving and replacing is easier to make with the wood open in front of you. Architects and contractors who bring us the survey and photographs from the stripping stage can discuss what is repairable and what has to be matched.
Work with us on the parts that cannot be saved
Gepetto Millworks designs, fabricates and restores wood windows, doors, trim, cabinetry, staircases and architectural millwork for historic buildings, including replication of period features. If your paint-removal survey ends with an element that needs restoring or an exact replica, start with our historic window restoration page or send the project details through gepettomillworks.com.
We work with architects, general contractors, builders and historic homeowners across Virginia, the Carolinas, West Virginia, Maryland and the District of Columbia.
Our view on stripping historic wood
Every historic project we see starts with the same temptation: take everything back to bare wood and begin again. Resist it. The layers on a century-old window or door carry its history, and the gentlest treatment that makes the surface sound is nearly always the right one.
What we value is the original profile. A muntin or a mould that has been rounded by aggressive stripping cannot be recovered by paint, and that is when replication becomes necessary. Our work is exact historic replication, using authentic materials and techniques, so that a replacement element stands comfortably beside the original.
Lead adds another reason for care. Plan the removal method, containment and cleanup together with the person who will restore or fabricate the woodwork, so the wood reaches the shop or the installer in the condition the design assumed.
Gepetto
Frequently asked questions
Do I have to strip paint before repainting historic wood?
Not usually. Preservation Brief 10 recommends removing paint only to the next sound layer, and only where it is failing. Sound paint is cleaned, lightly scraped and sanded by hand, then repainted. Full stripping is justified for painted-shut openings or where new wood is pieced in.
Can I use a heat gun on old wood?
Within limits. HUD prohibits open flame and heat guns above 1100°F on lead-containing paint, and Historic New England advises the lowest setting and never on elements still in place. Keep a fire extinguisher at hand and use chemical stripping on glazed or carved areas.
How long do I leave a chemical stripper on?
For the time the manufacturer’s label states. Dwell time varies with the product and the number of paint layers, and HUD directs workers to follow the manufacturer’s directions and wait the required period. Test a small area first to see how the paint responds.
Is a home test kit enough to prove the paint is lead-free?
For work covered by the RRP rule, the EPA has recognized three kits, but only for use by Lead-Safe Certified renovators. HUD-regulated housing requires a certified inspector or risk assessor. If you are unsure, assume lead is present in a pre-1978 building and plan accordingly.
Sources
Recommended
by Matthew Wiley | Nov 16, 2026 | Architectural Millwork
The most dependable way to match existing molding is to replicate it rather than shop for a near relative: a sample of the original is documented, a knife is ground to its exact profile, and new stock is milled in a species and grain that suit the house. Stock catalogs rarely contain a Victorian casing or a Federal-period crown, and a profile that is off by an eighth of an inch reads as wrong across a whole room. Gepetto Millworks designs, fabricates and restores period millwork for historic buildings, including the replication of period features and matching for historic tax credit eligibility, so the work described below is the work we do.
Gepettomillworks
gepettomillworks.com
Match Historic Molding with Custom Millwork
Gepettomillworks designs, fabricates and restores period millwork for historic buildings, including replication of period features.
Visit
TL;DR
- A true match means the same size, shape, depth and projection as the original, not merely a similar look. Stock profiles seldom achieve this on pre-1940 houses.
- Give the mill a physical sample, ideally a clean, undamaged section, and note any paint buildup or wear on it.
- Tax-credit and local review work follows the Secretary of the Interior’s Standards: replacements match the old in design, color, texture and, where possible, materials.
- Where the original survives, preservation guidance prefers repair over replacement; replicate only what is missing or beyond repair.
- For a full run, a custom-milled replica is the surest route to a seamless result; stock trim is a fallback for rooms where the molding is not a character-defining feature.
Table of Contents
Why a Near Match Fails in an Older Room
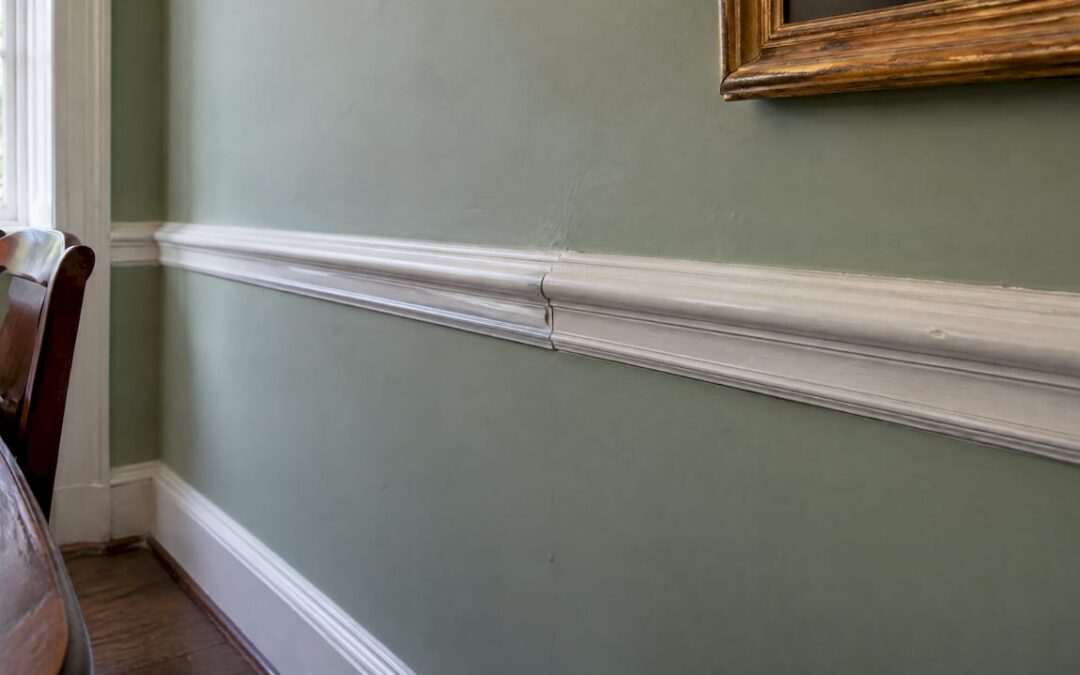
Molding is read by the eye as a system. Baseboard, casing, chair rail, picture rail and cornice each carry a profile composed of coves, ogees, beads, fillets and quirks, and the shadows these produce are what give a period room its depth. When a replacement piece substitutes a shallower cove or a thinner fillet, the shadow line shifts, and the discrepancy appears most plainly where old and new meet, at a doorway or at the end of a wall.
The problem is compounded by age. Nineteenth-century millwork was frequently run to local shop patterns, and the dimensions of a given “style” differ from town to town and from one decade to the next. A casing in a Richmond rowhouse of the 1880s will not be identical to its counterpart in a Charleston single house, even where both carry the same name in a catalog. Matching is therefore an exercise in documentation of the particular building, not in selecting a type.
Step 1: Read the Profile Before You Touch It
Begin by looking at the molding in raking light and identify the elements in order from the wall outward: the fillets, the cove, the bead, the ogee. Sketch it freehand first. This forces attention to the small features, such as a quirk bead or a tiny astragal, that a casual glance would pass over.
Then record the profile mechanically. A contour gauge, the tool with movable pins that lock to copy any shape, angle or curve, typically costs about $10 to $15 and is stocked by most hardware stores. Press it against a cleanly cut end, or against a section removed from an inconspicuous location, and trace the result onto paper at full size. Add the overall height, width, projection from the wall and the depth of each cove.
Two cautions apply at this stage:
- Paint buildup changes the profile. Generations of paint soften arrises and fill the quirks. Trace from the least coated surface available, such as a piece from a closet or the back of a returned section, and record where the paint is heavy.
- Walls and floors move. Measure projection and height at several points along the run, because a baseboard in a settled house is seldom the same height at both ends of a wall.
Step 2: Take a Physical Sample
A tracing is a record; a sample is the evidence. Remove a short length from a location that will not be missed, such as a closet, behind a door swing or the end of a run that a later alteration has hidden. Label it with the room and its position, and photograph the spot beforehand.
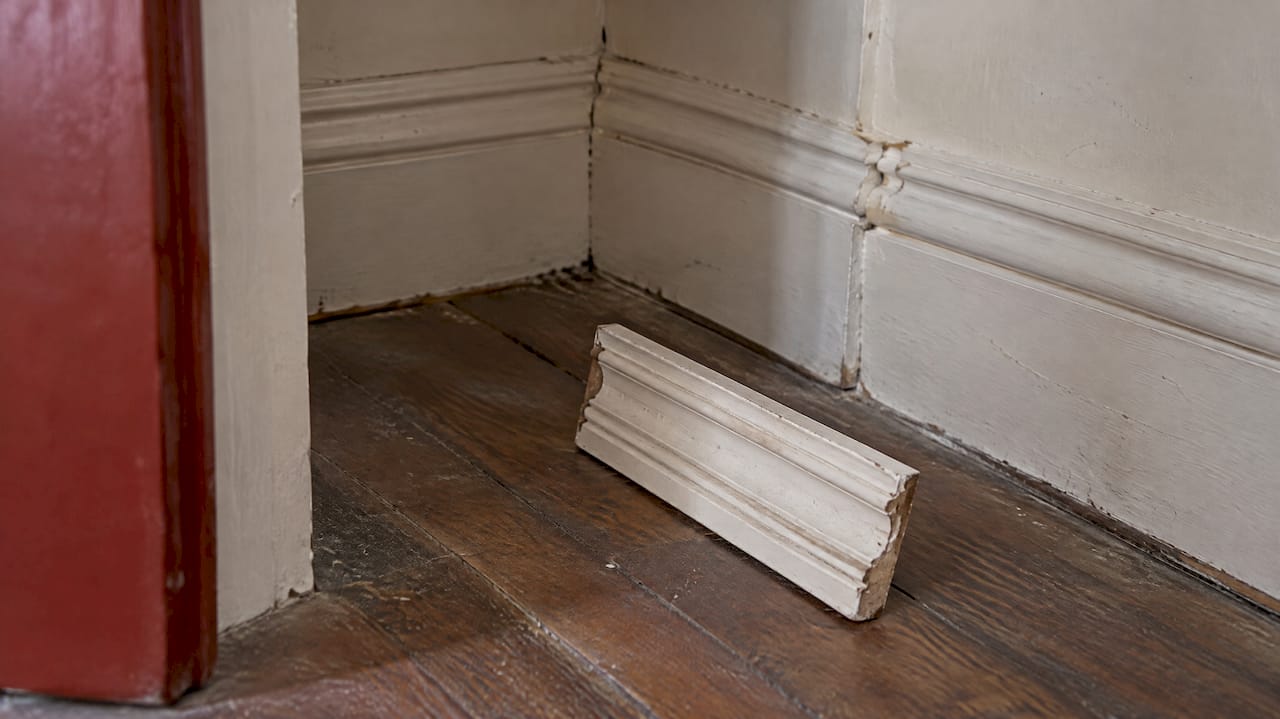
For a mill, the best reference is the original piece itself. Custom milling begins when the shop makes a custom knife from your traced profile or sample, mills new molding in your choice of wood, and the knife can be reused for future renovations. That reuse matters for a house in which work will proceed in phases: a second-floor hall can be completed years after the parlor, and the profile will still agree.
When you send or hand over a sample, include:
- the sample section, with its location in the building noted;
- a full-size tracing and the overall dimensions;
- the species of the original, if known, and whether it was originally painted or clear finished;
- the total linear footage required for each profile, with allowance for waste at miters and splices;
- photographs showing how the molding meets the floor, the door casing and the corners.
An architect specifying a project can fold this into the drawing set as a molding schedule, giving each profile a mark and a full-size detail so that the shop, the contractor and the reviewer are all reading the same drawing.
Step 3: Decide Between Stock, Modified Stock and a Replica
There are three routes, and the choice depends on how important the molding is to the building.
| Route |
What it is |
Where it suits |
| Custom replica |
A knife is made to the traced profile and new molding is milled to match |
Principal rooms, street-facing elevations, tax-credit and review projects |
| Modified stock |
A stock profile is combined with a cap or backband to approximate a built-up original |
Secondary spaces where the original was simple |
| Stock match |
A catalog profile chosen for proportion and scale |
Altered or non-historic rooms, additions |
The usual advice for a stock match is to take a sample to home centers, then specialty lumber yards and mill yards and compare it against their catalogs. Because an exact match is unlikely, the same guidance, attributed to Norm Abram, stresses proportion and scale and cautions against going bigger or thicker than the most formal trim in the house. That is sound for a rear bedroom. For a parlor, stair hall or any room a reviewer will examine, the replica is the route that gives a match rather than an approximation.
A custom replica is also the right answer when the original is discontinued, which in a house of this age is nearly always the case. Our replica millwork and historic replica architectural millwork pages show the kind of period work we undertake.
Step 4: Choose Wood, Grain and Finish with the Original in Mind
A profile can be exact and the room still look patched if the new wood is wrong. Consider three things.
Species. Pine, poplar, oak, cypress and heart pine were all common in American interiors, and the choice often tracked region and the room’s status. Old-growth lumber has tighter growth rings than most current stock, which affects how it takes paint and stain and how it holds an edge. Identify the original species, or have it identified, before ordering.
Painted or clear. The National Park Service’s guidance on historic interiors treats crown molding, baseboards, mantels and window and door millwork as character-defining features, and advises against removing paint from traditionally finished surfaces or painting previously unpainted millwork. If the original was clear finished, the replica must be as well, and the stain has to be matched to aged wood. We have written separately on matching stain on old trim without stripping sound finishes.
Period character. In a Craftsman house the trim is often flatter and more rectilinear than in a Victorian one, and the surrounding treatments follow it. Where window dressing is part of the same composition, this overview of Craftsman window treatments that fit the trim shows how the styles relate to the casing.

What Preservation Standards Require
For a reader pursuing historic tax credits or working under a local review board, matching is a matter of compliance as much as taste. The Secretary of the Interior’s Standards for Rehabilitation direct that deteriorated historic features be repaired rather than replaced, and that a replacement match the old in design, color, texture and, where possible, materials. They add that replacement of a missing feature must be substantiated by documentary and physical evidence, without creating a false sense of history.
Local guidelines apply the same logic in plainer language. The state historic preservation office’s design guidelines for Ponca City, Oklahoma, are representative: replacement of a deteriorated detail must match the original in composition, size, shape, texture and profile, and a missing element should be rebuilt from evidence on the actual building, not from similar houses. The same document holds that preserving the original is always preferred to replacing it, even with an exact copy. Your local review board’s own guidelines govern the project, so confirm them early.
In practice this yields a rule that architects and contractors can apply:
- Keep and repair what survives. Consolidate, patch and refinish sound original molding.
- Replicate what is missing or beyond repair, from a sample or from physical evidence in the building.
- Document the work, with the profile drawings, photographs of the originals before removal and a note of where each replica was installed. This record supports a tax-credit application and answers a reviewer’s questions.
Where a missing run has no surviving sample anywhere in the building, the evidence may be paint ghosts on the plaster, nail holes, or a matching room elsewhere in the same house. A conjectural profile borrowed from a neighbor’s house is the kind of invention the Standards warn against.
Installing New Molding Beside Old
Even a perfect profile can be spoiled by poor joinery. A few principles govern where new meets old.
- Place the join where the eye expects one. Corners, door casings and the ends of a wall are natural breaks. A splice in the middle of a long wall draws attention.
- Use a scarf joint for long runs. The two ends are mitered at an angle so one piece overlaps the other, which hides the seam and keeps the gap from opening conspicuously as the wood moves with the seasons. Glue the joint and, where possible, place it over framing so that it can be nailed securely.
- Leave a snug fit, not a compressed one. Wood expands with humidity, and a run installed too tightly can bow away from the wall.
- Finish after installation. Fill, sand and paint or stain the joints in place so that the seam disappears into the surface.
- Acclimate the wood. New molding should rest in the room for several days before it is cut and fixed.
When the sizes of the molding differ between rooms, as when a crown is to be matched to an existing baseboard, remember that the two do not need to be identical. Trade guidance suggests that at least two trim elements should match and the third should stay consistent in color, style, size or material. That holds for new construction and altered rooms. In a room with surviving period trim, the original proportions are the standard, and new pieces follow them.
What Affects Cost and Lead Time
A custom molding project is priced by the job, because the variables differ from one house to the next. The principal ones are:
- Number of distinct profiles. Each profile requires its own knife, so a house with eight casings and bases carries more setup than one with two.
- Complexity of the profile. Deep coves, multiple beads and built-up assemblies demand more tooling and more passes than a simple ogee.
- Species and grade. Clear, old-growth-quality stock and rare species take longer to source and cost more than common pine or poplar.
- Linear footage. A single profile run across a whole floor spreads its setup over a larger quantity.
- Finish. Painted, clear-coated and stained work each carry different preparation.
- Review and documentation. Tax-credit and board-reviewed projects may require drawings and sample approvals before milling begins.
Because a custom knife is reusable, the economics improve on a phased renovation, and ordering all the profiles you can foresee at once is generally more efficient than returning to the shop room by room. Lead time depends on the mill’s schedule and on whether samples and drawings are complete; the way to shorten it is to supply a clean sample, a full-size tracing and a footage count at the outset.
Our Perspective
Matching molding is, at bottom, an act of reading a building. Every house we are asked to work on carries its own shop patterns, its own species choices and its own habits of proportion, and the task is to recover them faithfully rather than to approximate them. That is why our practice is built around the exact replication of period features, using authentic materials and techniques, and around the documentation that lets a project stand up to review for historic tax credit eligibility.
We take on architecturally significant and complex projects, and custom requests that others may decline, because a historic interior is rarely served by a catalog. A knife made to the true profile gives an architect a drawing that can be specified, a contractor a product that installs without argument, and an owner a room in which the old and the new cannot be told apart.
Gepetto
Commissioning the Match
If you have a room, a run or a whole house of molding to reproduce, we can take it from the sample to the finished profile. Gepetto Millworks designs and fabricates custom casework, staircases, balustrades, doors, windows and trim for historic buildings in Virginia, West Virginia, North Carolina, South Carolina, Maryland and the District of Columbia, and our custom fabrication page describes the range. Windows with their casings and sashes are covered under historic window restoration, and the wider craft is described in our guide to millwork carpentry.
To begin, send us the sample or tracing, the footage and the location of the building, and tell us whether the project is seeking a tax credit.
FAQ
Can I match old molding with stock trim from a home center?
Sometimes, in rooms where the original profile was simple or has already been altered. Stock catalogs seldom contain nineteenth-century profiles, so the result is usually an approximation. For principal rooms and reviewed projects, a custom-milled replica gives a true match.
What should I send a millwork shop to replicate a profile?
A clean section of the original is best, with its location noted. Add a full-size tracing, the overall height, width and projection, the species if known, and the footage needed. Photographs of how the molding meets the floor and casings help.
Do crown molding and baseboard have to be the same size?
Not in a new or altered room, where trade guidance asks only that some elements match and the rest stay consistent. In a room with surviving period trim, the original proportions govern, and new pieces should follow them.
Is replacing old molding acceptable for a historic tax credit project?
Preservation standards prefer repairing deteriorated features, and they accept replacement of those beyond repair when it matches the old in design, color, texture and, where possible, materials. Missing features should be based on evidence from the building. Check your state historic preservation office and local board for their requirements.
Sources
Recommended
by Matthew Wiley | Nov 15, 2026 | Architectural Millwork
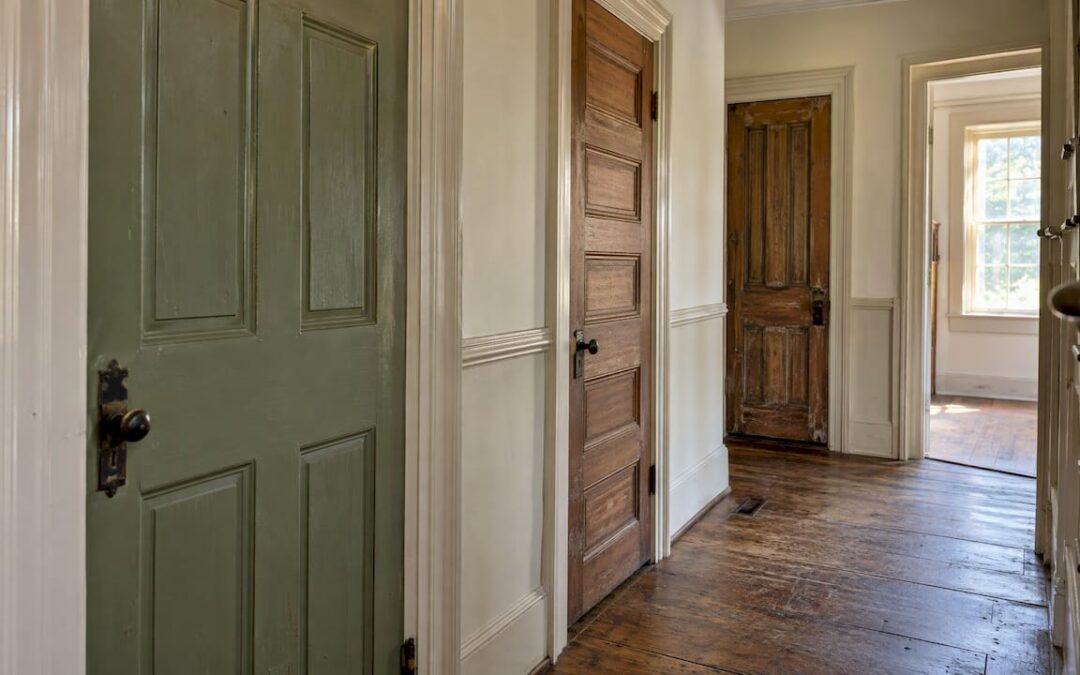
Matching interior door styles does not mean making every door identical. It means choosing one governing logic, usually the one the house already established in its period, and carrying its panel pattern, proportions, casing, wood and finish through every opening that is seen together. In a historic building the surviving doors are that logic, and the work is to repair them where possible and replicate them faithfully where they are lost. Gepetto Millworks designs, fabricates and restores doors, trim and other period features for exactly this purpose, including replication that supports historic tax credit eligibility.
Gepettomillworks
Bring Historic Door Details Into Alignment
Gepettomillworks creates custom millwork for historic building projects, supporting faithful door, trim and period feature restoration or replication.
Visit
TL;DR
- Doors need not be identical, but they should share visible characteristics: panel pattern, height, casing profile, color family and hardware finish.
- In a historic house, the original doors set the standard. Preserve them first; where one is too deteriorated, replace it in kind, matching material, panel pattern, configuration and dimensions.
- Match wood species, cut and finish to the existing woodwork, not only the door’s shape.
- Where doors cannot be matched, a unifying color or one consistent hardware finish restores cohesion.
- Custom fabrication is the route when no stock door carries the right profile, proportions or species.
Table of Contents
What matching actually means
Designers who have been asked whether every interior door in a home must match generally answer no. As Livingetc’s survey of designers puts it, door designs need not be identical, but the style should remain consistent, and a mixed approach works best in an eclectic home when it follows a plan. Interior designer Amy Youngblood, quoted in the same piece, advises that even when interior styles are mixed, keeping architectural basics such as door style consistent helps a home feel cohesive.
For a historic building, that advice needs a firmer footing. A house of 1790, 1880 or 1925 did not mix door styles by taste; it carried the vocabulary of its builder and its period. The question is therefore less which doors look good together than which doors belong to this building. Three tests are useful in practice:
- Sightline test. Doors visible together from a hall, stair landing or enfilade should read as one family.
- Room-hierarchy test. Public rooms traditionally received the most elaborate doors; service spaces, upper floors and closets were plainer. A stepped hierarchy is period-correct, not a mismatch.
- Original-fabric test. Any new door must be indistinguishable in proportion and profile from the surviving ones, at the distance a visitor stands.
Begin with the architecture of the house
Each period resolved the door differently, and a replacement that ignores the period will always look borrowed. A few anchors for the common American cases:
- Georgian and Federal. Six-panel doors with a pronounced vertical emphasis, the upper panels shorter than the lower, set within restrained, well-proportioned casings. Panel moldings are typically applied or stuck with delicate profiles.
- Greek Revival and early Victorian. Fewer, larger panels, often four, with a heavier, more solid presence and bolder moldings.
- Late Victorian. Doors with deeper molded panels, taller proportions, and surrounding casings that grow more elaborate, sometimes with corner blocks or a transom above.
- Craftsman, Prairie and Mission Revival. Flat or slab-like panels, a single long panel or a glazed upper section with a restrained grid, and casings of broad, plain boards, frequently in quarter-sawn oak.
- Colonial Revival. A return to six-panel and Georgian-derived forms, often a little more uniform in scale than the originals.
These are generalizations, and every house departs from them. The reliable method is to survey the building: measure thickness, stile and rail widths, panel depth and molding profile on the best-preserved doors, and record how the pattern varies by floor and by room. That survey, rather than a catalog, defines what a matching door means in your project.
What the Secretary of the Interior’s Standards say about doors
For architects and owners working on a property that is listed, or that may be certified for the federal historic tax credit, the governing text is the National Park Service’s Secretary of the Interior’s Standards for the Treatment of Historic Properties, in the 2017 edition of its guidelines. Several of its recommendations bear directly on door matching:
- Original interior doors, along with trim, paneling and hardware, are character-defining features and should be retained and preserved.
- When a door is too deteriorated to repair, it should be replaced in kind: the same material, matching the historic design’s form, configuration, panel pattern and dimensions.
- Alterations that strip away historic finishes or relocate original features such as staircases can destroy the integrity of an interior.
The practical consequence is a sequence of decisions. First, repair. Second, where repair is not feasible, replicate exactly. Only in spaces with no surviving evidence, or in a documented later addition, does the design question open up, and even there compatibility with the surrounding fabric governs.
The National Park Service’s maintenance guidance for the historic structures of Isle Royale National Park, published in 2010, makes the same point about materials: it advises against replacing original wood doors with modern solid-surface doors or substitutes such as steel or fiberglass. That guide concerns one park’s buildings, but the principle, wood for wood, carries over to residential and commercial work. Its guidance on finishing is equally transferable: refinish original doors in the same color and finish type as the original, and avoid a finish treatment out of keeping with the building’s historic character.
If tax credit eligibility is part of the project, confirm with your State Historic Preservation Office how interior work will be reviewed before ordering anything. That step belongs to the review authority, and a fabricator who documents the replication, as Gepetto Millworks does when matching period features for tax credit projects, makes the submission easier to support.
The details the eye reads
People rarely notice a door’s overall shape first. They notice the things that repeat. The table below sets out what to hold constant and where a match typically fails.
| Element |
What to hold consistent |
Where the match typically fails |
| Panel pattern |
Number, arrangement and relative size of panels |
A stock six-panel door with equal-height panels placed beside originals with graduated panels |
| Panel molding |
Profile (ovolo, ogee, bolection, flat) and whether it is stuck or applied |
A flat, routed profile used where the originals have a deep sticking |
| Stile and rail widths |
Proportion of frame to panel |
Stock rails that are narrower than original, which makes the door look light |
| Thickness |
Door thickness and jamb depth |
A thinner door that sits proud or shallow against the casing |
| Height |
Head height and any transoms |
Standard heights in openings that were cut tall in the original |
| Casing |
Profile, width, plinth or corner blocks |
New doors hung in plain modern casing beside heritage trim |
| Species and cut |
Wood and grain orientation |
Pine or poplar beside quarter-sawn oak, which reads differently under any finish |
| Finish |
Color, sheen, transparency |
A uniform modern stain over a layered, aged finish |
| Hardware |
Finish, scale, mortise locations |
Mortise locks replaced with bored ones, leaving old mortises visible |
The most common visible failure is proportion. A door can have the correct number of panels and still look wrong because the rails are two inches too narrow. This is the principal reason custom fabrication, rather than stock sizing, is the dependable route in period houses: stock catalogs are built to a few modern profiles and standard dimensions, while a period opening is a particular thing.
Wood species, cut and finish
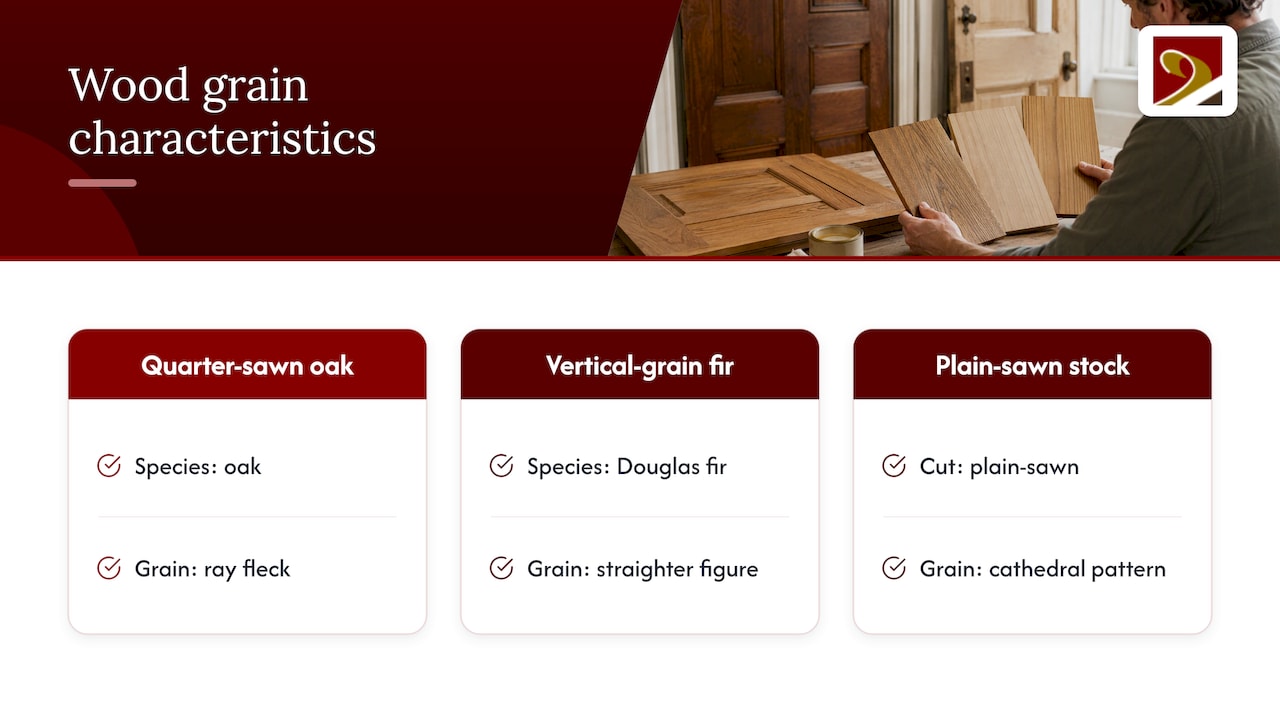
Matching the wood is where many otherwise careful replacements go astray. Mary Ellen Polson, writing in Arts & Crafts Homes, recommends that replacement doors match the species, cut and density of the existing woodwork, and notes that period-specific options such as quarter-sawn oak, poplar and Douglas fir remain available from makers. Cut matters as much as species: the ray fleck of quarter-sawn oak, the straighter figure of vertical-grain fir and the flat-sawn cathedral pattern of plain-sawn stock each carry a different period signal.
Finish is the second half of the same problem. Old trim carries decades of oxidation, shellac, varnish and, often, a toned patina that a fresh stain cannot reproduce by itself. Where the existing finish is sound, the better course is usually to leave it and bring new work to it. Our guide on how to match stain on old trim without stripping sound finishes goes through that approach in detail.
If the doors will be painted, the match becomes simpler, since species and grain disappear under the coating. Painted doors also open the way to the unifying strategy that designers recommend for mismatched sets: painting the doors one color pulls different designs into a single family. In a historic interior, confirm that the paint scheme is consistent with the documented finish history of the room, since the Isle Royale guidance cited above favors the original color and finish type.
Color, hardware and the supporting cast
When doors differ, the elements around them carry the continuity. Three are worth setting deliberately.
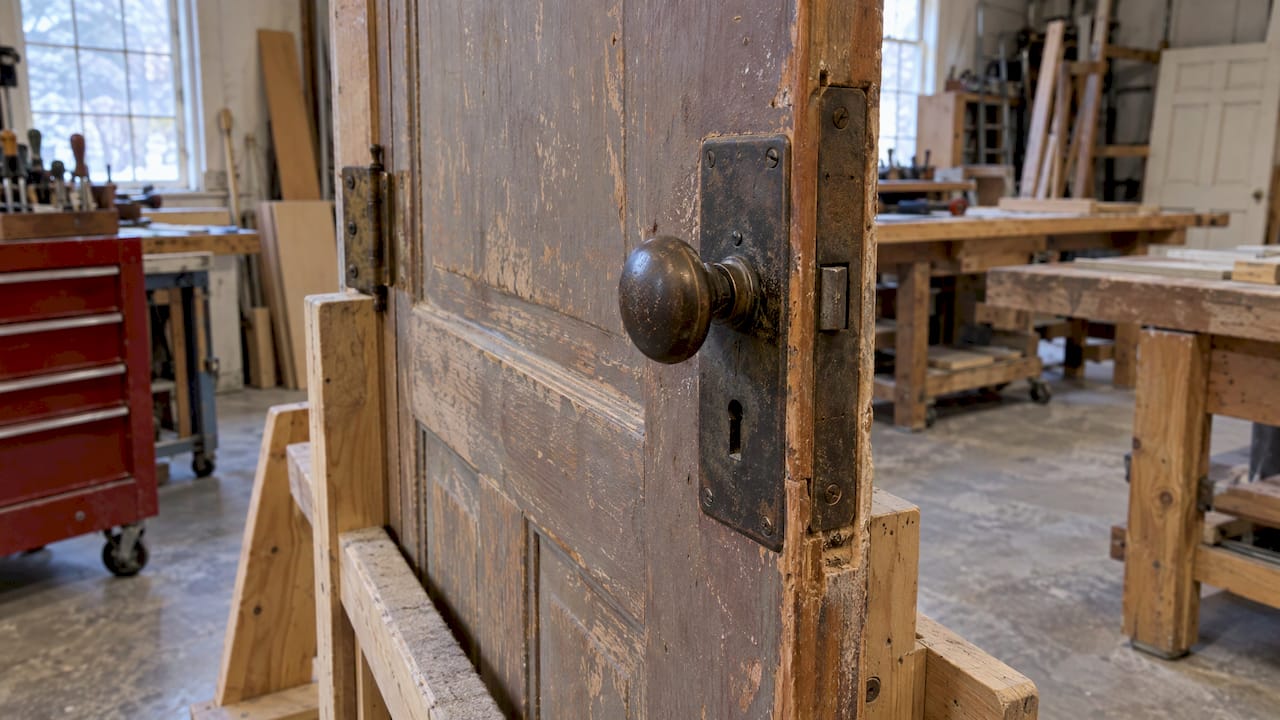
Hardware finish. One finish throughout, whether unlacquered brass, aged bronze or iron, ties together doors of different patterns. Period hardware, such as mortise locksets, rim locks and hinges with fixed or loose pins, also tells the eye what era the door belongs to. Reuse original hardware wherever it survives and reproduce it where it does not.
Wood tone. If doors, floors, stair rails and furniture all show wood, the question becomes how many distinct tones the eye will tolerate. The principle that works is to keep the doors within one tone family and let the floors differ modestly; guidance on mixing wood tones without making a room feel messy covers how to judge undertones when several woods share a sightline. For floors, compare door samples with the actual floor under the room’s light at the times of day it is used, since north light and warm evening light will shift the same stain noticeably.
Casing and baseboard. A consistent casing profile does more to unify a hall than a consistent door. If the doors must vary, keep the surround identical. If the casings must vary, as in a house with a Victorian front section and a later rear wing, change them at a threshold where the architecture itself changes, never mid-corridor.
Room by room: where variation is correct
Historic houses vary their doors on purpose, and a good match respects that:
- Principal rooms. Parlor, dining room and library doors sit at the top of the hierarchy: more panels, deeper moldings, sometimes pocket or sliding doors with matching reveals. French or glazed doors between them should match one another.
- Bedrooms and upper floors. Usually a simplified version of the same pattern, with the same casing family at reduced scale.
- Service spaces. Pantry, kitchen and closet doors in many houses are plain, narrow or batten-and-ledge construction. Replicating the plainness is correct; replacing it with a ornamented door is not.
- Hallways. Where several doors are visible together, keep the primary style consistent so the space does not feel busy.
- Doors that swing both ways. Pantry and kitchen swing doors, sometimes with a hinge that pivots in both directions, are a legitimate period type; treat them as their own category, matching their panels to the nearest doors in the same sightline.
- Exterior and interior. Interior doors need not copy the front door’s panel count. They should, however, share its proportions and wood family when the two are visible from the same space, such as a vestibule or entry hall.
Working through a house where nothing matches
Most projects begin with a mix of originals, mid-century replacements and a few stock doors from a previous renovation. A workable sequence:
- Inventory every opening. Photograph both faces, measure the door, jamb and casing, and note species, finish, hardware and condition.
- Establish the reference set. Identify the best-preserved original doors by period and room type. These define the pattern.
- Sort the rest. Mark each remaining door as retain and repair, replicate, or compatible new. Mid-century flush doors in an 1880 house fall in the middle category only where no evidence of the original survives.
- Draw the replication. Produce a profile drawing of panel molding, rails and stiles from the reference doors, with section details for the casing.
- Fabricate in the right species. Match species and cut, then test finish on the actual door beside its neighbors under the room’s lighting.
- Unify what remains. Where a mixed set is unavoidable, a common color and one hardware finish provide cohesion.
Preservation-minded owners often ask about the single mismatched door that cannot be replicated economically. The same logic applies: restore it if it is original, and if it is not, make a replica rather than letting one wrong door set the tone of a hallway.
Is there a timeless door style?
In American houses, the six-panel door is the form most often called classic because of its long association with Georgian, Federal and Colonial Revival architecture, and it sits comfortably in many later interiors. Craftsman interiors have their own enduring form in the plain, wide-stiled door with a single panel or a glazed upper section. Neither is timeless in the abstract. Each is timeless in its own house, and the most enduring choice for a historic building is the door the building was designed for.
Our view on matching doors
A door is rarely judged by itself. It is judged against its casing, its neighbors and the light in the hall, and a mismatch tends to show up in proportion before anything else: the rails, the molding depth, the thickness. That is why we work from the building rather than from a catalog.
When we replicate a period door, we begin with the surviving examples in the house, their species, cut and construction, and we aim to use authentic materials and techniques so the new door reads as part of the original fabric. For projects pursuing historic tax credits, that fidelity is what allows replacement work to sit within the preservation standards.
The same applies to the elements around the door: trim, stairs, casework and windows. A house reads as one design when they are made to speak the same language, and we prefer to take on the complex, architecturally significant requests where that consistency is hard to achieve.
Gepetto
When a door cannot be bought, it can be made
When the survey shows a profile, size or species that no catalog carries, the work belongs in a millwork shop. Gepetto Millworks fabricates and restores wood doors, trim, staircases, casework and windows for historic buildings, and replicates period features to match existing details, including for tax credit projects. You can see the range on our historic wooden doors page, and architects and contractors can bring a door schedule or a set of measured details to our custom fabrication page to start a conversation about a project.
We work with architects, general contractors, builders and owners on projects in Virginia, West Virginia, North Carolina, South Carolina, Maryland and the District of Columbia. Send the survey and tell us about the house.
FAQ
Should all the interior doors in my historic house match?
They should belong to one family rather than be identical. Share panel pattern, proportions, casing and hardware finish across doors that are seen together, and allow the plainer pattern that service rooms originally had. Where original doors survive, they set the reference.
Can I paint doors to hide a mismatch?
Painting different doors one color is a recognized way to unify them, and it suits doors that were painted originally. If the original finish was a clear or toned wood finish, the preservation guidance favors refinishing in the same color and finish type, so check the finish history before you paint.
What if an original door is too deteriorated to repair?
The Secretary of the Interior’s Standards call for replacement in kind, using the same material and matching the form, configuration, panel pattern and dimensions of the original. That means a custom-made replica, not a stock door of similar appearance.
Do the interior doors have to match the exterior doors?
No. They do not need the same panel count, but doors visible from the same space, such as an entry hall, should share proportions and a wood family. Keep the hardware finish consistent across both.
What is the most timeless interior door style?
For most American houses, it is the door that suits the building’s period. The six-panel door is the classic choice for Georgian, Federal and Colonial Revival interiors, and the wide-stiled plain or glazed door is the enduring form in Craftsman houses.
Sources
Recommended
by Matthew Wiley | Nov 14, 2026 | Architectural Millwork
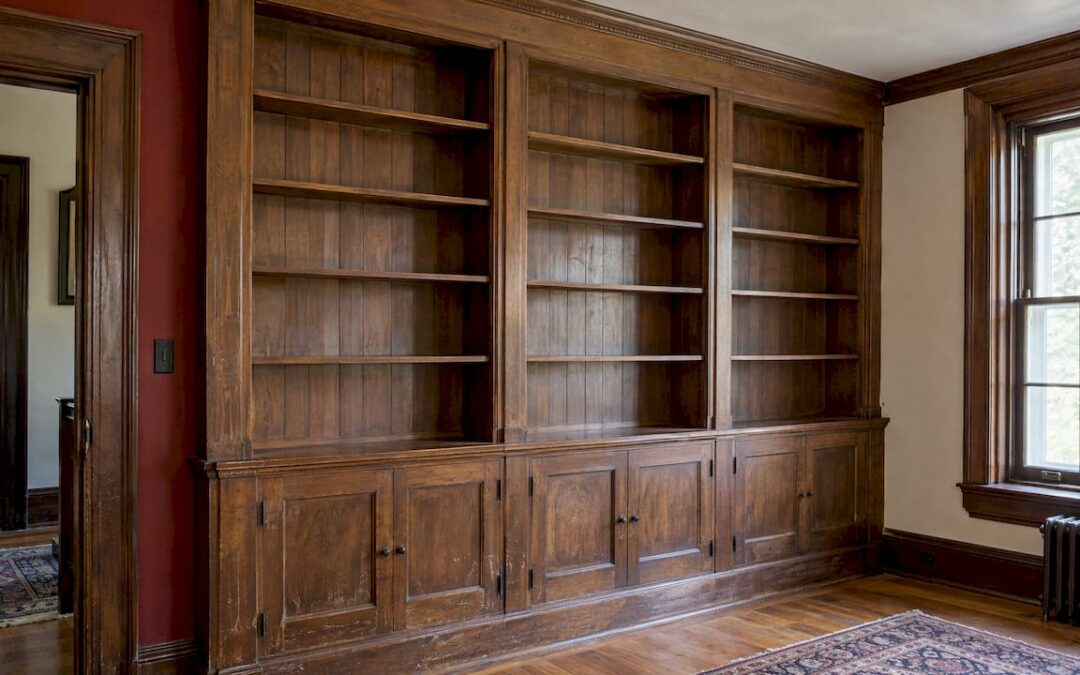
A historic built-in bookcase is restored well when the work follows a fixed order: investigate what survives, stabilize and repair the original fabric, replace only what is lost and match it exactly, and touch the finish last. For a house or building where the woodwork carries historic value, or where a tax credit depends on it, that order matters more than any single technique. We build, repair and replicate custom casework, libraries and built-ins for historic buildings, and the sections below set out the sequence we would hand to an architect, contractor or owner before the first screw is backed out.
Gepettomillworks
Restore Historic Built-Ins with Care
Gepettomillworks builds, repairs and replicates custom casework, libraries and built-ins for historic building projects.
Visit
TL;DR
- Record the condition first: which parts are sound, which are repairable, which are lost, and what earlier repairs changed. Treat the cause of damage (water, failed joints, insects), not only the symptom.
- Repair before replacing. Replace only extensively deteriorated or missing parts, and match them to surviving examples.
- Keep a sound original finish. The National Park Service specifically warns against painting built-in bookcases that were originally natural wood.
- Clean gently, test first, and keep moisture away from joints and veneer.
- In pre-1978 buildings, paid work that disturbs paint falls under EPA lead-safe rules.
Table of Contents
Why built-in bookcases are treated as architecture, not furniture
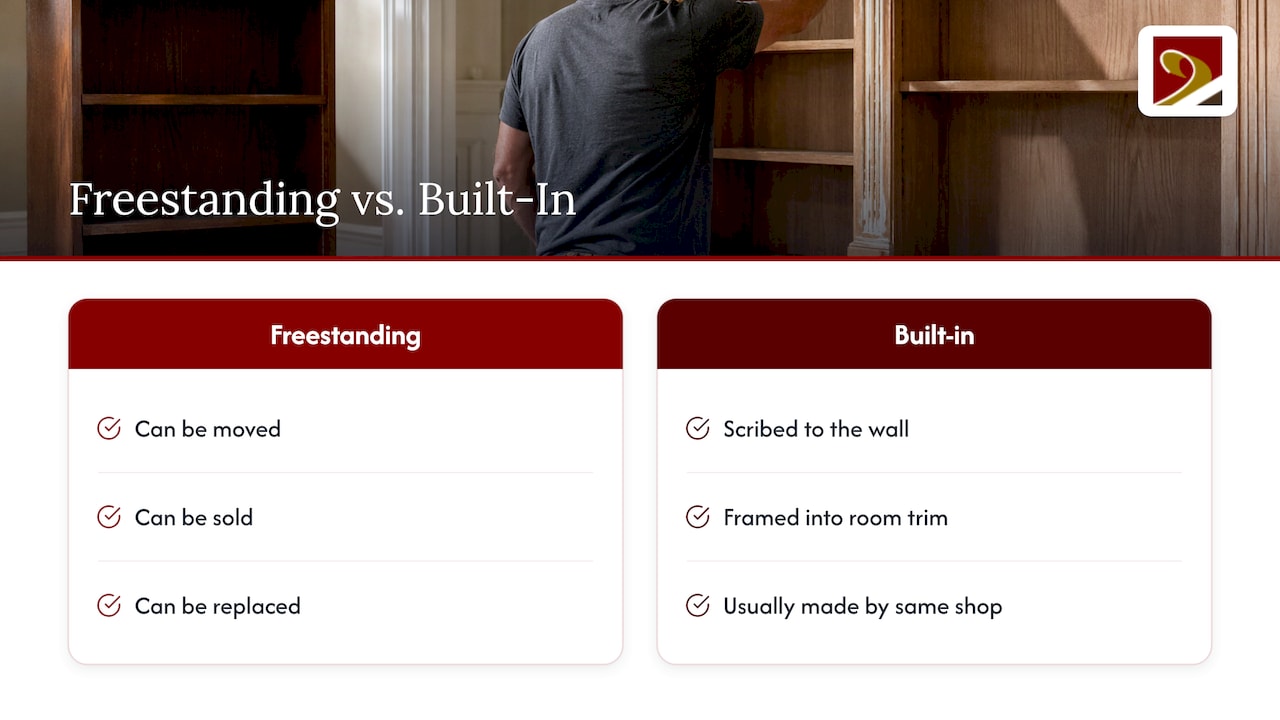
A freestanding bookcase can be moved, sold or replaced. A built-in cannot: it is scribed to the wall, framed into the room’s trim, and usually made by the same shop that produced the mantel, the wainscot and the stair. For that reason the National Park Service lists built-in bookshelves among the architectural details to look for when deciding which interior elements are significant and must be retained or only minimally modified in a rehabilitation.
The guidance behind that is Preservation Brief 18, which recommends retaining and preserving character-defining interior features and finishes, including built-in cabinetry, hardware, woodwork and paint. In practical terms, a bookcase in a principal parlor, library or stair hall is likely to be judged as part of the room’s character, and the treatment you choose should respect that.
The Secretary of the Interior’s Standards state that historic wood features important to a building’s character should be identified, retained and preserved, including their paints, finishes and colors. They are regulatory for federally assisted projects, such as those using the federal historic tax credit, and general guidance otherwise. That distinction tells an owner how much latitude the project has, and it is worth settling with the architect before any scope is priced.
Step 1: Assess the bookcase before touching it
The NPS describes architectural investigation as the critical first step in planning treatment: understanding how a building changed over time and what condition it is in now. The same logic applies at the scale of one bookcase. Understanding a building’s history, its alterations and its deterioration before choosing a treatment keeps the work proportionate to what the building actually is.
A useful assessment sorts every component of the bookcase into four groups:
- Extant and sound: original members that need only cleaning and conservation.
- Extant and repairable: loose joints, lifting veneer, cracked shelves, failed glue lines.
- Beyond repair or missing: rotted bases, lost cornice sections, absent doors, missing shelf pins or hardware.
- Later interventions: added paint, replaced backs, cut shelves, modern fasteners, relocated or altered parts.
Photograph each bay before anything moves, number the components, and note tool marks, nail types and joinery. That record becomes the pattern for any replacement part and the evidence a reviewer will want if tax-credit documentation is involved.
Find the cause, not only the damage
The Standards advise identifying and treating the causes of deterioration, such as water entry, failed joints or seams, and insect or fungus infestation, rather than covering the symptoms. A bookcase with a swollen, stained base on an exterior wall is a roof, gutter or masonry question before it is a woodworking question. A refinished surface over an active leak will fail again, and the repair will have to be repeated.
Look specifically for:
- Staining or softness at the base, the back panel and anywhere the case meets an exterior wall.
- Frass, exit holes or powder, which indicate insects.
- Gaps opening at joints, a sign of movement in the structure behind the case.
- Layers of paint obscuring profiles, which affect both appearance and the later repair.
Step 2: Safety before dust: lead paint in older buildings
The federal government banned the sale of lead-based paint for homes in 1978, and the EPA notes that about three-quarters of U.S. homes built before 1978 still contain some lead-based paint. Sanding, scraping or stripping a painted bookcase can create hazardous dust.
The EPA’s Renovation, Repair and Painting Rule requires that anyone paid to perform work that disturbs painted surfaces in pre-1978 homes, childcare facilities and preschools be certified and use lead-safe work practices. In general the rule does not apply to homeowners working on their own pre-1978 homes, but the hazard is the same for the household. If your building predates 1978, test the paint before the scope is written, and keep children and pregnant occupants out of the work area. Your state health department or a certified lead inspector can advise on testing.
Step 3: Clean gently, and know when to stop
Cleaning is where an irreplaceable surface is most often lost. The NPS Conserve O Gram on wood furniture advises that cleaning beyond dusting requires judgment, because patina, wear, soil and accumulated finish can contribute to the object’s historic value.
The sequence the NPS describes is conservative:
- Dust with a soft cloth or a vacuum with a soft brush.
- Test an inconspicuous area first.
- Clean only a sound, stable clear finish, using mineral spirits.
- Use water sparingly on veneer and dry immediately.
- Do not clean finishes that are embrittled, cracked, raised or flaking.
The last point is easy to overlook. A flaking shellac or varnish is not dirty; it is failing, and wiping it can pull the finish away in sheets. That is a condition for a repair plan, not a cleaning product.
What to avoid is just as clear. Preservation Brief 18 advises against destructive methods such as propane or butane torches and sandblasting, and against harsh cleaning agents that can change historic wood’s appearance. Kentucky Cooperative Extension adds that varnish has no single pure solvent and can be difficult to restore, and that excess moisture near joints can soften the glue holding them.
Step 4: Repair the structure before the surface
The Standards call for stabilizing deteriorated wood before further work and for repairing rather than replacing historic wood features. Limited replacement in kind is appropriate only for extensively deteriorated or missing parts, and when surviving prototypes exist to copy.
Joints and glue
Most built-ins of the nineteenth and early twentieth centuries were assembled with hide glue, which has a useful property: it can be reversed. Bob Flexner, writing in Popular Woodworking, explains that old hide-glue joints can often be separated with hot water, steam or denatured alcohol. The old adhesive should then be removed from the bonding surfaces so the new glue has clean wood to grip. Regluing over residue is a common cause of a repair that opens again within a season or two.
Veneer
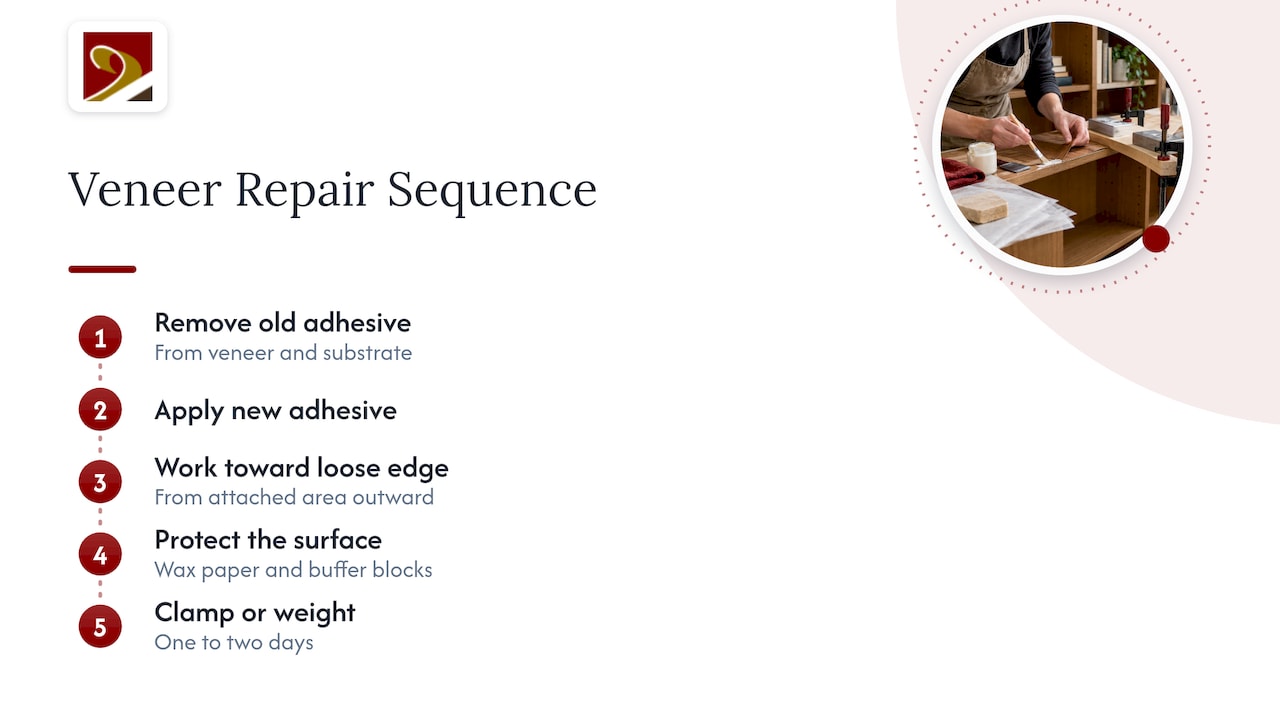
Where a bookcase carries veneered panels or face frames, lifting is typically repaired in place. Guidance from HowStuffWorks describes removing old adhesive from both veneer and substrate, applying new adhesive, working from the attached area toward the loose edge, protecting the surface with wax paper and buffer blocks, and clamping or weighting the repair for one to two days. For a missing section, Popular Woodworking recommends cutting the patch with straight edges and trimming it level once set.
The grain, figure and color of a patch decide whether it reads as repair or as scar, which is why matching the species and cut matters more than the glue chosen.
Hardware
Stripped screw holes in hinges and pulls are common. For slight enlargement, glued toothpicks or thin wood shavings work; for a substantial repair, a glued dowel is installed and redrilled. Distinctive antique hardware should generally be retained and matched rather than discarded. Original catches, hinges and pulls are part of the record of the piece.
Missing and irreparable parts
This is where a millwork shop earns its place on the project. A lost cornice, a rotted plinth, a missing pair of glazed doors or a cracked pilaster has to be made again, from the right species, with the right profile, sized to the existing case. We replicate period features and match them for historic tax credit eligibility, and that includes the moldings and casework that define a room. The documentation from Step 1 is the pattern, and a good replacement is one that a preservation reviewer cannot pick out from the original at arm’s length.
Step 5: Preserve the finish, or refinish with intent
The finish decision is the one most likely to cost a historic interior its character, and it is the one most often made too early.
When to keep the original finish
NPS Technical Preservation Services warns against painting previously unpainted interior woodwork, and its example specifically includes built-in bookcases whose natural finish contributed to a Victorian house’s historic character. Painting is effectively irreversible in practice, because later stripping risks the wood beneath.
Kentucky Extension offers a practical threshold: a dull finish with minor scratches can be restored if it is not badly cracked or blistered. The first job is to identify which of the four common furniture finishes you have, whether shellac, lacquer, varnish or penetrating oil, and to test in an inconspicuous spot before choosing a restoration solvent. Only the right solvent will soften the existing film without damaging it.
When repairs leave new wood next to old, the goal is a match, not a full strip. We have written separately on how to match stain on old trim without stripping sound finishes, and the same principle applies to a bookcase: blend the new into the old and leave the sound finish alone.
When refinishing is justified
Refinishing is reasonable when the finish has failed across the whole surface, when it was already painted in the period, or when the building’s significance and condition, in the words of the Standards, call for it. A bookcase that was painted from the start should be repainted in a compatible system, not stripped to bare wood to suit a modern taste. Document the existing layers before work so that the finish chosen is the finish the case was designed to carry.
A decision table
| Condition of the finish |
Recommended direction |
| Sound, dull, light scratches |
Clean carefully and restore; keep the original |
| Cracked, blistered or flaking across the surface |
Repair structure first, then refinish in a matching system |
| Original natural wood, later painted |
Evaluate removal with the architect; document the original beneath |
| Originally painted |
Repaint in a compatible system; do not strip to bare wood |
| New replacement parts beside old |
Match the new to the existing finish, not the reverse |
Step 6: Reinstall, fit and protect
Built-ins are scribed to walls that have moved over a century, so reinstallation is a fitting job, not a mounting job. Check that the case sits plumb against its wall, that the joints between the case and the trim are tight, and that any returned moldings align with the room’s baseboard, chair rail and crown. Replace shelf pins and supports as needed, keep the original ones if they are sound, and leave room for seasonal movement in solid wood. Protect the finished surface from sunlight, damp and radiators, which are the three most common causes of renewed damage.
Who should do the work
On a historic project, the restoration of a built-in often ties together several trades: an architect specifying treatment, a general contractor sequencing it, and a millwork shop making the parts that no longer exist. That coordination is the reason many owners and architects bring the millwork in early. Our work covers custom design, fabrication and restoration of casework, libraries, built-ins, trim, staircases and balustrades for historic buildings, and it includes replication of period features and matching for historic tax credit eligibility. Our wooden trim projects show the kind of profile-matching work that bookcase cornices and surrounds require.
A note from our shop
Every built-in bookcase we are asked to restore tells us something about the house around it. The joinery shows which hands built it, the moldings show which pattern book or mill catalog the carpenter admired, and the later paint layers show how the family used the room.
Our position is simple: the bookcase should be read before it is repaired. Where original fabric survives, we retain it. Where it is lost, we replicate it in the same species and profile, using authentic materials and techniques, so that the room reads as one piece. That approach is also what makes a project defensible when historic tax credit review is part of the picture.
We take on complex, architecturally significant restoration and custom requests that others may decline, and we would rather be involved while the scope is still being drawn than after a section of cornice has already been discarded.
Gepetto
Bring the bookcase to a millwork shop that restores historic buildings
If your project includes a built-in bookcase, library wall or run of casework in a historic building, we can design, fabricate and restore it to match the period, whether the job is repairing an original, replacing a lost section or building new casework that sits correctly beside the old. Architects, general contractors, builders and owners can start with our custom fabrication page, or reach us through the Gepetto Millworks home page.
We work with projects across Virginia, West Virginia, North Carolina, South Carolina, Maryland and Washington, D.C. The earlier we see the drawings and the building, the more of the original we can keep.
FAQ
Should I paint or stain a built-in bookcase I am restoring?
If the woodwork was originally natural, keep it natural. The National Park Service cautions against painting previously unpainted interior woodwork, and cites built-in bookcases as an example. Paint is appropriate when the case was painted originally or when the finish has failed throughout and the architect agrees.
Can a built-in bookcase be repaired, or does it have to be replaced?
In most cases it can be repaired. The Secretary of the Interior’s Standards favor repairing historic wood over replacing it, and allow replacement in kind only for parts that are extensively deteriorated or missing. Loose joints, lifting veneer and cracked shelves are ordinary repair work.
What should I clean a historic bookcase with?
Start with dusting. Beyond that, the NPS advises testing in an inconspicuous spot and using mineral spirits only on a sound, stable clear finish, with water kept to a minimum on veneer. Do not clean a finish that is cracked, raised or flaking; it needs repair first.
Does lead paint matter on an old bookcase?
It can. Buildings constructed before 1978 may contain lead-based paint, and sanding or scraping it makes hazardous dust. The EPA’s RRP Rule requires certified, lead-safe practices for paid work that disturbs paint in pre-1978 homes, so test the paint before work begins.
Can new casework match an old built-in for tax credit purposes?
It can when it replicates the original in species, profile and finish and when the work follows the Secretary of the Interior’s Standards. We build replacements for lost features and match them for historic tax credit eligibility. Confirm the specific requirements with your architect and the state historic preservation office.
Sources
Recommended