by Matthew Wiley | Sep 15, 2026 | Architectural Millwork
Choose true divided lite (TDL) when a project demands authentic shadow lines and historic tax credit compliance, and choose simulated divided lite (SDL) when energy performance and budget carry more weight than absolute period accuracy. The reason comes down to construction: TDL separates glass into individual panes held by structural muntins, while SDL applies bars to one continuous insulated pane. That single difference governs cost, thermal performance, and how each window reads from the sidewalk and the sofa alike.
TL;DR:
- True divided lite windows require wider muntins and multiple glass panes, making them more costly and harder to repair but more authentic for historic districts.
- Simulated divided lite options with spacer bars or GBG constructions offer better energy performance, larger sizes, and easier maintenance, at the expense of visual depth and authenticity.
- SDL with spacer bars closely mimics TDL’s look from a distance but features a sealed glazed unit that is more energy-efficient and better suited for modern budgets.
- Expert measurements of sash thickness and rebate depth are crucial to determine if true divided construction is physically feasible or if a hybrid approach is needed.
- Owners should ask detailed supplier questions about bar width, seal failure, and maintenance to ensure the chosen method aligns with project standards and long-term performance.
Gepettomillworks
Match Historic Millwork With Confidence
Gepettomillworks creates custom millwork for historic building projects, helping teams address demanding sash and muntin requirements.
Visit Gepettomillworks
Table of Contents
TDL vs SDL: What True Divided Lite Actually Is
True divided lite construction places separate panes of glass into individual openings, each held by muntins that do real structural work rather than decorative ones. Light hits each pane at a slightly different angle, and the muntins themselves cast a shadow line with real depth. That’s why TDL windows look different up close than they do from across the street, and why architects specifying historic replication almost always start here.
The construction carries a technical constraint that catches many renovation clients off guard: standard insulated glass units conflict with historic muntin widths built for single-pane glazing. A muntin profiled at 7/8 inch in 1890 was never meant to hold two panes of glass and a spacer bar.
- Each pane sits in its own glazing rebate, sealed and puttied or set with bead
- Muntin depth and profile can be replicated to match a building’s original millwork
- Individual panes can be reglazed one at a time without disturbing the whole sash
- Thermal performance depends on the glass itself, since there is no sealed IG unit
TDL remains the right specification for landmark districts, tax credit projects with strict Secretary of the Interior standards, and any sash where the muntin profile itself is part of the building’s documented character.
TDL vs SDL: How Simulated Divided Lite Works
Simulated divided lite flips the construction entirely. A single, continuous insulated glass unit fills the opening, and grid bars are applied to the interior and exterior surfaces to mimic the look of separate panes. SDL construction trades individual panes for one sealed unit with applied trim, which changes almost every performance and cost variable downstream.
Three variants show up in practice, each with a different depth-to-performance ratio:
- Surface-applied SDL bars sit directly on the glass face, the simplest and least expensive option but with the flattest shadow line
- SDL with spacer bars places a matching bar inside the sealed unit between the panes, which restores visual depth closer to TDL while keeping one continuous IG unit
- Grilles between glass (GBG) locates the grid entirely inside the sealed cavity, eliminating any surface bar to clean around
SDL suits large window replacements, additions where energy codes apply, and any project where the owner wants the divided lite look without the maintenance load of dozens of individual panes.
Comparing TDL and SDL Across Seven Decision Factors
The core TDL vs SDL trade-off narrows to seven factors that actually drive a specification decision on a real project.
- Authenticity and visual depth. TDL wins decisively at close range, since real glass edges catch light differently under each muntin. SDL with spacer bars closes most of that gap from ten feet back; surface-applied SDL closes very little.
- Sightlines and muntin width. TDL requires wider muntins to structurally hold glass and glazing putty, often 7/8 inch or more. SDL can achieve narrower profiles since the bar carries no structural glazing load, per Simpson’s documented divided lite construction specs.
- Cost drivers. TDL costs more per opening, since it multiplies glass count, cutting, and labor per pane. SDL’s single IG unit and applied bar reduce fabrication steps substantially.
- Energy performance. SDL and GBG generally outperform TDL because the sealed IG unit provides consistent insulating value, a point Marvin’s technical documentation confirms directly.
- Repairability. TDL allows single-pane reglazing when one section fails. SDL requires full IG unit replacement if the seal fails, since the bars are bonded to one sealed assembly.
- Large openings and transoms. SDL and GBG handle oversized lites and transoms more reliably, since a single IG unit resists wind load better than many small individual panes.
- Long-term cleanability. GBG wins outright here, since there’s no exterior bar to dust or repaint; surface-applied SDL and TDL both require cleaning around every muntin face.
Planning for Lifecycle Costs and Maintenance
Glass count drives most of the TDL vs SDL cost gap. A six-over-six TDL sash means twelve individual panes to cut, glaze, and seal, while an SDL version of the same sash uses one IG unit and a bonded grid. Custom muntin profiles, curved or diamond-pattern lites, and matching an existing building’s exact reveal depth all add fabrication time beyond the basic glass count.
Maintenance schedules diverge just as sharply. TDL glazing putty and glazing points typically need inspection every few years, with reglazing as sealant dries and cracks. SDL introduces a different failure mode: seal failures in insulated glass units show up as fogging or condensation between panes, and spacer bar adhesives can degrade under sustained UV and thermal cycling.
- TDL: periodic reglazing, individual pane replacement, ongoing paint maintenance on exposed muntins
- SDL: IG seal inspection, occasional full-unit replacement, adhesive checks on applied spacer bars
- GBG: minimal exterior maintenance, since bars are sealed inside the unit
Vacuum insulated glass and other thin IG technologies now let some historic projects achieve TDL-style profiles with better thermal performance than traditional single-pane TDL, though the fabrication requires specialist capability and a higher budget line.
Pro Tip: Ask any fabricator quoting SDL with spacer bars to show a cross-section sample, not just a photo. The depth of that internal bar relative to the glass surface is what determines whether the finished sash reads as authentic or flat.
Choosing Between TDL and SDL: A Practical Checklist
Work through these steps before finalizing a specification, in order:
- Confirm the project’s governing standard: is this under a historic tax credit review, a local historic district ordinance, or unrestricted renovation?
- Measure existing muntin width, glazing rebate depth, and sash thickness on any openings being matched.
- Set an explicit energy target (a U-factor or a code requirement) before comparing glass options.
- Request sample cross-sections from any supplier, not marketing photos.
- Ask ten direct questions: What’s the actual bar width? Is the spacer bar structural or cosmetic? What warranty covers seal failure? Can individual panes be reglazed later? How does GBG affect cleaning access? What’s the lead time for custom muntin profiles? Has this exact profile been matched before? What happens if the historic review board rejects the sightline? Is VIG an option for this opening size? What does a failed seal repair cost in five years?
As a rule of thumb, specify TDL for small multi-pane units where shadow lines are part of a documented historic character, and specify SDL with spacer bars or GBG for large insulated openings where energy targets and budget outweigh close-range authenticity. Watch for vendors who claim their SDL “looks exactly like TDL” without offering a physical sample. That claim rarely survives daylight.
What millwork fabricators have learned matching historic muntins
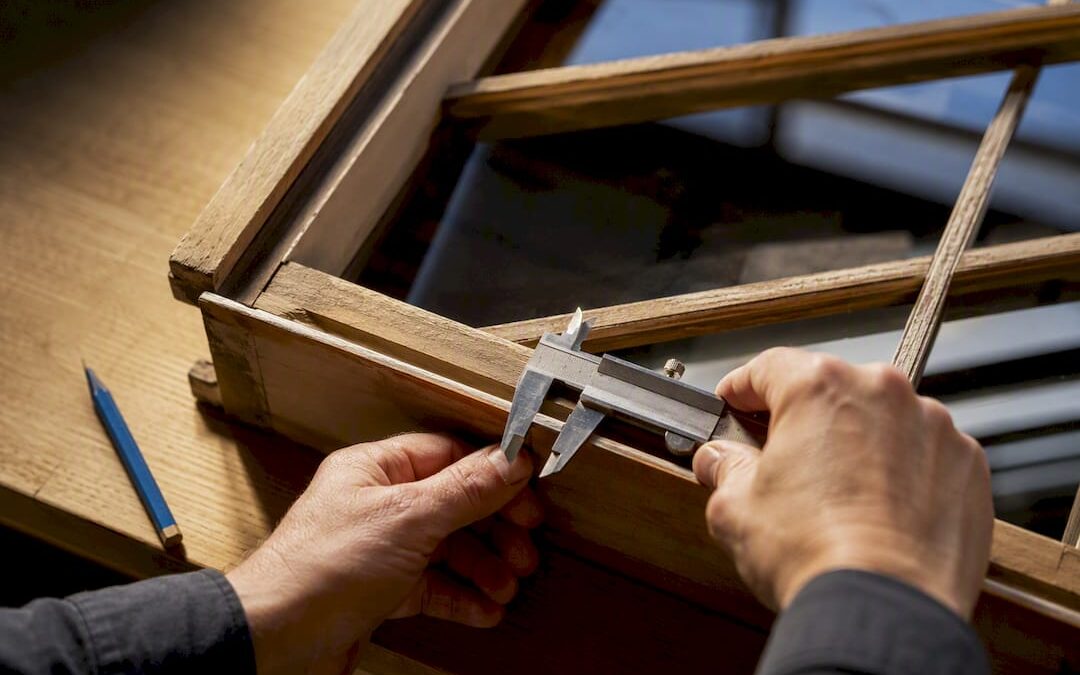
Every glazing decision starts the same way in Gepettomillworks’ shop: measuring the original sash thickness, the glazing rebate shoulder, and the muntin return depth before anyone discusses glass options. That measurement determines whether true divided construction is physically feasible or whether a hybrid approach becomes the honest recommendation.
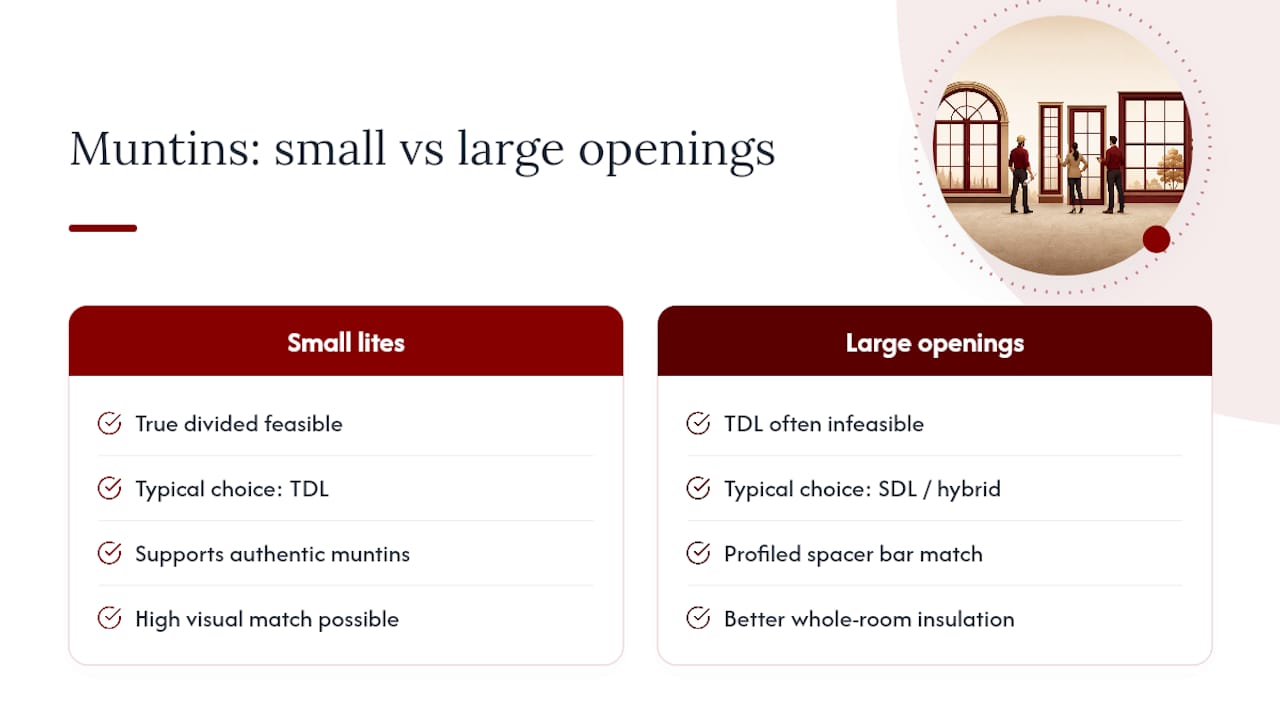
China cabinet doors and library sash, with their small individual lites, almost always support true divided construction without compromise. Larger openings, particularly where an owner wants insulated performance across a whole room, more often push toward an SDL with spacer bar profiled and painted to match the original muntin proportions. The lesson across these projects has stayed consistent: proportion matters more than method, and a well-matched hybrid outperforms a poorly proportioned TDL every time, which is why coordinating custom millwork with general contractors is crucial for success in these installations (Services – Axenia Construction).
Key Manufacturer and Specialist Resources
For technical drawings and construction specifics, Simpson’s divided lite construction page and Marvin’s divided lites overview cover manufacturer-grade detail on bar widths and IG options.
The instinct to treat TDL vs SDL as a binary choice misses how most historic projects actually get solved. The real question isn’t which method wins in the abstract. It’s whether the specific opening, its proportions, and its rebate depth can physically support true divided construction without forcing a compromise the owner will regret. Millwork fabricators approach every window and door with that measurement first, then recommend the construction method that fits the opening rather than the one that fits a preconceived standard. Sometimes that means true divided glass. Sometimes it means a carefully profiled hybrid that a passerby would never distinguish from the original. Either way, the commitment to matching historic profiles, paired with an honest account of what modern glass options can and cannot do, tends to serve owners better than chasing an ideal that the building’s own dimensions won’t support. Readers restoring a historic building are welcome to bring their measurements to that same table.
— Gepetto
Sources
FAQ
What is the difference between SDL and TDL?
TDL uses separate panes of glass held by structural muntins, while SDL uses one continuous insulated glass unit with bars applied to the surface or set inside the sealed cavity to mimic that look.
Is SDL still being developed?
Yes. Manufacturers continue refining SDL variants, particularly spacer bar and grilles between glass designs, to close the visual gap with TDL while preserving insulated glass performance.
What is a TDL window?
A TDL window is built with individual panes of glass, each set into its own glazing rebate and separated by muntins that do real structural work, rather than decorative bars applied over a single sheet of glass.
What are the differences between simulated divided light and true divided light glass?
True divided lite glass consists of multiple separate panes, each independently glazed and repairable. Simulated divided lite glass is one continuous insulated unit with bars applied on top or sealed inside, trading individual-pane repairability for better thermal performance and lower cost.
Recommended

by Matthew Wiley | Sep 15, 2026 | Architectural Millwork
Base rot confined to the lowest few inches of a column can usually be cut out and repaired. Once decay or insect damage reaches the shaft, or a capital has broken away entirely, replacement becomes the sounder path, and any structural column must be shored before it comes down. Photograph the damage and record basic dimensions before calling a millwork shop, since that documentation shapes both the estimate and the accuracy of the reproduction.
TL;DR:
- Repair is usually possible for base rot confined to the lowest inches of a column, but once decay reaches the shaft or capital, full replacement is necessary.
- Structural issues like leaning, sagging, or soft wood indicate load-bearing damage, requiring engineer consultation and temporary shoring before any repair or removal.
- Reproduction techniques depend on the column profile and function, with hollow stave construction favored for larger columns and composite wraps suitable for non-load-bearing or budget projects.
- Precise measurements, multiple photos, and detailed documentation are essential for accurate reproduction, especially for ornamented capitals and non-standard shapes.
- Full replication typically takes several weeks and involves pattern-making, approval of a mockup, and coordination with shoring and installation, with costs varying based on complexity and site conditions.
Gepettomillworks
Plan Your Historic Column Replication
Gepettomillworks creates custom millwork for historic building projects, helping teams approach complex porch column reproductions with care.
Discuss your column project
Table of Contents
What Determines Whether a Porch Column Can Be Repaired?
Columns that split, lean, sag, or show soft, spongy wood are signaling a structural problem, and the extent of the damage determines whether repair or full porch column replication is the right call. Localized base rot often responds well to targeted repair, including dutchman splices, epoxy consolidation, or a new plinth block, while damage that has migrated up the shaft or destroyed a capital typically forces a complete rebuild.
Run through this before deciding:
- Press a screwdriver into the base, plinth, and shaft at several heights. Soft or crumbling wood beyond the bottom six inches usually means replacement.
- Check for horizontal cracks, visible lean, or separation at the capital. These point to load-bearing compromise, not surface wear.
- If the column carries roof load and you’re uncertain about its condition, bring in a structural engineer before touching it.
- Install temporary shoring (teleposts or jack posts placed outside the column’s footprint) before any column comes out, full stop.
Porches with flat or low-slope roofs concentrate more weight on fewer columns, which raises the stakes of getting this assessment wrong.
Turned Shafts, Stave Construction, or Composite Wraps?
Once repair is off the table, the replication method depends on the column’s profile, its structural role, and how closely it needs to match the original. Millwork shops can reproduce a column profile from a photograph or a single salvaged fragment, reverse engineering the taper and reproducing it on a lathe or CNC pattern.
The main approaches:
- Solid turned shafts work for smaller diameter columns and offer the closest match to traditional wood construction, but they’re heavier and more prone to checking with seasonal movement.
- Hollow stave construction (staves glued and turned into a cylinder) is standard for larger classical columns; it resists checking better than solid stock and sheds weight.
- Dutchman repairs and glued-up sections patch a section of an otherwise sound shaft, saving material and cost when only part of the column is compromised.
- Composite, FRP, or PVC wraps suit non-load-bearing applications or budget-driven projects. These products are weatherproof and insect-proof, and some are sold as complete structural columns rather than decorative sleeves.
Ornament, fluting, and capital detail are typically produced through CNC roughing followed by hand-finishing, which keeps carved detail crisp without sacrificing the speed a lathe or router table provides.
Pro Tip: Ask any shop whether they turn hollow or solid before you commit. A solid shaft on a large Doric or Ionic column is heavier to ship and install, and it’s more likely to develop long checking cracks than a properly vented hollow stave column.
What Do You Need to Measure and Photograph First?
A shop can’t reproduce a column it hasn’t seen in enough detail, and vague measurements are the single biggest cause of a reproduction that doesn’t quite match. Accurate documentation captures diameter at multiple points along the shaft to record the taper or entasis, along with flute count, flute spacing, and capital and base profiles.
Send a shop this, in order:
- Overall height, base diameter, and shaft diameter measured at the top, middle, and bottom.
- Flute count and spacing if the shaft is fluted, measured at both the top and bottom of the shaft.
- Close-up photos of the capital and base from multiple angles, with a tape measure or ruler in frame for scale.
- A wide shot of the full column in context, showing how it meets the porch roof and floor.
- A rough field template (a cardboard or plywood cutout of the profile) if the column has an unusual or non-standard shape.
Shops that specialize in complex reproduction work will often ask clarifying questions once they see your first round of photos, so send them early rather than waiting for a perfect set.
Shoring, Temporary Supports, and Avoiding Repeat Rot
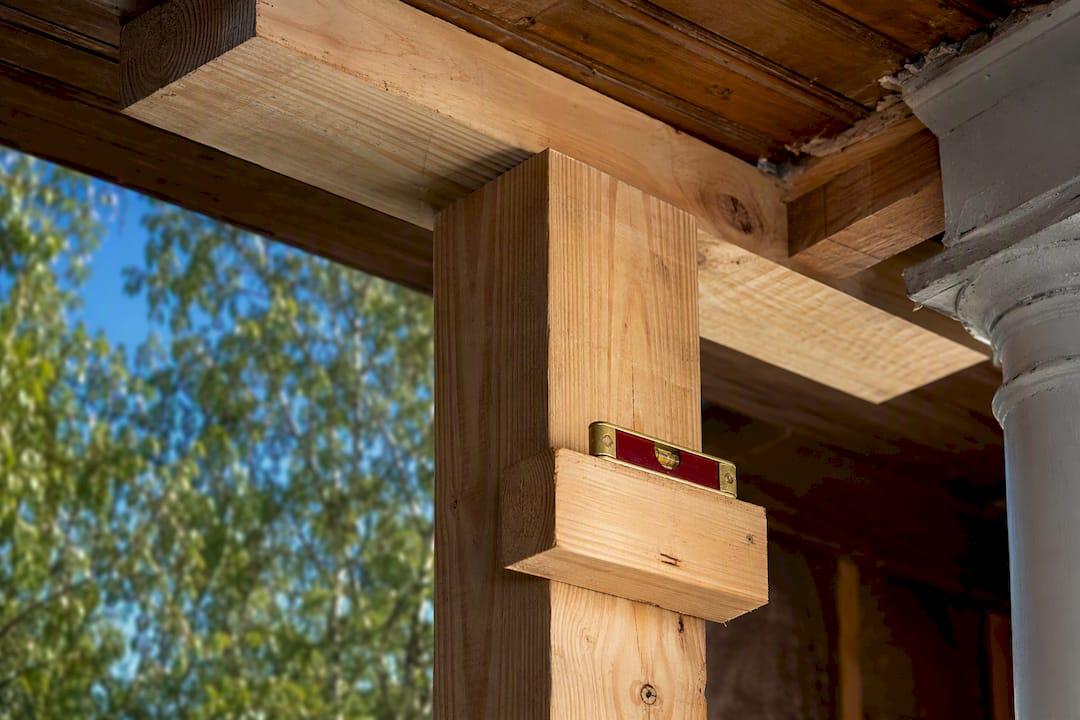
Shoring is not optional when a column carries roof load; teleposts or independent temporary supports need to go in before the old column comes out, positioned so they don’t sit in the path of the new column’s footprint. Get a structural engineer or licensed contractor involved whenever the load path is unclear, particularly on porches with unusual roof geometry or prior modifications.
Rot rarely happens by accident. Common causes worth fixing at the same time as the column:
- Failed or missing flashing where the column meets the porch roof beam.
- Gutters that overflow directly onto the column top.
- Painted end grain at the base, which traps moisture instead of shedding it.
- Ground contact or splash-back from grade that slopes toward the porch.
Vent hollow columns properly and use a treated or composite plinth block at the base. It’s a small detail that prevents the next column from failing the same way.
How Do You Match Capitals, Bases, and Fluting?
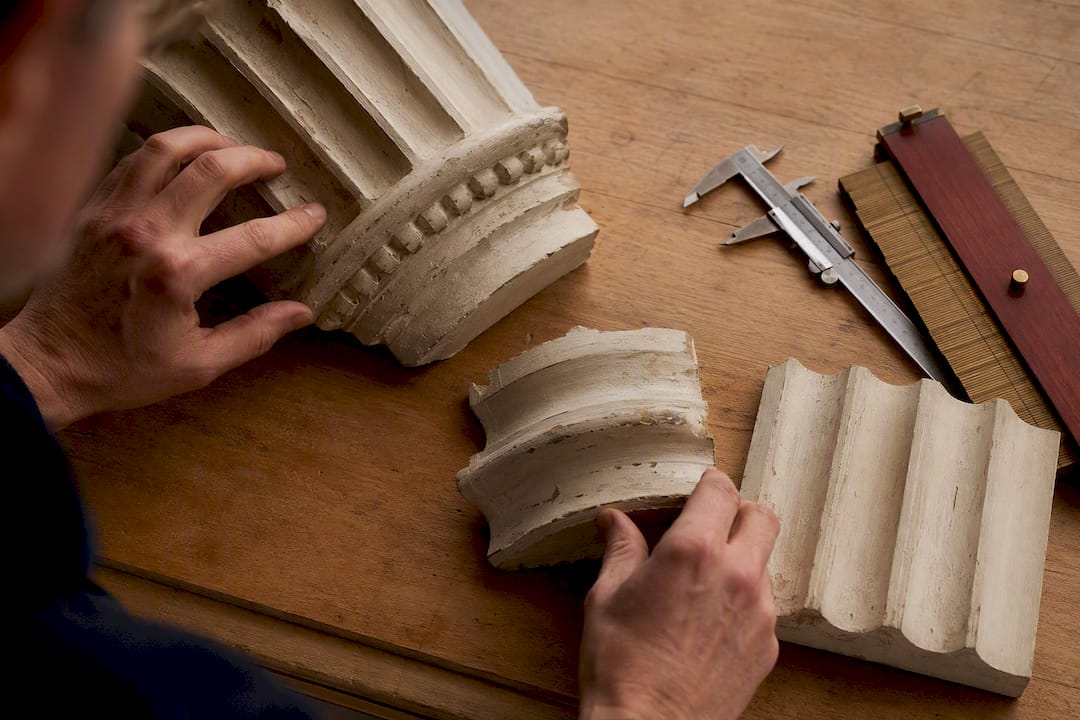
Capitals are usually the hardest element to reproduce because ornament that’s been painted over dozens of times loses crisp detail long before the wood itself fails. A shop typically works from whatever fragment survives, cross-referenced against period photographs, to rebuild the pattern before cutting new stock.
Points worth discussing with your shop:
- If the original capital is missing entirely, a reference from classical architectural pattern books can fill the gap with a historically consistent profile.
- Minor simplification of ornament is sometimes an acceptable compromise when an exact match would be cost-prohibitive; discuss this openly rather than discovering it after fabrication.
- Species selection affects both appearance and durability. Wood species matched to the original generally satisfies preservation review boards better than composite substitutes on historic properties.
- Painted finishes can visually unify a wood repair and a composite wrap on the same porch, though the two materials weather differently over time.
How Long Does Replication Take and What Drives Cost?
Set expectations early: replicating a column is not a same-week fix, even when the shop work itself moves efficiently.
- Targeted base repairs can often be completed in a matter of days.
- Full custom reproduction typically runs several weeks to a couple of months, covering measurement, pattern-making, fabrication, finishing, and installation.
- Cost climbs with site access difficulty, ornamentation complexity, species selection, and any required engineering or permit review.
- Ordering multiple matching columns at once generally lowers the per-unit cost, while elaborate capitals raise it regardless of quantity.
Shipping and crating for large turned shafts can add meaningfully to the total, particularly when the millwork shop is located far from the project site.
Hiring a Millwork Shop: What to Ask Before You Sign
DIY suits a straightforward, non-structural repair. Anything involving a load-bearing column, an ornate capital, or a finish that has to pass a preservation review belongs with a shop that does this work routinely, since attempting complex carpentry without the right shop equipment is where most DIY column projects go wrong.
Before signing a contract, ask:
- What in-house capabilities does the shop have (lathe turning, CNC patterning, hand-carving) versus outsourced work?
- Will they provide a sample section or profile mockup for approval before running the full order?
- What’s the realistic turnaround from signed contract to installed column?
- Are they insured, and who handles the shoring plan and installation scope?
- If the house was built before 1978, is the shop RRP-certified for lead-safe work practices on the existing paint?
Require drawings, a sample approval step, and a written shoring and installation plan as deliverables before work begins, not as an afterthought once fabrication is underway.
How Gepetto Approaches a Porch Column Replication Project
Reproducing a column accurately starts with the same documentation any careful shop asks for: measured diameters, ornament photography, and a fragment or template when one survives. From there, Gepettomillworks moves through pattern-making, lathe and CNC turning, and hand-finished ornament before a piece ever reaches the porch.
What that process looks like in practice:
- Field measurement and photo review to establish taper, flute spacing, and capital detail.
- Pattern-making and turning matched to the original species and profile, drawing on documented replica millwork from past projects.
- A sample or mockup section for client approval before full fabrication runs.
- Coordination with the contractor’s shoring plan and installation schedule, informed by porch column repair case work.
- Finish matching, including paint and texture, so the new column doesn’t read as an obvious patch job.
Restoration-First Recommendations
Repair whenever the shaft and capital are sound. Replicate when they’re not. Document everything, shore before you touch a load-bearing column, and insist on a sample before full fabrication. For anything beyond a straightforward repair, a shop like Gepetto is worth the conversation.
— Gepetto
Ready to Move Forward on Your Column Project?
Gepettomillworks fabricates from scratch, which means a column that’s missing its capital entirely or matches no catalog profile isn’t a dead end, it’s a pattern-making job. That’s the practical difference between a shop that stocks standard sizes and one that builds to what your porch actually needs.
Whether your porch reflects a Mission Revival profile, a bungalow porch column, or a Prairie School design with its own proportions, the process starts the same way: document what you have, shore the column if it carries roof load, and send photos and measurements for a sample approval before committing to full fabrication. If you’re ready to start that process, reach out through Gepettomillworks to request a quote and get a realistic timeline for your specific column.
Sources
FAQ
How Do I Update the Columns on My Front Porch?
Start by inspecting for rot, insect damage, or structural cracking at the base, shaft, and capital, then decide between a targeted repair or a full porch column replication based on how far the damage extends.
What Is the Average Cost to Replace a Porch Column?
Cost depends heavily on species, ornamentation complexity, quantity, and site access, so shops typically quote per project rather than a flat rate; current pricing for a custom replication is available directly from millwork shops.
Are My Porch Columns Load-Bearing?
Most porch columns supporting a roof structure are load-bearing, and any column carrying roof weight needs shoring before removal; if you’re unsure, a structural engineer can confirm the load path.
How Can I Make My Own Porch Column?
DIY works for non-structural PVC or composite wraps assembled on site, but a solid or hollow turned wood column with structural function or ornate detail generally requires lathe or CNC equipment a shop provides.
Recommended
by Matthew Wiley | Aug 8, 2026 | Architectural Millwork
Stile and rail doors are framed panel doors built from two vertical members (stiles) and two or more horizontal members (rails) that together form a structural frame surrounding one or more floating panels. The joinery is typically cope-and-stick or mortise-and-tenon, and the panels sit in grooves rather than being glued, allowing the wood to move seasonally without cracking the frame. This construction method has defined architectural interiors from Georgian townhouses to Craftsman bungalows precisely because it balances structural integrity with visual refinement.
Choose a stile and rail door when your project demands:
- Historic restoration or period-accurate replication, where molded slab doors cannot reproduce the sticking profiles, panel depths, or proportions of the original millwork.
- Custom interiors where panel count, glazing, species, and profile must be specified to match a particular architectural vocabulary.
- High-traffic commercial corridors where frame-and-panel construction distributes stress across the joinery rather than concentrating it in a single slab, extending service life considerably.
Table of Contents
How stile and rail doors are built: anatomy and tolerances
Understanding the named parts of a panel door is the first step toward writing a specification that a millworker can actually execute without ambiguity.
Stiles are the full-height vertical members running the entire length of the door. In traditional “stile-through” construction, the stiles are continuous from top to bottom, placing uninterrupted vertical grain at the hinge line. Fine Woodworking’s analysis of frame-and-panel construction confirms that this arrangement is structurally superior because it prevents levered rail end-grain from causing hinge failure and binding, a detail that matters most on heavy exterior doors.
Rails are the horizontal members. A standard door has a top rail, a bottom rail, and a lock rail positioned at handle height (typically 36"–40" from the floor). Doors with multiple panels add intermediate crossrails. The lock rail must be wide enough to accept the mortise lock hardware without compromising the stile/rail joint.
Panels float in grooves machined into the inside edges of the frame. They are intentionally set 1/16 to 1/8 inch undersized in their grooves, allowing roughly 1/4 inch of seasonal expansion without binding or cracking the frame. Mullions are vertical intermediate members that divide a wide opening into multiple panel bays.
Choosing the right materials and core types
The species and core you specify determine how the door performs over decades, not just how it looks on delivery day.
Solid wood species
White oak offers excellent stability and takes stain evenly, making it the preferred species for Arts and Crafts and Mission Revival interiors. Hard maple machines cleanly and accepts paint without grain telegraphing, though it moves more with humidity than oak. Cherry is dimensionally stable, darkens attractively with age, and is well suited to Federal and Colonial Revival work. Mahogany (genuine Honduran or African khaya) has been the benchmark for exterior stile and rail doors in historic American architecture because of its low shrinkage coefficient and natural resistance to decay. Douglas fir and pine are common softwood choices for painted interior doors, with finger-jointed pine used widely in production-grade work to reduce cost while maintaining appearance.
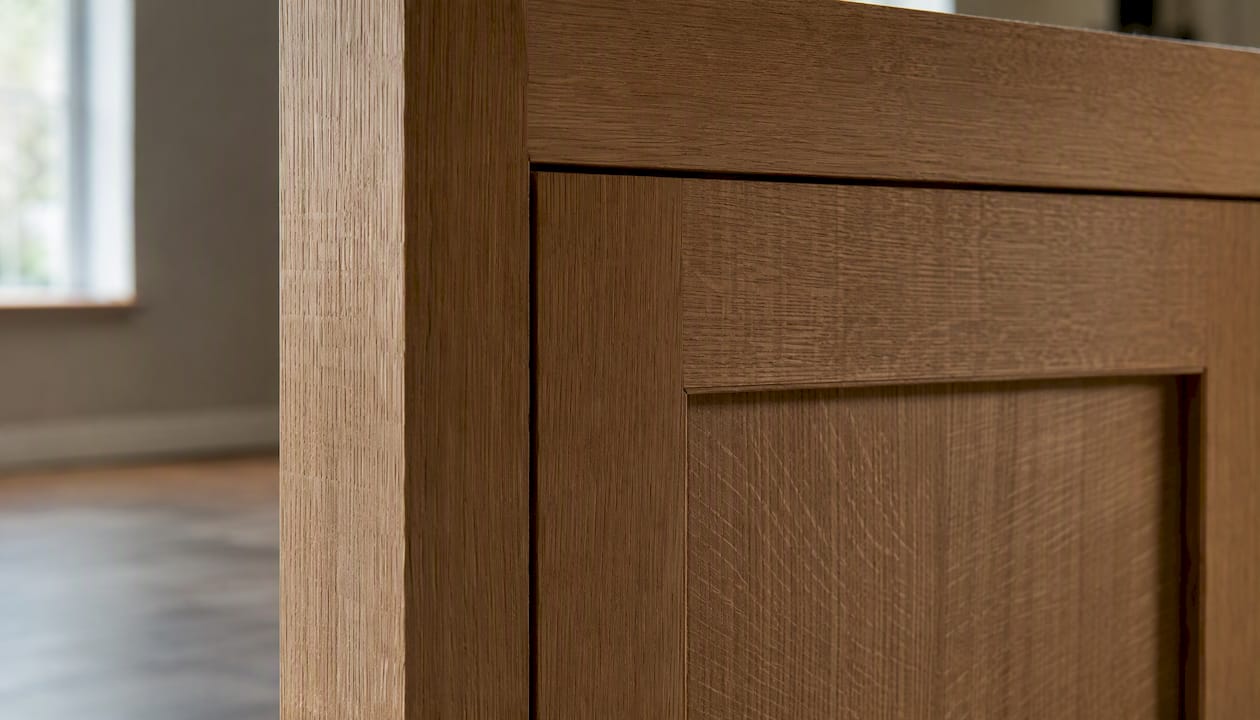
Quarter-sawn stock deserves particular attention for exterior applications. Because the growth rings run perpendicular to the face, quarter-sawn lumber moves primarily in thickness rather than width, reducing the risk of cupping and checking in the stile faces.
Core and construction options
| Core Type |
Stability |
Typical Finish |
Best Use |
Cost Range |
| Solid wood (matched species) |
Moderate |
Stain or paint |
Historic restoration, custom interiors |
High |
| Engineered core (Duracore / solid-core) |
High |
Paint or stain |
Exterior, high-humidity, commercial |
Medium–High |
| MDF stiles/rails |
Very high |
Paint only |
Painted interior doors, production work |
Low–Medium |
| Plywood panel (veneered) |
High |
Stain or paint |
Flat-panel contemporary, cost-sensitive |
Medium |
| Fiberglass composite |
Very high |
Factory finish |
Exterior, high-abuse, low-maintenance |
Medium–High |
Consulting the manufacturer early is not optional when hardware, climate, and finish interact. A solid mahogany door specified for a humid coastal climate without an engineered core may perform beautifully for a decade and then begin to bind as the stiles swell. An MDF core door in the same opening will hold its dimensions but cannot be stained. The decision tree runs: climate first, then finish intent, then species.
Pro Tip: For painted interior doors where budget is a constraint, MDF stiles and rails with a veneered plywood panel deliver excellent dimensional stability and a paint-ready surface. For solid wood interior doors where stain is the intent, specify quarter-sawn stock and discuss the climate data with your millworker before finalizing the core.
How stile and rail doors are fabricated in the shop
The fabrication sequence matters as much as the material choice. Cutting rails before stiles is the standard shop practice because rails can be registered squarely against the router table fence, producing a clean cope cut with no tearout on the show face. The stile bit then profiles the long edges and cuts the groove that receives both the panel and the rail’s stub tenon.
Step-by-step fabrication sequence
- Mill all stock to final thickness (typically 1-3/8" for interior, 1-3/4" for exterior) and allow it to acclimate in the shop for at least 48 hours.
- Cut rails to final length, including the tenon allowance if using full mortise-and-tenon joinery.
- Run the cope cut on rail ends using the cope (rail) bit in the router table, with the workpiece held vertically against a fence and backer board to prevent tearout.
- Run the stile profile on stile edges using the matching stile bit, cutting the decorative profile and the panel groove in one pass.
- Prepare panels to final dimension, undersizing by 1/16"–1/8" per side relative to the groove depth to allow seasonal movement.
- Dry-fit the assembly without glue, checking corner squareness by measuring diagonals. The tolerance is 1/32 inch.
- Glue up, applying adhesive only to the cope-and-stick joint surfaces, never to the panel groove. Use band clamps or pipe clamps in a flat, square jig.
- Check and correct squareness within the first 15 minutes of clamping, before the glue sets.
- After cure, trim stiles to final door height on the table saw for a clean, square bottom edge.
Matched cope-and-stick router bit sets cut the decorative profile and the joinery in a single pass, which reduces setup time and ensures the profile registers consistently. Single-bit sets require a bit change between the cope and stile operations; two-bit sets allow each operation to remain set up independently, which is the better choice for production runs. Both configurations must be run on a router table, never freehand.
Essential tools for shop fabrication:
- Router table with a 3-1/4 HP or larger router (1/2" collet required for stile-and-rail bit sets)
- Matched cope-and-stick bit set (CMT, Freud, or Whiteside are widely used)
- Jointer and thickness planer for stock preparation
- Miter saw or radial arm saw for rail crosscuts
- Band clamps and pipe clamps (minimum four clamps per door)
- Winding sticks and a reliable square for flatness and squareness checks
Pro Tip: Always run a test cope cut on scrap stock before committing to the door parts. Set bit height so the profile shoulder aligns flush with the stile face, then sneak up on the final depth in two passes. A misaligned bit height produces a step at the joint line that requires hand-planing to correct after assembly.
For builders interested in how joinery techniques translate from the shop to historic restoration work, the assembly principles are identical; the complexity increases when profiles must be matched to existing period millwork rather than selected from a standard catalog.
Finishing and hardware: what you need to specify before you order
Finish choice and hardware selection are not afterthoughts. Both affect the stile width you must specify, the core material you should select, and the surface preparation the door requires before it leaves the shop.
Paint vs. stain
Painted doors tolerate MDF stiles and rails because the surface is opaque. MDF holds paint exceptionally well, resists grain telegraphing, and does not require the same careful species matching that a stained door demands. Stained doors require solid wood or a veneer face that matches the species throughout, and the veneer must be thick enough to survive sanding without cutting through to the substrate. Quarter-sawn veneer faces are preferable for stained doors because the tight, consistent grain pattern reads as more refined and moves less with humidity.
Hardware clearances and lock-rail placement
Stile width directly determines whether a mortise lock or exit device can be installed without compromising the stile/rail joint. Standard mortise lock bodies require a minimum stile width of 4 inches; heavy-duty exit devices may require 4-1/2 inches or more. When the architectural design calls for a narrower stile, a lock block (a solid wood insert glued into the stile cavity at lock height) must be specified at the time of fabrication, not added in the field.
Pre-order hardware checklist:
- Confirm mortise lock body dimensions (height, width, depth) with the hardware supplier before finalizing stile width.
- Specify hinge size and weight rating relative to door weight. A 1-3/4" solid mahogany door at 36" x 84" can weigh 80–100 lbs; three 4-1/2" heavy-duty hinges are the minimum.
- Confirm door swing (left-hand or right-hand) and handing before routing hinge mortises.
- For exterior doors, specify weatherstrip allowance (typically 1/8" per side) in the rough opening calculation.
- Confirm fire rating or STC (sound transmission class) requirements before selecting core type, as rated assemblies require specific tested configurations.
Pro Tip: Specify stile width and lock-block reinforcement in the written purchase order, not just verbally. A stile that arrives at 3-1/2 inches when the mortise lock requires 4 inches cannot be corrected without remaking the door.
Stile and rail vs. molded, flush, and slab doors
The decision between construction types is ultimately a question of what the project demands over its full service life, not just what fits the budget at the time of purchase.
When molded or flush doors are the better choice
- Budget-constrained painted interiors where appearance at delivery matters more than repairability over decades. A molded HDF door in a rental unit is a rational choice.
- Contemporary minimalist interiors where a flush MDF door with no visible frame reads as architecturally correct.
- High-volume production where lead time and unit cost must be minimized and custom profiles are not required.
- Moisture-prone utility spaces where a fiberglass or steel slab door outperforms any wood construction.
The decision checklist: if you answer yes to any of the following, specify a stile and rail door.
- Does the project require a specific period profile or panel configuration not available in stock?
- Is the door in a high-traffic location where joint strength and repairability matter?
- Will the door be stained, requiring consistent grain across the face?
- Is the project subject to historic tax credit review, where period accuracy is a compliance issue?
- Does the opening require a non-standard size, radius top, or glazed configuration?
How to specify and order stile and rail doors correctly
A specification written before the door is ordered prevents the majority of field problems. The sequence below applies whether you are ordering from a production millwork shop or commissioning a fully custom door.
- Measure the rough opening and calculate the door size with reveal and gap tolerances. Standard reveals are 3/16"–1/4" per side; the gap at the threshold is typically 3/4" for carpet or 1/8"–1/4" for hard flooring.
- Confirm stile width relative to the specified mortise lock body and hinge size. Note lock-block requirements in writing.
- Specify door swing and handing (left-hand, right-hand, left-hand reverse, right-hand reverse) using the standard convention: stand outside the opening; the hinge side is the hand.
- Select species and core type based on climate, finish intent, and budget. Involve the manufacturer at this stage, not after the order is placed.
- Specify the sticking profile by name or by reference to a period drawing. “Shaker,” “ovolo,” “ogee,” and “bolection” are not interchangeable terms.
- Confirm fire rating or STC requirements with the architect or building official before finalizing core selection.
- Request a production sample or finish mock-up for stained doors, particularly when matching existing millwork.
- Confirm lead time and schedule site delivery to coincide with a controlled interior environment (HVAC running, humidity stabilized).
Additional notes before installation:
- Acclimate doors in the building for 48–72 hours before hanging, with the door standing vertically and air circulating on all faces.
- Seal all six faces (both faces, all four edges) with the specified finish before installation to equalize moisture absorption.
- Check the rough opening for plumb, level, and square before setting the frame.
Early manufacturer consultation is the single most effective way to prevent specification errors that only become visible after installation.
Maintenance and expected lifespan
A properly specified and installed stile and rail door, built from solid wood with appropriate joinery, should last the life of the building. The qualification “properly specified” does real work in that sentence.
Common defects and repairs
Panel binding occurs when the floating panel has been glued into its groove (intentionally or by finish buildup) and cannot move seasonally. The repair is to free the panel by running a thin blade around the perimeter of the groove. Loose joints at the cope-and-stick connection are typically caused by glue failure from moisture cycling. The repair requires disassembly, cleaning the joint surfaces, and re-gluing with a waterproof PVA or epoxy. Warped rails on exterior doors usually indicate that only one face was sealed before installation; the exposed face absorbed moisture and the rail cupped toward the dry face. Correction requires removing the door, equalizing moisture content across both faces, and re-hanging with all faces sealed.

Interior stile and rail doors in climate-controlled spaces typically last 50–100 years with routine maintenance. Exterior doors in exposed conditions, built from mahogany or white oak with an engineered core, typically perform well for 25–40 years before requiring significant refinishing or joint repair.
Pro Tip: When restoring a solid wood door rather than replacing it, check the panel float before refinishing. If the panel is tight in its groove, free it before applying new finish. Trapping the panel with finish is the single most common cause of panel cracking in restored historic doors.
When custom millwork is the right call for complex door projects
Stock doors solve the majority of residential interior openings. The cases where custom millwork becomes necessary are specific, and recognizing them early saves significant cost and schedule disruption.
Historic replica doors present the clearest case. When a building is under historic tax credit review, the replacement door must match the original in profile, panel configuration, species, and finish. A stock six-panel colonial door will not satisfy a preservation officer reviewing a Federal-period townhouse where the original doors had a specific bolection molding and raised burl panels. Gepettomillworks fabricates historic replica millwork to match surviving originals or period drawings, including reproducing sticking profiles that are no longer available from production suppliers.
Radius and archtop doors require bent lamination or steam-bent stiles and rails, which no stock program accommodates. The geometry of a curved stile demands that the cope cut follow the arc, which requires custom tooling or careful hand work at the joint. Gepettomillworks’s round door fabrication archive documents the techniques used for radius work, from full-circle doors to elliptical archtops in Italianate and Federal Revival buildings.
Multi-lite glazed French doors for historic interiors require that the muntin profiles match the existing window muntins in the building, a specification that production glazed doors cannot meet. The glazing bar profile, the glass thickness, and the sight line width are all period-specific.
Additional capabilities Gepettomillworks brings to complex projects:
- Matching existing sticking profiles from physical templates or measured drawings.
- Reproducing period hardware mortise layouts for antique lock sets.
- Fabricating Mission Revival millwork with the square-shouldered profiles and through-tenon details characteristic of the style.
- Coordinating finish matching with the building’s existing painted or stained millwork.
Pro Tip: Budget for custom millwork when the opening is non-standard in any dimension, when the profile must match existing work, or when the project is subject to historic review. The cost difference between a stock door and a custom door is almost always smaller than the cost of a rejected installation.
Key Takeaways
Stile and rail doors outperform molded and slab alternatives in any application where repairability, period accuracy, or structural performance over decades is a genuine requirement.
| Point |
Details |
| Panel float is non-negotiable |
Set panels 1/16"–1/8" undersized per side to allow seasonal movement and prevent cracking. |
| Stile width determines hardware options |
Mortise locks require a minimum 4" stile width; specify a lock block in writing when stiles are narrower. |
| Consult the manufacturer before ordering |
Hardware, climate, and finish type must be resolved before core material and species are finalized. |
| Match profile to period |
Sticking profile (shaker, ovolo, bolection) is the primary period marker; wrong profile undermines the entire restoration. |
| Gepettomillworks for historic and custom work |
Contact Gepettomillworks for historic replica doors, radius work, and period profile matching on preservation projects. |
The specification detail that mass manufacturers won’t tell you
The trade-off that rarely appears in product literature is the one between stile width and visual proportion. Production doors are typically built with 3-1/2" stiles because that width satisfies the most common residential hardware and keeps material cost low. But a 3-1/2" stile on a 36"-wide door looks thin, particularly in a period interior where the original doors had 4-1/2" or 5" stiles. The visual weight of the frame relative to the panel is one of the most legible signals of whether a door belongs in a room or was simply installed in it.
The same logic applies to rail width. A bottom rail that matches the top rail in width reads as a modern convention; historic doors almost universally had a bottom rail that was 1-1/2 to 2 times the width of the top rail, grounding the door visually and providing structural mass at the threshold. Specifying these proportions correctly requires either access to the original drawings or the experience to recognize what the period demanded.
Quarter-sawn stock is another specification that production suppliers rarely offer as a standard option, yet it is the correct choice for any exterior stile on a painted or stained door in a climate with more than 20% seasonal humidity variation. The additional cost is real. So is the difference in performance over 30 years.
Gepettomillworks custom stile and rail doors: next steps
For historic restorations, preservation projects, and architecturally demanding new construction, Gepettomillworks fabricates custom stile and rail doors that stock programs cannot match. The work includes period profile replication, radius and archtop construction, multi-lite glazed French doors, and finish matching to existing millwork in the building.
To request a quote, send measured drawings of the opening, photographs of any existing millwork to be matched, the hardware specification (mortise lock body dimensions, hinge size and weight rating), and the finish intent (paint or stain, species preference). Projects subject to historic tax credit review should include the relevant preservation standards documentation. Gepettomillworks will respond with a scope confirmation and lead-time estimate. For historic replica work and period-accurate restoration, contact Gepettomillworks directly through the website to begin the consultation.
Useful sources and further reading
The sources below support the technical claims in this article and provide additional depth for designers and builders who want to verify specifications or explore period examples.
| Source |
What you’ll find |
| Mastering Rail and Stile Doors: A Woodworker’s Guide |
Fabrication sequence, panel undersize tolerances, clamping and assembly procedures |
| Making Doors with Rail & Stile Bits |
Router table setup, matched bit usage, test cut guidance, and safety notes |
| Frame and Panel Door Construction |
Structural analysis of stile-through construction and hinge performance |
| Conspectus Tech Tips: Stile-and-Rail Wood Doors |
Manufacturer consultation guidance, hardware and climate interaction, core selection |
| What Are Stiles and Rails |
Stile width requirements for hardware installation and lock-block specifications |
| Gepettomillworks Historic Replica Archives |
Portfolio of period-accurate door and millwork fabrication for preservation projects |
| Gepettomillworks Prairie Style Millwork |
Specification notes and portfolio pieces for Prairie-style doors and mullion work |
| Gepettomillworks Round Doors Archive |
Radius and archtop door fabrication techniques and completed project examples |
Recommended
by Matthew Wiley | Aug 8, 2026 | Architectural Millwork
The best woods for exterior doors are white oak, Honduras mahogany, and Accoya for most U.S. climates, with teak and sapele as strong premium alternatives. Each species earns its place through a specific combination of rot resistance, dimensional stability, and finishability — and the right pick depends on your exposure, maintenance commitment, and whether the door must match a historic profile.
Quick shortlist:
- White oak — Best for durability and sustainable sourcing; mid-range cost
- Honduras mahogany (Swietenia macrophylla) — Best for historic accuracy and fine staining; mid-to-premium cost
- Sapele — Best mahogany-family alternative with interlocked grain; mid-range cost
- Western red cedar — Best for sheltered, rustic, or craftsman applications; low-to-mid cost
- Douglas fir — Best cost-effective painted door; entry-to-mid cost
- Accoya (acetylated radiata pine) — Best for coastal or wet exposure with minimal maintenance; premium cost
- Teak — Best natural low-maintenance option for full sun and coastal salt; premium cost
- Knotty alder — Best for warm aesthetic appeal in sheltered, dry climates; low-to-mid cost
Key Takeaways
White oak and Honduras mahogany are the most reliable all-climate choices for exterior wood doors; Accoya is the preferred specification where coastal or wet exposure makes regular maintenance impractical.
| Point |
Details |
| Top all-climate picks |
White oak and Honduras mahogany offer the best balance of durability, stability, and finishability across U.S. climates. |
| Coastal and wet exposure |
Accoya (acetylated wood) carries a 50-year above-ground warranty and outperforms natural species in high-humidity and coastal conditions. |
| Finish is non-negotiable |
Marine-grade finishes with UV blockers are required for clear-coated doors; recoat every 2–3 years on south- and west-facing exposures. |
| Hardware and end grain |
Seal all end grain before finishing; specify heavy-plate ball-bearing hinges sized to the door weight to prevent jamb failure. |
| Gepettomillworks |
Gepettomillworks fabricates and restores exterior doors in white oak, mahogany, and Accoya for historic and period-accurate projects across the U.S. |
Table of Contents
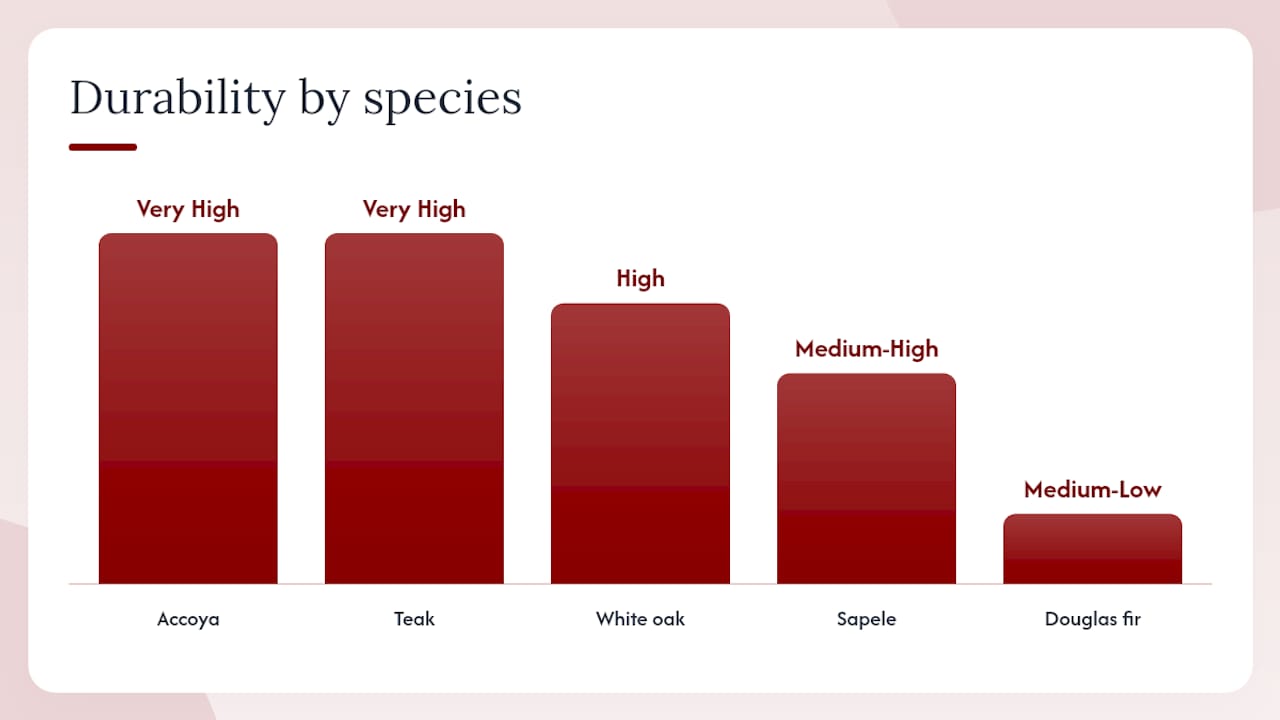
How do common species compare at a glance?
| Species |
Durability / rot resistance |
Dimensional stability |
Appearance / stain potential |
Maintenance level |
Cost / U.S. availability |
Best climates / exposure |
| White oak |
High (closed-cell grain) |
High (esp. quartersawn) |
Warm tan; accepts stain well |
Moderate |
Mid; widely available |
All U.S. climates; humid and freeze-thaw |
| Sapele |
Medium-High |
Medium |
Ribbon figure; rich reddish-brown |
Moderate |
Mid; specialty suppliers |
Temperate; partial exposure |
| Honduras mahogany |
High |
High |
Fine grain; excellent stain depth |
Low-Moderate |
Mid-Premium; declining supply |
All climates; historic restoration |
| Western red cedar |
Medium (soft) |
Medium |
Rustic; limited stain depth |
Moderate-High |
Low-Mid; widely available |
Sheltered; dry or mild climates |
| Douglas fir |
Medium-Low |
Medium-Low |
Straight grain; best painted |
High (if exposed) |
Low-Mid; widely available |
Sheltered; painted applications |
| Accoya |
Very High (modified) |
Very High |
Pale; accepts paint/stain |
Low |
Premium; specialty suppliers |
Coastal, wet, severe exposure |
| Teak |
Very High (natural oils) |
High |
Golden-brown; distinctive grain |
Low |
Premium; limited supply |
Coastal, full sun, tropical |
| Knotty alder |
Low-Medium |
Low-Medium |
Warm knots; rustic character |
High |
Low; widely available |
Sheltered, dry, interior-facing |
Detailed profiles for each recommended species
White oak
White oak’s closed-cell grain makes it measurably less porous than red oak, which is why it outperforms its close relative in every exterior application. Tyloses — microscopic structures that plug the pores — block moisture ingress at the cellular level.
- Pros: — Excellent rot resistance; quartersawn stock offers outstanding stability; takes oil and film finishes beautifully; domestically sourced and FSC-certified stock is readily available.
Honduras mahogany (Swietenia macrophylla)
Custom builders consistently name Honduras mahogany as the benchmark for exterior door fabrication — its combination of natural stability, moderate density, and exceptional finishability has made it the standard for high-end millwork for centuries. Supply has tightened considerably, and FSC-certified stock commands a premium.
- Lifespan: 40–60 years with proper maintenance; the preferred species for historic replica doors where period accuracy is required.
Accoya (acetylated wood)
Acetylation permanently alters Accoya’s cell chemistry to reduce moisture uptake, producing a modified wood with dimensional stability and decay resistance that rivals or exceeds most tropical hardwoods. The manufacturer’s 50-year above-ground warranty is the strongest in the category.
- Pros: — Exceptional dimensional stability; Class 1 durability (equivalent to teak); accepts paint and stain; non-toxic modification process; FSC-certified base material.
How to finish and construct a wood door that lasts decades
Species selection accounts for roughly half the performance equation. Construction method and finish quality determine the rest.
Finish checklist:
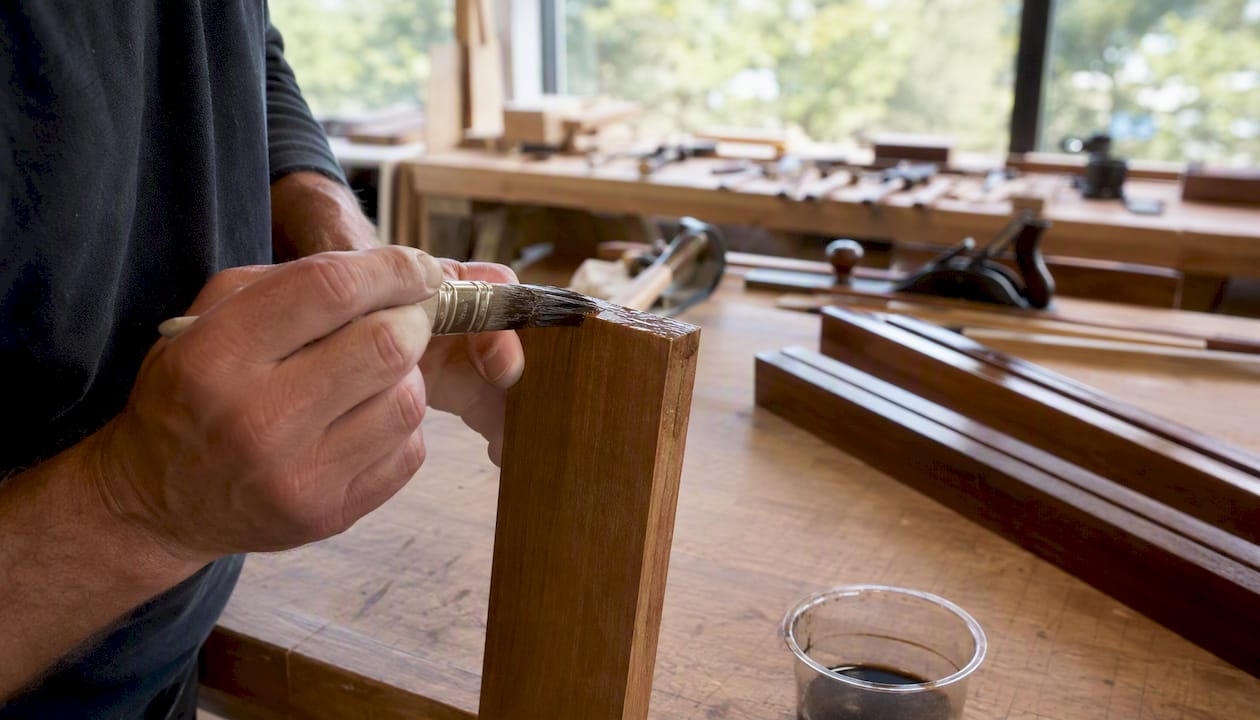
- Seal all end grain with epoxy consolidant or a dedicated end-grain sealer before any topcoat — end grain absorbs moisture at 10–15 times the rate of face grain, and unsealed mortise cuts are the most common point of early failure.
- Apply marine-grade finishes with UV blockers for any clear-coated door; two-component polyurethane or marine spar urethane outperforms standard exterior varnish in UV and moisture resistance.
- Factory finishing (applied before installation) produces a more uniform, penetrating coat than site finishing because the door can be finished on all six faces before the jamb is set.
- Recoat schedule: south- and west-facing doors typically need recoating every 2–3 years; north- or east-facing doors with good overhang can extend to 4–5 years.
Construction basics:
- Stile-and-rail construction (rather than solid slab) allows the panel to float and move independently, reducing the risk of cracking.
- Laminated stiles (finger-jointed or edge-glued from kiln-dried stock) are more dimensionally stable than single-piece stiles for wide doors.
- Sill design matters: a properly sloped sill with a drip kerf on the underside prevents water from wicking back under the door threshold.
- Hardware sizing for exterior doors is frequently underspecified. Heavy solid-wood doors require appropriately sized heavy-plate, ball-bearing hinges, with more hinges recommended for very heavy doors, because the jamb mounting points fail before the door itself when hardware is undersized.
Pro Tip: Order factory-finished doors whenever possible, or apply the first two finish coats in a controlled shop environment before delivery. Site-applied finishes on installed doors rarely penetrate the bottom rail and end grain adequately, and that gap is where moisture enters first.
Questions to ask your millworker and red flags to avoid
Bring this checklist to any supplier or fabricator conversation.
Checklist before ordering:
- Door thickness (1¾" minimum for solid exterior doors; 2¼" for heavy custom doors)
- Species grade and whether it is kiln-dried to 6–8% moisture content
- Laminated vs. solid stiles (laminated is preferred for wide doors)
- Finish system: factory-applied or site-applied, and number of coats
- Hardware specs: hinge size, plate weight, and whether ball-bearing hinges are standard
- Whether FSC chain-of-custody documentation is available for the species
Questions to ask your fabricator:
- What is the Latin name of the species? (“Mahogany” without a Latin name is a red flag.)
- What moisture content was the stock kiln-dried to, and when was it dried?
- Is the finish factory-applied or site-applied, and what product system is used?
- Does the finish warranty cover UV degradation, or only adhesion failure?
- How are end grain and mortise cuts sealed before finishing?
- What hinge specification do you use for a door of this weight?
- Can you provide FSC-certified sourcing documentation if required for a historic tax credit project?
- What is the lead time, and does the door ship primed or fully finished?
Red flags:
- “Mahogany” listed without a species name or Latin designation — it may be any of a dozen unrelated species with widely varying performance.
- Hinges specified at 3.5" or lighter for a door over 60 lbs.
- No mention of end-grain sealing in the finish process.
- Finish described only as “exterior stain” with no UV-blocker specification.
- Moisture content not documented or stated as “air-dried.”
- No warranty on the finish system.
When engineered or modified wood is the right call
Accoya is not a compromise — it is a deliberate specification choice for conditions where natural species reach their limits. Understanding when to choose it, and when not to, is the mark of an informed buyer.
Performance trade-offs vs. traditional species:
- Stability: Accoya’s dimensional movement is among the lowest of any wood product, outperforming teak and white oak in high-humidity cycling.
- Durability: Classified as Class 1 durable (equivalent to teak), with a 50-year above-ground warranty.
- Appearance: Pale, uniform grain lacks the figure of mahogany or the warmth of white oak. It accepts paint and stain well but does not produce the same visual depth as a fine-grained tropical hardwood.
- Cost: Consistently higher than white oak and sapele; comparable to or slightly above teak depending on market conditions.
Selection rules:
- Choose Accoya for severe coastal exposure, high-humidity climates, or any installation where the maintenance schedule cannot be reliably kept.
- Choose Honduras mahogany or white oak where historic appearance, fine-grain staining, or period-accurate profile replication is the primary requirement.
At Gepettomillworks, the decision to specify Accoya in a restoration context typically arises when an original door profile must be replicated exactly but the replacement will face exposure the original never did — a previously sheltered entry now exposed after a porch removal, for example, or a coastal property where the maintenance cycle cannot be guaranteed. In those cases, Accoya’s stability and warranty provide a performance baseline that no natural species can match at the same maintenance commitment. The restoration millwork process at Gepettomillworks treats species selection as an architectural decision, not a material substitution.
Pro Tip: When using Accoya or any acetylated wood, seal every cut edge immediately with a compatible end-grain sealer — the acetylation process does not extend to freshly cut surfaces, and unsealed cuts are the primary moisture entry point. This applies to hinge mortises, lock bore holes, and any site-cut adjustments.
The species choice that most buyers get wrong
The most common mistake in specifying an exterior wood door is treating species selection as a style decision and finish selection as an afterthought. The reality runs in the opposite direction: a well-finished Douglas fir door in a sheltered, north-facing entry will outlast a poorly finished mahogany door on a south-facing, fully exposed facade by a decade or more.
What the species determines is the margin for error — how much the door can tolerate a missed recoat cycle, a season of heavy rain, or a hardware failure before it begins to degrade. Teak and Accoya offer a wide margin. Knotty alder and flat-sawn Douglas fir offer almost none. The practical implication is that buyers who know they will not maintain a strict recoat schedule should move up the species list, not down, regardless of budget pressure. The cost of replacing a failed door far exceeds the premium for a more durable species at the outset.
There is also a persistent misconception that “mahogany” is a single, well-defined material. It is not. The trade term covers dozens of species from multiple continents, with performance ranging from excellent (genuine Swietenia macrophylla) to marginal (some African and Asian substitutes). Requesting the Latin name is not pedantry — it is the only way to know what you are actually buying.
Gepettomillworks crafts exterior doors built to last generations
Custom exterior doors fabricated from the right species, finished correctly, and hung with proper hardware are among the most durable architectural elements a building can have. Gepettomillworks designs and fabricates exterior doors in white oak, Honduras mahogany, sapele, Accoya, and other period-appropriate species for historic homes, restoration projects, and new construction that demands period accuracy.
Whether the project calls for a craftsman-style millwork entry, a bungalow supplier specification, or a full historic replica with documented species sourcing for tax credit eligibility, Gepettomillworks brings fabrication precision and restoration knowledge to every door. To get started, gather your rough opening dimensions, desired species, exposure notes (compass orientation, overhang depth, coastal proximity), and any reference photos of the existing or period door. Then contact Gepettomillworks directly to discuss fabrication options and lead times.
Useful sources and references
Recommended

by Matthew Wiley | Aug 6, 2026 | Architectural Millwork
For most budget-focused remodels, vinyl is the practical choice. For historic homes, luxury renovations, or any project where repairability and period authenticity matter, wood or wood-clad is the correct answer. The wood-clad window, which pairs a paintable wood interior with an aluminum- or vinyl-exterior, is the single best compromise when you want the warmth of wood inside without the exterior maintenance burden.
Quick scenarios:
- Starter home or rental property: Vinyl, installed cost $150–$550 per window, low maintenance, acceptable performance with a quality glass package.
- Historic or architecturally significant home: Wood or custom wood-clad. Off-the-shelf vinyl cannot replicate original muntin profiles, and most preservation boards will not accept it.
- Coastal or high-humidity climate: Wood-clad with aluminum exterior cladding, which resists moisture intrusion while preserving interior finish options.
- Luxury remodel with long ownership horizon: High-quality wood or wood-clad; the total cost of ownership can be competitive with budget vinyl once you account for replacement cycles.
Table of Contents
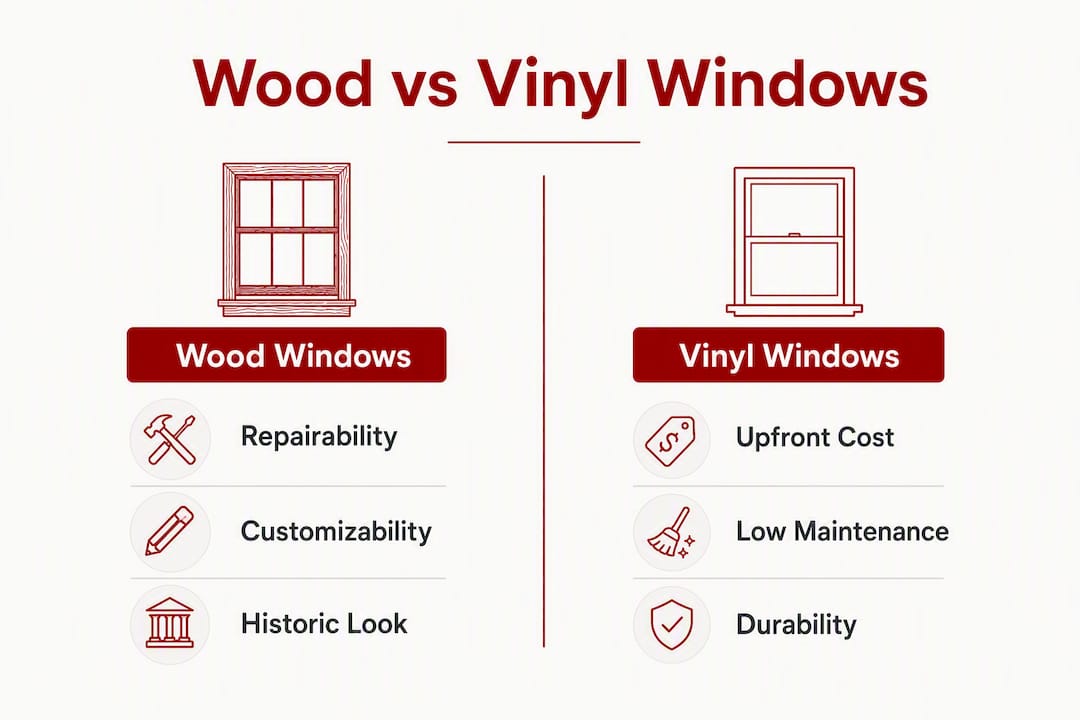
How do wood and vinyl windows compare across every decision axis?
The table below maps each material against the criteria that most directly affect a purchase decision. Glass package and installation quality cut across every row, a point worth holding in mind before the frame material debate consumes the conversation.
| Decision axis |
Wood |
Vinyl |
| Best for |
Historic homes, luxury remodels, cold climates |
Budget remodels, rentals, humid/coastal climates |
| Upfront installed cost |
$240–$880 per window |
$150–$550 per window |
| Maintenance frequency |
High: inspect every 3–6 months, repaint/restain every 3–7 years |
Low: annual cleaning, occasional hardware check |
| Energy performance |
Good; thermal mass helps in very cold climates |
Good; depends heavily on glass package |
| Repairability |
High: individual components can be milled and replaced |
Low: serious frame damage typically requires full-unit replacement |
| Aesthetics |
Broadest customization; stainable, paintable, custom profiles |
Limited profiles; simulated wood finishes available at higher price tiers |
| Lifespan |
30–100+ years with proper maintenance |
10–20 years; quality varies widely |
| Environmental |
Renewable resource; repairable; embodied energy lower for long-lived units |
Petroleum-based; difficult to recycle; shorter replacement cycle |
The frame is not the energy story. Consumer testing shows that top-rated vinyl and top-rated wood windows can perform similarly in laboratory conditions when both are equipped with equivalent glass packages. The glass specification and installation quality are the primary performance drivers; frame material is secondary except in extreme climates.
The Energy Star program reinforces this consistently: the largest efficiency gains come from replacing single-pane units with Energy Star-qualified windows, regardless of whether the frame is wood or vinyl. A homeowner who selects a premium wood frame but pairs it with a mediocre glass package will underperform a vinyl window fitted with a proper low-e, argon-filled insulating unit.
Glass and installation explain the majority of a window’s thermal performance. Frame material is a secondary variable, though not an irrelevant one in climates with sustained temperature extremes.
Three metrics govern window energy performance, and every reputable manufacturer publishes them on the National Fenestration Rating Council (NFRC) label:
- U-factor: The rate of heat transfer through the entire window assembly. Lower is better. Look for 0.30 or below in cold climates; Energy Star’s northern zone threshold is 0.27.
- Solar Heat Gain Coefficient (SHGC): The fraction of solar radiation admitted through the window. In hot climates, a lower SHGC (0.25 or below) reduces cooling loads. In cold climates, a higher SHGC on south-facing windows can contribute passive solar gain.
- Air leakage: Measured in cubic feet per minute per square foot of frame area. The NFRC certifies air leakage at 0.30 cfm/ft² or less; the best units achieve 0.10 or lower. A poorly detailed installation can negate a certified air leakage rating entirely.
Climate guidance by frame material:
- Very cold climates (IECC zones 5–7): Wood’s natural thermal mass provides a marginal insulating advantage over vinyl, and its dimensional stability at sustained low temperatures is well established. Pair with a triple-pane or high-performance double-pane unit and a warm-edge spacer.
- Hot-humid and coastal climates: Vinyl or aluminum-clad wood is preferable. Unclad wood exposed to sustained humidity and salt air requires aggressive maintenance to prevent finish failure and rot. Glazing package selection matters more than frame choice here; a low-SHGC, low-e coating does more for cooling loads than any frame material decision.
- Mixed climates: The frame material distinction narrows further. A quality glass package with a U-factor below 0.30 and a balanced SHGC will serve most mixed-climate homes well in either wood or vinyl.
Energy Star guidance is unambiguous: replacing single-pane windows with Energy Star-qualified units yields the largest measurable savings, and that benefit applies regardless of frame material when the installation prevents air leakage.
Older homes with original single-pane sash are losing a disproportionate share of their conditioned air through the glass itself, not the frame. Addressing that gap with a properly specified replacement, whether wood or vinyl, is the intervention that moves the energy bill. According to Lowe’s buying guidance, older windows can account for a notable portion of a home’s heat loss, a figure that underscores why the glass upgrade matters far more than the frame debate.
Pro Tip: When reviewing NFRC labels, compare the whole-unit U-factor, not the center-of-glass figure manufacturers sometimes lead with. The whole-unit number includes the frame and edge effects and reflects real-world performance more accurately.
What maintenance schedule should you follow for wood vs vinyl windows?
Vinyl is genuinely low-maintenance. Wood requires a disciplined inspection and finish maintenance routine to reach its potential lifespan. The gap is real, but manageable for owners who understand what they are committing to.

Practical maintenance schedule
| Task |
Wood |
Vinyl |
Frequency |
DIY or Pro |
Typical cost |
| Exterior cleaning |
✓ |
✓ |
Twice yearly |
DIY |
Minimal |
| Hardware lubrication |
✓ |
✓ |
Annually |
DIY |
Under $20 |
| Weatherstripping inspection |
✓ |
✓ |
Annually |
DIY |
$10–$40 to replace |
| Caulk/sealant inspection |
✓ |
✓ |
Every 1–2 years |
DIY |
$10–$30 per window |
| Caulk replacement |
✓ |
Rarely |
Every 3–5 years |
DIY/Pro |
$30–$100 per window |
| Paint or stain refresh |
✓ |
— |
Every 3–7 years |
Pro recommended |
$50–$150 per window |
| Glazing bead inspection |
✓ |
✓ |
Every 3–6 months |
DIY |
— |
| Rot repair |
✓ |
— |
As needed |
Pro |
$150–$550 per window |
| Full sash replacement |
Rare |
Common |
As needed |
Pro |
Varies widely |
Routine inspection every 3–6 months is the single most important habit for wood window owners. Catching a hairline paint crack before moisture infiltrates the joint is a $15 fix; discovering rot after a season of unchecked water intrusion is a $300 repair or a full replacement.
Inspection checklist (every 3–6 months):
- Check paint or stain for cracking, peeling, or bare wood exposure at joints and sill ends.
- Press the sill and bottom rail for soft spots that indicate early rot.
- Inspect sealant at the frame-to-wall junction for gaps or separation.
- Operate each sash through its full range; binding or sticking can signal moisture swelling or finish buildup.
- Examine glazing beads and putty for cracking or separation from the glass.
- Check weatherstripping for compression set or tears.
Pro Tip: Always caulk before you paint, not after. Applying paint over a fresh caulk bead seals the joint and extends the caulk’s service life significantly. Reversing the sequence leaves the caulk edge exposed and accelerates failure.
Wood-clad windows change the maintenance equation meaningfully. The aluminum or vinyl exterior cladding eliminates most exterior painting obligations, reducing the routine to cleaning, hardware lubrication, and periodic sealant checks. The interior wood surface still requires attention, but the total maintenance burden drops to something closer to vinyl than to unclad wood.
How do upfront costs and total cost of ownership compare?
Vinyl is cheaper to buy and install. Whether it is cheaper to own depends on the quality tier selected and how long you plan to stay in the home.
Installed price ranges
| Material |
Low end (per window) |
High end (per window) |
— |
| Vinyl |
$150 |
$550 |
— |
| Wood |
$240 |
$880 |
— |

Price data from RemodelCostCalc. Figures reflect installed cost including labor; glass package upgrades, custom sizes, and historic profiles add to both columns.
The total cost of ownership calculation shifts when you account for lifespan. Budget vinyl units at the lower end of the quality spectrum may require replacement in 10–15 years. A quality wood or wood-clad window, properly maintained, can serve 40–80 years or longer. Over a 40-year ownership horizon, the vinyl window may be purchased and installed twice or three times, while the wood window is refinished periodically at a fraction of the replacement cost.
What drives price differences:
- Material and species: Clear vertical-grain Douglas fir or old-growth pine commands a premium over finger-jointed pine composites.
- Customization: Non-standard sizes, custom profiles, true divided lites, and period muntins all add fabrication cost.
- Glass package: Low-e coatings, argon fill, triple pane, and warm-edge spacers add $50–$200 per unit regardless of frame material.
- Installation complexity: Retrofit installations in historic masonry or plaster-wall construction require more labor than new-construction rough openings.
- Finish: Factory-primed wood costs less than factory-painted; custom exterior colors on clad units add a surcharge.
Tax incentives and rebates can affect the math. The federal Residential Clean Energy Credit and the Energy Efficient Home Improvement Credit (25C) have covered qualifying window replacements in recent years; eligibility and credit amounts depend on the specific product’s Energy Star certification and the homeowner’s tax situation. Confirm current thresholds with a tax professional or the Energy Star website before building incentives into a budget.
What breaks, and can it be repaired?
The repairability gap between wood and vinyl is one of the most consequential differences for long-term owners, and it is almost entirely overlooked in price-focused comparisons.
Vinyl windows fail in predictable ways: seal failure between the insulating glass panes (visible as fogging or condensation inside the unit), hardware wear, and, in lower-quality products, frame warping or corner joint separation over time. Most of these failures require full-unit replacement because vinyl extrusions cannot be milled, spliced, or refinished. A vinyl sash with a failed seal is a disposal item.
Wood fails differently. Rot at the sill or bottom rail, paint failure at joints, glazing putty separation, and hardware wear are the common failure modes. Each of these can be addressed incrementally. A rotted sill section can be cut out, treated, and spliced with new wood. A failed glazing bead can be replaced. A warped sash can sometimes be planed and re-hung. Wood window components can be repaired and profiles can be milled to match originals, which is precisely why preservation professionals favor the material.
Expected lifespans under typical care:
- Vinyl: 10–20 years, with quality varying significantly across price tiers. Premium welded-corner vinyl units outperform budget extruded units, but the ceiling is lower than wood.
- Wood (unclad, well maintained): 30–100+ years. Original wood windows in well-maintained historic structures routinely outlast multiple generations of vinyl replacements installed in the same era.
- Wood-clad: Comparable to unclad wood for the interior; the exterior cladding extends the maintenance-free exterior life to 20–30 years before refinishing or re-cladding becomes necessary.
On historic preservation: Repairability is not merely a convenience. For properties subject to local historic district review or eligible for federal historic tax credits, the ability to repair and replicate original components is often a regulatory requirement. A vinyl replacement that alters the fenestration pattern or profile geometry can jeopardize tax credit eligibility and trigger a preservation board objection. Wood, precisely because it can be worked, remains the material of record for serious restoration work.
What finish and profile options does each material offer?
Wood provides the broadest customization of any window frame material. That said, wood-clad units and high-end vinyl with factory-applied wood-grain finishes can approximate the visual result at lower cost, depending on the architectural context.
Customization options by material:
- Paint: Both wood and vinyl accept paint, but wood accepts any paint system and can be stripped and repainted indefinitely. Vinyl is factory-colored and can be painted with adhesion-promoting primers, though the finish is less durable and the color palette is constrained by the extrusion.
- Stain: Wood is the only frame material that accepts a penetrating stain, which reveals grain and is the appropriate finish for Craftsman, Mission Revival, and Arts and Crafts interiors. Vinyl cannot be stained.
- Custom profiles: Wood can be milled to any profile, including historically accurate ovolo, ogee, or cyma recta muntins. Vinyl profiles are limited to what the manufacturer’s extrusion dies produce.
- Divided lites: True divided lites (TDL), where each pane is individually glazed, are a wood-only option and the standard for authentic period restoration. Simulated divided lites (SDL), where a grille is applied to the interior and exterior of an insulating glass unit, are available in both wood and vinyl and approximate the look at lower cost. Snap-in interior grilles, common in budget vinyl, read as decorative rather than architectural.
- Hardware: Wood windows accept a wider range of hardware finishes and styles, including period-appropriate cast brass, bronze, and iron. Most vinyl windows are limited to the manufacturer’s hardware program.
- Exterior cladding colors: Clad wood units offer a broad factory color palette on the aluminum exterior, often with custom color matching available at a surcharge.
For historic homes, the question is rarely whether wood looks better. It is whether the profile geometry, muntin proportions, and glass type can be replicated with sufficient fidelity to satisfy a preservation board or maintain the architectural character of the structure. Custom millwork for historic replication requires measured drawings of surviving original windows, knowledge of period joinery conventions, and access to appropriate glass, including restoration glass or antique glass where specified. Off-the-shelf products, in any material, rarely meet that standard.
A poorly installed window, regardless of frame material or glass specification, will underperform its rated values and may fail prematurely. Installation is where the energy performance story is either confirmed or undone.
Wood movement requires explicit installation clearances. Installers who do not account for seasonal dimensional change in wood frames will produce windows that bind in summer, develop sealant gaps in winter, and fail at the glazing bead over time. This is not a defect in the material; it is a consequence of installing wood without understanding its behavior.
The installer is often the largest determinant of whether a window reaches its expected lifespan. Correct flashing, thermal-bridge detailing at the rough opening, and proper clearance for wood movement are skills that separate a competent installation from one that voids the manufacturer warranty within five years.
Questions to ask any installer before signing a contract:
- What is your experience with retrofit versus new-construction installation in this wall assembly?
- How do you detail the flashing at the head and sill? Can you show me a cross-section drawing?
- What clearance do you allow for wood movement, and how do you seal the gap?
- How do you address thermal bridging at the rough opening framing?
- What does the manufacturer warranty cover, and what installation practices void it?
Warranty checklist: what to verify before purchase:
- Frame coverage: duration and what defects are included (warping, delamination, finish failure).
- Glass and seal failure: most manufacturers cover insulating glass seal failure for 10–20 years; confirm the term.
- Labor coverage: some warranties cover materials only; labor for reinstallation is a separate negotiation.
- Transferability: a transferable warranty adds resale value; confirm whether it transfers automatically or requires registration.
- Void conditions: improper installation, field modifications, and painting over vinyl are common void triggers.
For retrofit versus new-construction installation methods, the choice of installation type affects flashing detail complexity and the degree to which the existing wall assembly is disturbed. Historic masonry buildings often require custom sill and jamb extensions that a standard retrofit kit does not accommodate.
Are fiberglass and composite windows worth considering?
Fiberglass and composite materials occupy the space between vinyl and wood in both price and performance, and they are worth a brief evaluation before committing to either primary option.
Fiberglass frames are manufactured from pultruded glass-fiber-reinforced polymer, which gives them dimensional stability superior to both vinyl and wood across temperature extremes. They accept paint, resist moisture, and carry lifespans comparable to well-maintained wood. The trade-off is cost: fiberglass typically falls in the upper range of wood pricing or above, making it a premium option rather than a budget alternative.
Composite materials, including products built from wood fiber and PVC or other polymer binders, sit between vinyl and wood in price and performance. They resist rot and moisture better than solid wood, accept paint, and offer more profile variety than standard vinyl extrusions. Fibrex, a wood-fiber-and-polymer composite, is one recognized example of this category.
Where fiberglass and composite fit best: coastal and high-humidity climates where wood’s moisture sensitivity is a liability but vinyl’s limited profile options are architecturally insufficient; luxury new construction where dimensional stability and paint-holdout are priorities; and retrofit projects in historic districts where a preservation board accepts composite but the budget does not support custom wood millwork.
For strict historic replication, neither fiberglass nor composite can match the workability of wood. Profiles can be approximated but not milled to the precision that period restoration demands, and neither material accepts antique or restoration glass in the same way a custom wood sash does.
How should you decide? A practical checklist
Work through these questions in order. The answers will narrow your choice faster than any specification sheet.
Prioritized decision questions:
- Does your home fall under historic district review, landmark designation, or federal historic tax credit eligibility? If yes, wood or custom wood-clad is almost certainly required. Confirm with your preservation board before specifying anything else.
- What is your ownership horizon? Under 10 years, vinyl’s lower upfront cost is difficult to argue against. Over 20 years, the total cost of ownership calculation favors quality wood or wood-clad.
- What climate zone are you in? Sustained humidity or salt air exposure argues for clad or vinyl exteriors. Very cold climates favor wood’s thermal properties when paired with a high-performance glass package.
- What is your maintenance tolerance? Vinyl requires minimal ongoing effort. Wood requires a disciplined inspection and finish maintenance schedule.
- What are your aesthetic requirements? If the interior finish, profile geometry, or divided-lite pattern matters architecturally, wood is the only material that delivers full customization.
- What is your glass specification? Confirm U-factor, SHGC, and air leakage rating before comparing frame prices. A budget frame with a quality glass package will outperform a premium frame with a mediocre one.
Red flags in contractor quotes:
- No glass performance specification (U-factor, SHGC, air leakage) listed in the proposal.
- Vague or absent flashing detail (“we’ll flash it per standard practice” is not a specification).
- No written warranty documentation provided before contract signing.
- Installer cannot explain the difference between retrofit and new-construction installation methods.
- Quote does not distinguish between frame cost and glass package cost.
Questions to ask suppliers during the quoting process:
- What is the whole-unit U-factor and SHGC for this window as specified?
- What is the certified air infiltration rate?
- Is the glass package Energy Star certified for my climate zone?
- What installation method do you recommend for my wall assembly, and why?
- What does the manufacturer warranty cover, and what voids it?
When custom wood windows are the right choice: Gepettomillworks restoration work
For strict historic replication, antique glass handling, or complex period profiles, custom wood millwork is the correct path. Off-the-shelf products in any material cannot replicate the dimensional precision, joinery conventions, or glass character that a preservation board or a discerning owner requires.
Gepettomillworks works on projects where the architectural record demands fidelity: a Federal-period fanlight whose elliptical tracery cannot be approximated by a stock unit, a Craftsman bungalow whose divided-lite pattern and interior stain grade must match surviving originals, or a Prairie School structure whose art-glass panels require custom sash fabrication around existing glazing. In each case, the starting point is the surviving physical evidence, measured drawings, and, where available, historic photographs.
The case for custom millwork is not aesthetic preference alone. Properties seeking federal historic tax credits under the Historic Tax Credit program must demonstrate that rehabilitation work meets the Secretary of the Interior’s Standards for Rehabilitation. Window replacement that alters original profile geometry, muntin proportions, or glass type can disqualify a project from credit eligibility. Custom wood millwork, fabricated to match the original, is the documented path to compliance.
The qualified restoration craftsmen at Gepettomillworks bring experience with period joinery, handmade window fabrication, and antique glass sourcing to projects where those skills are not optional. The work encompasses not only the window unit itself but the surrounding trim, glazing details, and hardware selection that complete the architectural composition.
When to commission custom millwork rather than buy off-the-shelf:
- The original window profiles are documented and a preservation board requires near-exact replication.
- The project involves antique, restoration, or art glass that must be set into new sash.
- The fenestration pattern includes non-standard shapes: elliptical, circular, or polygonal units.
- The interior finish requires a specific species and grain orientation for staining.
- The project is seeking historic tax credit eligibility and documentation of material compliance is required.
For owners at the beginning of a restoration project, the first step is gathering physical evidence: rubbings or tracings of surviving muntin profiles, measurements of existing rough openings, and any available historic documentation. Gepettomillworks can work from that evidence to produce fabrication drawings and cost estimates before any commitment to a scope of work.
Key Takeaways
Wood wins on repairability, customization, and historic authenticity; vinyl wins on upfront cost and low maintenance; the wood-clad window is the most practical compromise for owners who want both.
| Point |
Details |
| Glass and installation matter most |
Frame material is secondary; U-factor, SHGC, and air leakage rating drive real energy performance. |
| Vinyl costs less upfront |
Installed at $150–$550 per window versus $240–$880 for wood; lifespan of 10–20 years versus 30–100+ for maintained wood. |
| Wood-clad is the best compromise |
Aluminum or vinyl exterior cladding reduces maintenance while preserving interior wood finish and profile options. |
| Historic projects require custom millwork |
Preservation boards and Historic Tax Credit eligibility often demand near-exact profile replication, which only custom wood fabrication can deliver. |
| Gepettomillworks for restoration work |
Custom wood window fabrication, antique glass handling, and period profile replication for historic and architecturally significant projects. |
The tradeoffs most homeowners don’t see until it’s too late
The conversation about wood versus vinyl windows almost always starts with price and ends with maintenance. Those are real considerations, but they miss the variable that most often determines whether a window project succeeds or fails over time: the quality of the installation and the specificity of the glass package.
A homeowner who spends $800 per window on a premium wood unit and then has it installed by a crew unfamiliar with wood movement clearances will have a binding, leaking window within three years. A homeowner who specifies vinyl but insists on a documented U-factor below 0.28 and a certified air infiltration rate will have a genuinely efficient window regardless of what the frame is made of. The frame debate is real, but it is downstream of those two decisions.
The second thing most homeowners underestimate is the cost of profile replication in historic work. Custom millwork is priced by complexity, species, and fabrication time, not by the linear foot of a catalog item. A window with a cyma recta ovolo muntin, a true divided lite configuration, and a specific glass type costs more to fabricate than a standard double-hung, and that cost is justified by what it preserves: the architectural integrity of a building that took generations to produce. The alternative, a stock vinyl unit that approximates the look, is a decision that compounds over time as the building’s character erodes incrementally with each substitution.
Gepettomillworks: custom wood window restoration for historic projects
When a project demands more than a catalog can offer, Gepettomillworks fabricates custom wood windows, doors, and architectural millwork to the dimensional and material standards that historic preservation requires.
The work begins with the physical evidence: measured profiles of surviving original windows, documentation of muntin patterns and joinery details, and, where required, coordination with preservation board specifications. From that foundation, Gepettomillworks produces custom sash, frames, and trim that replicate original profiles with the precision that both architectural integrity and tax credit compliance demand. Antique glass, restoration glass, and period-appropriate hardware are sourced and integrated as part of the fabrication scope.
For owners working on restoration millwork projects, whether a 19th-century row house, a Craftsman bungalow, or a Prairie School residence, the starting point is a conversation about what survives and what the project requires. Gather photographs of existing windows, any available historic documentation, and the rough opening dimensions before reaching out. Contact Gepettomillworks to discuss your project scope and request a fabrication estimate.
Useful sources and further reading
The sources below informed this article and offer additional depth on the topics covered.
A note on research quality: the most authoritative guidance on window energy performance comes from the Energy Star program and the NFRC. Cost data is inherently regional and should be verified with local contractors; the figures cited here are national ranges intended for planning purposes, not binding estimates.
Energy Star — 2025 Windows Messaging Document
The primary federal guidance document on window energy performance. Covers the case for replacing single-pane windows, the role of glass versus frame in energy savings, and the repairability advantages of wood for historic preservation. The most authoritative source in this article.
National Fenestration Rating Council (NFRC)
The organization that certifies and publishes U-factor, SHGC, and air leakage ratings for windows. Use the NFRC label as the baseline for any window comparison; manufacturer marketing figures are not a substitute.
RemodelCostCalc — Vinyl vs Wood Windows Cost Comparison
The most detailed publicly available cost breakdown for installed vinyl and wood windows, including per-window price bands and project-level estimates. Useful for budget planning; verify with local contractor quotes.
Consumer Reports — Replacement Windows Buying Guide
Independent testing data showing that frame material alone does not determine performance. Particularly useful for understanding how glass package and build quality interact with frame choice.
J&L Building Materials — Best Window Material Options
Practical overview of vinyl lifespan variability and the factors that separate quality tiers within the vinyl category. Useful context for the durability section.
ViewLux Windows — Energy Efficient Glazing Options
Detailed guidance on glazing packages, low-e coatings, and how glass selection affects whole-unit performance. Recommended reading before finalizing any glass specification.
Lowe’s — Vinyl vs Wood Windows Buying Guide
Accessible overview of the heat-loss impact of older windows and the resale value considerations associated with window replacement. Useful for homeowners early in the decision process.
Recommended