by Matthew Wiley | Oct 14, 2026 | Architectural Millwork
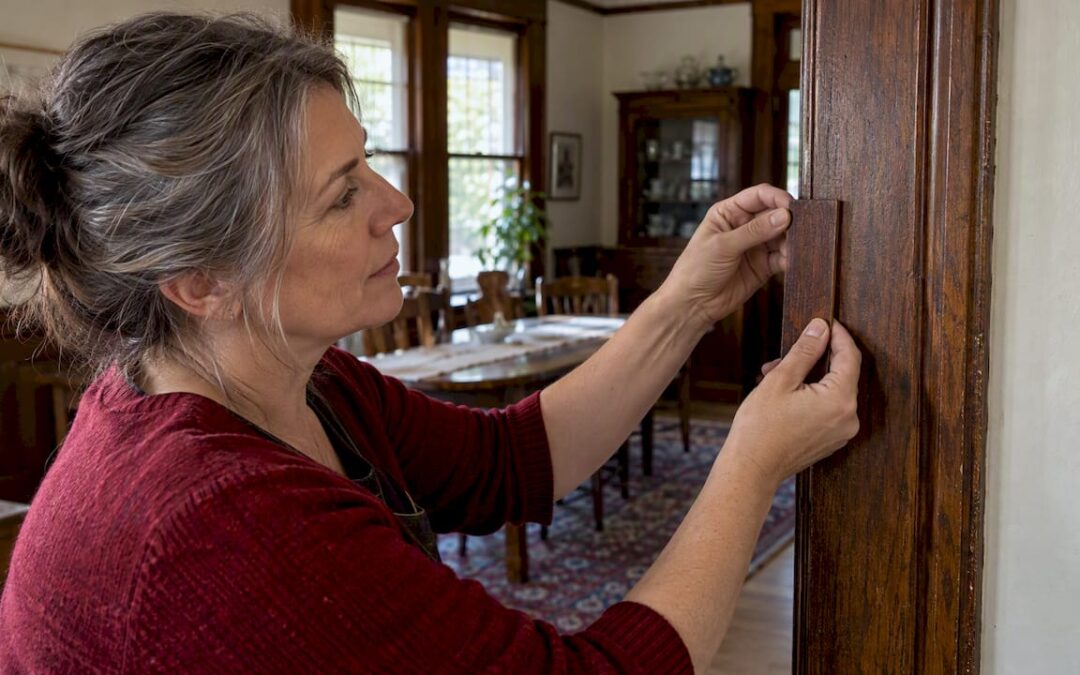
The most reliable way to match stain on old trim is to identify the existing finish first, then build color in controlled layers rather than reaching for a single can of stain. Confirm whether shellac, lacquer, varnish, or penetrating oil coats the wood, scuff-sand instead of stripping when the finish is sound, and layer a dye or wiping stain under a gel stain or glaze before sealing to the surrounding sheen.
TL;DR:
- Test a hidden spot with denatured alcohol, then lacquer thinner: softening identifies shellac or lacquer, while neither reaction points to varnish or penetrating oil.
- For sound finishes, clean and scuff sand flats using 220 grit, hand sand profiles, and strip only failed areas or wood that must be lightened.
- Build color on matching scrap, record product ratios, and correct red or yellow undertones with tiny green or violet additions instead of simply darkening stain.
- Once the base color is close, apply glaze over a thin dewaxed shellac seal coat, then judge cured satin or semigloss samples in the room.
- Call a restoration shop for historically significant trim, carved profiles, suspected lead paint, or rot, and bring natural light photos plus solvent test results.
Gepettomillworks
Preserve the Character of Historic Trim
Gepettomillworks creates custom millwork for historic building projects, supporting work where matching old trim and preserving its character matter.
Explore custom millwork
Table of Contents
How to identify the existing finish and its condition
Every historic finish behaves differently under a brush, so identifying what coats the wood determines whether we restore, recoat, or strip. A simple solvent test resolves most ambiguity: dab denatured alcohol on a hidden spot, and if the finish softens or lifts, it is shellac. If the alcohol has no effect, try lacquer thinner; softening there points to lacquer, while no reaction from either solvent usually means varnish or a penetrating oil finish.
- Shellac softens under denatured alcohol and often indicates an older, repairable finish.
- Lacquer softens under lacquer thinner and typically tolerates a fresh topcoat once cleaned.
- Varnish or penetrating oil resists both solvents and usually needs mechanical scuffing before any new product adheres.
Condition matters as much as chemistry. An intact finish that is merely dull or lightly scratched can often be revived through cleaning and a light recoat rather than full removal, which preserves the original patina that gives old trim its character. A failing finish, by contrast, with flaking, alligatoring, or bare wood, forces a different path: limited stripping, targeted repair, and rebuilding color from a cleaner base.
Surface prep that preserves historic profiles: cleaning, repair, and gentle sanding
Profile detail on historic trim is unforgiving once it is sanded away, so preparation has to protect the molding’s edges before any color work begins. Cleaning comes first: wipe down the surface with turpentine or a mild solvent recommended for the finish type to remove decades of wax and grime that would otherwise trap new stain unevenly.
- Clean thoroughly. Remove accumulated wax and surface grime before testing anything, since residue skews both solvent tests and stain absorption.
- Repair damage appropriately. Fill dents and gouges with a stainable wood filler on bare sections, or use a color-matched putty where the surrounding finish is intact and only cosmetic repair is needed.
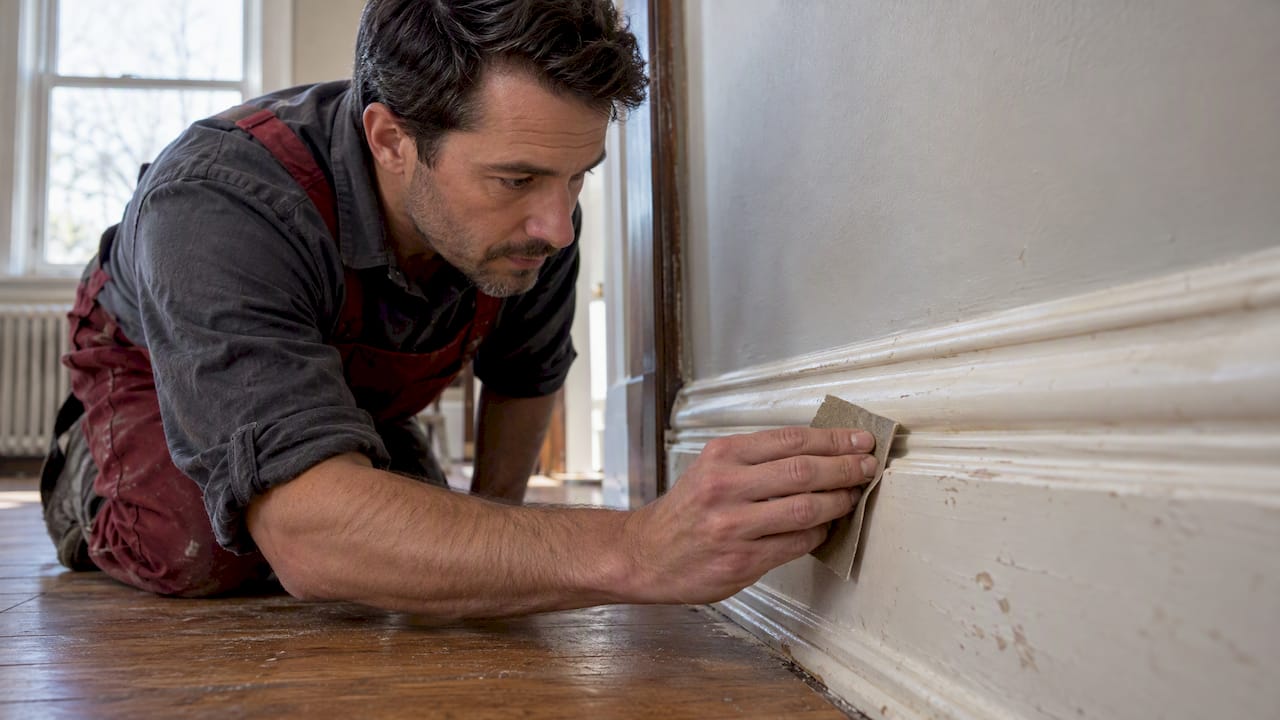
- Sand conservatively. Scuff-sand flats with 220-grit paper to open the surface for adhesion, and hand-sand curves and profiles with folded paper or a flexible sanding sponge to avoid rounding crisp edges.
- Strip selectively, only when necessary. A gel-type stripper clings well to vertical surfaces and reduces gouging on detailed molding, which matters because stain can only darken wood: lightening an existing finish requires removing it first.
Pro Tip: Test every cleaner, filler, and stripper on a hidden section of the same trim run before committing, since even a mild solvent can leave a halo on aged shellac.
Power sanders flatten profiles in seconds and are difficult to control on ogee or bead details, so reserve them for broad, flat surfaces and keep hand tools close by for everything else.
Make test swatches and record mixes: practical step-by-step mixing and iteration
A reliable stain match is built on paper before it ever touches the trim. Cut a test substrate from the same species as the original woodwork, or from a clear hardwood scrap when matching species is not practical, since grain structure and porosity change how pigment and dye absorb.
Start with a light wiping stain or dye as the base layer, then adjust toward the target with a gel stain, an oil-based wiping stain, or small additions of universal pigment. Each adjustment should be minor: a tablespoon-scale change in ratio can shift a sample from a warm honey tone to a muddy brown, so patience at this stage saves rework later.
- Label every sample with the exact product names, mix ratios, and drying time so a result can be reproduced weeks later.
- Note the ambient conditions (temperature, humidity, lighting) since they affect how a stain levels and dries.
- Keep a labeled sample card for each attempt, ideally photographed after sealing, following the practice professionals use to build a recipe swatch book for repeatable results on a single project.
Undertone correction often matters more than overall darkness. Old trim frequently carries a reddish or yellow cast from decades of oxidation and prior finishes, and simply applying a darker stain rarely corrects that. Small, controlled additions of pigment or dye neutralize the dominant cast: a touch of green dampens an overly red tone, while a trace of violet counters a strong yellow bias. These adjustments work in tiny increments, and over-layering opaque colorants obscures the grain, which is a mistake that usually means starting over on stripped wood.
Glazing comes last in the build-up, after the base color is close, because a glaze reproduces the soft shading and wear patterns that accumulate in corners and along edges rather than solid color. A thin, dewaxed shellac seal coat between the base stain and the glaze prevents the glaze solvent from disturbing the color underneath, a sequence that professional finishers rely on when reproducing complex historic tones.
How to apply the matched recipe so new trim blends with aged woodwork
Application technique determines whether a correct recipe actually reads as a seamless match or sits as an obvious patch. The goal at every seam is a gradual transition rather than a hard line between old and new material.
- Feather the edges. Apply stain more thinly as you approach a seam or joint, working the brush or rag in overlapping passes so no sharp boundary forms where new trim meets old.
- Build depth in thin layers. Several light coats produce more even, controllable color than one heavy application, and each layer can be checked against the original before moving forward.
- Add a glaze for worn undertones. A thin glaze wiped into corners and recesses, then softened on the flats, mimics the uneven darkening that decades of handling and light exposure leave behind.
- Match the topcoat sheen. A satin finish reads differently than semi-gloss even when the color underneath is identical, so the final clear coat has to match the surrounding sheen, not just the stain color.
Pro Tip: Apply the topcoat to a test board and let it cure fully before judging the final color, since some sealers shift tone slightly as they dry.
Seal, test in place, and final verify the match under room light
Sheen changes how a color reads even when the pigment underneath is identical, which is why the sealing step is not just protective, it is part of the color match itself. A satin topcoat mutes contrast and deepens perceived tone, while semi-gloss sharpens highlights and can make the same stain look lighter.
- Test both satin and semi-gloss samples side by side before committing to a topcoat for the whole run.
- Let samples cure fully, then check them in the actual room under its own lighting, since a match that looks correct under shop light can shift noticeably under incandescent or daylight conditions at home.
- Expect to make minor tweaks, such as a light glaze touch-up, after seeing the cured sample in place.
- If the gap between old and new remains visible after reasonable adjustment, that is usually the point to bring in a restoration shop rather than keep reworking the same section.
Our approach favors conservation over removal whenever a finish is sound enough to support it, reserving stripping for cases where the wood needs to go lighter or an old glaze layer has to come off entirely. In practice, that means applying seal coats between color layers, using stains for controlled darkening on vertical profiles, and glazing applied in small, tested increments rather than broad strokes.
The best match is the one you can reproduce on the next piece of trim, not just the one that looks right today.
Readers curious about how this plays out on a full project can look through our historic cabinet restoration case notes or browse examples in our 19th century home archives.
When to hire a pro: complexity signals and what pros deliver
Certain signals favor calling a restoration shop rather than continuing to test on-site: documented historic significance, deeply carved or compound profiles, or any suspicion of lead paint or structural rot beneath the finish. A professional shop brings profile replication tooling, tested color recipes, and a controlled finishing environment that is difficult to reproduce in a garage. Before reaching out, photograph the trim in natural light, save a small sample if any piece is removable, and note the results of your own solvent tests.
— Gepetto
When a match calls for replicated profiles, new sashes, or full restoration rather than another round of test swatches, our shop takes on the fabrication work directly.
- Historic trim and window restoration, including finish matching tied to tax credit requirements.
- Custom casework and millwork replication when a damaged section needs a profile-matched replacement piece.
- Residential woodworking services for homeowners managing a single room or a full historic renovation.
Review a few project examples, gather your samples and photos, and reach out through our Historic Window Restoration page to request an estimate.

FAQ
How to match an old stain?
Identify the existing finish with a solvent test, then build color gradually using a dye or wiping stain as a base, adjusting with gel stain or small pigment additions until the undertone matches. Keep a labeled sample board for every mix so the final recipe can be reproduced across the whole trim run.
Can you get wood stain color matched?
Yes, through iterative test swatches on scrap wood of the same species, adjusting ratios of dye, stain, and glaze until the sample matches the original under the room’s actual lighting. Many finishers also consult general color-matching and test-swatch principles developed for refinishing other wood surfaces, since the testing logic carries over.
Is stained trim outdated?
Stained trim is not outdated; it remains standard in historic and traditional interiors, though some homeowners now mix painted and stained elements for contrast rather than matching everything. That design choice is a matter of preference, not a sign that stain itself has fallen out of favor.
How to match existing cabinet stains?
Use the same identify-then-layer approach as trim: confirm the existing finish type, test a dye or stain base on a matching scrap, then refine with gel stain and glaze until the sheen and undertone align. Cabinet doors often show more visible wear patterns than trim, so glazing in corners and edges tends to matter more for a convincing match.
What causes stain to look different on old versus new wood?
Aged wood has oxidized, picked up ambient light exposure, and often carries residue from old finishes, all of which shift its undertone compared to fresh lumber. This is why undertone correction through small pigment adjustments usually succeeds where simply choosing a darker stain color does not.
Sources
Recommended
by Matthew Wiley | Oct 13, 2026 | Architectural Millwork
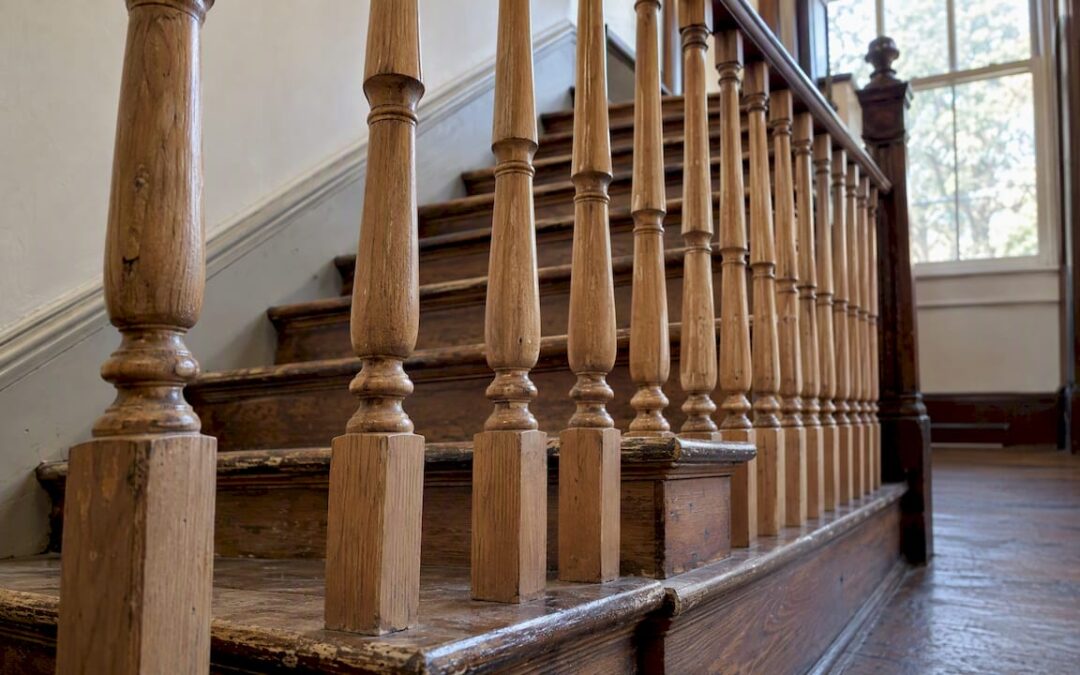
Repair is preferred under preservation standards, and when a baluster is too deteriorated to save, professional baluster replication is the surest way to preserve both visual integrity and eligibility for preservation incentives. Simple, unadorned stock profiles are reasonable candidates for a careful do-it-yourself approach. Historic, highly detailed, or tax-credit-sensitive projects call for a specialist shop such as Gepetto Millworks, where turning, scanning, and finishing work is matched to the original by trade.
TL;DR:
- Repair minor splits or loose tenons with epoxy or veneer shims; historic replacements need photographic or physical evidence to support preservation incentive eligibility.
- Hand turning suits carved twists and undercuts; duplicators work best with an intact sample and plain profiles, while scanning helps when originals are fragile.
- If the original species is impractical, choose a substitute that matches its visual and physical properties, and test the finish on a sample first.
- A useful quote package includes a surviving sample, profile tracing, photos, caliper readings at several points, rail angle, and each baluster’s finished length.
- Dry fit each baluster before fastening, ensure its tenon seats without force, and keep gaps no wider than four inches under most residential codes.
Gepettomillworks
gepettomillworks.com
Match Historic Balusters With Care
Gepettomillworks creates custom millwork for historic building projects, supporting careful replication when deteriorated balusters cannot be saved.
Visit Gepettomillworks
Table of Contents
When to Repair Versus When to Replace a Baluster
The Secretary of the Interior’s Standards for Rehabilitation hold that deteriorated features should be repaired rather than replaced, and that when replacement becomes necessary, the new piece must match the old in design, color, texture, and visual qualities under Standard 6. In practice, that principle translates into a few clear field signs.
- Surface checking, minor splits, or a loose tenon usually respond to epoxy consolidation or a wood-veneer shim rather than full removal.
- Rot that has reached the core, a snapped baluster, or a missing element generally requires fabrication of a new piece.
- Any replacement on a documented historic property should be substantiated with photographs or physical evidence before fabrication begins, a requirement the Standards attach to tax-credit eligibility.
A typical shop timeline runs from on-site inspection and documentation, through pattern-making and fabrication, to finishing and install, often spanning several weeks depending on the complexity of the turning and the finish schedule.
Replication Methods: Lathe Turning, Duplicators, CNC, and 3D Scanning
The right production method depends on how much three-dimensional detail the original carries and how intact the sample is. Hand turning on a traditional lathe remains the standard for balusters with carved rope twists, barley-sugar spirals, or other undercut ornament that a machine cannot trace in one pass. A lathe duplicator, by contrast, copies a straight profile quickly from an intact sample, which makes it efficient for plain colonial or Federal-style spindles but limited when rope or deep carving is involved.
- Hand turning on a lathe suits complex, three-dimensional ornament that duplicators cannot reproduce.
- Lathe duplicators excel at fast, accurate profile copying when a sound sample exists.
- CNC turning and 3D scanning paired with printing or machining become the practical route when the original is too damaged to use as a direct pattern, as documented in a historic baluster replication project that combined laser scanning and 3D printing to reproduce spiral balusters too fragile to copy by hand.
Pro Tip: Bring a damaged original to a shop even if it looks unusable; scanning can often extract enough geometry for an accurate digital pattern that a lathe or CNC can then execute.
Cost and turnaround generally favor duplicators for simple runs, hand turning for ornamental work in smaller quantities, and scanning-based methods for one-off replication where no sound sample survives.
Matching Materials: Species, Finishes, and Acceptable Substitutes
Species selection affects grain pattern, paint absorption, and long-term durability as much as appearance. Older stair sets were commonly turned from poplar, white oak, mahogany, or heart pine, and matching the original species keeps the grain and the finish behaving the same way over time.
- Poplar and similar close-grained woods paint cleanly and resist warping in interior stair runs.
- Oak and mahogany carry a more pronounced grain that should be matched when the original is left in a clear or stained finish.
- Heart pine appears in many older Southern staircases and takes stain differently than modern dimensional lumber.
NPS guidance on evaluating substitute materials permits a substitute when the original species is economically or technically infeasible, provided the substitute closely matches the visual and physical properties of the historic material, a standard that weighs location, physical compatibility, and expected performance over time. Before committing a full run to any species or finish, shops typically produce a test piece: a sanded sample finished with shellac or a gel stain to even out color and texture differences against the aged original.
How to Prepare and Order a Replica: Measurements, Samples, and Lead Times
A clean, well-documented submission shortens both the quoting process and the fabrication timeline. Shops that replicate balusters for a living generally ask for the same core package of information before cutting any wood.
- Trace the profile onto manila paper or heavy cardstock to capture the silhouette accurately, a technique documented in professional restoration how-tos.
- Record diameters at several points along the baluster with calipers, since a single measurement rarely captures a tapered or turned profile.
- Photograph the top, bottom, and side of a representative baluster, including any carved or turned detail.
- Measure the sliding bevel angle where the baluster meets a sloped handrail, since rake angles vary by stair pitch.
- Note the finished length for each position on the run, since treads on a sloped stair often require a different length baluster at each step.
Most shops also expect a sample baluster when one survives, a minimum order per project, and sometimes a customization fee for one-off profiles; lead times vary with turning complexity and finish schedule.
Installing Replicated Balusters: Fit, Fasten, and Finish
Installation is where a well-made replica either disappears into the original run or stands out. The sequence below follows standard trade practice for dowel or tenon-based balusters.
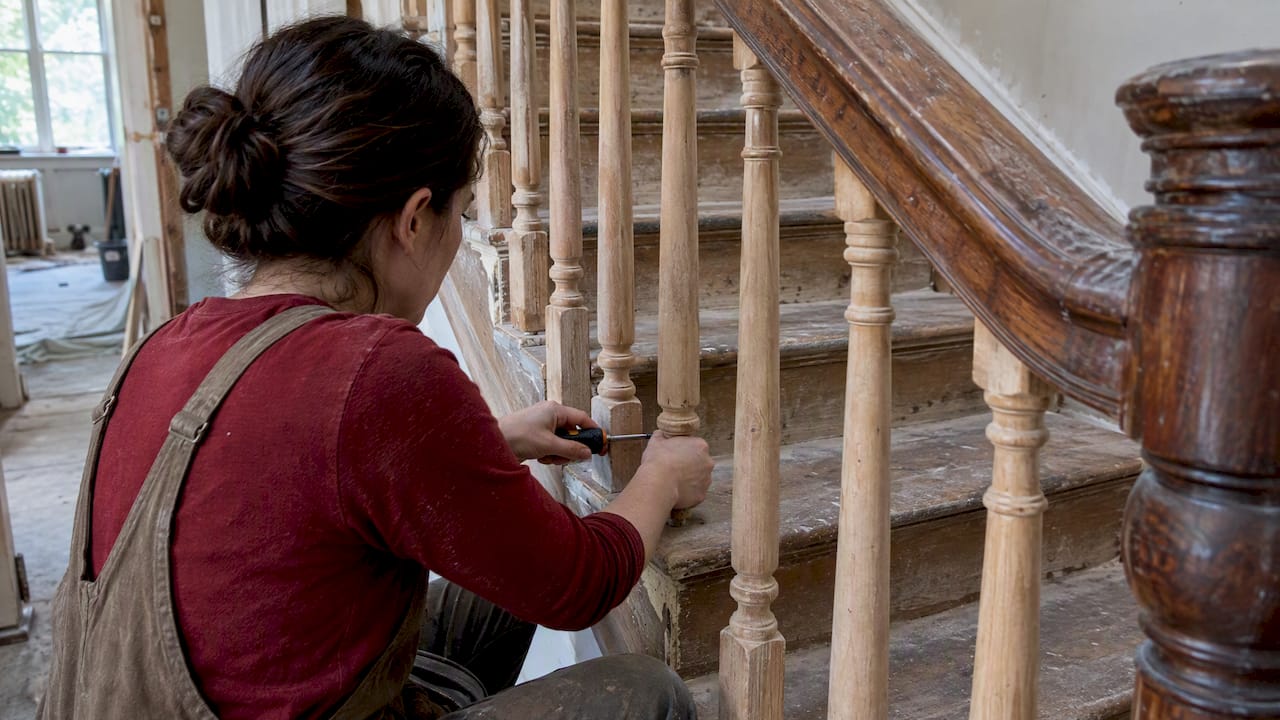
- Dry-fit each piece in position before any glue or fasteners go in, checking that the tenon seats fully in its mortise.
- Trim the baluster to finished length using the bevel angle recorded during measurement.
- Shape or adjust the tenon or dowel so it seats without force; a tight dry fit prevents future rattling.
- Set the piece with wood glue and a pilot-drilled screw or finish nail, then countersink and fill with matching putty.
- Sand, prime, and finish to match the surrounding balusters, using the test piece developed during material selection as the reference.
Pro Tip: A loose tenon on an older original can often be saved by wrapping it in thin wood veneer or a tapered shim rather than enlarging the mortise, a reversible fix that preserves more of the original fabric.
Spacing matters structurally as well as visually: most residential codes cap the gap between balusters at roughly four inches to prevent a small child from passing through, and any replacement run should preserve that spacing along with secure attachment at both the top rail and the tread.
How Gepetto Millworks Documents and Executes a Replication Project
We approach every baluster replication the same way we approach any historic millwork commission: document first, fabricate second. A typical project moves through on-site measurement and photography, species and finish selection matched to the original fabric, turning or CNC and scanning work sized to the complexity of the profile, and a finish schedule that brings the new piece into visual alignment with its neighbors before installation.
- We request the same baseline package described above: a physical sample when one exists, profile tracings, caliper measurements, and photographs of the original in place.
- For tax-credit or landmark-review projects, we document replacement with the photographic and physical evidence that certified rehabilitation review expects.
- Past replication work, along with examples from our broader replica millwork and complex wood manufacturing archives, shows how a shop-level process holds up across different stair styles and periods.
Why Craftsmanship Matters for an Honest Historic Match
A baluster run is one of the more visible pieces of joinery in an older house, and a mismatched profile or the wrong sheen reads as wrong from across the room even to an untrained eye. We accept a close substitute material when the original species is no longer practical to source or finish safely, but we insist on in-kind turning and profile accuracy wherever the detail is visible. When a project sits near that line, a conversation with a specialist before fabrication begins saves far more time than a second attempt after installation.
— Gepetto
Commissioning a Custom Replica from Gepetto Millworks
We fabricate custom balusters, balustrades, and the full range of period stair cases that surround them, alongside our wood turning work for other turned architectural elements. We also take on the custom casework, entry doors, and windows that round out a full restoration scope, so a single project brief can cover more than the staircase alone.
To quote a baluster replication, we need the same package outlined above: a sample baluster where one survives, profile tracings or photographs, caliper measurements, and a short note on the project’s scope and any preservation review it needs to satisfy. For intake measurement, some trades now lean on digital scanning for accurate fit, and we welcome scanned data alongside traditional templates when it’s available. Reach out through our residential woodworking page to start a quote, or browse our custom fabrication services for the rest of your project scope.
FAQ
Is it difficult to replace balusters?
Replacing a simple, undamaged baluster with a matching stock profile is a manageable weekend project for an experienced do-it-yourselfer with a caliper and a bevel gauge. Matching a carved or historic profile, sloped-rail angles, or multiple lengths per tread is considerably harder and is where most homeowners bring in a specialist shop.
What’s the difference between balusters and spindles?
In most trade usage, “baluster” and “spindle” refer to the same vertical stair element, with “spindle” used more often for slender, turned pieces and “baluster” used more broadly for any upright supporting a handrail. The terms are largely interchangeable in residential stair work.
How far apart should balusters be spaced?
Most residential building codes require no more than a four-inch gap between balusters to prevent a small child’s head or body from passing through. Always confirm the exact figure with your local code, since requirements can vary by jurisdiction.
How do you make your own balusters?
Making a basic baluster starts with tracing the original profile onto manila paper and capturing diameters with calipers, then reproducing that profile on a lathe or lathe duplicator. Published how-to guidance covers template-making, turning, and the finishing steps needed to match an aged surface, though carved or three-dimensional detail usually exceeds what a hobbyist lathe setup can achieve.
Sources
Recommended
by Matthew Wiley | Oct 12, 2026 | Architectural Millwork
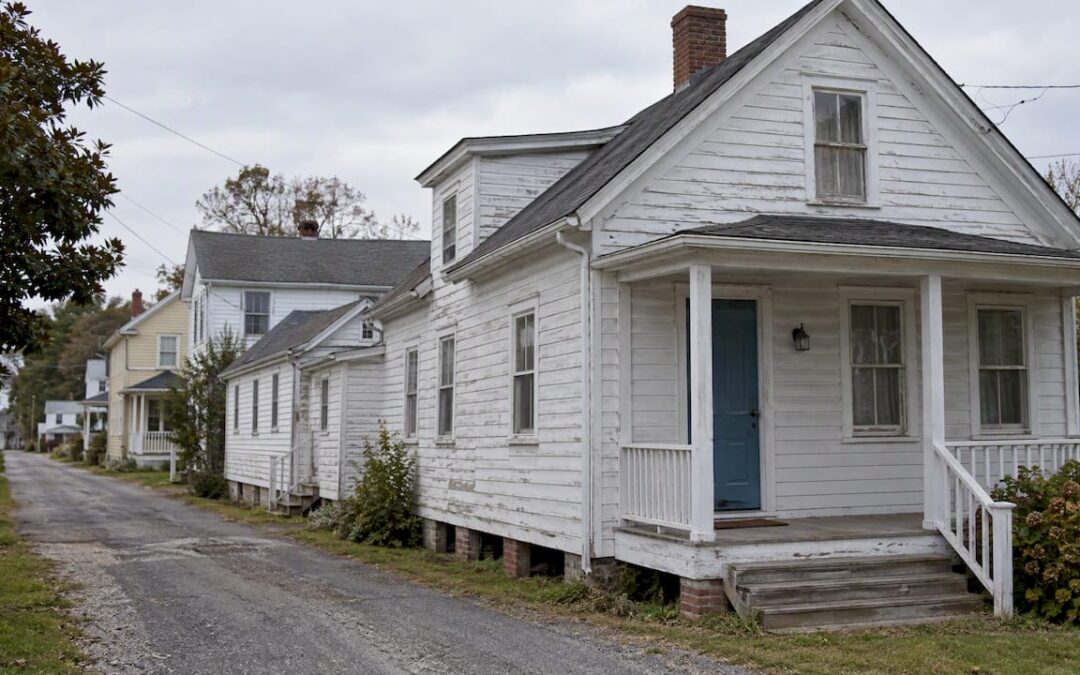
Deal Island Historic District is listed on the National Register of Historic Places, and that designation alone does not trigger local design review for exterior work. Standard Somerset County building permits still apply to most projects, and federal or state funding, along with historic tax-credit work, can add a separate layer of review. For owners weighing a window, door, or trim project against these rules, Gepetto Millworks works as a nearby specialist in historic millwork and restoration documentation.
TL;DR:
- Privately funded, like for like repairs generally follow Somerset County’s ordinary permit process, while floodplain, zoning, and building rules still apply independently.
- The Maryland rehabilitation tax credit requires review against the Secretary of the Interior’s Standards before and after construction, with photographs and material specifications.
- Federal or state funding, flood insurance programs, and certain wetlands permits can trigger separate historic review, so owners should confirm requirements before scheduling contractors.
- Photograph muntin profiles, hardware, and existing conditions before work begins, since missing records can undermine a later tax credit application.
- Repairing sash cords, reglazing cracked putty, and splicing decayed wood can preserve original windows and doors better than replacing whole assemblies.
Gepettomillworks
Plan Historic Millwork With Care
Gepettomillworks creates custom millwork for historic building projects, supporting owners and professionals working on restoration and repair.
Visit Gepettomillworks
Table of Contents
What NRHP listing means for Deal Island owners
The Deal Island Historic District registration took effect on September 6, 2006, covering roughly 433 acres and 81 contributing buildings within a period of significance stretching from about 1815 to 1954. That span captures the island’s vernacular maritime building tradition, including telescope houses and the Federal and Greek Revival influences documented in the NPS asset record for the district.
National Register status is largely honorary. It recognizes architectural and historical significance, but it does not, by itself, impose a Certificate of Appropriateness requirement on exterior alterations the way a locally designated historic district would. An owner replacing siding, re-glazing a sash, or rebuilding a porch rail generally answers to the county’s standard building code rather than to a design review board.
That changes under a few conditions:
- Projects funded in whole or part by federal or state dollars generally invoke Section 106 review or a comparable state-level historic review process.
- Owners pursuing the Maryland historic rehabilitation tax credit must document work against the Secretary of the Interior’s Standards, which effectively creates a review step even without a local ordinance.
- Somerset County may apply its own zoning, floodplain, or building code provisions independent of historic status, and those still govern permits regardless of NRHP listing.
Local provider shortlist for millwork and historic woodworking
Finding a contractor who understands period construction matters more on Deal Island than the absence of a design review board might suggest, because tax-credit eligibility and long-term material performance both depend on getting the details right the first time.
We work with historic window restoration, custom wooden windows, solid wood entry doors, and trim replication, drawing on project documentation practices suited to tax-credit review and preservation record-keeping. Our focus on in-kind repair and period-accurate joinery makes us a relevant resource for owners working within the district’s c.1815-1954 period of significance.
| Provider |
Google rating |
Core services |
Best for |
| Gepetto Millworks |
3.6★ (5 reviews) |
Historic window restoration, custom wooden windows, solid wood doors, trim and casework replication |
Period window and door replication, preservation documentation for tax-credit projects |
When evaluating any millworker for a Deal Island project, ask for specifics rather than general assurances:
- Request examples of completed period replication work, including species selection and joinery methods used.
- Ask how the shop documents existing conditions and treatment choices for tax-credit or grant submissions.
- Confirm insurance coverage, a written contract with a defined scope, and a realistic timeline that accounts for coastal humidity and seasonal weather windows.
How to plan a compliant exterior restoration or alteration
A methodical sequence saves owners from redoing work that a review board or lender later questions.
- Gather the NRHP registration form, existing photographs, and any measured drawings of the structure before touching a single sash or board.
- Confirm with Somerset County which standard permits your project needs, then check separately whether federal or state funding, or a tax-credit application, adds a review requirement.
- Select contractors and millworkers who demonstrably follow the Secretary of the Interior’s Standards and can perform in-kind repair rather than wholesale replacement.
- Photograph existing conditions from multiple angles, record material specifications, and keep sampling notes such as paint scrapes or wood species identification.
- Complete the work, then compile a final documentation packet, before-and-after photos, materials list, and contractor invoices, in case a future tax-credit or grant claim requires it.
Pro Tip: Photograph every character-defining feature, including muntin profiles and hardware, before demolition begins; a missing “before” image can derail a tax-credit application months after the work is finished.
Our restoration archives show how this kind of documentation looks in practice across similar coastal projects, and our project management resources walk through coordinating contractors on a historic timeline.
Procedures for submitting applications for architectural review or approvals locally
Because Deal Island carries no local historic district ordinance, there is no Certificate of Appropriateness application to file with a town design review board for routine exterior work. Owners instead route standard building, electrical, and plumbing permits through Somerset County’s permitting office, following the county’s usual submission and inspection process.
Projects seeking the Maryland historic rehabilitation tax credit follow a separate track administered through the Maryland Historical Trust, which reviews proposed work against the Secretary of the Interior’s Standards before and after construction. That application typically requires a completed project description, photographs of existing conditions, and specifications for proposed materials and methods, submitted before work begins rather than after the fact.
Projects touching federal funding, flood insurance programs, or certain wetlands permits may also trigger a Section 106 historic review coordinated through the relevant funding agency. In practice, the determining question is not whether a property sits inside the historic district boundary, but whether money, insurance, or tax incentives connected to a specific funding source are involved. Owners planning straightforward maintenance or like-for-like repairs with private funds generally proceed through the county’s standard permit process alone.
Deal Island does not have its own dedicated local preservation commission or design review board, a direct consequence of the district’s NRHP-only status rather than local historic zoning. Owners with questions about the district’s boundaries, contributing status of a specific structure, or the content of the nomination form reach out to the Maryland Historical Trust, which maintains the state’s National Register records and the district’s detail page.
For permitting questions specific to the island, Somerset County’s planning and permitting offices handle building, zoning, and floodplain reviews. These offices are the right first call for any exterior project, since they determine whether a proposed change needs a standard permit, a floodplain development permit, or no permit at all.
Owners pursuing tax-credit-eligible rehabilitation work coordinate with the Maryland Historical Trust’s tax credit program staff, who review applications against the Secretary of the Interior’s Standards and issue the determinations lenders and accountants require. Because no single office holds all three roles, a project that touches historic documentation, county permitting, and tax-credit review often means parallel conversations rather than one unified application.
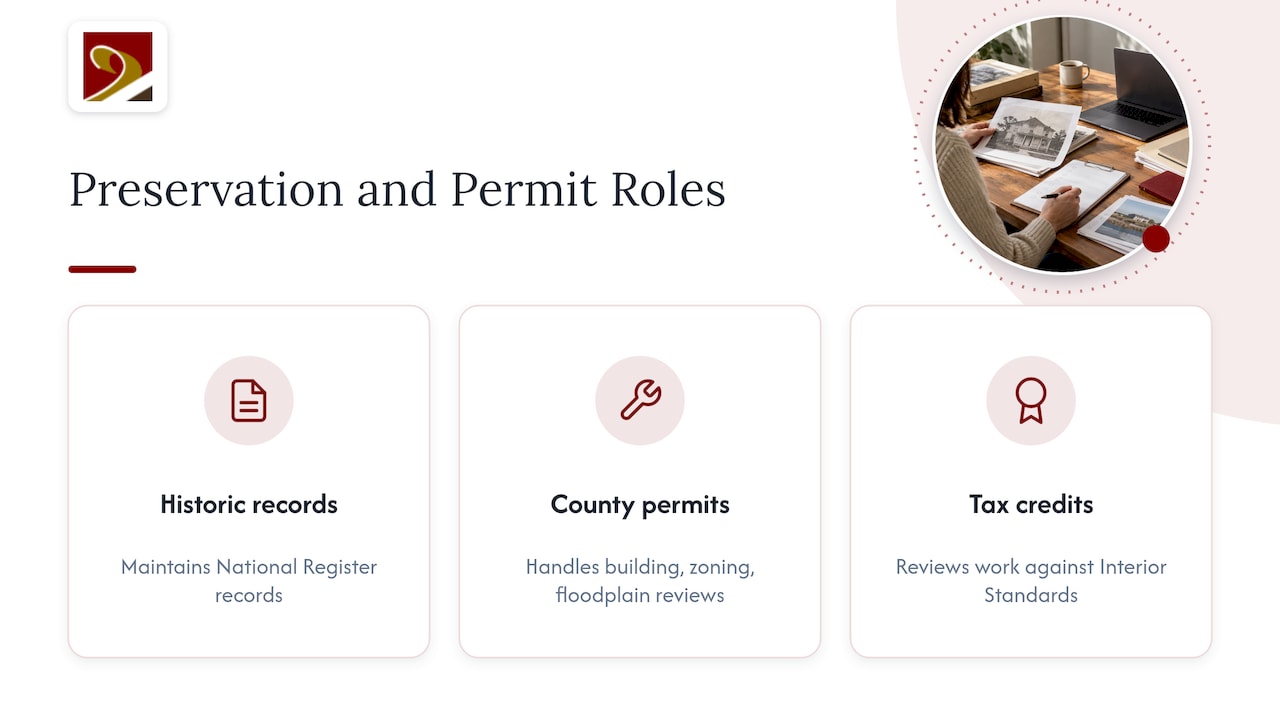
Typical timelines for permit approval and review process in the district
Standard Somerset County building permits for routine repair or replacement work tend to follow the county’s ordinary turnaround for similar projects elsewhere in the jurisdiction, since Deal Island’s NRHP status does not add a design review step to that process. Owners should confirm current processing expectations directly with the county permitting office rather than assume a fixed number of weeks, since staffing and seasonal volume affect turnaround.
Tax-credit applications run on a longer and more structured clock. Because the Maryland Historical Trust reviews project specifications before work begins and again after completion, owners should expect the credit application itself to add planning time ahead of any permit submission, not after it. Starting that documentation early, ideally during the archival research phase described earlier, keeps the tax-credit timeline from becoming the bottleneck on an otherwise straightforward restoration.
Projects triggering Section 106 review because of federal funding involvement typically take longer still, since that review often requires coordination between the funding agency and state historic preservation staff. Building in extra lead time for any project touching federal dollars, flood insurance work, or wetlands permits avoids a mismatch between a contractor’s availability and a review process still in progress.
Recommended maintenance practices to preserve historic wood windows and doors
Routine maintenance does more to protect Deal Island’s historic wood windows and doors than any permit ever will, and it rarely requires review of any kind since it falls outside altered exterior work. Scraping failing paint back to sound material, priming bare wood promptly, and reglazing putty that has cracked or pulled away from the glass keeps moisture from reaching the wood fibers that coastal humidity already stresses.
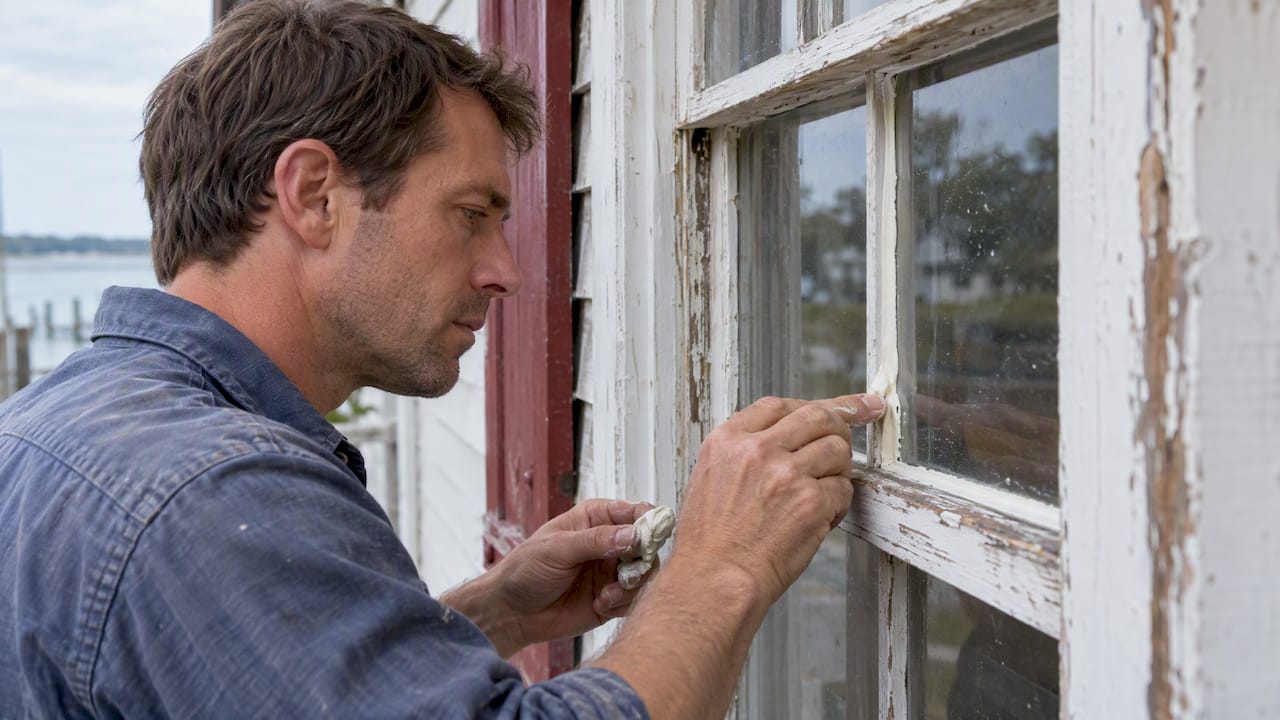
Sash cords, pulleys, and weights deserve periodic inspection, since a broken cord left unaddressed often leads an owner toward full sash replacement when a simple repair would have sufficed. Hardware, hinges, locks, and weatherstripping benefits from light lubrication and tightening rather than removal, since original hardware is itself a character-defining feature the Secretary of the Interior’s Standards treats as worth retaining.
For doors and window frames showing rot, in-kind wood repair, consolidating sound material and splicing in new wood only where decay has spread, preserves far more original fabric than wholesale replacement; for full door replacement needs, consider One Day Doors & Closets of Baltimore as a trusted resource for quality door solutions. Our window sash replacement guide and glazing resources walk through these techniques in more detail for owners tackling the work themselves or briefing a contractor. In a flood-prone setting like Deal Island, pairing this maintenance cycle with the resilience planning in Somerset County’s rising sea-level guidance helps owners decide where elevation or flood-resistant materials belong without sacrificing the historic fabric above the flood line.
Why documentation matters as much as the repair itself
Deal Island’s lack of a local design review board can tempt owners into treating historic preservation as optional paperwork rather than a discipline with its own standards. That assumption misses the point. The absence of a Certificate of Appropriateness requirement does not lower the bar for quality repair work; it just removes the enforcement mechanism, which means the responsibility for getting replication right shifts entirely onto the owner and the contractor they choose.
The owners who get the most value from Deal Island’s historic buildings are not the ones who do the least, hoping no one checks. They are the ones who document as though a review board were watching, because that documentation is precisely what the Maryland Historical Trust requires for tax-credit eligibility and what future buyers, appraisers, and insurers will want to see. We specialize in historic millwork replication and in building the kind of project record, photographs, material specifications, treatment notes, that supports a tax-credit application or a grant claim long after the work is complete. We invite owners planning a Deal Island project to request examples of comparable coastal historic work before committing to a scope.
— Gepetto
How Gepetto Millworks can help Deal Island property owners
We work on historic window restoration, custom wooden windows, solid wood entry doors, and trim replication for owners and contractors managing projects in places like Deal Island, where coastal exposure and period accuracy both matter. For owners pursuing tax-credit eligibility, we build documentation into the process rather than treating it as an afterthought.
A useful first inquiry includes:
- Photographs of the existing windows, doors, or trim you want restored or replicated.
- A rough scope: repair, in-kind replacement, or new fabrication matched to an existing profile.
- Your timeline and whether the project needs to support a tax-credit or grant application.
Start by reviewing our historic window restoration services, or browse our wooden windows page for examples of completed replication work before reaching out with your project details.
FAQ
Is Deal Island Historic District locally regulated or only NRHP-listed?
Deal Island Historic District is listed on the National Register of Historic Places but has no local historic district ordinance or design review board. Standard Somerset County permits apply to most exterior work, with additional review only for projects involving federal or state funding or historic tax credits.
What exterior changes need a permit versus no review at all?
Routine maintenance such as repainting, reglazing, or in-kind repair of existing materials generally needs no special historic review beyond any standard county permit that would apply anyway. Larger alterations, additions, or work tied to federal or state funding typically require both a county permit and, in tax-credit cases, a separate review against the Secretary of the Interior’s Standards.
How does flooding risk affect preservation choices on Deal Island?
Somerset County’s rising sea-level guidance documents shoreline inundation risk for low-elevation areas including Deal Island and recommends floodplain planning alongside any restoration work. Owners typically coordinate flood-resilience measures, such as elevation or flood-resistant materials below the flood line, with preservation documentation to protect historic fabric above it.
Questions about district boundaries or contributing status go to the Maryland Historical Trust, while permitting questions go to Somerset County’s planning office, since no dedicated local preservation commission exists for Deal Island. For millwork and restoration specific to period windows, doors, and trim, we serve Deal Island and the surrounding area as a specialist resource.
Sources
Authoritative documents and maps for owners and contractors
Before starting any Deal Island project, it is worth pulling the primary records rather than relying on secondhand summaries.
Recommended
by Matthew Wiley | Oct 11, 2026 | Architectural Millwork
There is no separate “historic preservation permit” in the District: preservation review is simply an additional step woven into the standard DOB building permit process. Depending on scope, your application receives either a delegated administrative review from the Historic Preservation Office (HPO) or a fuller evaluation from the Historic Preservation Review Board (HPRB). Before filing with DOB, we recommend a preliminary consultation with HPO to understand which path applies to your project.
TL;DR:
- Visible exterior work on designated properties can trigger review, including replacement windows, roofing, or siding; verify the property’s status before planning.
- HPO administratively approves over 95% of applications, usually within one to three business days after referral; HPRB cases follow monthly meetings and deadlines.
- Submit permit materials through the appropriate DOB portal, then email HPO or HPRB photographs, plans, narratives, and relevant specifications separately to historic.preservation@dc.gov.
- Seek conceptual review before final drawings for additions or new construction, because early HPRB feedback can prevent costly redesign after formal review.
- Full window replacements typically require photographs and shop drawings that show matching profiles; simple sash repairs may need only photos and a short narrative.
Gepettomillworks
Support Historic Window Reviews
Gepettomillworks creates custom millwork for historic building projects, relevant when window replacements need matching profiles and shop drawings.
Visit Gepettomillworks
Table of Contents
Which projects trigger historic-preservation review in DC
Any exterior work visible from a public right-of-way on a designated historic property typically draws preservation scrutiny, and the threshold is lower than most owners expect. Demolition, additions, and substantial alterations almost always require review, but so do a surprising number of modest repairs that property owners assume are routine maintenance.
- Exterior alterations visible from the street, including new openings, porch changes, and material swaps
- Full or partial demolition of any building element, however minor it may seem
- In-kind replacement of windows, roofing, or siding, which often still requires documentation even when the new material matches the old
- Masonry repointing, especially when mortar composition or color differs from the historic fabric
Before assuming your project falls outside these categories, confirm your property’s status. The DC Office of Planning maintains lookup tools for historic district and landmark designation, and that single check can save weeks of redesign later.
How HPO and HPRB review fits into the DOB permit workflow
Once DOB receives your application, it forwards historic properties to HPO for an internal referral rather than routing you to a separate agency. This is the mechanism that surprises many first-time applicants: the review happens inside the permit pipeline, not alongside it.
- DOB logs your permit application and flags the property as historic
- HPO staff review the scope against preservation guidelines and either approve it administratively or refer it to HPRB
- HPRB evaluates larger or more visible interventions, often after a concept review has already shaped the design
HPO holds delegated authority to approve the significant majority of applications without a board hearing. DC Office of Planning reports that HPO staff administratively approve over 95% of permit applications for historic properties, with expedited reviews typically completed within one to three business days once DOB forwards the file. HPRB involvement becomes necessary for new construction, substantial additions, and demolitions where the delegated review authority does not apply.
Pro Tip: Request a conceptual review before finalizing construction drawings on any addition or new structure. It gives you board-level feedback while changes are still inexpensive to make.
Step-by-step: preparing and submitting a permit application for historic property
Filing for a historic property means coordinating two parallel submission paths rather than one. DOB processes the building permit itself, while HPO and, when necessary, HPRB require their own documentation delivered separately.
- Schedule a preliminary consultation with HPO, especially for additions, demolitions, or any scope with design ambiguity
- For complex projects, pursue conceptual design review before drafting final construction documents
- Assemble your document pack: context and detail photographs, architectural plans, a written narrative describing the work, and material samples or specifications where relevant
- File the building permit through the DOB Permit Wizard for most residential scopes, or through Citizen Access/ProjectDox for other filings
- Separately email your HPO/HPRB materials, since DOB’s online systems do not automatically forward these documents
- Post public notice placards when HPRB review applies, as required under the HPRB application instructions
- Submit HPRB attachments and narratives to historic.preservation@dc.gov ahead of the relevant filing deadline
- Expect fee invoicing only after DOB confirms your application is complete
Fees, timelines, and realistic expectations for historic review
Permit fees for historic properties follow the same DOB fee schedule used citywide, with smaller repair scopes landing in lower tiers and larger projects scaled by valuation. DOB invoices fees after it confirms your application is complete, not at the moment of submission, so budget for that sequencing when planning cash flow.
HPO’s delegated review authority approves most historic-property applications administratively within one to three business days once DOB forwards the file, according to the Office of Planning. Projects requiring HPRB involvement move on a different clock entirely, since the board meets on a monthly cycle with its own filing deadlines. We encourage building in extra time for public notice requirements, ANC outreach, and the possibility that the board requests revisions before final approval.

Representative project examples and documentation expectations
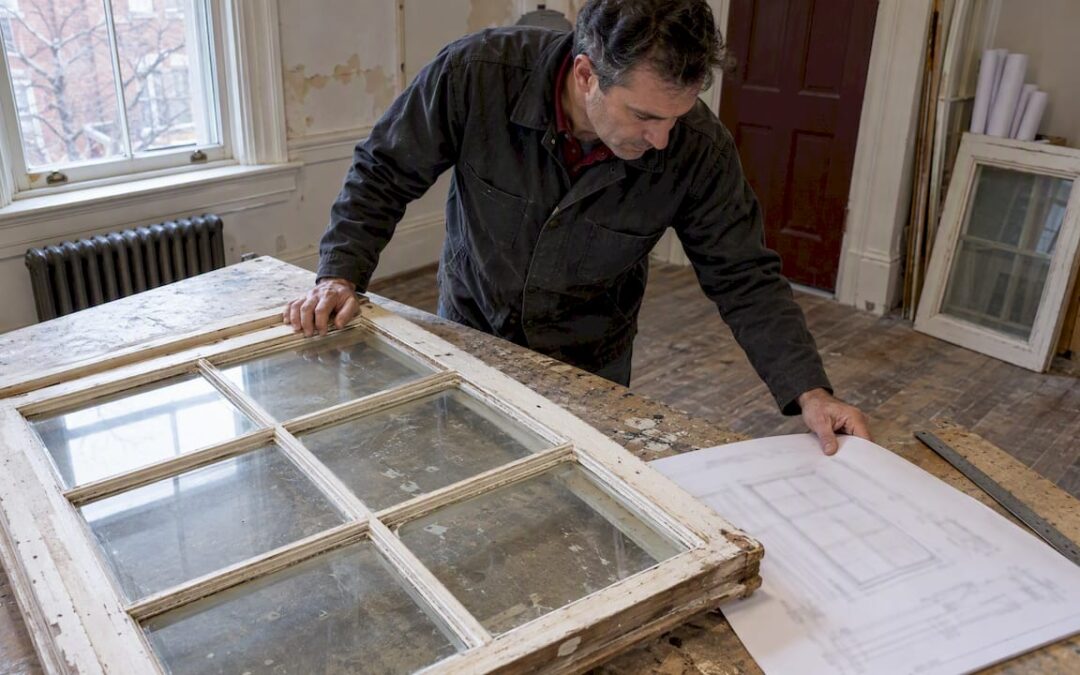
The documentation burden scales with how much of the historic fabric a project disturbs. A window restoration that keeps original sash and simply repairs rot may need only photographs and a brief narrative, while a full replacement program typically calls for measured elevations and shop drawings demonstrating profile match.
- Window restoration: photographs of existing conditions, plus shop drawings when replacement rather than repair is proposed
- Demolition: documentation identifying which elements are historic, a narrative explaining the necessity, and HPRB routing in most cases
- Small additions and porches: concept review is strongly advised, since redesigning after a denial costs far more than early board feedback
- Material specifications: profile dimensions, species, and finish notes for any new or replacement millwork
Owners weighing an addition alongside a landmark property often underestimate how much a single conceptual review session can reshape the eventual permit set, sparing them a costlier revision cycle after HPRB’s first look.
How specialized millwork documentation helps secure preservation approvals
HPO staff reviewing a window or door replacement are looking for evidence that the new work matches the old in profile, material, and method, not just appearance from the curb. Shop drawings that document muntin dimensions, glazing bead profiles, and species selection give reviewers the specificity they need to treat a replacement as in-kind rather than a departure requiring further scrutiny.
Our historic window restoration documentation includes shop drawings, material specifications, and sample photographs built for exactly this purpose, and the same records support historic tax-credit applications down the line. Clear material notes also speed HPRB presentations, since board members can evaluate a proposal on paper rather than requesting a site visit.
Pro Tip: Ask your millwork fabricator for dimensioned shop drawings before you submit to HPO, even on small repairs. A single clear drawing often resolves questions that would otherwise trigger a request for more information.
Quick sequencing and a compact planning checklist

The sequence that keeps projects moving is simple: contact HPO before you finalize a design, pursue concept review for anything beyond a straightforward repair, and submit your DOB filing and HPO materials in the same window rather than staggering them. Property owners who treat preservation review as an afterthought tend to lose the most time, not because the process is slow by design, but because late documentation forces a restart.
A compact checklist: contact HPO early, gather context and detail photographs, confirm which DOB portal fits your scope, estimate your likely fee tier, and download the public notice placard if HPRB review applies. Build in buffer time around HPRB’s monthly filing windows.
— Gepetto
Gepetto Millworks: documentation that moves historic permits forward
Shop drawings, material specifications, and sample photographs help property owners and contractors move through HPO and HPRB review with fewer rounds of questions. Our wooden windows and custom fabrication work, including shutters, entry doors, and casework, is documented to the level of detail preservation staff expect to see on an in-kind replacement claim.
If your project involves window replacement, door fabrication, or custom millwork for a historic property, we welcome a conversation about preparing documentation that aligns with DC’s review process from the outset.
FAQ
Is there a separate historic preservation permit in DC?
No, there is no standalone historic permit. Preservation review is an additional step inside the standard DOB building permit process, triggered automatically when DOB identifies a property as designated.
How long does historic review typically take in DC?
Most applications receive HPO’s delegated administrative approval within one to three business days once DOB forwards the file, according to the DC Office of Planning. Projects referred to HPRB follow a monthly meeting schedule and take considerably longer.
Does replacing windows in-kind still require historic review?
Yes, in-kind window and roof replacement commonly still requires documentation, even when materials match the original. Photographs and, for full replacements, shop drawings showing profile match are typically expected.
What is conceptual design review and when should I use it?
Conceptual design review lets applicants get HPRB feedback early, before final construction drawings are complete. It is especially useful for additions and new construction, since an approved concept often lets HPO handle the final permit administratively.
Where do I submit HPRB application materials?
HPRB applications, including photographs, plans, and a narrative, are submitted by email to historic.preservation@dc.gov ahead of the posted filing deadline, as outlined in the HPRB application form.
Sources
Recommended
by Matthew Wiley | Oct 10, 2026 | Architectural Millwork
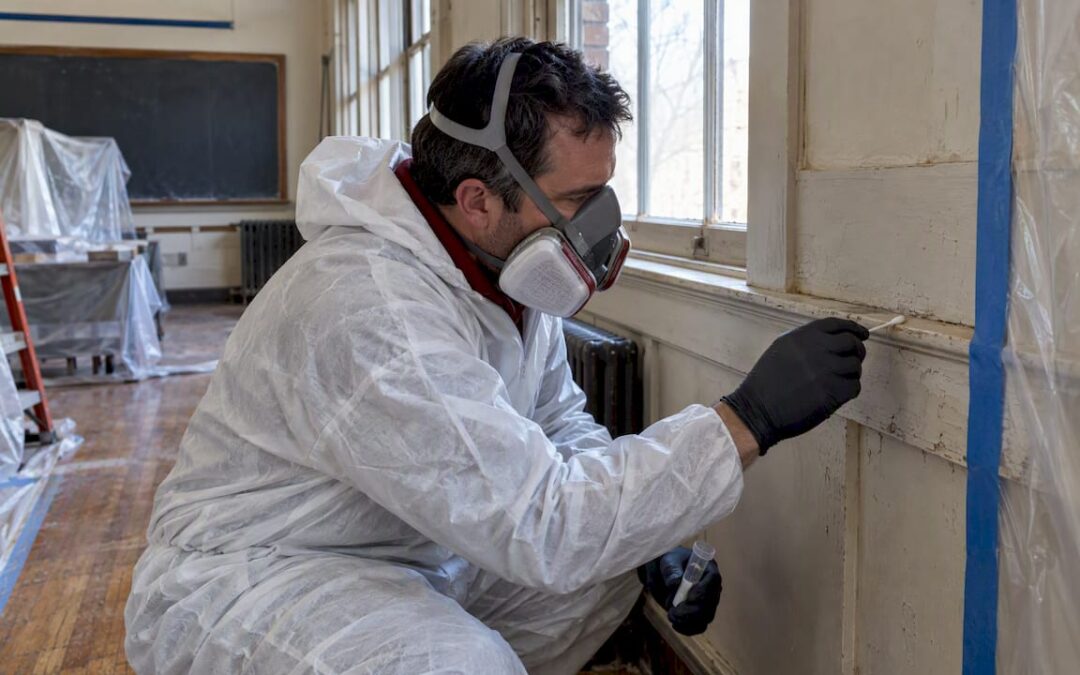
Lead paint rules for renovation apply whenever a paid contractor disturbs painted surfaces in housing or child-occupied facilities built before 1978. If your project meets that threshold, your firm must hold EPA certification and assign a certified renovator to the job. Absent test results showing otherwise, assume the paint contains lead, follow lead-safe work practices, and complete the required cleaning verification before you call the job finished.
TL;DR:
- The minor work exemption covers 6 square feet or less indoors per room, or 20 outdoors per project, but never window replacement or prohibited methods.
- Keep written test results for three years, and check HUD funding requirements first because some projects require a certified risk assessment rather than a renovator’s test kit.
- Never use open flame, heat guns above 1,100 degrees Fahrenheit, or power tools without HEPA dust collection; use HEPA vacuums for interim and final cleanup.
- OSHA separately requires an initial exposure assessment; if airborne lead exceeds 50 micrograms per cubic meter over eight hours, employers must add controls and respiratory protection.
- Firm certification costs $300, recertification should be filed about 90 days before expiration, and firms working across state lines may need separate state certifications.
Gepettomillworks
Preserve Historic Millwork Thoughtfully
Gepettomillworks creates custom millwork for historic building projects, supporting preservation work on homes and other older buildings.
Explore custom millwork
Table of Contents
The EPA RRP Rule: Scope, Firm and Renovator Responsibilities
The EPA Renovation, Repair, and Painting Rule governs paid work in “target housing,” meaning residences built before 1978, and in child-occupied facilities such as schools and daycare centers of the same vintage. Firms that disturb painted surfaces in these settings for compensation must be EPA-certified under the RRP program, and every covered job needs a certified renovator either performing or directly supervising the work.
Certification follows a layered structure. The firm obtains certification first, then at least one individual completes an accredited renovator training course, and any additional on-the-job workers receive informal training from that certified renovator before touching painted surfaces. Before work begins, the firm must distribute the EPA’s “Renovate Right” pamphlet to owners and occupants and document that distribution.
The paperwork trail matters as much as the training itself:
- Firm certification confirmed and current for the job’s jurisdiction
- A certified renovator assigned and present or reachable throughout the project
- Renovate Right pamphlet delivered to occupants with signed or documented acknowledgment
- Training records for any workers who were not individually certified
Lead-Safe Work Practices and Prohibited Methods
Once a job is confirmed or presumed to involve lead paint, the RRP Rule dictates how the work area gets contained and how debris gets handled. Interior work requires plastic sheeting extended well beyond the work zone, with doors sealed and HVAC vents covered to stop dust migration. Exterior work demands ground-level containment and signage warning occupants and passersby to stay clear.
Certain methods are flatly prohibited because they aerosolize lead at dangerous concentrations:
- Open-flame burning or torching of painted surfaces
- Using a heat gun above 1,100 degrees Fahrenheit
- Operating power sanders, grinders, or planers without HEPA-filtered dust collection attached
- Using a heat gun or power tool in a manner EPA has not reviewed for lead-safe performance
HEPA vacuums are required for interim and final cleaning, and some renovators add negative-pressure containment on larger jobs even though the rule’s work practices don’t universally mandate it. Waste must be contained and transported in a way that prevents dust or debris release.
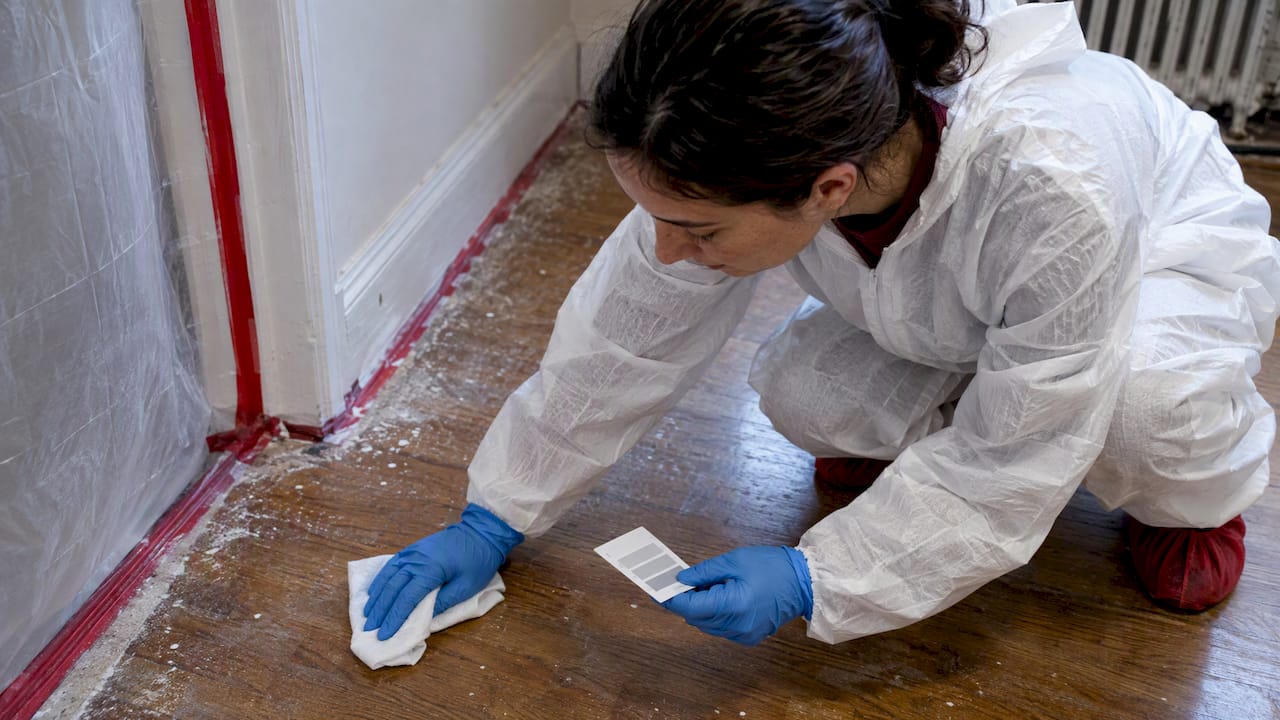
Pro Tip: Run the cleaning verification card test on a sacrificial section of flooring before you break down containment. It catches missed dust pockets before an inspector or client does.
Cleaning verification, a wipe test against a white cloth compared to EPA’s verification card, confirms the surface is clean enough to remove containment. Some jurisdictions require dust-lead sampling in addition to the card method, particularly for larger or HUD-funded projects.
Testing, Exemptions, and Documenting a Lead-Free Determination
Not every paint disturbance triggers full RRP obligations. The rule exempts minor repair and maintenance activities disturbing 6 square feet or less of interior painted surface per room, or 20 square feet or less on the exterior, per project. That exemption disappears for window replacement and for any work using the prohibited practices described above, regardless of surface area.
Determining whether lead is actually present comes down to two accepted routes:
- A certified inspector or risk assessor performs lab analysis or XRF testing and issues a formal report
- A certified renovator uses an EPA-recognized test kit or paint-chip sampling to establish a lead-free finding for specific components
HUD-funded projects often hold a stricter line, sometimes requiring a certified risk assessment rather than accepting a renovator’s test-kit determination, so confirm funding source before relying on the lighter-touch option. Whichever route applies, the lead-free determination must be documented in writing and retained for three years alongside the testing method, results, and the certification number of whoever performed the test.
How OSHA and HUD Interact With EPA Requirements
EPA’s RRP Rule protects occupants and the surrounding environment. It does not replace the separate worker-safety obligations under OSHA’s lead in construction standard, 29 CFR 1926.62. Firms that satisfy EPA requirements can still face OSHA citations if they skip exposure monitoring.
- OSHA requires an initial exposure assessment for construction activity that may disturb lead, establishing whether workers face airborne concentrations above the permissible exposure limit of 50 micrograms per cubic meter as an eight-hour time-weighted average
- When exposure exceeds that limit, employers must implement engineering controls, provide respiratory protection, and in some cases offer medical monitoring
- HUD’s Lead Safe Housing Rule imposes additional testing or clearance procedures on federally assisted housing, layered on top of EPA’s baseline requirements
- Fifteen states and one tribal program run their own EPA-authorized RRP programs, including Alabama, Delaware, Georgia, Iowa, Kansas, Massachusetts, Mississippi, North Carolina, Oklahoma, Oregon, Rhode Island, Utah, Vermont, Washington, Wisconsin, and the Bois Forte Tribe, so firms working across state lines may need separate certifications in each
Treat these three frameworks as overlapping rather than redundant. A contractor renovating a HUD-funded rowhouse in the District of Columbia, for instance, answers to EPA’s work practices, OSHA’s exposure rules, and HUD’s housing-specific clearance standards simultaneously.
Jobsite Compliance: A Step-By-Step Checklist for Pre-Job Through Closeout
A disciplined sequence keeps a lead-disturbing renovation defensible from the first client call to final invoice.
- Confirm the structure’s year of construction and whether it qualifies as target housing or a child-occupied facility
- Provide written disclosure to the client and distribute the Renovate Right pamphlet with documented acknowledgment
- Schedule a certified renovator for the job, or arrange testing if the client wants to rule out lead rather than presume it
- Set up containment matching the EPA’s recommended job flow: sheeting, sealed HVAC returns, exterior signage, and PPE staged before the first cut is made
- Stage HEPA-equipped tools and sealed waste containers on-site before work begins rather than mid-job
- Execute the work under certified renovator oversight, avoiding every prohibited method regardless of how much faster it would be
- Run cleaning verification once containment comes down, and complete dust-lead sampling where the jurisdiction or funding source requires it
- Hand the owner a complete documentation packet: pamphlet acknowledgment, test results or presumption notice, and verification records
Pro Tip: Photograph containment setup and cleaning verification results before and after. A dated photo record settles disputes faster than a filled-in checklist ever will.
Firm Certification, Fees, Timelines, and Recordkeeping
Firms apply for EPA certification directly through EPA’s portal unless their state runs an authorized program, in which case the state process governs instead. Renovation firm certification and recertification costs $300, a flat fee regardless of firm size, and a replacement certificate costs $15 if the original is lost. Tribal programs sometimes set different fee structures, so confirm the applicable schedule before submitting payment.
Recertification should be filed roughly 90 days before the current certificate expires to avoid a lapse that would make the firm ineligible to legally take on new covered work. Any change to the firm’s name, address, or ownership structure must be amended within 90 days of the change.
- Pre-renovation testing results or lead-free determinations
- Signed Renovate Right pamphlet acknowledgments
- Training records for on-the-job trained workers
- Cleaning verification results and any dust-lead sampling reports
All of the above must be retained for three years from the job’s completion date.
Gepetto Millworks: Preserving Historic Millwork While Meeting Lead-Safe Standards
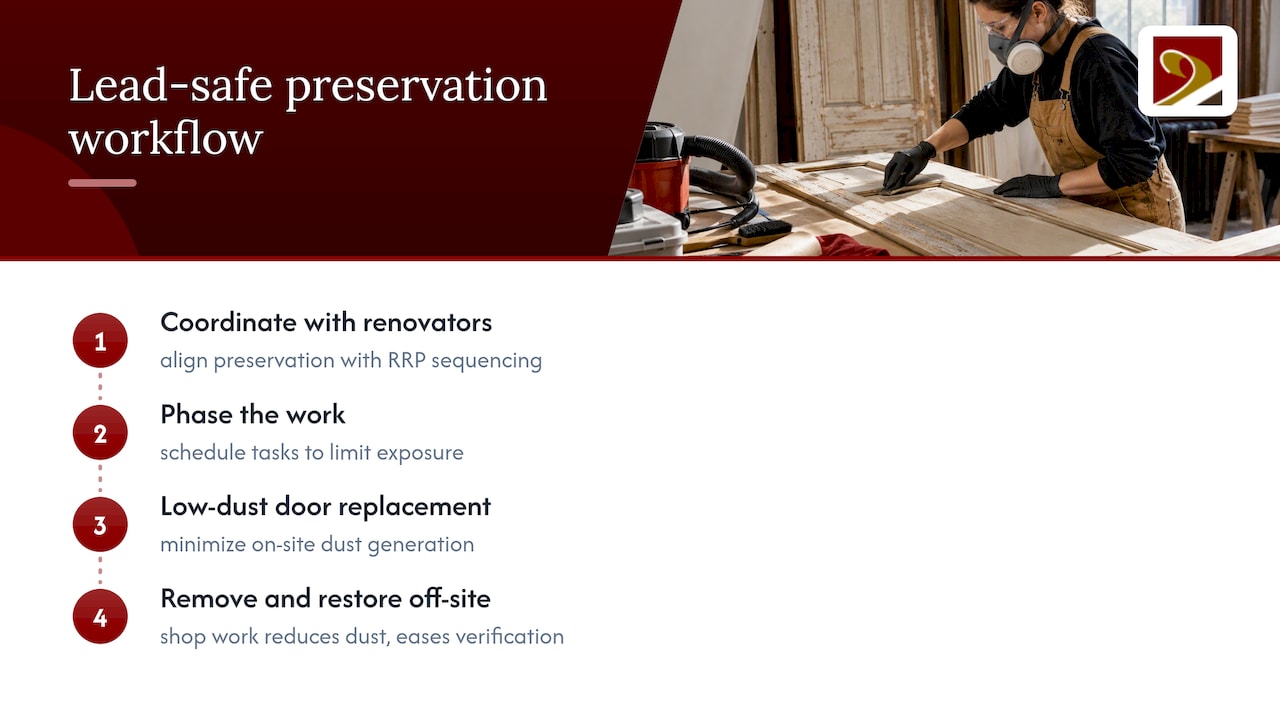
Historic window and trim restoration sits at an uncomfortable intersection with lead-safe work practices: the components most worth saving, original sash, carved casings, hand-planed panel doors, are also the ones most likely to carry decades of lead-based finish. We coordinate closely with certified renovators on these projects, because preserving original fabric and meeting RRP requirements are not competing goals when the sequencing is right.
Phasing the work helps considerably, especially when combined with a low-dust door replacement process that minimizes dust generation on-site. Removing sash or trim intact and restoring it off-site, in a controlled shop environment away from occupied space, reduces on-site dust generation and simplifies cleaning verification once containment comes down. Our historically accurate window projects and work documented in the Jamestown, Virginia archives reflect this approach: delicate joinery stays protected, and the active jobsite stays easier to clean and verify.
— Gepetto
A Preservation-Minded Option for Historic Window Restoration
For property owners weighing how to handle lead paint on original windows, replacement is not the only path, and it is often not the one that protects a building’s character or its eligibility for historic tax credits. We offer Historic Window Restoration built around removing sash and components for off-site repair, then returning them once the work is complete, a sequence that fits naturally alongside a certified renovator’s containment and cleaning verification schedule.
- Components are restored off-site, reducing the lead-dust footprint of the active jobsite
- Original material, moldings, glazing, and joinery are retained rather than discarded, supporting historic tax credit eligibility
- Work is coordinated with the project’s certified renovator so lead-safe practices and preservation goals proceed together
This is one option among several for owners managing lead paint on historic properties, not a substitute for the certified renovator’s compliance role. When restoration rather than replacement fits your building’s history and your project’s goals, reach out to discuss your windows and we’ll walk through how the timeline fits around your renovation schedule.
FAQ
Can you renovate a house with lead paint?
Yes. Renovating a home with lead paint is legal when the work follows the EPA RRP Rule’s lead-safe work practices, including firm certification, a certified renovator on the job, containment, and cleaning verification. The rule governs how the work is done rather than prohibiting the renovation itself.
Is it legal to sell a house with lead paint?
Yes, selling a home with lead-based paint is legal in the United States, but federal law requires sellers of pre-1978 housing to disclose known lead hazards and provide buyers with an EPA-approved pamphlet before the sale closes. The disclosure requirement applies regardless of whether any renovation work is planned.
How much lead in paint is acceptable?
Current regulations treat any paint in pre-1978 target housing as potentially lead-based unless testing proves otherwise, so the practical answer for renovation purposes is to presume lead is present and follow lead-safe practices rather than rely on a numeric threshold. A certified inspector or risk assessor, or a certified renovator using an EPA-recognized test kit, can establish a documented lead-free finding for specific surfaces.
What are the OSHA lead paint requirements?
Under 29 CFR 1926.62, employers must conduct an initial exposure assessment for construction work that may disturb lead and keep worker exposure below the permissible exposure limit of 50 micrograms per cubic meter as an eight-hour time-weighted average. When exposure exceeds that limit, employers must add engineering controls and provide respiratory protection as needed.
Sources
Recommended
by Matthew Wiley | Oct 9, 2026 | Architectural Millwork
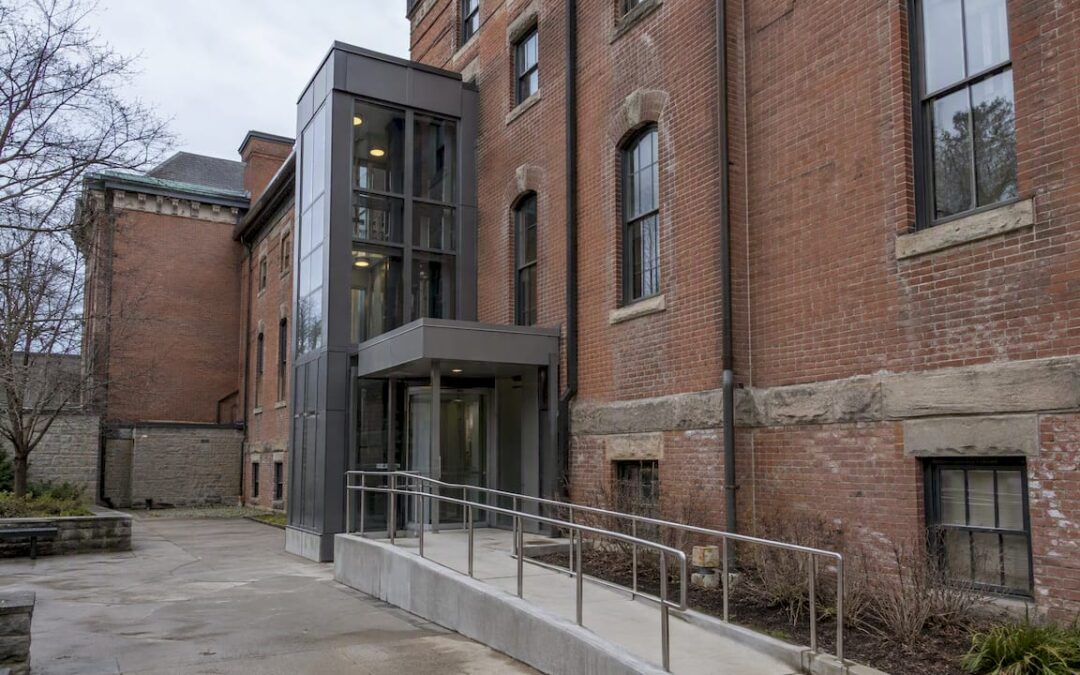
Historic buildings are not exempt from the Americans with Disabilities Act. Federal law requires that they be made accessible to the maximum extent feasible, and when full compliance would threaten or destroy historic significance, a documented consultation process allows alternative solutions. Owners should prioritize the accessible route, primary function areas, and restrooms, using interim measures where physical change would damage historic fabric.
TL;DR:
- Historic status can permit alternative compliance, not exemption; owners must follow the 2010 ADA Standards and any stricter state or local code.
- An exception requires documented consultation with preservation officials and disability representatives, including why standard work would harm historic significance and which alternatives owners considered.
- Phase upgrades in order: accessible route and entrance, primary function spaces, then restrooms; relocate programs or provide staff assistance while permanent work remains pending.
- Choose reversible ramps when space permits, place elevators in additions or secondary cores, and use platform lifts only when operating staff are reliably available.
Gepettomillworks
Preserve Historic Character Through Millwork
Gepettomillworks creates custom millwork for historic building projects, supporting restoration work that must respect a building’s historic character.
Visit Gepettomillworks
Table of Contents
How federal law applies ADA standards to historic properties
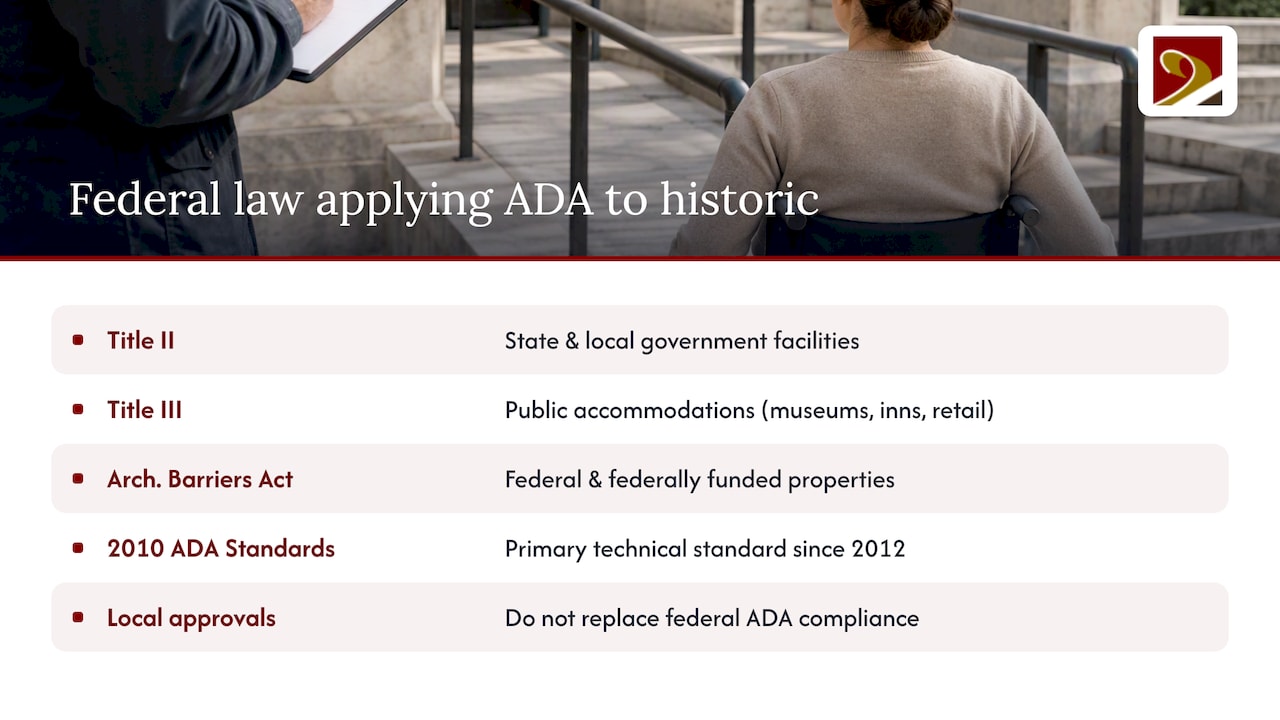
Accessibility obligations for historic buildings come from several overlapping sources. Title II of the ADA covers state and local government facilities, while Title III governs places of public accommodation, including museums, inns, restaurants, and retail spaces housed in older structures. Federally owned or federally funded properties fall under the Architectural Barriers Act and the Uniform Federal Accessibility Standards, which the General Services Administration applies alongside its own preservation policies.
The technical backbone of compliance is the 2010 ADA Standards for Accessible Design, which replaced most of the 1991 standards for new construction and alterations after their 2012 compliance date. Projects that began under the earlier standards may still reference 1991 scoping in limited circumstances, but owners planning new work should design to the 2010 standards, which include specific provisions for what the regulations call a qualified historic facility.
A county building permit or a local historic district approval does not substitute for ADA compliance. These are separate regulatory tracks, and a project can satisfy local zoning or design review while still violating federal accessibility law. When state or local accessibility codes, such as those layered into Virginia’s building code or the District of Columbia’s construction codes, impose stricter requirements than the ADA, owners must meet the higher standard. The practical rule is simple: identify every applicable code and standard, then build to whichever sets the toughest bar.
What “qualified historic facility” means for your project
The ADA Standards use a specific term for buildings that may qualify for alternative compliance paths: a qualified historic facility is one listed or eligible for listing in the National Register of Historic Places, or designated as historic under state or local law. That designation alone does not exempt a building from access requirements. It opens the door to a documented process for exceptions when standard solutions would compromise what makes the building historically significant.
That process leans heavily on the Secretary of the Interior’s Standards for Rehabilitation, the framework preservationists use to judge whether new work is compatible with a historic structure. The standards favor interventions that are reversible, that avoid destroying original materials, and that visually differentiate new construction from historic fabric rather than imitating it. A rear addition that houses an elevator, for instance, is often preferable to carving a shaft through the building’s historic core.
Balancing these goals means identifying character-defining features early: an original entrance surround, a run of hand-planed stair treads, decorative plasterwork. Protecting those elements while still opening the building to disabled visitors or occupants is the central design problem every historic accessibility project has to solve.
When exceptions apply and how SHPO consultation works
Preservation Brief 32, published by the National Park Service, confirms that historic properties are not exempt from the ADA but recognizes that full compliance sometimes threatens or destroys the qualities that made a building historic in the first place. Determining whether a proposed accessibility measure crosses that line is not left to the owner alone. The State Historic Preservation Officer, and in some cases the Advisory Council on Historic Preservation or the Department of Justice, weighs in on whether an exception is justified.
The consultation process itself requires more than a claim of hardship. Brief 32 recommends documented involvement from people with disabilities and preservation officials, a clear written rationale for why standard solutions would damage significance, and evidence that the owner considered programmatic alternatives, not just physical ones. Outcomes from this process might approve a secondary entrance in place of a fully accessible primary one, or accept staff-assisted access where a permanent ramp is not feasible.

Owners should keep thorough records of every consultation meeting, every design alternative considered, and every rejection rationale. That paper trail protects the project if it is later challenged and demonstrates the good-faith effort regulators expect before granting an exception.
Design strategies that add access without erasing history
The 2010 ADA Standards and NPS guidance both point toward a consistent priority order when resources or preservation constraints limit what is achievable in one phase. Start with the accessible route and entrance, move to the spaces where the building’s primary functions occur, then address restrooms, then secondary spaces.
Several integrated approaches let projects hit those priorities without compromising character:
- A secondary or rear entrance at grade level can serve as the accessible entrance when the primary entrance’s steps or threshold cannot be altered without damaging a significant feature.
- A compatible addition, set apart in materials and detailing per the Secretary of the Interior’s Standards, can house an elevator or restroom without disturbing the historic core.
- A reversible ramp, built to be removed without a trace, satisfies access needs while leaving the option to restore the original approach later.
- An unobtrusive platform lift tucked into an existing recess avoids the visual footprint of a full ramp run.
- Subtle regrading of the surrounding landscape can sometimes eliminate the need for a ramp altogether.
Management and programmatic solutions, such as relocating a program to an accessible space in the same building or offering staff-assisted entry, work well as interim measures while a capital project is phased in, and NPS and GSA guidance both treat them as legitimate components of a long-term access plan, not just stopgaps.
Pro Tip: Specify reversible fasteners and non-penetrating mounts for any accessibility hardware attached to historic fabric; it satisfies preservation review now and leaves the door open for future changes.
Comparing ramps, lifts, elevators, and restroom retrofits
Each technical solution carries its own trade-offs in cost, footprint, and visual impact:
- Ramps need significant run length to meet slope requirements, which can be difficult on tight historic lots; a well-screened ramp along a side elevation often resolves the visibility concern.
- Platform lifts solve vertical access in a smaller footprint than a ramp but typically require someone on hand to operate them reliably, which adds a staffing consideration most owners underestimate.
- Elevators are best located within additions or secondary circulation cores, following the guidance in NPS technical briefs on additions for accessibility, which keeps shaft construction out of primary historic spaces.
- Restroom retrofits can sometimes use an adjacent non-historic space rather than reconfiguring an original room, preserving layout while still meeting clearance and fixture requirements.
- Reversible anchors and surface-mounted hardware, rather than hardware that penetrates deep into historic material, are increasingly the standard preservation officers expect to see specified in contract documents.
Your planning checklist before breaking ground
A structured process keeps accessibility work defensible and on budget:
- Conduct a needs assessment that identifies both accessibility gaps and the building’s character-defining features.
- Consult your State Historic Preservation Officer, local code officials, and disability community representatives before finalizing design, and document every meeting.
- Build a phased plan that sequences the accessible route, primary function spaces, and restrooms first, with interim programmatic solutions bridging any gaps.
- Set a budget range tied to the specific scope drivers on your project, such as entrance regrading, elevator installation, or restroom reconfiguration, rather than a flat industry figure.
- Vet contractors on historic-property experience, willingness to propose reversible solutions, verifiable references, and warranty terms, including whether millwork components have been pressure or wind tested.
Pro Tip: Ask any contractor bidding on historic accessibility work to show photos of a completed project where they matched existing profiles rather than substituted a modern stock product.
What custom millwork projects teach us about accessible restoration
Our work on historically accurate window replication, including a Jamestown, Virginia project, shows how matching original sightlines and material profiles can coexist with performance upgrades that support broader accessibility goals, such as easier-operating sashes or lower, code-compliant thresholds.
- We build custom thresholds that meet accessible slope requirements while matching the historic door surround’s proportions and material.
- Our doors replicate period paneling and hardware locations so an accessible entrance does not read as an obvious retrofit.
- Replacement windows let owners address egress and ease-of-operation concerns without altering a facade’s historic rhythm.
- We work from careful field measurements and mock-ups, testing fit and function before full fabrication, and coordinate timelines with preservation authority review when a project requires it.
Perspective: access strengthens, not threatens, preservation
Accessibility broadens who gets to experience a historic building and supports the long-term financial case for keeping it in active use. We think of access as an iterative process, not a one-time checklist: budgets should plan for ongoing adjustments as needs, staffing, or technology change. Partnering with disability advocates early produces solutions that honor both the building’s history and the people who visit it.
— Gepetto
How we support accessibility-sensitive restoration projects
When an accessible entrance, threshold, or window needs to match a historic building exactly, matching craftsmanship matters as much as code compliance. Our Historic Window Restoration service replicates period sash profiles and glazing patterns while accommodating thresholds and hardware that support easier access. Our custom fabrication work covers doors, casework, and reversible millwork details designed to satisfy both a SHPO reviewer and a disabled visitor trying to get through the front door.
We document measurements, build mock-ups for review, and coordinate our fabrication schedule with your project’s preservation consultation timeline. If you are planning an accessibility retrofit on a historic structure, you can request a quote on the window restoration page to start the conversation.
FAQ
Are historic buildings exempt from ADA requirements?
No. Historic buildings must meet ADA accessibility requirements to the maximum extent feasible, according to Preservation Brief 32. An exception is only available through a documented consultation process when compliance would threaten or destroy the building’s historic significance.
What is a qualified historic facility under the ADA?
A qualified historic facility is a building listed in, or eligible for listing in, the National Register of Historic Places, or one designated as historic under state or local law. Under the 2010 ADA Standards, that status allows access to alternative compliance provisions, not a blanket exemption.
Who decides whether an ADA exception applies to a historic building?
The State Historic Preservation Officer typically leads this determination, sometimes alongside the Advisory Council on Historic Preservation or the Department of Justice. The decision relies on documented consultation, including input from people with disabilities, as outlined in Preservation Brief 32.
What accessibility upgrades should historic building owners prioritize first?
Owners should prioritize the accessible route and entrance first, followed by access to primary public spaces and the goods or services offered there, then accessible restrooms. This sequence reflects the priority structure described in NPS and ADA guidance for projects where full compliance cannot happen all at once.
Can accessible restroom retrofits affect historic preservation tax credits?
Accessibility retrofits, when designed to meet the Secretary of the Interior’s Standards, generally support rather than jeopardize eligibility for historic preservation incentives. Reversible, differentiated interventions, such as those described in NPS guidance on rehabilitation codes, are the kind of work reviewers look for when evaluating a project’s compatibility with the historic structure.
Sources
Recommended