by Matthew Wiley | Nov 4, 2026 | Architectural Millwork
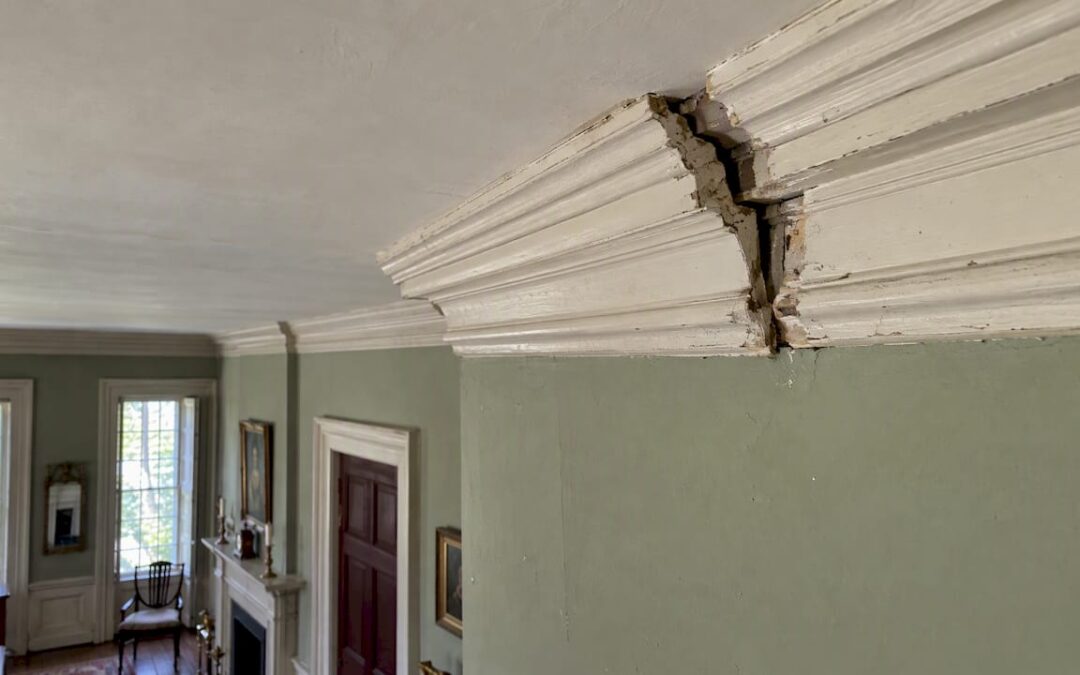
Crown molding restoration begins with a diagnosis, not a tool. Before anyone caulks a gap or reaches for a nail gun, the cornice must be identified as wood or ornamental plaster, its failure traced to a cause (structural movement, water, or a fastening that has simply given way), and its profile recorded so that anything lost can be reproduced exactly. In a historic building, that sequence separates a sound, reviewable restoration from a cosmetic patch that fails again within two winters.
Gepettomillworks
gepettomillworks.com
Restore Historic Cornices With Care
Gepettomillworks creates custom millwork for historic building projects, supporting work where existing crown molding profiles need careful attention.
Explore custom millwork
TL;DR
- Identify the material first: wood and ornamental plaster fail differently and are repaired by different trades.
- Find the cause before the cure. The National Park Service names structural movement and water intrusion among the most damaging causes of plaster deterioration, and the same logic applies to wood.
- Repair what is sound, replicate what is lost, and trace the existing profile so new sections match it exactly.
- Ornamental plaster repair is a craft the National Park Service says owners should not attempt themselves.
- On projects that must satisfy a preservation review, document the existing cornice and its replacement profile before any work begins.
Table of Contents
Why the cornice deserves a careful hand
The cornice is where wall meets ceiling, and in the Federal, Greek Revival, Italianate and Queen Anne houses common across Virginia, the Carolinas and Maryland it is often the most deliberate piece of ornament in a room. Egg-and-dart, dentil and cavetto profiles were not decoration added late; they were proportioned to the room’s height and the order of the architecture. Remove or flatten them, and the room loses its scale.
That is why restoration, as distinct from the stock-molding repair advice that dominates search results, treats the existing cornice as evidence. The profile, the way the sections are joined, the layers of paint and the nail pattern all record how the room was built. A restorer reads that record before disturbing it.
Identify the material before anything else
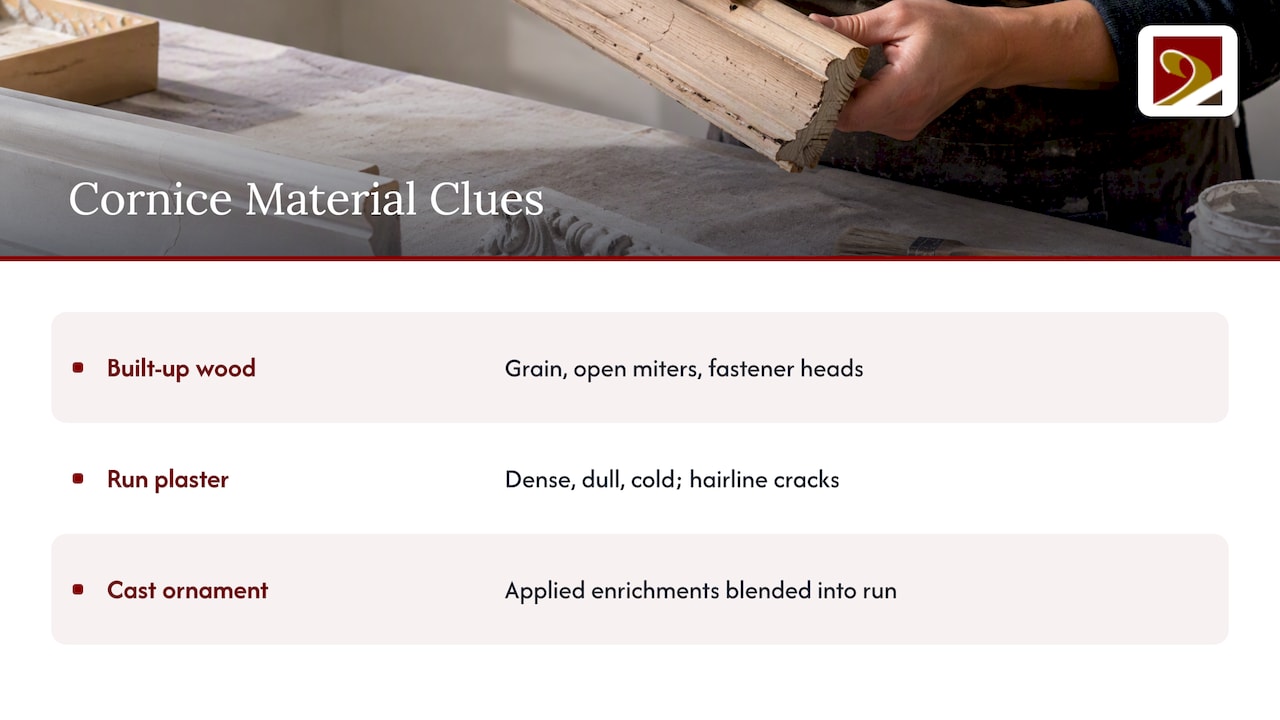
Crown molding in an older building is one of three things, and sometimes a combination.
Solid or built-up wood. Common in houses where the cornice was assembled on site from several stock members, a crown, a bed molding, a fascia board and sometimes a frieze, each nailed to blocking in the wall and ceiling framing.
Run plaster. In many nineteenth and early twentieth century interiors the cornice was formed in place or on a bench with a profiled sheet-metal template drawn through wet gypsum or lime plaster. The National Park Service describes this running of moldings with sheet-metal templates in Preservation Brief 23 on ornamental plaster.
Cast ornament. Enrichments such as modillions, rosettes and leaf bands are frequently cast and applied, then blended into a run cornice.
A tap and a close look usually tell them apart: plaster sounds dense and dull, shows hairline cracking along its field, and will feel cold and heavy. Wood shows grain under thin paint, open joints at miters and fastener heads. Where the answer is unclear, a preservation professional can confirm it with a small, discreet probe. The distinction matters because a wood cornice is repaired by a millwork shop, while ornamental plaster belongs to a plasterer who runs and casts.
How to assess the damage
A sound assessment asks three questions in order: what is failing, why, and how far has it spread.
Look for cause, not just symptom
The National Park Service states that structural movement and water intrusion are among the most deleterious causes of ornamental plaster deterioration, according to Preservation Brief 23. Its companion guidance on flat plaster adds that structural movement often produces stress cracks and may require structural repairs before the plaster finish is addressed, as set out in Preservation Brief 21. The lesson is plain: a crack that reappears after patching is telling you the building is still moving, or still wet.
For a wood cornice, the same discipline applies. Check the roofline, gutters, flashing and any plumbing above the room. A stained, soft or darkened section of molding almost always sits beneath a leak that must be found and stopped, or the replacement will rot in turn.
Inventory the cornice, run by run
The National Park Service advises that a qualified professional should inventory which details can be repaired in place and which must be removed for repair or remanufacture. Treat that as a template for any cornice survey:
- Photograph each wall in full, then every damaged section in raking light.
- Mark and number each run on a plan of the room.
- Note the condition of each run: sound, loose, cracked, missing, painted over, or previously patched with an incompatible material.
- Record moisture evidence: staining, efflorescence, blistered paint, spongy or discolored wood.
- Probe suspect wood gently with an awl. Wood that crumbles or gives easily has lost its internal structure.
- Record the profile of every distinct molding, even those that appear intact, before work begins.
The last step is the one most often skipped, and it is the one a preservation reviewer will ask about.
What the findings mean
Loose sections with sound wood point to a fastening problem. Open miters across a whole room point to seasonal movement or settlement. Cracking that follows the line of a wall points to structure. Staining and softness point to water. Each finding leads to a different repair, which is why we group them before proposing a scope. Our own guide to wood cornice restoration, from assessment through repair and replication walks through the same triage for wood.
Repair or replace: the deciding line
The general principle in preservation practice is to repair rather than replace wherever the material is sound, and to replicate exactly where it is not. For plaster, the National Park Service technical note ITS 19 on deteriorated plaster finishes states that leaving historic plaster in a deteriorated, ruined condition is not a recommended rehabilitation treatment under the Secretary of the Interior’s Standards. Deterioration is not character-defining; it must be addressed so the space keeps its historically finished appearance.
In practice, the decision falls along these lines:
| Condition |
Typical course |
| Sound wood, loose fastening or open joints |
Repair in place: re-secure to framing, close joints, fill and refinish |
| Localized rot or insect damage in otherwise sound wood |
Cut out and splice in a new section of matching species and profile |
| Missing runs or lost enrichments |
Replicate from a traced profile, using the original as the pattern |
| Wood that is rotted through, structurally unsound or severely warped |
Replace the affected members with exact replicas |
| Plaster with isolated cracks or small losses |
Specialist plaster repair, often keeping the cornice in place |
| Plaster that has delaminated, collapsed or lost its attachment |
Remove for repair or remanufacture by a qualified plasterer |
The boundary is a judgment call, and it is made on site by someone who has seen both outcomes. Replacement is not a failure of preservation when the alternative is retaining a member that can no longer do its job. What matters is that the replacement reproduces the original in species, dimension and profile, so the room reads as it did.
Fixing molding that has pulled from the wall or ceiling
Separation is the most frequent complaint in homeowner forums, and in wood it is usually a fastening or movement problem rather than a material one. Older cornices were nailed into blocking or plates; decades of humidity cycling loosen those nails, and later paint layers conceal the gap until it opens.
A careful repair proceeds in this order:
- Find the cause. If the movement is recent and progressive, resolve any settlement or leak first, following the principle that structural repairs come before the finish.
- Locate the solid framing behind the molding, such as the wall plate or ceiling joists, rather than relying on drywall or plaster alone.
- If the section is sound, re-secure it into that framing, and use adhesive on the back only where it will not trap or harm historic material.
- Close hairline joints with a flexible, paintable filler that can follow minor seasonal movement, saving rigid fillers for stable areas.
- Re-prime and repaint the repaired run, feathering the new paint into the surrounding finish.
For run plaster, the situation differs. The National Park Service notes in Preservation Brief 23 that ornamental plaster units are often attached with plaster itself as the adhesive, and that deterioration beyond simple patching usually calls for professional removal and matching. It goes further, describing the repair of ornamental plaster as a craft requiring years of training that property owners should not undertake. A loose plaster cornice is also a falling hazard, which is one more reason to bring in a specialist rather than experiment.
Recreating missing sections while keeping the original profile
When a run is lost to rot, a past renovation or a fire, the aim is a replacement indistinguishable from what remains. The method is old and reliable.
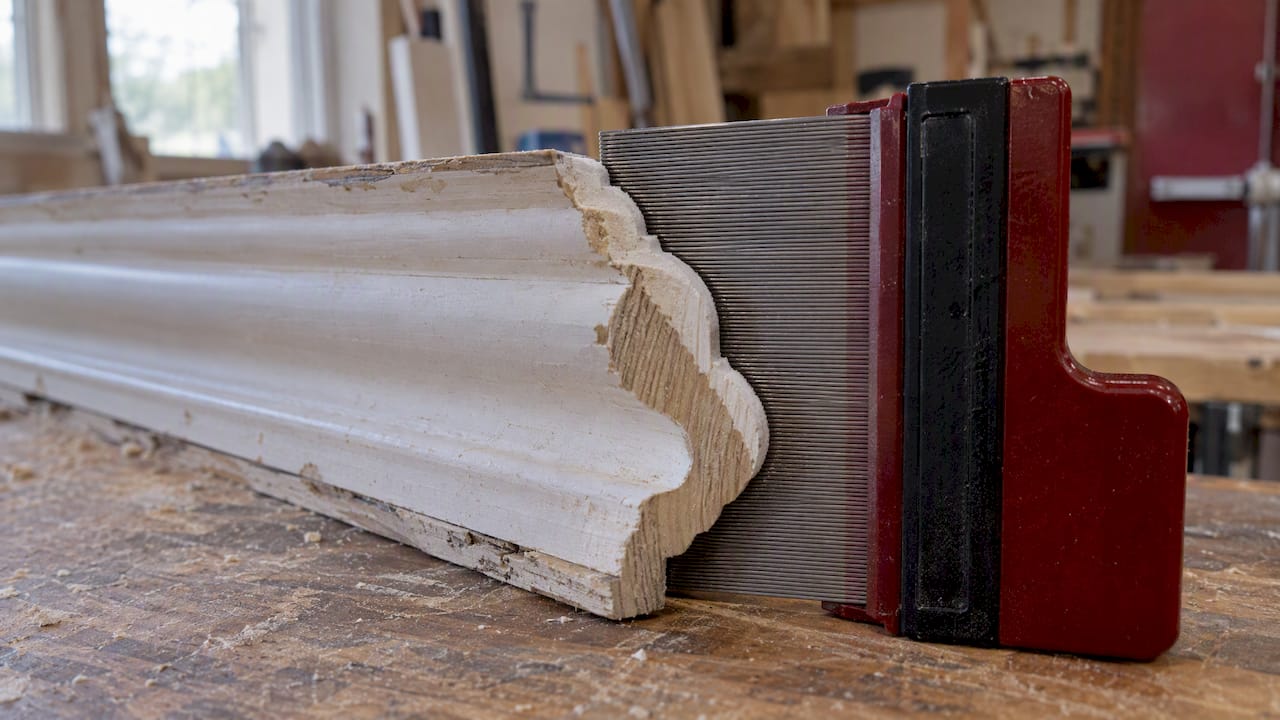
Capture the profile. For plaster, the National Park Service describes tracing the cross-section onto a sheet-metal template, then using that template at a bench to run new lengths matching the historic profile. The same record serves wood: a contour gauge, a tracing of a clean end-grain section, or a cast of the profile gives a millwork shop what it needs to grind knives.
Find the best surviving section. Paint buildup softens profiles. The most accurate section is often in a closet, above a later soffit or behind a cabinet, where it escaped repainting. Stripping a small test area reveals the true edges.
Match species and grain direction. Old-growth heart pine, poplar and mahogany behave differently from modern plantation stock. A replica cut from properly seasoned lumber of a compatible species moves and takes paint more like the original.
Build it as it was built. If the original was a built-up assembly of three members, the replica should be, too. A single piece cut to the overall silhouette will look flat and shadow differently.
The National Park Service observes that partial restoration is often a more accurate term than repair for ornamental plaster, because damaged pieces have to be matched exactly. The same is true of wood. Where the work is matching, not patching, the quality of the template decides the quality of the result.
Preparation and finishing in a historic room
A good finish hides the repair without hiding the molding. A few practices serve most rooms:
- Test before stripping. Painted surfaces in buildings from before 1978 may contain lead, so confirm with testing and follow lead-safe practices before sanding or scraping. An abatement or lead-safe contractor should handle disturbed surfaces in occupied homes.
- Clean out old caulk and failed fillers so new material bonds to sound substrate.
- Prime bare wood and new patches with a primer suited to the existing coating system.
- Choose finish by condition. A cornice with many small flaws usually looks best in a durable paint whose sheen does not magnify surface defects, instead of a high gloss that exaggerates them.
- Paint replacement sections before installation when ceiling access will be awkward, then touch up the joints afterward.
- Caulk the perimeter where the cornice meets plaster walls and ceilings with a paintable, flexible product to absorb minor movement.
On plaster cornices, the finishing step belongs to the plasterer and the painter together, since the paint system must be compatible with the lime or gypsum below it. As the National Park Service stresses, replacement plaster pieces should exactly match the existing historic plaster.
Documenting the work for a preservation review
Where a project seeks historic tax credit review or must satisfy a local historic commission, the cornice is part of the evidence of a faithful rehabilitation. Reviewers want to see that features were retained where possible, and that replacements match the old in material, design and finish. Useful submissions include the pre-work photographs, the numbered plan, a profile drawing of each molding, and a short note explaining why each replaced run could not be saved. Architects and contractors who gather this before demolition rarely face redesign later. Requirements differ between state offices and local boards, so confirm current expectations with the relevant review body before the scope is finalized.
The view from the shop
We approach a cornice the way we approach a window sash or a stair rail: as a piece of period joinery that carries information. The first visit is for reading, not quoting. Where a profile has been buried under a century of paint, we look for the clean section that survived, and we build the replica from that evidence.
Our work is exact historic replication in authentic materials and with period techniques, and we are glad to take on the architecturally significant and awkward requests that other shops decline. That is why architects bring us in early, before the scope hardens, so that the cornice, the casing and the baseboard are specified together and read as one design.
A restored cornice should look as though no one had ever touched it. When it does, the room has been returned to its original proportions, and the project team has a defensible record of how that was done.
Gepetto
Working with us on cornice and trim
Gepetto Millworks designs, fabricates and restores wood windows, doors, trim, casework, staircases and architectural millwork for historic buildings, including the replication of period features and matching for historic tax credit eligibility. For a cornice, that means profile capture, replica fabrication in a species suited to the building, and coordination with the architect or contractor on the wider trim package.

If you are scoping a restoration in Virginia, the Carolinas, Maryland or the District of Columbia, send us your photographs and drawings through our custom fabrication page, or see the full range of work on the Gepetto Millworks home page. Where window and door work runs alongside the trim, our historic window restoration service is handled by the same shop.
FAQ
Can I repair a plaster crown molding myself?
For minor cosmetic cracks in sound plaster, a careful owner may handle paint touch-ups. Anything beyond that is a different matter. The National Park Service describes ornamental plaster repair as a craft requiring years of training that owners should not attempt, and loose sections can fall. Call a qualified plasterer or preservation professional.
How do I know if my crown molding is wood or plaster?
Tapping tells you a good deal: plaster sounds dull and dense, wood sounds lighter and hollow-edged. Wood shows grain beneath thin paint and visible nail heads at its joints, while plaster tends to show fine cracks and rounded, continuous profiles. A small test opening, made by a professional, confirms it without guesswork.
Is separated crown molding a sign of a structural problem?
It can be, but often it is a loosened fastening or seasonal movement. Cracks that recur after patching, widen over time or follow a wall line suggest ongoing movement, which the National Park Service says may need structural attention before the finish is repaired. Have an engineer or preservation specialist look at progressive cases.
When should historic crown molding be replaced rather than repaired?
Replace it when the wood is rotted through, structurally unsound or badly warped, and repair when the material is sound. Replacement should be an exact replica in species, dimension and profile. Under the Secretary of the Interior’s Standards, leaving deteriorated plaster in ruined condition is not a recommended treatment, so a lost or failing run needs to be repaired or replicated.
Can a new cornice match an old profile exactly?
Yes, when the original is recorded carefully. A traced or gauged cross-section from the best-preserved area gives a shop the pattern for knives or a plaster template, and building the replica the same way the original was built keeps shadow lines true.
Sources
Recommended
by Matthew Wiley | Nov 3, 2026 | Architectural Millwork
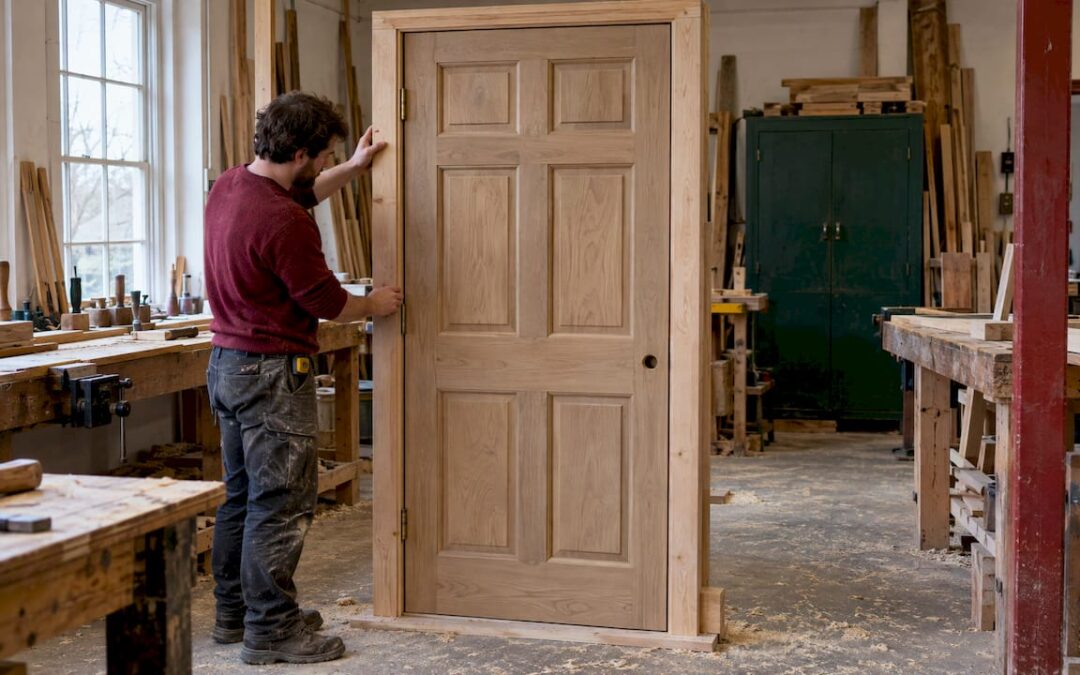
Historic door replication is the making of a new door that reproduces a lost or beyond-repair original in material, proportion, profile, joinery and hardware, on the evidence of the building itself. The sequence is consistent from a Federal rowhouse to a Craftsman bungalow: repair what survives, document what remains, build the replica from that evidence, and fit it to the existing opening. Where evidence runs out, a compatible design replaces invention. What follows sets out each stage for architects, contractors and owners of historic buildings.
Gepettomillworks
Preserve the Character of Historic Doors
Gepettomillworks creates custom millwork for historic building projects, supporting work where accurate replication matters.
Explore custom millwork
TL;DR
- Retain and repair an existing historic door whenever possible; replicate only when deterioration makes repair infeasible, or when a door is missing altogether.
- A replica rests on physical, pictorial or photographic evidence. Without it, preservation guidance calls for a design compatible with the building, not a guess presented as history.
- Match material, panel layout, muntin profiles, joinery and finish, and treat the door, transom, sidelights and surround as one composition.
- Modern code, security and weather requirements can be met with discreet means, such as tempered glass and concealed weatherstripping.
- Prepare photographs, measured drawings and a full specification before review; reviewers ask for them, and so does a fabricator.
Table of Contents
When replication is the right answer
The National Park Service, in its technical note on inappropriate replacement doors, applies the Secretary of the Interior’s Standards for Rehabilitation to this question. An existing historic door should be retained and repaired whenever possible, and replacement is justified only when deterioration makes repair infeasible. A door that has lost a rail to rot, a stile to insect damage, or a panel to an old forced entry is usually a repair candidate. A door that has been removed, flushed over with a hollow-core slab in the 1960s, or reduced to fragments is a replication candidate.
The distinction matters commercially and legally. Projects pursuing historic tax credits, or located in a local historic district, are reviewed against this principle. A replica proposed where repair was feasible invites a request for more information. A replica backed by a condition survey showing why repair is infeasible tends to move through review more cleanly.
Three situations typically lead to replication:
- The original is gone, but evidence of it survives. Early photographs, ghost lines on the jamb, hinge mortises and sill wear all describe the missing leaf.
- The original survives but cannot be saved. Here the old door becomes the pattern, and its decay is itself documented for the reviewer.
- A matched pair or a set is needed. One interior door of a run of eight is missing, and the replacement must be indistinguishable from its neighbors.
Documenting the evidence before drawing anything
A replica is only as sound as the record behind it. Preservation offices say so plainly, and the requirements are concrete. Washington, D.C.’s door guidelines ask applicants proposing replacement for photographs showing the building and the doors, including deterioration, drawings measuring existing and proposed doors with opening and framing dimensions, and a specification sheet, photograph or drawing of the proposed door. Louisville’s design guidance goes further on timing: historic doors should be photographically documented before reconstruction or exterior modification, and original elements should not be removed until approval is obtained.
What to record on site
A useful field record for a door replica includes:
- Overall photographs of the elevation and the opening, then close views of each rail, stile, panel, molding and hardware location.
- Measurements of the clear opening, the frame, the leaf thickness, stile and rail widths, panel depths and the projection of each molding. The same discipline applies as in the practical guidance on how to measure a door opening: measure width and height at several points, since historic openings are rarely square.
- Hinge, lock and bolt mortises, strike locations, and any paint-filled holes that reveal former hardware.
- Evidence of the finish history: layers of paint, graining, or varnish, ideally sampled in a hidden location.
- Comparable doors in the same building, on the same street, or by the same builder.
Reading fragments
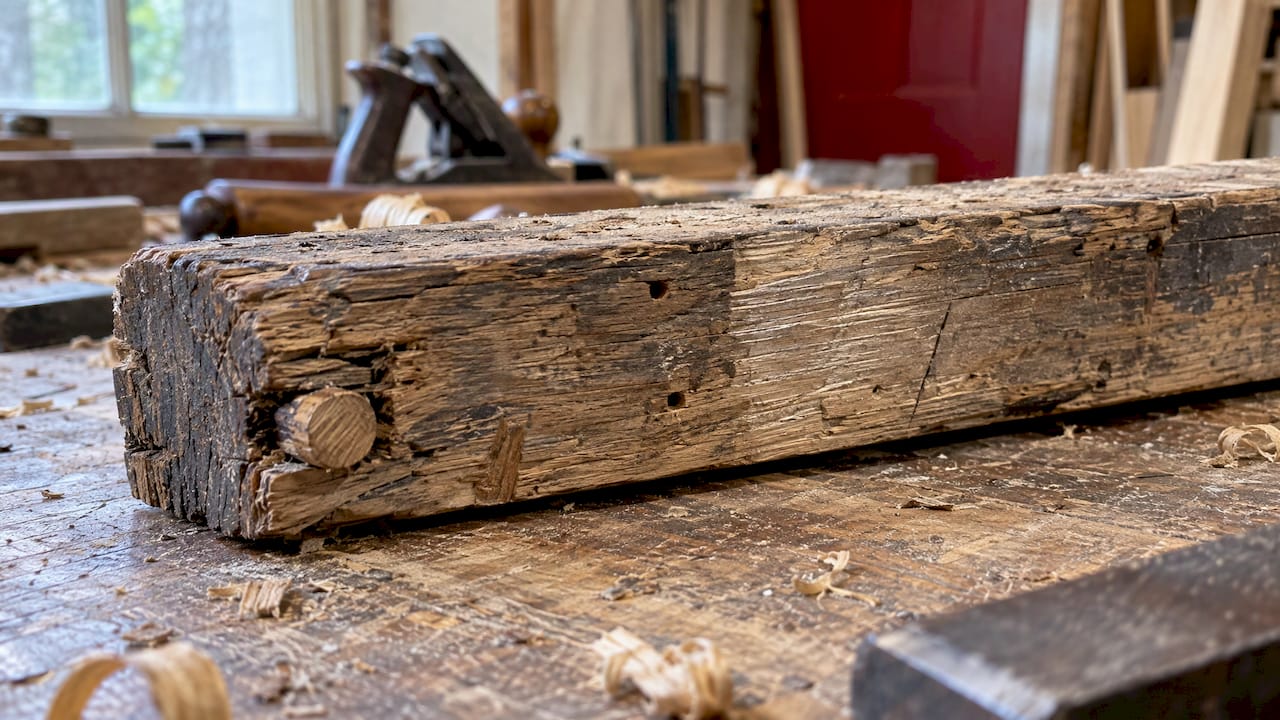
Often the best information is hidden. George Washington’s Mount Vernon describes its own reproduction work in a craft account of building eighteenth-century doors: craftsmen reverse-engineered details that could not be reached from fragments, and documented the joinery of every surviving door before reproducing the new one. The lesson scales down to any project. Pins, dowel ends, plane marks and scribe lines are evidence, and they disappear the moment the old door is discarded.
Identifying period and style when evidence is incomplete
Style dictates nearly every decision downstream: panel count, molding profile, the presence of a fanlight, the thickness of the leaf. The Park Service’s guidance asks owners to identify the building’s style, its period of architectural significance and its use, then to use physical, pictorial or photographic evidence to establish how a missing door looked.
In practice, the reader works outward through four tiers of evidence:
- The door itself, or what remains of it.
- The building, including other doors on the same floor, original openings, and trim profiles that echo door moldings.
- Documentary sources: historic photographs, insurance maps, builder’s pattern books, early drawings, and written descriptions.
- Comparable buildings of the same date, builder and neighborhood.
D.C.’s guidelines frame this hierarchy the same way: replacement design should be based on the original door, the building’s character, comparable historic buildings, or historic documentation.
Period vocabulary helps here. A six-panel Georgian or Federal door with raised fields and bolection moldings belongs to a different world from a Victorian door with a single large glazed light above two vertical panels, and again from a Craftsman door with a glazed upper third and flat panels below. Our archives on Classical architecture and Victorian architecture illustrate how widely these proportions vary.
When the evidence ends: compatible design, not conjecture
The most common error in replication is false certainty. A designer finds a handsome door in a catalog of the right decade and installs it as though it were the original. Louisville’s guidance describes conjectural or falsely historical reconstruction as inappropriate; where documentation is insufficient, the new design should be compatible with the building and the district and should avoid invented details presented as original history.
A practical test for any proposed replica is to ask of each element, from panel count to hardware: where is the evidence? If the answer is a photograph, a ghost line or a surviving sibling door, the element is documented. If the answer is that it looks right, the element is compatible design, and it should be labeled as such in the submission. Reviewers respond well to that candor, and it protects the owner if questions arise later.
What an accurate replica must reproduce
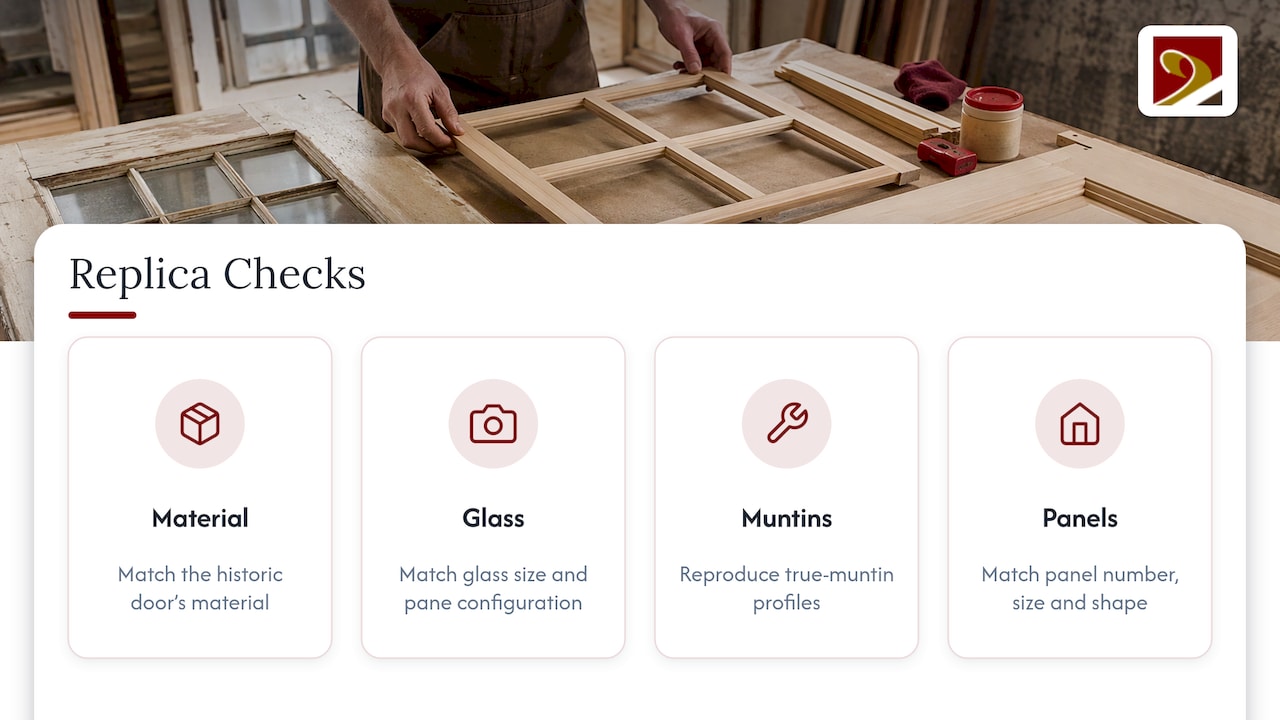
The Park Service’s direction is to replicate the historic door as closely as possible, including its material, glass size and pane configuration, true-muntin profiles, and the number, size and shape of its panels. Each of those items deserves attention in the shop drawings.
Material
D.C.’s guidance states that wood was the predominant door material in the eighteenth, nineteenth and early twentieth centuries and is generally the most appropriate replacement for those periods. A park-service maintenance guide for historic structures at Isle Royale adds that replacement doors should use the same material, dimensions, paneling pattern, color and finish type as the original, and advises against altering the opening or substituting steel or fiberglass for wood.
Species selection follows climate and period. An exterior door facing weather needs a rot-resistant, dimensionally stable species with tight, straight grain; our note on the best wood for exterior doors covers the trade-offs.
Joinery
Joinery is where replicas most often betray themselves. A modern door is frequently doweled or glued from engineered stock. A historic door is typically a frame of rails and stiles joined by mortise and tenon, with grooved members holding panels that float so the wood can move seasonally. Mount Vernon’s documented replica used mortise-and-tenon rail-and-stile joints, grooved rails and stiles for the panels, wooden pegs, and a historically specific scribe joint rather than a modern miter. The U.S. Forest Service’s preservation guide adds that historic door components were commonly pinned or doweled, with some nailed or screwed, so surviving pins are evidence of original construction, and that replacement parts must match the original’s profile, meaning its shape, size and joining types.
Panel construction deserves its own mention. Mount Vernon reports that large panels were assembled from several boards because a single wide board would be likely to warp, then shaped with planes to reproduce raised fields and bevels. A replica that uses one wide glued-up slab, or a routed profile where the original was planed, will read differently in raking light.
We describe our own approach to this in hand-hewn mortise and tenon doors and in our discussion of solid wood joinery built to last.
Glazing, hardware and finish
Glazed doors add a second layer of detail: muntin profiles, putty or bead glazing, glass size and the distortion of old cylinder glass where it survives. Hardware, from strap hinges and box locks to knobs and escutcheons, is often the most telling piece of dating evidence, and mortise locations should be recorded before anything is removed. Finish is the last decision, and a paint analysis should precede it, since the first coat is not always the one the building was meant to show.
The whole entrance
A door seldom stands alone. The Park Service’s guidance on entrance treatments says the full entrance, door, transom or fanlight, sidelights, pilasters and entablature, should be retained and repaired as a coordinated historic feature. A faithful leaf in a mismatched surround looks wrong, and a reviewer will notice. When you commission a door, ask whether the quote includes the frame, the casing and the threshold, and whether the existing frame can be kept.
Balancing accuracy with code, security and weather
Historic accuracy and modern performance are not opposed, but they do require planning. The Park Service allows for this directly: replicate the historic door as closely as possible while meeting modern code or security requirements that may call for a stronger or more fire-resistant door.
The usual compromises are quiet ones:
- Safety glazing. The Forest Service guide names tempered glass as an option for door windows where safety and building-code requirements apply.
- Weather tightness. The same guide recommends rubber-bulb or brush weatherstripping to improve tightness while retaining the historic door. Concealed kerf-set seals do the same work with little visual change.
- Storm protection. A well-proportioned wooden storm door protects a historic leaf and improves thermal performance without altering the original; see our page on combination storm doors for historic restorations.
- Security. Reinforced strike plates, longer screws into the framing and concealed hardware upgrades strengthen a door without changing its face.
Fire-rated or egress requirements in commercial and multifamily buildings need coordination with the code official before design, not after. Raise them in the first meeting with the preservation reviewer.
The process, from survey to installation
The sequence below reflects the guidance above and the way a shop typically organizes the work.
- Condition assessment. Evaluate the existing door and its repair options first, and write down why repair is or is not feasible.
- Evidence gathering. Photograph, measure and research as described earlier, and document joinery before anything is removed.
- Design. Base the replica on the original door, the building’s character, comparable doors or historic documentation, and mark compatible-design elements as such.
- Submission. Provide the photographs, measured drawings and proposed-door information the reviewing body requires. Park Service rehabilitation specifications, for example, call for construction documents covering the scope of repair and alteration, removal and replacement, and full specifications, reviewed for buildability, code adherence and compliance with the Secretary of the Interior’s Standards.
- Fabrication. Mill and joint the leaf, shape the panels and moldings, and prefit it to the measured opening.
- Installation. Either install a pre-hung unit or replace the leaf on the existing frame. D.C.’s guidance notes that the second is often preferable in historic buildings, because it keeps original frame, casing and threshold in place.
- Finishing and hardware. Apply the finish system established by paint analysis and fit period-appropriate or documented hardware.
Lead times depend on species, complexity and the review schedule, so involve the fabricator before the submission, not after approval. A fabricator who reads the drawings early will often catch a conflict, such as a panel depth that the stile cannot accommodate, while it is still a line on paper.
What to ask a door maker
Whether you are an architect writing a specification or an owner choosing a shop, a few questions separate replication from approximation:
- Can the shop work from your documentation and produce shop drawings you can submit for review?
- Is the joinery mortise and tenon with floating panels, or is it a modern assembly dressed up in period moldings?
- Can the shop match muntin profiles, bolection moldings and raised fields by planing or by custom cutters?
- Will the shop address the frame, transom and sidelights as one entrance?
- Does the shop understand the review process for historic tax credits and local districts?
Our historic wooden doors and solid wood door manufacturing pages describe how we approach this work, and the replica millwork archive shows finished projects.
Perspective
We approach every door as evidence first and product second. A historic door carries the hand of the joiner who made it, the climate it endured and the household it served, and a replica earns its place only if it respects all three.
In our experience, the projects that go well begin with documentation rather than a catalog. We would rather spend a day with calipers, a raking light and a stack of old photographs than propose a design that cannot be defended before a review board. That is why our work centers on exact replication in authentic materials and traditional techniques, including the matching that historic tax credit eligibility depends on.
We also take on the commissions others decline: the fanlight with its tracery, the oversized entrance with a surround of pilasters and entablature, the pair of doors whose panels no longer exist anywhere but in a photograph. Where the evidence runs out, we say so, and we design what is compatible rather than what is merely convenient.
Gepetto
Commission a historic door replica
Gepetto Millworks designs, fabricates and restores doors, windows, trim, staircases and cabinetry for historic buildings, and we work with architects, general contractors, builders and owners across Virginia, West Virginia, North Carolina, South Carolina, Maryland and the District of Columbia. If your project calls for a documented replica, a matched set or a door that must satisfy preservation review, send us your photographs and measurements.
Start with our historic doors page or our custom fabrication services, and we will discuss the evidence, the review path and the shop drawings with you. Pricing depends on species, complexity and scope, so we quote each project individually.
FAQ
Can a replica door satisfy historic tax credit review?
It can when the replacement is justified and documented. Federal guidance applies the Secretary of the Interior’s Standards: retain and repair what exists, and replace to match where physical, pictorial or photographic evidence shows the original. Confirm requirements with your state historic preservation office before fabrication.
What if no photographs or fragments of the original door exist?
Then the guidance calls for a design compatible with the building’s style, period and character. Use comparable doors from the same era and neighborhood as references. Present the result as compatible new work, not as a reconstruction of a specific lost original.
Should the replica be wood even if the original was painted?
Generally yes. D.C. guidance identifies wood as the most appropriate replacement material for doors of the eighteenth, nineteenth and early twentieth centuries, and paint does not change that. Steel or fiberglass substitutes are discouraged on historic elevations.
Can a replica meet modern code and security requirements?
Usually, yes. The Park Service accepts a replica that matches the original as closely as possible while meeting code or security needs. Tempered glazing, concealed weatherstripping and reinforced hardware are common ways to do it without changing the door’s appearance.
Sources
- ITS Number 4: Inappropriate Replacement Doors, National Park Service
- Door Repair and Replacement, Washington, D.C. Office of Planning
- Doors and Entrances design guidelines, Louisville
- Building 18th-Century Doors, George Washington’s Mount Vernon
- Dovetails and Broadaxes: Hands-on Log Cabin Preservation, U.S. Forest Service
- ITS Number 26: Entrance Treatments, National Park Service
- A Guide to Repair and Maintenance of Historic Structures, National Park Service, Isle Royale
- Rehabilitation terms and specific requirements, National Park Service
- How to Measure a Door Opening, UFDoor
Recommended
by Matthew Wiley | Nov 2, 2026 | Architectural Millwork
A wood cornice is restored best by repairing it in place: find and stop the water first, probe to learn how much sound original wood remains, splice in matched new wood only where the old has failed, and reproduce missing profiles from documentation rather than guesswork. Replacement of an entire run is the last resort, not the starting point. What follows sets out how architects, contractors and owners of historic buildings can make each of those decisions with confidence.
Gepettomillworks
gepettomillworks.com
Preserve Historic Cornice Details
Gepettomillworks creates custom millwork for historic building projects, supporting careful restoration of distinctive architectural details.
Explore custom millwork
TL;DR
- Most cornice failure is moisture-related, so trace leaks, failed flashing and open joints before any wood is touched.
- Preservation practice favors retaining the greatest amount of historic fabric; repair and Dutchman splices come before replacement.
- Repair in place whenever possible, with temporary support and work from the top, rather than dismantling the cornice.
- Missing elements are reproduced from historical, pictorial and physical evidence, with new timber matched in species, grain direction and moisture content.
- Painted cornices on older buildings call for lead-safe, low-heat methods and, on tall facades, proper shoring and fall protection.
Table of Contents
Why cornices fail, and why it matters for the decision
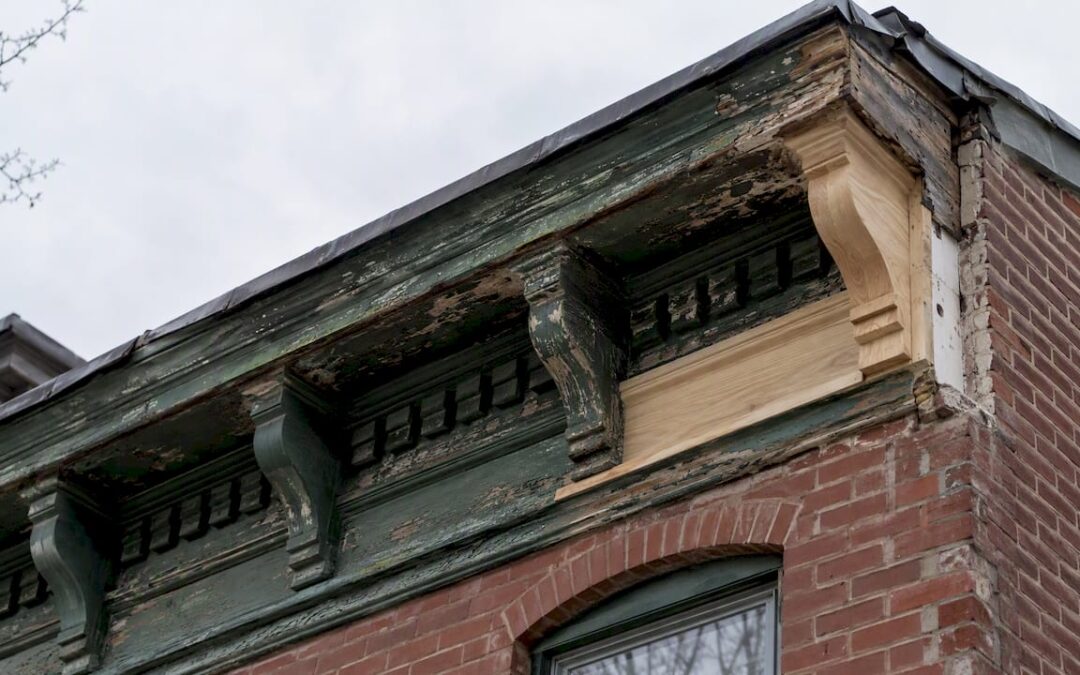
The cornice is the crown of a facade: it throws water clear of the wall, terminates the composition, and, in the Italianate, Greek Revival, Second Empire and Colonial Revival idioms alike, carries much of a building’s character in its brackets, dentils, modillions and coved profiles. It is also the most exposed assembly on the building, sitting at the junction of roof, gutter, wall and sky.
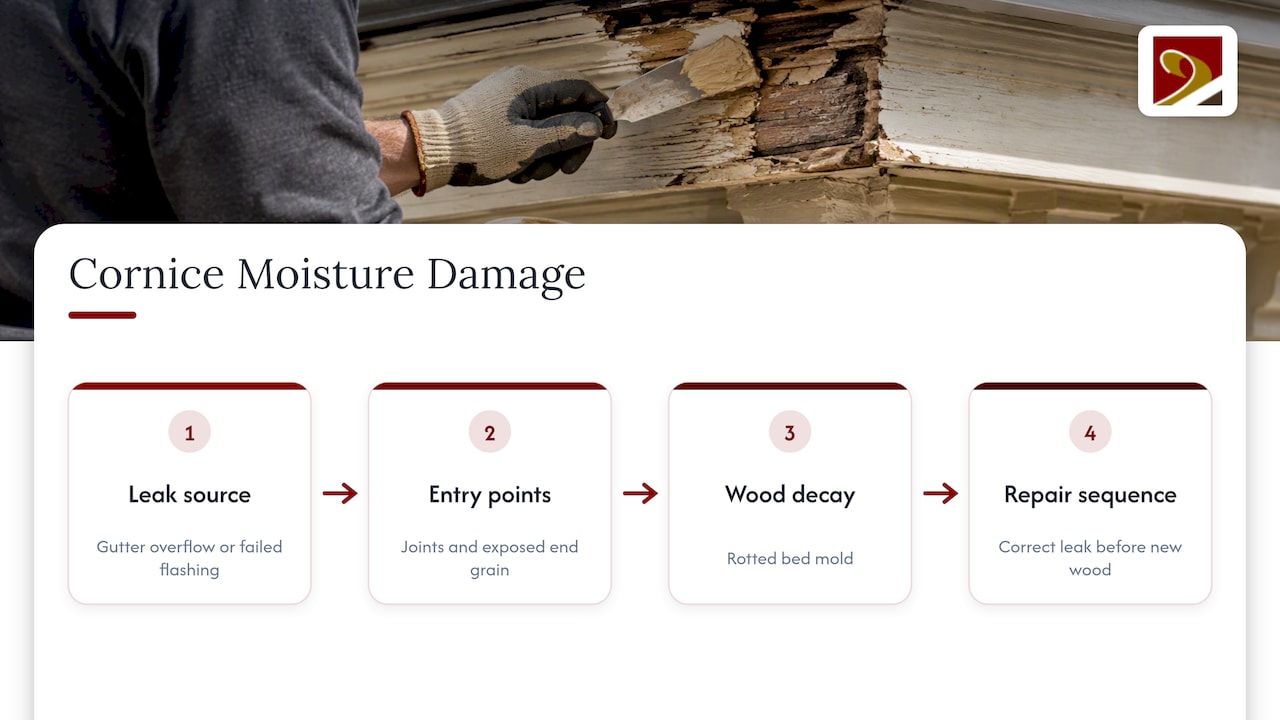
That exposure explains the pattern of decay. A 1987 restoration primer written for building professionals observes that most cornice deterioration is moisture-related, and advises tracing leaks to their sources and gently probing susceptible wood, particularly at joints, exposed end grain and failed flashing. The practical consequence is simple: a rotted bed mold is usually a symptom. If the gutter still overflows behind it, new wood will follow the old into failure.
The second consideration is regulatory and philosophical. The Secretary of the Interior’s Standards for Preservation call for retention of the greatest amount of historic fabric, with work focused on maintenance and repair rather than extensive replacement. Whether or not a project is formally reviewed, that hierarchy is a sound guide, and it shapes everything below.
Assessing the cornice before you choose a treatment
A survey precedes any proposal. The same primer recommends inspecting for missing, damaged, deteriorated and non-original elements, photographing the cornice thoroughly, and gently probing the wood for deterioration. In practice, a useful survey proceeds in this order.
- Record the existing condition. Photograph every elevation, close up and from a distance, and number the bays or sections. Note where profiles have been altered, where later additions such as aluminum wrap or modern gutters have been applied, and where the original geometry can still be read.
- Find the water. Check the roof edge, gutter, downspout outlets, flashing and parapet coping. Deterioration concentrated beneath a particular corner almost always points to a particular leak.
- Probe, do not pry. A blunt awl or screwdriver pressed gently into the surface distinguishes sound wood from punky wood. Pay attention to end grain at miters, to the backs of brackets, and to the soffit at the wall line.
- Map the losses. Sketch each element and mark it as sound, repairable, or lost. This map becomes the basis for the scope of work and, on a certified project, for the documentation a reviewer will expect.
- Check the structure behind it. Where the cornice is tied into a masonry parapet or its framing is compromised, the guidance is to consult a structural engineer for major repairs to strengthen unsafe parapet walls.
When to bring in a professional
A homeowner can reasonably document and photograph. Deciding that material is too deteriorated to save is a different matter. New York City’s Landmarks Preservation Commission guidance says that where materials are too deteriorated to repair and must be replaced for safety, detailed information about the deterioration should come from a qualified engineer, contractor or other industry professional. That is a sensible standard well beyond New York: the written finding is what justifies replacement to a review board, an insurer or a tax-credit reviewer.
Repairing in place: the preferred sequence
The primer’s central practical advice is that most cornices are easier to repair in place. The cornice is temporarily supported, repairs are made from the top where possible, and decorative trim and facing boards are left undisturbed. Removing the face of a cornice to reach a rotted bed is a common shortcut that destroys original paint layers, nail patterns and fit, and it is seldom necessary.
Choosing the repair method by extent of loss
| Condition |
Typical treatment |
Notes |
| Surface checking, small holes, minor soft spots |
Consolidant, patching compound or wood putty |
Materials must be compatible with the historic wood |
| Localized rot in a molding, rail or bracket |
Dutchman (a shaped piece of new wood spliced into a prepared cut) |
Match species, grain direction and profile |
| Failed section of a run |
Replicate the section in the shop from a template, splice at a joint |
Keep adjacent sound original wood |
| Lost or non-original element |
Re-create from documentation |
Historical, pictorial and physical evidence |
| Structurally unsafe assembly |
Engineer-led intervention |
Document deterioration before replacing |
The New York guidance describes this ladder directly: small repairs can use wood putty, patching compound or consolidant, while Dutchman repairs can address larger areas of loss, and repair materials must be compatible with the historic wood. Compatibility is the operative word. A filler harder than the surrounding wood will crack the paint film at its edges as the old timber moves seasonally.
Fasteners and anchorage
Old buildings punish careless anchoring. The primer cautions against masonry anchors or bolts shot into masonry with a powder charge, and notes that too many anchors can weaken masonry parapet walls. For interior framing joints, it recommends screws and waterproof glue, and treated lumber to replace deteriorated members where rot is likely to recur; epoxies have a place in shop restoration. Hidden framing is where modern durable materials can be used freely, provided the visible, original-looking surface remains authentic.
Matching profiles and reproducing what is missing
A cornice is read as a sequence of profiles: cyma recta, ogee, cavetto, bead, fillet. A replacement that is a quarter inch off in projection or has a flattened curve will read as wrong even to an untrained eye, because the shadow line changes.
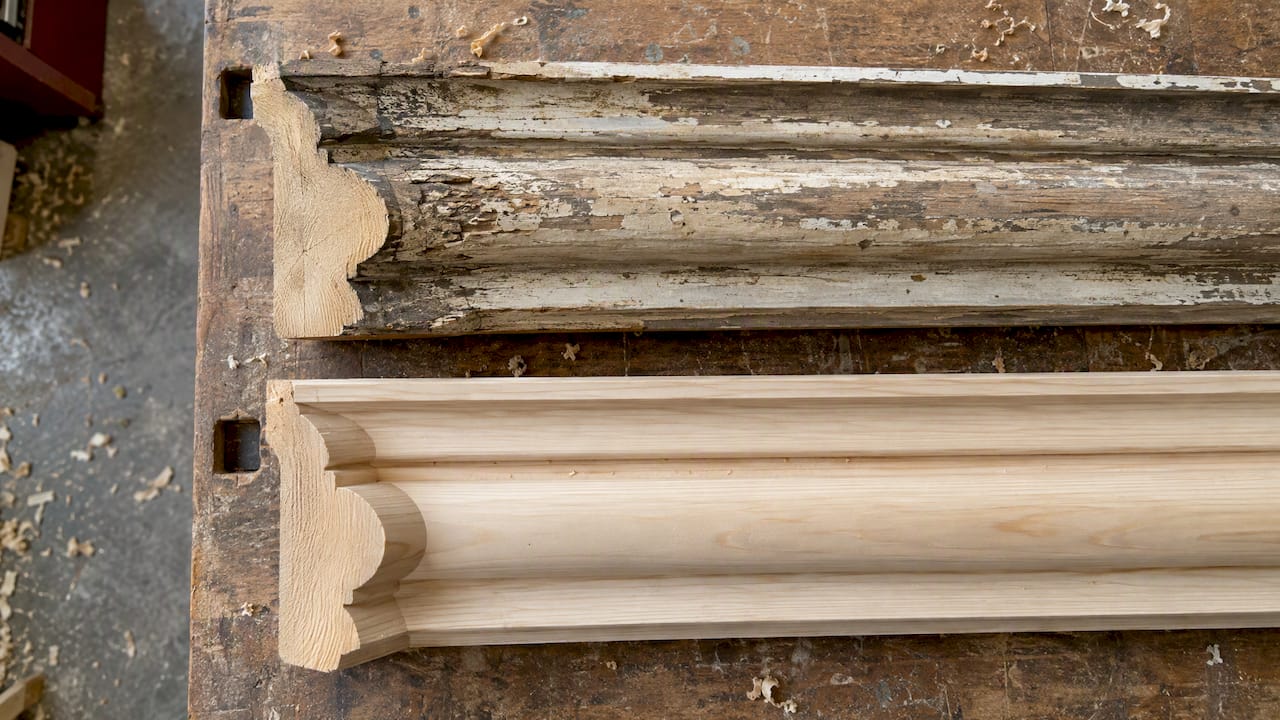
There are two legitimate routes for lost elements. One guideline from a municipal historic district states that a missing wood feature may be accurately restored using historical, pictorial and physical documentation, or else designed to be compatible with the building. Where evidence survives, accurate restoration is the stronger option.
Gathering the evidence
- Physical evidence: ghost lines in the paint, nail holes, surviving fragments on a rear or side elevation, and the profile of the least altered corner.
- Pictorial evidence: historic photographs, insurance maps, postcards and early survey drawings. Local archives and historical societies in the Mid-Atlantic hold more of these than most owners expect.
- Documentary evidence: original specifications, pattern-book designs and builder’s catalogs for the period.
- Sister buildings: neighboring structures by the same builder often share the same bracket and dentil patterns.
A professional conservation article on decorative timber repair states the standard plainly: repair, restoration, replacement or re-creation should match the physical and aesthetic characteristics of the original materials and features. In the shop, that means taking a contour gauge or profile template from the best surviving section, drawing it full size, and milling or turning the new pieces to the drawing. Built-up members such as multi-layer scrolled corbels are typically laminated and carved or shaped to match.
Selecting and preparing replacement wood
The same sources agree on the essentials. Choose a timber type and grain direction as similar as possible to the original, and acclimatize new wood so that its moisture content is close to that of the existing timber, which minimizes expansion or contraction at the junction. A splice made with wet lumber will open as it dries; one made with kiln-dried stock placed in a damp environment will swell against its neighbors.
If provenance matters to your project, verifying FSC certified wood with chain-of-custody codes is a practical way to confirm that replacement stock is what the supplier says it is. For a wider view of how responsible sourcing fits historic work, see our guide to sustainable historic preservation.
Safety on an older painted cornice
Buildings of the cornice-building era are very likely to carry multiple layers of lead-bearing paint, and the work happens at height, overhead and at the roofline. Safety planning belongs to the scope, not to the afterthought.
Lead and paint removal
The National Park Service advises that where lead-based paint is present, damp methods should be used to minimize airborne particles, and that torches, open flames and high heat should be avoided because they endanger workers and can ignite debris in walls. Personal protection, per the same brief, may include goggles, gloves, a mask, closed-toed shoes and a hard hat. Its companion brief on exterior paint problems cautions that unsafe paint removal can damage historic woodwork or injure workers, and recommends choosing the gentlest method that will do the job.
For contractors, the federal rule is OSHA’s construction lead standard, 29 CFR 1926.62, which applies where an employee may be occupationally exposed to lead, including during construction, alteration or repair of structures containing lead. Homeowners hiring out the work should ask any contractor how it will contain debris and protect occupants and neighbors, and should consult the state agency or a certified lead professional for the rules that apply where they live.
Working at height and around unstable parapets
OSHA’s demolition safety guidance is written for demolition, but its principle carries over to restoration: employees must not work where collapse hazards exist until they have been corrected by shoring, bracing or other effective means. If the parapet behind a cornice is loose or the cornice is pulling away, the engineer’s shoring plan comes before the first scaffold plank.
Finish: paint, stain and long-term protection
Repairs only last when the surface is sealed. Prime bare wood and all cut ends, back-prime splices, and keep joints, drip edges and flashings in order so water leaves the cornice rather than entering it. Where a cornice is stained or clear-finished, as on some Arts and Crafts and Craftsman buildings, it is often better to blend new work to sound existing finish; our note on matching stain on old trim without stripping sound finishes explains the approach, and our millwork finishing guide for Maryland homeowners covers coastal and humid-climate conditions.
A related case is the porch, where the same moisture logic governs columns and entablatures. Our guide to porch column repair walks through the decision between repair, splice and replacement, which maps closely onto cornice work.
What affects the cost of cornice restoration
Published per-foot figures for cornice work circulate widely, but they come from forums and lead-generation pages, vary by region and building height, and we would not use them for a budget. The factors that actually move a cost are better established, and every one can be assessed during the survey:
- Access: scaffold or lift requirements on a two-story versus a four-story facade.
- Extent of loss: the proportion that is repairable in place versus rebuilt.
- Profile complexity: a plain crown versus bracketed, dentiled and modillioned assemblies that demand custom knives or hand-carving.
- Hazardous material handling: lead-safe containment and disposal.
- Structural work: parapet stabilization, flashing and gutter reconstruction.
- Documentation and review: drawings, photographs and material submissions for a certified project or local commission.
The best way to control cost is to bid from a written condition survey, so that every bidder prices the same scope. Our own projects are quoted individually, from drawings and site conditions, because no two cornices are the same.
Our perspective
Cornices are where a building’s craftsmanship is most visible and most vulnerable. In our experience the best outcomes begin with restraint: we aim to keep every sound original member, and to treat the new work as a careful completion of the old rather than a replacement for it.
That discipline is also practical. A cornice replicated in the shop from a profile taken off the building, in matched species with acclimatized stock, can be spliced in without disturbing the surrounding original fabric. Our approach to exact historic replication using authentic materials and techniques is designed to support projects seeking historic tax credit eligibility, where reviewers expect a clear record of what was retained, what was repaired and what was re-created.
We also take on complex, architecturally significant work, the unusual bracket, the built-up corbel, the curved or returned run, that general suppliers often decline. Bring us the survey, the photographs, even a single surviving fragment, and we will tell you what can be saved and what must be rebuilt.
Gepetto
From survey to finished cornice with Gepetto Millworks
Gepetto Millworks designs, fabricates and restores custom millwork for historic buildings, including period trim, windows, doors, staircases and other architectural features, with matching for historic tax credit eligibility as part of our approach. If your cornice needs a profile replicated, a bracket re-created or a run of trim milled to match, we can work from your drawings or from the building itself.
See our custom fabrication capabilities, or contact us about your project with photographs and a short description of the conditions. We work with architects, general contractors, builders and owners of historic properties across Virginia, Maryland, the Carolinas and the District of Columbia, and you can browse our Virginia restoration work and historic church woodworking for examples of the scale we handle. Because cornices and windows share a roofline-to-sill logic, owners often pair this work with historic window restoration.
FAQ
Can a rotted wood cornice be saved, or does it always need replacing?
Often it can be saved. Preservation practice prioritizes repair over replacement, and Dutchman splices, consolidants and compatible patching materials address most localized rot. Replacement is justified when a qualified professional documents that the material is too deteriorated to repair, usually for safety.
Should the cornice be removed to repair it?
Usually not. The standard advice is to support the cornice temporarily and repair it in place, working from the top where possible, without removing decorative trim or facing boards. Removal risks damaging original fabric and the masonry behind it.
How do I match a profile that is partly missing?
Take a template from the best surviving section, then confirm it against old photographs, ghost lines in the paint and similar buildings nearby. Accurate restoration from historical, pictorial and physical documentation is preferred; a compatible design is the fallback when evidence is thin.
Is it safe to scrape or sand old cornice paint?
Not without precautions. Older paint may contain lead, so use damp methods, avoid open flame and high heat, and wear appropriate protection. Contractors must follow OSHA’s construction lead standard, and owners should hire a lead-safe professional for the work.
What wood should be used for repairs?
Choose the same species and grain direction as the original where possible, and acclimatize the new timber so its moisture content is close to that of the existing wood before it is spliced in. Treated lumber can be used for hidden framing where rot is likely to recur.
Sources
Recommended
by Matthew Wiley | Nov 1, 2026 | Architectural Millwork
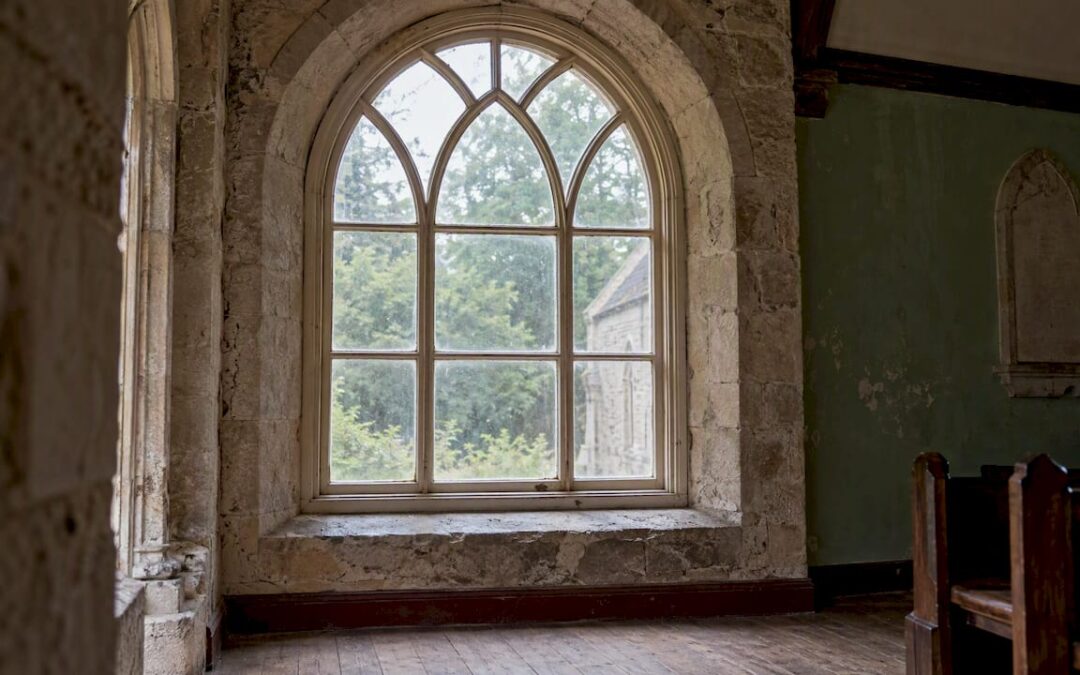
An arched window reproduction is a new wood window built to match a lost or beyond-repair original in shape, profile, proportion, material and operation. It is the right answer only when repair cannot save the original sash, and it succeeds only when the new unit is drawn from measured evidence of the old one. What follows sets out when to reproduce, how to document the arch, what to specify, how the work is fabricated and installed, and how the Secretary of the Interior’s Standards bear on every step, including the curved and bowed windows of the Victorian period.
Gepettomillworks
Custom Millwork for Historic Windows
Gepettomillworks creates custom millwork for historic building projects, including work for architects, homeowners, builders and restoration professionals.
Visit Gepettomillworks
TL;DR
- Repair first: federal guidance begins with the principle that deteriorated historic features are repaired rather than replaced, and replacements match the old in design, color, texture and, where possible, materials.
- Reproduce from evidence: field measurements, scaled drawings, muntin profiles and a physical template of the arch, never a manufacturer’s catalog cut sheet.
- Specify painted wood with true exterior muntin profiles; grids applied to insulated glass rarely read as the original.
- Build a sample, review it, and seal the frame to the masonry with a flexible joint before production windows are installed.
- Arched and bowed Victorian windows, including units curved on the round to fit a turret, are custom work from the first drawing.
Table of Contents
When Reproduction Is Appropriate
The National Park Service states that the treatment of historic windows begins with Standard 6 of the Secretary of the Interior’s Standards for Rehabilitation: deteriorated historic features should be repaired rather than replaced, and where replacement is unavoidable, the new feature should match the old in design, color, texture and other visual qualities and, where possible, materials. That sequence governs the decision. An arched sash with a rotted bottom rail, failed glazing putty or a loose joint is a repair candidate. An arched sash that has been removed, burned, crushed by a previous renovation, or reduced to fragments is a reproduction candidate.
The same NPS guidance also says that window decisions should weigh condition together with the importance of the elevation, feature or space the windows belong to, as set out in its window evaluation outline. A Palladian window above a principal entrance carries far more weight than a basement window on a rear wall, and a reviewer will treat the two differently.
In practice, reproduction is warranted in four situations:
- Missing originals. Earlier owners replaced arched sash with rectangular units or infilled the opening, and photographs or ghost marks on the masonry document what stood there.
- Terminal deterioration. The sash has lost so much sound wood that repair would leave little original fabric.
- Partial sets. One arched sash in a run of matching windows survives, and the remaining windows must be made to match it.
- Reconstruction of a lost elevation, where documentary evidence supports rebuilding the openings.
Where a window can be saved, we say so plainly, and we offer historic window restoration for exactly that case. Our own regional write-ups on repairing first and replicating only when needed and on saving original sashes in Winchester, Virginia describe how that judgment is made on real buildings.
The word “arched” covers several distinct geometries, and each demands a different template and a different joinery solution.
- Segmental arch. A shallow arc, the rise being a fraction of the span. Common on Greek Revival and Italianate buildings.
- Round or semicircular arch. The rise equals half the span. Typical of Romanesque, Federal and many Georgian openings.
- Elliptical arch. A flattened curve with a changing radius, which cannot be struck from a single compass point and must be traced rather than calculated casually.
- Gothic or pointed arch. Two radii meeting at an apex, with tracery in the head of the sash on higher-style work.
- Fanlights and arched transoms. Fixed heads with radiating muntins, often above doors.
- Palladian composition. A central arched sash flanked by narrower rectangular windows, in which the arch must align with the entablature and the side lights.
Recording which of these a window is, and whether the arch is in the sash, in the frame, or only in the masonry opening, is the first act of documentation.
Arched and Bowed Victorian Windows, Curved on the Round
The Victorian period pushed the arched window into three dimensions. Turrets, rounded bays, curved porch enclosures and bowed fronts called for glazing that follows the circumference of the building rather than sitting flat in it. A bowed window curved on the round is a different object from an arched-top window: its head, sill, stiles and muntins all describe a radius in plan, and many also describe an arch in elevation. Each pane, in turn, is a small curved or faceted piece of the whole.
Such windows are not found in catalogs because they are cut to the individual radius of the structure. Public-facing descriptions of arched and bowed work in Virginia point the same way: curved units made to order to fit a turret’s circumference, because no stock dimension will match. We build to that logic. For Victorian turrets and bowed fronts the process changes in four ways:
- The radius is measured in plan as well as in elevation. A turret that is slightly out of round, as many hand-built ones are, needs a template at each window, not a single radius applied to all.
- Heads and sills are laminated or cut from the solid. Bent lamination suits large sweeping curves; cutting from wide stock suits tighter radii, with grain direction managed so that short grain does not sit at a vulnerable point.
- Glass is specified early. Curved glass has long lead times and its cost and availability should be settled before the sash is finalized, because the glazing rabbet depends on it.
- Operation is decided before fabrication. Many curved Victorian sash were fixed or hung in curved frames; if the original operated, the reproduction should too, with hardware that suits the curve.
Because an owner or architect will be asked by a review board to justify each of these choices, they belong in the drawings from the start.
Documenting the Original Before Anything Is Cut
A reproduction is only as accurate as the record it copies. The research behind historic review boards is consistent on this point.
Photographs. Guidance from the City of Boston’s Landmarks Commission calls for clear photographs of the whole window and its relevant components, including jamb liners, wood joints, muntins and brick mold. Photograph the window from inside and out, with a scale in frame, and photograph every joint that will have to be reproduced.
Measured drawings. NPS guidance holds that documentation for proposed replacements must rest on precise field measurements and include scaled drawings showing elevations, horizontal and vertical sections, muntin profiles, the sash, and the window’s relationship to the wall plane. It adds that a manufacturer’s standard cut sheets are usually not an adequate substitute for drawings prepared specifically for the proposed replacement.
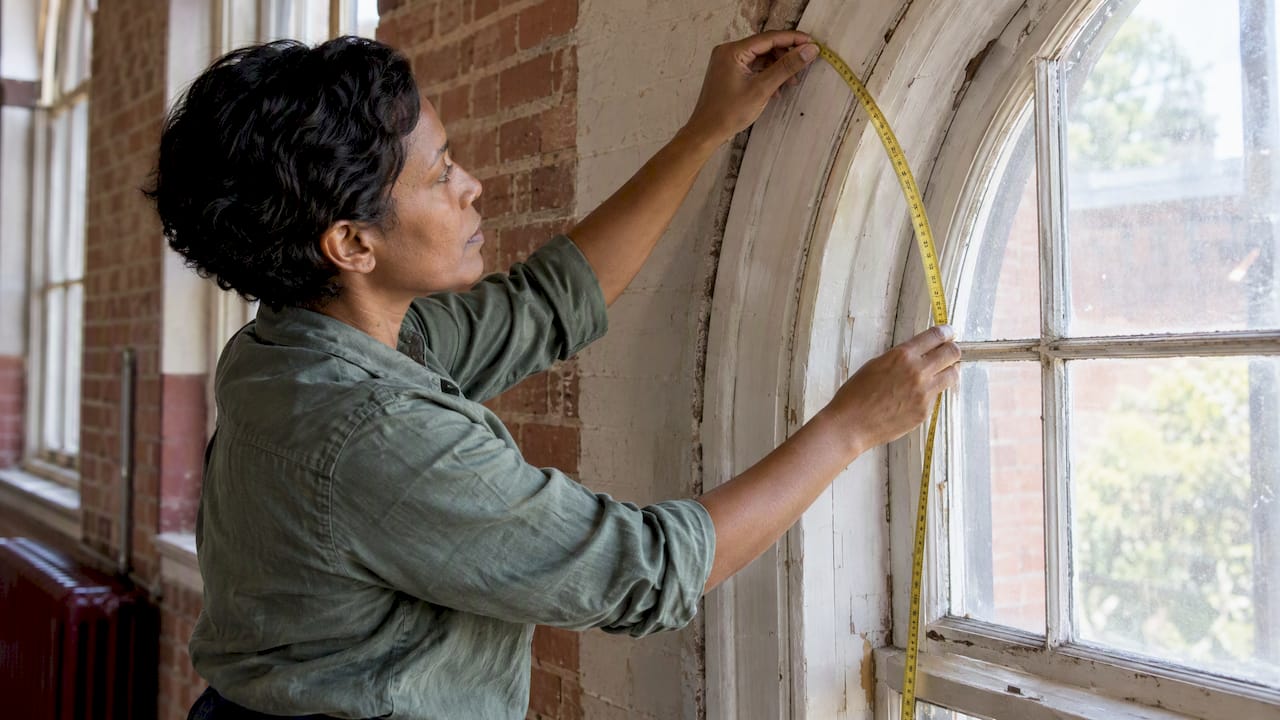
A physical template. For the arch itself, nothing replaces tracing the opening. In the 1980 work at Lyndhurst, described in an NPS technical note, a Masonite template was fitted to each historic arch and used to trace the top rail onto pine or cypress stock. Hand-built arches vary from one opening to the next, so each template belongs to its window.
A practical documentation checklist:
- Overall opening width and height, measured at several points and checked for square.
- Springline height and arch rise, plus the arch radius or traced profile.
- Sash thickness, rail and stile widths, and meeting-rail dimensions.
- Full-size sections of the muntin, glazing rabbet, stop and parting bead.
- Original species where identifiable, joinery type, and paint history.
- Glass type, thickness and any distortion that characterizes it.
- Hardware, including weights, pulleys, hinges, latches and their mortise locations.
- The window’s position in the wall plane relative to the masonry, trim and sill.
If the architect is preparing a design for tax credit review, ask us for dimensioned shop drawings early so the reviewer sees the same information the shop will build from.
Specifying Materials, Glazing, Muntins and Finish
The District of Columbia’s historic preservation guidance states that painted wood is generally the most appropriate replacement for historic wood windows, that alternative materials may be acceptable only if they closely match the original’s visual characteristics, and that muntins should have an exterior profile. The same document notes that vinyl is generally considered inappropriate on primary elevations because it fails to replicate the traditional dimensions, profiles and finish of historic wood. Preservation Pennsylvania’s 2026 guidance on repair, retrofit and replacement says the same in broader terms: replacements should reproduce the original’s shape, pane configuration, dimensions, profiles and materials.
For an arched window the specification should therefore address:
| Element |
What to specify |
| Frame and sash |
Solid wood, species matched to the original or a durable equivalent, painted |
| Arch head |
Template-traced; cut from solid or laminated, with the joinery type recorded |
| Muntins |
True exterior profile matching the original section, not applied grids |
| Glazing |
Single or insulated glass chosen to preserve the original muntin depth and profile; curved glass ordered early for bowed units |
| Hardware |
Period-appropriate pulleys, latches and hinges; custom fabrication where none exists |
| Finish |
Primed in the shop, with the final color matched to paint investigation |
Muntins deserve particular attention. In the Beatty’s Mill project, the team found that grids applied to sealed insulated glass were insufficient to match the historic windows, and instead selected custom wood windows that closely matched the original detail and appearance. On a tracery head or a fanlight the reasoning is stronger still: the radiating bars are the design.
How a Reproduction Is Fabricated and Installed
The process below follows the sequence documented in NPS case studies and the way a careful shop works.
- Shop drawings. Drawn from the field measurements and approved by the architect and, where tax credits are involved, the reviewing agency.
- A sample window. At Beatty’s Mill, the team prepared shop drawings, fabricated and tested a sample window before production. The same note observes that testing new designs at an independent laboratory can confirm that custom units meet the required performance specifications.
- Milling to profile. Custom cutter knives are ground to the original muntin and sash profile. The Beatty’s Mill note observed that new knives to match a muntin profile would not have been expensive for the custom shop given the project’s size, which is a useful reminder that profile accuracy is seldom the budget driver.
- Joinery and assembly. At Lyndhurst, the parts were glued at the joints with resorcinol glue; the assembled windows were then sanded, treated with a non-toxic preservative and primed with oil-alkyd paint. Modern shops use their own adhesives and finishes, but the discipline of waterproof joints and preservative treatment before paint is the same.
- Hardware. The Lyndhurst team used custom stainless-steel pin-in-socket hinges to minimize damage to the historic woodwork, an example of choosing fittings that protect the surrounding original fabric.
- Installation and sealing. The NPS has long recommended flexible polyurethane sealant with a compressible backer rod for the joint between a new frame and the masonry opening. At Beatty’s Mill the new frames were set close to the masonry.
On an arched opening, installation is where a poor template shows. A head that is 1/4 inch off the masonry curve cannot be hidden by sealant, so test-fit the sample in the actual opening before the production run is released.
Cost Drivers for Arched Reproductions
No honest figure can be quoted without drawings, and published numbers rarely compare like with like. A homeowner in a forum thread might mention a few thousand dollars per restored window set; a commercial project spreads cost across hundreds of units. The NPS Beatty’s Mill note recorded a $236,000 window delivery cost for a mill project in 2004 and 2005, but that figure also included exterior door work, so it is a scale reference and never a unit price.
What moves the price of a given arched window:
- Geometry. Round and segmental heads are less demanding than elliptical, Gothic or curved-on-plan units.
- Muntin count and complexity. A fanlight with radiating bars takes much longer than a single-light arch.
- Glass. Curved or restoration glass adds cost and lead time.
- Operation and hardware. Fixed units cost less than operable ones with custom hardware.
- Quantity. Repeating a profile across a run of windows spreads the tooling and drawing cost.
- Documentation requirements. Tax credit submissions add drawing and review time.
We do not publish prices, because every project is quoted from its own drawings. Send us the opening dimensions and photographs and we will respond with a scoped estimate.
Matching the Surrounding Millwork
An arched window seldom stands alone. Its interior casing, window seat, paneled reveals and neighboring built-ins should share the same period detail, and the cleanest results come when one shop draws the window and its surrounding woodwork together. Matching a window casing to a run of built-in bookcase ideas in the same room is one way architects keep trim profiles consistent from the window to the shelving. For houses where doors, stairs and casework are also being replicated, our custom fabrication work covers those elements under one roof.
Preservation Standards and Tax Credit Review
Projects pursuing the federal historic tax incentive are reviewed against the Secretary of the Interior’s Standards for Rehabilitation, and window treatment is one of the most closely watched items. The NPS page on evaluating historic windows frames the hierarchy: repair, then replace only what cannot be repaired, and match the old in visual qualities. State review offices and local historic commissions apply their own guidelines in addition, such as those published by the District of Columbia’s Historic Preservation Office.
The lessons for submissions are consistent:
- Document the condition of each window and why repair is not feasible.
- Submit scaled drawings and profile sections, not catalog sheets.
- Show that the replacement matches shape, pane configuration, dimensions, profiles and material.
- Confirm the reviewer’s requirements for your state before ordering, because they can differ.
Our Perspective
Most of the arched windows that come through our shop were not lost to age alone. They were lost to a quick decision, a stock replacement that fit the rough opening and ignored the arch above it. Undoing that decision is slow work, and it rewards patience.
We believe the sample window is the most valuable hour of any reproduction. It lets the architect, the owner and the reviewer see the profile, the proportions and the paint color in the opening before a full run is committed. We would rather build one extra sample than ask a client to live with an approximation.
Our focus is exact replication of historic millwork using authentic materials and techniques, so that projects can satisfy preservation review, and we take on complex, architecturally significant requests such as curved Victorian sash that others may decline. We still tell clients when an original can be saved, because the best arched window in a historic house is usually the one that was built there.
Gepetto
Working With Gepetto Millworks
We design, fabricate and restore wood windows, doors, trim, cabinetry and staircases for historic buildings across Virginia, West Virginia, North Carolina, South Carolina, Maryland and the District of Columbia, including replication of period features and matching for historic tax credit eligibility.
If you have an arched or bowed opening to reproduce, start with our wooden windows page, or reach us through our main site with photographs, dimensions and the name of your reviewing agency.
FAQ
Should I repair or reproduce an arched window?
Repair whenever the original has enough sound wood to keep, since federal guidance puts repair ahead of replacement. Reproduce when the sash is missing or too deteriorated to save. A written condition assessment for each window supports either decision with a reviewer.
What drawings do I need for a reproduction?
You need scaled elevations, horizontal and vertical sections, muntin profiles and the window’s position in the wall plane, all based on field measurements. NPS guidance notes that manufacturers’ standard cut sheets are usually not an adequate substitute for these drawings.
Can the windows be made with insulated glass?
Often yes, but the muntin must keep a true exterior profile that matches the original. Applied grids on sealed units were found insufficient at Beatty’s Mill, so the glazing detail should be reviewed with your preservation office before ordering.
Can a bowed Victorian window be built to fit a turret?
Yes. A curved-on-plan window is cut to the measured radius of the individual turret, with the head and sill shaped to follow it. Because turrets are often slightly out of round, each opening is templated separately.
Sources
- Evaluating Historic Windows for Repair or Replacement, National Park Service
- Photographing Windows, Boston Landmarks Commission
- Windows Number 3: Exterior Storm Windows, NPS Preservation Tech Note
- Windows Number 21: Replacement Wood Sash, NPS Preservation Tech Note
- Window Repair and Replacement, DC Office of Planning
- HPO Window Guidelines, DC Office of Planning, 2011
- Considering the Repair, Retrofit and Replacement of Historic Windows, Preservation Pennsylvania, 2026
- Sealing joints between window frames and masonry, National Park Service
- 15 Built In Bookcase Ideas: Checklist
Recommended
by Matthew Wiley | Oct 31, 2026 | Architectural Millwork
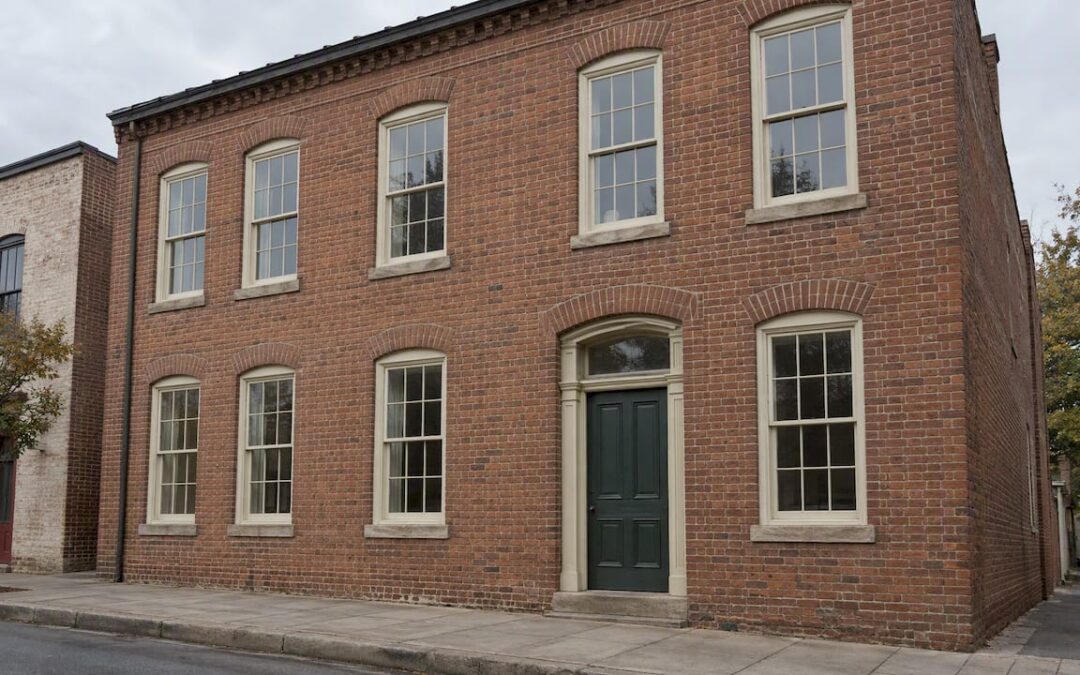
A 19th-century building in Virginia is best served by a team, not a single provider: a preservation architect to document and specify, a contractor with real historic experience to coordinate, and a specialty millwork shop to repair or replicate windows, doors, stairs, and trim. This guide compares those options, explains how the state and federal tax credits constrain the work, and sets out what to ask before signing a contract.
Gepettomillworks
Preserve the Character of Historic Woodwork
Gepettomillworks creates custom millwork for historic building projects, supporting repairs and replacements that respect a building’s original character.
Explore custom millwork
TL;DR
- Virginia’s state historic rehabilitation credit is 25% of eligible expenses and the federal credit is 20%; both may sometimes apply together, and the work must meet the Secretary of the Interior’s Standards.
- Preservation architects, historic-experienced general contractors, and specialty millwork shops solve different problems. Most successful projects use all three.
- Repair before replacement is the governing principle for original wooden windows and woodwork; where replacement is unavoidable, the new feature must match the old.
- Ask every prospective contractor about a problematic past job, liability insurance, and license class, and require photographs and drawings of existing conditions before any work begins.
Table of Contents
What preservation services a 19th-century building actually needs
Buildings erected between roughly 1800 and 1900 in Virginia span a considerable stylistic range: Federal and Greek Revival townhouses in Alexandria and Richmond, Italianate and Second Empire commercial blocks, Gothic Revival churches, and the vernacular farmhouses and tobacco-country outbuildings of the Piedmont and Shenandoah Valley. They share a common technical profile. Their fabric is old-growth timber, lime-based mortar, hand-planed or early-milled woodwork, and wavy glass set in putty, and it responds poorly to modern materials and methods.
The services that surround such a building typically fall into five groups:
- Assessment and documentation: condition surveys, historic structure reports, measured drawings, and photographic records.
- Design and treatment planning: deciding what is preserved, rehabilitated, restored, or reconstructed, and drawing the construction documents.
- Structural and envelope work: foundations, roofs, masonry repointing, and framing stabilization.
- Architectural woodwork: windows, doors, trim, stairs, balustrades, casework, and shutters.
- Administration: tax credit applications, cost estimating, and construction oversight.
No single firm is equally strong across all five, which is why the comparison below is organized by type of provider rather than by brand.
Understanding the four treatment approaches
Before comparing providers, an owner should understand the vocabulary, because it determines what a provider is being asked to do. The National Park Service distinguishes four treatments: preservation emphasizes maintenance and repair of historic materials; rehabilitation permits compatible, use-related alterations; restoration depicts a documented period; and reconstruction recreates a resource that no longer survives, chiefly for interpretation.
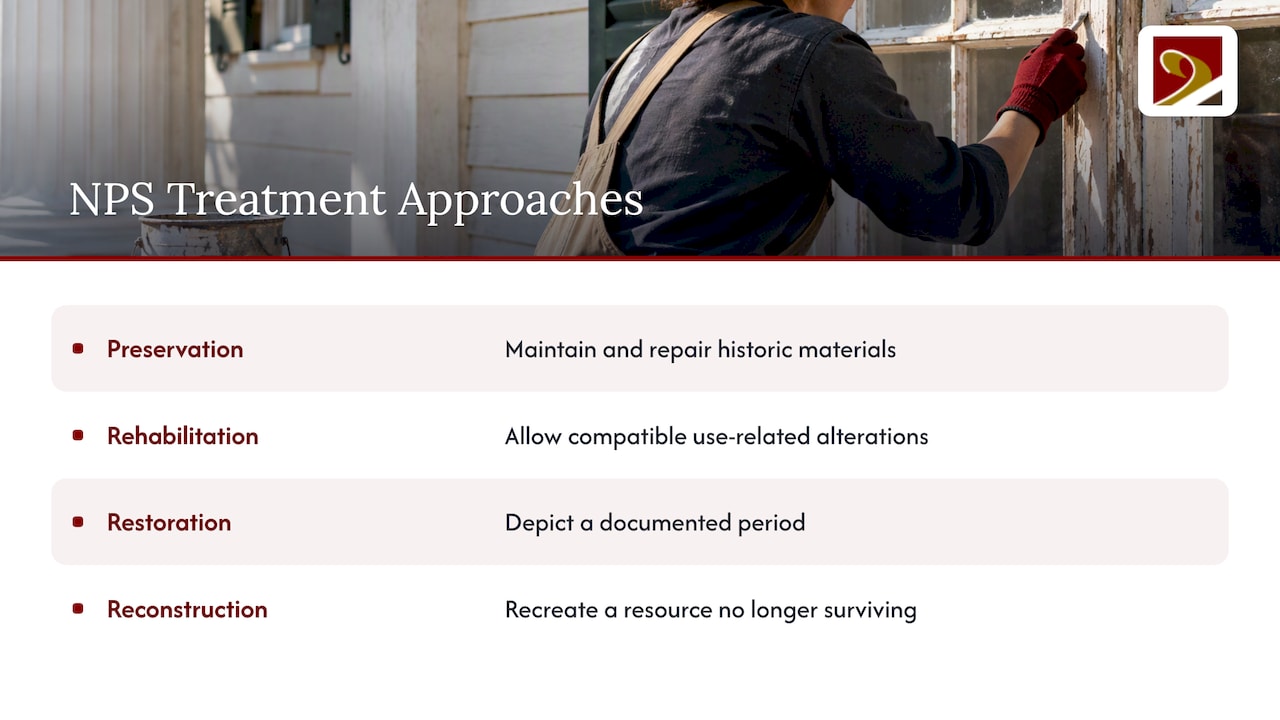
The same NPS guidance says that treatment selection should weigh the building’s significance, its physical condition, the proposed use, and code or other regulatory requirements. Rehabilitation is commonly the appropriate choice where extensive repair, replacement, alterations, or additions are needed, which describes most 19th-century buildings returning to active use. Tax credit projects are almost always rehabilitations.
Comparing your options
The table below describes the main provider types an owner, architect, or contractor will encounter in Virginia. It deliberately names categories, not firms, since the right choice depends on the project’s scope.
| Provider type |
Best at |
Typical limits |
Role in a credit project |
| Preservation architect or consultant |
Condition surveys, treatment plans, drawings, tax credit narratives |
Does not fabricate or install; relies on trades |
Authors the application documents and specifications |
| General contractor with historic experience |
Sequencing trades, structure, roofs, masonry, budget control |
Often subcontracts millwork; quality depends on the subs chosen |
Builds to the approved scope and manages change orders |
| Specialty millwork and restoration shop |
Repairing and replicating sashes, doors, stairs, trim, curved or unusual profiles |
Not a full-service builder; scope limited to woodwork |
Produces matching components that satisfy the Standards |
| Window-only restoration firm |
Weatherization and repair of standard double-hung sashes |
May decline curved, arched, or heavily deteriorated units |
Useful for conventional windows on large, repetitive facades |
| Local carpenter or handyman |
Small repairs, modest budgets |
Rarely documents work; may lack insurance for historic fabric |
Seldom suitable for certified rehabilitation |
| Design-build preservation firm |
One contract covering design and construction |
Fewer independent checks; premium for integrated management |
Can streamline schedules on mid-sized projects |
Preservation architects and consultants
This is the starting point for anything beyond routine maintenance. A preservation architect reads the building, identifies its character-defining features, and writes the treatment plan. The Historic Fredericksburg Foundation advises owners to use architects for large renovations or additions and to hire contractors with substantial historic-building experience, because older materials and building systems demand different treatment than modern construction.
General contractors
A contractor with a record on pre-1900 structures understands, for example, why a hard Portland cement repointing job can destroy soft historic brick, and why a floor cannot be leveled without consequences for plaster and trim. The weakness is that a general contractor’s woodwork is frequently subcontracted to whichever shop is available, so it is reasonable for an architect to specify the millwork source separately.
Specialty millwork and restoration shops
This is the category in which we work. Windows, doors, staircases, and trim are the most visible character-defining features of a 19th-century façade, and they are also the features most often judged against the Standards by reviewers. A shop that can mill a matching profile from the correct species, replicate muntin geometry, or build a sash for a curved wall removes a significant risk from the project.
Window-only firms and general carpenters
Window-specialist firms do valuable work on conventional units. The difficulty arises with arched, elliptical, or round-headed openings, which many decline. General carpenters are appropriate for minor repairs but are rarely equipped to document conditions or to replicate profiles to a standard a state reviewer will accept.
How the tax credits shape the choice
For most commercial and income-producing owners, the deciding factor is the tax credit, because it dictates what work is permissible and how it must be documented. According to the Virginia Department of Historic Resources, the state credit equals 25% of eligible rehabilitation expenses, and qualifying taxpayers may sometimes combine it with the federal 20% credit for a potential 45% total. DHR administers the programs in Virginia.
Eligibility is defined by listing status. Per DHR’s 2023 FAQ, federal eligibility generally requires individual National Register listing or contributing status within a listed district, while Virginia also accepts individual Virginia Register listing or formal eligibility for listing. DHR’s economic report notes that the Virginia program, established in 1997, provides 25% credits that investors can use to reduce tax liability for up to 10 years.
The operative legal test is the Virginia Administrative Code, 17VAC10-30-60. It favors retaining distinctive historic materials and craftsmanship, repairing deteriorated features rather than replacing them, and, where replacement is necessary, matching the original in design, color, texture, and visual qualities and, where possible, materials. The rule applies to exterior, interior, site, and landscape work alike.
This is why provider choice matters. A contractor who installs stock vinyl-clad windows on a 19th-century façade may produce a handsome result and still forfeit a credit worth tens or hundreds of thousands of dollars. Owners should confirm current rules and program procedures directly with DHR and a qualified tax adviser before committing capital.
Assessing condition: what gets repaired and what gets replaced
A defensible preservation project begins with documentation. DHR’s sample Part 2 narrative shows the expected approach: existing conditions and proposed work are recorded in narrative form, with photographs and architectural drawings or sketches of both. Reviewers evaluate the proposal against the Standards, so vague descriptions invite questions.
For wooden windows, the benchmark text is Preservation Brief 9. It advises evaluating each window’s significance and physical condition, identifying sources of moisture, and then applying three increasing levels of intervention: maintenance, stabilization, and parts replacement. It recommends retaining and repairing original windows whenever possible, and where replacement is warranted, the new unit should follow the existing opening pattern, proportions, panes, muntins, wood, glass, and associated details.
In practice, a sound assessment sorts each element into one of three bins:
- Retain and repair: original sashes, frames, and trim with localized rot that can be consolidated or spliced with matching wood.
- Replace in kind: components beyond repair, rebuilt to the documented profile and species.
- Reconstruct: features lost entirely, recreated from physical evidence, historic photographs, or surviving analogues on the building.
The quality of the replication in the second and third bins is where a millwork specialist contributes most. Careful tracing of the original muntin profile, the correct sash thickness, and appropriate glazing are the details that distinguish a reviewed-and-approved window from a rejected one.
What projects cost and how long they take
Published Virginia figures are mostly for large institutional projects, but they illustrate how estimates behave over time. A 2019 feasibility report for Fredericksburg’s Renwick Compound estimated construction for its first scenario at $7,959,218 to $10,111,307 across 20,180 square feet, and its second at $8,457,431 to $10,734,074. The report grounded those options in a historic structures report, market analysis, design options, and operations analysis.
Overruns are a recurring theme. Cardinal News reported that the restoration of Bath County’s Warm Springs Pools cost $4.6 million, against an initial estimate of $2 million, after crews confronted rotting roofs and collapsing foundations. In Manassas, a 2024 report on the 1892 Annaburg Manor put the stabilization and restoration effort at $4.4 million including acquisition, covering the slate roof, paint, wood floors, doors, windows, accessibility, lighting, landscaping, and an archaeological discovery.
The lesson for owners is practical: budget a contingency, investigate concealed conditions early, and commission the survey before fixing a number. Millwork generally has a long lead time because components are made individually, so ordering windows and doors early in the schedule protects the critical path.
Documenting the project, including exterior elements
A complete documentation package covers every visible change, including items that owners sometimes treat as afterthoughts. Storefront lettering, plaques, and wayfinding on a rehabilitated commercial building are reviewed along with the rest of the exterior, so projects that add period-appropriate signage can consult architectural sign design and fabrication resources while preparing drawings. The same discipline applies to everything else: each element needs a photograph of what exists and a drawing of what is proposed.
Questions to ask before you hire
The Historic Fredericksburg Foundation’s homeowner workshop booklet suggests asking prospective contractors about a problematic prior job and requesting proof of liability insurance and the contractor’s license class. To those, an owner or architect working on a credit project can add:
- Have you completed work that DHR or the National Park Service approved, and can you describe the scope?
- Who mills the woodwork, and from what species and stock?
- Can you replicate curved, arched, or custom profiles, or do you decline them?
- How will you document existing conditions before and during demolition?
- How do you handle discovered conditions and change orders?
The answers reveal quickly whether a firm treats old buildings as a specialty or merely as an occasional job.
Our perspective: why the woodwork decides the review
We build and restore windows, doors, stairs, trim, and casework for historic buildings, and our experience is that the woodwork is where a rehabilitation is most often won or lost. Architects and reviewers read a façade through its openings. A sash with the wrong muntin profile, or a door whose panels do not match the period, registers immediately, however sound the rest of the project may be.
For that reason we concentrate on exact replication using authentic materials and techniques, so that projects can meet the matching requirements that tax credit eligibility depends on. We also take on the architecturally significant and unusual commissions, such as sashes for curved walls and round turrets, that other shops tend to decline. Our work spans Virginia, West Virginia, North Carolina, South Carolina, Maryland, and the District of Columbia.
Our advice to architects and contractors is to bring the millwork specialist in during design, not after bidding. A conversation about profiles, species, and fabrication limits at the drawing stage prevents the substitutions that reviewers later question.
— Gepetto
Working with Gepetto Millworks on your project
If your 19th-century building needs repaired sashes, replicated windows, historic doors, period staircases, or custom casework, our historic window restoration service and our custom fabrication shop are the places to start. For new sashes built to match existing openings, see our wooden windows. We do not publish prices, because each project is fabricated to its own drawings; send us the survey or the drawings and we will respond with a scope.
For more of our local work and notes on credit-eligible matching, browse our pages on historic tax credit projects and restoration in Virginia.
How to choose: a short decision guide
- Small, owner-occupied house with no credit sought: a historic-experienced contractor, with a millwork specialist for any windows or doors you intend to keep original.
- Income-producing building pursuing credits: a preservation architect first, then a contractor and millwork specialist engaged during design.
- Façade with curved, arched, or unusual openings: a specialty shop that has built such units, confirmed before bids close.
- Large institutional or multi-phase project: a full team, a funded contingency, and a published historic structures report as the baseline.
In every case, the sequence matters more than the individual firm: document, design, specify the woodwork, and only then bid.
FAQ
What is the difference between restoration and rehabilitation?
Restoration depicts a building as it appeared in a documented period, removing later work. Rehabilitation permits compatible alterations so the building can serve a contemporary use, while retaining its historic character. Tax credit projects are normally rehabilitations.
Can I claim both Virginia and federal historic tax credits?
Qualifying taxpayers may sometimes combine Virginia’s 25% credit with the federal 20% credit, according to DHR. Eligibility depends on listing status and compliance with the Secretary of the Interior’s Standards, so confirm your situation with DHR and a tax professional.
Should original wooden windows be repaired or replaced?
Preservation Brief 9 recommends retaining and repairing original wooden windows whenever possible. Replacement is considered only when a unit is beyond repair, and the new window should replicate the original’s proportions, muntins, wood, and glass.
What should I ask a contractor before hiring them for a historic building?
Ask about a problematic past job, request proof of liability insurance and the license class, and ask for examples of approved historic work. For woodwork, ask who fabricates it and whether they handle custom profiles.
Sources
- Historic Rehabilitation Tax Credits, Virginia DHR
- Historic Tax Credit Frequently Asked Questions, Virginia DHR (2023)
- Historic Rehabilitation Tax Credit economic report, Virginia DHR (2023)
- 17VAC10-30-60, Standards for Rehabilitation
- Sample Part 2 Narrative Description of Rehabilitation, Virginia DHR (2023)
- The Secretary of the Interior’s Standards for the Treatment of Historic Properties, NPS
- Preservation Brief 9: The Repair of Historic Wooden Windows, NPS
- Before Starting Work, Historic Fredericksburg Foundation
- Historic Homeowner Workshop Booklet, Historic Fredericksburg Foundation (2015)
- Renwick Compound Economic Feasibility Report (2019)
- Bath County reopens the Warm Springs Pools, Cardinal News (2022)
- Historic Annaburg Manor celebrates restoration, Potomac Local (2024)