
Stile and rail doors are framed panel doors built from two vertical members (stiles) and two or more horizontal members (rails) that together form a structural frame surrounding one or more floating panels. The joinery is typically cope-and-stick or mortise-and-tenon, and the panels sit in grooves rather than being glued, allowing the wood to move seasonally without cracking the frame. This construction method has defined architectural interiors from Georgian townhouses to Craftsman bungalows precisely because it balances structural integrity with visual refinement.
Choose a stile and rail door when your project demands:
- Historic restoration or period-accurate replication, where molded slab doors cannot reproduce the sticking profiles, panel depths, or proportions of the original millwork.
- Custom interiors where panel count, glazing, species, and profile must be specified to match a particular architectural vocabulary.
- High-traffic commercial corridors where frame-and-panel construction distributes stress across the joinery rather than concentrating it in a single slab, extending service life considerably.
Table of Contents
- How stile and rail doors are built: anatomy and tolerances
- Choosing the right materials and core types
- How stile and rail doors are fabricated in the shop
- Finishing and hardware: what you need to specify before you order
- Stile and rail vs. molded, flush, and slab doors
- How to specify and order stile and rail doors correctly
- Maintenance and expected lifespan
- When custom millwork is the right call for complex door projects
- Key Takeaways
- The specification detail that mass manufacturers won’t tell you
- Gepettomillworks custom stile and rail doors: next steps
- Useful sources and further reading
How stile and rail doors are built: anatomy and tolerances
Understanding the named parts of a panel door is the first step toward writing a specification that a millworker can actually execute without ambiguity.
Stiles are the full-height vertical members running the entire length of the door. In traditional “stile-through” construction, the stiles are continuous from top to bottom, placing uninterrupted vertical grain at the hinge line. Fine Woodworking’s analysis of frame-and-panel construction confirms that this arrangement is structurally superior because it prevents levered rail end-grain from causing hinge failure and binding, a detail that matters most on heavy exterior doors.
Rails are the horizontal members. A standard door has a top rail, a bottom rail, and a lock rail positioned at handle height (typically 36"–40" from the floor). Doors with multiple panels add intermediate crossrails. The lock rail must be wide enough to accept the mortise lock hardware without compromising the stile/rail joint.
Panels float in grooves machined into the inside edges of the frame. They are intentionally set 1/16 to 1/8 inch undersized in their grooves, allowing roughly 1/4 inch of seasonal expansion without binding or cracking the frame. Mullions are vertical intermediate members that divide a wide opening into multiple panel bays.
Choosing the right materials and core types
The species and core you specify determine how the door performs over decades, not just how it looks on delivery day.
Solid wood species
White oak offers excellent stability and takes stain evenly, making it the preferred species for Arts and Crafts and Mission Revival interiors. Hard maple machines cleanly and accepts paint without grain telegraphing, though it moves more with humidity than oak. Cherry is dimensionally stable, darkens attractively with age, and is well suited to Federal and Colonial Revival work. Mahogany (genuine Honduran or African khaya) has been the benchmark for exterior stile and rail doors in historic American architecture because of its low shrinkage coefficient and natural resistance to decay. Douglas fir and pine are common softwood choices for painted interior doors, with finger-jointed pine used widely in production-grade work to reduce cost while maintaining appearance.
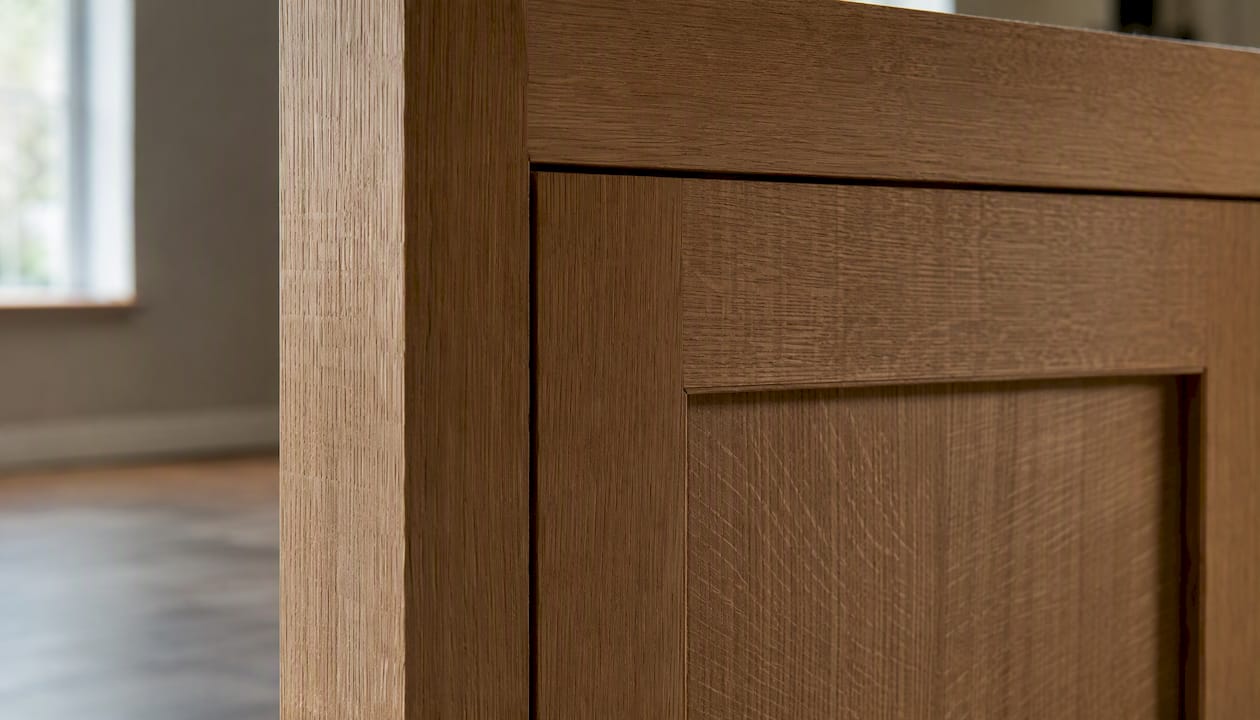
Quarter-sawn stock deserves particular attention for exterior applications. Because the growth rings run perpendicular to the face, quarter-sawn lumber moves primarily in thickness rather than width, reducing the risk of cupping and checking in the stile faces.
Core and construction options
| Core Type | Stability | Typical Finish | Best Use | Cost Range |
|---|---|---|---|---|
| Solid wood (matched species) | Moderate | Stain or paint | Historic restoration, custom interiors | High |
| Engineered core (Duracore / solid-core) | High | Paint or stain | Exterior, high-humidity, commercial | Medium–High |
| MDF stiles/rails | Very high | Paint only | Painted interior doors, production work | Low–Medium |
| Plywood panel (veneered) | High | Stain or paint | Flat-panel contemporary, cost-sensitive | Medium |
| Fiberglass composite | Very high | Factory finish | Exterior, high-abuse, low-maintenance | Medium–High |
Consulting the manufacturer early is not optional when hardware, climate, and finish interact. A solid mahogany door specified for a humid coastal climate without an engineered core may perform beautifully for a decade and then begin to bind as the stiles swell. An MDF core door in the same opening will hold its dimensions but cannot be stained. The decision tree runs: climate first, then finish intent, then species.
Pro Tip: For painted interior doors where budget is a constraint, MDF stiles and rails with a veneered plywood panel deliver excellent dimensional stability and a paint-ready surface. For solid wood interior doors where stain is the intent, specify quarter-sawn stock and discuss the climate data with your millworker before finalizing the core.
How stile and rail doors are fabricated in the shop
The fabrication sequence matters as much as the material choice. Cutting rails before stiles is the standard shop practice because rails can be registered squarely against the router table fence, producing a clean cope cut with no tearout on the show face. The stile bit then profiles the long edges and cuts the groove that receives both the panel and the rail’s stub tenon.
Step-by-step fabrication sequence
- Mill all stock to final thickness (typically 1-3/8" for interior, 1-3/4" for exterior) and allow it to acclimate in the shop for at least 48 hours.
- Cut rails to final length, including the tenon allowance if using full mortise-and-tenon joinery.
- Run the cope cut on rail ends using the cope (rail) bit in the router table, with the workpiece held vertically against a fence and backer board to prevent tearout.
- Run the stile profile on stile edges using the matching stile bit, cutting the decorative profile and the panel groove in one pass.
- Prepare panels to final dimension, undersizing by 1/16"–1/8" per side relative to the groove depth to allow seasonal movement.
- Dry-fit the assembly without glue, checking corner squareness by measuring diagonals. The tolerance is 1/32 inch.
- Glue up, applying adhesive only to the cope-and-stick joint surfaces, never to the panel groove. Use band clamps or pipe clamps in a flat, square jig.
- Check and correct squareness within the first 15 minutes of clamping, before the glue sets.
- After cure, trim stiles to final door height on the table saw for a clean, square bottom edge.
Matched cope-and-stick router bit sets cut the decorative profile and the joinery in a single pass, which reduces setup time and ensures the profile registers consistently. Single-bit sets require a bit change between the cope and stile operations; two-bit sets allow each operation to remain set up independently, which is the better choice for production runs. Both configurations must be run on a router table, never freehand.
Essential tools for shop fabrication:
- Router table with a 3-1/4 HP or larger router (1/2" collet required for stile-and-rail bit sets)
- Matched cope-and-stick bit set (CMT, Freud, or Whiteside are widely used)
- Jointer and thickness planer for stock preparation
- Miter saw or radial arm saw for rail crosscuts
- Band clamps and pipe clamps (minimum four clamps per door)
- Winding sticks and a reliable square for flatness and squareness checks
Pro Tip: Always run a test cope cut on scrap stock before committing to the door parts. Set bit height so the profile shoulder aligns flush with the stile face, then sneak up on the final depth in two passes. A misaligned bit height produces a step at the joint line that requires hand-planing to correct after assembly.
For builders interested in how joinery techniques translate from the shop to historic restoration work, the assembly principles are identical; the complexity increases when profiles must be matched to existing period millwork rather than selected from a standard catalog.
Finishing and hardware: what you need to specify before you order
Finish choice and hardware selection are not afterthoughts. Both affect the stile width you must specify, the core material you should select, and the surface preparation the door requires before it leaves the shop.
Paint vs. stain
Painted doors tolerate MDF stiles and rails because the surface is opaque. MDF holds paint exceptionally well, resists grain telegraphing, and does not require the same careful species matching that a stained door demands. Stained doors require solid wood or a veneer face that matches the species throughout, and the veneer must be thick enough to survive sanding without cutting through to the substrate. Quarter-sawn veneer faces are preferable for stained doors because the tight, consistent grain pattern reads as more refined and moves less with humidity.
Hardware clearances and lock-rail placement
Stile width directly determines whether a mortise lock or exit device can be installed without compromising the stile/rail joint. Standard mortise lock bodies require a minimum stile width of 4 inches; heavy-duty exit devices may require 4-1/2 inches or more. When the architectural design calls for a narrower stile, a lock block (a solid wood insert glued into the stile cavity at lock height) must be specified at the time of fabrication, not added in the field.
Pre-order hardware checklist:
- Confirm mortise lock body dimensions (height, width, depth) with the hardware supplier before finalizing stile width.
- Specify hinge size and weight rating relative to door weight. A 1-3/4" solid mahogany door at 36" x 84" can weigh 80–100 lbs; three 4-1/2" heavy-duty hinges are the minimum.
- Confirm door swing (left-hand or right-hand) and handing before routing hinge mortises.
- For exterior doors, specify weatherstrip allowance (typically 1/8" per side) in the rough opening calculation.
- Confirm fire rating or STC (sound transmission class) requirements before selecting core type, as rated assemblies require specific tested configurations.
Pro Tip: Specify stile width and lock-block reinforcement in the written purchase order, not just verbally. A stile that arrives at 3-1/2 inches when the mortise lock requires 4 inches cannot be corrected without remaking the door.
Stile and rail vs. molded, flush, and slab doors
The decision between construction types is ultimately a question of what the project demands over its full service life, not just what fits the budget at the time of purchase.
When molded or flush doors are the better choice
- Budget-constrained painted interiors where appearance at delivery matters more than repairability over decades. A molded HDF door in a rental unit is a rational choice.
- Contemporary minimalist interiors where a flush MDF door with no visible frame reads as architecturally correct.
- High-volume production where lead time and unit cost must be minimized and custom profiles are not required.
- Moisture-prone utility spaces where a fiberglass or steel slab door outperforms any wood construction.
The decision checklist: if you answer yes to any of the following, specify a stile and rail door.
- Does the project require a specific period profile or panel configuration not available in stock?
- Is the door in a high-traffic location where joint strength and repairability matter?
- Will the door be stained, requiring consistent grain across the face?
- Is the project subject to historic tax credit review, where period accuracy is a compliance issue?
- Does the opening require a non-standard size, radius top, or glazed configuration?
How to specify and order stile and rail doors correctly
A specification written before the door is ordered prevents the majority of field problems. The sequence below applies whether you are ordering from a production millwork shop or commissioning a fully custom door.
- Measure the rough opening and calculate the door size with reveal and gap tolerances. Standard reveals are 3/16"–1/4" per side; the gap at the threshold is typically 3/4" for carpet or 1/8"–1/4" for hard flooring.
- Confirm stile width relative to the specified mortise lock body and hinge size. Note lock-block requirements in writing.
- Specify door swing and handing (left-hand, right-hand, left-hand reverse, right-hand reverse) using the standard convention: stand outside the opening; the hinge side is the hand.
- Select species and core type based on climate, finish intent, and budget. Involve the manufacturer at this stage, not after the order is placed.
- Specify the sticking profile by name or by reference to a period drawing. “Shaker,” “ovolo,” “ogee,” and “bolection” are not interchangeable terms.
- Confirm fire rating or STC requirements with the architect or building official before finalizing core selection.
- Request a production sample or finish mock-up for stained doors, particularly when matching existing millwork.
- Confirm lead time and schedule site delivery to coincide with a controlled interior environment (HVAC running, humidity stabilized).
Additional notes before installation:
- Acclimate doors in the building for 48–72 hours before hanging, with the door standing vertically and air circulating on all faces.
- Seal all six faces (both faces, all four edges) with the specified finish before installation to equalize moisture absorption.
- Check the rough opening for plumb, level, and square before setting the frame.
Early manufacturer consultation is the single most effective way to prevent specification errors that only become visible after installation.
Maintenance and expected lifespan
A properly specified and installed stile and rail door, built from solid wood with appropriate joinery, should last the life of the building. The qualification “properly specified” does real work in that sentence.
Common defects and repairs
Panel binding occurs when the floating panel has been glued into its groove (intentionally or by finish buildup) and cannot move seasonally. The repair is to free the panel by running a thin blade around the perimeter of the groove. Loose joints at the cope-and-stick connection are typically caused by glue failure from moisture cycling. The repair requires disassembly, cleaning the joint surfaces, and re-gluing with a waterproof PVA or epoxy. Warped rails on exterior doors usually indicate that only one face was sealed before installation; the exposed face absorbed moisture and the rail cupped toward the dry face. Correction requires removing the door, equalizing moisture content across both faces, and re-hanging with all faces sealed.

Interior stile and rail doors in climate-controlled spaces typically last 50–100 years with routine maintenance. Exterior doors in exposed conditions, built from mahogany or white oak with an engineered core, typically perform well for 25–40 years before requiring significant refinishing or joint repair.
Pro Tip: When restoring a solid wood door rather than replacing it, check the panel float before refinishing. If the panel is tight in its groove, free it before applying new finish. Trapping the panel with finish is the single most common cause of panel cracking in restored historic doors.
When custom millwork is the right call for complex door projects
Stock doors solve the majority of residential interior openings. The cases where custom millwork becomes necessary are specific, and recognizing them early saves significant cost and schedule disruption.
Historic replica doors present the clearest case. When a building is under historic tax credit review, the replacement door must match the original in profile, panel configuration, species, and finish. A stock six-panel colonial door will not satisfy a preservation officer reviewing a Federal-period townhouse where the original doors had a specific bolection molding and raised burl panels. Gepettomillworks fabricates historic replica millwork to match surviving originals or period drawings, including reproducing sticking profiles that are no longer available from production suppliers.
Radius and archtop doors require bent lamination or steam-bent stiles and rails, which no stock program accommodates. The geometry of a curved stile demands that the cope cut follow the arc, which requires custom tooling or careful hand work at the joint. Gepettomillworks’s round door fabrication archive documents the techniques used for radius work, from full-circle doors to elliptical archtops in Italianate and Federal Revival buildings.
Multi-lite glazed French doors for historic interiors require that the muntin profiles match the existing window muntins in the building, a specification that production glazed doors cannot meet. The glazing bar profile, the glass thickness, and the sight line width are all period-specific.
Additional capabilities Gepettomillworks brings to complex projects:
- Matching existing sticking profiles from physical templates or measured drawings.
- Reproducing period hardware mortise layouts for antique lock sets.
- Fabricating Mission Revival millwork with the square-shouldered profiles and through-tenon details characteristic of the style.
- Coordinating finish matching with the building’s existing painted or stained millwork.
Pro Tip: Budget for custom millwork when the opening is non-standard in any dimension, when the profile must match existing work, or when the project is subject to historic review. The cost difference between a stock door and a custom door is almost always smaller than the cost of a rejected installation.
Key Takeaways
Stile and rail doors outperform molded and slab alternatives in any application where repairability, period accuracy, or structural performance over decades is a genuine requirement.
| Point | Details |
|---|---|
| Panel float is non-negotiable | Set panels 1/16"–1/8" undersized per side to allow seasonal movement and prevent cracking. |
| Stile width determines hardware options | Mortise locks require a minimum 4" stile width; specify a lock block in writing when stiles are narrower. |
| Consult the manufacturer before ordering | Hardware, climate, and finish type must be resolved before core material and species are finalized. |
| Match profile to period | Sticking profile (shaker, ovolo, bolection) is the primary period marker; wrong profile undermines the entire restoration. |
| Gepettomillworks for historic and custom work | Contact Gepettomillworks for historic replica doors, radius work, and period profile matching on preservation projects. |
The specification detail that mass manufacturers won’t tell you
The trade-off that rarely appears in product literature is the one between stile width and visual proportion. Production doors are typically built with 3-1/2" stiles because that width satisfies the most common residential hardware and keeps material cost low. But a 3-1/2" stile on a 36"-wide door looks thin, particularly in a period interior where the original doors had 4-1/2" or 5" stiles. The visual weight of the frame relative to the panel is one of the most legible signals of whether a door belongs in a room or was simply installed in it.
The same logic applies to rail width. A bottom rail that matches the top rail in width reads as a modern convention; historic doors almost universally had a bottom rail that was 1-1/2 to 2 times the width of the top rail, grounding the door visually and providing structural mass at the threshold. Specifying these proportions correctly requires either access to the original drawings or the experience to recognize what the period demanded.
Quarter-sawn stock is another specification that production suppliers rarely offer as a standard option, yet it is the correct choice for any exterior stile on a painted or stained door in a climate with more than 20% seasonal humidity variation. The additional cost is real. So is the difference in performance over 30 years.
Gepettomillworks custom stile and rail doors: next steps
For historic restorations, preservation projects, and architecturally demanding new construction, Gepettomillworks fabricates custom stile and rail doors that stock programs cannot match. The work includes period profile replication, radius and archtop construction, multi-lite glazed French doors, and finish matching to existing millwork in the building.

To request a quote, send measured drawings of the opening, photographs of any existing millwork to be matched, the hardware specification (mortise lock body dimensions, hinge size and weight rating), and the finish intent (paint or stain, species preference). Projects subject to historic tax credit review should include the relevant preservation standards documentation. Gepettomillworks will respond with a scope confirmation and lead-time estimate. For historic replica work and period-accurate restoration, contact Gepettomillworks directly through the website to begin the consultation.
Useful sources and further reading
The sources below support the technical claims in this article and provide additional depth for designers and builders who want to verify specifications or explore period examples.
| Source | What you’ll find |
|---|---|
| Mastering Rail and Stile Doors: A Woodworker’s Guide | Fabrication sequence, panel undersize tolerances, clamping and assembly procedures |
| Making Doors with Rail & Stile Bits | Router table setup, matched bit usage, test cut guidance, and safety notes |
| Frame and Panel Door Construction | Structural analysis of stile-through construction and hinge performance |
| Conspectus Tech Tips: Stile-and-Rail Wood Doors | Manufacturer consultation guidance, hardware and climate interaction, core selection |
| What Are Stiles and Rails | Stile width requirements for hardware installation and lock-block specifications |
| Gepettomillworks Historic Replica Archives | Portfolio of period-accurate door and millwork fabrication for preservation projects |
| Gepettomillworks Prairie Style Millwork | Specification notes and portfolio pieces for Prairie-style doors and mullion work |
| Gepettomillworks Round Doors Archive | Radius and archtop door fabrication techniques and completed project examples |