by Matthew Wiley | Aug 6, 2026 | Architectural Millwork
Craftsman window casing is a built-up, square-edged trim assembly composed of flat side casings, a layered head entablature (frieze board, architrave bead, and cap), and a projecting stool with apron below — all joined with simple butt joints rather than mitered corners. That structural clarity is precisely what makes it approachable for a competent DIYer. Craftsman-style casing relies on flat-stock lumber with square butt joints and a proportional header that reads as a distinct horizontal entablature above the opening, a direct inheritance from the Arts and Crafts movement’s rejection of ornate Victorian millwork.
The quick recipe:
- Stool first: Cut and install the projecting sill board before any vertical work.
- Side casings second: Butt-jointed to the stool, set with a 1/4" reveal off the jamb edge.
- Head entablature last: A pre-assembled three-piece unit (frieze + architrave bead + cap) that sits proud of the side casings and overhangs them by 1–3 inches per side.
- No complex miters: Every connection is a 90-degree square cut; the layered header creates depth through profile, not angle.
Most single-window installs are well within a skilled DIYer’s reach over a weekend. Projects requiring exact historic replication, wide stain-grade entablatures across multiple rooms, or matched profiles for historic tax-credit eligibility are where a custom millwork shop like Gepettomillworks becomes the more reliable path.
Table of Contents
Lumber and materials
- 1×4 and 1×6 boards for side casings and frieze; 3/4" actual thickness is standard for most interior applications.
- 5/4 stock (approximately 1" actual thickness) for the stool, which needs the extra mass to project cleanly.
- 1×3 or ripped lattice for the architrave bead and cap pieces in the entablature.
- Paint-grade vs. stain-grade: Poplar and finger-jointed primed stock work well for painted finishes and cost less. For stain-grade work, select boards at the lumberyard for straight grain and consistent color; wider boards can be ripped into multiple trim pieces with matched grain.
- Construction adhesive (PL Premium or equivalent) for prefinished assemblies; yellow wood glue for bench-assembled entablatures.
- 18-gauge finish nails for cap and bead pieces; 16-gauge finish nails for side casings and frieze boards nailed into framing.
- Trim-head screws for fastening the stool from below when back-screwing is possible.
- Tape measure, combination square, and marking gauge
- Miter saw (square cuts only — no compound angles needed)
- Table saw or circular saw with rip fence for ripping lattice and fillets
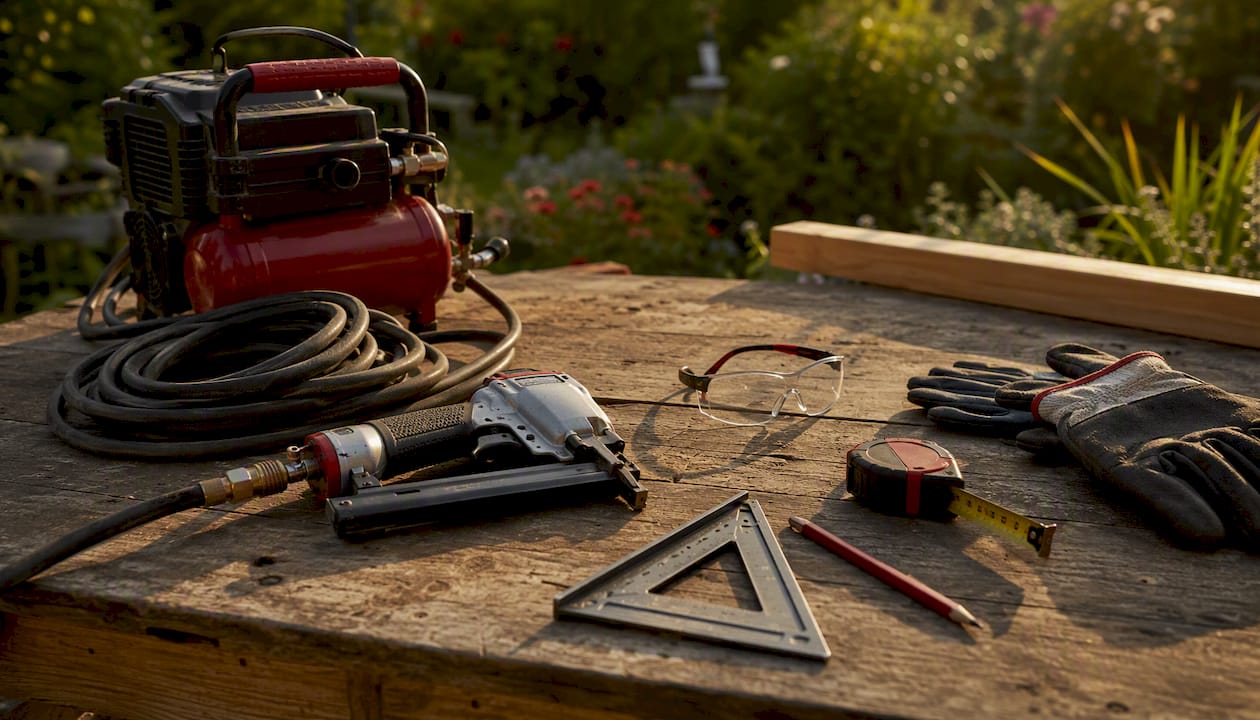
- Pneumatic finish nailer with compressor (worth renting if you own fewer than ten windows)
- Stud finder, 4-foot level, and clamps
- Chisels and block plane for fitting and scribing
- Safety glasses and hearing protection
Pro Tip: Rent the compressor and nailer as a package from a tool rental counter rather than buying. For a single-room project, the rental cost is a fraction of ownership, and a pneumatic nailer drives nails flush consistently in a way that hand-nailing rarely matches.
How do you size Craftsman casing for balanced proportions?
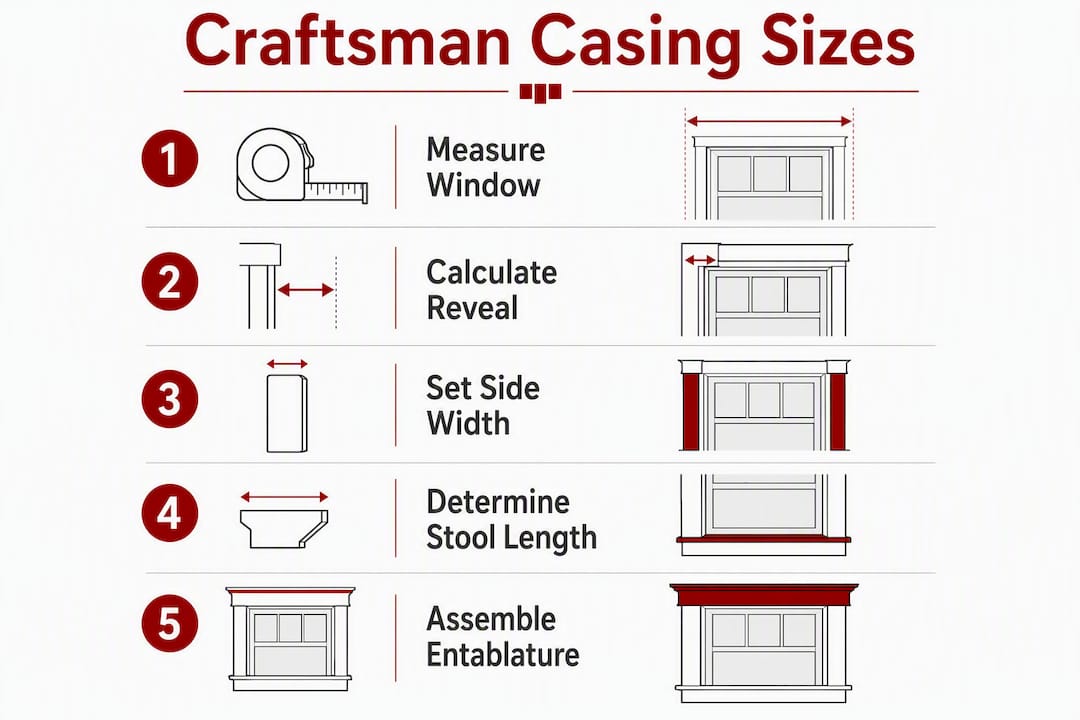
Craftsman casing has no single fixed dimension — proportions should scale to ceiling height and window size, with formal or larger rooms typically calling for wider stock to achieve the visual mass the style demands. That said, several working rules give you a reliable starting point.
| Dimension |
Typical Range |
Proportion Rule |
| Side casing width |
2"–3" |
Scale to window height; taller windows read better with 3" |
| Head entablature face width |
4"–6" assembled |
Roughly twice the side casing width |
| Stool projection beyond casing face |
3/4"–1" |
Creates the shadow line that defines period proportion |
| Jamb reveal (casing setback) |
1/4" |
Consistent on all four sides for a crisp Craftsman shadow line |
| Head overhang beyond side casings |
1"–3" per side |
Wider overhang reads more formal; 1" is a common residential choice |
Marking the reveal
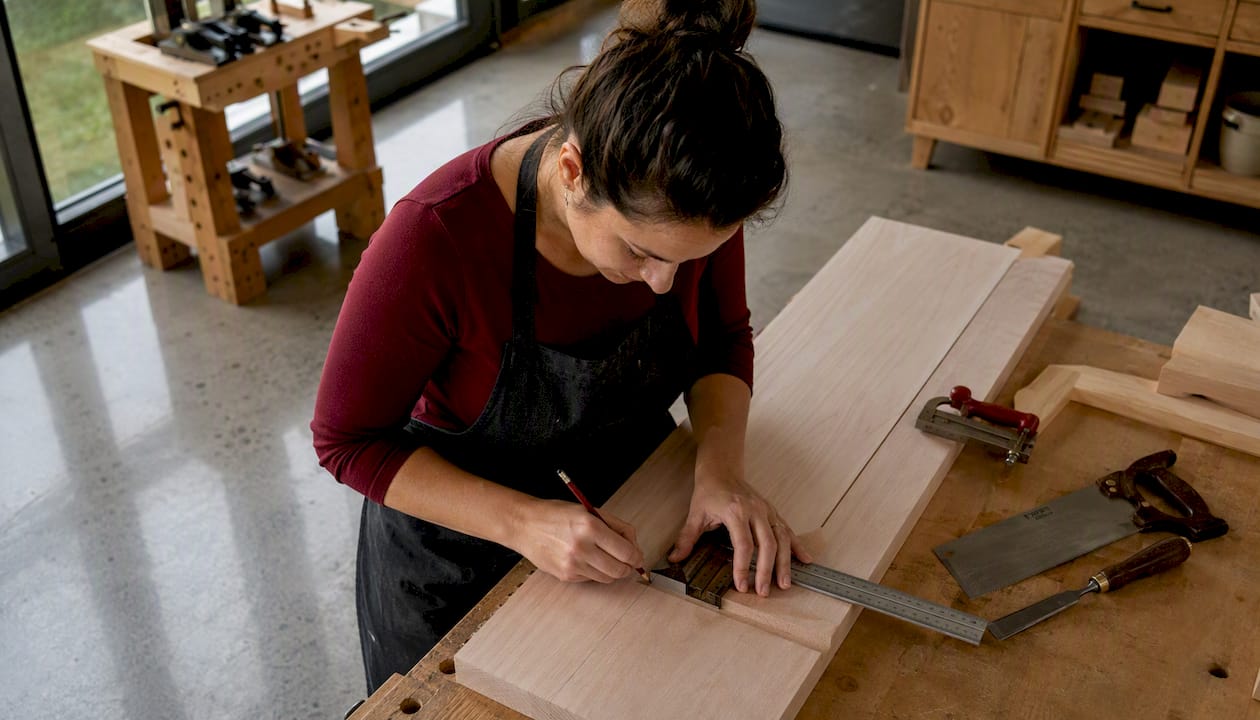
Set a combination square or a simple reveal block to 1/4" and scribe a light pencil line around the jamb perimeter before you cut a single piece of casing. That line becomes your alignment reference for every piece, and keeping it consistent is what separates a professional-looking install from one that reads as slightly off.
Measure the jamb opening width and add roughly 1" total — about 1/2" per side — so the stool ears project beyond the side casings by the target amount. Adjust that ear dimension if your proportions call for a more pronounced projection.
Pro Tip: Before cutting any stock, tape full-size paper strips to the wall in the approximate widths and heights of your planned casing and step back to the typical standing distance for that room. Entablature massing that looks correct on paper can read as too heavy or too slight against a specific ceiling height. The mock-up takes fifteen minutes and prevents expensive remilling.
How to install Craftsman window casing step by step
Step 1: Prep and demolition
- Score the paint line around existing casing with a utility knife before prying to avoid tearing drywall paper.
- Remove old casing carefully; inspect the jamb plane and drywall surface for gaps, proud nails, or drywall that sits above the jamb face.
- Install extension jambs or filler strips if the jamb does not reach the wall plane — the casing must land on a flat, consistent surface.
- Check the opening for square with a framing square. Note any deviation greater than 1/8" so you can plan scribing or shimming before you cut.
Step 2: Assemble the head entablature on the bench
Pre-assembling the frieze, architrave bead, and cap as a single unit before installation gives you precise control over alignment and produces a stronger, more consistent profile than fitting each piece individually on the wall. Apply yellow glue to the mating faces, clamp, and reinforce with 18-gauge pins. For small self-returns at the ends, cyanoacrylate (CA glue) holds thin pieces without clamps. Let the assembly cure fully before mounting.
- Cut the stool to length (jamb opening + 1" minimum, adjusted for your ear dimension).
- Notch the ends so the stool fits snugly against the wall on both sides of the window.
- Apply construction adhesive to the back face, predrill screw locations to avoid splitting, and fasten with trim-head screws from below where accessible.
- Check level before the adhesive sets.
Step 4: Fit and attach side casings
- Cut each side casing slightly long, then test-fit against the stool and mark the reveal line.
- Shim or back-block behind the casing if the jamb is out of plane with the wall — a thin shim at the top and bottom brings the face flush without forcing the casing to cant.
- Nail into the jamb with 18-gauge nails and into the wall framing with 16-gauge nails, using a dual-nail pattern (one into jamb, one into stud) every 12"–16".
Step 5: Mount the pre-assembled head entablature
- Center the entablature above the opening and check that the overhang is equal on both sides.
- Drive pilot screws or nails through the frieze into the wall framing; avoid fastening only into drywall.
- Confirm the bottom edge of the entablature sits flush against the top of the side casings.
Step 6: Joinery and trim details
- Butt-joint all connections; do not attempt mitered returns on the entablature ends unless you have significant milling experience.
- Fill nail holes with wood filler for paint-grade work; for stain-grade, use a tinted wax filler applied after finishing to keep the grain visible.
- Apply minimal caulk at the wall-to-casing joint for paint-grade work only. On stain-grade assemblies, tight scribing and shimming produce a cleaner result than caulk.
Step 7: Finish
- Sand all faces through 150-grit before priming or staining.
- Prime paint-grade stock with a shellac-based primer on end grain to prevent bleed-through.
- For stain-grade wood, apply a pre-conditioner on poplar or pine before staining to prevent blotching, then finish with two coats of oil-based polyurethane or a period-appropriate penetrating oil finish.
Pro Tip: Pre-finish the entablature assembly in the shop before mounting it. Crisp paint lines at inside corners are far easier to achieve on a bench than on a wall, and you eliminate the risk of lap marks from painting around installed trim.
Which materials and finishes work best for Craftsman trim?
Using thin, generic moldings is the most common rookie mistake; substantial stock with correct thickness creates the shadow lines that give Craftsman trim its architectural weight.
| Material |
Best For |
Notes |
| Vertical-grain Douglas fir |
Stain-grade, historic accuracy |
Stable, takes stain evenly, period-correct for West Coast bungalows |
| Plain-sawn white oak |
Stain-grade, formal interiors |
Pronounced ray fleck; authentic to Mission and Arts and Crafts interiors |
| Poplar |
Paint-grade |
Machines cleanly, holds paint well, affordable |
| Finger-jointed primed stock |
Paint-grade, budget installs |
Stable and ready to prime; not suitable for stain |
| Primed rot-resistant wood or PVC |
Exterior applications |
Resists moisture; requires exterior-grade primer and paint |
For painted interiors, a high-quality alkyd or waterborne alkyd topcoat over a shellac-based primer gives the sharpest, most durable finish on poplar or finger-jointed stock. For stain-grade Douglas fir or oak, an oil-based penetrating stain followed by two coats of satin polyurethane reads closest to historic period finishes.
When a project requires custom profiles, matched grain selection across multiple rooms, or entablatures that replicate a specific historic section, Gepettomillworks fabricates matched Craftsman and bungalow millwork to specification, including pre-assembled entablatures ready for field installation.
Can you replace exterior Craftsman casing, and what weatherproofing steps matter most?
Exterior casing replacement follows the same sequence as interior work, but the substrate and water-shedding details are as consequential as the trim itself. Correct substrate repair — sheathing, flashing, and filler boards — is as important as the trim; failing here causes leaks and rot regardless of how well the trim is fitted.
Exterior replacement checklist:
- Remove old casing carefully; inspect sheathing for soft spots, delamination, or rot before ordering new stock.
- Check and replace window flashing tape at the head and sides; the head flashing must lap over the side flashing, not under it.
- Install a sloped sill ledge or backer where the stool meets the wall to direct water away from the opening.
- Use only primed and back-primed stock for exterior wood trim; seal all end grain before installation.
- Apply a continuous bead of exterior-grade sealant (paintable polyurethane caulk) at the wall-to-casing joint after installation, not before.
- For period homes, exterior trim repair examples illustrate how flashing integration and profile replication interact on historic facades.
When to hire a pro: Complex siding transitions, failing sheathing, or projects subject to historic preservation review require professional assessment. Exact profile replication for historic tax-credit eligibility is a specialized service that Gepettomillworks provides through its restoration millwork practice.
What are the most common Craftsman casing mistakes, and how do you fix them?
Out-of-square openings are the single most frequent source of visible gaps in butt-jointed Craftsman trim. Scribe-fitting and shimming behind the casing are the standard pro corrections — not over-caulking, which telegraphs the problem rather than solving it.
Specific fixes:
- Gapping butt joints at the stool: Scribe the bottom of the side casing to the stool surface rather than assuming the stool is perfectly level. A block plane removes material in controlled passes.
- Canting side casings: Thin shims placed behind the casing at top and bottom bring the face into a consistent plane. Plane the show face of the casing for consistent thickness before final installation if the stock varies.
- Stool rocking: Glue the apron to the underside of the stool before mounting; predrill screw locations to prevent splitting the stool end grain.
- Damaged single member: A single casing board can be replaced without disturbing the entablature. Score the paint line, pry carefully, and cut a replacement from matching stock. If the head entablature profile is no longer available in stock lumber, a partial reassembly using a custom-milled replacement piece is often cleaner than patching.
Pro Tip: If your walls are more than 1/4" out of plane across the window height, back-blocking the casing with a thin filler strip glued to the back face before installation is faster and more durable than shimming in the field. Cut the filler strip on the table saw and glue it to the casing back; then the whole assembly goes up as one flat unit.
What does a DIY Craftsman casing project cost and how long does it take?
| Item |
Estimated Range |
Notes |
| Paint-grade stock (single window) |
$15–$35 |
Poplar or finger-jointed primed boards |
| Stain-grade hardwood (single window) |
$45–$110 |
Douglas fir or oak; price varies by region |
| Fasteners, adhesive, caulk |
$10–$15 |
Per window; shared across a multi-window run |
| Nailer + compressor rental (day rate) |
$40–$70 |
Shared across all windows done in one session |
| Time: prep and demolition |
30 min or more per window |
Longer if drywall repair is needed |
| Time: bench assembly of entablature |
30 min |
One-time per profile; faster for repeat windows |
| Time: installation and finishing |
2–3 hours per window |
Faster after the first window |
A competent DIYer working alone can typically complete a single standard window from prep through paint-ready finish in a half day. A run of four to six windows in the same room compresses to roughly two days total once the entablature profile is established and the workflow is set.
When material costs, tool rental, and time are weighed against a professional installation, custom millwork fabrication becomes cost-effective for projects requiring more than six windows with matched stain-grade profiles, or any window where the existing profile must be replicated exactly for preservation compliance.
Where can you find authoritative resources and when should you consult a millworker?
The technical literature on Craftsman and Arts and Crafts trim is well developed, and several resources stand out for their depth and accuracy.
Gepettomillworks specializes in Craftsman, Prairie, and Mission Revival millwork, with shop archives documenting historic profiles, entablature proportions, and matched fabrication for restoration projects. The Craftsman style millwork archives are a practical reference for homeowners trying to identify an existing profile or understand what a period-correct assembly should look like. For related Prairie School proportions and visual balance, the Prairie style millwork archives offer comparable documentation.
Consult Gepettomillworks when:
- The project requires exact historic replication of a profile no longer available in stock lumber.
- You need stain-grade entablatures matched across multiple rooms with consistent grain and color.
- The window opening is non-standard and a custom plinth block or entablature must be fabricated to fit.
- Historic tax-credit eligibility depends on documented profile replication.
A professional millwork shop adds value beyond fabrication: pre-assembled entablatures arrive on site as single units, grain is selected and matched in the shop, and custom plinths eliminate the field-fitting problems that consume the most time on complex installs.
Key Takeaways
Craftsman window casing achieves its architectural authority through proportional flat stock and a pre-assembled head entablature, not through complex joinery — and that simplicity makes it one of the most DIY-accessible period trim styles available.
| Point |
Details |
| Proportion drives the look |
Keep the head entablature face width at roughly twice the side casing width for balanced massing. |
| Install stool before casings |
The stool establishes the baseline for all vertical work; fitting it first prevents alignment errors. |
| Pre-assemble the entablature |
Bench-assembling the frieze, bead, and cap as one unit before mounting improves fit and finish quality. |
| Scribe, don’t caulk |
Out-of-square openings require scribing and shimming, not caulk, to maintain crisp butt joints. |
| Gepettomillworks for custom work |
For historic replication, matched stain-grade profiles, or tax-credit projects, consult Gepettomillworks’ restoration millwork services. |
The proportions matter more than the profile
The most persistent misconception about Craftsman window trim is that the style is simple because it is plain. It is plain, but plain done correctly requires more discipline than ornate work, not less. A Victorian casing can absorb a slightly mismatched reveal or an inconsistent shadow line because the eye has other details to follow. A Craftsman entablature has nowhere to hide. Every dimension is visible, every butt joint is exposed, and the proportional relationship between the head and the side casings is the entire visual argument.
What Gepettomillworks observes repeatedly in restoration work is that homeowners who struggle with Craftsman trim are usually working from stock that is too thin, or they have skipped the mock-up step and cut directly from a plan. The entablature that reads correctly in a room with 9-foot ceilings will look stunted in a room with 10-foot ceilings. That 12-inch difference in ceiling height changes the visual weight the trim must carry, and no amount of careful installation recovers from a proportionally wrong header.
The other consistent finding: the pieces that benefit most from shop pre-assembly are exactly the ones most DIYers try to fit on the wall. Pre-assemble the entablature, pre-finish it, and bring it to the site as a single unit. Document the profile with photographs and measurements before you install it, because if you ever need to match it in another room or replace a damaged section, those records are the only reliable reference you will have.
When does a project call for custom millwork fabrication?
Some Craftsman window casing projects are straightforward weekend work. Others — historic restorations, wide stain-grade entablatures, profiles that no longer exist in stock lumber, or multi-room installations where grain consistency matters — require a different level of precision than a lumberyard and a miter saw can deliver.
Gepettomillworks fabricates custom bungalow and Craftsman millwork to specification: matched entablature profiles, pre-assembled head units, stain-grade grain selection, and custom plinth blocks that eliminate the most time-consuming field-fitting problems. For projects subject to historic preservation review or tax-credit documentation, the shop’s archive of period profiles provides the verified reference that preservation officers require.
Before contacting a millwork shop, collect the following: photographs of the existing trim from multiple angles, the window opening dimensions (width, height, and jamb depth), and a physical sample or measured drawing of the existing profile if replication is the goal. That information allows Gepettomillworks to assess the project accurately and provide a realistic fabrication scope. To discuss a project or review the shop’s Craftsman profile archive, request a consultation directly.
Useful sources for further reading
A curated set of resources for diagrams, full project walkthroughs, and deeper technique articles:
- Craftsman Style Window Trim Installation Guide — Randy Lemmon: A practical, step-by-step walkthrough covering the defining characteristics of Craftsman casing and proportional assembly guidance.
- Craftsman-Style Casing — Fine Homebuilding: Detailed finish-carpenter perspective on proportionality, mock-up technique, and scribing for out-of-square openings.
- Assembling Craftsman Trim — JLC Online: The most technically specific resource on bench pre-assembly of the three-piece entablature, including adhesive selection and fastening sequence.
- How to Install Craftsman Trim — Family Handyman: Full project coverage with stool measurement methods, material selection advice, and installation photography.
- Dress Up Any Window with Period Trim — Fine Woodworking: Mario Rodriguez’s anatomy-of-a-window article covering Arts and Crafts, Federal, and Victorian trim compositions with detailed drawings.
- Renovation Detail: Arts and Crafts Interior Trim — Houzz: A homeowner-perspective account of restoring Arts and Crafts trim in a historic home, useful for understanding the aesthetic and preservation context.
- Gepettomillworks Craftsman Style Millwork Archives: Shop archive of Craftsman profiles, custom entablature examples, and restoration case studies for readers who need matched or replicated millwork.
Recommended

by Matthew Wiley | Aug 4, 2026 | Architectural Millwork
For budget-conscious replacements and true historic authenticity, single-hung windows are usually the right call. For easier cleaning, flexible ventilation, and second-story accessibility, double-hung windows are typically worth the added cost. The decision rarely comes down to one factor alone, but these two priorities drive most of the trade-offs.
Before you commit to either type, consider where you stand on these three questions:
- Cost sensitivity: Single-hung windows average $150–$400 per unit, while comparable double-hung units often run $500–$700 or more. For a whole-house replacement, that gap compounds quickly.
- Cleaning access: Double-hung windows with tilt-wash functionality let you clean both sashes from inside. Single-hung windows require exterior access for the upper pane, which is a real constraint on upper floors.
- Historic match: For Colonial, Federal, or Greek Revival homes, the fixed upper sash of a single-hung window is often the period-accurate choice. Gepettomillworks specializes in custom wood sash fabrication that replicates historic profiles precisely, including counterweight systems and true divided lights, for projects where authenticity is non-negotiable.
ENERGY STAR and NFRC ratings apply to both window types, so performance is more a function of glass package and installation quality than sash configuration alone; for more on energy performance in older homes, see How New Interior Doors Improve Energy Efficiency in Older Portland Homes | One Day Doors & Closets.
Table of Contents
What is a single-hung window and how does it work?
A single-hung window has two sashes stacked vertically within the frame: the upper sash is fixed in place, and the lower sash slides upward to open. Only one sash moves. The jamb, which is the vertical side channel that guides the sash, holds the lower sash in position using either a spring-balance mechanism or, in older installations, a counterweight system concealed within the wall cavity.
Single-hung windows are common in historic and budget-conscious builds because their simpler hardware reduces both manufacturing cost and the number of components that can fail over time. They appear across a wide range of materials:
- Wood: The traditional choice for historic properties; accepts paint and stain; requires periodic maintenance.
- Vinyl: Low maintenance, widely available, and the most affordable option for standard replacement work.
- Fiberglass: Dimensionally stable across temperature swings; a strong performer in climates with wide seasonal variation.
- Aluminum: Slim sightlines; common in commercial and mid-century modern applications.
The fixed upper sash carries one meaningful consequence for maintenance: you cannot clean the exterior face of that pane from inside the room. On a first-floor window, that is a minor inconvenience. On a second or third floor, it means either a ladder or a professional window cleaner. The lower sash on most single-hung models does not tilt inward either, though some manufacturers offer a tilt-latch option on the lower sash as an upgrade.
What is a double-hung window and how does it work?
A double-hung window operates both sashes independently. The upper sash can slide down; the lower sash slides up. Either or both can be open simultaneously, which creates ventilation patterns impossible with a single-hung configuration. Both sashes are typically tilt-wash or tilt-in enabled, meaning they pivot inward on a horizontal axis so you can clean the exterior glass surface from inside the room.
The hardware required to make both sashes operable is more complex than a single-hung assembly:
- Spring balances or jamb liners: Modern double-hung windows use compression jamb liners or coil-spring balances to counteract sash weight. These components degrade over time and occasionally need replacement.
- Sash weights (historic): Pre-20th-century double-hung windows used cast-iron counterweights suspended on cords inside the wall cavity, a system that is durable but requires specific expertise to restore.
- Independent sash locks: Each sash typically has its own locking mechanism, allowing the top sash to be secured independently of the bottom.
The tilt-wash feature is a genuine convenience, particularly for upper-story installations where exterior cleaning would otherwise require scaffolding or a ladder. Tilt-wash is a standard feature across most manufacturer double-hung lines and is frequently cited as the primary reason homeowners choose double-hung over single-hung when cost is not the overriding constraint.
How do single-hung and double-hung windows compare?
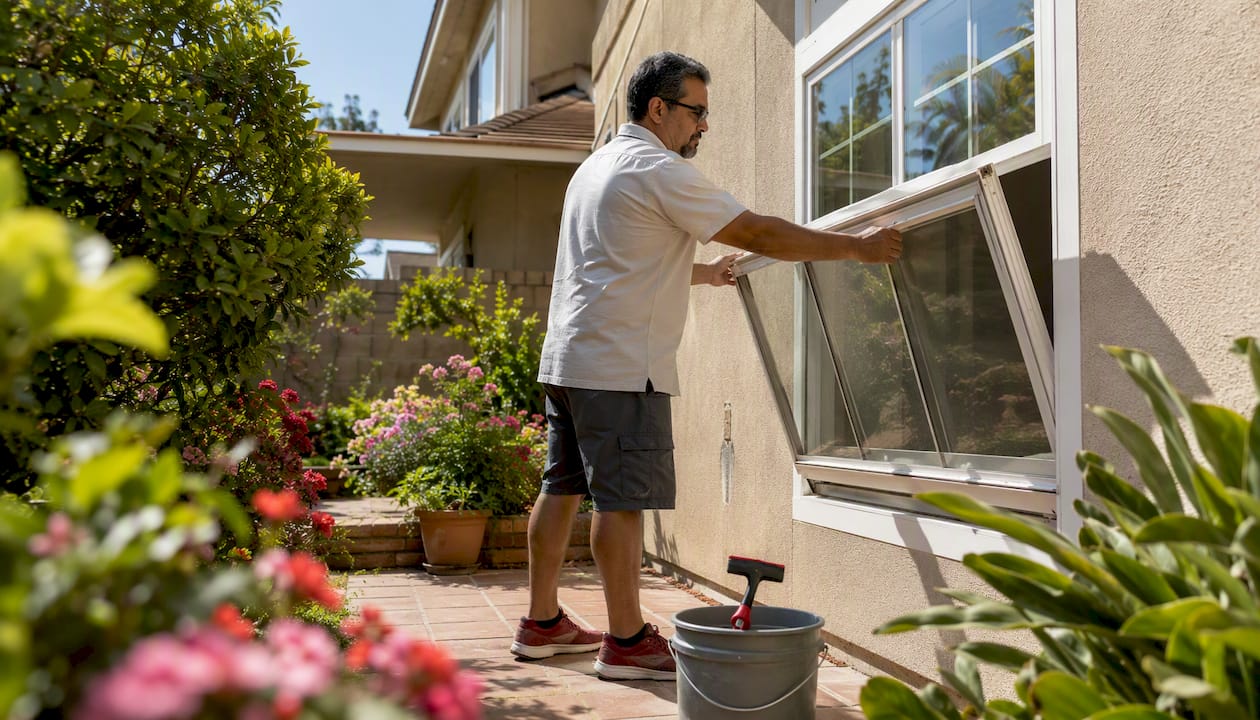
The table below maps both window types across the eight dimensions that most commonly drive purchase decisions.
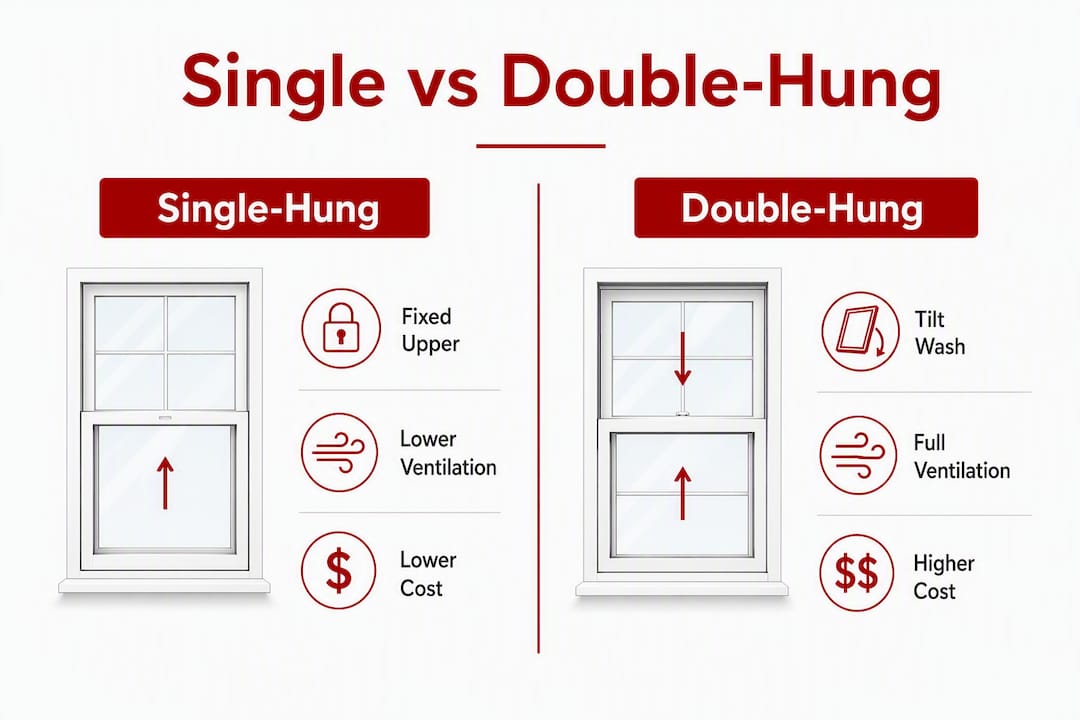
| Dimension |
Single-Hung |
Double-Hung |
| Ventilation / airflow |
Lower sash only; no convection stack effect |
Top and bottom sashes operable; supports convective airflow |
| Cleaning & maintenance |
Upper sash requires exterior access; lower may tilt on some models |
Both sashes tilt inward on most models; full interior cleaning |
| Cost (unit only) |
$150–$400 per unit |
$500–$700 or more per unit |
| Cost (installed) |
Lower; fewer parts, simpler labor |
Higher; additional hardware and alignment time |
| Energy efficiency / air infiltration |
Slightly fewer infiltration points due to one fixed sash |
Comparable with quality weatherstripping; more seals to maintain |
| Installation complexity |
Simpler; fewer moving parts to align |
More components; spring balance or jamb liner calibration required |
| Aesthetics / historic authenticity |
Period-accurate for pre-20th-century styles; fixed upper sash matches historic profiles |
Common in modern builds; less authentic for Federal or Colonial restorations |
| Safety & childproofing |
Bottom sash only; window stops recommended |
Top sash can be opened while bottom stays locked; safer for families |
| Typical use cases / home styles |
Historic homes, budget replacements, first-floor installations |
Two-story modern homes, upper floors, kitchens, and family rooms |
Three dimensions tend to tip the decision most often. Cleaning access is the most practical: if the window is above the first floor and you want to avoid exterior ladder work, double-hung is the clear choice. Cost is the second: across a full house, the price gap between single- and double-hung units is substantial. Ventilation is the third, and it is more nuanced than it first appears. Opening the top sash draws warm air out near the ceiling while cooler air enters at the bottom, a convection pattern that single-hung windows simply cannot replicate.
What do single-hung and double-hung windows typically cost?
Single-hung windows average roughly $150–$400 per unit, while comparable double-hung windows often run $500–$700 or more. Installed costs add labor, which varies by region, frame condition, and whether the rough opening requires modification.
Several factors push prices in either direction:
- Material: Wood and fiberglass cost more than vinyl; aluminum sits in the middle for most residential applications.
- Glass package: Standard double-pane clear glass is the baseline. Low-E coatings and argon-gas fills add cost but improve thermal performance meaningfully. For double-pane historical windows, the glazing choice also affects sightline width and the visual character of divided lights.
- Sash size: Larger sashes require heavier glass and more robust balancing hardware, both of which increase unit price.
- Custom millwork: Reproduction sashes with period-accurate profiles, custom muntin configurations, or matched wood species command a premium over stock units. This is where Gepettomillworks operates, fabricating to specification rather than pulling from a standard catalog.
- Installation complexity: Replacing a window in a plumb, square opening with a standard rough-opening dimension is straightforward. Replacing a window in a historic masonry wall, or one with a non-standard opening, adds time and cost.
Pro Tip: Spending more on glass performance (low-E, argon fill) and professional installation typically returns more long-term value than upgrading from a mid-grade to a premium sash in the same material. The glass package affects energy bills every month; the sash upgrade is largely aesthetic.
Does window type affect energy efficiency?
The honest answer: not as much as most buyers assume. Energy performance in real projects depends more on weatherstripping quality, glass performance, and installation precision than on whether the upper sash moves. Single-hung windows do have one fewer moving sash, which means one fewer perimeter seal to maintain, giving them a marginal infiltration advantage in theory. In practice, that advantage disappears quickly if the weatherstripping degrades or the installation leaves gaps at the frame.
Single-hung windows are generally considered slightly more energy efficient because of fewer moving parts, but the NFRC U-factor and Solar Heat Gain Coefficient (SHGC) ratings on the label tell you far more about real-world performance than sash count does. Look for ENERGY STAR certification for your climate zone, and prioritize these factors regardless of which sash type you choose:
- Quality weatherstripping on every sash perimeter, replaced on a schedule rather than waiting for visible failure.
- A low-E glass coating appropriate for your climate (low SHGC for hot climates, higher SHGC where solar gain is welcome in winter).
- Argon or krypton fill between panes for improved center-of-glass U-factor.
- Precise frame fit with no gaps at the rough opening, sealed with low-expansion foam and finished with interior trim.
For historic restorations, energy gains from replacement windows are often outweighed by properly fitted storm windows or custom double-pane retrofits that preserve original sightlines. Gepettomillworks’s energy efficiency work in restoration contexts frequently involves pairing custom wood sashes with high-performance glazing rather than substituting a modern replacement window that alters the building’s character.
How do you clean and maintain each window type?
Cleaning is where the practical difference between single-hung and double-hung windows is most tangible. Double-hung windows with tilt-wash functionality allow both sashes to be cleaned from inside, which is a meaningful convenience on upper floors. Single-hung windows require exterior access to clean the fixed upper pane, whether that means a ladder, a long-handled squeegee, or a professional service.
Routine maintenance tasks and their approximate cadence:
- Weatherstripping inspection: Annually, before heating season. Replace any section that shows compression set, cracking, or visible gaps.
- Sash balance check (double-hung): Every two to three years. A sash that slams shut or refuses to stay open indicates a failing spring balance or jamb liner.
- Lubrication: Annually. Apply a dry silicone lubricant to jamb channels and pivot bars; avoid petroleum-based products that attract dust.
- Re-caulking: Every five to seven years on exterior joints, or sooner if caulk shows cracking or separation.
- Wood sash inspection: For painted wood sashes, check for paint film failure and bare wood exposure annually. Bare wood that contacts moisture will begin to deteriorate within one to two seasons.
- Counterweight cord inspection (historic wood windows): Every five years. Sash cord failure is gradual; replace before it breaks to avoid sash damage.
When a spring balance fails on a double-hung window, the repair is typically a straightforward parts replacement. When a sash cord fails on a historic counterweight system, the repair requires opening the wall pocket, which is more involved but preserves the original operating character of the window.
How does sash type affect safety and ventilation?

Double-hung windows offer a safety advantage for families with young children: you can open the top sash for ventilation while keeping the bottom sash closed and locked, placing the opening above a child’s reach. Single-hung windows open only at the bottom, so any ventilation opening is accessible at floor level.
Childproofing and security options for both types:
- Window stops: Limit sash travel to a maximum of four inches, the threshold recommended by the Consumer Product Safety Commission for fall prevention. Available for both single- and double-hung configurations.
- Keyed sash locks: Replace standard cam locks with keyed versions to prevent children from opening sashes without adult assistance.
- Security pins: A drilled pin through the inner sash into the outer frame prevents the window from being opened from outside, even if the lock is defeated.
- Window sensors: Integrate with home security systems to alert when any sash is opened.
Pro Tip: For bedrooms and kitchens, use the top sash of a double-hung window to establish convective airflow: open the top sash two to four inches and the bottom sash two to four inches simultaneously. Warm air exits at the top while cooler air enters at the bottom, producing a stack effect that moves air without creating a low opening. In a kitchen, this also helps exhaust cooking odors more efficiently than a bottom-only opening.
Which window type suits your home style and placement?
Single-hung windows are common in older homes for historic authenticity and lower cost, while double-hung windows are favored in modern builds, particularly for upper stories. The mapping by architectural style and placement is fairly consistent across the industry:
- Colonial, Federal, and Greek Revival: Single-hung with six-over-six or nine-over-six true divided lights is the period-accurate configuration. The fixed upper sash matches the original construction logic of these styles.
- Craftsman and bungalow: Either type appears historically, though single-hung with divided upper lights and a plain lower sash is the more common original configuration. Gepettomillworks’s bungalow millwork work frequently involves replicating these profiles in wood.
- Victorian and Queen Anne: Double-hung windows with decorative upper sash muntins were common; restoration work here often requires custom sash fabrication to match original profiles.
- Modern and contemporary: Double-hung is the standard choice, valued for cleaning convenience and ventilation flexibility.
Placement guidance by room:
- Upper-story bedrooms: Double-hung is strongly preferred for cleaning access and the top-sash safety option.
- Kitchens: Double-hung allows ventilation without opening a low sash over a counter or sink.
- Bathrooms: Either type works; double-hung is preferable where the window is above a tub or shower and exterior access is impractical.
- First-floor living areas: Single-hung is a reasonable choice where cost is a priority and exterior cleaning is accessible.
Mixing types across a house is common and practical. A typical approach: single-hung on the first floor where cleaning is easy and historic character matters, double-hung on upper floors where tilt-wash cleaning is a genuine convenience.
How can you tell which type you have and measure for replacement?
Identifying your existing window type takes about thirty seconds. Try to push the upper sash downward from inside the room. If it moves, you have a double-hung window. If it is fixed, you have a single-hung. Look also for tilt-latches on the sash stiles: small plastic or metal tabs near the top corners of the lower sash indicate a tilt-in feature. Their presence on the upper sash as well confirms double-hung.
Checklist to identify your window type:
- Push the upper sash downward. Does it move? Yes = double-hung. No = single-hung.
- Look for tilt-latches on the lower sash stiles. Present = tilt-in lower sash.
- Look for tilt-latches on the upper sash stiles. Present = full double-hung tilt-wash.
- Check the jamb channel. A visible jamb liner (plastic channel) indicates a spring-balance system. No liner suggests a counterweight pocket in the wall.
Measurement checklist for replacement windows:
- Measure the width of the existing sash opening at three points: top, middle, and bottom. Record the smallest dimension.
- Measure the height at three points: left, center, and right. Record the smallest dimension.
- Measure the jamb depth (the distance from the interior stop to the exterior stop) to confirm the replacement unit will fit the existing frame thickness.
- Photograph the full window from inside and outside, including the sill, head, and both jambs.
- Note any visible rot, paint buildup, or frame distortion. These affect whether a pocket replacement or a full-frame replacement is appropriate.
Red flags contractors look for: soft wood at the sill or jamb base (probe with a screwdriver; it should not penetrate easily), frames that are visibly out of square, and rough openings that deviate from standard dimensions by more than half an inch. Any of these conditions affects the replacement strategy and cost.
What questions should you ask before choosing a window type?
Start with your top constraint. If budget is primary, single-hung is the default unless a specific functional need overrides it. If cleaning access or ventilation flexibility is primary, double-hung is worth the premium. Historic authenticity as a hard requirement usually points to custom fabrication regardless of sash type.
Contractor and manufacturer questions to ask before signing:
- What installation method do you use: pocket replacement or full-frame? What does each include?
- What glazing options are available, and what are the NFRC U-factor and SHGC ratings for each?
- Does the unit carry ENERGY STAR certification for my climate zone?
- What hardware type is used for the sash balance: spring balance, jamb liner, or counterweight?
- Is tilt-in or tilt-wash available on the lower sash? On the upper sash?
- What is the warranty on the unit, the glass seal, and the hardware separately?
- What is the lead time from order to installation?
- Can you provide references or project photos for comparable installations?
Red flags when reviewing quotes: vague descriptions of installation scope (“we’ll handle everything”), missing NFRC data on the specification sheet, and claims that one window size fits all openings in your house without a site measurement. Request a written scope of work that specifies the unit model, glazing package, installation method, and warranty terms before committing.
When does a historic project require custom millwork?
Historic projects almost always require custom solutions. A stock replacement window, even a well-made one, rarely replicates the sash profile width, muntin depth, glass thickness, or joinery character of a pre-1940 original. For buildings subject to historic tax credit review, the Secretary of the Interior’s Standards for Rehabilitation require that replacement windows match the original in material, configuration, and visual character, a standard that stock units typically cannot meet.
The specific elements that custom fabrication addresses:
- Period-accurate joinery: Mortise-and-tenon sash construction rather than stapled or glued assemblies.
- True divided lights: Individual glass panes separated by solid wood muntins, as opposed to simulated divided lights with a plastic grille applied to a single pane.
- Sash weight counterweight systems: For restorations where the original operating character must be preserved, modern spring-balance jamb liners are not an appropriate substitute. Historic preservation projects may require recreating period sash hardware and counterweight systems rather than substituting modern spring-balance components.
- Matched wood species and profiles: Replacement sashes must match the original species (often old-growth pine, Douglas fir, or white oak) and profile dimensions to pass historic review.
Modern compression jamb liners change the visual and physical performance compared to traditional wood joinery, a distinction that matters both aesthetically and for long-term maintenance in a historic context. The liner degrades and must eventually be replaced; the original counterweight system, properly maintained, can outlast the building’s other systems.
For energy performance in historic contexts, the most defensible approach is often a custom wood sash with dual-pane glazing paired with a properly fitted exterior storm window, rather than a full replacement. This strategy preserves the original sightlines and profiles while delivering meaningful thermal improvement. Gepettomillworks’s historically accurate windows work follows this principle, integrating modern glazing into period-accurate wood sash construction.
Pro Tip: When matching historic windows, preserve the original sightline width above all else. A muntin that is even 3/16 of an inch wider than the original reads as wrong to a trained eye and will fail historic review. Measure the original muntins before ordering any replacement.
Key Takeaways
Double-hung windows cost more and require more maintenance than single-hung windows, but they offer superior cleaning access, safer ventilation for families, and greater flexibility on upper floors, making them the practical choice for most modern two-story homes.
| Point |
Details |
| Cost difference is significant |
Single-hung windows average $150–$400 per unit, while double-hung windows in comparable specs often run $500–$700 or more. |
| Cleaning access drives the choice |
Double-hung tilt-wash lets you clean both sashes from inside; single-hung requires exterior access for the upper pane. |
| Energy performance depends on installation |
Glass package, weatherstripping quality, and installation precision matter more than sash count for real-world efficiency. |
| Historic projects need custom fabrication |
Stock replacement windows rarely meet historic tax credit standards; period-accurate joinery and profiles require custom millwork. |
| Gepettomillworks for historic work |
Gepettomillworks fabricates custom wood sashes with period-accurate profiles, true divided lights, and dual-pane glazing for restoration projects. |
The case for knowing what you’re actually choosing
Most homeowners approach the single-hung versus double-hung decision as a cost question, and it is, but only partly. The more consequential choice is often the glazing package and the installation quality, two variables that affect energy bills and comfort for the life of the window regardless of how many sashes move.
What tends to get underweighted is the cleaning burden. A double-hung window on the second floor that you can clean from inside is not a luxury; it is a practical necessity for most homeowners who are not going to hire a window cleaner twice a year. The tilt-wash feature earns its cost premium over the window’s lifespan in reduced maintenance friction alone.
For historic work, the framing of the question changes entirely. The choice between single- and double-hung becomes secondary to the question of whether the replacement preserves the building’s architectural character. A well-fabricated custom wood sash, whether single- or double-hung, that matches the original profile and joinery is the right answer for a historic property. A stock vinyl unit that approximates the look is not, regardless of its NFRC rating.
Gepettomillworks: custom wood windows for historic and period-accurate projects
Historic window replacement is not a catalog decision. When the profiles, joinery, and material must match the original to satisfy historic tax credit requirements or simply to honor the building’s architectural character, Gepettomillworks fabricates custom wood sashes to specification, including period-accurate counterweight systems, true divided lights, and dual-pane glazing integrated into historically correct frames.
Whether you are restoring a Federal townhouse, a Craftsman bungalow, or a Victorian-era commercial building, Gepettomillworks works with architects, contractors, and historic homeowners to produce windows that meet preservation standards without sacrificing thermal performance. The work spans single-hung and double-hung configurations, matched to the original construction logic of the building. Explore bungalow supplier resources for Craftsman and bungalow projects, or visit Gepettomillworks to discuss your project and request a custom fabrication quote.
Cited sources and further reading
The following sources informed this article’s technical claims, cost ranges, and preservation guidance:
Recommended

by Matthew Wiley | Aug 3, 2026 | Architectural Millwork
Historic window restoration involves a broad range of costs per window, varying widely depending on project scope and condition. Small projects involving a few windows can range significantly in total cost before optional upgrades are considered. The single decision that moves that number most is scope: mechanical restoration, full glass-out restoration, or historically accurate replica replacement each occupy a distinct cost tier and carry different implications for preservation compliance, lead-safe work, and tax-credit eligibility. Gepettomillworks, which works to National Park Service and State Historic Preservation Office (SHPO) standards, structures every estimate around that scope decision first.
Table of Contents
What does historic window restoration cost by scope?
Scope is the controlling variable in any wood window restoration cost estimate, and conflating the three primary categories is the most common source of bid confusion.
Mechanical restoration
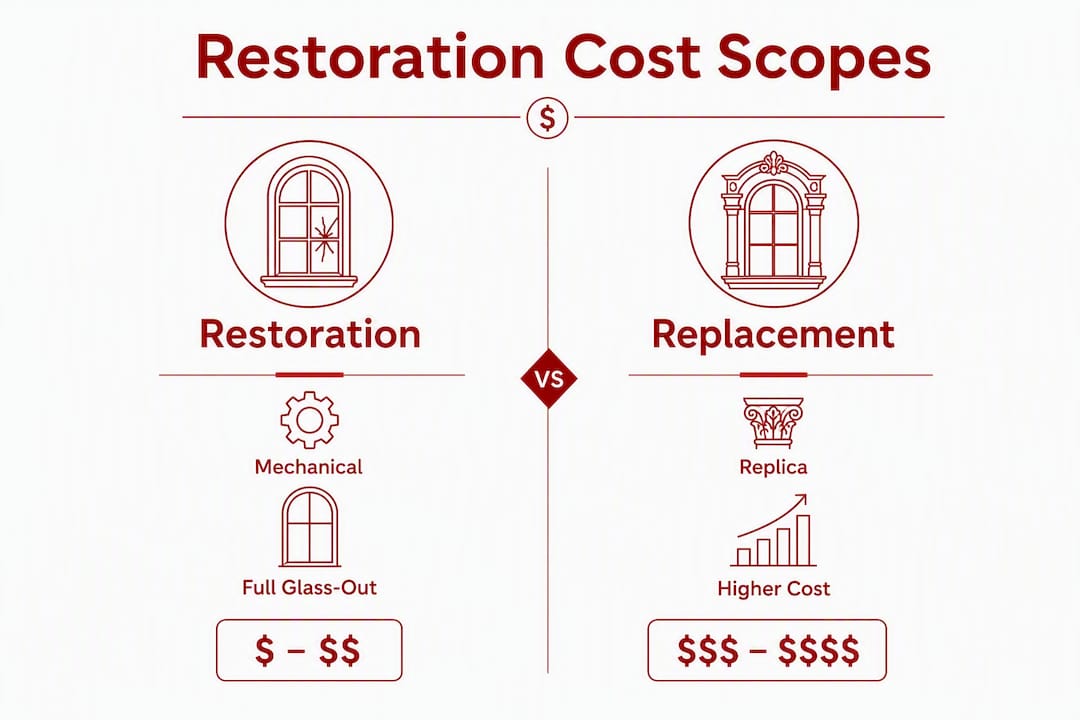
Mechanical restoration addresses operability without removing the sash from the frame. Work typically includes planing sticking sashes, replacing weatherstripping, re-glazing individual cracked panes, and repairing sash cords. Mechanical restoration for a standard double-hung window generally involves moderate cost, depending on extent of work. Hardware is usually retained and cleaned rather than replaced, and lead paint is managed in place rather than stripped.
Full glass-out restoration
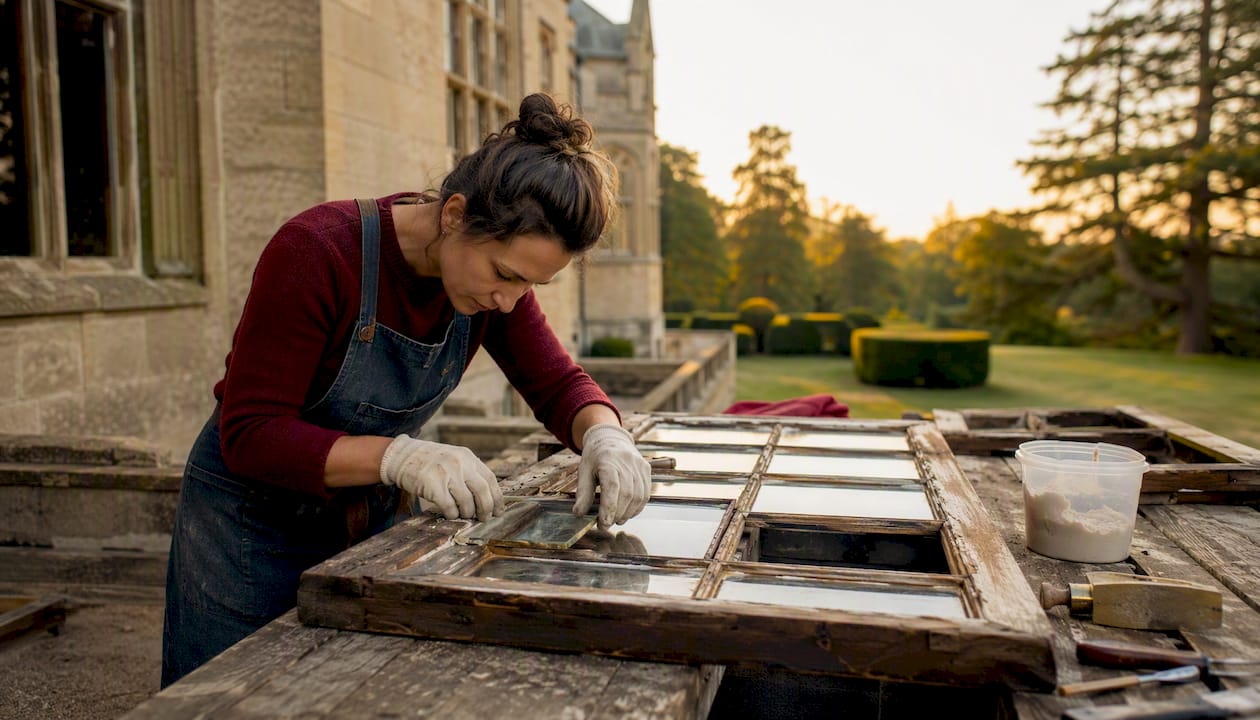
Full glass-out restoration involves comprehensive sash removal and refinishing, with costs typically higher than mechanical restoration, reflecting added shop hours, lead-safe containment, and finish curing time.
Historically accurate replica replacement
When structural deterioration is severe, a shop-fabricated replica in matching species and profile can approach or undercut the cost of full glass-out work on a lifecycle basis. Historically accurate replica replacement costs vary widely but can be comparable to full glass-out restoration for severely deteriorated windows.
| Line Item |
Mechanical Restoration |
Full Glass-Out |
Replica Replacement |
| Labor (shop + site) |
Minimal shop |
Significant shop |
Full shop fabrication |
| Glazing |
Spot re-glaze |
Full re-glaze |
New glazing throughout |
| Lead-safe containment |
In-place management |
Full containment protocol |
Shop-controlled |
| Hardware |
Clean/retain |
Repair or replace |
New or period-matched |
| Finish |
Touch-up |
Full strip and refinish |
New prime and finish |
| Tax-credit eligibility |
Often qualifies |
Qualifies with documentation |
Qualifies if in-kind |
Pro Tip: Request a condition survey before committing to scope. A sash with 30% rot in the lower rail almost always costs less to replicate than to restore to glass-out standard, and knowing that before bidding prevents the most common budget overrun.
Per-window and per-project cost ranges
Typical costs include materials, labor, and hardware, with additional modest surcharges for lead containment and permits. The table below shows how those components assemble across common project scenarios.
| Scenario |
Scope |
Per-Window Range |
Project Total |
Key Assumptions |
| 2 small 6-over-6 sash |
Mechanical |
$400–$600 |
$800–$1,200 |
No lead abatement; minor glazing |
| 3 medium 6-over-6 sash |
Full glass-out |
$1,000–$1,400 |
— |
Lead containment; shop refinish |
| 5 large 12-over-12 sash |
Full glass-out + frame work |
— |
— |
Multi-lite; partial frame repair |
| 4 deteriorated sash |
Replica replacement |
— |
— |
Custom profile match; new glazing |
Regional labor rates and lead-safe work protocols can increase costs in some markets. As a regional reference point, an Atlanta market survey shows tune-up work at $180–$450, standard restoration at $450–$850, and full glass-out at $1,100–$1,800 per window. Mid-Atlantic and Northeast urban markets tend toward the upper end of those bands.
Labor rates across U.S. restoration contractors run $40–$95 per hour, with four to twelve hours typical per window depending on condition and lite count. Batching windows from the same elevation into a single shop run meaningfully reduces per-window overhead.
What factors affect the cost to restore old windows?
Scope level is the dominant driver, but several secondary variables can shift a line item by hundreds of dollars per window.
- Lite count: Each lite requires its own glazing and muntin work, so a 12-over-12 sash carries roughly four times the glazing labor of a 6-over-6. Multi-lite configurations drive cost more than overall sash area.
- Rot severity: Isolated sill rot may add $150–$300 per window; widespread rail and stile deterioration can push a repair past the cost of replication.
- Wood species: Old-growth longleaf pine and white oak command premium material costs; matching species for patches or replicas in those materials adds to both material and sourcing time.
- Lead paint: Containment and disposal under EPA RRP protocols typically adds $75–$250 per window in labor and materials.
- Hardware: Retaining and cleaning original sash lifts and locks costs little; sourcing period-matched replacements or commissioning reproductions can add $40–$120 per window.
- Glazing type: Standard single-strength glass is the baseline; restoration glass, wavy antique glass, or decorative leaded glass each carry significant premiums.
- Site access: Upper-story windows requiring staging or lift equipment add mobilization costs that are best amortized across a full-elevation batch.
- Scheduling: Rush delivery or out-of-sequence installation breaks the shop’s batching efficiency and typically adds a premium.
Statistic: Labor typically makes up the majority portion of per-window restoration costs, often well over half the total, which is why batching windows and minimizing remobilization are the most reliable ways to control project spend.
Pro Tip: Schedule all windows on a single elevation in one shop run. The per-window overhead for setup, containment, and finish drops substantially when a craftsman processes six sashes in sequence rather than returning to the same wall three times.
How do you get an accurate restoration estimate?
Reliable bids require specific documentation. Providing the following before soliciting quotes reduces scope ambiguity and prevents change orders.
What to provide to bidders:
- Measured elevations with rough opening dimensions for each window
- Photographs of each sash face, sill, and frame condition (interior and exterior)
- Lite count per sash and glazing type (clear, restoration glass, decorative)
- Lead paint assessment or XRF test results if available
- Existing hardware inventory and condition notes
- Interior and exterior access conditions (staging required, occupied space)
- Desired finish standard (paint species, sheen, number of coats) and material preferences
Questions to ask every bidder:
- Which scope are you pricing: mechanical, full glass-out, or replica?
- Do you hold EPA RRP lead-safe certification for the work as described?
- What portion of the work is performed in-shop versus on-site?
- How do you handle hardware: retain, repair, or reproduce?
- What warranty do you offer on glazing and finish?
- What are your maintenance recommendations post-restoration?
Pro Tip: Request a line-item estimate that prices both full glass-out and replica replacement for any sash flagged as severely deteriorated. Locking in both fallback paths before work begins lets the contractor make the right call on-site without triggering a change order.
Gepettomillworks project examples from the archives
The Restoration Virginia Archives and Richmond Restoration Archives document Gepettomillworks’ completed projects with condition photographs, scope decisions, and material specifications. Three representative project profiles illustrate how scope, condition, and preservation goals interact with final cost.
| Project Profile |
Scope Chosen |
Condition at Survey |
Approach |
Ballpark Range |
| Richmond Federal-style townhouse, 8 sash |
Full glass-out |
Moderate rot, original wavy glass intact |
Repair and re-glaze; retain glass |
— |
| Virginia coastal cottage, 6 sash |
Replica replacement |
Severe lower-rail deterioration |
Shop-fabricated replicas in longleaf pine |
— |
| Jamestown-area historic structure, 12 sash |
Mixed: 8 glass-out, 4 replica |
Variable; 4 sash beyond repair |
Hybrid approach per condition survey |
— |
The Historically Accurate Windows Archives and Jamestown VA Archives show photographic documentation of profile matching, muntin detailing, and finish standards that support historic tax-credit applications. Where original glass survived, Gepettomillworks retained it; where it did not, restoration-grade glass was specified to preserve the visual character of the fenestration.
What is the typical timeline from survey to installation?
A well-sequenced restoration project moves through five phases, each with its own cost implications.
- Initial survey and condition report (1–2 weeks): Field measurements, photographic documentation, lead assessment, and scope recommendation. This phase produces the specification that all bids should price against.
- Shop restoration or fabrication (3–8 weeks): Sash removal, steam stripping, wood repair or replication, glazing, and priming. Batch size and profile complexity drive duration.
- Finish curing (1–2 weeks): Paint systems on restored or new wood require full cure before reinstallation to prevent adhesion failure at the sash-to-frame interface.
- Site removal and reinstallation (1–3 days per elevation): Temporary weather protection, sash swap, hardware fitting, and perimeter sealing.
- Final adjustments and touch-up (1–2 days): Operational tuning, glazing inspection, and finish touch-up.
Common causes of schedule slippage and added cost:
- Lead assessment results arriving after shop work begins, requiring scope revision
- Undiscovered frame rot found only after sash removal
- Custom hardware reproduction with long lead times from specialty suppliers
- Finish incompatibility between existing frame paint and new sash finish system
Pro Tip: Build a two-week buffer between shop completion and scheduled reinstallation. Finish curing is non-negotiable, and compressing it produces callbacks that cost more than the time saved.
How do preservation rules and tax credits affect cost?
Working to National Park Service and SHPO standards shapes both method selection and material specification in ways that directly affect the estimate.
- In-kind material requirements: NPS guidance generally requires that replacement elements match original species, profile, and glazing type. Substituting modern materials, even high-performance ones, typically disqualifies a project from federal historic tax credit consideration.
- Federal Historic Tax Credit: The federal program offers a 20% credit on qualified rehabilitation expenditures for certified historic structures. Window work must meet the Secretary of the Interior’s Standards for Rehabilitation to count as a qualified expenditure.
- State programs: Many states layer additional credits on top of the federal program. Virginia’s Historic Rehabilitation Tax Credit, for example, has supported numerous projects documented in the Gepettomillworks archives.
- Documentation requirements: SHPO applications require before-and-after photographs, material specifications, and contractor certifications. Building that documentation into the project scope from the start avoids retroactive cost.
The Secretary of the Interior’s Standards for Rehabilitation state that historic materials and features shall be retained and preserved, and that deteriorated historic features shall be repaired rather than replaced — a principle that directly governs scope decisions on tax-credit projects.
Pro Tip: Confirm SHPO pre-approval of your scope before committing to a replica approach. Documented replication of a deteriorated original typically qualifies; substitution with a non-matching profile or material does not.
When does replica replacement make more sense than restoration?
Replication is not a concession to deterioration. For severely compromised sashes, it is often the more responsible and cost-effective path.
Consider replica replacement when:
- Structural rot affects more than 30–40% of a sash’s cross-section
- Prior repairs have already been attempted and failed
- The existing sash profile cannot be made weathertight without intrusive alteration that would compromise historic character
- Full glass-out restoration cost approaches or exceeds the cost of a shop-fabricated replica in matching species
For severely deteriorated sashes, a historically accurate reproduction is often cost-competitive with, or cheaper than, full glass-out restoration when evaluated as lifecycle spend. Planning for replication during the condition survey prevents over-investing in sashes that will require replacement within a decade regardless.
A short decision checklist:
- Has a qualified craftsman assessed rot extent by probing, not visual inspection alone?
- Does the sash retain any original glass worth preserving?
- Is the project subject to tax-credit review that requires documented justification for replacement?
- Has the cost of full glass-out been compared against a shop replica quote for the same unit?
The Replica Wooden Windows Archives at Gepettomillworks document cases where replication produced equal or lower lifecycle cost than restoration, with profile-matching photographs and material specifications on record.
Key Takeaways
Historic window restoration cost is controlled primarily by scope: mechanical restoration, full glass-out, and replica replacement each occupy a distinct cost tier with different preservation and tax-credit implications.
| Point |
Details |
| Per-window cost range |
Costs vary depending on scope and condition. |
| Scope is the controlling variable |
Mechanical restoration runs $180–$450; full glass-out $1,100–$1,800; replica replacement varies but is often cost-competitive for severely deteriorated sashes. |
| Regional and lead-paint premiums |
Coastal and metro markets can increase base costs; lead containment typically adds $75–$250 per window. |
| Tax-credit compliance |
NPS and SHPO standards require in-kind materials and documented methods; non-compliant scope disqualifies expenditures from the federal 20% Historic Tax Credit. |
| Gepettomillworks archives |
Project case studies in the Restoration Virginia and Richmond Restoration Archives provide documented scope, condition, and cost examples for reference. |
The case for letting preservation set the budget, not the other way around
The most persistent mistake in historic window procurement is treating restoration as a line item to be minimized rather than as a preservation act with long-term architectural and financial consequences. When an owner or contractor selects mechanical restoration on a sash that genuinely requires full glass-out work, the savings are real for perhaps three years. After that, the callbacks, the re-glazing, and the eventual full restoration cost more in aggregate than the correct scope would have cost at the outset.
The more consequential error is choosing a non-compliant scope to save money on a tax-credit project. A 20% federal credit on qualified rehabilitation expenditures is a substantial offset. Disqualifying window work by substituting a non-matching material or skipping the SHPO documentation process forfeits that offset entirely, often for a per-window saving of a few hundred dollars.
Gepettomillworks’ position is that the condition survey is not overhead. It is the document that aligns scope to preservation goals, supports tax-credit applications, and prevents the two most expensive outcomes in historic window work: under-scoping a deteriorated sash and over-investing in one that should have been replicated from the start.
Gepettomillworks: custom restoration and replica work, documented for preservation compliance
Gepettomillworks brings custom millwork fabrication, shop-grade restoration, and archival documentation to historic window projects across the region. Where other approaches offer a single scope, Gepettomillworks prices mechanical restoration, full glass-out, and historically accurate replica replacement side by side, so architects and contractors can make the scope decision with real numbers in hand.
The process begins with a condition survey that produces the specification your bids should price against. From there, Gepettomillworks’ qualified restoration craftsmen handle shop fabrication and site installation, with photographic documentation built in for SHPO and tax-credit applications. Period-specific work, from Bungalow supplier profiles to historic replica sash fabrication, is documented in the project archives and available for reference before you commit to a scope.
Request a condition survey, provide your window count and photographs, and ask for line-item quotes across all three scope levels. Contact Gepettomillworks at gepettomillworks.com to start the estimate process.
Useful sources and preservation references
The following resources support project preparation, tax-credit applications, and scope documentation.
- National Park Service — Historic Preservation Tax Incentives: Primary authority on the federal 20% Historic Tax Credit, the Secretary of the Interior’s Standards for Rehabilitation, and qualified expenditure definitions.
- Restoration Virginia Archives — Gepettomillworks: Photo-documented Virginia restoration projects with scope and material specifications.
- Richmond Restoration Archives — Gepettomillworks: Richmond-area project case studies with condition surveys and cost context.
- Historically Accurate Windows Archives — Gepettomillworks: Portfolio of historically accurate reproduction windows with profile-matching documentation.
- Jamestown VA Archives — Gepettomillworks: Preservation-grade restoration work at Jamestown-area structures, useful as high-trust documented examples.
- R. J. Aley — Old Wood Windows FAQ: Contractor-level specification examples distinguishing mechanical restoration from full glass-out, with cost comparisons.
- Current Cost — Historic Window Restoration Cost: Per-window cost ranges, component breakdowns, and regional multiplier data for U.S. projects.
The Secretary of the Interior’s Standards for Rehabilitation remain the governing framework for any window work intended to qualify for federal historic tax credits. Consulting NPS guidance and your State Historic Preservation Office before finalizing scope is the single most reliable way to protect both the building’s integrity and the project’s tax-credit eligibility.
Recommended

by Matthew Wiley | Aug 2, 2026 | Architectural Millwork
For most U.S. homeowners and property managers who prioritize longevity and minimal upkeep, fiberglass is the practical choice. For properties where historic authenticity, period profiles, or tax-credit compliance govern the specification, custom wood windows are not merely preferable — they are often the only architecturally defensible option.
Two qualifiers shape every project before material selection begins: installation quality and glazing specification. Air sealing, correct flashing, and a well-chosen glass package frequently determine real-world energy performance more decisively than the frame material itself.
- Choose fiberglass when thermal stability, low maintenance, and a 40–50 year service life are the primary criteria.
- Choose custom wood when preservation boards, historic tax-credit documentation, or authentic shadow lines and muntins govern the design.
- In either case, specify your glazing package first — low-E coatings, argon fills, and warm-edge spacers affect U-factor more than frame material alone.
Table of Contents
How do wood and fiberglass windows compare side by side?
| Dimension |
Wood |
Fiberglass |
| Thermal performance |
Competitive with quality glazing |
U-factor avg ~0.20; excellent |
| Durability / rot & pest resistance |
Moderate; requires maintenance |
High; resists rot, pests, corrosion |
| Maintenance frequency |
Inspection + refinish every 5–10 years |
Wash twice yearly; touch-up as needed |
| Upfront installed cost |
higher per window for wood |
moderate per window for fiberglass |
| Aesthetics / customization |
Unmatched; unlimited profiles and finishes |
Good; woodgrain options available |
| Expected lifespan |
about two to three decades for clad-wood with maintenance |
several decades with minimal maintenance for fiberglass |
| Climate suitability |
Best in stable, controlled environments |
Excels in extreme and coastal climates |
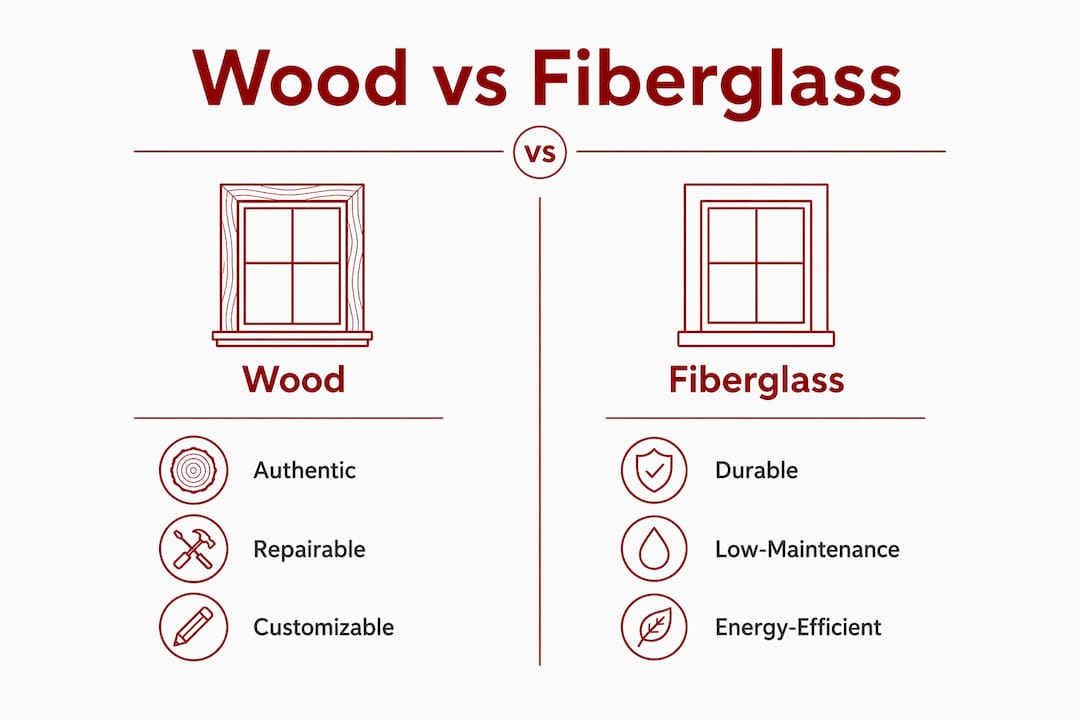
Wood windows: Authentic profiles, repairability, and unlimited finish options make wood the material of choice for historic and architecturally demanding projects. The trade-off is a maintenance commitment and a shorter replacement cycle without consistent care.
Fiberglass windows: Dimensional stability, pest and rot resistance, and a lifespan that often doubles wood’s make fiberglass the functional upgrade for homeowners focused on total cost of ownership. Color and profile flexibility have improved markedly, though complex custom profiles remain a wood advantage.
Both materials can achieve strong thermal performance, but they arrive there differently. Production fiberglass units average a U-factor of approximately 0.20, compared to vinyl’s standard 0.30 — a measurable advantage that compounds over decades of heating and cooling loads. High-performance engineered wood windows with triple glazing can reach whole-window Uw values of 0.74–0.80 W/m²K, which meets Passive House thresholds when paired with precision glazing packages.
In U.S. terms, a lower U-factor means less heat escaping through the frame in winter and less solar heat entering in summer. The difference between a U-0.20 fiberglass frame and a U-0.30 vinyl frame is real, but the glazing unit — the combination of pane count, low-E coating, gas fill, and spacer bar — typically contributes more to whole-window performance than the frame alone.
One factor that most comparison guides understate: installation quality is often the decisive variable. Air gaps from poor flashing or inadequate air sealing can negate the thermal advantage of even a premium frame. A fiberglass window installed carelessly will underperform a wood window installed with precision.
Pro Tip: When reviewing bids, ask each installer for the whole-window U-factor (not just the glass U-value) with the proposed glazing package. Specify low-E coatings, argon gas fills, and warm-edge spacer bars — these three elements, covered in Gepettomillworks’ glazing project archive, consistently deliver the largest efficiency gains regardless of frame material.
How do durability and maintenance differ between the two materials?
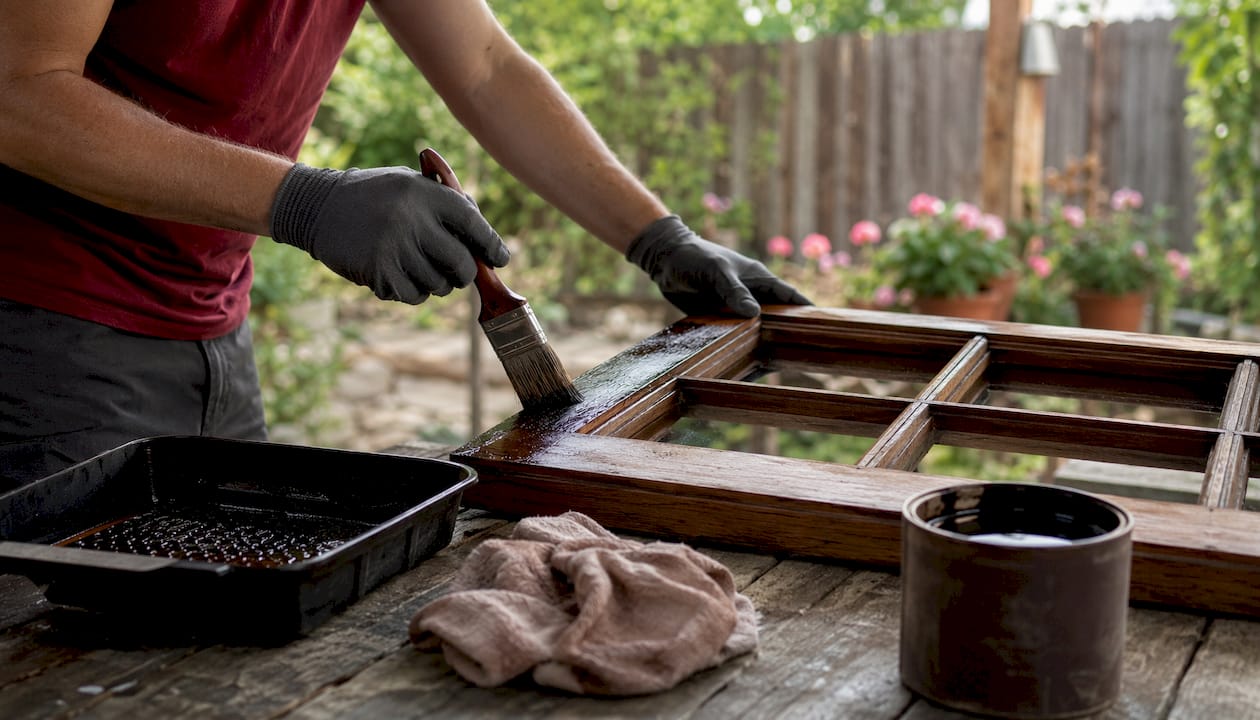
Fiberglass requires minimal maintenance and resists rot, pests, and corrosion. Wood can be repaired and refinished rather than fully replaced, but that repairability comes with a genuine maintenance obligation.
Fiberglass frames expand and contract at a rate closely matching glass itself, which reduces seal stress and preserves airtightness through decades of temperature cycling. Wood frames move more with humidity and temperature changes, which is why cladding details and proper drainage design matter so much in wood-clad systems.
Common failure risks by material:
- Wood: rot from moisture infiltration, paint or stain failure, insect damage in unprotected species, warping in poorly ventilated installations
- Fiberglass: finish wear in lower-quality products, limited standard color ranges in some lines, occasional brittleness at fastener points in cold climates
Realistic maintenance schedule:
- Wood (bare or clad-wood interior): Annual visual inspection of seals and finish; sanding and repainting or restaining every 5–10 years depending on climate and exposure; immediate repair of any cracked or peeling finish to prevent moisture infiltration.
- Fiberglass: Wash frames twice yearly with mild soap; touch up any surface chips with manufacturer-supplied paint; inspect seals at the 15–20 year mark.
Properly engineered wood-clad systems — where an aluminum or fiberglass exterior shell protects a wood interior — extend service life considerably. The critical specification detail is cladding attachment and drainage: a cladding system that traps moisture behind it creates hidden rot that is far more damaging than exposed bare wood.
What should you budget for wood versus fiberglass windows?
Wood carries a higher upfront cost and higher maintenance-driven lifecycle costs. Fiberglass costs more than vinyl at installation but typically delivers a lower total cost of ownership than wood when maintenance and replacement cycles are factored across 30–40 years.
Typical installed price ranges: vinyl is the most affordable, fiberglass is moderately priced, and wood or wood-clad are generally the most expensive, with custom-milled historic profiles costing the most.
| Material |
Installed cost range |
Expected lifespan |
Maintenance cost (lifetime) |
| Fiberglass |
— |
40–50 years |
Low |
| Wood / clad-wood |
— |
20–30 years (maintained) |
Moderate to high |
Cost checklist when collecting bids:
- Confirm glazing specification is included (pane count, coating, gas fill)
- Verify warranty terms cover both frame and glass seal
- Clarify installation scope: flashing, air sealing, interior and exterior trim
- Ask for the expected maintenance schedule in writing
A simple lifecycle comparison: add the installed cost, estimated refinishing or maintenance costs over the window’s service life, and the cost of one replacement cycle. For a 40-year horizon, fiberglass often closes the upfront price gap because it typically requires no replacement within that period.
When does historic authenticity require wood?
Wood remains the superior material for authentic profiles, shadow lines, and the tactile depth that defines pre-20th-century American architectural character. Fiberglass can replicate many visual qualities, but conservation boards and historic tax-credit programs frequently require original materials and profiles that factory-extruded fiberglass cannot satisfy.
Finish and customization options by material:
- Wood: paint, stain, or clear finish in any color; complex profiles including elliptical lights, fanlights, tracery, and Palladian configurations; field-adjustable to non-standard openings
- Fiberglass: factory colors, woodgrain and EverWood-style interior finishes, paintable after installation — but complex custom profiles are constrained by manufacturing tooling
When a local historic district, the National Park Service’s Secretary of the Interior’s Standards, or a state historic tax-credit program governs a project, wood is often effectively mandated. Historically accurate window replication requires not just matching the visual profile but reproducing the muntin dimensions, glazing bar geometry, and glass type that preservation authorities expect.
Gepettomillworks fabricates custom wood windows to period-accurate profiles for historic restoration projects, including documentation support for federal and state historic tax credit eligibility. Where a planning board or preservation commission requires authentic wood profiles and shadowlines, that specification is the starting point, not a constraint.
Which material fits your climate and property type?
Fiberglass excels in extreme, variable, and coastal climates because its dimensional stability preserves seal integrity through wide temperature swings and salt-air exposure. Wood performs well in stable, interior, or controlled environments and is the natural choice for conservation and restoration contexts.
Climate guidance:
- Cold climates (Upper Midwest, New England): Prioritize low U-factor and triple glazing; fiberglass’s seal stability under thermal cycling is a meaningful advantage.
- Hot/humid climates (Gulf Coast, Southeast): Rot and moisture resistance favor fiberglass; wood-clad systems with proper drainage can perform, but require more vigilance.
- Coastal environments: Salt air and corrosion exposure make fiberglass the clear choice for longevity; bare wood exteriors degrade rapidly without frequent maintenance.
- High-sun climates (Southwest): UV-stable factory finishes on fiberglass outperform painted wood over time; specify UV-resistant coatings for either material.
| Climate / Property type |
Recommended material |
Primary reason |
| Cold, extreme temperature swings |
Fiberglass |
Seal stability, low U-factor |
| Hot/humid |
Fiberglass |
Rot and moisture resistance |
| Coastal / salt air |
Fiberglass |
Corrosion and UV resistance |
| Historic landmark / conservation |
Wood |
Authenticity, preservation compliance |
| Multi-family replacement |
Fiberglass |
Low maintenance, long service life |
| Single-family, Craftsman / bungalow |
Wood or fiberglass |
Depends on historic status and budget |
How should you decide and what to ask installers?
Define your priorities in this order: authenticity vs. maintenance burden vs. thermal performance. Then set the glazing specification. Then compare frame options. Then vet installers on their installation practices, not just their product lines.
Decision checklist:
- Identify your primary priority: historic authenticity, energy performance, or low lifetime cost.
- Choose your glazing package: triple vs. double pane, low-E coating type, gas fill, spacer bar.
- Obtain at least three bids with identical glazing specifications for a fair comparison.
- Check installer references specifically for flashing and air-sealing practices.
- Confirm warranty coverage for both frame and glass seal separately.
Questions to ask every bidder:
- What is the whole-window U-factor with the proposed glazing, not just the center-of-glass value?
- What is the flashing and air-sealing approach at the rough opening?
- What does the warranty cover, and who handles claims — the manufacturer or the installer?
- Can you provide examples of similar projects, including any historic or preservation work?
Red flags in bids: vague installation scope with no mention of flashing; missing glazing specifications; prices significantly below market ranges without a clear explanation; no written maintenance schedule provided.
What are the environmental and sourcing considerations?
Timber typically carries lower embodied carbon than many manufactured cladding materials when sourced responsibly, and its natural origin makes it the only genuinely renewable frame material in common use. Lifecycle durability and replacement frequency, however, affect whole-life carbon as much as upfront material choice — a fiberglass window that lasts 40–50 years may carry a lower whole-life carbon footprint than a wood window replaced twice in the same period.
Sourcing checks:
- Wood: Look for FSC (Forest Stewardship Council) or PEFC certification; ask about reclaimed timber options for restoration projects, which carry near-zero embodied carbon.
- Fiberglass: Manufactured from glass fiber and resin; energy-intensive to produce; limited recyclability at end of life compared to timber.
Properly engineered wood with protective exterior cladding, particularly when fabricated from certified or reclaimed timber, can be a genuinely low-carbon option for conservation projects where replacement frequency is low and the material is maintained correctly.
Pro Tip: When evaluating environmental impact, ask suppliers for a whole-life carbon estimate, not just an upfront material comparison. A well-maintained wood window on a 40-year cycle with FSC-certified timber often compares favorably to a fiberglass unit when manufacturing energy is included in the calculation.
Key Takeaways
Fiberglass delivers the lowest lifetime maintenance burden and strongest dimensional stability; wood remains the only material that satisfies historic preservation requirements and delivers authentic period profiles.
| Point |
Details |
| Fiberglass for longevity |
Fiberglass windows last multiple decades with minimal maintenance, outpacing wood’s 20–30 year cycle. |
| Wood for authenticity |
Historic boards and tax-credit programs often require authentic wood profiles that fiberglass cannot replicate. |
| Glazing outweighs frame |
Low-E coatings, argon fills, and warm-edge spacers affect U-factor more than frame material alone. |
| Installation is decisive |
Poor flashing and air sealing negate even premium frames; vet installers on their rough-opening practices. |
| Gepettomillworks for historic work |
Gepettomillworks fabricates custom wood windows to period-accurate profiles, including historic tax-credit documentation support. |
The case for specifying wood where it genuinely matters
The window material debate tends to flatten into a simple maintenance-vs-aesthetics trade-off, and that framing misses the most consequential dimension: regulatory and architectural obligation. For a Victorian rowhouse, a Craftsman bungalow, or a neoclassical civic building, the question is rarely “which material performs better in the abstract” — it is “which material the preservation authority will accept and which profile the building’s character demands.”
Fiberglass has earned its reputation as the functional upgrade for replacement projects in demanding climates, and the performance data supports that reputation. But the assumption that fiberglass woodgrain finishes satisfy conservation boards is one of the more persistent misconceptions in the window industry. Preservation commissions evaluate muntin profiles, glazing bar dimensions, and glass type with a precision that factory-extruded profiles rarely meet. The handmade wood windows that Gepettomillworks produces are not a nostalgic preference — they are a technical response to specifications that no off-the-shelf product addresses.
For homeowners and property managers who are not bound by preservation requirements, the honest recommendation is fiberglass for most replacement projects. For those who are, or who simply want the architectural depth that only worked wood delivers, the specification conversation starts with material and profile, not with U-factor.
Gepettomillworks: custom wood windows for historic and preservation projects
Historic properties deserve windows fabricated to the exact profiles, shadowlines, and glazing configurations their architecture requires — not the closest available substitute.
Gepettomillworks designs and fabricates custom wood windows for historic replica projects, restoration work, and new construction where period authenticity is the governing specification. Services include custom window fabrication to period-accurate profiles, glazing coordination for high-performance glass packages, and documentation support for federal and state historic tax-credit eligibility. Whether the project is a single fanlight or a full-building restoration, the starting point is always the building’s original character.
Contact Gepettomillworks to discuss your project and receive a specification-level consultation grounded in preservation standards.
Useful sources and further reading
- Windows: Energy Efficiency Facts and Myths — Washington State Department of Archaeology and Historic Preservation; covers R-value realities, rehabilitation costs, and historic window performance.
- Vinyl, Wood, or Fiberglass Windows: Here’s the Data — comparative U-factor, lifespan, and cost data across frame materials.
- The Benefits of Fiberglass Windows — lifespan and maintenance expectations for fiberglass.
- Fiberglass vs Wood Windows (Infinity by Marvin) — dimensional stability and seal longevity comparison.
- All-Timber Windows: Performance and Value Guide (Norrsken) — Uw values for triple-glazed timber and Passive House thresholds.
- Best Replacement Windows: Vinyl vs Fiberglass vs Wood — installed price ranges across material categories.
- Benefits of Fiberglass Windows (Milgard) — manufacturer perspective on installation requirements and cost-benefit.
- Gepettomillworks: glazing project archive — glazing specifications and project examples for historic and high-performance installations.
- Gepettomillworks: historically accurate windows — period profile replication and preservation documentation.
- Gepettomillworks: historic tax credit projects — tax-credit eligibility documentation and restoration project examples.
Recommended
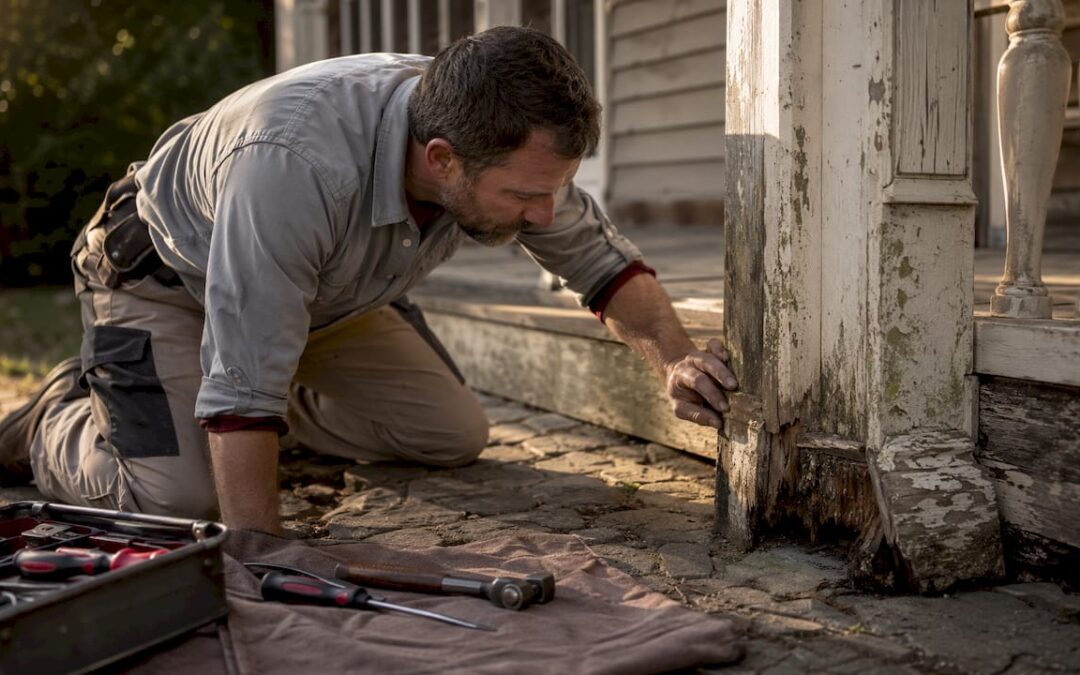
by Matthew Wiley | Aug 1, 2026 | Architectural Millwork
Most porch columns with localized base rot can be repaired in place; full replacement becomes necessary only when the structural core is compromised, decay extends past 18 inches up the shaft, or the inner load-bearing post has lost integrity. Before any cutting or probing begins, shore the roof load off the damaged column entirely.
Safety first: Transfer the roof load to a hydraulic jack and a temporary 4×4 post before touching the column. Lift slowly, install distribution plates to spread the load, and keep redundant shores in place throughout the repair. Never cut into a column that is still carrying load.
Immediate next steps for any field assessment:
- Shore and transfer load before any inspection cuts or probing
- Tap and probe to confirm whether the column is decorative or load-bearing
- Document rot extent with photos and measurements before cutting
- Call a structural engineer if the inner post shows any sign of compromise
Table of Contents
How do you decide between repair, splice, and full replacement?
The decision turns on two variables: how far decay has traveled vertically, and whether the visible column is a decorative wrap or the structural member itself.
Deterioration typically concentrates in the bottom 6–12 inches, where moisture collects between the base and the deck surface. Soft wood confined to that zone is a strong candidate for a splice repair. When softness extends past 18 inches or into the taper transition, replacement of the full column shaft is usually the more defensible specification, both structurally and economically.
Before writing a repair scope, verify whether the column is decorative or structural. Cosmetic patching is unsafe if the internal load-bearing post is compromised. Tap the shaft: a hollow sound in the lower third warrants an inspection port. In bid language, distinguish clearly between “splice repair of decorative column wrap” and “structural post replacement with matching millwork cladding” — conflating the two creates liability and change-order disputes.
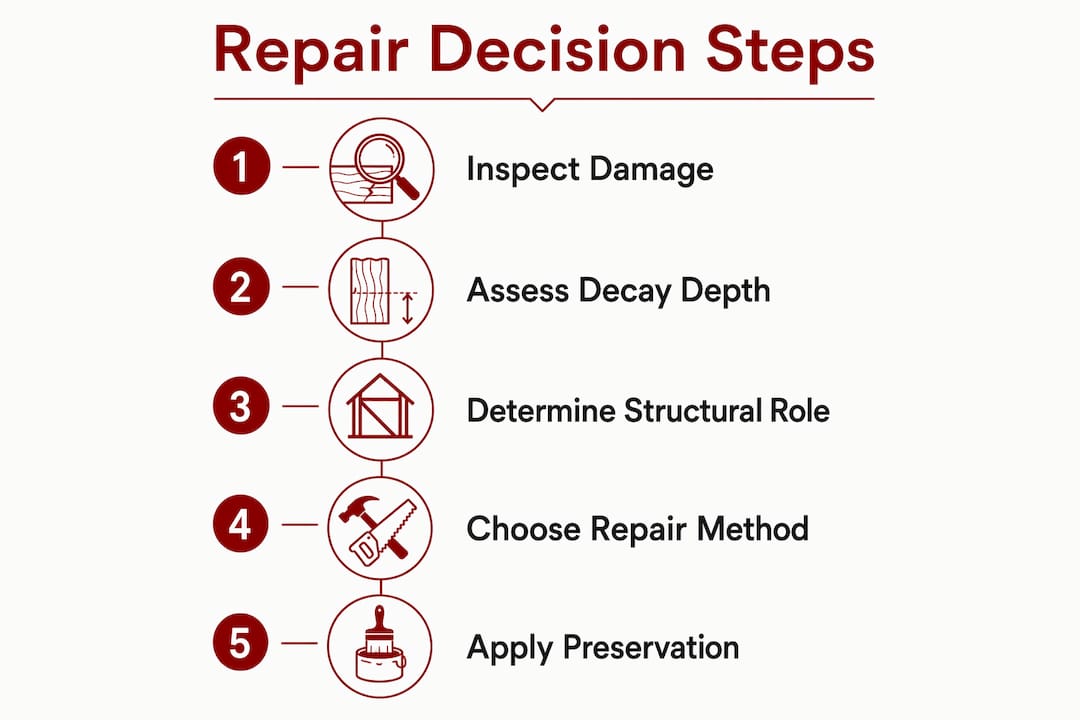
Field inspection: how to test, cut back, and document damage
Shoring precedes every other step. Use a hydraulic jack rated for the roof load, a temporary 4×4 post, and steel distribution plates above and below. Install redundant shores before making any cuts.
With the load transferred, proceed through this inspection sequence:
- Tap the full column height with a mallet, listening for hollow or dead sounds that indicate internal decay beyond the surface.
- Probe with a screwdriver at the base and any soft spots; sound wood resists penetration, decayed wood yields easily.
- Take moisture meter readings at multiple heights; readings above 19% in wood that appears intact signal hidden fungal activity.
- Open a small inspection port (typically 2–3 inches square) at the suspected decay boundary to confirm core condition.
- Mark the cut line at least 2 inches above the highest visible rot; continue cutting higher until only clean, solid wood remains at the kerf.
- Photograph every stage: the rot extent before cutting, the cut face, the core condition, and all measurements. These images become the basis for your repair spec and any change-order documentation.
Record shaft diameter at the cut line, taper geometry above and below, base profile dimensions, and original species if determinable. That data package is what a millworker needs to fabricate a matching splice block.
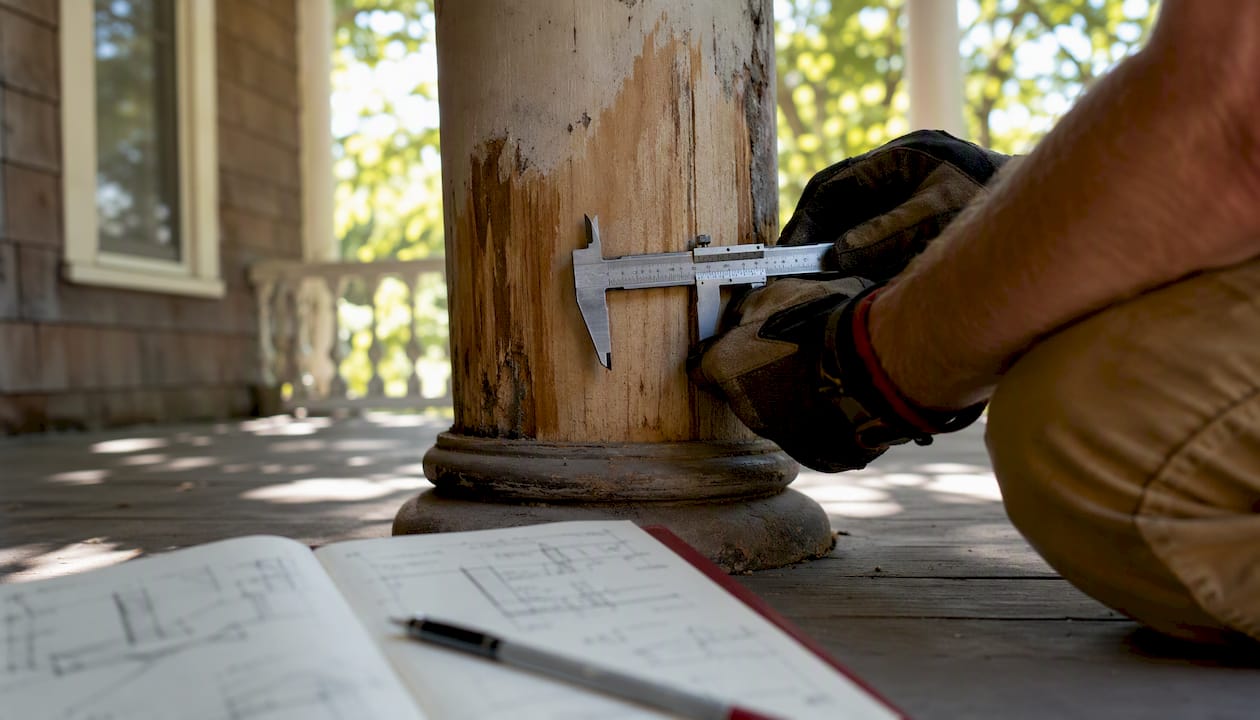
Which repair technique is right for the damage you found?
| Condition |
Recommended Method |
Structural Notes |
Preservation Notes |
| Surface checks, no decay |
Two-stage epoxy fill + prime |
No structural concern |
Reversible; matches paint finish |
| Decay confined to bottom 6–12 in., core sound |
Splice block with structural epoxy + fasteners |
Verify core before proceeding |
Match taper geometry precisely |
| Decay 12–18 in., core intact |
Extended splice or base section replacement |
Engineer review advisable |
Commission matched profile from millworker |
| Decay past 18 in. or into taper |
Full column replacement |
Structural sign-off required |
Replicate profile from measured drawings |
| Inner structural post compromised |
Remove and replace structural post; reclad |
Engineering sign-off mandatory |
Decorative wrap fabricated separately |
Profession-grade consolidants and two-part structural epoxies restore strength in moderate decay cases where core integrity is verified. They are appropriate for surface and near-surface decay but should never substitute for a splice when the cross-section has lost meaningful bearing capacity.
Key cautions by method:
- Epoxy consolidants: effective for moderate decay with a sound core; never use as a cosmetic cover over a structurally compromised section
- Splice blocks: precision in the horizontal cut is critical for tapered columns; even a small angular gap becomes a water trap and causes repeat failure within a few years
- Sistering / sleeving: appropriate when the structural post needs reinforcement but the decorative wrap is largely intact
- Full replication: the correct path when decay or damage has destroyed the historic profile; commission from a millworker with measured drawings in hand
Materials, preservatives, and moisture control that prevent recurrence
Species selection matters as much as technique. For splice blocks on visible faces, match the original species where possible — clear vertical-grain Douglas fir, white oak, or old-growth heart pine are common in pre-1940 work. Pressure-treated lumber is acceptable for concealed structural blocking but should not appear on finished surfaces where color and grain must align with historic fabric.
Preservative application:
- Apply a wood hardener or copper-based preservative to all exposed end grain immediately after cutting; do not allow cut faces to dry before treatment
- Copper-based preservatives penetrate more deeply than surface sealers and arrest residual fungal spores that tapping and probing cannot locate
- Allow full cure before applying adhesive or fasteners
Moisture control at the base:
- Install a metal post base plate (galvanized or stainless) between the column base and the deck to create a capillary break
- Maintain a 1/8-inch air gap between the column base and the plate
- Confirm deck pitch of at least 1/4 inch per foot away from the column; standing water at the base is the primary cause of repeat decay
Fasteners and adhesives: use exterior structural epoxy for the glue line and galvanized or stainless lag screws for mechanical connection. Never use standard interior wood glue or zinc-plated fasteners in an exterior splice.
Finishing: ventilation, waterproofing, and a quality exterior primer are the foundation of long-term performance. For deep cracks or splice seams, fill in two stages — bulk fill first, then a skim coat — and finish with a bonding primer plus two topcoats. Paint the full column face to avoid sheen mismatches at the repair boundary.
Pro Tip: Copper flashing tape at the base-to-deck junction ages appropriately on historic work and often outperforms modern plastic barriers in both longevity and visual compatibility with period materials.
How do you document historic profiles for exact replication?
When decay or damage has destroyed a portion of the historic profile, the quality of your documentation determines whether the replacement reads as a restoration or a substitution. Gather the following before contacting a millworker:
- Full-column elevation photographs from at least two perpendicular angles, with a scale reference in frame
- Measured drawings showing shaft diameter at base, mid-point, and capital; taper rate; base and capital profile sections; and overall height
- Scribe measurements of any applied moldings, flutes, or entasis curves
- Original material notes (species, finish system, evidence of prior repairs)
- A rubbing or template of the base and capital profiles if the column is partially intact
When the visible profile is affected, include a mock-up approval clause in the contract. Specify acceptable dimensional tolerances (typically ±1/16 inch on profile dimensions for historic tax credit work) and require a sample panel or column section for client and preservation officer review before full fabrication begins. Gepettomillworks’s replica millwork archive illustrates the range of period profiles that can be matched from measured drawings alone.
Pro Tip: A full-size cardboard template of the base profile, cut on site from the intact portion of the column, is faster and more accurate than a photograph for communicating taper geometry to the shop.
Step-by-step field procedure for a splice or base repair
- Shore and transfer load: hydraulic jack, temporary 4×4, distribution plates; install redundant shores before proceeding.
- Confirm core status: probe, tap, and open inspection port if needed; stop and call a structural engineer if the inner post is compromised.
- Mark and make the cut: square cut at least 2 inches above the highest visible rot; use a jig or table saw for tapered columns to hold the precise angle.
- Remove decayed material: extract the rot section completely; inspect the remaining shaft face for any residual soft wood.
- Treat exposed grain: apply wood hardener or copper-based preservative to all cut faces; allow full cure per manufacturer instructions.
- Fit the splice block: dry-fit first to confirm bearing and geometry; for tapered columns, the block must be table-sawn or jig-cut to match taper geometry exactly.
- Glue, fasten, and seal: apply exterior structural epoxy to mating faces, draw tight, and secure with galvanized or stainless lags; seal all joints before priming.
- Install post base and flashing: set the metal post base plate with the 1/8-inch air gap; confirm deck pitch.
- Transfer load back: lower the jack slowly and confirm the column seats fully before removing shores.
- Finish and paint: prime with a bonding exterior primer; apply two finish coats; paint the full column face.
Shoring checklist:
- Jack capacity rated at or above the tributary roof load
- Adjustable shores with steel bearing plates top and bottom
- Redundant secondary shore in place before any cutting begins
- No single point of failure in the temporary support system
Post-repair monitoring:
- At one month: check splice joint for any gap opening or paint cracking at the seam
- At six months: probe base area for any moisture infiltration; confirm deck pitch has not settled
- Annual: full tap-and-probe inspection of base zone; check fastener heads for corrosion; repaint as needed
What drives timeline and cost in U.S. restoration projects?
A straightforward splice repair on an accessible column typically runs two to four days from shoring through final paint cure. Add one to two weeks when a structural engineer’s review is required, and four to eight weeks when custom profile replication involves shop fabrication of a matched column section.
Primary cost drivers, in rough order of impact:
- Access and shoring complexity: second-story or portico columns with limited staging access add significant labor
- Profile replication: shop time for exact-match millwork on a non-standard Craftsman, Tuscan, or neoclassical column profile is the single largest variable in a restoration budget
- Species and material: clear vertical-grain old-growth species command a premium over contemporary equivalents; the cost difference is justified when historic tax credit eligibility depends on material authenticity
- Engineering and permits: load-bearing column repairs in many jurisdictions require a permit and a licensed engineer’s stamp; budget accordingly
- Finish matching: achieving a seamless color and sheen match on a weathered historic column often requires full-column repainting rather than spot touch-up
When requesting estimates, ask contractors and millworkers to provide line-item breakdowns separating shoring labor, material costs, shop fabrication, finish work, and engineering fees. A single lump-sum bid on a restoration project makes scope changes and change orders nearly impossible to adjudicate fairly.
Red flags that require a structural engineer or preservation specialist
Certain conditions move a project beyond carpentry repair into structural or historic-preservation territory. Escalate immediately when you observe any of the following:
- Rot extending past 18 inches or into the taper transition of the column shaft
- Hollow sound or visible separation at the beam-to-column connection at the capital
- Visible deflection or settling in the beam or roof structure above the column
- Evidence of insect damage (termite galleries, carpenter ant frass) in the column framing or adjacent sill
- Split or open joints at the column-to-beam connection that suggest the column has shifted under load
- Any sign that the inner structural post, rather than the decorative wrap, has lost cross-sectional integrity
For load-path issues, engage a licensed structural engineer before writing a repair scope. For historically significant elements on National Register properties or tax credit projects, a preservation architect should review the repair methodology. When the visible profile must be replicated, Gepettomillworks provides historic replication services from measured drawings through fabrication and installation support.
When drafting an RFI or emergency scope for a specialist, describe: the column’s position in the structure (corner, intermediate, portico), the approximate extent of visible decay, any observed deflection, the historic period and profile type, and whether the project carries tax credit or preservation officer oversight.
Key Takeaways
Sound wood at the cut face, a metal post base with a 1/8-inch air gap, and exact-profile splice geometry are the three non-negotiable conditions for a durable, preservation-compliant porch column repair.
| Point |
Details |
| Shore before you cut |
Transfer the roof load to a hydraulic jack and temporary 4×4 before any inspection or cutting begins. |
| Cut to sound wood |
Mark the cut line at least 2 inches above the highest visible rot; continue cutting higher until only solid, clean wood remains, and then apply a wood hardener or copper-based preservative to all exposed end grain. |
| Install a capillary break |
A metal post base plate with a 1/8-inch air gap and 1/4-inch-per-foot deck pitch prevents moisture recurrence. |
| Commission exact-profile millwork |
When the historic profile is affected, provide measured drawings and require a mock-up approval clause in the contract. |
| Gepettomillworks for replication |
Engage Gepettomillworks when exact-profile fabrication, measured drawings, or historic tax credit compliance is required. |
Why field patching alone rarely honors the architecture
The conventional wisdom in porch repair holds that epoxy consolidants and a fresh coat of paint constitute a complete restoration. That view underestimates two things: the precision that tapered historic profiles demand at the splice line, and the degree to which moisture management at the base determines whether the repair lasts five years or fifty.
A splice that closes the geometry perfectly but sits directly on a concrete deck without a capillary break will fail again, often faster than the original decay, because the repair wood lacks the old-growth density that slowed the first cycle of deterioration. Conversely, a post base installed with textbook moisture control but a slightly open splice joint becomes a water reservoir at exactly the point where the new wood is most vulnerable.
The repairs that hold are the ones that treat geometry, moisture, and material as a single integrated system rather than three separate line items. For historic columns where the profile itself carries architectural meaning — a Tuscan entasis, a Craftsman taper, a neoclassical base molding — that integration extends into the shop. Field carpentry alone cannot reproduce a period profile to the tolerances that preservation review requires. That is precisely where a millworker with documented experience in historic construction methods becomes not a luxury but a specification requirement.
Gepettomillworks: exact-profile replication for porch column projects
When a porch column repair requires more than field carpentry — when the historic profile must be matched, the taper geometry reproduced, or the material authenticated for tax credit review — Gepettomillworks fabricates to measured drawings with the precision that preservation work demands.
Services directly relevant to column repair and restoration include measured-drawing consultation, custom splice block and full-column fabrication, species-matched material selection, and installation support. The bungalow millwork archive and bungalow supplier pages document period-correct Craftsman and Prairie column profiles available for replication. To begin, prepare your profile documentation package (photographs, measured drawings, and material notes) and request a fabrication consultation at gepettomillworks.com.
Useful sources for preservation-minded column repair
The following references support the procedures, cut-back rules, and material specifications in this guide. Include relevant sources in your project file for preservation compliance or historic tax credit documentation.
- InspectAPedia: Wood Column Repairs — field diagnostic guidance on column defects, rot assessment, and structural evaluation
- This Old House: Replacing a Porch Column Base — ventilation, waterproofing, and finishing recommendations for hollow wood columns
- Craftsman Charm: Craftsman Porch Column Rot Repair — detailed splice geometry, post base installation, and moisture control for tapered columns
- PatioFixes: How to Repair the Bottom of a Porch Post — shoring procedure, cut-back rules, and preservative application
- Front Porch Ideas and More: How to Repair Porch Columns — consolidant and structural epoxy options for moderate decay
- BCA Periodic Structural Inspection guidance — structural inspection protocols relevant to escalation criteria and engineer engagement thresholds
Recommended