
For many exterior wood doors, kerf-in silicone or vinyl weatherstripping paired with a durable, adjustable door sweep can provide a reliable long-term seal. Before installing anything, measure the gaps at the sides, head, and bottom, and check that hinges and strike plates hold the door square in its frame. Sealing the rough opening behind the jamb matters just as much as the visible weatherstripping, since both work together to cut drafts and protect the wood from moisture.
TL;DR:
- Measure the widest gap at the sides, head, and bottom; choose a seal that contacts the full jamb while allowing seasonal wood movement.
- Kerf in strips need a 1/8 inch groove, while loose hinges or a shifted strike plate should be corrected before installation.
- Seal the hidden gap between the jamb and rough opening with caulk, low expansion foam, or backer rod; fibrous insulation alone will not block drafts.
- For historic doors, choose discreet silicone or spring bronze seals, and place alternatives behind the stop when molding makes a groove impractical.
- Use an adjustable sweep or door shoe at the bottom, then set its glides to stop daylight without making the door drag.
Table of Contents
- Types of weatherstripping and where each works best on wood doors
- How to choose by gap size, wood movement, and door location
- Step-by-step installation for kerf-in, adhesive, and nail-on methods
- Door bottoms and thresholds: sweeps, shoes, or gasketed systems
- Sealing the rough opening before the weatherstripping goes in
- Maintenance schedule and signs it’s time for a fix
- Why precise millwork makes weatherstripping work better
- Weatherstripping historic wood doors without losing their character
- Seal your doors well, then let craftsmanship do the rest
- FAQ
- Sources
Types of weatherstripping and where each works best on wood doors
Wood doors move with the seasons, and the right weatherstripping material accounts for that movement rather than fighting it. Kerf-in strips, made of silicone, vinyl, or nylon, insert into a milled groove along the jamb and can be a durable option for exterior wood doors because they stay anchored under repeated opening and closing. Tubular and bulb-style seals, often rubber, vinyl, or silicone, compress against the door face and suit both jambs and door bottoms, though their lifespan depends on how much daily compression they absorb.
For period-appropriate or especially durable sealing, V-strip tension seals and spring bronze or metal-leaf options are frequently recommended for wood doors and windows, since they hold up over decades with minimal visible profile. Adhesive-backed foam has its place too, but mainly on small, even gaps in interior applications, where exposure and movement are limited. When a jamb cannot be kerfed, whether due to existing trim profiles or structural limits, nail-on or screw-on mechanical strips offer a workable alternative.
- Kerf-in silicone, vinyl, or nylon: best for exterior wood doors with milled jamb grooves.
- Tubular or bulb seals: flexible compression fit for jambs and bottoms.
- V-strip, spring bronze, or metal-leaf: durable, low-profile options suited to historic finishes.
- Adhesive-backed foam: acceptable for small, even interior gaps only.
- Nail-on or screw-on strips: a practical fallback when kerfing isn’t possible.
How to choose by gap size, wood movement, and door location
Measure the largest gap at several points along each side, the head, and the bottom rather than relying on a single reading, since wood doors rarely sit perfectly parallel to their frames. The widest gap you find determines which profile will actually make contact across the full length of the jamb.
Kerf-in weatherstripping typically relies on a 1/8-inch kerf cut into the jamb; check whether your door already has this groove from the factory or whether a kerfing tool will be needed to create one. Because wood expands in humid months and contracts in dry ones, choose a compression range with enough give to seal in winter without binding in summer.
- Measure gaps at the top, middle, and bottom of each side and the head jamb.
- Confirm or cut a standard 1/8-inch kerf before ordering kerf-in strips.
- Select a compression range that accounts for seasonal wood movement.
- Consider adjustable screw-slot strips or threshold systems when kerfing isn’t practical.
Pro Tip: Cut a test kerf on a scrap piece of matching wood before committing to the jamb itself, especially on a historic or custom door.
Step-by-step installation for kerf-in, adhesive, and nail-on methods
A durable seal starts with the door itself, not the weatherstripping. If hinges are loose or the strike plate has shifted, tighten or reset them first, since weatherstripping cannot compensate for a door that isn’t hung square in its frame. Plane or shim as needed to create an even gap all the way around.
- Remove any old or deteriorated weatherstripping and clean the jamb surface.
- For kerf-in strips, cut or confirm the 1/8-inch kerf, then insert the strip without stretching it, working from one end to the other.
- At the head jamb, notch the side pieces to create a tight butt joint rather than overlapping them.
- For adhesive-backed strips, clean the surface thoroughly, press firmly along the full length, and avoid gaps caused by wrinkled or stretched material.
- For nail-on or screw-on strips, drill pilot holes to avoid splitting the wood and use slotted holes where available so the strip can be adjusted later.
- For a door sweep or shoe, rout a shallow dado if a recessed fit is desired, finish any exposed wood to match the door, then install the channel and attach the sweep with its glides loose.
- Close the door and check for daylight along every edge, then adjust glides, fasteners, or strip position until contact is even and the door still swings freely.
A well-sealed exterior door requires weatherstripping along both sides and the top, plus a sweep across the bottom, with full contact against the threshold confirmed before the job is considered finished. Even a 1/8-inch gap left unsealed around an entry door is roughly equivalent to a 5 1/2-inch-diameter hole cut straight through an exterior wall, which makes the final daylight check worth the extra few minutes.
Door bottoms and thresholds: sweeps, shoes, or gasketed systems
Air and water can get through the bottom of a wood door, so this is not a spot to treat as an afterthought. Inswing and outswing doors call for different threshold approaches, since the sweep or shoe must clear the threshold on the swing side while still sealing against it when closed.
Measure the clearance between the door bottom and the threshold, using roughly 1/2 inch as a common reference point when sizing a shoe or adjustable threshold, then adjust from there based on your actual gap. If you’re routing a dado for a recessed sweep, finish or paint any exposed wood before installing the channel and end caps to protect it from moisture.
- Choose a door shoe or gasketed threshold for high-traffic exterior doors with uneven wear.
- Size clearance against the threshold using a 1/2-inch reference, then fine-tune to the actual gap.
- Finish exposed wood before installing channels, sweeps, or end caps.
- Adjust sweep glides until daylight disappears without creating excessive drag on the door.
- In wet climates, pair the threshold choice with adequate roof or porch overhang to limit standing water at the sill.
Sealing the rough opening before the weatherstripping goes in
Weatherstripping only seals what’s visible, so the gap between the door jamb and the rough opening behind it deserves attention first. Building Science Education guidance recommends sealing this gap with caulk, low-expansion foam, or backer rod, and cautions against relying on fibrous insulation alone to block air movement there.
This hidden layer works alongside the visible jamb weatherstripping rather than replacing it, closing off drafts that would otherwise bypass even a perfectly installed strip. A simple smoke pencil test near the trim can reveal leaks you can’t feel by hand, and for a fuller picture of whole-house air leakage, a professional blower-door test is worth considering.
- Seal the rough opening gap with caulk, low-expansion foam, or backer rod.
- Avoid relying on fibrous insulation alone to stop air infiltration at this joint.
- Use a smoke pencil for a quick visual check of hidden drafts near the trim.
- Call in a professional for blower-door testing if drafts persist after sealing.
Maintenance schedule and signs it’s time for a fix
Inspect weatherstripping at least once a year for compression set, tears, and fasteners that have worked loose, ideally before the coldest months set in. A damp cloth clears dirt and debris, while a light lubricant on metal strips like spring bronze keeps them flexing smoothly instead of cracking.
Visible daylight or a draft that persists after adjustment usually means the strip has lost its memory and needs full replacement rather than another tweak. If the door binds or contacts unevenly right after installation, recheck hinge alignment before assuming the weatherstripping itself is at fault.
- Check seals annually for compression set, tearing, or loose fasteners.
- Clean with a damp cloth and lubricate metal strips periodically.
- Replace strips once daylight or drafts return despite adjustment.
- Recheck hinges and strike plates first if a new installation binds unevenly.
Pro Tip: Keep a small offcut of your installed weatherstripping on hand. It makes matching replacement material years later far easier.
Why precise millwork makes weatherstripping work better
A door that’s been fabricated or restored with accurate joinery may need less aggressive weatherstripping, and what’s installed may perform better for longer. Custom and restored wood doors can hold their fit through seasonal movement, helping the seal stay consistent. Preserving historic fabric and sealing it well aren’t competing goals. For a door with real architectural significance, consulting a specialist on fit and finish before reaching for weatherstripping products is worth the conversation.
— Gepetto
Weatherstripping historic wood doors without losing their character
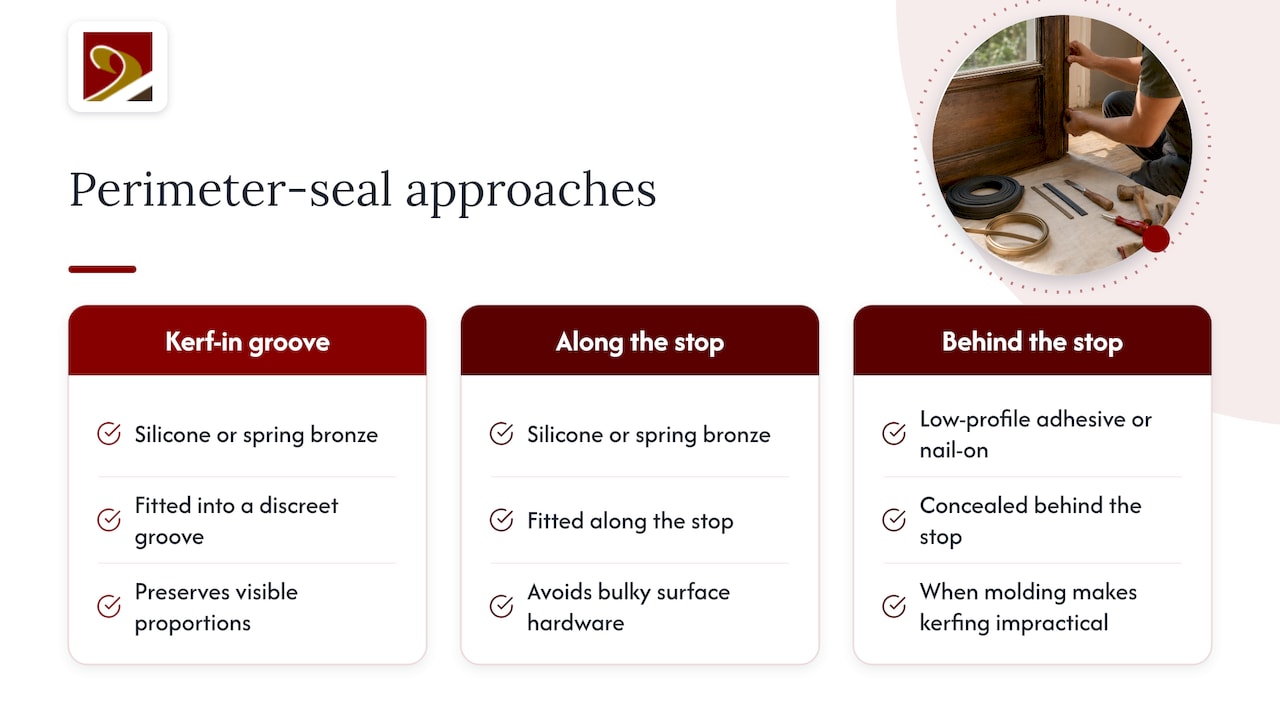
Historic wood doors call for a different calculus than a standard exterior replacement, since the goal is sealing performance without disturbing original material, period hardware, or finishes that carry the building’s history. Kerf-in strips in silicone or spring bronze tend to suit these doors well, since both can be fitted into a discreet groove or along the stop without altering visible proportions or requiring bulky surface-mounted hardware.
When a historic door’s casing or molding profile makes kerfing impractical, a low-profile adhesive or nail-on strip set behind the stop, rather than across a visible face, keeps the original lines intact. Finishing any new wood or hardware to match existing patina also goes a long way toward keeping the seal invisible. For doors tied to historic restoration work or museum-quality preservation standards, matching weatherstripping choices to the original material palette protects both the building’s character and its eligibility for preservation-related considerations.
Seal your doors well, then let craftsmanship do the rest
Weatherstripping only performs as well as the door it’s attached to, which is why we focus on getting the fit right before a single strip goes in. Our Historic Wooden Doors work includes replicating period profiles and joinery for historic buildings. For entryways that call for a new solid wood door rather than a repair, our Solid Wood Entry Doors are made to order.
If your current sealing struggles trace back to a door that’s warped, out of square, or simply reaching the end of its service life, reach out through our Historic Doors page to talk through restoration or replacement options suited to your building.
FAQ
What is the best way to seal an exterior wood door?
Kerf-in silicone or vinyl weatherstripping on the sides and head, combined with an adjustable door sweep or gasketed threshold at the bottom, can provide a durable seal on a wood exterior door. Before installing any of it, confirm the door is square and the hinges and strike plate are tight, since weatherstripping cannot fix a poorly hung door.
What are the three types of door weather stripping?
Door weatherstripping commonly falls into tension seals like V-strip, compression seals like tubular or bulb styles, and kerf-style strips set into a milled groove. Felt and spring bronze are also widely used, with felt offering a lower cost but a shorter service life compared to the others.
How can I weatherproof my wooden door?
Start by measuring gaps at the sides, head, and bottom, then choose weatherstripping sized to the widest gap you find so it seals without binding the door shut. Seal the rough opening behind the jamb with caulk or low-expansion foam as well, since that hidden gap can leak air even after the visible weatherstripping is installed.
What to use instead of weather stripping?
There isn’t a true substitute for weatherstripping on an exterior door, since it’s the layer that seals the moving joint between door and frame. A storm door or well-fitted threshold can reduce the load on the primary seal, but sealing the door itself still does most of the work in cutting air infiltration and protecting the wood from moisture.
How often should I replace door weatherstripping?
There’s no fixed replacement interval, since wear depends on climate, material, and how often the door is used, but an annual inspection catches compression set, tears, and loosened fasteners before they cause drafts. Visible daylight around the door or a draft that persists after adjustment is the clearest sign it’s time to replace the strip rather than continue adjusting it.
Sources
- Install Weatherstripping on an Exterior Door
- Greenhome
- Weatherstripping Door Frames – Fine Homebuilding
- Rough Opening Flashing: Air Sealing | Building Science Education