by Matthew Wiley | Nov 22, 2026 | Architectural Millwork
A historic baluster is replicated by documenting the surviving profile, matching its species and proportions, turning or milling the new piece against the original, and reconciling the result with the guard rules the local code official enforces. The work rewards a fabricator who can reproduce period turnings exactly and who understands how preservation reviewers read a staircase. At Gepetto Millworks we design and fabricate period staircases and balustrades for historic buildings, including replication of period features and matching for historic tax credit eligibility, and this article sets out what that process demands of architects, contractors and owners.
Gepettomillworks
gepettomillworks.com
Match Historic Staircase Details
Gepettomillworks designs and fabricates period staircases and balustrades for historic buildings, including replication of period features.
Visit
TL;DR
- Document before you remove anything: a donor baluster, a profile trace and calipered diameters at every transition are the foundation of an accurate copy.
- Historic balusters are often larger than stock lumberyard parts, so matching size usually means milling from heavier stock rather than adapting a catalog pattern.
- Preservation guidance favors in-kind replacement of only the missing or deteriorated pieces, and codes still govern guard height and openings on new or substantially replaced work.
- Order spares with the first run; balusters are lost to impact and accident more often than expected.
- Send us photographs, the donor baluster and your reviewer’s requirements early, and we will scope the replication with the tax credit review in mind.
Table of Contents
Why replication differs from replacement
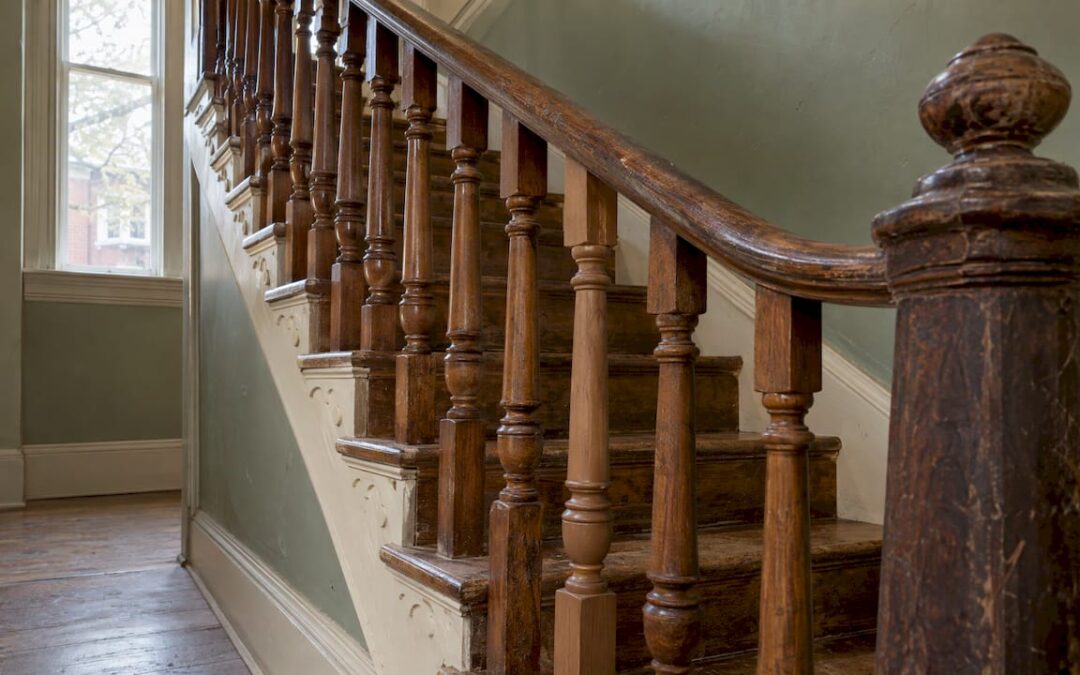
A catalog baluster is a product. A replicated baluster is a record. The distinction matters because a staircase carries the proportions of its period: the entasis of a swelled shaft, the crispness of a bead, the spacing of two or three balusters per tread, the relationship between the vase and the ring below the rail. A part that is merely close interrupts that rhythm, and on a stair that rhythm is read from every landing.
The National Park Service’s guidance on historic wood porches makes the principle explicit for balusters: the replacement should be fabricated to match the original in design and material, with its size and shape determined by examining adjacent balusters or by temporarily removing an existing one as a sample. The same brief cautions that simple rectangular balusters should not be swapped for pattern-sawn or turned ones unless physical or pictorial evidence shows such forms existed historically. Replication, in other words, runs in both directions: it forbids invention as firmly as it forbids approximation.
For architects preparing a tax credit submission, that discipline is the point. Reviewers compare the proposed work with the documented existing condition, and a baluster that departs from the original in profile, species or dimension is the sort of detail that draws comment. Our own work is built around exact historic replication using authentic materials and techniques, so the pieces we produce are intended to stand up to that comparison.
Documenting the original before anything is reproduced
The quality of a replica is fixed at the documentation stage. Nothing a lathe operator does later can recover information that was never recorded.
Choose the donor carefully
The standard approach is to remove an intact baluster from a less visible location, such as the underside of a landing run or a secondary flight, and use it as the pattern. The Park Service brief adds that heavy paint buildup must be removed so the original dimensions can be established, since several generations of coatings can add a sixteenth of an inch or more to every profile. Where no intact example survives, a historic photograph, a surviving drawing or a matching baluster elsewhere in the building can serve as evidence.
The documentary tradition is long. The Massachusetts Historical Society holds Thomas Jefferson’s 1775 detail drawings of the Monticello stair balusters, drawn at one-third full scale with specifications. A modern shop drawing of a baluster serves the same function: a scaled profile with dimensions, species and joinery noted.
What to record
A complete record of a baluster includes:
- Profile trace. The silhouette traced full size on paper, as This Old House describes it, by scribing the profile onto manila paper and recording the diameter at each transition point with calipers.
- Overall length and shaft dimensions. Including the square blocks at top and bottom, where the baluster meets the rail and tread or shoe.
- Species and grain. Mahogany, walnut, oak, heart pine and poplar all appear on American stairs, and each turns and finishes differently.
- Joinery. Whether the foot is doweled, tenoned or pinned, and how the top is fixed beneath the handrail.
- Finish history. Clear, stained, grained or painted, since this governs how the new piece is prepared.
- Photographs. The whole flight, the newel, the rail and each variant in the run.
Balusters within a run are not always identical. Hand-turned originals vary slightly, and some stairs mix a plain baluster with a twisted or fluted one in a repeating sequence. Photograph and number every position so the replica order reproduces the pattern, not just a single piece.
We describe what we need from a contractor or owner at the outset of a project in our guide to baluster replication, which also addresses how historic rules and lead times shape the schedule. For the surrounding handrail and porch assemblies, our guide to historic handrails and decorative porch builders covers the related components.
Materials and dimensions: why stock parts rarely match
Historic balusters are frequently heavier than their modern equivalents. This Old House notes that standard lumberyard balusters are typically 1¼ inches square, while historic originals are often 1¾ inches square or larger. Matching the size can therefore mean ripping stock from a larger timber, such as a 6×6, and planing it to final dimension in several light passes per face.
That is a mill operation, not a shelf purchase. It also bears on species: the replacement should be the same wood as the original wherever it can be sourced, with comparable grain orientation and density, because a baluster of a different species will take stain and age differently beside its neighbors. Our work with period staircases, balustrades and wood turning is organized around this requirement, and the range is described on our custom fabrication page.
How a turned baluster is made to match
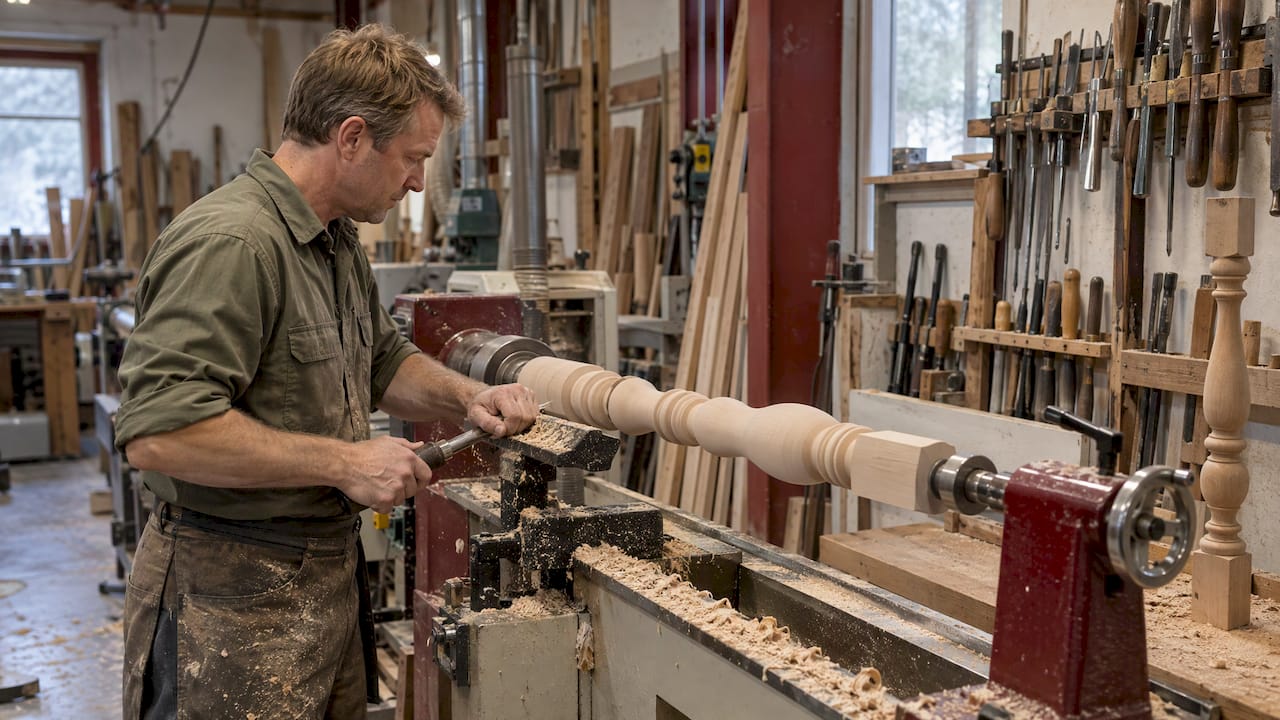
Turning is where the donor profile becomes a three-dimensional copy. In the sequence This Old House describes, the blank is chucked in the lathe and rounded, the original is placed beside the blank, and the high and low points of each curve are marked. The profile is then cut with chisels against the template, checking each section with calipers. The turner works from the largest diameter to the smallest, which reduces the risk of raising splinters, particularly in softer woods such as pine.
Two points deserve the attention of anyone specifying this work.
Tolerance accumulates. A baluster has perhaps a dozen transitions: fillets, beads, coves, a vase swell, a neck. A small error at each one produces a visibly different silhouette. This is why a fabricator checks each section against the original, not only the overall length.
Hand-carved and twisted forms need different methods. Barley twist, spiral and fluted balusters involve carving or specialized tooling beyond plain lathe work. Any such form should be assessed from the donor piece before a schedule is promised. Our wood turning and custom millwork page is the place to begin when the pattern is turned.
Fitting, joinery and finish
The baluster must be made to fit the staircase as it now stands, not as a drawing says it should. Stairs settle, rails sag and treads wear.
This Old House’s fitting method is to measure the horizontal distance between neighboring spindles, split the difference to mark the rail, and measure down to the tread for height. A bevel gauge captures the angle of the handrail’s underside before the baluster is trimmed. At the base a dowel fits into corresponding holes in the baluster and tread, and the top is secured with pre-drilled trim-head screws. The same source advises sealing all railing pieces on all six sides before assembly.
For exterior and porch work, the Park Service adds specific direction. The new baluster is cut one-half inch longer than needed at each end, test-fitted with a sliding bevel, and then its ends and end grain are sealed with a high-grade primer or epoxy before it is fastened with hot-dipped galvanized or stainless steel nails. Joints and fastener holes are sealed and painted. End-grain protection is the detail that most often decides whether a porch baluster lasts twenty years or five.
Matching the finish
For interior stairs, the finishing sequence This Old House gives for a replica is wax-free shellac applied with a rag, a light sanding with 220-grit paper, and a gel stain matched to the existing balusters, left to dry completely before installation. Color matching against aged wood is its own discipline, because the surrounding balusters have darkened over decades. We discuss the approach in our piece on matching stain on old trim.
Codes, guards and historic fabric
The question architects raise most often is what happens when a faithful reproduction meets a modern guard requirement. The answer depends on the scope of work and on the authority having jurisdiction, which is the local building official or, for designated districts, the historic review board.
The New Orleans Historic District Landmarks Commission guidelines illustrate the usual preservation position: replace only missing or deteriorated materials in kind, matching material, dimensions, profile and details, including custom replication of individual deteriorated balusters. The same guidelines note that new construction and, in some instances, significant replacement must meet current codes, which typically affect railing heights and stair tread and riser dimensions.
The 2024 International Residential Code (IRC), which states and municipalities adopt on their own schedules, requires guards on open sides more than 30 inches above the floor or grade, with a minimum residential guard height of 36 inches. According to a summary of IRC 2024 section R312, no opening in the guard may allow a 4-inch sphere to pass, and the triangular opening at the bottom of a stair guard may not pass a 6-inch sphere. The same summary points out that the clear opening between balusters, not the center-to-center spacing, is the dimension that counts, so the width of the baluster changes the result directly.
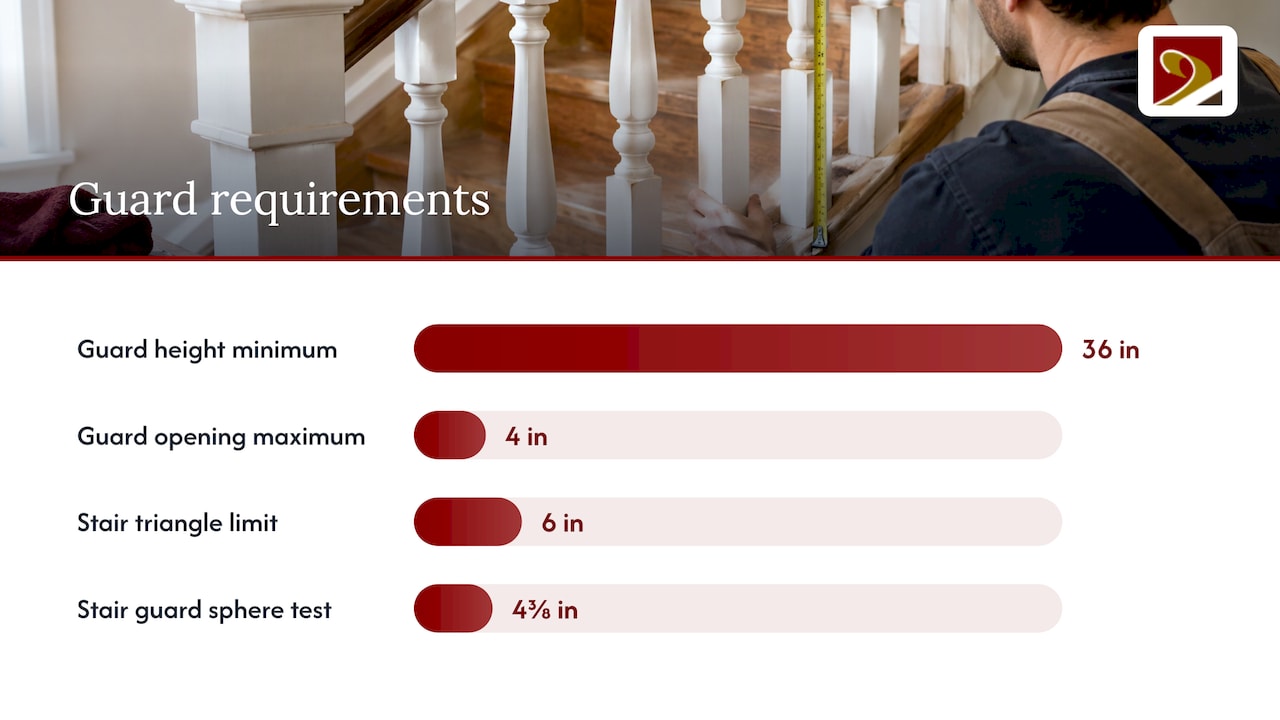
On stairs, a further allowance applies. A summary of IBC 2024 and IRC R312.1.3 states that the sphere test on stair guards is 4⅜ inches rather than 4 inches, because the slope of the rail creates wider diagonal openings than a level guard at the same spacing. Many existing stairs were built before any such rule, and states differ: Massachusetts, for example, sets a baluster interval of no more than 4 inches, and 6 inches for stairs built before August 28, 1997 under its residential sanitary code.
These figures differ by jurisdiction and edition. Confirm the adopted code and any historic-building provisions with your local building official before fixing a design, and bring the preservation reviewer into that conversation when a tax credit is involved.
A worked example
Take an 1890s townhouse stair with two turned balusters per tread, each about 1½ inches at the widest point of the vase, on a rail running at a typical stair pitch. Replicating the missing balusters at the original spacing preserves the historic rhythm, and a measured clear opening at the widest diagonal tells the architect whether the existing spacing is acceptable to the reviewer and the code official. If it is not, the usual preservation-minded options are a variance or alternative-compliance path for the historic fabric, or an adjustment confined to the least visible portion of the run. Either way the decision is made on measured drawings, which is why the documentation stage comes first.
What to send a fabricator, and what to expect
A useful first inquiry from an architect, contractor or owner contains:
- Five or six photographs: the full flight, the newel, a close view of the baluster, the foot and top connections, and any damaged pieces.
- The donor baluster itself, if one can be removed safely, or a calipered profile trace.
- The quantity needed, including the number of variants in the run.
- Any tax credit or review board requirements, including the reviewer’s name and the stage of the application.
- The jurisdiction, so code questions can be considered alongside fidelity.
On the schedule, baluster replication is custom work rather than a stock order, and we outline the typical rhythm of documentation, approval, fabrication and finishing in our baluster replication guide. For related assemblies, such as columns on a porch that shares the rail, see our notes on porch column replication.
Order spares with the first run. This Old House contractor Tom Silva observes that balusters are broken by far more causes than expected and advises having extras made when ordering replacements. A single additional baluster per variant costs little when the pattern is already set up and a great deal when it must be reproduced again in two years.
Where this work is done
We serve historic projects in Virginia, West Virginia, Virginia Beach, North Carolina, South Carolina, the District of Columbia and Maryland, including the Deal Island Historic District. Our restoration work in Richmond and the Fan District is gathered in our Richmond restoration archive.
Our work on historic stairs
Gepetto Millworks designs, fabricates and restores wood windows, doors, trim, cabinetry, staircases and architectural millwork for historic buildings. Period stair cases and balustrades are part of that range, along with wood turning, and our emphasis is on replicating period features and matching for historic tax credit eligibility. If you have a staircase with missing or damaged balusters, send us your photographs and the donor piece and we will scope the replication with you.

The starting point for a baluster, newel or full staircase project is our custom fabrication page, and the landing page lists the rest of our services.
Our perspective
A staircase is usually the most handled piece of architecture in a house. Hands, shoulders, luggage and children all find the balusters, and so the losses are predictable. What is less predictable is how quietly a poor replacement damages a stair: a baluster a quarter inch too slender, a vase swell set a half inch too high, and the eye registers something wrong without being able to say what.
We approach replication as an exercise in evidence. The donor baluster, the paint layers, the tool marks and the photographs tell us what the original turner intended, and our job is to reproduce that intention in the same species and the same proportions. This is the reason we work from the surviving piece and not from a catalog.
For architects and contractors the benefit is practical. A replicated baluster that is documented, dimensioned and matched in material gives a reviewer little to question, and it keeps the historic stair intact for the next century instead of being replaced again in the next decade. That is the standard we hold ourselves to on every period stair we build.
Gepetto
FAQ
How many balusters should be ordered for a repair?
Order every missing piece, plus spares of each variant in the run. Balusters break from impact and accident more often than expected, and a later order means setting up the pattern again. Your fabricator can advise on a sensible number once the staircase has been photographed.
Can a replica baluster be made from a single damaged original?
Yes, provided enough of the profile survives to trace and measure. A donor from a less visible location is better, and adjacent balusters on the same flight can confirm the pattern. Where nothing survives, historic photographs or drawings can supply the evidence.
Do replacement balusters have to meet current code spacing?
The answer depends on the jurisdiction, the edition of the code adopted and the extent of the work. Preservation guidance generally favors in-kind replacement of individual missing pieces, while new construction and significant replacement must meet current codes. Confirm the requirements with your local building official and your preservation reviewer before design is fixed.
Why not use stock balusters?
Stock balusters are commonly 1¼ inches square, while historic originals are often 1¾ inches or larger, and the profiles differ. A replica made from the original keeps the proportions, species and detailing of the stair intact, which matters for preservation review.
What should I send for a quote?
Send photographs of the full flight, the newel, the baluster and its connections, together with the donor piece or a calipered trace and any review requirements. The more you provide at the start, the more exactly the replication can be scoped.
Sources
Recommended
by Matthew Wiley | Nov 21, 2026 | Architectural Millwork
Custom millwork rarely has a single lead time. It has a sequence of them: scope definition, field measurement, shop drawings, review, fabrication, finishing, delivery and installation. Published figures for the fabrication stage alone commonly run from 6 to 12 weeks after shop drawing approval, with architect review adding two to three weeks on top. On a historic building, profile matching, mock-ups and preservation review can lengthen the front end of that sequence. The reliable way to protect a schedule is to order early and to settle scope, measurements and approvals before the first cut. At Gepetto Millworks, that is how we approach historic windows, doors, stairs and casework for architects, general contractors and owners.
Gepettomillworks
gepettomillworks.com
Plan Historic Millwork Earlier
Gepettomillworks creates custom millwork for historic building projects, supporting schedule planning for architects, owners and builders.
Visit
TL;DR
- Budget for the whole chain, not just the shop: a full kitchen’s production alone is typically 8 to 14 weeks, before delivery and installation.
- The clock that matters starts at written approval of shop drawings, so the weeks before it (measuring, drawing, review) belong in your schedule from day one.
- Historic work adds profile research, knife or cutter making, and mock-ups, which is why early scope and samples save more time than any rush fee.
- Site readiness decides whether finished millwork can be installed: enclosed building, wet trades complete, climate control running.
- Order long-lead items as soon as the design is fixed, and request a bid early so fabrication can be slotted into the shop’s calendar.
Table of Contents
Where the lead time clock actually starts
When a contractor asks “how long?”, the answer depends on which event the question is measured from. Quotes of “8 to 12 weeks” almost always begin at approved shop drawings, not at the day a deposit is paid or the day an architect first sketches a stair.
For a project schedule, it helps to think in five phases:
- Scope and bid. Drawings, species, grade, finish and hardware allowances are defined and priced. Scope guidance for millwork buy-outs stresses locking down species, grade, finish, hardware and substrate before shop drawings begin.
- Field measurement and shop drawings. Dimensions are verified on site and drawn in detail. The U.S. Army Corps of Engineers’ architectural cabinet specification requires field-measurement verification before fabrication, a sound principle for any custom work, and critical in buildings where no wall is plumb.
- Review and approval. Submittals go to the architect, and sometimes to a preservation reviewer. A draft Architectural Woodwork Institute standard describes drawings returned within ten days, but it is a draft, not a contractual deadline, and real reviews on multi-party projects often run longer.
- Fabrication and finishing. Milling, joinery, sanding, finishing and quality checks.
- Delivery and installation. Delivery commonly lands a day to three days ahead of installers, and a full kitchen’s installation is typically 3 to 7 days, with a day or two more for large, complex layouts.
Add these together and a cabinetry package that a shop describes as “ten weeks” can easily represent four to five months from first meeting to final trim. Consumer-facing guidance for residential cabinets lands in a similar place, reporting three to four months from accepted order to delivery for custom work, though that figure comes from a single shop’s rules of thumb and should not be read as a standard.
Typical ranges by type of millwork
There is no national table for custom millwork lead times, because species, profile complexity and shop backlog vary. The ranges below are working planning figures drawn from the sources cited in this article. Treat them as the order of magnitude, then ask the fabricating shop for a figure tied to your drawings.
| Stage or item |
Planning range |
Notes |
| Architect review of millwork submittals |
2 to 3 weeks |
Plan for it explicitly; do not assume a standard two-week turnaround |
| Custom millwork fabrication, after approved shop drawings |
6 to 12 weeks |
Commercial and casework packages, same source |
| Full custom kitchen, shop production |
8 to 14 weeks |
First cut to delivery-ready |
| Kitchen installation |
3 to 7 days |
Larger layouts may add 1 to 3 days |
| Historic profiles, stairs, radius work, restored sash |
Set per project |
Depends on profile research, tooling and mock-ups |
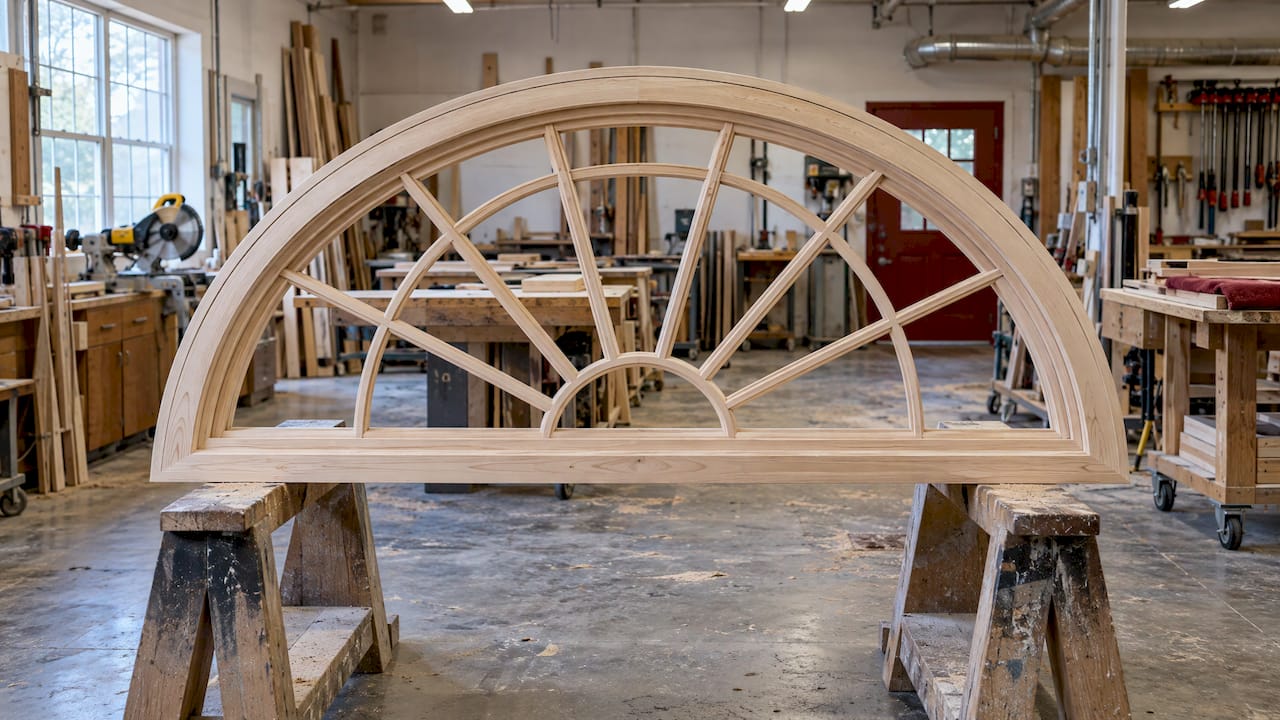
The last row is deliberate. A reproduction window sash with a specific muntin profile, a curved stair rail, or a fanlight with tracery has no catalog behavior. Its schedule follows the work that precedes cutting, which is the subject of the next section.
Why historic millwork takes longer
Mass-produced trim is stocked. Historic trim is reconstructed from evidence, and that evidence-gathering is schedule time.
Profiles that no longer exist in a catalog
The National Park Service’s Preservation Brief 9 notes that repairing historic wooden windows can call for custom reproduction of parts, and that feasibility depends on mill availability, available cutting knives, and a craftsperson’s ability to reproduce profiles. In practice this means someone documents the original molding, makes or grinds cutters to match, and runs a test piece before production begins. Standardized, ready-made moldings arrived with mechanized production after the Civil War, as the Secretary of the Interior’s guidelines discuss, which is why pre-1870s buildings often hold profiles that no stock supplier ever offered.
Evaluation before decisions
The same brief says repair-or-replace decisions should follow evaluation of the existing windows, and that masonry connections can make frame removal substantially more complicated, sometimes requiring professional investigation. Those findings change scope, so a firm schedule cannot be written until they are in.
Approvals and tax-credit review
Projects pursuing historic tax credits carry an additional layer: the work must match what the reviewing authority will accept. Physical samples help here. Our page on millwork shop samples for West Virginia historic tax credits explains why putting a real profile in front of reviewers early prevents a rejection that would otherwise reset the submittal cycle. Shop samples and mock-ups for radius work serve the same purpose: they convert an approval question into a yes before production money is committed.
Specialty geometry
Elliptical fanlights, curved balustrades, and turned newels are slower than straight-run casework because setup, templating and hand finishing dominate over machine time. If your design includes any of these, say so in the first conversation, not after drawings are circulated.
What stretches or shrinks the schedule
Most lead-time overruns trace back to a short list of causes.
Incomplete scope. Items routinely left out of millwork bids, such as hardware allowances, site-measurement responsibility, on-site storage and field touch-up, become disputes at delivery. Each dispute is a delay.
Late changes after approval. Shop guidance describes written approval of shop drawings preceding production, with later changes requiring a written revision that may affect schedule and cost. Treat approval as the point where the design is frozen.
Slow review loops. A drawing that bounces between architect, owner, and preservation reviewer three times has cost weeks before the shop saw it. Naming one decision-maker for millwork approvals is the cheapest schedule insurance there is.
Species and material availability. Old-growth-look lumber, wide boards for stair treads and large glass for sash can have their own procurement time. Confirm species and glazing early, because both are locked in at shop drawing stage.
Site conditions. Finished millwork that arrives before the building is ready sits in a truck or a storage bay, or worse, gets installed into conditions that damage it. The Woodwork Institute’s jobsite requirements list clear access, an enclosed and sealed space, rough framing and MEP complete, functioning HVAC, clean staging and 72-hour acclimation as conditions for on-schedule delivery and installation. Federal specifications go in the same direction: no delivery or installation until the building is enclosed, wet work is complete and HVAC is running within stated temperature and humidity limits, with rooms not receiving units until painting and ceiling installation are done. A scheduling consultant makes the same point: complete wet trades and stabilize temperature and humidity before millwork ships, and use climate-controlled staging if delivery must come early.
On a historic building, site readiness has an extra dimension. Plaster, old masonry and uninsulated envelopes hold moisture, and solid wood responds to it. A realistic installation date should come after the building has stabilized, not merely after the drywall crew leaves.
When to order
Work backward from the installation date, and set each milestone with a person’s name next to it.
- Installation date. Pick the week by site readiness: enclosed, wet trades done, HVAC running.
- Delivery. Count back a few days, plus acclimation time if the millwork needs to settle on site.
- Fabrication and finishing. Count back the shop’s quoted production time, then add a buffer for finishing and inspection.
- Approval of shop drawings. Count back your realistic review cycle: at least two to three weeks for architect review, longer when a preservation reviewer is involved.
- Field measurement and drawings. Measure once the existing conditions are exposed. Selective demolition often reveals what the walls really are.
- Bid and award. Engage the shop before this point if you can.
For most historic projects, that means the millwork conversation belongs at schematic design, not at construction documents. Early manufacturability input costs little and shows where a profile, joint or curve will drive the schedule. That is why we offer early design manufacturability consulting alongside fabrication.
If you are an owner rather than a professional, the same logic applies in simpler terms: ask your architect to include millwork submittals in the schedule and to tell you the date by which you must choose species, finish and profiles. A decision that arrives a month late costs a month.
A worked example

Take a stair rail and balustrade package for a circa-1900 townhouse, with installation targeted for early in the finish phase. Suppose measurement and shop drawings take three weeks, architect and owner review takes three more, fabrication takes ten, and delivery and installation take one. That is 17 weeks, roughly four months, and it assumes no revisions. A single round of late changes, a species substitution or a delayed measurement shifts the finish date week for week. Starting the conversation at design development, not at construction, is the difference between hitting the date and explaining it. These numbers are illustrative arithmetic using the ranges above, not a quote for any particular project.
How to shorten the path without cutting corners
- Hand over everything at once. Drawings, photographs of existing profiles, any preservation commission comments and the finish schedule.
- Send physical evidence. A section of original casing or a sash member lets a shop match a profile far faster than photographs.
- Decide species, glazing and hardware before drawings are issued.
- Appoint one approver. Collect comments from the owner, architect and reviewer into a single marked-up set.
- Coordinate delivery with the superintendent. Keep the delivery window inside the period when HVAC is running and the area is clean.
- Phase the package. Items needed first, such as windows for weather-tightness, can be released ahead of cabinetry and stairs.
Phasing deserves emphasis. A fabricator who knows the sequence can sequence production to match, so windows leave the shop first and the library built-ins follow. Our Virginia architectural millwork project portfolio shows the range of packages we have built.
What we offer for schedule-sensitive projects
Gepetto Millworks designs, fabricates and restores wood windows, doors, trim, cabinetry, staircases and architectural millwork for historic buildings, including replication of period features and matching for historic tax credit eligibility. Window work starts with historic window restoration and wooden windows. Doors, stairs, balustrades, casework, libraries and built-ins, and kitchens are on our custom fabrication page. Commercial interiors are covered under commercial millwork. To get a project onto a fabrication calendar, send drawings through the architectural millwork bid request.
If you are still setting scope, our historic millwork scope of work guide for architects, general contractors and owners is the place to start. Standards defined first make every later date easier to hold.
Perspective
On historic projects, the weeks that decide the schedule are rarely in the shop. They are spent deciding what the original looked like, whether it can be matched exactly, and who has to agree before anyone cuts.
We build our approach around that fact. Gepetto Millworks focuses on exact historic replication using authentic materials and techniques, which is what makes a project eligible for historic preservation tax credits. We take on complex, architecturally significant work and custom requests that others may not accept, and we would rather resolve a profile or a curve at the mock-up stage than discover it on the jobsite.
Our advice to architects and contractors is simple: bring us in while the drawings are still flexible. A shop that sees the stair, the fanlight and the window schedule together can sequence the package so that what you need first is built first. An approved sample is worth more to a schedule than any promise of speed.
Gepetto
FAQ
How long does custom millwork take from approval to installation?
Published guidance puts fabrication of custom millwork at 6 to 12 weeks after shop drawing approval, and a full custom kitchen at 8 to 14 weeks of shop production, plus delivery and several days of installation. Historic profiles, radius work and specialty glazing are scheduled per project once drawings are reviewed.
When should I order custom millwork for a renovation?
Order as soon as the design is fixed and the existing conditions are exposed enough to measure, typically during design development. Work backward from the installation date and include field measurement, drawings and review in the plan. Early conversations with a fabricator also reveal which items should be released first.
Why did my shop drawings take longer than the fabrication quote?
Fabrication quotes usually start at approved drawings, so the measurement, drawing and review steps sit outside them. A draft industry standard describes ten-day review returns, but multi-party reviews on historic projects often take longer. Plan the review loop explicitly.
Can a changed detail after approval affect the delivery date?
Yes. Changes after written approval generally require a written revision and can affect both schedule and cost. Settle profiles, species and hardware before approval.
What site conditions need to be in place before installation?
The building should be enclosed, wet trades finished and HVAC operating, with clear access and clean staging, per the Woodwork Institute’s jobsite requirements, which also identify a 72-hour acclimation period. Confirm these with your superintendent before delivery is booked.
Sources
Recommended
by Matthew Wiley | Nov 20, 2026 | Architectural Millwork
Exterior millwork stays sound when water is shed quickly, allowed to escape as vapor, and never trapped behind a coating or cladding. That means three things working together: drainage details that keep water off windows, doors and trim; a finish that slows moisture exchange without sealing the wood in; and a routine of inspection that finds failure while it is still a repair rather than a replacement. On a historic building, the work is done in matching materials and profiles, so the detailing and the fabrication have to be planned together. We build and restore exterior windows, doors, trim and period features for historic projects, and the sections below set out the principles we would want every architect, contractor and owner to have in hand before a drawing is issued.
Gepettomillworks
Protect Historic Millwork from Moisture
Gepettomillworks builds and restores exterior windows, doors, trim and period features for historic building projects.
Visit
TL;DR
- Moisture is the leading cause of deterioration in historic buildings, and the aim is to manage its movement, not to seal it out entirely (NPS Preservation Brief 39).
- Assume every cladding and trim assembly will leak at some point; flash openings and leave a path for water to drain and the wall to dry (Building America Solution Center).
- No coating is moisture-proof. Choose finishes that slow wood’s moisture exchange, and avoid layers that behave as an unintended vapor barrier.
- Fix the cause (flashing, gutters, grade) before replacing wood, then replace only what is beyond repair, in kind.
- Inspect twice a year and repaint on a schedule so small failures never reach the framing.
Table of Contents
Where the water comes from
The National Park Service names uncontrolled moisture as the most prevalent cause of deterioration in older and historic buildings, leading to erosion, corrosion, rot and eventually the loss of materials, finishes and structure (Preservation Brief 39). Its list of sources is wider than rain on a sash. It includes snow, high ambient humidity, high water tables, plumbing and mechanical leaks, moisture generated inside the building by occupants and climate control, and even water used during maintenance or construction.
The South Carolina State Historic Preservation Office puts the matter plainly in its owners’ manual: water is the most destructive agent a building faces day to day. It recommends something any project team can do at no cost: stand outside during a heavy rain and watch where water goes from the roof, gutters, downspouts and site drainage (SC Department of Archives and History). The same manual notes that energy measures such as added insulation, storm windows and tight replacement windows can make it harder for interior moisture to dry out.
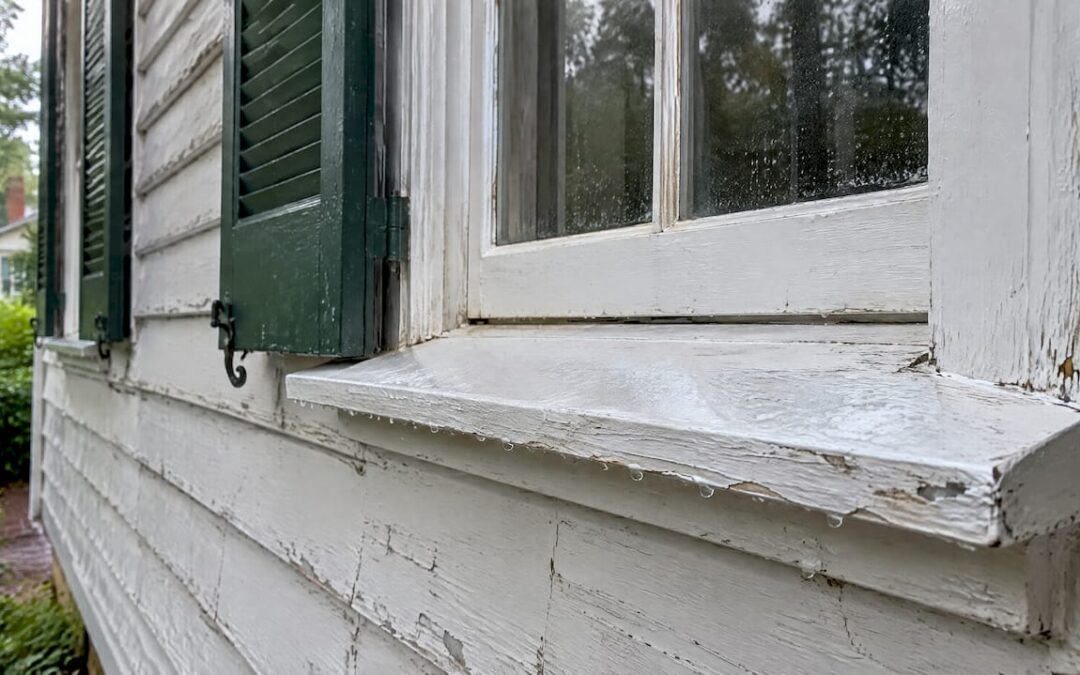
For the exterior wood itself, dew and precipitation cause cracking, peeling, discoloration and early paint failure, as the National Park Service’s technical center explains in its guide to traditional and modern paints and stains for exterior wood. The practical conclusion for designers is that millwork rarely fails because of one dramatic event. It fails at the places where water lingers: horizontal surfaces, joints, end grain, and the junctions between wall and opening.
Detailing to shed water and let the wall dry
Assume the cladding will leak
The Building America Solution Center, a U.S. Department of Energy program, advises that all siding, whatever its material, should be assumed to leak at some point in its life. Walls therefore need a means of drainage and drying behind the cladding: a gap created with furring strips, a drainage mat or textured house wrap, between the cladding and the water-resistive barrier, with vents at top and bottom to promote air circulation (BASC exterior siding guide). The same guide adds that wood siding able to dry quickly and spend little time in a high-moisture state resists decay far longer.
On a historic building the original wall may have no such gap, and adding one is a design decision with consequences for trim projection and window reveals. That is the stage at which fabrication matters: casings, sills and returns have to be dimensioned for the wall as it will actually be built, not as it was drawn a century ago.
Flash every opening
Windows, doors and penetrations should not depend on the cladding to keep water out. The Building America guidance calls for flashing at these locations, and the USDA Forest Products Laboratory’s guide to finishing wood exteriors lists the older, proven features that minimize moisture damage (Cassens and Feist, Finishing Wood Exteriors):
- wide roof overhangs, where a 4-foot overhang shields about two-thirds of a conventional one-story sidewall from full sun and a good share of rain;
- metal flashings under shingles at roof edges and at valleys and wall junctions;
- drip caps over window and door frames;
- eave troughs and downspouts kept in working order.
Where roof edges meet gutters, the way the metal is lapped decides whether water runs into the gutter or behind it onto fascia and cornice trim. Roofers describe the difference between the two components in their gutter apron and drip edge guidance, which is worth a look before specifying either one against a historic cornice.
Keep water from standing
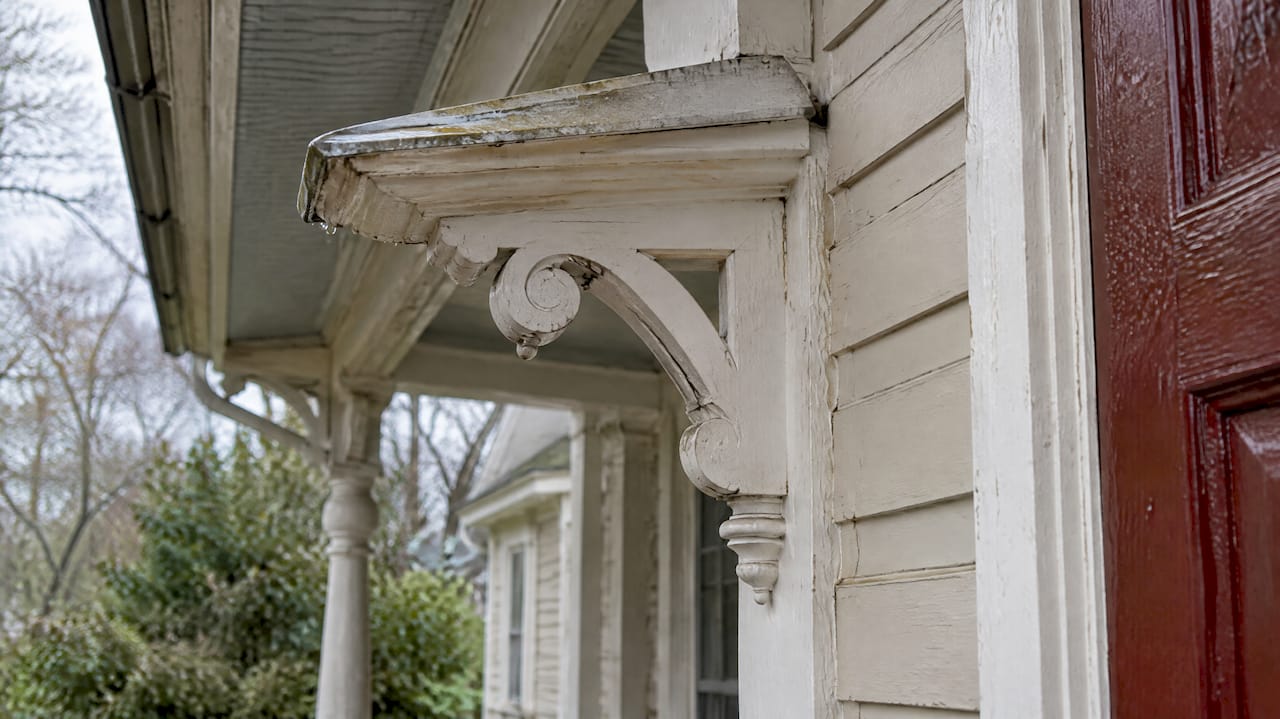
The historic district guidelines of St. Charles, Illinois, direct owners to provide drainage so that water does not stand on flat horizontal surfaces or collect in decorative features (St. Charles residential design guidelines). In practice this means sloped sills with a proper drip, caps that overhang the face below, and carved or applied ornament that can drain rather than hold a pool. The same guidelines observe that correctly installed siding and trim shed storm water and let vapor leave the wall cavity outward, and that peeling paint on an otherwise properly painted surface is early evidence of excess moisture within the wall.
Acclimate before you install
Moisture is also a matter of timing. The Woodwork Institute’s job-site guide recommends that millwork be acclimated for 72 hours before installation at 45 to 65 percent relative humidity and 60 to 90°F, which corresponds to an equilibrium moisture content of 8 to 12 percent. It records a case in which glued veneer paneling, 150 to 160 feet of it, split after absorbing moisture through an unfinished window wall because it was installed before the building was enclosed (Woodwork Institute, Protecting Your Millwork at the Job Site). Exterior pieces are less sensitive than paneling, but the principle carries over: sequence the work so that finished wood is not exposed to wetting before the envelope is complete.
Choosing finishes that do not trap moisture
What a coating can and cannot do
The Forest Products Laboratory is direct on this point: no coating is entirely moisture-proof. A finish slows the rate at which wood gains or loses moisture, and film-forming finishes last longer on dimensionally stable wood. Their effectiveness depends on film thickness, defects, pigment type and resin chemistry, and porous latex or flat oil-based paints (those with a pigment volume concentration above 40 percent) give little protection unless applied over a nonporous primer (Cassens and Feist).
Preservation Brief 39 cautions that waterproof coatings can trap moisture and make an existing problem worse. The lesson is to treat the finish as one layer in a system that also includes the species, the grain orientation, the joinery and the drainage detail.
A sound paint sequence
Purdue Extension recommends that bare or stripped wood receive a paintable water-repellent preservative, followed by an oil-base or stain-blocking latex primer and at least one high-quality acrylic latex topcoat. One topcoat may last four to five years; two may last as long as ten (Purdue Extension, NCR-133).
Old paint and new paint
The Preservation Society’s guidance on exterior wood observes that the oil paint found on many older buildings tends to adhere well to difficult surfaces, whereas several layers of latex can form an unintended impermeable barrier whose surface tension pulls older layers off the substrate. It advises consulting a paint specialist and choosing light colors for exterior walls to reflect heat (Preservation Society, Exterior Wood resilience guidance). When the existing finish is sound, matching it rather than stripping it is often the more conservative course; our note on matching stain on old trim without stripping sound finishes explains the approach, and our Maryland homeowner’s guide to millwork finishing covers finishing choices for a humid mid-Atlantic climate.
Do not seal the wall behind new cladding
The St. Charles guidelines warn that a synthetic veneer over foam underlayment on a wood exterior inhibits moisture escape from the wall cavity, and that fungal decay can continue for years behind such a shell with no visible sign on the surface. They add that concealing original wood siding, trim and architectural elements with aluminum, vinyl or synthetic material is generally not appropriate. Preservation Brief 16 makes a related point for substitute materials generally: their expansion, contraction, moisture resistance and permeability must be weighed against the surrounding historic fabric, or the assembly is put at risk (NPS Preservation Brief 16). Wood replaced with wood of the same character behaves like the wood around it.
Inspection and upkeep
The Preservation Society recommends semi-annual inspection of exterior wood, looking for peeling paint and for dirt veins near the ground that may point to termite activity; an annual wash with a garden hose, detergent and a bristle brush; and repainting every five to eight years (Preservation Society). A useful walk-through looks for these signs:
| What you see |
What it often indicates |
First response |
| Peeling or blistering paint on a well-prepared surface |
Moisture moving outward through the wall |
Trace the source before repainting |
| Soft wood at sill ends and the bottom of casings |
Standing water or a failed drip |
Check slope, flashing and grade |
| Open joints at mitres and rails |
Repeated wetting and drying |
Repair the joint and review the finish |
| Staining below a window head |
Failed or missing head flashing |
Inspect and replace flashing |
| Dirt veins near the ground |
Possible termite activity |
Have a pest professional inspect |
Preservation Brief 39 states that most unwanted exterior moisture can be relieved by repairing damaged materials, replacing flashings, rehanging gutters, repairing downspouts, caulking the perimeter joints around windows and doors, and repainting. The order matters: the cause comes first, the wood second, the paint last.
Repairing historic millwork: what the standards ask
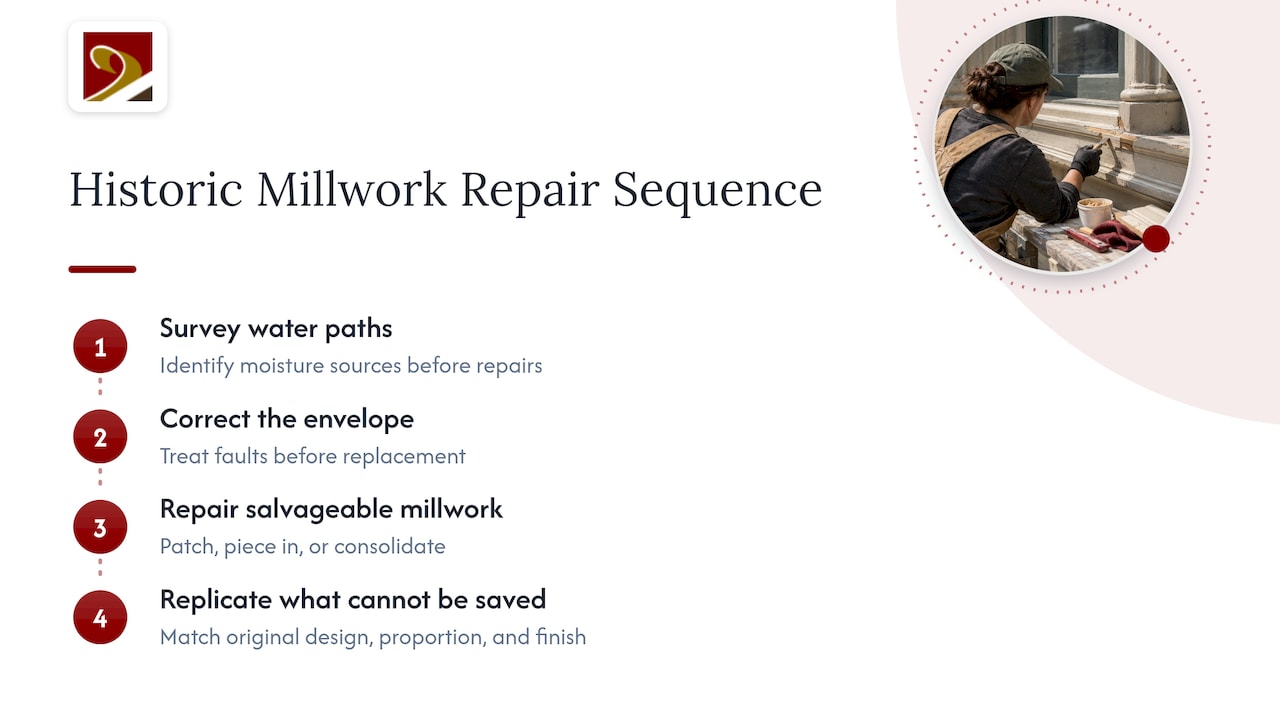
The NPS Illustrated Guidelines for Rehabilitating Historic Buildings direct owners to identify, retain and preserve character-defining wood features. Deteriorated parts are repaired by patching, piecing in or consolidating, and replaced in kind only where surviving prototypes exist. Causes such as faulty flashing, leaking gutters, deteriorated caulking, plant growth and infestation are to be treated before any replacement, and protective paint is retained unless it is itself failing (Illustrated Guidelines for Rehabilitating Historic Buildings).
The Secretary of the Interior’s Standards add that historic drainage features, including roof overhangs, gutters and downspouts, must be kept intact and functioning, and that moisture sources such as clogged gutters, leaky roofs and soil held against wood at the foundation must be found and eliminated (Standards for Rehabilitation, 2017 edition). Local review boards commonly require replacement trim to match the original in design, proportion and finish.
For architects and contractors, this sets the sequence of a sound scope: survey the water paths, correct the envelope, repair salvageable millwork, and replicate what cannot be saved. Projects seeking historic tax credits are reviewed against these same standards, so the documentation of what was repaired and what was replicated has value beyond the building’s longevity. We cover the sample and approval process for one state in our piece on millwork shop samples for West Virginia historic tax credits.
What we make and restore
Gepetto Millworks designs, fabricates and restores wood windows, doors, trim, staircases and architectural millwork for historic buildings, including the replication of period features and matching for historic tax credit eligibility. Where a sash, casing, door or ornamental element has passed the point of repair, we replicate it using authentic materials and techniques. Where it can be saved, our historic window restoration keeps the original fabric in service. New openings and replacement units are available as wooden windows, and entry doors, shutters, casework and balustrades are produced through our custom fabrication work.
If you are planning an envelope repair on a historic building in Virginia, Maryland, North Carolina, South Carolina, West Virginia or Washington, D.C., send us the drawings or the existing conditions and we will talk through the millwork scope at gepettomillworks.com.
Our perspective
Moisture control in historic millwork is, in the end, a question of fidelity. The original joiners understood that a sill must shed water, that a cornice must throw rain clear of the wall, and that a painted surface must be renewed before it fails. When those details are lost to a careless replacement, the wood is blamed, though the detail was at fault.
We approach every exterior commission with that in mind. A replicated sash or casing is only as durable as its profile, its joinery and its relationship to the flashing above and the sill below, so we look at the whole opening, not the single part. Our expertise lies in exact historic replication with authentic materials and techniques, and in taking on architecturally significant and complex pieces that other shops may decline.
That fidelity is also what a preservation reviewer looks for. Millwork that matches the original in proportion and finish, and that is detailed to drain and dry as the original was, satisfies the standards and the weather together. For architects, builders and owners of historic buildings, we regard the choice of a fabricator with that discipline as part of the moisture strategy itself.
Gepetto
Frequently asked questions
Should exterior millwork be sealed completely against moisture?
No. The Forest Products Laboratory states that no coating is entirely moisture-proof, and Preservation Brief 39 warns that waterproof coatings can trap moisture and aggravate existing problems. The goal is to shed water quickly and let the wood dry, using flashing, drainage gaps and a breathable finish system.
How often should exterior wood trim and windows be inspected and repainted?
The Preservation Society recommends inspecting exterior wood twice a year, washing it annually, and repainting every five to eight years. Purdue Extension notes that one topcoat over a proper primer may last four to five years and two topcoats up to ten, depending on conditions.
Is peeling paint a sign of a moisture problem?
Often it is. Guidelines from St. Charles, Illinois, describe peeling of properly applied paint as early evidence of excessive moisture within the wall. Trace the source, such as failed flashing, a leaking gutter or a blocked drainage path, before repainting, or the new coat will fail in the same place.
Can historic wood windows and trim be repaired rather than replaced?
In most cases the standards favor it. The NPS guidelines call for patching, piecing in and consolidating deteriorated wood, with in-kind replacement only for parts too far gone and where surviving prototypes guide the replica. Fix the water source first, then repair or replicate the millwork.
Does air sealing and insulation affect millwork moisture?
It can. The South Carolina historic building owners’ manual notes that tight energy measures such as insulation, storm windows and tight replacement windows can make it harder for interior moisture to dry out. Plan the drying path of the wall together with any upgrade to the envelope.
Sources
Recommended
by Matthew Wiley | Nov 19, 2026 | Architectural Millwork
Millwork can earn the federal 20% historic tax credit, but only when it is treated as part of a certified rehabilitation: the windows, doors, stairs and paneling must be capitalized as qualified expenses, and the work must meet the Secretary of the Interior’s Standards. In practice, the approval turns on whether each new or repaired element matches the historic one in design, profile, material and finish, and whether you can prove it with documentation. This guide explains how the credit treats millwork, how the National Park Service (NPS) reviews it, and how to prepare so that the joinery your reviewers see on paper is the joinery that is built.
Gepettomillworks
Bring Historic Millwork to Life
Gepettomillworks creates custom millwork for historic building projects, helping bring careful attention to the details your rehabilitation requires.
Visit
TL;DR
- The federal credit is 20% of qualified rehabilitation expenditures (QREs), claimed over five years, for income-producing certified historic buildings. Owner-occupied residences do not qualify.
- Windows, doors, stairs and permanent paneling are structural components that can count as QREs when properly capitalized as part of the rehabilitation.
- NPS reviews millwork against the Secretary of the Interior’s Standards: repair first, and where replacement is unavoidable, match the original in design, color, texture and visual qualities, and materials where possible.
- Photograph, measure and document existing millwork before anything is removed, and seek Part 2 approval before work begins.
- Millwork shops that replicate period profiles from evidence give the review file the drawings and samples it needs.
Table of Contents
How the federal credit treats millwork
The credit is set out in Section 47 of the Internal Revenue Code. According to the IRS rehabilitation credit page, it equals 20% of the qualified rehabilitation expenditures for a qualified rehabilitated building, allocated ratably over five years on the federal income tax return. Millwork enters the calculation as a cost, not as a separate credit category. A restored sash, a replicated entry door or a rebuilt stair is simply one more line in the rehabilitation budget, and it is the building as a whole that must qualify.
Four conditions define a qualified building, as the IRS summarizes them:
- It must be a certified historic structure.
- It must be substantially rehabilitated: costs within a 24-month period (or 60 months for certain phased projects) must exceed the greater of the building’s adjusted basis or $5,000.
- It must have been placed in service before the rehabilitation began.
- It must be depreciable, which means income-producing use.
A certified historic structure is a building listed individually in the National Register of Historic Places, or one certified by the Secretary of the Interior as contributing to a registered historic district, according to the NPS certification application instructions. The credit is limited to buildings, so bridges, ships, railroad cars, grain silos and dams are outside it, as the Texas Historical Commission notes.
Who can claim it
The 20% credit applies to income-producing properties: commercial, industrial, agricultural and rental residential. The NPS eligibility requirements state that owner-occupied private residences do not qualify, although the business-use portion of a residence may in some instances be eligible. A historic homeowner who rents out an apartment, runs an inn, or operates an office in part of the house should discuss that portion with a tax adviser and with the State Historic Preservation Office (SHPO) early. For an owner-occupied house, state programs, where they exist, may be the relevant incentive, and they differ by state.
The former 10% credit for non-historic buildings built before 1936 was repealed by Public Law 115-97 in 2017, according to the NPS instructions. Only the 20% credit for certified historic structures remains.
Which millwork counts as a qualified expense
The question architects and contractors ask most often is whether a given door, sash or newel is a QRE. The guidance from state preservation offices working with the IRS rules is consistent: properly capitalized expenditures for a building’s structural components, including permanent coverings such as paneling or tiles, windows, doors and stairs, may be QREs when incurred in connection with the rehabilitation. The Illinois historic preservation agency’s QRE guidance lays this out.
That covers a good deal of what historic interiors and façades are made of:
- Wood windows, including sash, frames, muntins, sills and trim.
- Exterior and interior doors, transoms and sidelights.
- Staircases, newels, balusters and handrails.
- Permanent wall paneling, wainscot, cornices and applied trim.
- Built-in casework that is part of the building’s fabric.
Some related costs can also count. The Texas Historical Commission lists construction-period interest and taxes, architect and engineering fees, construction management costs and reasonable arm’s-length developer fees among potentially qualifying costs. The same page names what does not qualify: property acquisition, new additions, furniture, parking lots, sidewalks and landscaping. A freestanding cabinet is furniture; a library built into the wall of a certified room is architecture. Your tax adviser makes the final call on capitalization, but the distinction between fixed and movable should shape how millwork is specified and drawn.
How NPS reviews millwork: the Standards
Eligibility for expenses means little if the work is denied certification. The federal program is administered by NPS in partnership with the IRS and the state historic preservation offices, and the reviewers measure every project against the ten Standards for Rehabilitation codified at 36 CFR 67.7. Three of them govern millwork directly.
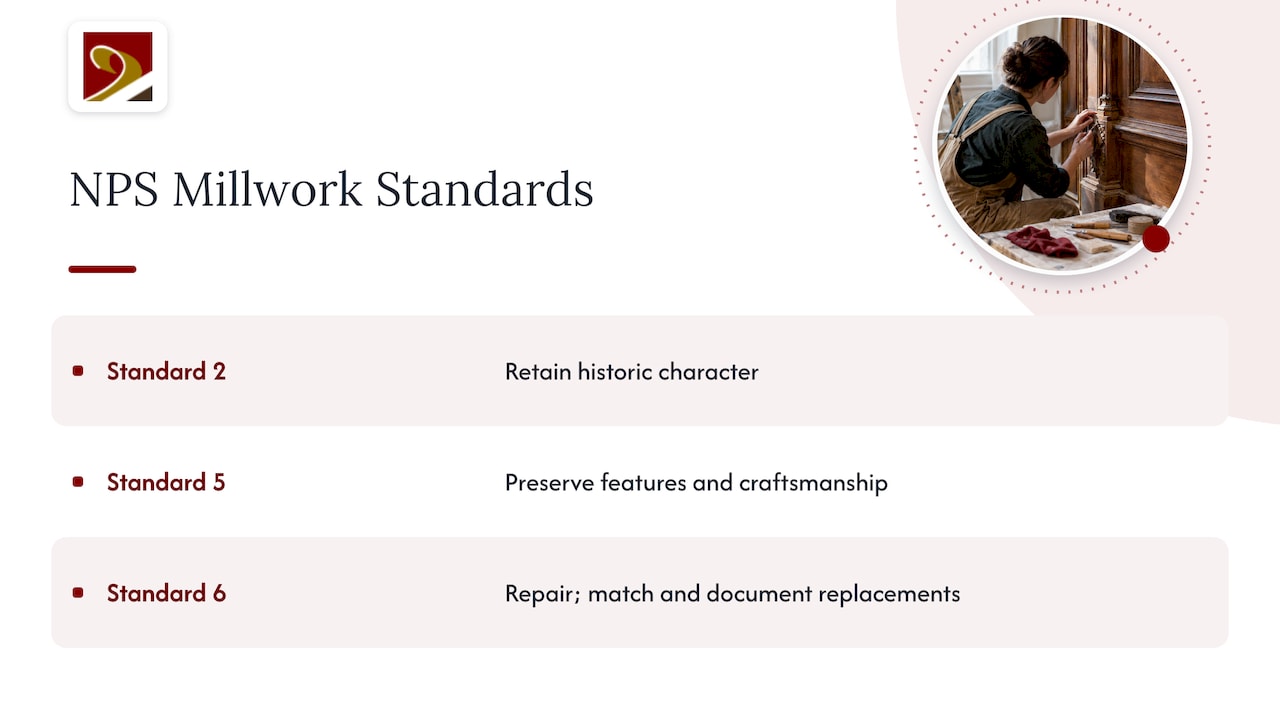
Standard 2 requires that a property’s historic character be retained and preserved. Removing distinctive features or altering spaces that define that character is what reviewers look for first.
Standard 5 requires that distinctive features, finishes and construction techniques or examples of craftsmanship be preserved. A carved newel, a hand-planed raised panel, a mortise-and-tenon sash and a graded wavy-glass light all fall here.
Standard 6 requires that deteriorated historic features be repaired rather than replaced. Where severity of deterioration requires replacement, the new feature must match the old in design, color, texture and other visual qualities and, where possible, materials. The replacement of missing features must be substantiated by documentary, physical or pictorial evidence.
Two practical points follow. First, the Standards cover interiors as well as exteriors, and NPS reviews the whole project, including attached or related new construction; certification rests on the cumulative effect of all the work, applied reasonably with attention to economic and technical feasibility, as the NPS instructions explain. A single mismatched door will not necessarily sink a project, but a pattern of replaced original fabric can. Second, NPS is looking at integrity. Its eligibility guidance stresses that the credit is meant to preserve buildings that retain physical integrity, not to create buildings that merely look old, and that material integrity once lost cannot be regained. That is why the first decision on any original sash or door is whether it can be repaired.
Repair first, replicate when evidence supports it
The hierarchy in Standard 6 gives a clear sequence for every millwork element:
- Retain and repair the original wherever it can be consolidated, spliced, patched or re-glazed.
- Replace in kind only the portions or components that are beyond repair, matching profile, species, dimensions and detailing.
- Reconstruct missing features only when documentary, physical or pictorial evidence shows what was there: old photographs, ghost marks on plaster, paint stratigraphy, surviving examples elsewhere in the building.
The Kentucky SHPO’s proposed-work FAQ illustrates the logic for wood: damaged material may be replaced, but the applicant should document the problem and replace only the damaged boards, not whole floors or façades, and good historic wood may be relocated and consolidated on the most visible elevations. The same discipline applies to sash, casings and stair parts. A reviewer reading your file should see a reason for each replacement.
This is where the fabrication shop becomes part of the approval strategy and not merely a supplier. Reproducing a sash profile that matches the original to the sixteenth of an inch, with the same muntin section, meeting rail and putty-glazed lights, requires measured documentation of the original, appropriate species and joinery, and the ability to make a one-off cutter or ground knife for a profile nobody stocks. Our historic tax credit window specifications guide walks through the window details that most often decide NPS review.
Windows, the most scrutinized element
Windows carry more of a building’s character than any other single element, and they are where Part 2 applications are most often questioned. Reviewers compare the proposed unit with the existing in:
- Sash and frame dimensions and the depth of the profile.
- Muntin width and shape, which govern how light reads across the façade.
- Glass type and the reflectivity or distortion of the glazing.
- Operation, such as double-hung versus fixed, and the pattern of divided lights.
- Material: wood replaced with wood.
For a deteriorated but repairable window, restoration is the course the Standards favor, and historic window restoration keeps original fabric in place. Where a window is beyond repair or missing, a replica must reproduce the documented original; wooden windows built to that documentation are how project teams show NPS a match in design, texture and material.
Doors, stairs and interior trim
Entry doors, interior doors with their panel layouts, transoms, newels and stair stringers are usually read as character-defining features in the principal public spaces: a lobby, a main stair hall, a parlor. Secondary spaces generally have more flexibility. When a stair must be rebuilt to meet code, the question reviewers ask is whether the balustrade, tread nosing and newel details remain true to the period. Staircases, balustrades, casework and doors of this kind are built to order through our custom fabrication work, and our archive of replica millwork projects shows the range of period features reproduced.
Documenting millwork before you touch it
The credit is won or lost in the paperwork as much as at the bench. The process runs in two parts: Part 1 requests certification that the building is a historic structure, and Part 2 describes the proposed rehabilitation. As the Mississippi Department of Archives and History explains, Part 2 must be approved by NPS and applicants are advised to obtain that approval before beginning work. The SHPO reviews first and forwards its recommendation; the IRS handles the tax side.
For millwork, assemble this before demolition or removal:
- Photographs of every existing element. The Oklahoma SHPO manual calls for labeled, numbered, high-resolution color photographs of exterior, interior, site and setting before and after work, printed at least 4 by 6 inches and keyed to photo plans.
- Keyed drawings. The same manual asks for drawings or sketches that show existing wall configurations and anticipated changes, with floor plans and, where needed, sections and elevations, keyed to the narrative.
- A condition record for anything proposed for replacement. Kentucky’s guidance is to document the problem before replacing. Photograph rot, failed joints and lost sections, and note what can be saved.
- Profile drawings and samples. Full-size sections of moldings, sash and rails, and a physical sample or mock-up where the profile is complex, give reviewers something concrete to approve.
- Evidence for missing features. Historic photographs, drawings and physical traces support any reconstruction.
A note on timing. Some states require approval before work starts without exception: Kansas instructions, for example, require SHPO approval of Part 2 prior to the start of the project for state credit applications. Federal guidance advises the same caution. Work done without approval risks being found not to meet the Standards, and removed historic fabric cannot be put back.
Planning around the building’s systems
Millwork rarely stands alone in a rehabilitation. New mechanical systems often cut into the same plaster walls, floors and trim that the Standards protect. Routing and equipment choices that keep casings, baseboards and paneling intact belong in the early design conversation; this guide to preserving trim while heating a 1900s home shows how one approach to ductless heating avoids cutting into historic interiors. Coordinating systems and millwork before Part 2 is submitted keeps the narrative and drawings consistent.
Budgeting and timing the credit
Because the credit accrues on QREs, accurate cost allocation matters. A few points to raise with your tax adviser:
- Substantial rehabilitation test. Costs in the chosen 24-month window must exceed the greater of adjusted basis or $5,000. Phased projects may select a 60-month window if requirements are met, per IRS guidance.
- Claim timing. The credit is generally allowed in the tax year the rehabilitated property is placed in service, with unused credit carryover rules changed by the December 22, 2017 legislation, as the Texas Historical Commission describes.
- Recapture. If the building is disposed of within a year after being placed in service, 100% of the credit is recaptured, and for holdings between one and five years the recapture percentage declines by 20% per year, according to the Mississippi Department of Archives and History.
The practical lesson for millwork is to price it separately and early. Custom fabrication has lead times, and a replicated sash or stair that is specified late can stretch a project outside its window or force a substitution the Standards would not allow.
State credits
Many states layer their own credits over the federal one, and the terms vary widely. Missouri’s 2024 program guidelines, for example, provide a 25% credit, rising to 35% for QREs incurred on or after July 1, 2024 for qualifying properties outside Kansas City and St. Louis City, with a $90 million statewide cap. Programs in Virginia, North Carolina, South Carolina, Maryland, West Virginia and the District of Columbia each have their own rates, caps and approval sequences, so check the current rules with your SHPO before you budget. State reviews generally follow the same Standards, which means millwork that satisfies NPS is well placed for state approval too.
Perspective: why exact replication is the best route to approval
We build millwork for historic buildings, and the pattern we see in the Standards is plain: the review rewards evidence. Standard 6 asks for a match in design, color, texture and visual qualities, and for proof when a feature is reconstructed. Our work is exact historic replication using authentic materials and techniques, and we believe that is the surest way to put a convincing file in front of reviewers.
That means starting from the building. Before a profile is cut, it is measured, drawn and compared with what survives, so that the sash, door or newel that arrives on site is the one the drawings described. We take on complex, architecturally significant restoration and custom requests, because the elements that define a historic interior are seldom the ones that come off a shelf.
For architects and contractors, the benefit is a single fabricator who understands both the craft and the credit. For owners, it is a rehabilitation in which the millwork reads as original, which is, after all, what the Standards ask of it.
Gepetto
Bringing millwork into your tax credit project
Gepetto Millworks designs, fabricates and restores wood windows, doors, trim, cabinetry, staircases and architectural millwork for historic buildings, including the replication of period features and matching for historic tax credit eligibility. Architects can bring us in while drawings are still taking shape, contractors can hand us a sash or stair schedule, and owners can start from a photograph of what remains.
We serve projects across Virginia, West Virginia, North Carolina, South Carolina, Maryland and the District of Columbia. To discuss a certified historic project, start with our historic window restoration and custom fabrication pages, or reach us through Gepetto Millworks.
FAQ
Does the 20% historic tax credit apply to my own home?
Not if you live in it. The NPS states that owner-occupied private residences do not qualify for the 20% credit, although a business-used portion may in some instances be eligible. If part of the house is rented or used for business, talk with your SHPO and a tax adviser about that portion, and ask your state office whether a state incentive applies.
Can new millwork count as a qualified rehabilitation expense?
Yes, when it is a structural component such as a window, door, stair or permanent paneling, properly capitalized and part of a rehabilitation of a qualified building. Furniture and new additions are excluded. The work must also meet the Secretary of the Interior’s Standards to be certified.
Should I repair or replace deteriorated original windows and doors?
Repair first. Standard 6 requires repairing deteriorated historic features rather than replacing them. Where replacement is truly needed, the new element must match the old in design, color, texture and visual qualities, and in materials where possible, and any reconstruction of a missing feature needs documentary, physical or pictorial evidence.
When should I submit the application relative to ordering millwork?
Before work starts. Applicants are advised to obtain NPS approval of Part 2 before beginning, and some state programs require approval in advance without exception. Because custom millwork has fabrication lead times, drawings and profile details should be settled while the application is being prepared.
Sources
- Rehabilitation Credit, Internal Revenue Service
- Historic Preservation Certification Application Instructions, National Park Service
- Eligibility Requirements, National Park Service
- 36 CFR 67.7, Standards for Rehabilitation, eCFR
- Qualified Rehabilitation Expenditures, Illinois historic preservation agency
- Federal Rehabilitation Tax Credit Program, Texas Historical Commission
- Federal Preservation Tax Credit, Mississippi Department of Archives and History
- Frequently Asked Questions: Proposed Work, Kentucky Heritage Council
- Rehabilitating Historic Properties for Federal Investment Tax Credit, Oklahoma SHPO
- Kansas Rehabilitation Tax Credit Application Instructions
- Historic Preservation Tax Credit Program Guidelines, Missouri DED
Recommended
by Matthew Wiley | Nov 18, 2026 | Architectural Millwork
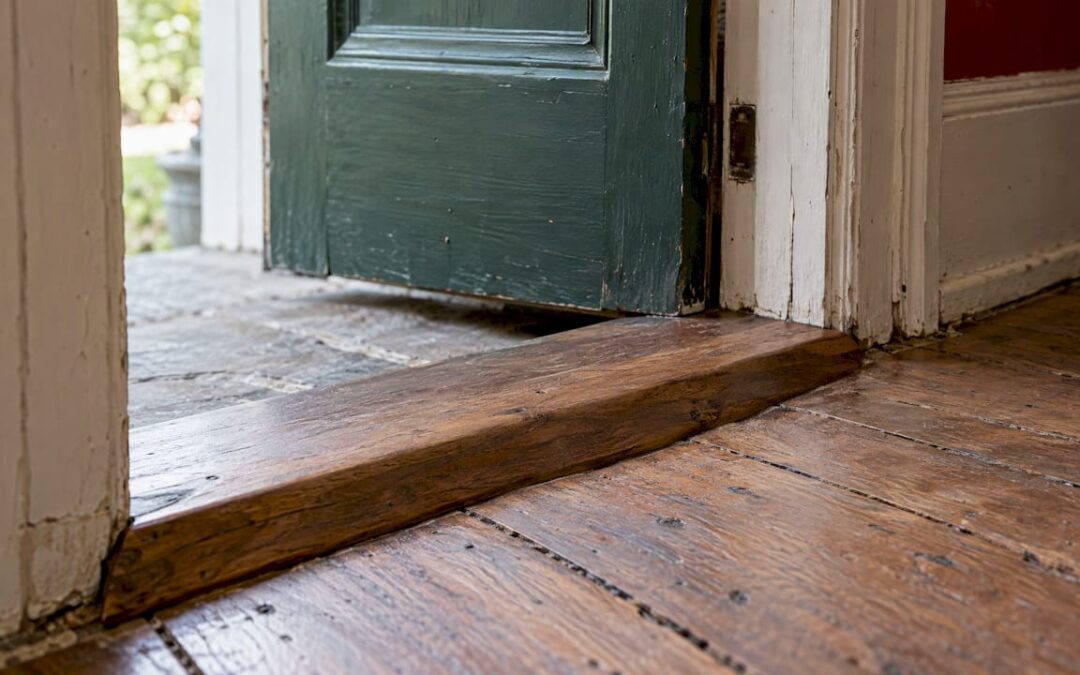
In a historic building, the best door threshold is one made for that opening. It is cut to the existing jamb profile, built from a species and section that suits the exterior, and detailed so water drains out and the original sill and subfloor are left intact. Stock aluminum thresholds rarely meet those conditions. They also tend to fight the character of a period entrance. We build historic doors and trim and replicate period features, and the threshold is where the door, the floor and the weather meet, so it deserves the same drawing-level attention as the door itself. For a closer look at profiles, fit and approval, see our page on custom historic door thresholds.
Gepettomillworks
Fit Historic Thresholds to Their Openings
Gepettomillworks creates custom millwork for historic building projects, including thresholds shaped to suit period doorways.
Visit
TL;DR
- A threshold is the piece you step over and the door seals against. The sill is the framing member beneath it, and a sill pan is the separate flashing under both.
- On weather-exposed historic exteriors, bronze, stainless steel or a laminated hardwood such as oak serve better than a generic mill-finish extrusion.
- Water control depends on the sill pan and the slope, not on the visible threshold alone.
- Under the ADA Standards, accessible doorways allow thresholds of 1/2 inch, or 3/4 inch for exterior sliding doors, with bevels no steeper than 1:2. Qualified historic buildings have an alternative route where compliance would destroy significance.
- Measure from the inside of the casing and take a template of the jamb profile before anything is cut.
Table of Contents
What a threshold does, and how it differs from a sill
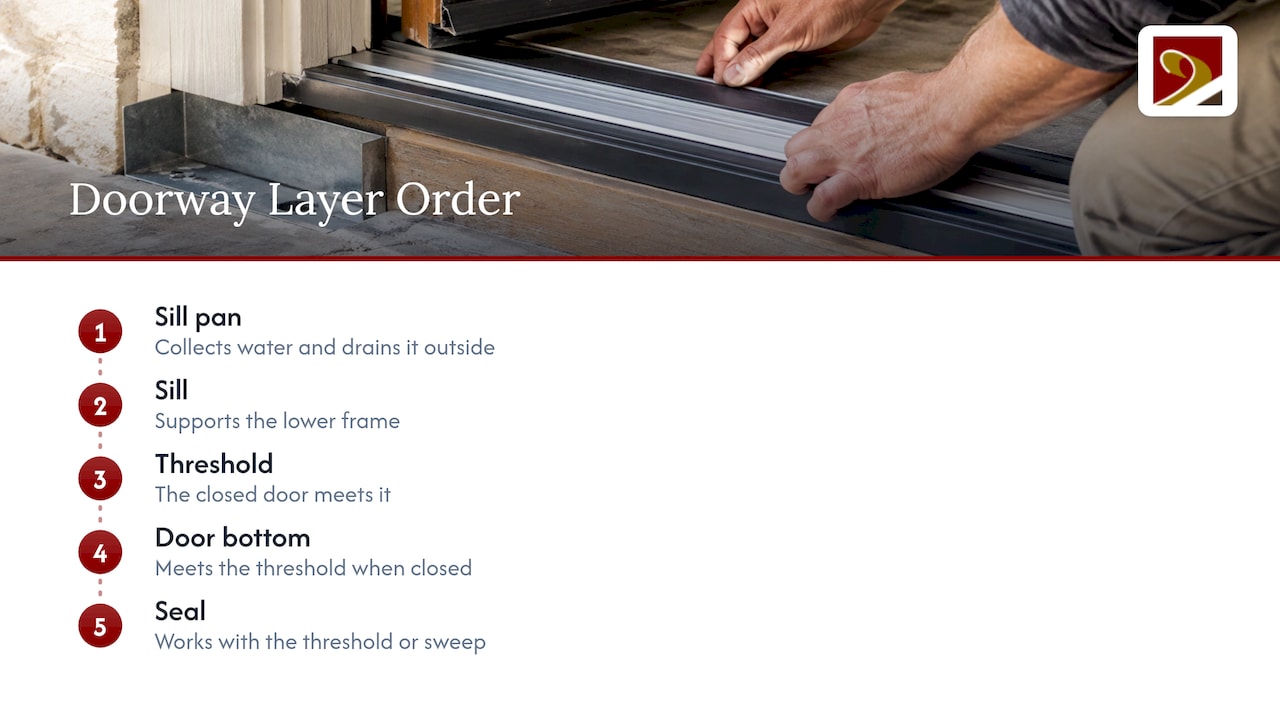
The words are used loosely on job sites, and the confusion causes real errors in drawings and orders. The threshold is the component at the bottom of the doorway that the closed door meets, and it typically works with the door’s bottom seal or sweep. The sill is the lower supporting member of the frame. A Fine Homebuilding discussion describes the sill as the wooden framing piece set against the slab, beveled downward to shed water, while the threshold holds the weatherstripping the door rests on. On a pre-hung metal unit the threshold is the aluminum piece in the frame, and the sill is the member the frame sits upon.
A third layer matters just as much. The IIBEC field guide to window and door flashing explains that ASTM E2112-07 recommends sill pan flashing under all windows and doors in low-rise residential and light commercial buildings. A pan has upturned legs at the interior edge and the ends, so it forms a three-sided tray that collects water and drains it toward the exterior.
When you order a custom threshold, you are therefore specifying one part of a stack: pan, sill, threshold, door bottom and seal. If any layer is left to chance, the others cannot compensate.
Why historic openings rarely suit off-the-shelf thresholds
Older doorways are seldom square, level or standard. Floors have settled, wood frames have moved with the seasons, and successive owners have raised or lowered the interior finish. A stock threshold is made to a catalog width and a fixed profile, so installers trim it, shim it and caulk the gaps. That is how water finds the subfloor.
The preservation standard points the other way. The Secretary of the Interior’s Standards for the Treatment of Historic Properties say wood features important to historic character, doorway surrounds among them, should be identified, retained and preserved. Repair should be by patching, piecing in or limited replacement in kind where surviving prototypes exist. A threshold that is cut to the opening, rather than an opening cut to the threshold, follows that logic. The jamb, casing and sill stay as they are, and the new piece is made to meet them.
This is also where a project’s review file is won or lost. If the work is part of a rehabilitation seeking historic tax credits, the reviewer looks at whether visible new elements are compatible with the historic entrance. We replicate period features and match them for historic tax credit eligibility, and a threshold that echoes the profile of its neighbors is part of that picture.
Choosing material and profile
For street-level entrances, Facilities Management Insights cites Richard W. Off in recommending bronze or stainless steel, or at least traffic-grade powder coatings on steel or aluminum, because deicing salts attack street-level hardware. The Secretary of the Interior’s guidelines note that bronze weathers well and appears historically on entrance doors and storefronts. For commercial or storefront-style entries in a historic district, a bronze or stainless saddle with a period-appropriate profile is usually the right conversation to open with.
Wood: laminated oak
On residential entries, a wood threshold looks right under a wood door and meets the floor without a visual break. In a This Old House walkthrough, general contractor Tom Silva explains that laminated oak responds better to weather than a single solid piece because it is more dimensionally stable and wears just as well. The same project builds the threshold from 3/4-inch-thick laminated oak.
Three-piece water-return assemblies
For openings with some protection, Fine Homebuilding contributor Gary M. Katz reports that a three-piece water-return threshold is the safest bet. It consists of a threshold, a drain pan and an interlocking sill cover. The sill cover is the visible, replaceable part, which suits historic work because the finish element can be made to a period profile while the drain pan does the hidden work.
| Situation |
Material and profile to discuss |
Why |
| Exposed street-level commercial entry |
Bronze or stainless saddle |
Resists deicing salts and weathers well |
| Residential front door, original wood sill retained |
Laminated oak threshold on a pan |
Stable, matches wood floors and casing |
| Protected porch or vestibule entry |
Three-piece water-return assembly |
Drains water outward, replaceable cover |
| Accessible route into a listed building |
Low, beveled or interlocking profile |
Reduces the level change visually and physically |
Sizing a custom threshold for the opening
Sizing is where custom work earns its name. The sequence below applies whether the threshold is wood or metal.
- Measure the opening from inside the casing, not from the floor finish. Katz’s threshold replacement guide measures the clear opening between the casings and adds a small allowance, for example 1/16 inch, for touch-up fitting.
- Take the jamb profile off the building. The same guide transfers the jamb profile to the threshold ends with a template. In a historic opening the profile may be molded or irregular, so a physical template beats a dimension.
- Record the floor heights on both sides. Note the finished interior floor, the subfloor, and the exterior landing or porch deck. The difference sets the threshold’s height, the slope of the top, and whether the underside needs a rabbet to overlap the flooring.
- Check the door bottom. Scribe the door at threshold height plus 1/8 inch, as the This Old House method does, and decide whether the door will close on a threshold insert or a sweep. Katz notes that a threshold without a rubber insert should have a smooth, low-profile top and a slightly concave underside for good floor contact, and that an insert is for doors lacking a weather-sealing sweep.
- Verify the subfloor. The sill area has to be flat, level and solid before any threshold goes down. Rot beneath an old sill is common and should be repaired before the finish piece is made.
- Measure more than once. Old wood frames and floors move seasonally, so a second measurement at a different time of year is a sensible check on a long project.
On a project with architects, builders and a restoration contractor involved, one person should own the template and the floor-height record. When we fabricate doors and trim for a historic opening, the threshold is drawn against those same measurements.
Making the threshold: what the method looks like
For a wood threshold, the method published by This Old House is a useful baseline. The door is scribed and cut, and the exposed grain on the door bottom is sealed. The threshold is cut to length against the casing, its top edges are beveled at 45 degrees, and a rabbet is cut in the underside to overlap the existing flooring. After fitting the ends, sanding and sealing, it is set in construction adhesive, nailed and finished with a door sweep.
The weak point on historic jobs is the ends. Where the threshold meets a molded jamb or a plinth block, a square cut leaves a gap. This is why the template step matters, and why a cabinetmaker’s fit is better than a field trim.
Keeping water out: the pan matters more than the threshold
A threshold is not a waterproofing system by itself. Silva recommends waterproofing the exposed sill and subfloor with self-adhesive rubberized membrane as flexible flashing, because water splashes up in front of the door, gets under the threshold and rots the sill. His installation guide adds a bead of caulk under the threshold so no water weeps beneath it, a step he calls easy to overlook but critical to protecting the subfloor. Katz runs silicone under the sill cover and a second bead on top of it, beneath the drain pan and kept clear of the pan’s front edge.
The IIBEC guide singles out one performance factor: the height of the pan’s rear leg, which resists wind driving water uphill. It also notes that a low-performance door can be backed by a sill pan with a higher rear leg. On an exposed historic elevation, that is worth specifying on the drawing.
A practical way to diagnose a leak is to separate its causes. Water pooling at the door may mean the threshold is pitched the wrong way or a drip detail is missing. Drafts, by contrast, usually come from worn weatherstripping rather than from the threshold. Fix the cause before you order a replacement.
Accessibility and historic fabric
Most public and commercial buildings, and many rehabilitated residences that are open to the public, have to deal with thresholds under the ADA. The ADA Standards excerpt (Section 4.13.8) caps thresholds at 3/4 inch for exterior sliding doors and 1/2 inch for other doors at accessible doorways, with bevels no steeper than 1:2. Any threshold taller than 1/4 inch generally needs that bevel, as UpCodes’ guidance summarizes.
For historic buildings, Section 4.1.7, reproduced in a municipal ADA manual, says alterations to a qualified historic building, meaning one listed or eligible for the National Register or designated under state or local law, must comply unless it is determined that compliance would threaten or destroy historic significance. In that case alternative requirements may be used.
NPS Preservation Brief 32 is specific about thresholds. If one exceeds the generally allowable 1/2 inch, it can be altered or replaced with a threshold that meets accessibility requirements. If the existing threshold is significant, a bevel can be added to each side to reduce its height, or it can be replaced with an accessible threshold that is visually compatible with the historic entrance.
That is precisely the brief for a custom piece. UpCodes also notes that even a code-compliant 3/4-inch beveled threshold is very hard for some wheelchair users, and suggests a low interior rise of at most 1/4 inch with the drop taken outside, or an interlocking threshold that brings the exterior surface up to interior floor level while still managing water.
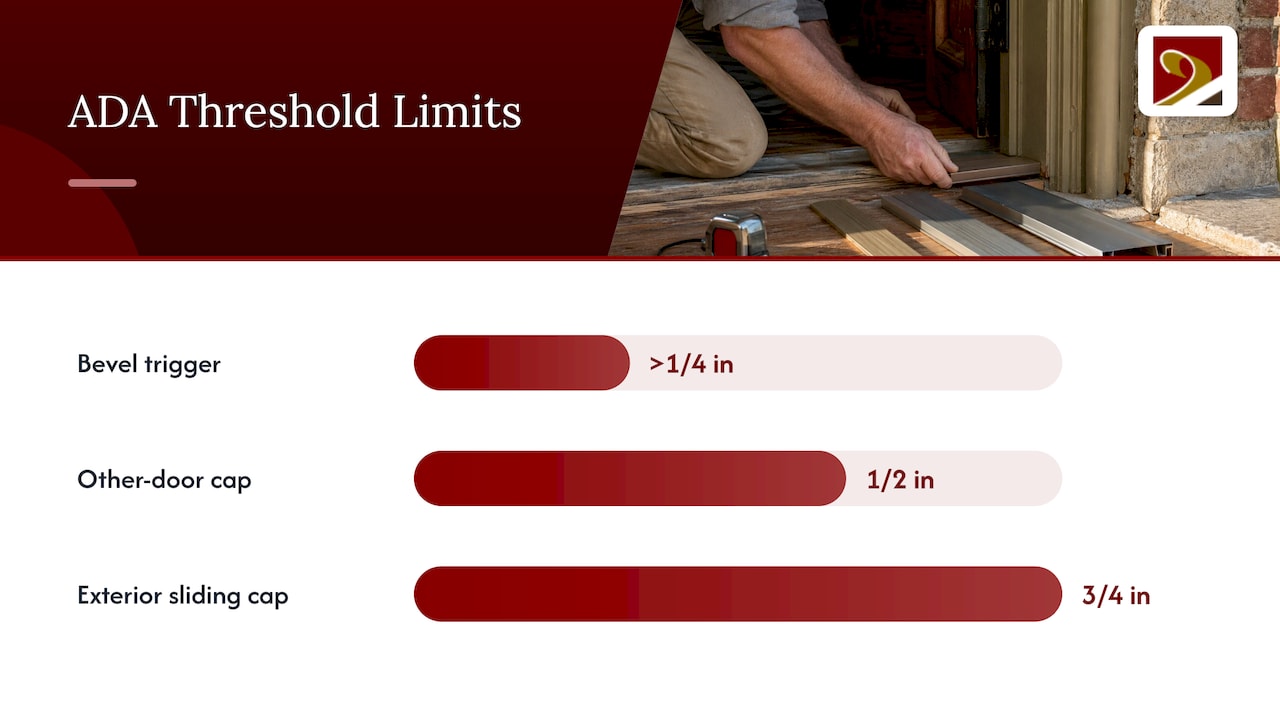
Codes are adopted and amended locally, and a state or local jurisdiction may differ from the model codes. Confirm the enforced edition with the building official, and for tax-credit projects, with the State Historic Preservation Office, before drawings are finalized. The California Building Code, for example, changed its accessibility provisions effective January 1, 2026, so a project there is not governed by the same text as one in Virginia or the Carolinas.
Where custom threshold work goes wrong
- Specifying by catalog width. The opening is never the catalog dimension. Template first, order second.
- Treating caulk as flashing. Sealant joints age. The drainage path must work without them.
- Ignoring the door bottom. A threshold sealed to a door whose bottom grain is bare will fail from the door side.
- Raising the threshold to solve a floor problem. It creates an accessibility and tripping issue and often a review comment.
- Replacing a significant original. Bevel or retain first, as Preservation Brief 32 advises, and replace only with a compatible profile.
Working with us on the threshold and the door together
A threshold decision rarely stands alone. It is tied to the door’s bottom rail, the casing, the sill condition and sometimes the stair or porch beyond. We design and fabricate custom wood doors, windows, trim and period stairs for historic buildings, and our work includes replicating period features and matching for historic tax credit eligibility. Architects and contractors can bring us the opening, the drawings or the review comments, and we will build the door and its surrounding millwork as one coordinated set. Start with our historic doors offer or our custom fabrication services.
For a historic wood door that needs restoration rather than replacement, see our restoration of solid wood doors, and for entries in Richmond and the surrounding area, our historic wooden doors.
Our view on thresholds in historic work
We treat the threshold as part of the door, because that is how the building was made. In a period entrance the sill, the casing and the door bottom were fitted to one another by hand, and the best replacement work repeats that logic.
Our approach is to start from the opening as it stands: the template, the floor heights, the condition of the sill beneath. From there we can make the door, the trim and the threshold to the same drawing, in materials and profiles that suit the period and that reviewers can read as compatible. Because we replicate period features and match work for historic tax credit eligibility, we write the threshold into the same documentation as the rest of the entrance.
Architects and builders who bring us the door and the threshold together get one fit rather than three trades meeting at a gap. That is the case for custom work in a historic building: nothing in the entrance has to be forced.
Gepetto
FAQ
What is the difference between a door threshold and a sill?
The threshold is the piece at the bottom of the doorway that the closed door meets and that you step over. The sill is the framing member beneath it, often wood against a slab, sloped to shed water. A sill pan is the separate flashing below that collects and drains any water that gets through.
What is the best material for a historic exterior threshold?
On exposed street-level entries, bronze or stainless steel hold up against deicing salts, and bronze has a long history on entrance doors. For a residential wood door, laminated oak is more dimensionally stable than a single solid piece. The right choice depends on exposure, the door and the review requirements.
How do you size a custom threshold?
Measure the opening from the inside of the casings, take a template of the jamb profile, and record the floor heights on both sides. Check the door bottom and the sweep or insert it will close against, and confirm the subfloor is flat and sound. Then allow a small margin for final fitting.
How high can a threshold be under the ADA?
At accessible doorways the ADA Standards allow 1/2 inch for most doors and 3/4 inch for exterior sliding doors, with a bevel no steeper than 1:2 on anything above 1/4 inch. Qualified historic buildings may use alternative requirements where compliance would threaten or destroy historic significance. Confirm local rules with the building official.
Sources
Recommended