by Matthew Wiley | Oct 10, 2026 | Architectural Millwork
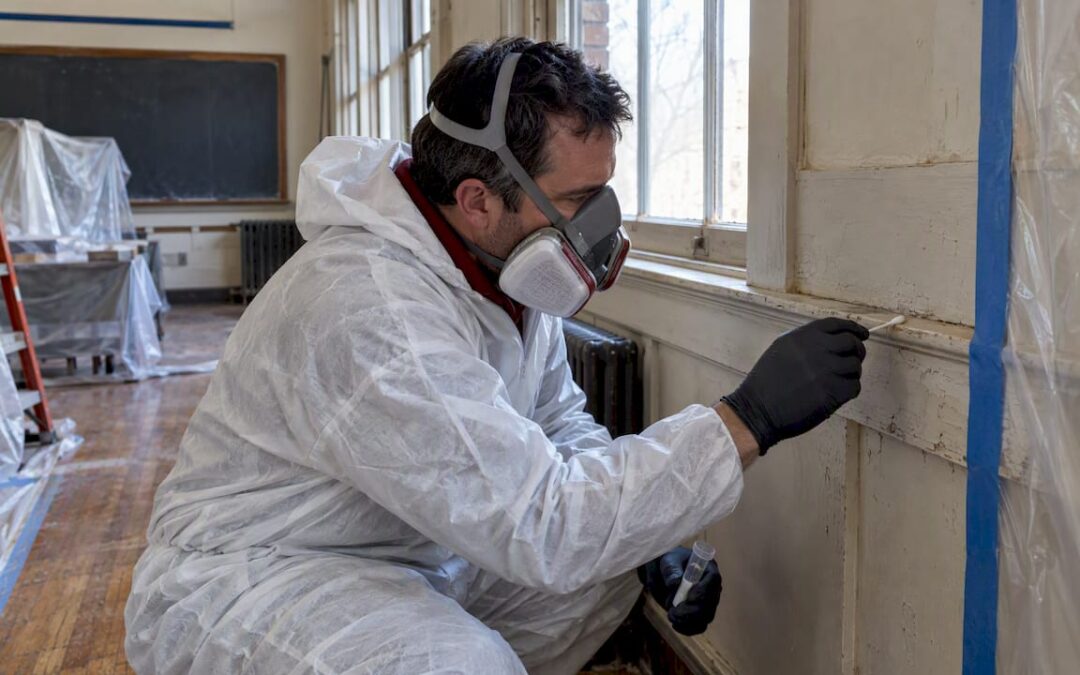
Lead paint rules for renovation apply whenever a paid contractor disturbs painted surfaces in housing or child-occupied facilities built before 1978. If your project meets that threshold, your firm must hold EPA certification and assign a certified renovator to the job. Absent test results showing otherwise, assume the paint contains lead, follow lead-safe work practices, and complete the required cleaning verification before you call the job finished.
TL;DR:
- The minor work exemption covers 6 square feet or less indoors per room, or 20 outdoors per project, but never window replacement or prohibited methods.
- Keep written test results for three years, and check HUD funding requirements first because some projects require a certified risk assessment rather than a renovator’s test kit.
- Never use open flame, heat guns above 1,100 degrees Fahrenheit, or power tools without HEPA dust collection; use HEPA vacuums for interim and final cleanup.
- OSHA separately requires an initial exposure assessment; if airborne lead exceeds 50 micrograms per cubic meter over eight hours, employers must add controls and respiratory protection.
- Firm certification costs $300, recertification should be filed about 90 days before expiration, and firms working across state lines may need separate state certifications.
Gepettomillworks
Preserve Historic Millwork Thoughtfully
Gepettomillworks creates custom millwork for historic building projects, supporting preservation work on homes and other older buildings.
Explore custom millwork
Table of Contents
The EPA RRP Rule: Scope, Firm and Renovator Responsibilities
The EPA Renovation, Repair, and Painting Rule governs paid work in “target housing,” meaning residences built before 1978, and in child-occupied facilities such as schools and daycare centers of the same vintage. Firms that disturb painted surfaces in these settings for compensation must be EPA-certified under the RRP program, and every covered job needs a certified renovator either performing or directly supervising the work.
Certification follows a layered structure. The firm obtains certification first, then at least one individual completes an accredited renovator training course, and any additional on-the-job workers receive informal training from that certified renovator before touching painted surfaces. Before work begins, the firm must distribute the EPA’s “Renovate Right” pamphlet to owners and occupants and document that distribution.
The paperwork trail matters as much as the training itself:
- Firm certification confirmed and current for the job’s jurisdiction
- A certified renovator assigned and present or reachable throughout the project
- Renovate Right pamphlet delivered to occupants with signed or documented acknowledgment
- Training records for any workers who were not individually certified
Lead-Safe Work Practices and Prohibited Methods
Once a job is confirmed or presumed to involve lead paint, the RRP Rule dictates how the work area gets contained and how debris gets handled. Interior work requires plastic sheeting extended well beyond the work zone, with doors sealed and HVAC vents covered to stop dust migration. Exterior work demands ground-level containment and signage warning occupants and passersby to stay clear.
Certain methods are flatly prohibited because they aerosolize lead at dangerous concentrations:
- Open-flame burning or torching of painted surfaces
- Using a heat gun above 1,100 degrees Fahrenheit
- Operating power sanders, grinders, or planers without HEPA-filtered dust collection attached
- Using a heat gun or power tool in a manner EPA has not reviewed for lead-safe performance
HEPA vacuums are required for interim and final cleaning, and some renovators add negative-pressure containment on larger jobs even though the rule’s work practices don’t universally mandate it. Waste must be contained and transported in a way that prevents dust or debris release.
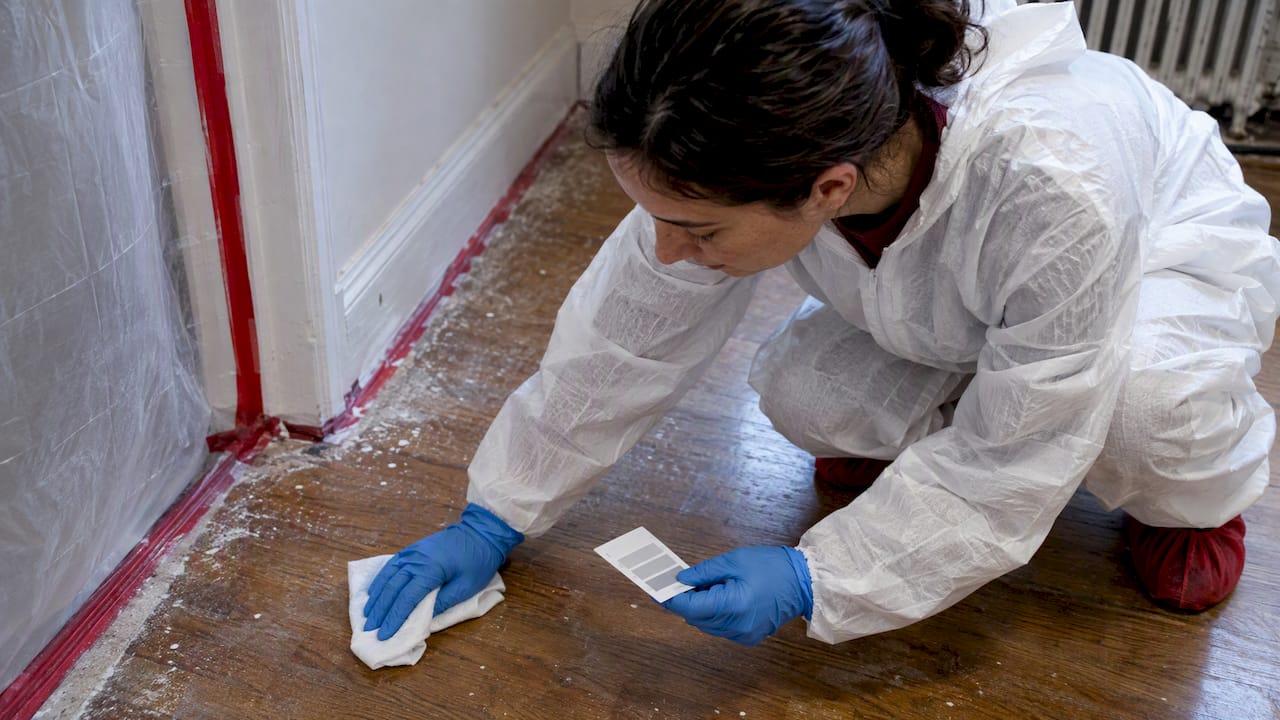
Pro Tip: Run the cleaning verification card test on a sacrificial section of flooring before you break down containment. It catches missed dust pockets before an inspector or client does.
Cleaning verification, a wipe test against a white cloth compared to EPA’s verification card, confirms the surface is clean enough to remove containment. Some jurisdictions require dust-lead sampling in addition to the card method, particularly for larger or HUD-funded projects.
Testing, Exemptions, and Documenting a Lead-Free Determination
Not every paint disturbance triggers full RRP obligations. The rule exempts minor repair and maintenance activities disturbing 6 square feet or less of interior painted surface per room, or 20 square feet or less on the exterior, per project. That exemption disappears for window replacement and for any work using the prohibited practices described above, regardless of surface area.
Determining whether lead is actually present comes down to two accepted routes:
- A certified inspector or risk assessor performs lab analysis or XRF testing and issues a formal report
- A certified renovator uses an EPA-recognized test kit or paint-chip sampling to establish a lead-free finding for specific components
HUD-funded projects often hold a stricter line, sometimes requiring a certified risk assessment rather than accepting a renovator’s test-kit determination, so confirm funding source before relying on the lighter-touch option. Whichever route applies, the lead-free determination must be documented in writing and retained for three years alongside the testing method, results, and the certification number of whoever performed the test.
How OSHA and HUD Interact With EPA Requirements
EPA’s RRP Rule protects occupants and the surrounding environment. It does not replace the separate worker-safety obligations under OSHA’s lead in construction standard, 29 CFR 1926.62. Firms that satisfy EPA requirements can still face OSHA citations if they skip exposure monitoring.
- OSHA requires an initial exposure assessment for construction activity that may disturb lead, establishing whether workers face airborne concentrations above the permissible exposure limit of 50 micrograms per cubic meter as an eight-hour time-weighted average
- When exposure exceeds that limit, employers must implement engineering controls, provide respiratory protection, and in some cases offer medical monitoring
- HUD’s Lead Safe Housing Rule imposes additional testing or clearance procedures on federally assisted housing, layered on top of EPA’s baseline requirements
- Fifteen states and one tribal program run their own EPA-authorized RRP programs, including Alabama, Delaware, Georgia, Iowa, Kansas, Massachusetts, Mississippi, North Carolina, Oklahoma, Oregon, Rhode Island, Utah, Vermont, Washington, Wisconsin, and the Bois Forte Tribe, so firms working across state lines may need separate certifications in each
Treat these three frameworks as overlapping rather than redundant. A contractor renovating a HUD-funded rowhouse in the District of Columbia, for instance, answers to EPA’s work practices, OSHA’s exposure rules, and HUD’s housing-specific clearance standards simultaneously.
Jobsite Compliance: A Step-By-Step Checklist for Pre-Job Through Closeout
A disciplined sequence keeps a lead-disturbing renovation defensible from the first client call to final invoice.
- Confirm the structure’s year of construction and whether it qualifies as target housing or a child-occupied facility
- Provide written disclosure to the client and distribute the Renovate Right pamphlet with documented acknowledgment
- Schedule a certified renovator for the job, or arrange testing if the client wants to rule out lead rather than presume it
- Set up containment matching the EPA’s recommended job flow: sheeting, sealed HVAC returns, exterior signage, and PPE staged before the first cut is made
- Stage HEPA-equipped tools and sealed waste containers on-site before work begins rather than mid-job
- Execute the work under certified renovator oversight, avoiding every prohibited method regardless of how much faster it would be
- Run cleaning verification once containment comes down, and complete dust-lead sampling where the jurisdiction or funding source requires it
- Hand the owner a complete documentation packet: pamphlet acknowledgment, test results or presumption notice, and verification records
Pro Tip: Photograph containment setup and cleaning verification results before and after. A dated photo record settles disputes faster than a filled-in checklist ever will.
Firm Certification, Fees, Timelines, and Recordkeeping
Firms apply for EPA certification directly through EPA’s portal unless their state runs an authorized program, in which case the state process governs instead. Renovation firm certification and recertification costs $300, a flat fee regardless of firm size, and a replacement certificate costs $15 if the original is lost. Tribal programs sometimes set different fee structures, so confirm the applicable schedule before submitting payment.
Recertification should be filed roughly 90 days before the current certificate expires to avoid a lapse that would make the firm ineligible to legally take on new covered work. Any change to the firm’s name, address, or ownership structure must be amended within 90 days of the change.
- Pre-renovation testing results or lead-free determinations
- Signed Renovate Right pamphlet acknowledgments
- Training records for on-the-job trained workers
- Cleaning verification results and any dust-lead sampling reports
All of the above must be retained for three years from the job’s completion date.
Gepetto Millworks: Preserving Historic Millwork While Meeting Lead-Safe Standards
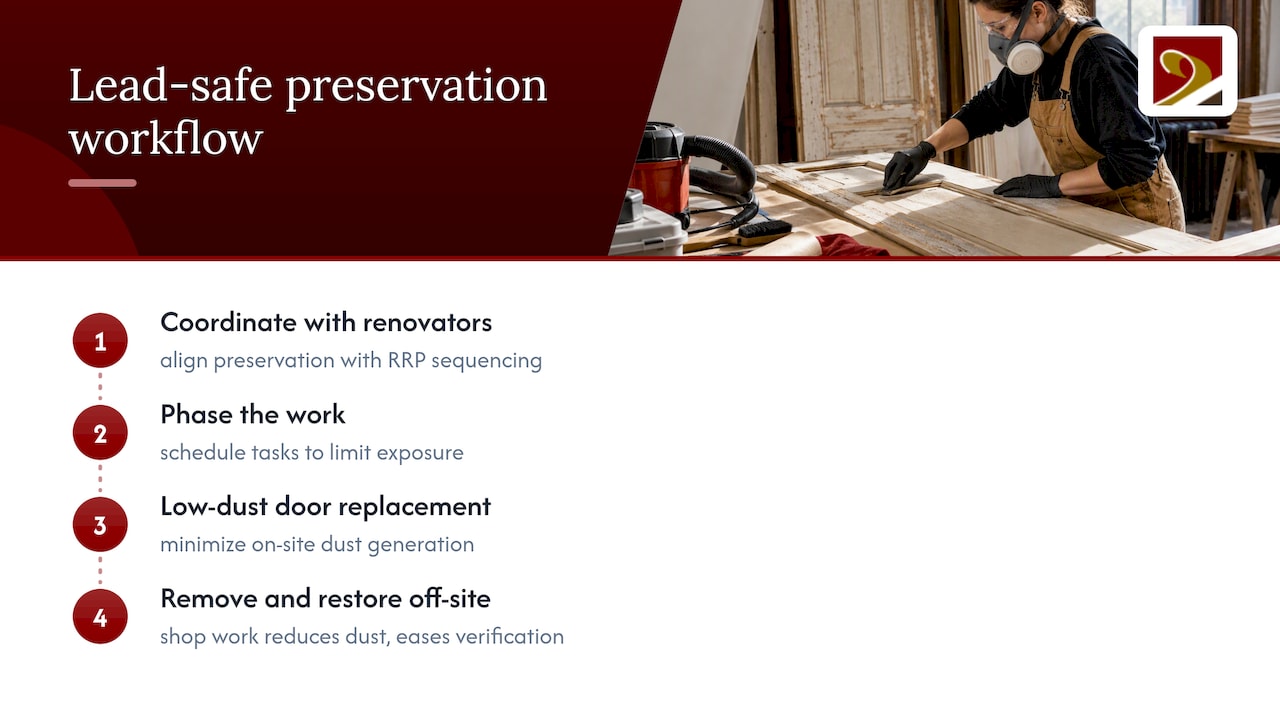
Historic window and trim restoration sits at an uncomfortable intersection with lead-safe work practices: the components most worth saving, original sash, carved casings, hand-planed panel doors, are also the ones most likely to carry decades of lead-based finish. We coordinate closely with certified renovators on these projects, because preserving original fabric and meeting RRP requirements are not competing goals when the sequencing is right.
Phasing the work helps considerably, especially when combined with a low-dust door replacement process that minimizes dust generation on-site. Removing sash or trim intact and restoring it off-site, in a controlled shop environment away from occupied space, reduces on-site dust generation and simplifies cleaning verification once containment comes down. Our historically accurate window projects and work documented in the Jamestown, Virginia archives reflect this approach: delicate joinery stays protected, and the active jobsite stays easier to clean and verify.
— Gepetto
A Preservation-Minded Option for Historic Window Restoration
For property owners weighing how to handle lead paint on original windows, replacement is not the only path, and it is often not the one that protects a building’s character or its eligibility for historic tax credits. We offer Historic Window Restoration built around removing sash and components for off-site repair, then returning them once the work is complete, a sequence that fits naturally alongside a certified renovator’s containment and cleaning verification schedule.

- Components are restored off-site, reducing the lead-dust footprint of the active jobsite
- Original material, moldings, glazing, and joinery are retained rather than discarded, supporting historic tax credit eligibility
- Work is coordinated with the project’s certified renovator so lead-safe practices and preservation goals proceed together
This is one option among several for owners managing lead paint on historic properties, not a substitute for the certified renovator’s compliance role. When restoration rather than replacement fits your building’s history and your project’s goals, reach out to discuss your windows and we’ll walk through how the timeline fits around your renovation schedule.
FAQ
Can you renovate a house with lead paint?
Yes. Renovating a home with lead paint is legal when the work follows the EPA RRP Rule’s lead-safe work practices, including firm certification, a certified renovator on the job, containment, and cleaning verification. The rule governs how the work is done rather than prohibiting the renovation itself.
Is it legal to sell a house with lead paint?
Yes, selling a home with lead-based paint is legal in the United States, but federal law requires sellers of pre-1978 housing to disclose known lead hazards and provide buyers with an EPA-approved pamphlet before the sale closes. The disclosure requirement applies regardless of whether any renovation work is planned.
How much lead in paint is acceptable?
Current regulations treat any paint in pre-1978 target housing as potentially lead-based unless testing proves otherwise, so the practical answer for renovation purposes is to presume lead is present and follow lead-safe practices rather than rely on a numeric threshold. A certified inspector or risk assessor, or a certified renovator using an EPA-recognized test kit, can establish a documented lead-free finding for specific surfaces.
What are the OSHA lead paint requirements?
Under 29 CFR 1926.62, employers must conduct an initial exposure assessment for construction work that may disturb lead and keep worker exposure below the permissible exposure limit of 50 micrograms per cubic meter as an eight-hour time-weighted average. When exposure exceeds that limit, employers must add engineering controls and provide respiratory protection as needed.
Sources
Recommended
by Matthew Wiley | Oct 9, 2026 | Architectural Millwork
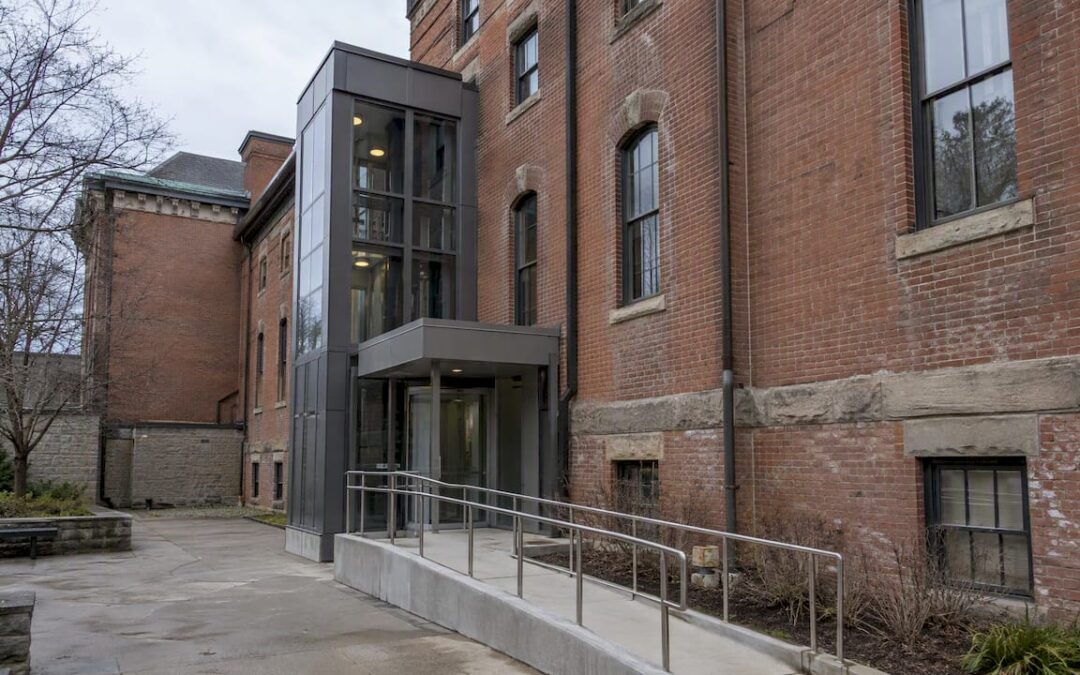
Historic buildings are not exempt from the Americans with Disabilities Act. Federal law requires that they be made accessible to the maximum extent feasible, and when full compliance would threaten or destroy historic significance, a documented consultation process allows alternative solutions. Owners should prioritize the accessible route, primary function areas, and restrooms, using interim measures where physical change would damage historic fabric.
TL;DR:
- Historic status can permit alternative compliance, not exemption; owners must follow the 2010 ADA Standards and any stricter state or local code.
- An exception requires documented consultation with preservation officials and disability representatives, including why standard work would harm historic significance and which alternatives owners considered.
- Phase upgrades in order: accessible route and entrance, primary function spaces, then restrooms; relocate programs or provide staff assistance while permanent work remains pending.
- Choose reversible ramps when space permits, place elevators in additions or secondary cores, and use platform lifts only when operating staff are reliably available.
Gepettomillworks
Preserve Historic Character Through Millwork
Gepettomillworks creates custom millwork for historic building projects, supporting restoration work that must respect a building’s historic character.
Visit Gepettomillworks
Table of Contents
How federal law applies ADA standards to historic properties
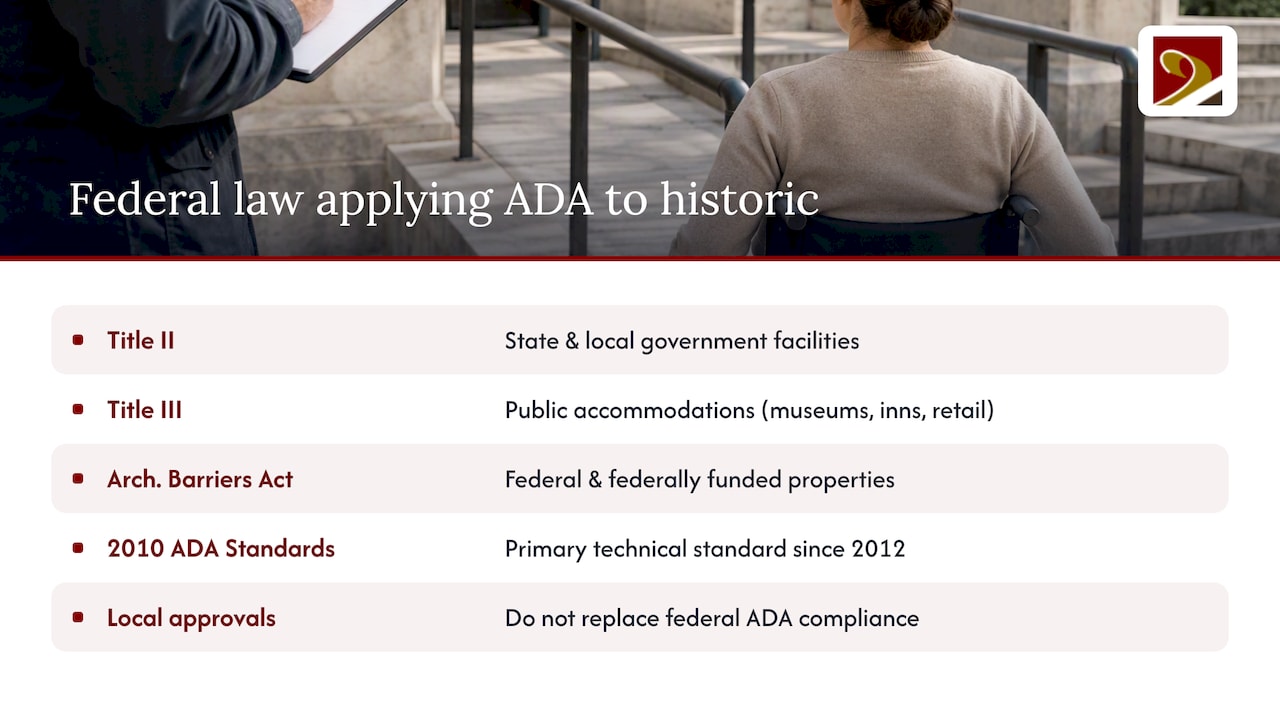
Accessibility obligations for historic buildings come from several overlapping sources. Title II of the ADA covers state and local government facilities, while Title III governs places of public accommodation, including museums, inns, restaurants, and retail spaces housed in older structures. Federally owned or federally funded properties fall under the Architectural Barriers Act and the Uniform Federal Accessibility Standards, which the General Services Administration applies alongside its own preservation policies.
The technical backbone of compliance is the 2010 ADA Standards for Accessible Design, which replaced most of the 1991 standards for new construction and alterations after their 2012 compliance date. Projects that began under the earlier standards may still reference 1991 scoping in limited circumstances, but owners planning new work should design to the 2010 standards, which include specific provisions for what the regulations call a qualified historic facility.
A county building permit or a local historic district approval does not substitute for ADA compliance. These are separate regulatory tracks, and a project can satisfy local zoning or design review while still violating federal accessibility law. When state or local accessibility codes, such as those layered into Virginia’s building code or the District of Columbia’s construction codes, impose stricter requirements than the ADA, owners must meet the higher standard. The practical rule is simple: identify every applicable code and standard, then build to whichever sets the toughest bar.
What “qualified historic facility” means for your project
The ADA Standards use a specific term for buildings that may qualify for alternative compliance paths: a qualified historic facility is one listed or eligible for listing in the National Register of Historic Places, or designated as historic under state or local law. That designation alone does not exempt a building from access requirements. It opens the door to a documented process for exceptions when standard solutions would compromise what makes the building historically significant.
That process leans heavily on the Secretary of the Interior’s Standards for Rehabilitation, the framework preservationists use to judge whether new work is compatible with a historic structure. The standards favor interventions that are reversible, that avoid destroying original materials, and that visually differentiate new construction from historic fabric rather than imitating it. A rear addition that houses an elevator, for instance, is often preferable to carving a shaft through the building’s historic core.
Balancing these goals means identifying character-defining features early: an original entrance surround, a run of hand-planed stair treads, decorative plasterwork. Protecting those elements while still opening the building to disabled visitors or occupants is the central design problem every historic accessibility project has to solve.
When exceptions apply and how SHPO consultation works
Preservation Brief 32, published by the National Park Service, confirms that historic properties are not exempt from the ADA but recognizes that full compliance sometimes threatens or destroys the qualities that made a building historic in the first place. Determining whether a proposed accessibility measure crosses that line is not left to the owner alone. The State Historic Preservation Officer, and in some cases the Advisory Council on Historic Preservation or the Department of Justice, weighs in on whether an exception is justified.
The consultation process itself requires more than a claim of hardship. Brief 32 recommends documented involvement from people with disabilities and preservation officials, a clear written rationale for why standard solutions would damage significance, and evidence that the owner considered programmatic alternatives, not just physical ones. Outcomes from this process might approve a secondary entrance in place of a fully accessible primary one, or accept staff-assisted access where a permanent ramp is not feasible.

Owners should keep thorough records of every consultation meeting, every design alternative considered, and every rejection rationale. That paper trail protects the project if it is later challenged and demonstrates the good-faith effort regulators expect before granting an exception.
Design strategies that add access without erasing history
The 2010 ADA Standards and NPS guidance both point toward a consistent priority order when resources or preservation constraints limit what is achievable in one phase. Start with the accessible route and entrance, move to the spaces where the building’s primary functions occur, then address restrooms, then secondary spaces.
Several integrated approaches let projects hit those priorities without compromising character:
- A secondary or rear entrance at grade level can serve as the accessible entrance when the primary entrance’s steps or threshold cannot be altered without damaging a significant feature.
- A compatible addition, set apart in materials and detailing per the Secretary of the Interior’s Standards, can house an elevator or restroom without disturbing the historic core.
- A reversible ramp, built to be removed without a trace, satisfies access needs while leaving the option to restore the original approach later.
- An unobtrusive platform lift tucked into an existing recess avoids the visual footprint of a full ramp run.
- Subtle regrading of the surrounding landscape can sometimes eliminate the need for a ramp altogether.
Management and programmatic solutions, such as relocating a program to an accessible space in the same building or offering staff-assisted entry, work well as interim measures while a capital project is phased in, and NPS and GSA guidance both treat them as legitimate components of a long-term access plan, not just stopgaps.
Pro Tip: Specify reversible fasteners and non-penetrating mounts for any accessibility hardware attached to historic fabric; it satisfies preservation review now and leaves the door open for future changes.
Comparing ramps, lifts, elevators, and restroom retrofits
Each technical solution carries its own trade-offs in cost, footprint, and visual impact:
- Ramps need significant run length to meet slope requirements, which can be difficult on tight historic lots; a well-screened ramp along a side elevation often resolves the visibility concern.
- Platform lifts solve vertical access in a smaller footprint than a ramp but typically require someone on hand to operate them reliably, which adds a staffing consideration most owners underestimate.
- Elevators are best located within additions or secondary circulation cores, following the guidance in NPS technical briefs on additions for accessibility, which keeps shaft construction out of primary historic spaces.
- Restroom retrofits can sometimes use an adjacent non-historic space rather than reconfiguring an original room, preserving layout while still meeting clearance and fixture requirements.
- Reversible anchors and surface-mounted hardware, rather than hardware that penetrates deep into historic material, are increasingly the standard preservation officers expect to see specified in contract documents.
Your planning checklist before breaking ground
A structured process keeps accessibility work defensible and on budget:
- Conduct a needs assessment that identifies both accessibility gaps and the building’s character-defining features.
- Consult your State Historic Preservation Officer, local code officials, and disability community representatives before finalizing design, and document every meeting.
- Build a phased plan that sequences the accessible route, primary function spaces, and restrooms first, with interim programmatic solutions bridging any gaps.
- Set a budget range tied to the specific scope drivers on your project, such as entrance regrading, elevator installation, or restroom reconfiguration, rather than a flat industry figure.
- Vet contractors on historic-property experience, willingness to propose reversible solutions, verifiable references, and warranty terms, including whether millwork components have been pressure or wind tested.
Pro Tip: Ask any contractor bidding on historic accessibility work to show photos of a completed project where they matched existing profiles rather than substituted a modern stock product.
What custom millwork projects teach us about accessible restoration
Our work on historically accurate window replication, including a Jamestown, Virginia project, shows how matching original sightlines and material profiles can coexist with performance upgrades that support broader accessibility goals, such as easier-operating sashes or lower, code-compliant thresholds.
- We build custom thresholds that meet accessible slope requirements while matching the historic door surround’s proportions and material.
- Our doors replicate period paneling and hardware locations so an accessible entrance does not read as an obvious retrofit.
- Replacement windows let owners address egress and ease-of-operation concerns without altering a facade’s historic rhythm.
- We work from careful field measurements and mock-ups, testing fit and function before full fabrication, and coordinate timelines with preservation authority review when a project requires it.
Perspective: access strengthens, not threatens, preservation
Accessibility broadens who gets to experience a historic building and supports the long-term financial case for keeping it in active use. We think of access as an iterative process, not a one-time checklist: budgets should plan for ongoing adjustments as needs, staffing, or technology change. Partnering with disability advocates early produces solutions that honor both the building’s history and the people who visit it.
— Gepetto
How we support accessibility-sensitive restoration projects
When an accessible entrance, threshold, or window needs to match a historic building exactly, matching craftsmanship matters as much as code compliance. Our Historic Window Restoration service replicates period sash profiles and glazing patterns while accommodating thresholds and hardware that support easier access. Our custom fabrication work covers doors, casework, and reversible millwork details designed to satisfy both a SHPO reviewer and a disabled visitor trying to get through the front door.
We document measurements, build mock-ups for review, and coordinate our fabrication schedule with your project’s preservation consultation timeline. If you are planning an accessibility retrofit on a historic structure, you can request a quote on the window restoration page to start the conversation.
FAQ
Are historic buildings exempt from ADA requirements?
No. Historic buildings must meet ADA accessibility requirements to the maximum extent feasible, according to Preservation Brief 32. An exception is only available through a documented consultation process when compliance would threaten or destroy the building’s historic significance.
What is a qualified historic facility under the ADA?
A qualified historic facility is a building listed in, or eligible for listing in, the National Register of Historic Places, or one designated as historic under state or local law. Under the 2010 ADA Standards, that status allows access to alternative compliance provisions, not a blanket exemption.
Who decides whether an ADA exception applies to a historic building?
The State Historic Preservation Officer typically leads this determination, sometimes alongside the Advisory Council on Historic Preservation or the Department of Justice. The decision relies on documented consultation, including input from people with disabilities, as outlined in Preservation Brief 32.
What accessibility upgrades should historic building owners prioritize first?
Owners should prioritize the accessible route and entrance first, followed by access to primary public spaces and the goods or services offered there, then accessible restrooms. This sequence reflects the priority structure described in NPS and ADA guidance for projects where full compliance cannot happen all at once.
Can accessible restroom retrofits affect historic preservation tax credits?
Accessibility retrofits, when designed to meet the Secretary of the Interior’s Standards, generally support rather than jeopardize eligibility for historic preservation incentives. Reversible, differentiated interventions, such as those described in NPS guidance on rehabilitation codes, are the kind of work reviewers look for when evaluating a project’s compatibility with the historic structure.
Sources
Recommended
by Matthew Wiley | Oct 8, 2026 | Architectural Millwork
A complete historic millwork scope of work names the treatment, whether preservation, rehabilitation, restoration, or reconstruction, and then supplies itemized line items, shop drawings, approved mockups and field samples, fabrication tolerances, a pre-installation coordination checklist, and measurable acceptance criteria. Every clause should trace back to AWI 0601-2024 and the Secretary of the Interior’s Standards, with an experienced specialist like Gepetto Millworks able to speak to both.
TL;DR:
- Proper scope must itemize each millwork piece with detailed descriptions, profiles, and tolerances to avoid bidding ambiguities and ensure accurate fabrication.
- The treatment type—preservation, rehabilitation, restoration, or reconstruction—dictates scope complexity, documentation requirements, and allowable replacements.
- Shop drawings, field measurements, and a field sample approval are critical control points before fabrication begins to ensure matching quality and fit.
- Fabrication must adhere to strict tolerances, matching visible details, and include clear finish, hardware, and packaging instructions to prevent site issues.
- Early scheduling of lead times, site coordination, and explicit treatment decisions prevents delays and costly change orders in historic millwork projects.
Gepettomillworks
gepettomillworks.com
Bring Historic Millwork Into Focus
Gepettomillworks creates custom millwork for historic building projects, supporting teams working with demanding restoration requirements.
Visit Gepettomillworks
Table of Contents
Choosing a Treatment and the Standards That Govern the Scope
Before a single line item gets written, the project team has to settle on a treatment, because that choice dictates what the millwork package is legally and contractually allowed to do. The Secretary of the Interior’s framework defines four distinct approaches, and each one reshapes the scope differently for wood windows, doors, and trim.
Preservation keeps existing material in place with the lightest possible intervention, meaning a scope under this treatment favors consolidation, selective patching, and reglazing over wholesale replacement. Rehabilitation permits adaptive changes for continued use, so a millwork scope here might allow new casework or updated hardware as long as character-defining profiles and sightlines survive. Restoration depicts a building at one particular period, which means features from other eras may be removed and missing elements recreated, but only where documentary or physical evidence supports the recreation. Reconstruction recreates a vanished feature entirely from historical research, the most evidence-intensive and scope-heavy of the four.
Restoration and reconstruction carry the heaviest documentation burden. The Secretary of the Interior’s guidelines require identifying and retaining material from the restoration period, protecting what remains, and repairing rather than replacing wherever feasible. When replacement is unavoidable, the new work must be justified with documentary evidence such as period photographs, pattern books, or physical ghost marks left on adjacent fabric.
Once the treatment is settled, AWI 0601-2024 supplies the technical language that makes the scope enforceable. The standard addresses aesthetic compatibility, species and grain matching, finish technique, and fit tolerances for exposed surfaces, giving specifiers exact clauses to cite rather than vague references to “historic appropriateness.”
A Division 06 specification section should reference these normative documents directly:
- The Secretary of the Interior’s Standards and Guidelines for the Treatment of Historic Properties, cited by treatment name.
- AWI 0601-2024, Historic Restoration of Architectural Woodwork, cited by section number for aesthetic and tolerance clauses.
- Any state or municipal historic preservation office guidance applicable to the jurisdiction.
- A project-specific documentation plan when restoration or reconstruction is the chosen treatment.
Restoration work requires a documentation plan justifying any replaced feature with physical or documentary evidence, a requirement that keeps a restoration scope from drifting into guesswork presented as history.
Line Items to Specify for Every Millwork Category
Ambiguity at buy-out almost always traces back to a scope that described millwork in general terms instead of itemizing each piece with the fields a fabricator needs to bid accurately. Every line item in a historic millwork package should carry the same structure regardless of category, adapted to the piece in question.
- Existing condition and repair class. Note whether the piece is sound, repairable, or beyond repair, and assign a class (repair, patch, replace-in-kind) that ties directly to the treatment selected.
- Full description and location. Identify the piece by room, elevation, or grid reference so field crews and shop staff reference the same item.
- Species, cut, and veneer. Specify the wood species, grain orientation, and whether the original used quarter-sawn, rift-sawn, or flat-sawn stock, since this governs both strength and appearance.
- Profile reference. Attach a measured drawing, a physical template pulled from an intact section, or a photograph with a scale reference for every molding or turned element.
- Finish system. Name the primer, topcoat, and sheen, along with whether the finish is being matched to an existing color sample or a documented historic formula.
- Hardware type and allowance. List hardware by function (hinges, sash locks, pulls) with a dollar allowance when the exact historic pattern has not yet been sourced.
- Tolerances and acceptance criteria. State the allowable dimensional variance and the visual standard the finished piece must meet before it ships.
- Provenance or documentary support. For restoration-period replacements, cite the photograph, drawing, or ghost line that justifies the recreated profile.
- Salvage and inventory instructions. Note whether removed original material is retained, cataloged, and returned to the owner or held for reinstallation elsewhere in the project.
Applied to actual building components, this structure looks different piece by piece. A window sash line item specifies the muntin profile, glass type (restoration crown glass versus modern insulated units), weatherstripping, and whether the sash cord-and-pulley system is retained or converted to spring balances. An interior door item specifies panel configuration, stile and rail dimensions, the species match for any replaced panel, and hinge and lockset hardware with historic backset dimensions. A crown molding item references a profile template, specifies whether it is run in one piece or built up from multiple members, and notes the finish coat count. A built-in bookcase item describes case construction, shelf adjustability, glazing if doors are glazed, and how new casework ties into existing baseboard and crown profiles in the room. A stair handrail item specifies wood species, rail profile, baluster spacing and profile, newel construction, and the structural method for splicing new rail sections to existing ones without a visible joint.
Our custom fabrication work regularly starts from exactly this kind of itemized list, because a vague description of “replace damaged trim” gives a shop nothing to bid against and invites change orders later.
Shop Drawings, Submittals, and the Approval Gates Before Fabrication
Fabrication should never begin on documentation alone. The submittal package is where the scope’s intent gets translated into something a shop can actually cut, and the approval sequence is where the owner’s representative confirms the translation is accurate.
A complete shop drawing submittal should include:
- Full-scale or large-scale profile drawings for every molding, sash, and panel detail.
- Exploded assembly views showing joinery method (mortise and tenon, dowel, biscuit) for each major component.
- Overall and detail dimensions, with tolerances noted per piece.
- A hardware schedule cross-referenced to approved allowances or specific product selections.
- A finish schedule listing stain, primer, and topcoat products with manufacturer and color reference numbers.
- Glazing details, including glass type, putty or bead profile, and any leaded or restoration glass specifications.
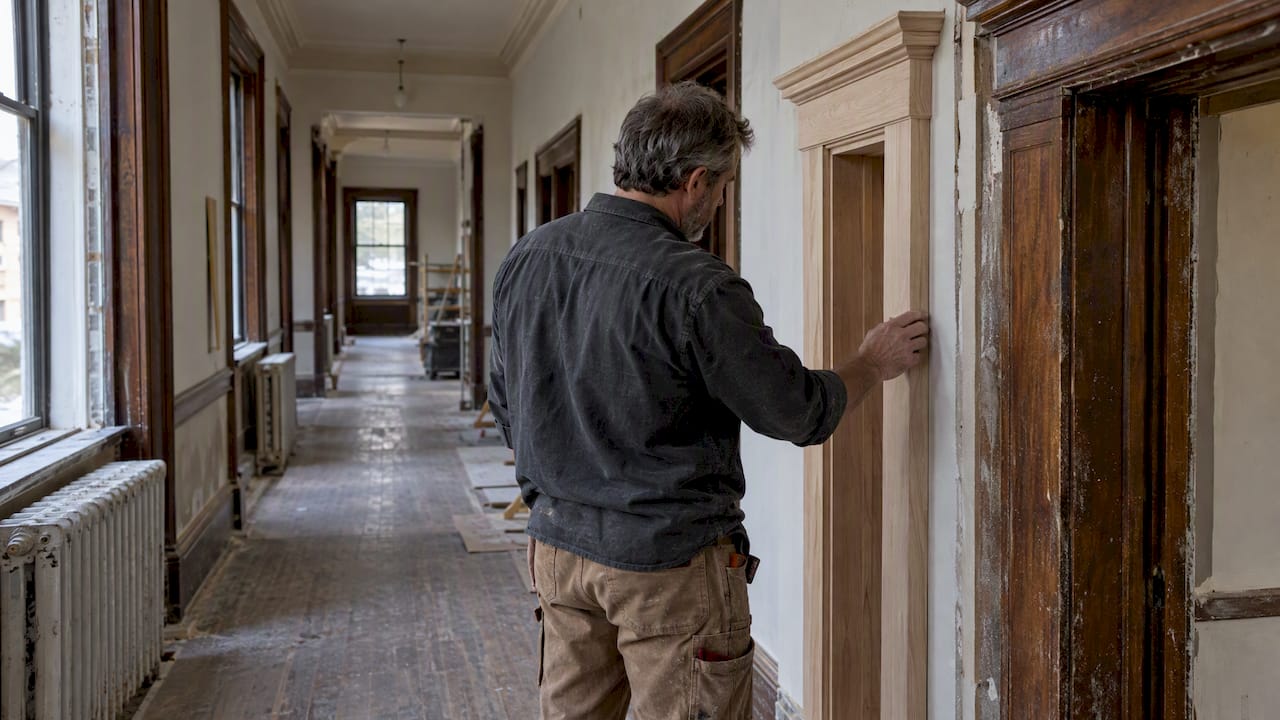
Field measurement has to happen before fabrication for anything fitted to existing construction, since historic openings are rarely square and rarely match the dimensions on an old drawing. The GSA’s supplemental guidelines for specifying repairs call for verified field measurements prior to fabricating pieces meant to fit other construction, and the scope should name who signs off on those measurements, typically the fabricator’s field representative with the general contractor countersigning.
GSA guidance recommends a field sample covering roughly 20 square feet or 5 linear feet as the review unit before full production proceeds, a sample size large enough to judge grain match, finish tone, and joinery quality without committing the full scope to an unapproved method.
Our team treats that sample as a hard gate rather than a formality: once it passes review, the approved sample becomes the physical standard every subsequent piece is measured against, and any deviation gets flagged before, not after, installation.
Pro Tip: Photograph every approved field sample against a color card and a scale reference, and keep that photo in the submittal log, because verbal memory of “the approved tone” fades fast across a multi-month fabrication schedule.
Fabrication Tolerances, Finishing, and Shipping Requirements
The fabrication clauses in a historic millwork scope exist to prevent two failures: pieces that do not fit when they arrive on site, and pieces that fit but look wrong once installed next to original fabric. Both failures are preventable with specific, enforceable language rather than general instructions to “match existing.”
Factory-applied finish and hardware should be required wherever practical, since field finishing introduces inconsistency in temperature, dust, and technique that a controlled shop environment avoids. AWI and AWS guidance recommends completing assembly and finishing before shipment where the piece’s size and the project’s logistics allow it.
A fabrication clause set should cover:
- Disassembly and reassembly tolerances. State the allowable gap or offset when a piece must ship in sections and be joined on site.
- Aesthetic matching rules. AWI’s aesthetic requirements call for repair materials on exposed, transparent-finished surfaces to match species, grade, cut, color tone, and grain pattern, not just wood type.
- Preservative treatment. Specify non-pressure preservative treatment for exterior millwork (sash, exterior doors, exterior trim) exposed to moisture cycling, naming the product class if the project has a preference.
- Labeling and sequencing. Require each piece to be labeled with its location reference before it leaves the shop, in an order that matches the installation sequence rather than the fabrication sequence.
- Packing and handling. Specify crating or blanket-wrapping standards sufficient to prevent edge chipping and finish abrasion in transit.
- On-site acclimation. Require a minimum acclimation period in conditioned space before installation, particularly for solid wood panels and door slabs sensitive to humidity swings.
Species and grain matching deserves its own line of attention because it is where otherwise careful scopes fail. A piece cut from flat-sawn stock will never read correctly next to quarter-sawn original fabric, regardless of how precisely the profile is matched, and a scope that does not specify cut orientation leaves that decision to chance.
Pre-Installation Coordination and Site Sequencing
Millwork installation failures rarely originate in the shop. They originate on site, where HVAC was not yet balanced, drywall finishers were still sanding above the new casework, or nobody confirmed who was responsible for backing blocking behind a newly hung door frame. A scope that treats installation coordination as an afterthought invites exactly these problems.
- Hold a pre-installation meeting with the general contractor, the millwork fabricator’s installer, the mechanical trade, and the finish painter present, and confirm HVAC setpoints, dust protection measures, and site access before any crate is opened.
- Set ambient condition thresholds for the space, typically a temperature range in the 60s to low 70s Fahrenheit and relative humidity in the 30 to 50 percent band, and require those conditions to be verified and held for a specified period before installation begins.
- Assign trade boundary responsibilities explicitly: who installs blocking and backing, who ties adjacent baseboard or casing into the new work, and who corrects a mismatch if the rough opening is out of square.
- Sequence millwork installation after drywall and plaster finish work but before final paint, so that touch-up painting can address any scuffing from installation without requiring a second full finish pass.
- Require a sign-off gate at each sequencing milestone, meaning drywall finish is inspected and approved before millwork crews are released to start, and millwork installation is inspected before glazing or final hardware is set.
- Document temporary HVAC needs when permanent systems are not yet operational, since wood millwork installed into an unconditioned shell is prone to movement that shows up as cracked joints months later.
Teams managing a demolition-heavy phase ahead of millwork installation sometimes benefit from outside sequencing experience; Mr Build Co.’s guidance on demolition and rebuild sequencing covers the kind of phased coordination that applies just as directly to historic interiors with structural scope preceding finish work.
Repair Versus Replacement: Conservation Techniques That Belong in the Scope
The decision to repair or replace a piece of historic millwork should never be left to whoever happens to be on site that day. A scope that states the decision framework up front protects both the historic fabric and the budget.
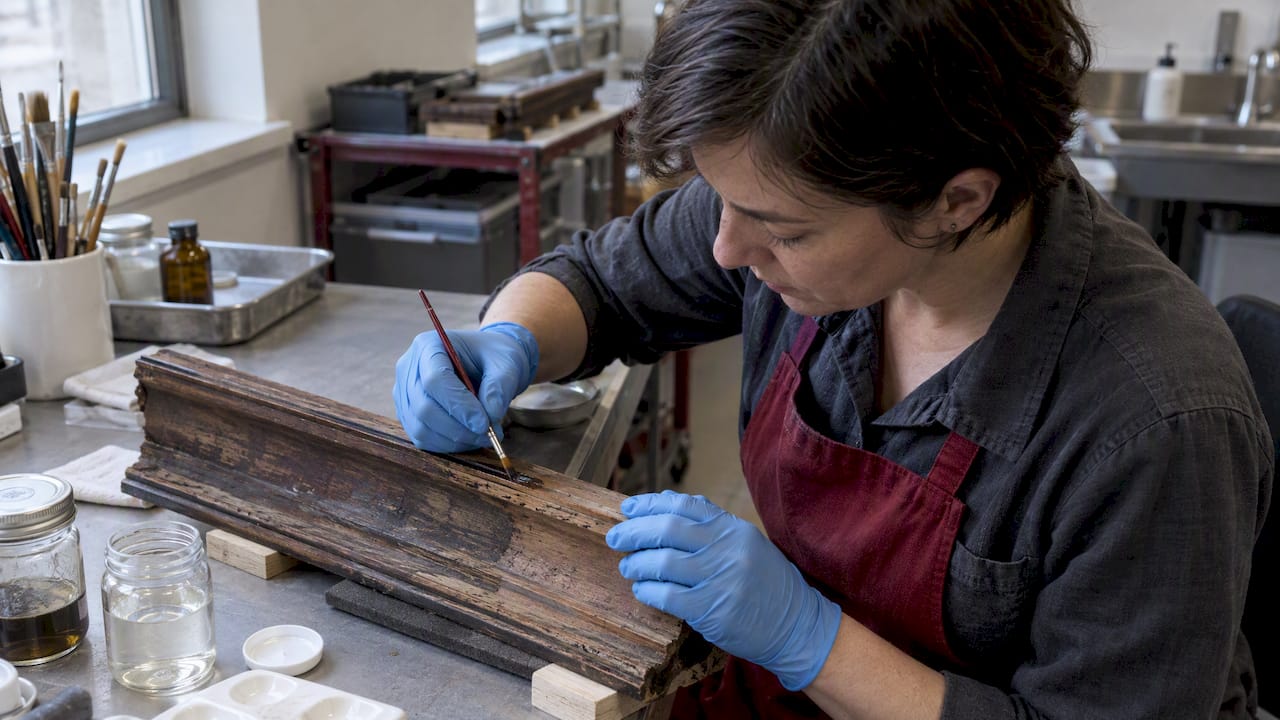
The baseline rule favors conserving original material wherever structurally and aesthetically feasible, reserving replacement for pieces that are missing entirely or too deteriorated to stabilize. GSA’s repair procedure for cracks and checks in wood ornament outlines accepted techniques: filling with compatible wood filler for shallow checks, regluing and clamping for separated joints, and dutchman insertion, a shaped wood patch let into the original piece, for larger losses where filler alone would not hold.
A conservation-minded scope should specify:
- A repair threshold, stating the maximum area or depth of loss addressable by filler before a dutchman repair is required instead.
- A requirement for RHPO (the Regional Historic Preservation Officer, where the project involves a federal or federally assisted building) or architect sign-off before any full-piece replacement proceeds.
- Matching rules for dutchman patches, requiring species, grain direction, and cut to match the surrounding original material, consistent with AWI’s aesthetic requirements for exposed finished surfaces.
- A finish test area requirement before refinishing proceeds across a full room or elevation.
- Before-and-after photo documentation of every repair, filed with the closeout package.
Readers balancing repair against replacement on doors specifically may find One Day Doors & Closets’ comparison of painting versus replacing old doors a useful framework for the cost and condition tradeoffs, even though historic door decisions add the extra layer of material authenticity that a purely cosmetic renovation does not carry.
Pro Tip: Always test refinishing products on a hidden or low-visibility section of original material first. A stain that reads correctly on new stock often dries noticeably different on century-old, oil-saturated wood.
Quality Assurance, Acceptance Criteria, and Closeout Documents
A scope without measurable acceptance criteria turns every disagreement into a negotiation. Measurable standards close that gap before the first piece is installed.
- Dimensional tolerances stated as a specific allowable variance per piece type, not a general “as approved” standard.
- Finish uniformity judged against the approved field sample under consistent lighting, with sheen and color variance limits stated numerically where possible.
- Hardware operation tested for smooth function (locks engage, sashes slide, doors swing without binding) at substantial completion.
- Mockup conformity, confirming the installed piece matches the approved sample in profile, joinery visibility, and finish.
- Installer and fabricator qualifications, requiring documented experience on comparable period work and references from prior historic projects.
Closeout should include as-built shop drawings reflecting any field-approved changes, a finish schedule with product and color reference numbers for future maintenance, hardware operation and maintenance instructions, and any warranty documents tied to the fabricator’s work. A punch list process with a defined remedial timeline, typically 30 days for cosmetic items, keeps small deficiencies from lingering into occupancy.
Schedule, Lead Times, and the Gaps That Stall Buy-Out
Historic-quality millwork does not move at the pace of stock trim, and a scope that does not account for that mismatch creates schedule conflict before fabrication even starts. Matching old-growth lumber, cutting custom profiles, and sourcing restoration or leaded glass all extend lead time well beyond standard casework.
- Build milestone dates around submittal approval and field sample sign-off, not around an assumed fabrication start date, since fabrication cannot proceed until the sample gate clears.
- State a lead-time allowance explicitly in the contract rather than leaving it to verbal estimate, and tie liquidated damages clauses, if any, to the approved schedule rather than the original bid schedule.
- Flag common buy-out gaps directly in the scope: unspecified hardware allowances that balloon once a historic pattern is sourced, missing mockup line items that fabricators assume are optional, and unclear measurement responsibility that leaves field verification undone until installation week.
- Specify storage and protection requirements for fabricated pieces awaiting a site that is not yet ready, including climate-controlled storage for finished wood components.
GSA’s specification guidance treats the field sample review as a required checkpoint, and projects that skip naming it in the schedule routinely lose weeks to an unplanned approval cycle later.
What Vendor Proof Should Look Like During Procurement
When evaluating a fabricator for historic millwork work, the proof worth requesting is specific and checkable, not a general claim of experience. Ask for a portfolio of completed replication projects with photographs showing the original profile alongside the reproduced piece, since side-by-side documentation reveals matching skill far better than a finished-room photo alone.
Our replica millwork archive and restoration millwork archive exist for exactly this kind of review, showing measured templates, approved field samples, and before-and-after documentation across completed projects. A fabricator who can produce that level of record keeping is generally one who can also produce the submittal discipline a historic scope demands.
Vendor claims about historic tax-credit eligibility deserve particular scrutiny. Ask for the specific documentation the fabricator provides to support a credit application, such as photographic records tied to the Secretary of the Interior’s Standards and a written statement of treatment compliance, rather than accepting the claim of eligibility on its own. We describe our own approach to replication fidelity as grounded in exact historic matching using authentic materials and techniques, a claim worth testing against the archive evidence rather than taking on faith, same as any fabricator’s claim should be tested.
What the Standards Leave Out of Most Scopes
The standards documents get the technical language right, but they do not solve the problem most historic millwork projects actually run into, which is that owners and architects treat the scope as a formality to satisfy a reviewing agency rather than as the operating document the fabricator will actually build from. We would argue the field sample requirement is the single most underused clause in the entire package. It costs little, it catches aesthetic mismatches before they are baked into forty finished pieces, and most scopes either omit it or treat it as optional paperwork.
The conventional advice to “match existing conditions” is not wrong, but it is not actionable on its own. A fabricator cannot bid or build from an instruction that vague, and a scope that stops there is quietly asking the lowest bidder to interpret history. Readers managing one of these projects should prioritize two things above everything else in this guide: naming the treatment explicitly, and writing the field sample gate into the schedule with a real date attached. Everything else in the package becomes easier to enforce once those two decisions are locked down early.
— Gepetto
Where Gepetto Millworks Fits Into Your Scope
Our team builds, restores, and replicates historic millwork such as wood windows, solid wood entry doors, staircases, balustrades, built-ins, and custom casework, matched to original profiles using the species, grain, and finish standards a historic scope requires.
We support the specification process directly rather than waiting for a finished drawing set to bid against. We can review proposed line items, produce shop drawings tied to profiles, pull field measurements before fabrication, and stand behind a field sample for approval before a full production run begins.
- Request a mockup or field sample before committing to a full order, and use it as your approval gate the way GSA guidance recommends.
- Ask for archived replica photos and project references tied to a period or building type similar to yours.
- Schedule a site review so field measurements and existing conditions inform the shop drawings from the start, not after fabrication begins.
If your project calls for historic window work specifically, our Historic Window Restoration page outlines how we approach sash repair, reglazing, and replication. For broader scope needs spanning doors, casework, and staircases, our custom fabrication page covers the full range of what we build to match.
FAQ
Is millwork rough or finish carpentry?
Millwork falls under finish carpentry, not rough carpentry, because it covers the visible, detailed wood elements installed after the structural framing and rough openings are complete. Rough carpentry includes framing, blocking, and sheathing, while millwork includes trim, casework, doors, and similar finished components.
What category does millwork fall under?
Millwork is typically classified under Division 06 of construction specifications, specifically the finish carpentry and architectural woodwork subsections. In a historic project, it often carries additional reference to AWI 0601-2024 for restoration-specific tolerances and aesthetic requirements.
Can you give me some examples of millwork?
Millwork includes wood windows and sash, interior and exterior doors, crown and base molding, wainscoting and paneling, built-in cabinetry and bookcases, and staircase components such as handrails, balusters, and newels. In historic buildings, it also covers architectural details like mantels, window and door surrounds, and decorative paneling.
What is the architectural scope of work?
An architectural scope of work is the document that defines exactly what work will be performed, including the materials, standards, and sequence of tasks a project requires. For historic millwork specifically, that scope must name the treatment selected under the Secretary of the Interior’s Standards and itemize deliverables such as shop drawings, field samples, and acceptance criteria.
Sources
Recommended
by Matthew Wiley | Oct 7, 2026 | Architectural Millwork
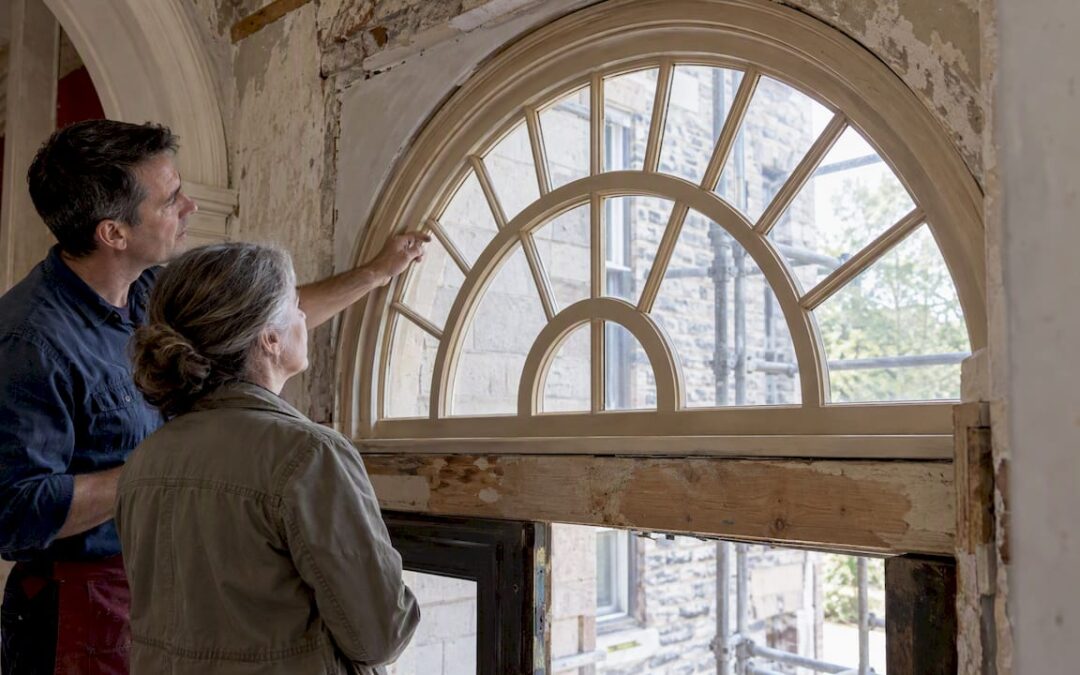
Repair comes first. When a historic transom has deteriorated beyond the reach of splicing or part replacement, National Park Service guidance calls for custom replication that matches the original material, profiles, glazing, and its relationship to the wall plane. We recommend commissioning a fabricator who delivers field-measured drawings and a physical mockup before production begins.
TL;DR:
- Repair is preferred unless more than half of a structural member is destroyed, profiles are completely lost, or structural relationship shifts beyond stabilization.
- Complete documentation, including precise field measurements and detailed shop drawings, is required for approval of transom replication projects.
- Matching the original wood species, profiles, and glazing methods is critical for authenticity, with salvaged materials and mockups playing key roles in quality control.
- Custom fabrication should start with a mockup and involve shop techniques like CNC or splicing salvaged parts, with quality checks at each stage to prevent costly errors.
- Installation must ensure the transom sits at the original wall plane and incorporates non-invasive weatherization techniques, with post-installation review documentation necessary.
Gepettomillworks
Custom Millwork For Historic Projects
Gepettomillworks creates custom millwork for historic building projects, supporting accurate transom replication and restoration work.
Visit Gepettomillworks
Table of Contents
Assessing condition: repair, partial repair, or full replication
A transom’s fate should rest on a careful survey of its parts, not on a glance from the sidewalk. We look closely at the sash, muntins, frame, glazing, and sill, noting where rot, insect damage, or paint failure has compromised structural integrity versus where it has only marred the surface. Historic sash often survives decades of neglect with its core members intact, and that durability is precisely why the National Park Service’s preservation guidance treats repair and retention as the preferred approach, reserving replacement for cases where repair is no longer feasible.
Splicing new wood into an existing muntin or rail, a technique Preservation Brief 9 describes as an accepted practice, preserves original fabric and the subtle tool marks and material density that give a transom its age. Full replication becomes pragmatic only when:
- Rot or insect damage has destroyed more than half of a structural member
- Original profiles have been lost entirely to prior alterations
- Glazing rebates or joinery have failed beyond stabilization
- The assembly’s relationship to the wall plane has shifted structurally
The least-destructive treatment should always be attempted first, with full replication held in reserve for genuinely unsalvageable fabric.
Documentation and drawings required for preservation review
Preservation reviewers and tax-credit examiners expect a specific set of drawings before they will approve a replication proposal. The National Park Service’s documentation requirements outline what a complete submission needs:
- Field-measured elevations drawn to scale, not estimated from photographs
- Horizontal and vertical sections showing muntin and mullion profiles precisely
- Material callouts identifying species, finish, and glazing type
- Joinery details that show how members meet and how the sash is assembled
- Installation drawings showing the transom’s relationship to the surrounding wall plane
Manufacturer cut sheets, the generic specification pages that window suppliers hand out, are rarely adequate for this purpose. They describe standard products, not the hand-shaped profiles and period joinery that define a historic transom, and a reviewer who receives only a cut sheet will almost always request a resubmission.
Coordinating with preservation staff early, before fabrication drawings are finalized, avoids that costly redesign cycle. Shop-level drawings that make the construction legible at a glance tend to move through review faster than anything assembled after the fact. Our documentation-focused projects follow this sequence because it protects both the timeline and the tax-credit eligibility of the broader rehabilitation.
Design and materials: wood species, profiles, and glazing choices
Matching a transom’s appearance starts with the wood itself. Species selection affects grain, density, and how paint or stain will sit on the finished piece, so we select species and finishes that mirror what the original sash would have used, whether that is old-growth heart pine, cypress, or mahogany.
Profile reproduction is where the visual character of a transom lives or dies. Muntin width, rail thickness, and glazing rebate depth all affect the glass-to-wood ratio, the proportion that gives a period transom its particular rhythm of light. A profile cut even slightly oversized will read as modern from the sidewalk, regardless of how accurate the material is underneath.
Glazing presents its own set of choices, especially for prismatic transom tiles:
- Salvaged glass, when available, offers the most authentic texture and color
- Custom-cast prism tiles reproduce the exact optical pattern but carry the highest cost for small runs
- Textured sheet glass approximates the historic prism effect and is often the practical choice for limited quantities, according to National Park Service guidance on prismatic glass
For energy performance, true divided lights paired with an interior piggyback panel preserve the historic sightlines while improving thermal behavior, an approach documented in NPS technical notes as a workable compromise between authenticity and comfort. We detail glazing specifics on our glass and glazing project notes for readers evaluating these tradeoffs.
Pro Tip: Request a glazing sample alongside your wood sample; the two interact visually in ways a swatch alone won’t show.
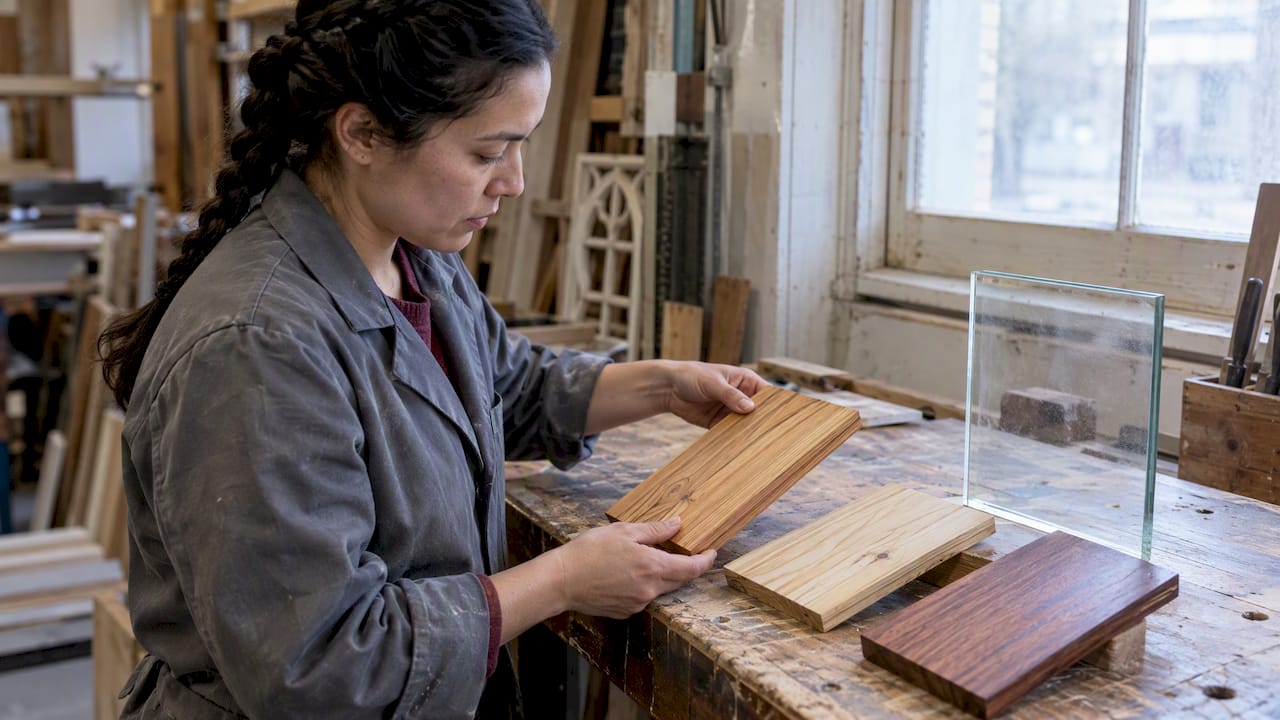
Shop fabrication and glazing workflow for accurate replication
A sound shop workflow begins with approval, not production. We build a mockup of a single muntin section or a full stile before cutting the final stock, giving architects, contractors, and homeowners a physical object to review against archival photographs or surviving fragments.
Profile reproduction can proceed several ways:
- Custom molding knives ground to match a surviving profile, for runs long enough to justify tooling
- CNC roughing followed by hand finishing, which speeds production without losing the final hand-worked texture
- Splicing salvaged members directly into new stock when enough original material survives to anchor the joint
For prismatic glazing, assembly typically uses zinc came rather than lead, with reinforcing bars set at intervals to carry the weight of cast glass tiles. Our replica window case notes walk through several of these sequences in more detail. Quality checks at each stage, dry-fitting joints, checking reveal depth, confirming sightlines against the mockup, catch problems while they are still cheap to fix.
Installation, weatherization, and preservation compliance
Installation is where the most carefully replicated transom can still look wrong if the wall-plane relationship is off, so consulting with experienced contractors on replacement windows in Dodge County, WI ensures proper installation and weatherization. The assembly needs to sit at the same depth relative to the brick mold, siding, or masonry opening that the original occupied, with flashing details that shed water without altering the visible reveal.
Weatherization should stay noninvasive:
- Exterior storm windows, sized to the original opening rather than a generic stock size
- Interior piggyback panels that improve thermal performance without touching the exterior profile
- Discreet weatherstripping set into the existing reveal rather than applied as visible surface trim
A documented approach pairs true divided lights with an interior piggyback energy panel, a method NPS case studies describe as successful on rehabilitation projects where sightlines had to be preserved exactly.
Post-installation, reviewers typically expect as-built photographs, a brief treatment report describing what was repaired versus replicated, and maintenance guidance for the owner going forward.
Project timeline and cost factors: what clients should budget and expect
Custom transom replication moves through several distinct phases, and each has its own realistic duration:
- Condition assessment and field measurement, typically the shortest phase
- Documentation and drawing production, which can extend if preservation review requires revisions
- Mockup fabrication and approval, a step worth protecting even under schedule pressure
- Shop production, where custom-cast glazing often sets the pace
- Installation and post-install documentation
Cost drivers tend to cluster around a few variables: the number of openings involved, whether glazing requires custom casting versus salvage or textured sheet glass, how complex the profile work is, and how much adjacent fabric, sills, surrounding trim, masonry, needs repair alongside the transom itself.
Phasing a larger project, reusing salvaged material where it survives, and locking in mockup approval before full production are the most reliable ways to keep both scope and budget under control.
Gepetto’s practitioner perspective on transom replication
We treat documentation as the backbone of any replication project, not paperwork to produce after the fact. Field measurements and shop drawings come before a single board is cut, and salvaged material is reused wherever its condition allows. A mockup goes out for review before production begins, every time, because a drawing can hide what a physical sample reveals immediately.
— Gepetto
How Gepetto Millworks can help with custom transom replication
Transom work rarely stands alone. It usually arrives as part of a broader restoration scope, and that is where our Historic Window Restoration services and custom Wooden Windows fabrication fit into a project from the start.
When you request a proposal, ask for specifics rather than a general estimate:
- Field-measured drawings that document your transom’s exact profiles and dimensions
- A physical mockup for review before full production
- Material and glass samples matched to your building’s period
- Clear installation scope, including how the new assembly meets the existing wall plane
- Maintenance guidance for the finished piece
We also take on transoms as one piece of a larger custom fabrication contract, alongside doors, casework, or staircases where a historic building needs several elements matched to the same standard. Reach out through our Historic Window Restoration page to start that conversation.
FAQ
What’s the difference between repairing and replicating a transom?
Repair preserves the original material through techniques like splicing new wood into damaged sections, while replication involves fabricating an entirely new assembly to match the original’s appearance. The National Park Service treats repair as the preferred approach, reserving replication for transoms too deteriorated to save.
Will a replicated transom qualify for historic tax credits?
A replicated transom can qualify when it matches the original’s design, visual qualities, and material, and when the project includes the field-measured documentation that reviewers require. Manufacturer cut sheets alone typically fall short of that standard.
Can missing prismatic glass tiles be replicated?
Missing prismatic tiles can be replaced using custom-cast glass, salvaged tiles, or textured sheet glass, depending on the quantity needed and the budget available. NPS guidance on prismatic glass transoms notes that textured sheet glass is often the practical choice for smaller runs.
How does a piggyback energy panel affect a transom’s appearance?
An interior piggyback panel adds thermal performance without altering the exterior profile or sightlines, since it mounts to the interior face of the existing sash. NPS technical notes describe this approach as a workable way to upgrade performance while preserving historic appearance.
What does Gepetto Millworks offer for transom projects?
We provide Historic Window Restoration and custom Wooden Windows fabrication, including field-measured drawings, mockups, and material matching for transom replication. Pricing is available on request through our Historic Window Restoration page.
Sources
Primary sources and further reading
The documents below form the technical backbone of any serious transom replication proposal, and we recommend including them directly in submission packages where preservation review or tax-credit eligibility is at stake. The National Park Service’s replacement standards and documentation requirements outline what reviewers expect. Preservation Brief 9 covers repair techniques in depth, while the prismatic glass technical note and piggyback panel tech note address specialized glazing and energy upgrades respectively.
Recommended
by Matthew Wiley | Oct 6, 2026 | Architectural Millwork
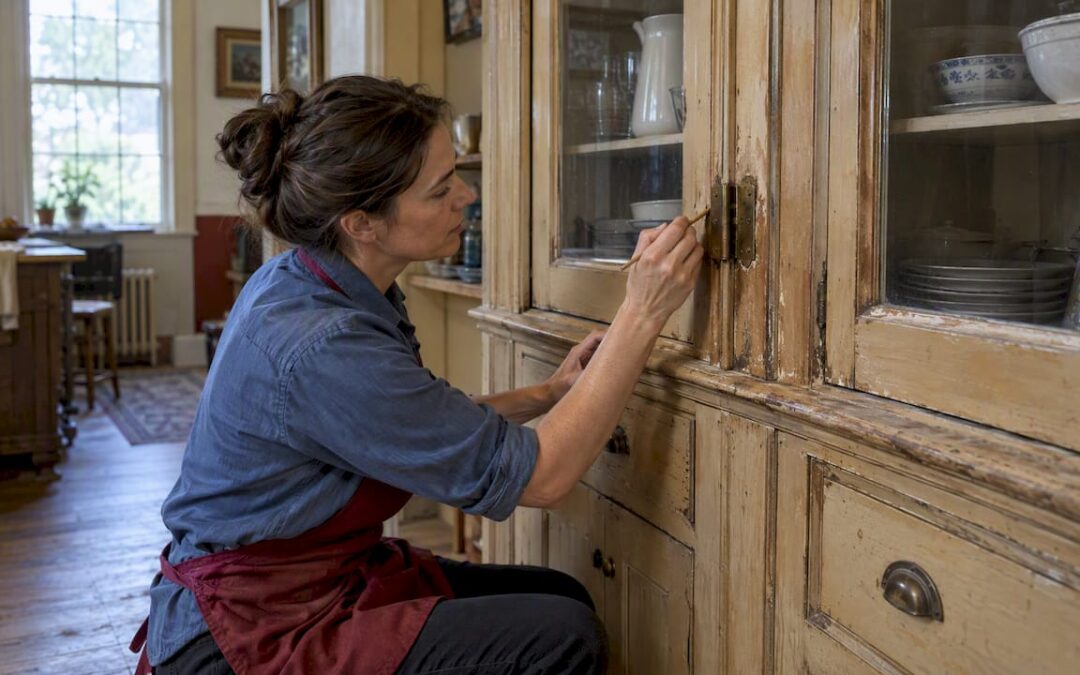
When built-in cabinetry qualifies as a character-defining feature, we recommend repair over replacement, and when replacement becomes unavoidable, only an evidence-based, exact-match replication preserves both the architectural integrity of the room and the project’s standing for historic rehabilitation tax incentives. Professional, documentation-driven restoration protects character and eligibility alike. Treating that cabinetry as disposable millwork risks both.
TL;DR:
- Preservation of historic cabinetry relies on thorough documentation, including measured drawings, photographs, and evidence of physical clues like ghost marks and fastener patterns.
- Repairs should be prioritized over replacement, with full replication only justified when loss exceeds patch repair, and all work must match original profiles, materials, and finishes.
- Early involvement of preservation specialists and the SHPO reduces review delays and ensures documentation aligns with standards before fabrication begins.
- Surface cleaning must be gentle and staged to avoid destroying finish stratigraphy, with destructive methods used only after detailed sampling and documentation.
- Lead paint on pre-1978 cabinetry requires strict containment, proper personnel certification, and careful hazardous waste disposal to ensure safety during restoration.
Gepettomillworks
Bring Historic Millwork Back Into Focus
Gepettomillworks creates custom millwork for historic building projects, supporting teams working to preserve architectural character.
Visit Gepettomillworks
Table of Contents
Quick decision checklist: preserve, repair, or commission replication
Before any tool touches a historic built-in, the commissioning team needs to establish what the piece actually is within the building’s history. A cabinet installed during the period of significance carries different weight than a 1980s kitchen renovation layered atop an 1890s dining room, and the National Park Service’s guidance on primary and secondary interior spaces offers the clearest framework for making that distinction. Built-in cabinets, paneled wainscoting, and millwork trim frequently qualify as character-defining elements whose removal or radical alteration can jeopardize a project’s tax credit eligibility.
Once that status is confirmed, the Standards direct the next decision: repair before replace, and replace only in kind.
- Confirm whether the cabinetry falls within the building’s period of significance and whether it appears in historic photographs or architectural surveys.
- Apply a repair-first test: if structural members, face frames, or doors retain at least partial integrity, conservation generally outperforms wholesale replacement.
- Watch for triggers that call for a specialist: missing physical evidence, carved or composition ornament, curved casework, or explicit tax-credit intent.
- Write procurement language that requires documentation packages, approved mockups, and reversible installation methods before fabrication begins.
A contract that skips these items invites costly rework once a reviewer asks for evidence the team never gathered.
Documentation and investigation required before work begins
Every defensible restoration decision rests on a paper trail assembled before demolition or fabrication starts. The NPS documentation requirements for Historic Preservation Certification Applications specify high-resolution color photographs keyed to floor plans, along with drawings sufficient to show existing conditions and proposed work. Reviewers cannot evaluate what they cannot see, and incomplete photo keys are among the most common causes of delayed applications.
A thorough pre-construction investigation typically proceeds in this order:
- Produce measured drawings of the cabinetry’s profiles, dimensions, and relationship to adjoining walls and trim.
- Photograph every elevation, interior surface, and hardware detail, keyed to a plan diagram for the reviewer’s reference.
- Map fastener patterns, ghost marks, and shadow lines left by missing components, since these often substitute for photographic evidence when historic images do not exist.
- Sample painted surfaces in inconspicuous locations to establish a paint stratigraphy sequence before committing to a finish scheme.
- Decide whether on-site scraping and comparison suffice or whether a laboratory cross-section analysis is warranted for a significant or highly visible feature.
Preservation Brief 18 finds that interior rehabilitation projects benefit from engaging professionals with preservation experience and consulting the State Historic Preservation Office early, a step that shapes how the documentation package should be organized from the outset. Early SHPO contact also clarifies how Parts 1 through 3 of the certification application will be sequenced relative to construction, which spares teams from reworking drawings after the fact.
Assessment: repair methods and evidence-based replication using physical clues
Condition assessment separates what can be saved from what must be recreated, and the distinction matters more than it first appears. Consolidation with reversible adhesives, Dutchman patches scarfed into deteriorated rails, and selective splicing of sound stock into damaged stiles all fall under conservation. Full replication becomes necessary only when loss exceeds what a patch repair can credibly restore, structurally or visually.
Where a piece or an entire run of cabinetry is missing outright, the shop’s job shifts from repair to detective work.
- Ghost marks, those shadow outlines left by removed moldings or hardware, often indicate the exact profile and placement of a lost element.
- Fastener holes and their spacing reveal where shelves, brackets, or hinges once sat, even after the hardware itself disappears.
- Surviving fragments elsewhere in the building, such as a matching cabinet in an adjacent room, frequently supply the missing profile without guesswork.
- Species, board width, and joinery method should match the original as closely as sourcing allows, with modern substitutes reserved for concealed structural members rather than visible surfaces.
Pro Tip: Photograph every ghost mark and fastener pattern before cleaning or sanding disturbs it. Once removed, that evidence cannot be recovered.
Preservation Brief 34’s guidance on composition ornament demonstrates how physical evidence and mold-making techniques allow missing decorative elements to be reproduced with precision, a method that applies equally well to carved cabinet ornament. Reviewers who encounter a replacement that diverges from the documented original in profile or material are within their rights to flag it, which can unravel an otherwise sound application.
Fabrication, finishing, and installation: mockups, moldmaking, and finish matching
Production quality hinges on proof points built into the contract rather than assumed from a shop’s reputation. A disciplined fabrication sequence looks like this:
- Build a shop mockup of the proposed profile or joint detail and circulate it to the architect and owner for sign-off before full production begins.
- Install a field mockup in situ when lighting, adjacent trim, or finish sheen cannot be judged accurately in a shop setting.
- Reproduce carved or molded ornament using the molds and casts described in Preservation Brief 34, integrating salvaged fragments where they survive rather than discarding them.
- Match the finish to the paint stratigraphy findings, substituting a safe modern coating only where the original formulation is no longer available or poses a hazard.
- Install replacement or repaired elements using mechanical fasteners and reversible joinery wherever the original construction allows it, so a future conservator can undo the work without damaging adjacent fabric.
Preservation Brief 28 addresses paint analysis and cautions against destructive stripping methods, favoring targeted sampling that preserves the stratigraphy for future reference. A shop that skips this step and repaints from guesswork risks a finish that reads as historically plausible but is not, in fact, accurate, a distinction reviewers are trained to notice.
How restoration choices affect tax credit eligibility and HPCA documentation
The Secretary of the Interior’s Standards for Rehabilitation state plainly that deteriorated historic features should be repaired rather than replaced, and where replacement is unavoidable, the new work must match the old in design, color, texture, and, where feasible, material. Those Standards govern eligibility for the federal historic tax credit program, which makes every decision about a built-in cabinet a decision with financial consequences.
- Repair-first treatments generally simplify the documentation burden and improve certification odds compared with wholesale replacement.
- HPCA submissions move through Part 1, which establishes the building’s historic status, Part 2, which describes proposed rehabilitation work, and Part 3, which certifies completed work matches what was approved.
- Narrative descriptions, drawings, and photographs must align precisely with what gets built, since discrepancies between Part 2 and Part 3 submissions invite additional review.
- Teams that involve the State Historic Preservation Office before construction begins tend to avoid the rework that comes from submitting documentation after the fact.
Projects that treat documentation as an afterthought rather than a parallel workstream routinely lose weeks to review cycles that better preparation would have avoided.
Project timeline and cost drivers for restoration and replication work
A realistic schedule allocates meaningful time to investigation before fabrication starts, since skipping that phase only pushes the cost downstream into change orders. Expect a sequence of condition assessment and documentation, followed by mockup approval, then fabrication, then installation, with each phase gated by a sign-off rather than running concurrently.
- Salvageability drives cost more than any other single factor: a cabinet with sound structural members costs far less to conserve than one requiring full replication.
- Ornament complexity, particularly carved or composition details, adds time for mold-making and finish matching that flat panel work does not require.
- Laboratory paint analysis adds cost but reduces the risk of a finish scheme that fails review or ages poorly.
- Specialty subcontractors, such as a plasterer for composition ornament or a conservator for veneer stabilization, should be scoped and priced separately rather than bundled into a general carpentry allowance.
- Contracts should include a documented mockup sign-off point and a contingency allowance for deterioration discovered only after demolition exposes concealed surfaces.
Common types of damage and deterioration specific to historic cabinetry
Historic built-ins fail in patterns distinct from modern cabinetry, largely because of the materials and construction methods available when they were built. Solid wood face frames and panels move with seasonal humidity far more than engineered sheet goods, which produces the splitting, cupping, and joint separation common in cabinets older than a century. Veneer losses are especially frequent on curved or decorative surfaces, where thin veneer sheets were glued under tension and later failed as hide glue dried out and lost adhesion.
Water infiltration from roof or plumbing failures causes the most severe damage, swelling panels, delaminating veneer, and promoting rot in lower cabinet bases where moisture pools. Insect damage, particularly from powderpost beetles, hollows out structural members from within while leaving surfaces deceptively intact, which is why a tap test or a probe with an awl often reveals more than a visual inspection alone.
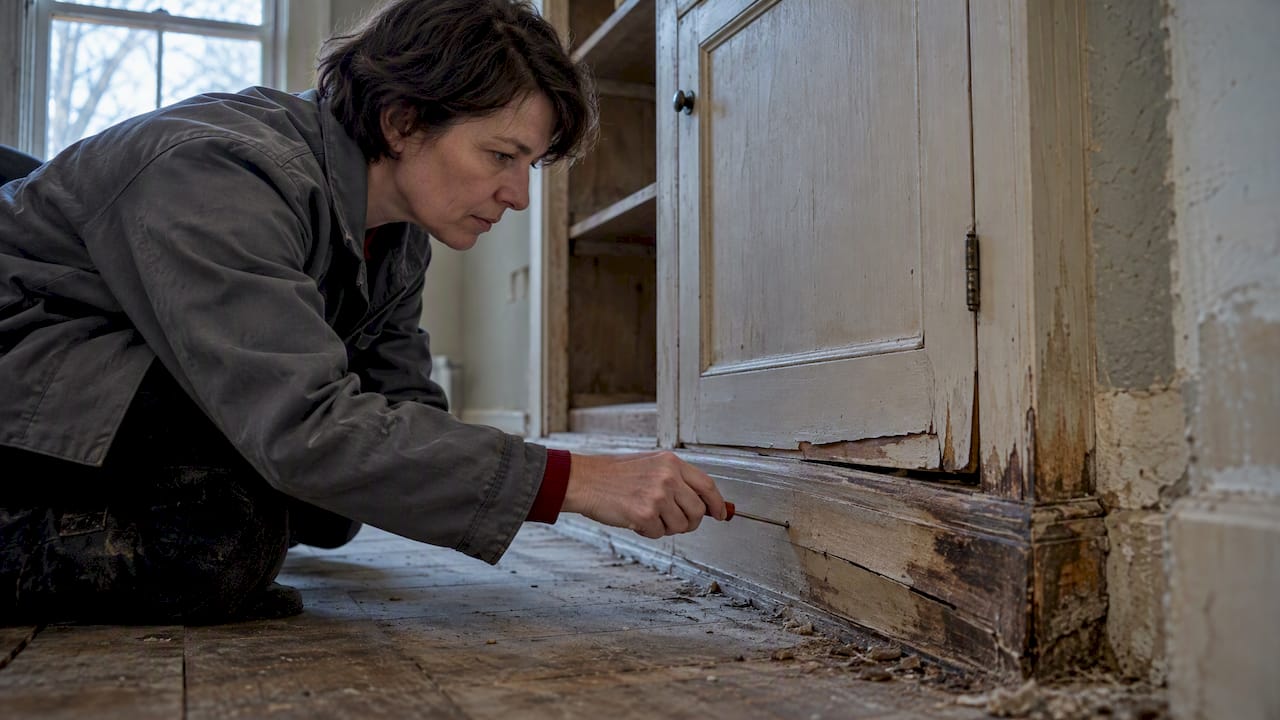
Hardware deterioration compounds the problem: cast brass hinges and pulls corrode or seize, and the screws securing them often strip the surrounding wood after a century of use and reuse. Finish failure, whether through alligatoring shellac, UV-darkened varnish, or repeated overpainting, obscures the wood beneath and frequently masks structural problems that only surface once a conservator begins stripping the finish layers. Each of these failure modes calls for a different repair strategy, which is why an accurate condition assessment precedes any treatment decision.
Recommended cleaning and surface preparation techniques before restoration
Surface preparation on historic cabinetry demands restraint, since aggressive cleaning destroys the same evidence that guides accurate restoration. The sequence should begin with the gentlest method capable of achieving the goal: dry dusting and a soft-bristle brush remove surface grime without disturbing finish or substrate, and only when that proves insufficient should a conservator move to mild aqueous or solvent cleaning.
Mechanical sanding and chemical strippers belong near the end of that sequence, not the beginning, because both methods permanently remove the finish layers that paint stratigraphy analysis depends on. Preservation Brief 28’s guidance against destructive paint removal applies directly here: sampling for analysis should precede any broad stripping, and a conservator should document the existing finish condition with photographs before cleaning begins.
Wax-based cleaners and silicone polishes, common in general furniture care, should be avoided on historic cabinetry because they penetrate wood pores and complicate future conservation or refinishing work. A pH-neutral cleaner, tested first in an inconspicuous area, generally performs the job safely. Where grime has bonded with an old finish, patience and repeated gentle passes outperform a single aggressive treatment, since the goal is removing dirt while leaving the historic finish substrate intact wherever it remains sound.
Conservation methods for original wood finishes and hardware
Original finishes carry evidence of a building’s history that a fresh coat of polyurethane erases permanently, which is why conservation favors stabilization over replacement wherever the existing finish remains structurally sound. Shellac and varnish finishes that have merely dulled or crazed often respond to careful reamalgamation, a technique that reflows the existing finish layer using a compatible solvent rather than stripping it away. This approach preserves the original material and its paint stratigraphy for future reference while restoring clarity and sheen.
Where the existing finish has failed beyond reamalgamation, stripping becomes necessary, but it should follow documented paint or finish sampling so the historic sequence is recorded before it disappears. Replacement finishes should match the original in sheen, color, and application method as closely as practical, following the guidance in Preservation Brief 28 on replicating period finish treatments.
Hardware deserves the same conservative approach. Cast brass hinges, pulls, and escutcheons typically respond to gentle mechanical cleaning and a protective wax coating rather than aggressive polishing, which can remove the original plating or patina permanently. Where hardware is missing, salvaged period pieces or accurate reproductions sourced to match the surviving hardware’s style and era preserve the room’s historic character far better than modern substitutes chosen for convenience.
Safety considerations and handling of lead paint during restoration
Cabinetry finished before 1978 should be treated as presumptively coated with lead-based paint until testing proves otherwise, since lead paint remained in common use for interior woodwork well into the twentieth century. Any sanding, scraping, or heat-stripping of these surfaces generates lead dust and fumes that pose serious health risks, particularly to children and pregnant workers, which is why containment and proper personal protective equipment are not optional steps.
Wet methods, HEPA-filtered sanders, and chemical strippers used under proper ventilation reduce airborne lead dust far more effectively than dry sanding or open-flame heat guns. Work areas should be sealed with plastic sheeting, and debris should be collected and disposed of according to applicable hazardous waste regulations rather than treated as ordinary construction trash.
Paint stratigraphy sampling, the same investigative step that supports accurate finish replication, also identifies which layers contain lead before broader surface preparation begins. This dual purpose makes early sampling worthwhile even on projects with a modest finish-matching budget. Contractors handling pre-1978 interior woodwork should hold appropriate lead-safe certification, and project specifications should require documentation of containment and disposal procedures as a condition of the scope of work.
Restoring historic cabinetry calls for a different toolkit than general carpentry, built around precision and reversibility rather than speed. Hide glue remains the preferred adhesive for structural repairs on period furniture and built-ins because, unlike modern synthetic adhesives, it can be reversed with gentle heat and moisture, a property conservators rely on when a future repair needs to undo earlier work. Hot hide glue pots, glue injectors for consolidating loose veneer, and clamps sized for delicate joinery round out the adhesive side of the kit.
Hand tools dominate the profile and joinery work: wooden molding planes or scratch stocks reproduce historic profiles that router bits cannot match exactly, while fine-tooth dovetail saws and chisels handle joinery repairs without the tear-out a power tool risks on brittle, century-old stock. Species-matched lumber, sourced to match board width and grain pattern rather than just wood type, forms the raw material for Dutchman patches and splices.
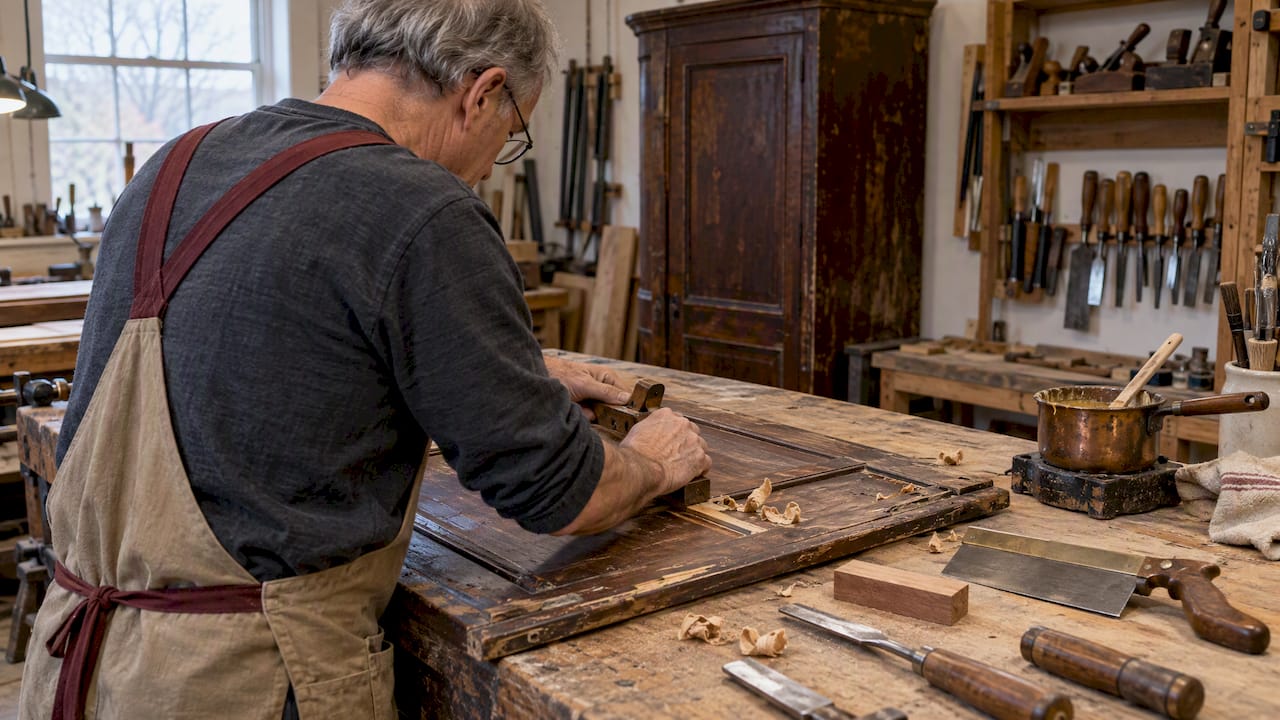
For ornament reproduction, silicone or latex molding compounds capture surviving carved or composition details, which plaster or synthetic casting compounds then reproduce as replacement elements, a technique detailed in Preservation Brief 34’s approach to composition ornament. Paint stratigraphy sampling relies on a scalpel, a binocular microscope for layer examination, and archival sample mounting materials when laboratory analysis is warranted rather than on-site comparison alone.
Case studies demonstrating successful historic cabinet restorations
Our work replicating historic millwork illustrates how these principles play out in practice. Our replica millwork archives document projects where profile matching and ghost-mark evidence guided the reproduction of built-in elements that could not be salvaged in place, preserving the room’s historic proportions without guessing at missing details.
On plantation home restoration projects, our plantation home restoration archives show how built-in cabinetry and casework were conserved or replicated to match surviving fabric elsewhere in the structure, an approach consistent with the repair-first principle the Standards require. Bespoke fabrication work, including custom-designed loft beds and the glass shelves archives showing finish integration techniques, demonstrates the shop capability needed to extend historic cabinetry programs into new, compatible built-in elements without disrupting the room’s original character. Each project reinforces the same lesson: accurate replication depends on evidence gathered before fabrication begins, not after.
What we bring to historic cabinet restoration projects
We specialize in custom millwork for historic building projects, which means our restoration and replication work is built around the same evidence-based approach described throughout this piece rather than treating historic cabinetry as a generic carpentry job, guided by Historic Hardwood Restoration: A Conservation-First Guide. Casework, window, and door restoration experience informs how to approach built-in cabinetry specifically, since the documentation and material-matching disciplines carry across all of it.
Project teams evaluating a restoration partner, our guide to selecting a custom cabinetry shop outlines the criteria worth asking about before signing a contract. We welcome requests for project checklists, mockup samples, and references so architects and contractors can evaluate our fit before committing to a scope.
— Gepetto
Working with Gepetto Millworks on your restoration project
We offer custom casework, historic door and window restoration, and exact-match replication for built-in cabinetry and architectural millwork, all scoped around the documentation and repair-first discipline the Standards require. Rather than treating historic cabinetry as an off-the-shelf product, we build each piece to match the surviving evidence in your specific building.
- Ask us to review your existing documentation packet before fabrication begins, so gaps surface early rather than during HPCA review.
- Request a sample mockup of a proposed profile or joint detail before committing to full production.
- Scope the project in phases, investigation, mockup approval, fabrication, installation, so budget and timeline stay predictable.
For custom casework, replication work, or a broader look at our custom fabrication services, reach out through our project inquiry page to start the conversation.
FAQ
What makes a built-in cabinet “character-defining” under NPS guidance?
A cabinet qualifies as character-defining when it dates to the building’s period of significance and contributes to the historic identity of the space, a distinction the NPS guidance on primary and secondary interior spaces uses to separate original features from later additions. Removing or radically altering such a feature can jeopardize a project’s tax credit eligibility.
Should we always repair historic cabinetry instead of replacing it?
The Secretary of the Interior’s Standards for Rehabilitation direct that deteriorated historic features be repaired rather than replaced whenever repair is feasible. Replacement is reserved for cases where deterioration has progressed beyond what conservation techniques can credibly restore, and even then the new work must match the original in design and material.
What documentation does a Historic Preservation Certification Application require?
The NPS documentation requirements call for high-resolution color photographs keyed to plans, along with drawings sufficient to show existing and proposed conditions, submitted electronically across Parts 1 through 3. Early consultation with the State Historic Preservation Office helps teams sequence this documentation correctly relative to construction.
How do specialists recreate cabinet details that are completely missing?
Specialists rely on physical evidence such as ghost marks, fastener patterns, and surviving fragments elsewhere in the building to determine the missing profile, a method consistent with Preservation Brief 34’s approach to composition ornament. Mold-making from surviving details then allows accurate reproduction of missing carved or decorative elements.
Does Gepetto Millworks handle both restoration and new replication work?
Yes, our services cover both conservation of existing historic cabinetry and exact-match replication when original fabric cannot be saved, scoped through our custom fabrication services. We approach both paths through the same documentation and material-matching discipline that preservation review expects.
Sources
Consult these directly, and contact your SHPO early in planning.
Recommended