
Craftsman window casing is a built-up, square-edged trim assembly composed of flat side casings, a layered head entablature (frieze board, architrave bead, and cap), and a projecting stool with apron below — all joined with simple butt joints rather than mitered corners. That structural clarity is precisely what makes it approachable for a competent DIYer. Craftsman-style casing relies on flat-stock lumber with square butt joints and a proportional header that reads as a distinct horizontal entablature above the opening, a direct inheritance from the Arts and Crafts movement’s rejection of ornate Victorian millwork.
The quick recipe:
- Stool first: Cut and install the projecting sill board before any vertical work.
- Side casings second: Butt-jointed to the stool, set with a 1/4" reveal off the jamb edge.
- Head entablature last: A pre-assembled three-piece unit (frieze + architrave bead + cap) that sits proud of the side casings and overhangs them by 1–3 inches per side.
- No complex miters: Every connection is a 90-degree square cut; the layered header creates depth through profile, not angle.
Most single-window installs are well within a skilled DIYer’s reach over a weekend. Projects requiring exact historic replication, wide stain-grade entablatures across multiple rooms, or matched profiles for historic tax-credit eligibility are where a custom millwork shop like Gepettomillworks becomes the more reliable path.
Table of Contents
- What supplies and tools do you need for a Craftsman casing install?
- How do you size Craftsman casing for balanced proportions?
- How to install Craftsman window casing step by step
- Which materials and finishes work best for Craftsman trim?
- Can you replace exterior Craftsman casing, and what weatherproofing steps matter most?
- What are the most common Craftsman casing mistakes, and how do you fix them?
- What does a DIY Craftsman casing project cost and how long does it take?
- Where can you find authoritative resources and when should you consult a millworker?
- Key Takeaways
- The proportions matter more than the profile
- When does a project call for custom millwork fabrication?
- Useful sources for further reading
What supplies and tools do you need for a Craftsman casing install?
Lumber and materials
- 1×4 and 1×6 boards for side casings and frieze; 3/4" actual thickness is standard for most interior applications.
- 5/4 stock (approximately 1" actual thickness) for the stool, which needs the extra mass to project cleanly.
- 1×3 or ripped lattice for the architrave bead and cap pieces in the entablature.
- Paint-grade vs. stain-grade: Poplar and finger-jointed primed stock work well for painted finishes and cost less. For stain-grade work, select boards at the lumberyard for straight grain and consistent color; wider boards can be ripped into multiple trim pieces with matched grain.
- Construction adhesive (PL Premium or equivalent) for prefinished assemblies; yellow wood glue for bench-assembled entablatures.
- 18-gauge finish nails for cap and bead pieces; 16-gauge finish nails for side casings and frieze boards nailed into framing.
- Trim-head screws for fastening the stool from below when back-screwing is possible.
Tools
- Tape measure, combination square, and marking gauge
- Miter saw (square cuts only — no compound angles needed)
- Table saw or circular saw with rip fence for ripping lattice and fillets
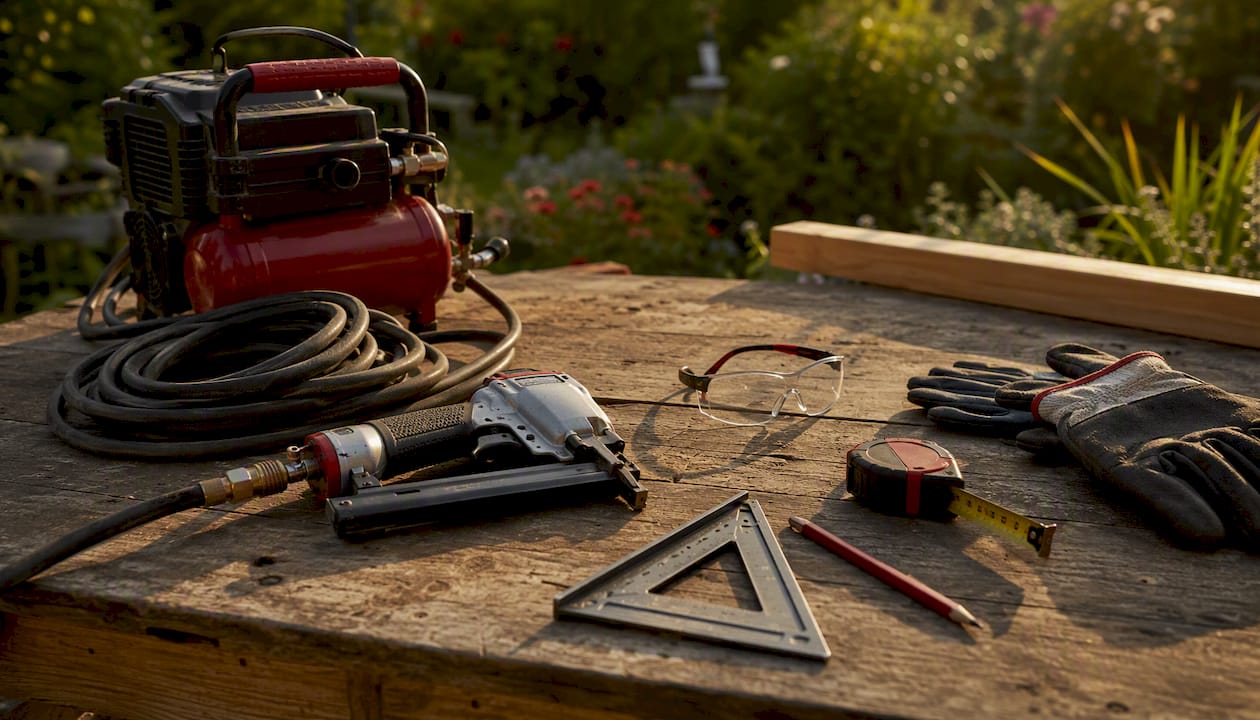
- Pneumatic finish nailer with compressor (worth renting if you own fewer than ten windows)
- Stud finder, 4-foot level, and clamps
- Chisels and block plane for fitting and scribing
- Safety glasses and hearing protection
Pro Tip: Rent the compressor and nailer as a package from a tool rental counter rather than buying. For a single-room project, the rental cost is a fraction of ownership, and a pneumatic nailer drives nails flush consistently in a way that hand-nailing rarely matches.
How do you size Craftsman casing for balanced proportions?
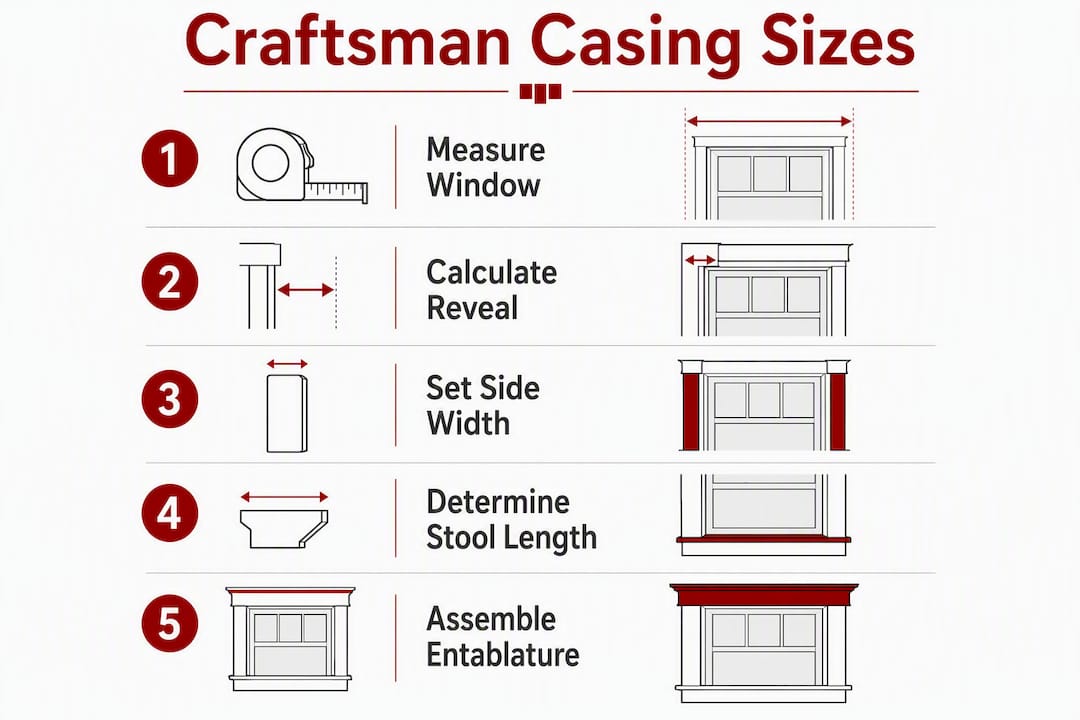
Craftsman casing has no single fixed dimension — proportions should scale to ceiling height and window size, with formal or larger rooms typically calling for wider stock to achieve the visual mass the style demands. That said, several working rules give you a reliable starting point.
| Dimension | Typical Range | Proportion Rule |
|---|---|---|
| Side casing width | 2"–3" | Scale to window height; taller windows read better with 3" |
| Head entablature face width | 4"–6" assembled | Roughly twice the side casing width |
| Stool projection beyond casing face | 3/4"–1" | Creates the shadow line that defines period proportion |
| Jamb reveal (casing setback) | 1/4" | Consistent on all four sides for a crisp Craftsman shadow line |
| Head overhang beyond side casings | 1"–3" per side | Wider overhang reads more formal; 1" is a common residential choice |
Marking the reveal
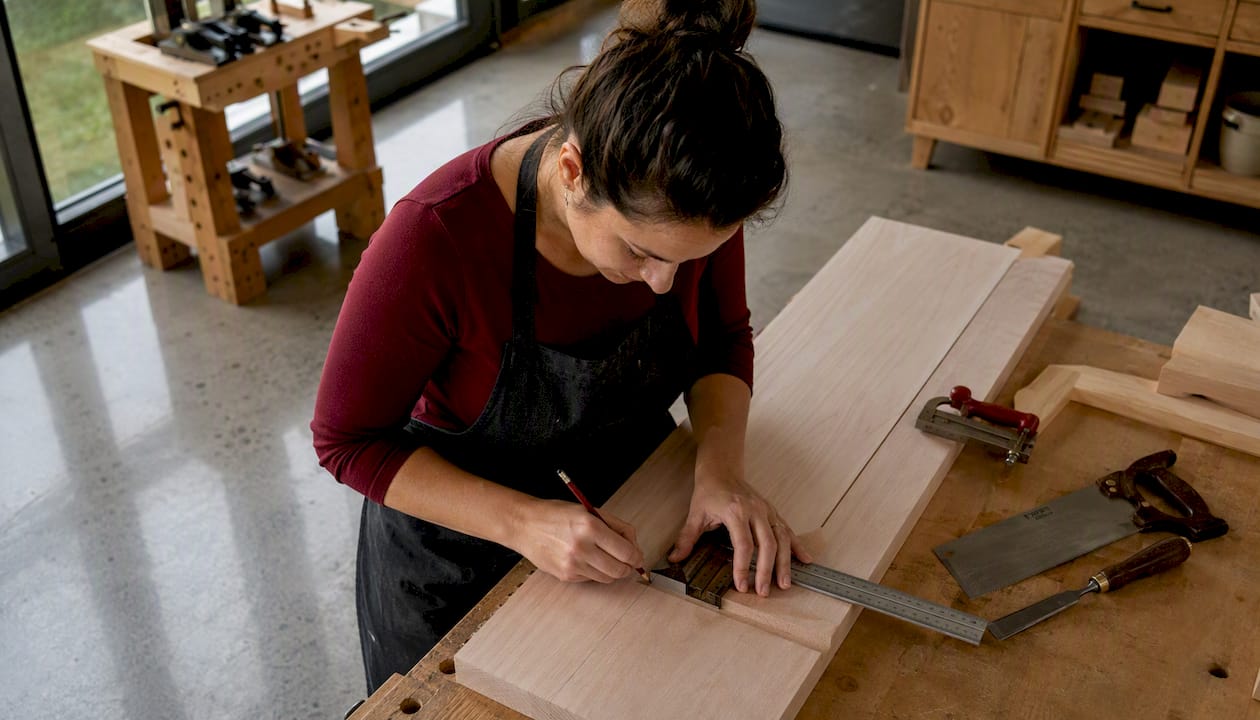
Set a combination square or a simple reveal block to 1/4" and scribe a light pencil line around the jamb perimeter before you cut a single piece of casing. That line becomes your alignment reference for every piece, and keeping it consistent is what separates a professional-looking install from one that reads as slightly off.
Stool length
Measure the jamb opening width and add roughly 1" total — about 1/2" per side — so the stool ears project beyond the side casings by the target amount. Adjust that ear dimension if your proportions call for a more pronounced projection.
Pro Tip: Before cutting any stock, tape full-size paper strips to the wall in the approximate widths and heights of your planned casing and step back to the typical standing distance for that room. Entablature massing that looks correct on paper can read as too heavy or too slight against a specific ceiling height. The mock-up takes fifteen minutes and prevents expensive remilling.
How to install Craftsman window casing step by step
Step 1: Prep and demolition
- Score the paint line around existing casing with a utility knife before prying to avoid tearing drywall paper.
- Remove old casing carefully; inspect the jamb plane and drywall surface for gaps, proud nails, or drywall that sits above the jamb face.
- Install extension jambs or filler strips if the jamb does not reach the wall plane — the casing must land on a flat, consistent surface.
- Check the opening for square with a framing square. Note any deviation greater than 1/8" so you can plan scribing or shimming before you cut.
Step 2: Assemble the head entablature on the bench
Pre-assembling the frieze, architrave bead, and cap as a single unit before installation gives you precise control over alignment and produces a stronger, more consistent profile than fitting each piece individually on the wall. Apply yellow glue to the mating faces, clamp, and reinforce with 18-gauge pins. For small self-returns at the ends, cyanoacrylate (CA glue) holds thin pieces without clamps. Let the assembly cure fully before mounting.
Step 3: Install the stool first
- Cut the stool to length (jamb opening + 1" minimum, adjusted for your ear dimension).
- Notch the ends so the stool fits snugly against the wall on both sides of the window.
- Apply construction adhesive to the back face, predrill screw locations to avoid splitting, and fasten with trim-head screws from below where accessible.
- Check level before the adhesive sets.
Step 4: Fit and attach side casings
- Cut each side casing slightly long, then test-fit against the stool and mark the reveal line.
- Shim or back-block behind the casing if the jamb is out of plane with the wall — a thin shim at the top and bottom brings the face flush without forcing the casing to cant.
- Nail into the jamb with 18-gauge nails and into the wall framing with 16-gauge nails, using a dual-nail pattern (one into jamb, one into stud) every 12"–16".
Step 5: Mount the pre-assembled head entablature
- Center the entablature above the opening and check that the overhang is equal on both sides.
- Drive pilot screws or nails through the frieze into the wall framing; avoid fastening only into drywall.
- Confirm the bottom edge of the entablature sits flush against the top of the side casings.
Step 6: Joinery and trim details
- Butt-joint all connections; do not attempt mitered returns on the entablature ends unless you have significant milling experience.
- Fill nail holes with wood filler for paint-grade work; for stain-grade, use a tinted wax filler applied after finishing to keep the grain visible.
- Apply minimal caulk at the wall-to-casing joint for paint-grade work only. On stain-grade assemblies, tight scribing and shimming produce a cleaner result than caulk.
Step 7: Finish
- Sand all faces through 150-grit before priming or staining.
- Prime paint-grade stock with a shellac-based primer on end grain to prevent bleed-through.
- For stain-grade wood, apply a pre-conditioner on poplar or pine before staining to prevent blotching, then finish with two coats of oil-based polyurethane or a period-appropriate penetrating oil finish.
Pro Tip: Pre-finish the entablature assembly in the shop before mounting it. Crisp paint lines at inside corners are far easier to achieve on a bench than on a wall, and you eliminate the risk of lap marks from painting around installed trim.
Which materials and finishes work best for Craftsman trim?
Using thin, generic moldings is the most common rookie mistake; substantial stock with correct thickness creates the shadow lines that give Craftsman trim its architectural weight.
| Material | Best For | Notes |
|---|---|---|
| Vertical-grain Douglas fir | Stain-grade, historic accuracy | Stable, takes stain evenly, period-correct for West Coast bungalows |
| Plain-sawn white oak | Stain-grade, formal interiors | Pronounced ray fleck; authentic to Mission and Arts and Crafts interiors |
| Poplar | Paint-grade | Machines cleanly, holds paint well, affordable |
| Finger-jointed primed stock | Paint-grade, budget installs | Stable and ready to prime; not suitable for stain |
| Primed rot-resistant wood or PVC | Exterior applications | Resists moisture; requires exterior-grade primer and paint |
For painted interiors, a high-quality alkyd or waterborne alkyd topcoat over a shellac-based primer gives the sharpest, most durable finish on poplar or finger-jointed stock. For stain-grade Douglas fir or oak, an oil-based penetrating stain followed by two coats of satin polyurethane reads closest to historic period finishes.
When a project requires custom profiles, matched grain selection across multiple rooms, or entablatures that replicate a specific historic section, Gepettomillworks fabricates matched Craftsman and bungalow millwork to specification, including pre-assembled entablatures ready for field installation.
Can you replace exterior Craftsman casing, and what weatherproofing steps matter most?
Exterior casing replacement follows the same sequence as interior work, but the substrate and water-shedding details are as consequential as the trim itself. Correct substrate repair — sheathing, flashing, and filler boards — is as important as the trim; failing here causes leaks and rot regardless of how well the trim is fitted.
Exterior replacement checklist:
- Remove old casing carefully; inspect sheathing for soft spots, delamination, or rot before ordering new stock.
- Check and replace window flashing tape at the head and sides; the head flashing must lap over the side flashing, not under it.
- Install a sloped sill ledge or backer where the stool meets the wall to direct water away from the opening.
- Use only primed and back-primed stock for exterior wood trim; seal all end grain before installation.
- Apply a continuous bead of exterior-grade sealant (paintable polyurethane caulk) at the wall-to-casing joint after installation, not before.
- For period homes, exterior trim repair examples illustrate how flashing integration and profile replication interact on historic facades.
When to hire a pro: Complex siding transitions, failing sheathing, or projects subject to historic preservation review require professional assessment. Exact profile replication for historic tax-credit eligibility is a specialized service that Gepettomillworks provides through its restoration millwork practice.
What are the most common Craftsman casing mistakes, and how do you fix them?
Out-of-square openings are the single most frequent source of visible gaps in butt-jointed Craftsman trim. Scribe-fitting and shimming behind the casing are the standard pro corrections — not over-caulking, which telegraphs the problem rather than solving it.
Specific fixes:
- Gapping butt joints at the stool: Scribe the bottom of the side casing to the stool surface rather than assuming the stool is perfectly level. A block plane removes material in controlled passes.
- Canting side casings: Thin shims placed behind the casing at top and bottom bring the face into a consistent plane. Plane the show face of the casing for consistent thickness before final installation if the stock varies.
- Stool rocking: Glue the apron to the underside of the stool before mounting; predrill screw locations to prevent splitting the stool end grain.
- Damaged single member: A single casing board can be replaced without disturbing the entablature. Score the paint line, pry carefully, and cut a replacement from matching stock. If the head entablature profile is no longer available in stock lumber, a partial reassembly using a custom-milled replacement piece is often cleaner than patching.
Pro Tip: If your walls are more than 1/4" out of plane across the window height, back-blocking the casing with a thin filler strip glued to the back face before installation is faster and more durable than shimming in the field. Cut the filler strip on the table saw and glue it to the casing back; then the whole assembly goes up as one flat unit.
What does a DIY Craftsman casing project cost and how long does it take?
| Item | Estimated Range | Notes |
|---|---|---|
| Paint-grade stock (single window) | $15–$35 | Poplar or finger-jointed primed boards |
| Stain-grade hardwood (single window) | $45–$110 | Douglas fir or oak; price varies by region |
| Fasteners, adhesive, caulk | $10–$15 | Per window; shared across a multi-window run |
| Nailer + compressor rental (day rate) | $40–$70 | Shared across all windows done in one session |
| Time: prep and demolition | 30 min or more per window | Longer if drywall repair is needed |
| Time: bench assembly of entablature | 30 min | One-time per profile; faster for repeat windows |
| Time: installation and finishing | 2–3 hours per window | Faster after the first window |
A competent DIYer working alone can typically complete a single standard window from prep through paint-ready finish in a half day. A run of four to six windows in the same room compresses to roughly two days total once the entablature profile is established and the workflow is set.
When material costs, tool rental, and time are weighed against a professional installation, custom millwork fabrication becomes cost-effective for projects requiring more than six windows with matched stain-grade profiles, or any window where the existing profile must be replicated exactly for preservation compliance.
Where can you find authoritative resources and when should you consult a millworker?
The technical literature on Craftsman and Arts and Crafts trim is well developed, and several resources stand out for their depth and accuracy.
Gepettomillworks specializes in Craftsman, Prairie, and Mission Revival millwork, with shop archives documenting historic profiles, entablature proportions, and matched fabrication for restoration projects. The Craftsman style millwork archives are a practical reference for homeowners trying to identify an existing profile or understand what a period-correct assembly should look like. For related Prairie School proportions and visual balance, the Prairie style millwork archives offer comparable documentation.
Consult Gepettomillworks when:
- The project requires exact historic replication of a profile no longer available in stock lumber.
- You need stain-grade entablatures matched across multiple rooms with consistent grain and color.
- The window opening is non-standard and a custom plinth block or entablature must be fabricated to fit.
- Historic tax-credit eligibility depends on documented profile replication.
A professional millwork shop adds value beyond fabrication: pre-assembled entablatures arrive on site as single units, grain is selected and matched in the shop, and custom plinths eliminate the field-fitting problems that consume the most time on complex installs.
Key Takeaways
Craftsman window casing achieves its architectural authority through proportional flat stock and a pre-assembled head entablature, not through complex joinery — and that simplicity makes it one of the most DIY-accessible period trim styles available.
| Point | Details |
|---|---|
| Proportion drives the look | Keep the head entablature face width at roughly twice the side casing width for balanced massing. |
| Install stool before casings | The stool establishes the baseline for all vertical work; fitting it first prevents alignment errors. |
| Pre-assemble the entablature | Bench-assembling the frieze, bead, and cap as one unit before mounting improves fit and finish quality. |
| Scribe, don’t caulk | Out-of-square openings require scribing and shimming, not caulk, to maintain crisp butt joints. |
| Gepettomillworks for custom work | For historic replication, matched stain-grade profiles, or tax-credit projects, consult Gepettomillworks’ restoration millwork services. |
The proportions matter more than the profile
The most persistent misconception about Craftsman window trim is that the style is simple because it is plain. It is plain, but plain done correctly requires more discipline than ornate work, not less. A Victorian casing can absorb a slightly mismatched reveal or an inconsistent shadow line because the eye has other details to follow. A Craftsman entablature has nowhere to hide. Every dimension is visible, every butt joint is exposed, and the proportional relationship between the head and the side casings is the entire visual argument.
What Gepettomillworks observes repeatedly in restoration work is that homeowners who struggle with Craftsman trim are usually working from stock that is too thin, or they have skipped the mock-up step and cut directly from a plan. The entablature that reads correctly in a room with 9-foot ceilings will look stunted in a room with 10-foot ceilings. That 12-inch difference in ceiling height changes the visual weight the trim must carry, and no amount of careful installation recovers from a proportionally wrong header.
The other consistent finding: the pieces that benefit most from shop pre-assembly are exactly the ones most DIYers try to fit on the wall. Pre-assemble the entablature, pre-finish it, and bring it to the site as a single unit. Document the profile with photographs and measurements before you install it, because if you ever need to match it in another room or replace a damaged section, those records are the only reliable reference you will have.
When does a project call for custom millwork fabrication?
Some Craftsman window casing projects are straightforward weekend work. Others — historic restorations, wide stain-grade entablatures, profiles that no longer exist in stock lumber, or multi-room installations where grain consistency matters — require a different level of precision than a lumberyard and a miter saw can deliver.

Gepettomillworks fabricates custom bungalow and Craftsman millwork to specification: matched entablature profiles, pre-assembled head units, stain-grade grain selection, and custom plinth blocks that eliminate the most time-consuming field-fitting problems. For projects subject to historic preservation review or tax-credit documentation, the shop’s archive of period profiles provides the verified reference that preservation officers require.
Before contacting a millwork shop, collect the following: photographs of the existing trim from multiple angles, the window opening dimensions (width, height, and jamb depth), and a physical sample or measured drawing of the existing profile if replication is the goal. That information allows Gepettomillworks to assess the project accurately and provide a realistic fabrication scope. To discuss a project or review the shop’s Craftsman profile archive, request a consultation directly.
Useful sources for further reading
A curated set of resources for diagrams, full project walkthroughs, and deeper technique articles:
- Craftsman Style Window Trim Installation Guide — Randy Lemmon: A practical, step-by-step walkthrough covering the defining characteristics of Craftsman casing and proportional assembly guidance.
- Craftsman-Style Casing — Fine Homebuilding: Detailed finish-carpenter perspective on proportionality, mock-up technique, and scribing for out-of-square openings.
- Assembling Craftsman Trim — JLC Online: The most technically specific resource on bench pre-assembly of the three-piece entablature, including adhesive selection and fastening sequence.
- How to Install Craftsman Trim — Family Handyman: Full project coverage with stool measurement methods, material selection advice, and installation photography.
- Dress Up Any Window with Period Trim — Fine Woodworking: Mario Rodriguez’s anatomy-of-a-window article covering Arts and Crafts, Federal, and Victorian trim compositions with detailed drawings.
- Renovation Detail: Arts and Crafts Interior Trim — Houzz: A homeowner-perspective account of restoring Arts and Crafts trim in a historic home, useful for understanding the aesthetic and preservation context.
- Gepettomillworks Craftsman Style Millwork Archives: Shop archive of Craftsman profiles, custom entablature examples, and restoration case studies for readers who need matched or replicated millwork.