by Matthew Wiley | Oct 5, 2026 | Architectural Millwork
Replacing windows on a contributing historic structure almost always requires design review before work begins, and the single most useful thing a homeowner can do first is document the existing windows and call commission staff for pre-application guidance. The Secretary of the Interior’s Standards for Rehabilitation favor repair over replacement, and many proposals that meet local rules move through staff-level approval rather than a full public hearing.
TL;DR:
- Using a detailed window condition survey with measurements, photos, and repair history is essential to justify replacement and streamline approval processes.
- Wood sash with true divided lights and narrow muntins are the preferred choice, especially for face-visible exterior facades of historic buildings.
- Approvals typically happen faster when applicants pre-submit physical mock-ups and clear profiles that match original period-specific window designs.
- Repair is prioritized over replacement unless deterioration is well documented, with energy-efficient retrofits like storm windows often favored.
- Non-compliance or unauthorized window work risks fines, stop-work orders, and loss of tax credits, making early consultation with review staff crucial.
Gepettomillworks
gepettomillworks.com
Craft Windows That Meet Historic Standards
Gepettomillworks creates custom millwork for historic building projects, helping preserve period-specific character in restoration work.
Explore custom millwork
Table of Contents
- Which approvals and agencies govern window work in U.S. historic districts
- How commissions evaluate windows: standards, criteria, and visibility rules
- Repair vs replacement: the window survey and proving replacement is necessary
- Typical timelines, application routes, and fast-track staff approvals
- Design and material choices that usually pass review (and what raises red flags)
- How to prepare a strong application: checklist of documents, mock-ups, and consultant roles
- Costs, incentives, and tax-credit considerations for historic window projects
- Consequences and how to avoid or resolve violations
- Practitioner perspective: our approach to approvals, mock-ups, and historic replication
- Common types of historic windows and their period-specific characteristics
- Common challenges and objections raised by historic commissions and strategies to address them
- Case studies or examples of successful window approval projects
- What homeowners get wrong about historic window approval
- How we can help with approval-ready historic window work
- FAQ
- Sources
Which approvals and agencies govern window work in U.S. historic districts
Authority over window changes typically sits with a local historic district or architectural review commission, which applies design guidelines adopted under a city or county preservation ordinance. State Historic Preservation Offices (SHPOs) weigh in when a project seeks state or federal rehabilitation tax credits, and the National Park Service reviews work tied to the federal tax incentives program. Local commission review and tax-credit review are separate tracks that sometimes run in parallel on the same house.
Homeowners will encounter a handful of recurring permit names:
- Certificate of Appropriateness (COA): required for exterior changes visible from the public right-of-way, typically reviewed by staff or the full commission depending on scope.
- Certificate of No Effect: issued when proposed work does not alter character-defining features, often a faster staff-level track.
- Permit for Minor Work: covers small, well-defined repairs that commissions have pre-approved as routine.
In Philadelphia, for example, work in a historic district or on the local register needs a Certificate of Appropriateness before replacement begins, and the city resolves the majority of these applications at the staff level rather than sending every case to a public hearing.
How commissions evaluate windows: standards, criteria, and visibility rules
Every review starts from the same premise: repair first, replace only when deterioration is documented. The Secretary of the Interior’s Standards direct owners to retain original sash and frames whenever feasible, and reserve replacement for windows beyond practical repair, with the replacement matching the original’s design, size, and visual qualities.
Reviewers typically judge a proposed window against several axes at once:
- Configuration and light count: the pattern of panes and sash divisions as it appears from the street.
- Operation: whether the original double-hung, casement, or fixed function is preserved.
- Material and profile depth: the thickness and shadow lines that wood produces and that thinner substitutes often flatten.
- Muntin detail: true divided lights versus a surface-applied grid read very differently up close.
- Finish and reflectivity: glossy modern coatings or reflective glass can clash with historic glazing.
- Façade context: a primary, street-facing elevation draws far stricter scrutiny than a rear or side wall hidden from view.
Commissions frequently grant more latitude on secondary façades and smaller outbuildings, and when original windows are already missing, the focus shifts toward overall compatibility rather than exact replication, according to NPS guidance on evaluating windows.
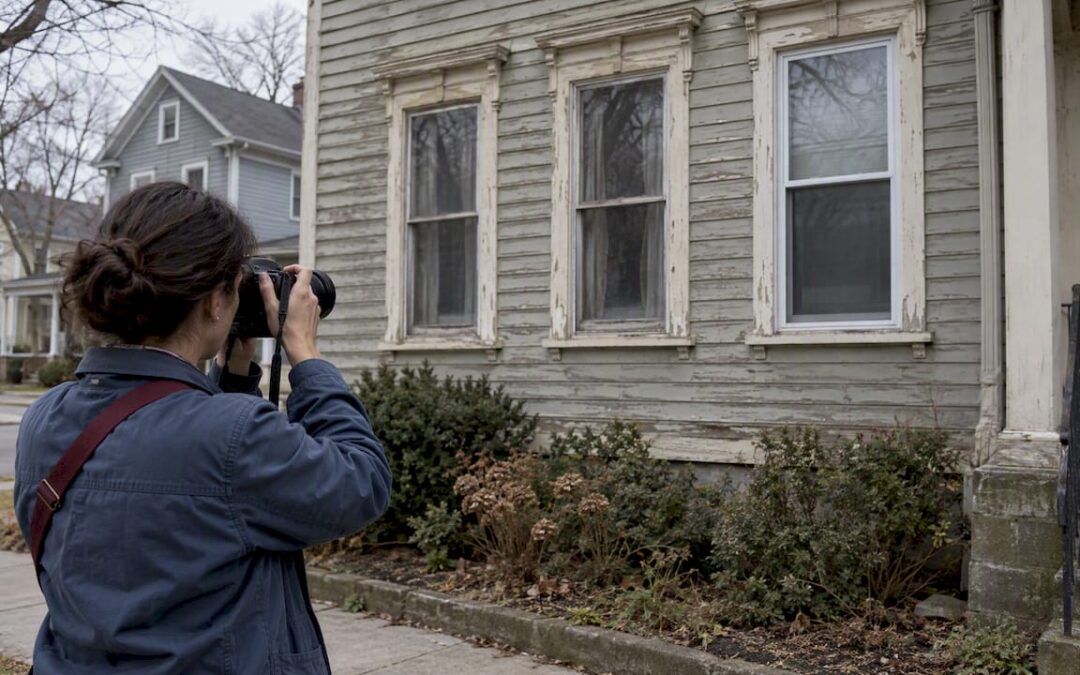
Pro Tip: Photograph your windows from the street before you plan anything. If a commissioner can’t easily see a window from a public way, your design options usually expand.
Repair vs replacement: the window survey and proving replacement is necessary
A condition survey is the evidence that turns “we want new windows” into an approvable application. Building one well means:
- Photograph every elevation and assign a unit number to each window that matches a floor plan or elevation drawing.
- Rate each unit’s condition on a simple scale, often Class I through IV, from sound to beyond repair.
- Record measurements, sash counts, glazing type, and any prior patch repairs or splices.
- Compile the photos, ratings, and measurements into a single window schedule that reviewers can cross-reference line by line.
Many problems that look like full-replacement cases turn out to be solvable with weatherstripping, sash cord replacement, selective wood splicing, or the addition of a storm window, and preservation offices such as the California Office of Historic Preservation note that retrofitting is often both cheaper and more likely to win approval than wholesale replacement. When replacement really is warranted, commissions expect to see the documented deterioration: rot photographs, structural failure, or a repair history showing the sash has already been spliced past the point of further repair.
Typical timelines, application routes, and fast-track staff approvals
Review timeframes vary by jurisdiction, but published municipal examples give homeowners a useful planning baseline.
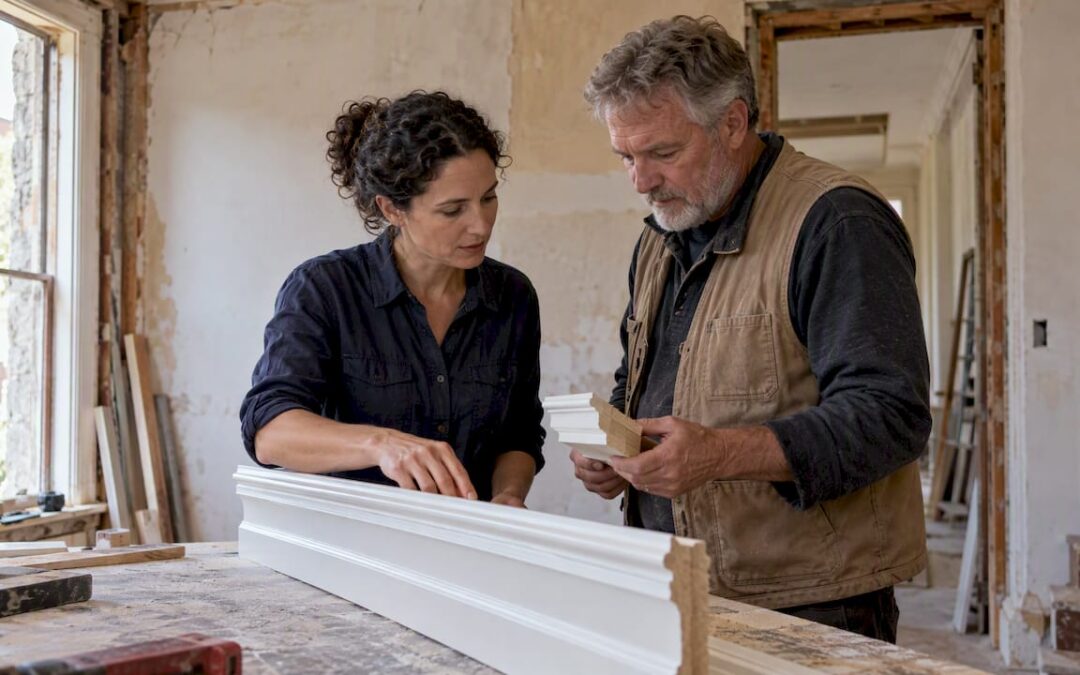
These figures, drawn from New York City’s Certificate of No Effect process, illustrate a pattern seen in many jurisdictions: staff-level approvals move faster than items that require a full public hearing. Work that clearly meets adopted guidelines rarely needs to go before the commission at all. For owners planning to replace windows in stages, a master plan lets a commission pre-approve a standard window design once, after which each later phase files against that approved standard instead of starting review from scratch, a mechanism LPC’s master plan program describes in detail.
Design and material choices that usually pass review (and what raises red flags)
Wood is the default expectation for historic sash, since it reproduces the profile depth and shadow lines that define a period window. Metal or fiberglass has been accepted in some cases, but almost always on buildings with limited visibility, modest architectural significance, or secondary elevations where an exact match matters less.
The distinction between true divided lights and a surface-applied grid is one reviewers notice immediately: the former produces real shadow lines at each muntin intersection, while the latter reads as flat from a few feet away. Getting the sash profile, muntin width, and glazing depth close to the original is often the deciding factor in whether a design is approved on a visible façade.
For energy performance, commissions tend to favor approaches that leave the historic sash intact:
- Interior storm windows installed behind the original sash, invisible from the street.
- Exterior storms built to fit the existing reveal rather than sit awkwardly on the surface.
- Retrofit insulating glazing set into the historic sash itself, keeping the original frame and muntins.
The NPS technical guidance on planning for window preservation and municipal fact sheets both treat storm windows and retrofit glazing as acceptable, commission-friendly ways to cut energy loss without altering the historic appearance; our notes on double-pane retrofit strategies cover how this plays out on actual sash.
Pro Tip: Build a small sample panel showing the proposed muntin profile and glazing before you submit. A physical mock-up often resolves staff questions faster than another round of drawings.
How to prepare a strong application: checklist of documents, mock-ups, and consultant roles
A complete application is the fastest path through review. At minimum, plan to submit:
- A full window survey with condition ratings and a numbered photo set tied to a window schedule.
- Measured sections showing sash profile, muntin dimensions, and glazing depth.
- Material and finish samples for the proposed replacement or repair.
- A written conditions assessment, ideally prepared or signed by a qualified preservation professional.
- A mock-up plan showing where and how a sample unit will be installed for staff review.
State programs are explicit about this level of detail. The Virginia Department of Historic Resources’ application checklist requires photo documentation, narrative descriptions, and drawings, and notes that incomplete submissions are a common cause of delay.
Depending on project complexity, it is worth bringing in outside expertise:
- An architect for sealed drawings on larger or structurally involved projects.
- A preservation consultant for the conditions assessment and historic documentation.
- A millwork fabricator for shop drawings, sample profiles, and the physical mock-up itself.
A well-built mock-up, paired with a sample profile reviewers can hold and compare, frequently settles visual-match questions that photographs alone cannot.
Costs, incentives, and tax-credit considerations for historic window projects
Costs generally fall into a predictable order: weatherstripping and sash repair cost the least, custom in-kind replacement costs more but is far less likely to trigger corrective work later, and stock replacement windows that fail review end up costing the most once removal and a compliant redo are factored in.
Federal and state rehabilitation tax-credit programs add another layer worth planning around:
- Programs tied to the federal tax incentives program require documented review and generally favor repair or in-kind replacement over wholesale substitution.
- Incomplete or missing documentation, as the Virginia application checklist notes, is a frequent cause of delayed or denied tax-credit claims.
- Local utilities and municipalities sometimes offer energy-efficiency rebates for storm windows or insulating retrofits; checking with your local commission or utility before committing to a product is worth the phone call.
Consequences and how to avoid or resolve violations
Replacing windows without approval can bring fines, a stop-work order, or a commission directive to remove the new windows and restore the originals, and it can jeopardize eligibility for a pending tax credit. If work has already started without a permit, stop immediately, photograph the current state, and call commission staff rather than waiting for an inspector to find it. Filing an after-the-fact application with a mitigation plan, and showing willingness to adjust the design, often resolves the matter without the harshest penalty.
Practitioner perspective: our approach to approvals, mock-ups, and historic replication
On projects in Richmond and at Jamestown, we have built applications around a documented window survey, measured shop drawings, and a physical mock-up submitted before the full application, which commission staff can review against the adopted guidelines without guesswork. Clients who pre-submit sample profiles alongside their survey consistently move through staff review faster than those who rely on photographs alone. Our Richmond restoration work and historically accurate window projects follow this same documentation sequence on every commission.
Common types of historic windows and their period-specific characteristics
Window character shifts by period in ways commissions are trained to recognize immediately. Federal and Georgian houses, built roughly through the early 1800s, favor tall double-hung sash with six-over-six true divided lights and slender muntins. Greek Revival homes of the 1830s through 1850s often widen the panes and simplify the muntin pattern to six-over-six or two-over-two, with heavier surrounds.
Victorian-era houses, spanning roughly 1860 to 1900, introduce decorative glazing patterns, including two-over-two sash topped with multi-pane or textured transoms, along with bay windows and arched tops on Queen Anne and Italianate examples. Craftsman and Bungalow houses of the early twentieth century typically pair a multi-pane upper sash, often six or nine lights, over a single-pane lower sash, emphasizing horizontal bands of wood muntins.
Colonial Revival and Neoclassical homes built into the 1930s and 1940s often return to symmetrical six-over-six or eight-over-eight patterns, sometimes with a fanlight or sidelights at the entry echoing earlier Federal details. Mission Revival and Spanish Colonial Revival houses, common across the same decades, favor casement sash with simple divided lights and deep-set reveals suited to stucco walls.
Each of these periods carries its own expectations for muntin width, pane proportion, and sash depth, and a commission comparing a proposed replacement against the house’s actual period is checking for exactly these details, not a generic “old-looking” window.
Common challenges and objections raised by historic commissions and strategies to address them
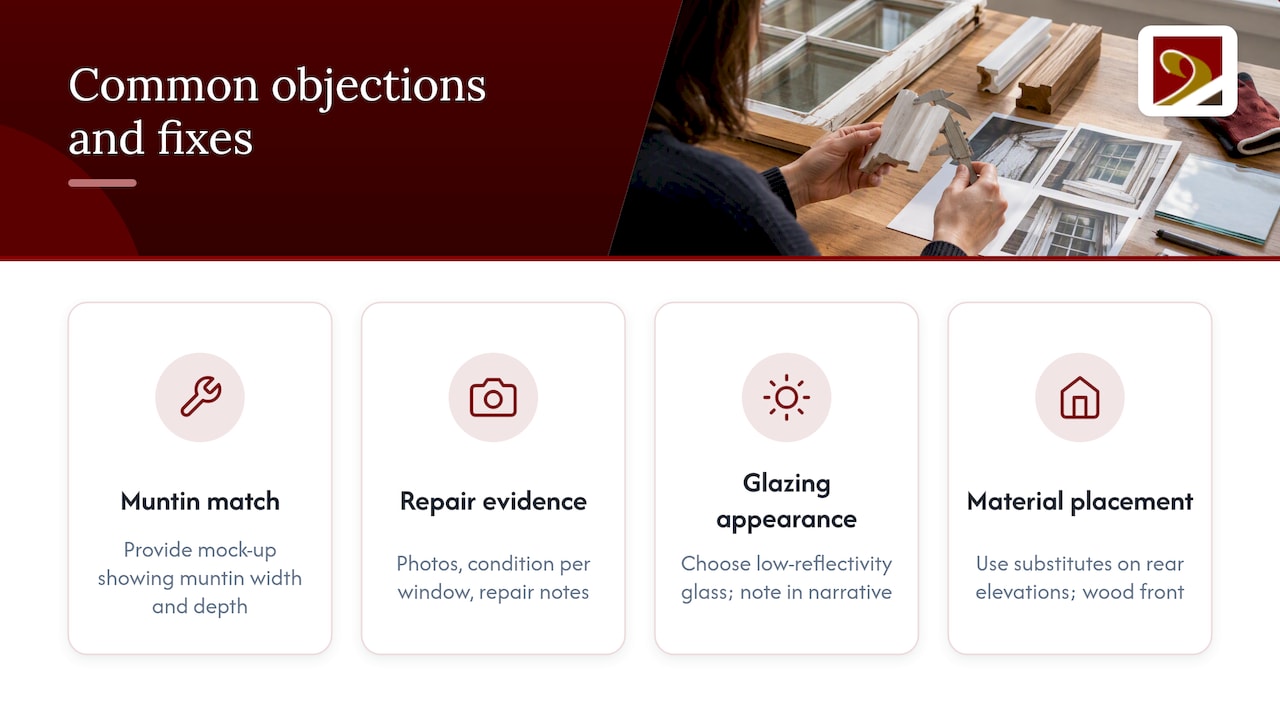
The most common objection is a mismatch between the proposed muntin profile and the original, particularly when an applicant proposes a simulated-divided-light window with a flat, surface-applied grid instead of true divided lights. The fix is almost always a physical sample: a small mock-up section showing the actual muntin width and glazing depth resolves this faster than another revised drawing.
A second recurring objection involves insufficient evidence that repair is impossible. Commissions that favor the repair-first standard will push back on a replacement request that lacks a documented condition survey, so arriving with photographs, a condition classification per window, and notes on prior repair attempts heads off this objection before it is raised.
Reflectivity and glazing appearance generate a third category of pushback, since some energy-efficient glass reads as noticeably shinier or more mirror-like than historic glass. Choosing a low-reflectivity glazing option and noting it in the application narrative usually satisfies this concern.
Finally, commissions sometimes object to material substitutions on primary façades even when a product performs well. Reserving substitute materials for secondary or rear elevations, and keeping wood on the street-facing façade, tends to resolve this tension without a drawn-out appeal.
Case studies or examples of successful window approval projects
Approved-window lists published by several municipal commissions show a consistent pattern: projects that pair a documented survey with a sample profile or mock-up tend to clear staff review without a public hearing, while projects relying only on manufacturer cut sheets more often get kicked up to the full commission for additional questions. Successful applications typically share three traits: a window schedule that ties every proposed unit back to a photographed condition, a sample or mock-up the reviewer can physically inspect, and a narrative that explains why repair was ruled out rather than simply asserting that replacement is needed.
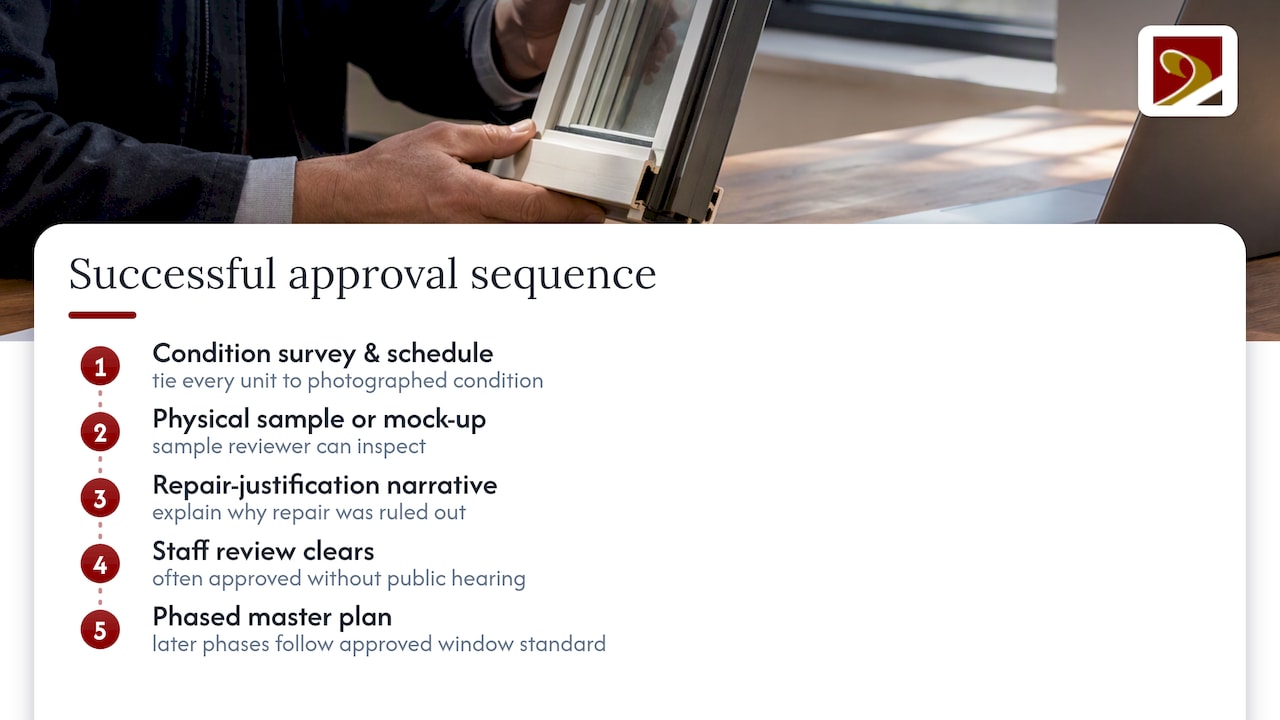
On a practical level, projects that phase their window work under a master plan, rather than filing a single large replacement request, often see faster approvals on each subsequent phase because the commission has already signed off on the window standard itself. That approach, described in municipal guidance on phased master plans, rewards owners who are willing to front-load documentation once instead of repeating the full review for every window.
What homeowners get wrong about historic window approval
The most common mistake is treating the commission as an obstacle to negotiate around rather than a technical reviewer to persuade with evidence. Homeowners who show up with a strong survey and a physical sample rarely face the drawn-out disputes that generate so much of the frustration around this process; those who show up with a sales brochure for a vinyl replacement window almost always do.
The conventional advice to “just ask for an exception” undersells how much latitude already exists within the Standards themselves, particularly on secondary façades and smaller structures. The real lever is documentation, not persuasion. A commission that sees a condition survey, measured profiles, and a sample muntin section has very little reason to escalate a case to a hearing.
If there is one priority worth adopting before any other, it is this: build the window survey before drawing a single replacement sash. Everything else in the application, from the narrative to the mock-up, follows naturally once that record exists.
— Gepetto
How we can help with approval-ready historic window work
We build custom wood windows, shutters, and doors matched to a building’s original profiles, and we prepare documentation suitable for commission review: window surveys, measured shop drawings, sample profiles, and physical mock-ups ready for staff review.

Our focus stays on exact historic replication, which also supports eligibility for historic tax-credit programs that require in-kind matching. If you’re planning a window project in a historic district, the first practical step is a site survey and conditions assessment, something our historic window restoration team can schedule before you file anything with your local commission. For custom replacement units built to match your home’s original sash, see our wooden windows program.
FAQ
What type of replacement windows are best for historic homes?
Custom wood windows built to match the original sash profile, muntin pattern, and glazing depth are generally the strongest fit for historic homes, since commissions evaluate exactly these details against the building’s period. Metal or fiberglass units are sometimes accepted on secondary façades or less visible elevations, but wood remains the default expectation on street-facing walls.
Can I replace windows in a Grade 2 listed building?
“Grade 2 listed” is a United Kingdom designation, not a U.S. classification, so American homeowners should check their property’s status under the local historic district ordinance or the National Register instead. In the United States, replacement on a contributing historic structure typically requires a Certificate of Appropriateness or similar local approval before work begins.
When did they stop using single-pane windows?
Single-pane windows remained standard well into the mid-twentieth century, with insulated double-pane glazing becoming common in American residential construction as energy codes evolved. Many historic homes built before that shift still carry original single-pane sash, which is why retrofit storm windows and interior insulating glazing are common preservation-compatible upgrades.
What are historic windows?
Historic windows are the original or period-appropriate sash, frames, and glazing installed when a building was constructed, carrying details like true divided lights, specific muntin profiles, and sash depth tied to their architectural era. Preservation standards generally treat them as character-defining features that should be repaired rather than replaced whenever feasible, under the Secretary of the Interior’s Standards for Rehabilitation.
Sources
Before filing anything, confirm your local commission’s exact checklist and your state SHPO’s current submission requirements, since forms and required documentation vary by jurisdiction.
Recommended
by Matthew Wiley | Oct 4, 2026 | Architectural Millwork
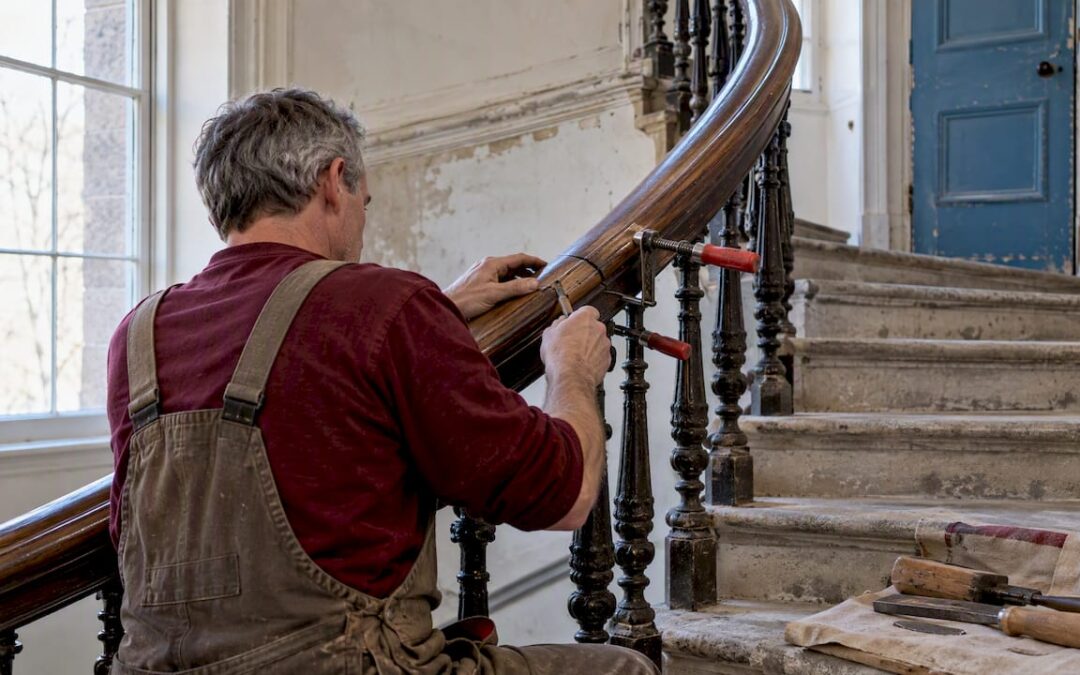
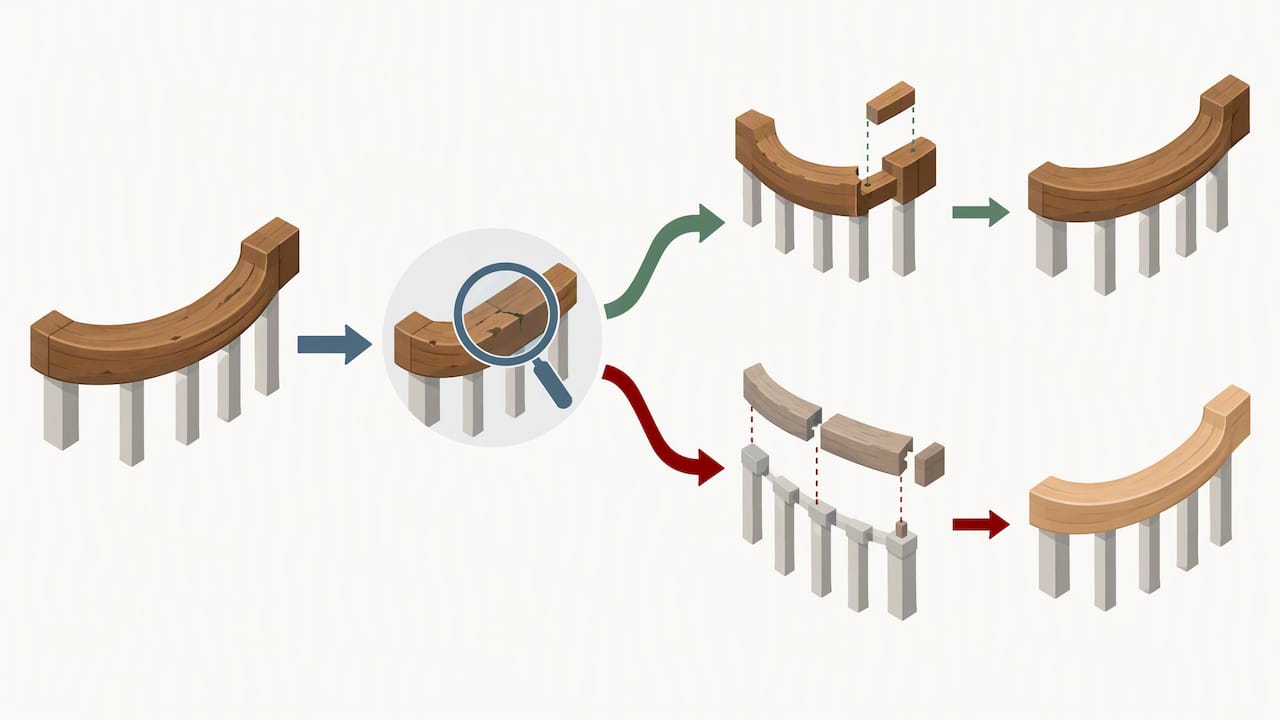
For preservation-grade projects, the governing rule is repair before replacement: a curved stair handrail should be spliced, patched, or pieced in where the original fabric allows, with full replacement reserved for sections where deterioration or structural failure makes repair infeasible. When replacement is unavoidable, the new work matches the original profile, species, and joinery, documented thoroughly enough to satisfy both conservation ethics and historic tax-credit review.
TL;DR:
- Repair and patch curved handrails are preferred unless deterioration is extensive or safety concerns require full replacement.
- Documentation, including measured drawings and photographs, is crucial before proceeding with any repair or replacement work.
- Early consultation with preservation agencies and code officials can help identify reversible modifications that meet safety standards while preserving historic integrity.
- Mockups and on-site fitting are essential steps to ensure profile accuracy and minimize original material loss during restoration.
- Costs and timelines vary depending on the complexity of the radii, species choice, and discovery of hidden deterioration during the project.
Gepettomillworks
Preserve Historic Handrail Detail
Gepettomillworks creates custom millwork for historic building projects, supporting careful repair and replacement work.
Visit Gepettomillworks
Table of Contents
How to determine whether a curved handrail should be repaired, spliced, or replaced
The Secretary of the Interior’s Standards for Rehabilitation call for the least degree of intervention: fix what can be fixed, and match what must be replaced in design, material, and texture. Applying that principle to a curved handrail starts with an honest accounting of where the damage sits and how far it extends.
Isolated rot at a newel connection or a cracked easement reads differently than a run compromised along its full radius, where structural fiber has failed under load. Conservation value weighs against life safety only when the two genuinely conflict; most deterioration can be stabilized without sacrificing original material.
- Map the extent and location of decay: a localized defect favors splicing, while pervasive failure may justify replacement of that section only.
- Weigh structural safety against what the handrail’s age and craftsmanship contribute to the building’s character.
- Test the economic and technical feasibility of in-kind repair methods, such as piecing-in or consolidation, against the cost of full replication.
- Gather physical evidence, measured drawings, and photographs before concluding that replacement is the only option, since that documentation becomes part of the justification record.
Professional workflow for curved handrail restoration
A disciplined sequence protects original fabric and produces the paper trail that preservation review expects.
-
Survey and document. Record condition with a keyed photo set, measured drawings, and material samples, the same documentation NPS requires for Part 2 certification applications.
-
Build mockups. A sample section confirms profile, tone, and attachment method before committing shop time to a full run.
-
Apply repair techniques in order of intervention. Rehabilitation guidance favors patching, splicing, piecing-in, and consolidants over wholesale removal, with slip-in tread repairs preserving original stock wherever joinery allows.
-
Fabricate replacement sections only where justified. Laminated bending suits continuous radii; carved profiles suit tight curves or decorative transitions where grain visibility matters.
-
Field-fit and finish. Each piece is scribed to its neighbor before final fastening, since curved runs rarely hold a single consistent radius.
-
Produce as-built documentation. Final photographs and drawings close out the record for client files and, where applicable, Part 3 certification.
Pro Tip: Cut mockup sections slightly long and trim to fit on site; curved stock shrinks and twists differently than the straight runs most shops are used to milling.
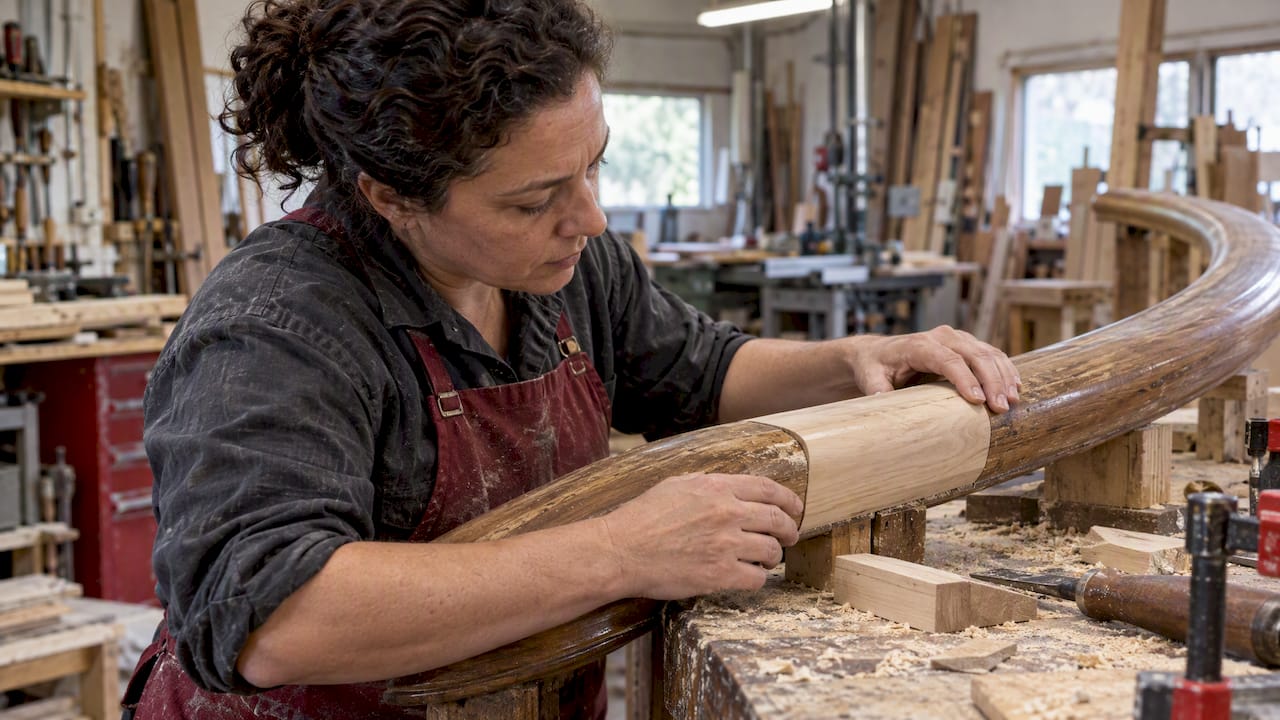
Slip-in tread and rail repairs at Independence Hall demonstrate how skilled joinery can preserve the majority of original stock while reading as seamless at normal viewing distance, an approach we apply on our own period stair case projects whenever the original profile survives intact.
Reconciling building codes with the Secretary’s Standards
Code officials and preservation review do not always agree on the right answer, which is why early conversation matters more than a late-stage appeal. Consulting the State Historic Preservation Office and local code officials before design finalizes almost always produces a better outcome than retrofitting a compliant rail after the fact.
ITS-46 guidance illustrates compatible, reversible solutions that satisfy code without erasing character-defining fabric.
- A thin supplemental inner rail, mounted below the historic rail, can meet grip and height requirements without altering the original.
- An inset painted metal rail that follows the stair’s contour reads as contemporary while preserving the wood profile behind it.
- Reversible height-raising brackets allow removal without damage if code requirements or the building’s use change later.
- Every design decision, along with the rationale for choosing it, belongs in the documentation package submitted for review.
Reversible supplemental rails that are visually distinct from the historic fabric are often an acceptable path to code compliance when properly documented, a strategy ITS-46 presents as preferable to obtrusive permanent additions that diminish historic character.
Scheduling and cost factors for preservation-grade projects
Budgets and timelines on these projects hinge on variables that a standard renovation schedule rarely accounts for.
- Review windows at the state and federal level can add weeks to a schedule when a project is pursuing the federal historic rehabilitation tax credit, so preliminary Part 2 drawings should go in early rather than after construction starts.
- Fabrication lead time depends on method: laminated bending for continuous curves typically moves faster through the shop than hand-carved profiles for tight or decorative radii, which usually take longer.
- Species selection and grain matching drive cost directly, since a curved run demanding visible continuity of figure limits which boards in a lift can be used.
- The number of distinct radii in a single run multiplies mockup time, because each transition point may need its own test fit.
- Contingency budget for discovery, the rot or prior repair work found only once a handrail is opened up, keeps a tight schedule from becoming an emergency.
What to require from a historic millworker
Procurement decisions made before a contract is signed determine most of the outcome.
- Review a shop’s portfolio for completed curved staircases and restoration case studies with photographs, not renderings.
- Require measured drawings, a keyed photo survey, mockups, material samples, a written scope, a realistic schedule, and warranty terms in the proposal.
- Write mockup sign-off into the contract as a milestone, along with clear acceptance criteria for what counts as an in-kind match.
- Define discovery change-order rules up front so hidden deterioration does not stall the project in a billing dispute.
- Confirm the millworker can produce documentation formatted for NPS or SHPO electronic submission, since documentation standards reject photographs that are low resolution or unkeyed to plans.
Pro Tip: Ask for a single reference project where the shop’s repair was reviewed and approved under a tax-credit application, not just a restoration they completed independently; approval history tells you more than craftsmanship alone.
Protecting the stair during construction
A handrail survives careful millwork only if it also survives the rest of the job. Custom plywood frames built around balustrades, paired with padded guards along the rail itself, prevent the dings and scrapes that other trades inflict without meaning to, as recommended by construction experts like Mr Build Co..
- Layer tread protection with fiberboard over sacrificial plywood, and avoid adhesive tapes that pull original finish when removed.
- Assign on-site supervision and mark protection zones on the construction drawings so every worker on site understands the boundary.
- Sequence other trades to use alternate routes wherever possible, keeping stair traffic to a minimum during the roughest phases of work.
Preservation Brief 18 treats these protective systems as the most cost-effective insurance against irreparable loss, far cheaper than any repair that follows a preventable accident.
Why early millworker involvement protects preservation value
We have found that bringing a millworker into the conversation during design, not after demolition starts, changes what is possible. A rail assessed and documented before construction begins almost always has more original material worth saving than one examined after other trades have already touched it.
Our portfolio of milled staircase projects reflects that pattern: surveys, mockups, and SHPO coordination scoped early, repairs executed with full documentation intact. That sequencing tends to lower overall project cost, since late-stage discovery rarely comes with the luxury of a calm schedule.
— Gepetto
How Gepetto Millworks can support your curved handrail repair project
We fabricate and restore period stair cases and balustrades for historic buildings, with documentation support built into our process for clients pursuing historic-preservation certification.
- Request a measured survey and photo key before we quote repair versus replacement.
- Ask for a mockup section so you can confirm profile and finish before full fabrication begins.
- Tell us your timeline and whether NPS or SHPO coordination is part of the scope, so we can plan review windows into the schedule.
Reach out through our architectural millwork bid request page to start the conversation, or browse our custom fabrication services for the full range of what we build.
FAQ
What is the Secretary of the Interior’s Standards approach to handrail repair?
The Secretary of the Interior’s Standards call for repairing historic features whenever possible rather than replacing them. When replacement is unavoidable, the new work must match the original in design, material, color, and texture.
When is replacing a curved handrail the right call instead of repair?
Replacement is appropriate once deterioration is pervasive enough, or structurally unsafe enough, that patching, splicing, or piecing-in can no longer restore the rail’s integrity. Rehabilitation guidelines recommend substantiating that conclusion with photographic and physical evidence before fabrication begins.
What documentation does a tax-credit application require for handrail work?
Applications need clear, keyed photographs and measured drawings submitted through the Historic Preservation Certification Application process, generally in Parts 1 through 3. Electronic submission is required, and photos that are low resolution or not keyed to plans can hold up review.
Can a historic handrail be modified to meet modern building code?
Yes, through reversible, visually distinct additions such as a thin supplemental rail or an inset metal rail that follows the original contour, as illustrated in ITS-46 guidance. These solutions are generally preferred over permanent alterations that obscure the historic rail.
Does Gepetto Millworks handle curved stair handrail restoration?
Yes, we fabricate and restore period stair cases and balustrades for historic buildings, including documentation support for clients pursuing historic-preservation tax credits. Project pricing is available on request based on scope and condition.
Sources
These sources set the standards and documentation requirements that govern preservation-grade curved handrail work, and consulting them directly helps architects and contractors prepare submissions that withstand SHPO and NPS review.
Recommended
by Matthew Wiley | Oct 3, 2026 | Architectural Millwork
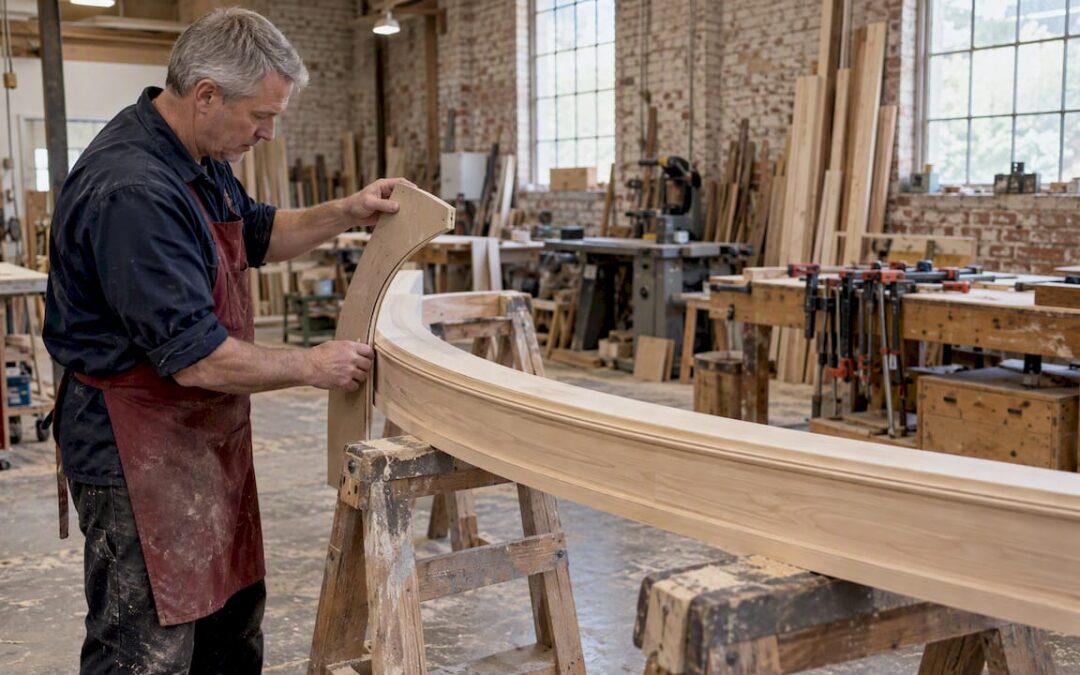
Five fabrication families govern nearly all radius millwork: solid machining (nested band-sawing), block-lamination, ply-lamination, core-veneering, and kerfing. The governing rule is simple: ply-lamination and core-veneering suit tight radii and continuous grain, solid machining and block-lamination suit gentler curves and longer runs, and kerfing serves field bends where the specification permits it. Preservation projects add a further demand: matching material, full-scale templates, and approved mock-ups before anything leaves the shop.
TL;DR:
- Ply-lamination and core-veneering are best suited for tight radii on curved profiles, while solid machining and block-lamination work better on gentler curves and longer runs.
- Full-scale templates and mock-ups are essential for preservation projects and when matching original grain and material in historic replication.
- Material species, ply thickness, and moisture conditioning directly impact achievable radius, with thinner plies and proper prep enabling tighter bends.
- Shop schedules depend heavily on form production, custom knife grinding, and adhesive curing times, which influence costs and delivery timelines.
- Concealing glue lines requires careful sanding, color-matched fillers, and proper staining, with verification protocols to ensure consistent appearance and quality.
Gepettomillworks
gepettomillworks.com
Bring Historic Curves Into Focus
Gepettomillworks creates custom millwork for historic building projects, including radius work and historic replication for approval.
Discuss your millwork project
Table of Contents
Fabrication methods explained: strengths, limits, and visual outcomes
Solid machining, or nested band-sawing, cuts the curve directly from solid stock, following the arc’s layout on a bandsaw before final shaping. It gives continuous grain and a clean, traditional appearance, but stock width limits the length of any single piece without a joint, which matters on wide elliptical heads or long sweeping casings.
Block-lamination glues smaller blocks together before bandsawing the curve from the built-up mass. It extends beyond what a single board can offer and suits moderate curves where some glue-line visibility on the face is acceptable.
Ply-lamination bends thin plies around a form, letting the curve take shape without external bracing once cured. The AWS standard notes that this method keeps glue lines running with the edge grain and the curve itself, which makes them far less conspicuous than a kerfed or segmented joint.
Core-veneering wraps a veneer face over a shaped substrate, giving the fabricator close control over figure and color on visible surfaces while the substrate handles structure.
Kerfing saws a series of closely spaced cuts into the back face of a board, allowing it to flex into a curve on site. It is fast and economical for gentle, non-structural bends, but it tends to leave flats on the face in tighter radii, a tradeoff worth weighing before specifying it for decorative work.
How to choose a method: decision criteria and quick rules of thumb
Method selection comes down to a handful of axes: how tight the radius is, whether the profile face is simple or deeply molded, how much grain continuity the design demands, how long the run is, whether the piece carries structural load, and what the budget and schedule allow.
- Tight radius with visible grain flow: specify ply-lamination or core-veneering.
- Gentle curve, long run, cost-sensitive: solid machining or block-lamination.
- Non-structural field bend where flats on the back face are acceptable: kerfing.
- Deeply molded decorative profile on a tight arc: ply-lamination with custom knife work.
- Historic replication where original material and grain pattern must match: solid machining or segmented lamination, confirmed by mock-up.
Specifications should mandate a method outright when grain continuity or historic accuracy is non-negotiable. Where appearance tolerance is looser, “manufacturer’s option with approved mock-up” gives the shop latitude without risking an unacceptable result on a finished building.
Materials and grain: species selection, ply thickness, and moisture prep
Species choice balances workability against figure. Mahogany, white oak, and sapele machine and bend predictably and take stain evenly, while figured woods like curly maple offer striking grain but complicate bending and glue-line concealment.
Grain orientation controls how continuous the curve reads to the eye. Selecting veneer faces with matching grain direction, and sequencing them around the form in order, keeps the arc looking like one continuous sweep rather than a patchwork.
Ply thickness and species set the practical radius limit for lamination work: thinner plies bend tighter but require more laminations and longer clamp cycles to build the same finished thickness. Moisture conditioning before bending reduces springback once the piece leaves the form and lowers the risk of delamination at the glue line, a failure that shows up months later as a visible crack rather than at the bench.
Templates, shop drawings, and field measurement best practices
Full-scale templates and scribed arcs remain standard practice for radius elements because a drawing at reduced scale cannot reliably capture a curve’s true geometry. Shops typically transfer the template directly to the layout stock, eliminating the compounding error that comes from scaling up a small drawing.
- Produce a full-scale template or scribed arc from field measurements before cutting any stock.
- Draft shop drawings showing profile, sightlines, tolerances, blocking, and installation notes consistent with AWI submittal requirements, which call for drawings per AWI 100 submittal practices and field verification where applicable.
- Verify field dimensions against the original opening or existing fabric before committing to final production.
- Build and submit a mock-up for review and sign-off before full production begins.
On preservation projects, this sequence also satisfies the documentation that review agencies expect to see before approving replacement work.
A radius shop runs on a defined set of equipment: bandsaws for rough curves, vacuum or clamp-up forms for lamination, routers and trammel jigs for profiling, and custom-ground molding knives for matching historic sections. The Popular Woodworking guide to routing arches describes trammel jigs and progressive shallow routing passes as the standard approach to shaping curved panels without tear-out, a technique that scales directly to arched casings and moldings.
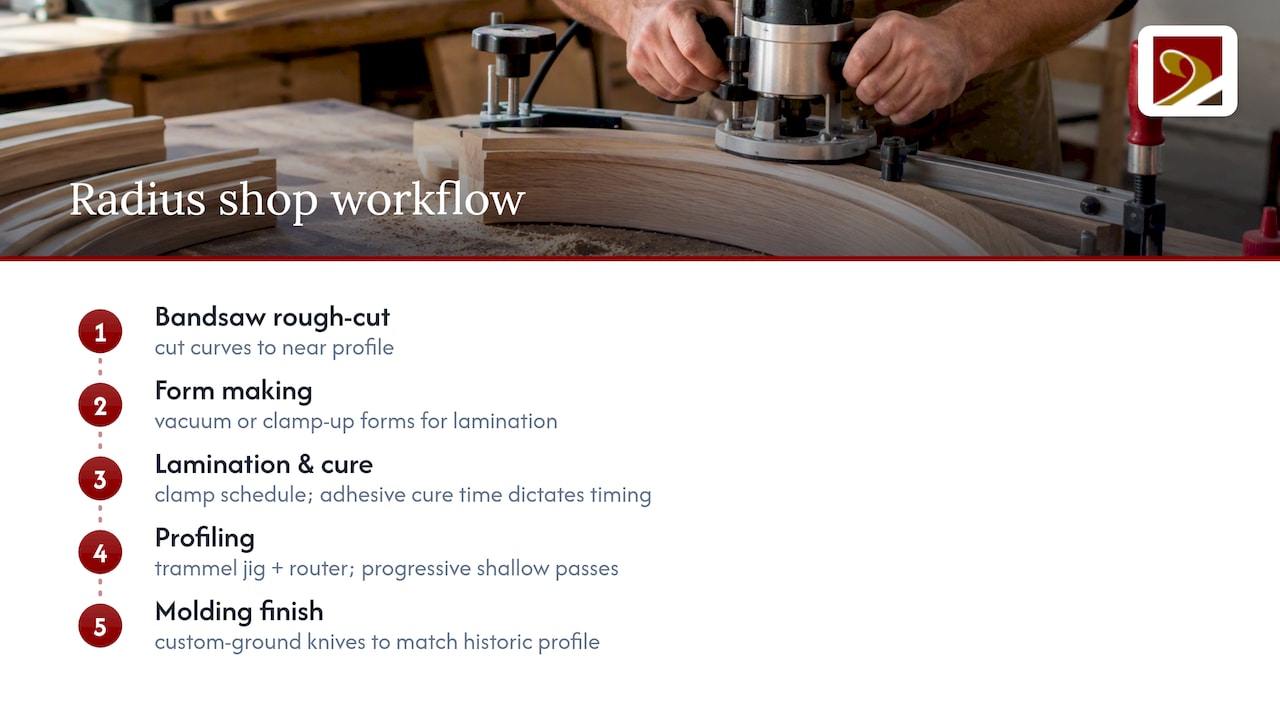
Form production and clamp schedules drive much of the timeline on laminated work, since adhesive cure times cannot be compressed without risking a weak glue line. Custom knife grinding, often needed to replicate a historic profile exactly, adds its own lead time before a single foot of molding runs. These production realities, more than the cost of raw material, typically set the schedule and the price on a radius order.
Finishing and quality control: concealing glue lines and verifying appearance
Sanding progression matters more on curved work than on flat stock, since tool marks and glue-line ridges catch light differently along an arc. A graduated sequence, moving through successively finer grits, removes machine marks and blends laminated joints before any filler or stain goes on.
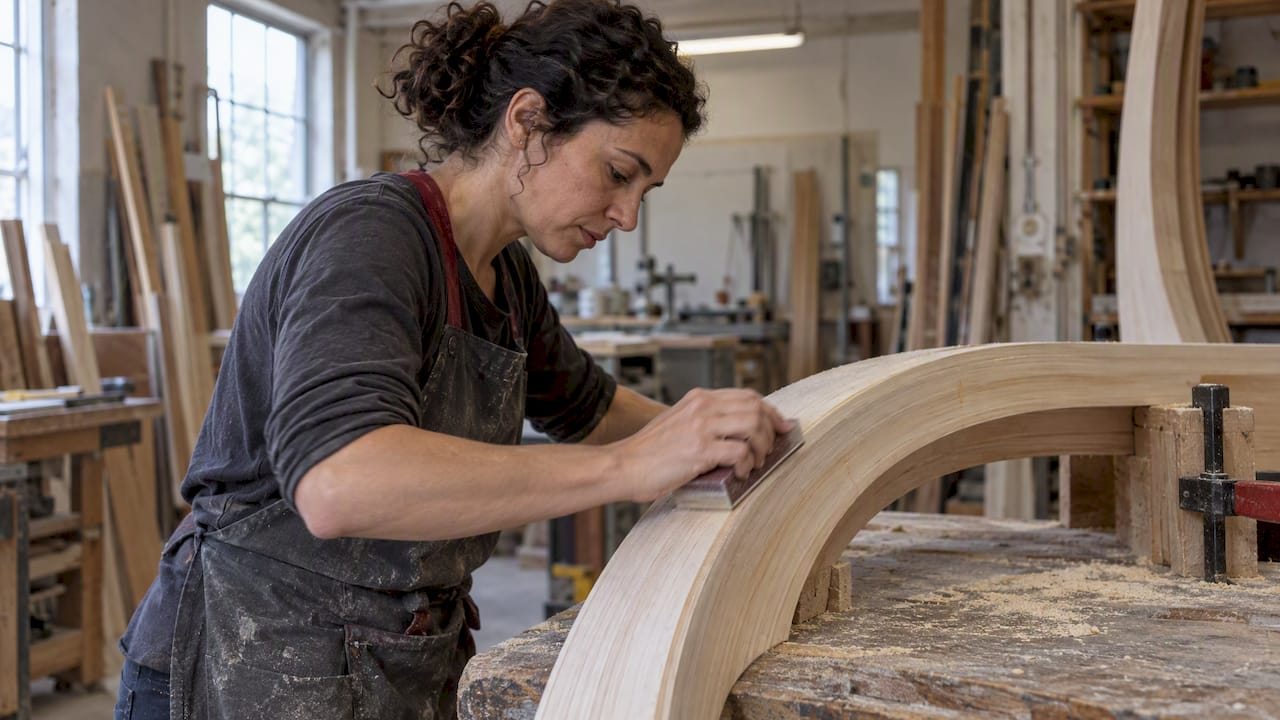
Color-matched fillers and careful staining sequence conceal glue lines on ply-laminated and block-laminated pieces, particularly where edge-grain lines follow the curve and sit less conspicuously than a kerfed flat. Pre-finishing or back-priming faces that become hard to reach after assembly, such as the inner easements of a narrow arched sash, protects the finish and avoids rework once the piece is installed.
Quality control on radius work should include a sightline check against the template, an adhesion test on sample laminate, and, for performance-critical assemblies, a prototype sent for independent verification before full production proceeds.
Historic preservation considerations: matching originals and review approval
The Secretary of the Interior’s Standards for Rehabilitation call for replacement work to match the original in design, material, and visual quality, reserving full replacement for elements too deteriorated to repair. The NPS technical note on replacement wood sash describes shops building full-scale templates, grinding custom knives, and producing a prototype window before committing to a production run. Preservation Brief 9 adds that splicing, custom milling, and economies of scale on larger projects are standard tools in this kind of work.
- Match original material species and grain character, not just the visible profile.
- Submit templates and mock-ups for agency review before production begins.
- Document the approval record carefully, since tax-credit projects depend on it.
When original stock dimensions fall short, segmented laminations and bandsawn sections joined with custom knife work let a shop hold the sightline and strength the design calls for.
Pro Tip: Run a sanding and stain trial on a sample laminate before committing to full production. It catches glue-line visibility problems while they are still cheap to fix.
Gepetto’s checklist for specifying radius millwork in contract documents
A short checklist for specifying radius millwork in contract documents includes requiring full-scale templates and an approved mock-up before production, clarifying ownership of custom-ground knives, and explicitly setting installation tolerances.
Build knife-grinding and form-construction time into the schedule from the start, and phase a mock-up approval before committing to final runs. Proper documentation from template to installed piece and coordination with preservation review bodies helps ensure the paper trail matches the work on the wall.
— Gepetto
Gepetto services: custom radius millwork and historic replication
Radius work rewards a shop that treats templates, knife work, and mock-ups as standard practice rather than an upcharge. Custom radius millwork often includes arched sash, curved casings, and replicated historic profiles, typically accompanied by documentation suitable for preservation review and tax-credit projects.
Architects and contractors working on a radius element now, whether new construction or a historic facade, can start with a shop drawing request through either page above.
Sources
FAQ
What is millwork fabrication?
Millwork fabrication is the shop process of designing, machining, and finishing custom wood elements such as windows, doors, trim, moldings, and staircases for a specific building rather than pulling stock parts off a shelf. It typically moves from shop drawings and templates through machining, assembly, and finishing before installation.
What is a millwork manufacturer?
A millwork manufacturer is a shop that designs and produces custom wood building components, often working from architect drawings, field measurements, and, on preservation projects, matching samples of the original material. Many millwork manufacturers also handle restoration and replication work alongside new fabrication.
Is millwork custom?
Millwork can be either custom-fabricated to a specific building’s dimensions and profiles or sourced as stock trim and molding. Radius elements like arched casings and curved sash are almost always custom, since a standard stock profile cannot follow a bespoke curve or match a historic original.
What is custom architectural millwork?
Custom architectural millwork refers to wood building elements, trim, cabinetry, windows, doors, and staircases among them, designed and fabricated for a particular project rather than selected from a catalog. On historic buildings, it often includes matching an original profile in material, grain, and visual quality under standards such as the Secretary of the Interior’s Standards for Rehabilitation.
How tight a radius can millwork be fabricated to?
The achievable radius depends on the method and species: ply-lamination with thin plies and a bendable species like mahogany can follow a tighter curve than solid machining or block-lamination allow. The AWS standard notes that ply thickness and species set the practical limit, and a sample laminate test is the reliable way to confirm a given radius before committing to production.
Recommended
by Matthew Wiley | Oct 2, 2026 | Architectural Millwork
The federal historic rehabilitation tax credit delivers a 20% income tax credit for the certified rehabilitation of income-producing historic buildings in the District of Columbia, but it demands formal certification from the DC State Historic Preservation Office and the National Park Service, along with rigorous adherence to the Secretary of the Interior’s Standards for Rehabilitation. Primary residences do not qualify. Every eligible dollar of qualified rehabilitation expenditure must be documented and defensible.
TL;DR:
- The property must be listed individually on the National Register or part of a registered historic district recognized by DC SHPO to qualify for the federal historic tax credit.
- Eligible uses are limited to income-producing functions such as commercial leasing, rental apartments, or mixed-use development, excluding primary residences.
- Qualified rehabilitation expenditures include structural repairs, window restoration, roof replacement, and mechanical upgrades, but exclude soft costs like landscaping or new additions beyond the historic footprint.
- Projects must complete a three-part application process with approved design prior to any irreversible work, with detailed documentation of all work and costs supported by precise shop drawings and photographs.
- Pairing the federal historic credit with other tools like LIHTC is common for larger projects, but early coordination is essential to optimize financial benefits and avoid recapture risks.
Gepettomillworks
Support Historic Millwork Projects
Gepettomillworks creates custom millwork for historic building projects involving architects, builders, contractors, and restoration professionals.
Table of Contents
Who and what qualifies for the federal rehab tax credit in DC
Eligibility for the federal credit rests on four pillars, and each one carries its own documentation burden. The property must first achieve certified historic structure status: listed individually in the National Register of Historic Places, or recognized as a contributing building within a registered historic district, a designation that in DC often overlaps with local landmark status administered through the DC Historic Preservation Office. NPS eligibility guidance confirms this certification step as foundational: without it, no amount of sensitive rehabilitation work earns the credit.
The second pillar concerns use. The building must generate income, whether through commercial leasing, rental apartments, or mixed-use development that combines ground-floor retail with upper-floor housing. A rowhouse converted entirely to an owner-occupied primary residence forfeits eligibility, a distinction that surprises many DC homeowners drawn to the credit by neighborhood rehabilitation stories that actually involved investment properties.
Third comes the substantial rehabilitation test, a formula rather than a judgment call. Qualified rehabilitation expenditures must exceed the greater of $5,000 or the building’s adjusted basis, a threshold DC’s Office of Planning applies consistently across the District’s inventory of contributing structures. For a modest rowhouse with a low adjusted basis, this bar can be cleared quickly; for a larger commercial building, the rehabilitation must be genuinely extensive. Projects phased over multiple years face additional timing rules governing when expenditures count toward the same rehabilitation period.
Fourth, the completed work must meet the Secretary of the Interior’s Standards, a subject significant enough to warrant its own treatment later in this guide.
A handful of edge cases complicate otherwise straightforward applications:
-
A campus of multiple buildings under common ownership may need separate certifications unless treated as a single coordinated project.
-
A building moved from its original site can lose contributing status unless the move itself was historically documented and approved.
-
Loss of historic integrity, whether from prior insensitive alterations or from demolition of character-defining features, can disqualify a structure even within an otherwise certified district.
-
Partial demolition during rehabilitation, even when well-intentioned, invites the closest scrutiny from reviewers.
Each of these scenarios benefits from early consultation with DC SHPO before design work advances too far to adjust.
Step-by-step HPCA application workflow in DC
The Historic Preservation Certification Application unfolds in three distinct parts, and sequencing matters as much as content. Filing out of order, or beginning construction before the right approval lands, is the single most common way a DC project forfeits its credit.
- Part 1, Evaluation of Significance, establishes or confirms certified historic status. This step is required whenever a building’s individual listing or contributing status has not already been established through the National Register nomination itself, and DC SHPO reviews the submission before forwarding a recommendation to NPS.
- Part 2, Description of Rehabilitation, is the design review stage, and it is the one developers most often rush. Applicants submit existing-condition photographs, architectural drawings, a detailed scope of work, and a narrative explaining how proposed interventions meet the Secretary’s Standards. NPS and DC SHPO review this package before approving the plan, and that approval should arrive before any irreversible work begins.
- Part 3, Request for Certification of Completed Work, closes the loop. Applicants submit post-construction photographs, final invoices documenting actual expenditures, and confirmation that the completed scope matches what Part 2 described.
Filing tips that save months of back-and-forth: DC’s planning office recommends electronic submission for HPCA materials, and applicants should establish a point of contact at DC SHPO early rather than submitting cold. Sequencing expectations are worth internalizing up front, since NPS review timelines are not instantaneous and construction schedules built without that buffer routinely stall.
Pro Tip: File Part 2 with enough lead time that a reviewer’s requested revision does not force you to pause active construction.
What counts as QREs and how the Standards govern acceptable work
Qualified rehabilitation expenditures cover the hard costs of bringing a historic structure back into productive use: structural repair, roof replacement, window and door restoration or replication, plumbing and electrical upgrades, and the architectural and engineering fees tied directly to the work. What does not qualify tends to catch first-time applicants off guard. Landscaping, site work outside the building envelope, new additions that expand square footage beyond the historic footprint, and certain soft costs like leasing commissions fall outside the credit.
- Qualifying costs typically include masonry repair, window restoration, roof replacement, and mechanical system upgrades tied to the rehabilitation.
- Non-qualifying costs typically include landscaping, parking lot improvements, and new construction that adds floor area beyond the historic structure.
- Interior work counts alongside exterior work, provided it does not strip character-defining features like plaster cornices, original stair details, or historic floor plans.
- Reviewers evaluate cumulative effect: a series of individually minor changes can collectively compromise historic character even when no single change would.
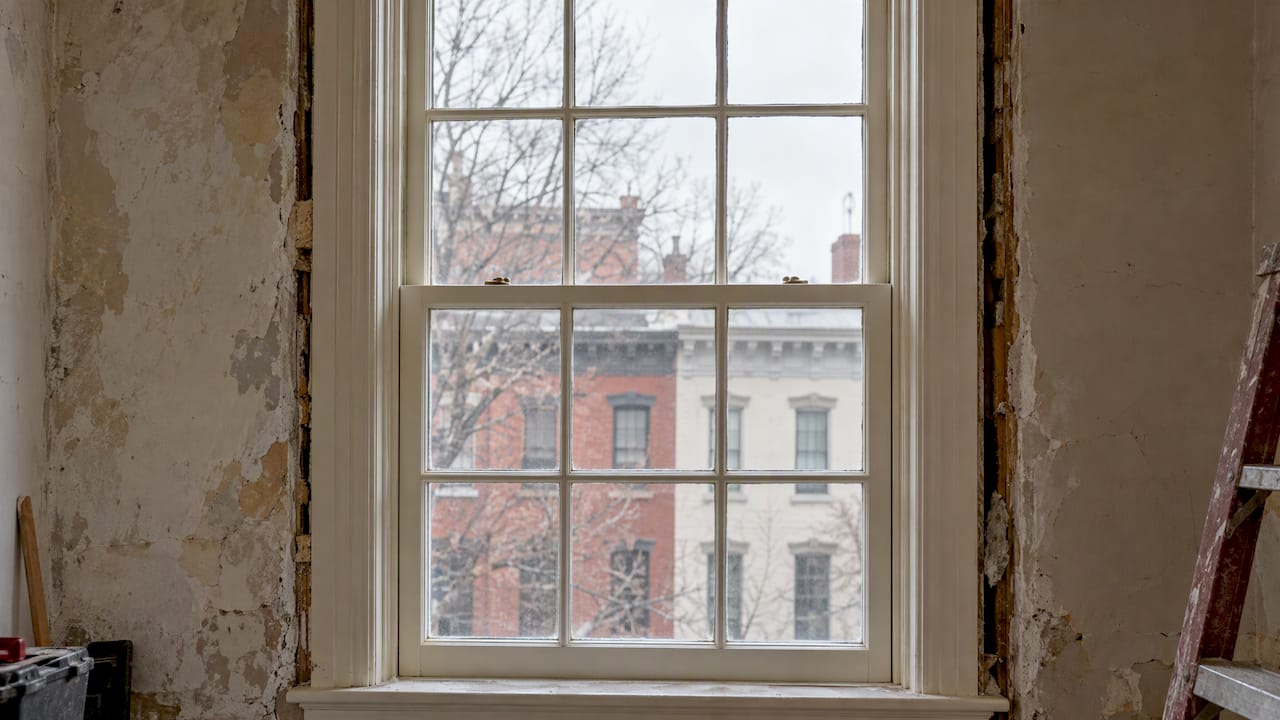
The Secretary of the Interior’s Standards for Rehabilitation shape every judgment NPS and DC SHPO reviewers make, and that scrutiny extends deep into detail work that many owners assume is cosmetic. Window and door assemblies are frequently the most visible test of compliance, since replacing a historic sash with a modern vinyl unit, even one that looks similar from the sidewalk, routinely triggers rejection. Period-accurate millwork, matched in wood species, profile, and glazing pattern to the original fabric, is often what separates an approved Part 2 from one sent back for revision.
More than 20% of eligible rehabilitation cost returns to the owner as a federal tax credit, which is precisely why documentation precision on items like windows carries financial weight, not just aesthetic significance.
A final requirement anchors the whole program: the building must remain in qualified income-producing use for five years after rehabilitation. Selling, converting to owner-occupied use, or otherwise changing that status within the holding period triggers partial recapture of the credit already claimed, calculated on a declining schedule tied to how much of the five years has elapsed.
Larger DC rehabilitation projects rarely rely on the federal historic credit alone. Pairing it with Low-Income Housing Tax Credits is a well-established strategy in the District, particularly for adaptive reuse of institutional buildings, former school buildings, and larger apartment conversions where the combined credits attract equity investors who would not otherwise underwrite a historic rehabilitation on its own.
Scale matters in this calculation. Transaction costs, legal structuring, and the accounting overhead of syndicating tax credits mean smaller rehabilitation budgets often cannot justify the complexity of a paired transaction, while larger commercial or multifamily projects with substantial qualified expenditures can absorb those costs and still come out ahead.
- Pairing HTC with LIHTC typically suits larger, income-restricted housing developments with substantial rehabilitation scope.
- Claiming the historic credit reduces the eligible basis available for LIHTC calculations, a tradeoff that requires early coordination between tax counsel and the development team.
- New Markets Tax Credits sometimes layer into the same capital stack for projects in qualifying census tracts.
- Many developers sell or syndicate the historic credit to a tax-equity investor rather than using it directly, converting a future tax benefit into upfront project capital.
This layering explains why serious DC historic rehabilitation projects assemble their financing and preservation teams simultaneously rather than sequentially.
Common reasons HPCA applications fail and how to avoid them
Most denials and delays trace back to a small set of avoidable mistakes, and nearly all of them are preventable with earlier coordination.
- Starting irreversible work before Part 2 approval. Demolishing a feature, removing a window, or altering a floor plan before DC SHPO and NPS sign off on the design puts the entire credit at risk, since approval cannot retroactively bless work already completed.
- Weak cost documentation. Reviewers and the IRS expect clear allocation between qualified and non-qualified expenditures, supported by invoices, contractor timesheets, and change orders tied to specific scope items rather than lump-sum billing.
- Inadequate millwork and window documentation. Shop drawings, material specifications, and sample mockups submitted with Part 2 give reviewers confidence that a proposed replacement genuinely matches the original, a level of specificity that generic product cut sheets rarely provide.
- Overlooking the recapture period. A sale, refinancing that changes ownership structure, or conversion to non-income use within five years of completion can trigger recapture, so any anticipated ownership change should be reviewed with tax counsel before it happens, not after.
Pro Tip: Photograph every character-defining feature before demolition begins, even features not explicitly discussed in your Part 2 narrative. Reviewers sometimes ask about details you did not think to document.
Gepetto Millworks: practical millwork practices that support HPCA compliance
Historic windows, doors, and trim are frequently the detail on which an HPCA Part 2 review turns, since reviewers judge replication work against the original profile, material, and glazing pattern rather than against a general impression of historical style. A specialized custom millwork provider for historic building projects produces the kind of shop drawings and photographic documentation that HPCA reviewers expect to see alongside a rehabilitation narrative.
Typical deliverables that support a compliant submission include:
- Detailed shop drawings showing exact profiles, joinery, and dimensions matched to the original element.
- A material list specifying wood species, glazing type, and hardware consistent with the building’s period.
- Sample mockups that reviewers or SHPO staff can examine before full fabrication proceeds.
- In-progress and completed photographs documenting the installation for the Part 3 submission.
For DC rowhouses and commercial buildings alike, this level of specificity in window and door replication, drawn from a focus on exact historic replication using authentic materials and techniques, is often what distinguishes a Part 2 narrative that sails through review from one that draws a request for revision. The firm’s work on replica wooden windows illustrates the kind of documentation trail that supports, rather than undermines, a certification application.
When pursuing the DC historic tax credit is worth the effort
A rowhouse conversion to a handful of rental units can qualify, but the paperwork burden scales less gracefully than the credit itself.
Assembling the right team early matters more than any single filing tactic: a preservation architect fluent in the Secretary’s Standards, tax counsel who understands recapture and basis reduction, a historic consultant who has worked with DC SHPO before, a contractor experienced in rehabilitation sequencing, and a millwork specialist who can produce documentation reviewers trust. Expect the certification process to add real lead time to a project schedule, and budget for it accordingly rather than treating documentation as an afterthought once construction is already underway.
— Gepetto
Millwork support for HPCA-compliant DC projects
Meeting the Secretary’s Standards on windows, doors, and trim is often the narrowest part of an HPCA approval, and it is the part Gepetto Millworks works on directly. The firm’s Historic Window Restoration service restores original sash and frames where repair is feasible, while custom fabrication covers replication when replacement is unavoidable.
Beyond the physical work, preparation of shop drawings, material specifications, and in-progress photographs are part of what a Part 3 submission requires, documentation built to hold up under SHPO and NPS review rather than assembled after the fact. Owners and developers planning a DC rehabilitation that depends on window or door replication can review the Historic Window Restoration page to see how that documentation process fits into a broader project timeline.
Sources
Confirming current rules directly with primary sources avoids relying on outdated guidance.
FAQ
What are the DC tax credits and how can I get them?
The primary credit available to DC property owners is the federal 20% rehabilitation tax credit, which applies to certified rehabilitation of income-producing historic buildings. Owners apply by filing the three-part HPCA application with DC SHPO and NPS, documenting qualified expenditures, and completing work that meets the Secretary of the Interior’s Standards.
How does a historic tax credit work?
A qualifying owner completes a certified rehabilitation of an income-producing historic building and claims a credit equal to 20% of qualified rehabilitation expenditures, generally spread ratably over five years under IRS rules. The building must stay in qualified use for five years, or the owner faces partial recapture of the credit already claimed.
What are the downsides of historic preservation?
Preservation requirements can limit design flexibility, since exterior alterations and many interior changes must follow the Secretary of the Interior’s Standards rather than an owner’s original design preferences. The certification process also adds administrative lead time and documentation cost, and starting irreversible work before approval can jeopardize the credit entirely.
How do I know if my house is in a historic district?
DC’s Office of Planning maintains records of designated historic districts and can confirm whether a specific address carries contributing status within one. A property’s certified historic structure status is also confirmed through the National Register listing process if it is not already part of a recognized district.
Recommended
by Matthew Wiley | Oct 1, 2026 | Architectural Millwork
Window restoration or replacement can qualify for the federal 20% rehabilitation tax credit, but only as one component of a certified rehabilitation of an income-producing historic building, never as a standalone contract. The National Park Service favors repair over replacement, and any replacement must be justified and documented under Standard 6. Before finalizing a window order or signing a fabrication contract, engage a preservation consultant and a tax advisor: the sequence in which you make decisions determines whether the work survives review.
TL;DR:
- The rehabilitation credit applies only when window work is part of a certified building renovation that exceeds a minimum expenditure threshold, and it cannot be claimed on standalone window projects.
- Window costs included in qualifying expenditures must relate to repairs, compatible replacements, and installation labor, excluding site work or additions, and require coordination between preservation and tax professionals from the start.
- Replacement windows on prominent elevations must match original profiles, muntin patterns, and reflective qualities to meet Standards, with physical mock-ups preferred for certification.
- Documentation for certification includes detailed window schedules, dimensioned elevations, condition photos, mock-up evidence, and a clear phasing schedule if using a phased measuring period.
- Owners should delay ordering window units until after Part 2 approval and certification, and track the NPS project number to support tax claims and avoid costly changes.
Gepettomillworks
gepettomillworks.com
Historic Window Millwork, Made Carefully
Gepettomillworks creates custom millwork for historic building projects, supporting accurate window restoration and replacement work.
Visit Gepettomillworks
Table of Contents
How the federal rehabilitation tax credit works and who qualifies
The federal rehabilitation credit is generally worth 20% of qualified rehabilitation expenditures on a certified historic structure, an income-producing, depreciable building listed individually in the National Register or located in a registered historic district and certified by the National Park Service as contributing to that district’s significance. The credit is not available for owner-occupied residences; it exists for commercial, rental, and other revenue-generating properties, which shapes every downstream decision about window scope.
Qualification hinges on the substantial-rehabilitation test. Under NPS guidance, expenditures during a 24-month measuring period, or a 60-month period for phased projects, must exceed a minimum value based on either a fixed amount or the building’s adjusted basis. A project that fails this threshold produces no federal credit regardless of how carefully the windows were restored.
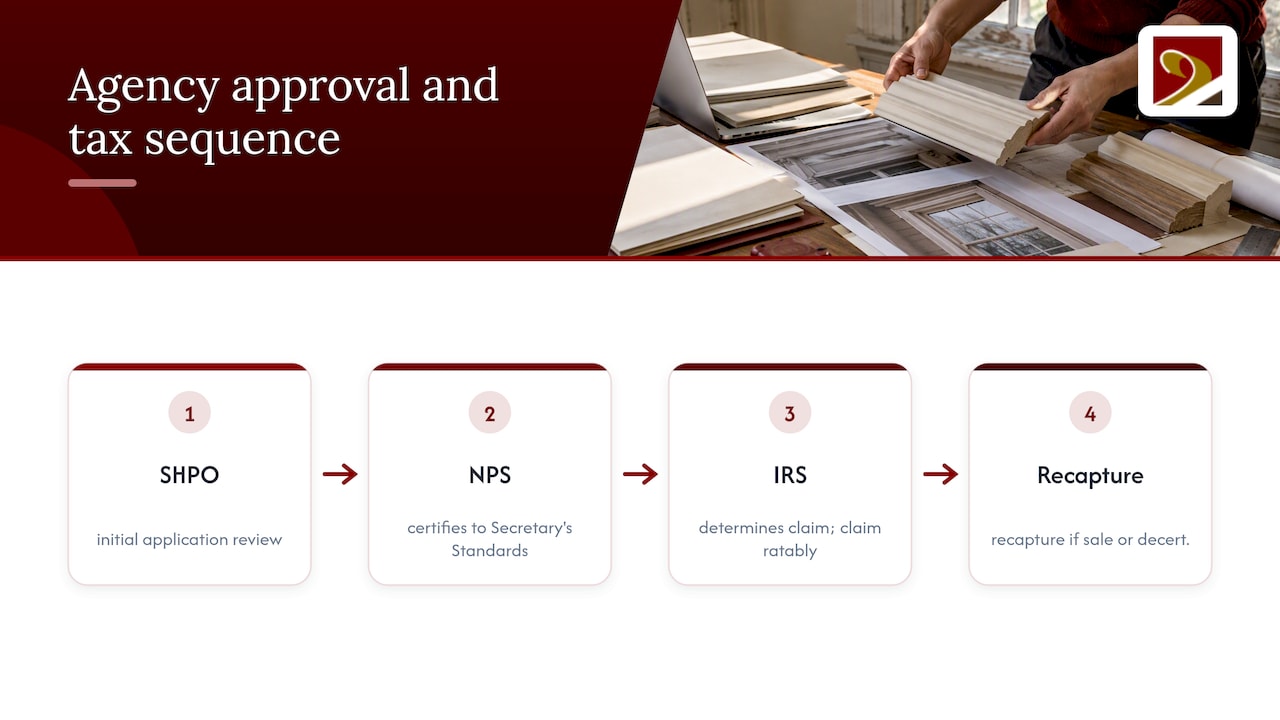
The three agencies play distinct roles. The State Historic Preservation Office conducts the first review of the application, the National Park Service certifies whether the completed rehabilitation conforms to the Secretary of the Interior’s Standards, and the Internal Revenue Service determines when and how the credit is claimed on a tax return. Since 2018, the credit is generally claimed ratably over multiple years rather than in a single year, and early disposition of the property or failure to maintain certified status can trigger recapture of the unused portion. Because window work is often the most visible and most debated element of a rehabilitation, understanding this chain of authority matters before a single sash comes off its frame.
Do windows alone qualify? How window costs fit into qualified rehabilitation expenditures
Window-only projects rarely produce a federal credit on their own. Eligibility is not evaluated window by window; it depends on whether the entire building rehabilitation meets the substantial-rehabilitation test and receives NPS certification. A building owner who replaces forty window units but does nothing else to the structure will likely fall short of the threshold and receive no credit, however well the windows were executed.
When windows are part of a larger certified rehabilitation, qualified rehabilitation expenditures typically include repair labor, historically compatible replacement sash and frames, glazing, weatherstripping, and the installation labor tied to those elements. Costs that usually fall outside QREs include new additions, appliances, site work such as landscaping, and any work unrelated to the historic building’s structure and finishes, as state preservation guidance on project scope makes clear.
Because NPS certification addresses design conformity while the IRS determines tax qualification, allocating window costs correctly requires the preservation consultant and the tax professional to coordinate from the outset, not after invoices arrive.
NPS standards for windows: repair first, then replacement, what reviewers look for
The Secretary of the Interior’s Standards begin from a clear premise: repair and retention of historic windows is preferred over replacement whenever feasible. Reviewers expect documentation showing why repair is not a reasonable option, typically deteriorated wood beyond structural repair, missing or irreparably damaged hardware, or conditions that repair specialists have assessed and rejected. A blanket claim of “beyond repair” without supporting evidence rarely survives scrutiny.
When replacement is justified, the evaluation criteria differ by location on the building. Windows on primary, highly visible elevations face the closest examination: size, sash and frame profile, muntin pattern, glazing configuration, and the reflective and planar qualities of the glass all factor into whether a replacement reads as compatible with the historic fabric. Secondary and rear elevations sometimes allow more flexibility, though NPS still expects the replacement to fill the original opening and match the historic character rather than introduce an unrelated design.
One point trips up many owners: replacing an incompatible nonhistoric window with another incompatible unit does not satisfy the Standards, even if the new window performs better or costs less. NPS’s logic favors retaining original material because a faithful replacement, however precise, is still a replacement, and the agency treats retained historic fabric as inherently stronger evidence of preservation than reproduction.
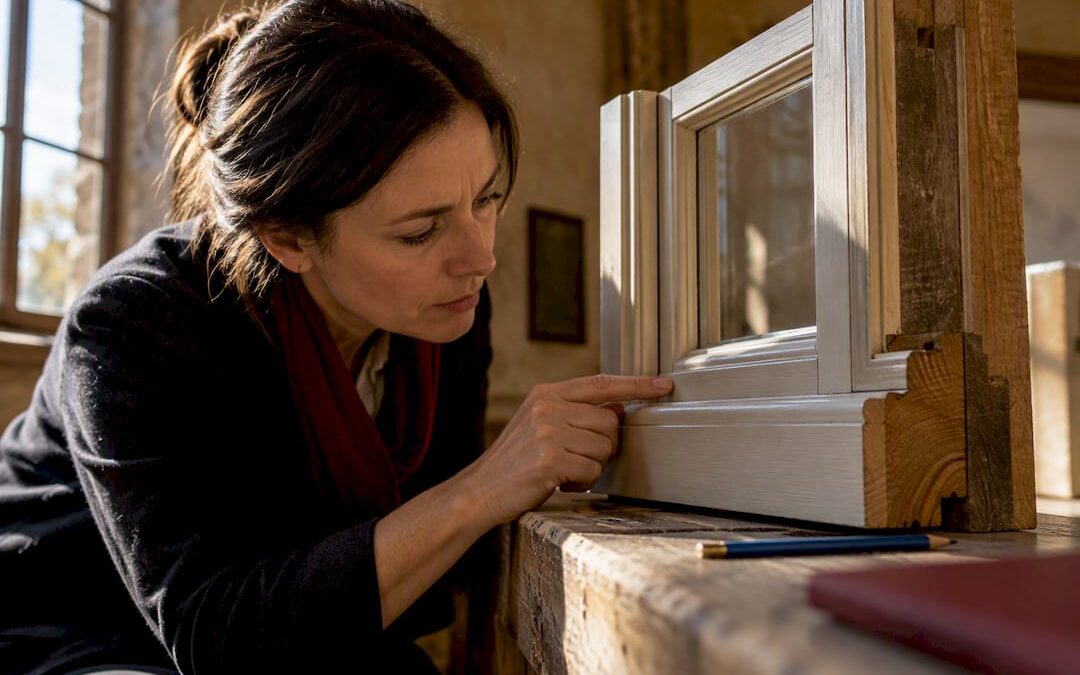
Mock-ups and three-dimensional samples carry real weight in this evaluation. A profile drawing can misrepresent how a muntin will actually catch light, while a physical sample installed in a test opening lets reviewers judge shadow lines, reflectivity, and depth the way a passerby would. Projects that produce a sample window for SHPO and NPS review before ordering the full run tend to move through certification with fewer amendments.
Exactly what to include for windows in HPCA Part 2 and Part 3
The Historic Preservation Certification Application moves through three parts: Part 1 establishes the building’s significance, Part 2 documents the proposed rehabilitation, and Part 3 certifies the completed work. Part 2 and Part 3 are the parts that determine federal credit eligibility, and windows are frequently the section reviewers scrutinize most closely.
A complete window submission generally includes:
- A building-wide window schedule or key plan identifying every opening, its existing materials and configuration, and the proposed treatment for each.
- Dimensioned existing and proposed elevations, along with vertical and horizontal sections that allow direct, measurable comparison between old and new profiles.
- Condition photographs documenting deterioration, paired with a repair-versus-replacement cost analysis for openings proposed for replacement.
- Photographs of mock-ups or physical test samples where replacement is proposed on visible elevations.
- A clear phasing narrative and schedule when the project elects the 60-month measuring period, since phased-project rules require defined phases and completed architectural plans before physical work begins.
The documentation guidance NPS publishes specifically for windows treats this as a design-review record, not a compliance formality. Submissions that tie each proposed treatment to documented condition evidence and measured comparisons move faster than narrative descriptions asserting general deterioration.
Choosing between the 24-month and 60-month measuring periods shapes both construction scheduling and tax timing. The 60-month phased option requires a defined phasing plan and completed architectural plans before physical work begins on the first phase, a precondition set out in Treasury Regulation § 1.48-12(b)(2)(v) and reinforced in NPS phased-project guidance. Owners who plan to replace windows building-wide over several years, rather than all at once, typically need this election in place from the start rather than added after construction begins.
The credit is claimed in the taxable year the building is placed in service, using Form 3468, with the resulting general business credit generally flowing through Form 3800. Since the current allocation rules take effect, the credit is spread ratably over five years rather than claimed in full at once, and disposing of the property or losing certified status before that period ends can trigger recapture of the unclaimed portion.
Timing mismatches are common. Final NPS certification sometimes arrives after a tax return is due, and the Form 3468 instructions include a 30-month documentation rule addressing exactly this situation. Owners filing before certification is complete should keep the NPS project number, submission dates, and any interim correspondence in their tax records, since that paper trail is what supports the claim if the IRS asks questions before final certification lands.
State credits and coordinating federal and state reviews
Federal certification does not guarantee approval under a state historic tax credit program. States administer their own credits with their own documentation standards, and some expect closer material matching or additional scaled comparisons beyond what NPS requires. Treating the state submission as a copy of the federal package is a common and costly mistake.
The practical fix is sequencing: check the relevant state program’s window-specific requirements early, before finalizing Part 2 documentation, so a single set of drawings and photographs can satisfy both reviews where possible. Some project teams submit to SHPO and the state program simultaneously to shorten the overall timeline, but this only works when the state’s documentation thresholds are known in advance. Owners restoring buildings in Virginia, West Virginia, North Carolina, South Carolina, or Maryland should confirm current state guidance directly with their SHPO rather than assuming federal standards automatically transfer.
Step-by-step checklist for a window-focused HTC project
A window program that survives review usually follows the same sequence, regardless of building size or budget.
- Engage a preservation consultant, a tax advisor, and a qualified millworker before finalizing window specifications or signing a fabrication contract.
- Complete a full window inventory and condition assessment, producing the building-wide key plan reviewers expect.
- Develop dimensioned elevations, sections, and, for visible elevations, a physical mock-up alongside a documented repair-versus-replacement cost comparison.
- Submit Part 2 with a clear phasing narrative if using the 60-month election, then wait for SHPO comments and NPS determination before placing final orders for replacement units.
- Document as-built conditions for Part 3 and retain every invoice, change order, and photograph tying the finished work to the approved design.
- File Form 3468 in the year the building is placed in service and keep the NPS project number attached to the supporting tax records.
Pro Tip: Order long-lead-time window units only after Part 2 comments come back; a rejected profile ordered early becomes an expensive change order later.
How millwork and measured replication support approvals
Gepetto Millworks’ project archives, including Jamestown VA restoration work and historically accurate window reproductions, illustrate what reviewers respond to: measured drawings that match the existing opening exactly, not approximations scaled from a photograph.
A millwork submission that supports an HPCA typically documents sash and frame profiles to the sixteenth of an inch, joinery methods consistent with the original construction, glazing reflectivity and thickness, and the paint or finish specification for both faces of the unit. Installation plane, how far the new sash sits from the exterior wall face compared to the original, matters as much as the profile itself, since a unit set too far forward or back changes the shadow line reviewers evaluate.
Producing a physical sample before committing to a full production run, drawing on the kind of replica sash work documented in Gepetto’s project history, reduces the risk that a rejected detail turns into a formal amendment after fabrication has already begun.
Repair-first thinking is not sentimentality, it is the strategy most likely to clear NPS review and preserve the building’s original material. Owners who treat replacement as a last resort, backed by an honest repair-versus-replacement cost comparison rather than a contractor’s convenience, tend to face fewer amendments and less rework.
The temptation to order windows early, before Part 2 comments arrive, is the single most avoidable risk in this process. Documentation feels like overhead until the moment it is the only thing standing between a project and a rejected certification.
— Gepetto
Gepetto Millworks: historic window restoration and HPCA documentation support
Gepetto Millworks builds custom historic window restoration around the same documentation reviewers expect to see: measured drawings tied to the original opening, physical samples for visible elevations, and finish specifications that match historic sash rather than approximate it.
A millwork provider’s role in a rehabilitation project may include:
- Producing dimensioned profile drawings suitable for Part 2 submission.
- Fabricating mock-ups or test units for SHPO and NPS review before full production.
- Matching joinery, glazing, and finish details to the building’s documented historic condition.
- Coordinating delivery timing with the preservation consultant so units are not ordered ahead of approval.
Owners and architects working through a certified rehabilitation are welcome to start with a consultation on the Historic Window Restoration page before finalizing a window scope.
FAQ
Is there still an energy credit for windows in 2026?
Energy-efficiency window credits are a separate program from the historic rehabilitation credit, with their own eligibility rules and expiration timelines; a breakdown of recent changes to energy-related credits explains what remains available. Owners restoring a certified historic building should evaluate the two programs independently, since qualifying for one does not determine eligibility for the other.
What type of windows qualify for tax credits?
Under the federal historic rehabilitation credit, window work qualifies only as part of a certified rehabilitation that meets the substantial-rehabilitation test, not based on the window type itself. NPS favors repair of original windows, and any replacement must match the historic sash profile, muntin pattern, and materials under Standard 6.
Who gets the new $6000 tax break?
There is no federal historic preservation provision tied to a fixed amount; the federal rehabilitation credit is calculated as 20% of qualified rehabilitation expenditures on a certified historic building. Readers encountering specific dollar figures elsewhere should confirm whether they refer to a different program, such as a state or local incentive, and verify details with the relevant agency.
How does the historic tax credit work?
The federal credit equals 20% of qualified rehabilitation expenditures on a certified historic, income-producing building, claimed ratably over five years after the building is placed in service. The project must pass the substantial-rehabilitation test and receive NPS certification that the completed work conforms to the Secretary of the Interior’s Standards.
Recommended