
A historic built-in bookcase is restored well when the work follows a fixed order: investigate what survives, stabilize and repair the original fabric, replace only what is lost and match it exactly, and touch the finish last. For a house or building where the woodwork carries historic value, or where a tax credit depends on it, that order matters more than any single technique. We build, repair and replicate custom casework, libraries and built-ins for historic buildings, and the sections below set out the sequence we would hand to an architect, contractor or owner before the first screw is backed out.
TL;DR
- Record the condition first: which parts are sound, which are repairable, which are lost, and what earlier repairs changed. Treat the cause of damage (water, failed joints, insects), not only the symptom.
- Repair before replacing. Replace only extensively deteriorated or missing parts, and match them to surviving examples.
- Keep a sound original finish. The National Park Service specifically warns against painting built-in bookcases that were originally natural wood.
- Clean gently, test first, and keep moisture away from joints and veneer.
- In pre-1978 buildings, paid work that disturbs paint falls under EPA lead-safe rules.
Table of Contents
- Why built-in bookcases are treated as architecture, not furniture
- Step 1: Assess the bookcase before touching it
- Step 2: Safety before dust: lead paint in older buildings
- Step 3: Clean gently, and know when to stop
- Step 4: Repair the structure before the surface
- Step 5: Preserve the finish, or refinish with intent
- Step 6: Reinstall, fit and protect
- Who should do the work
- A note from our shop
- Bring the bookcase to a millwork shop that restores historic buildings
- FAQ
- Sources
Why built-in bookcases are treated as architecture, not furniture
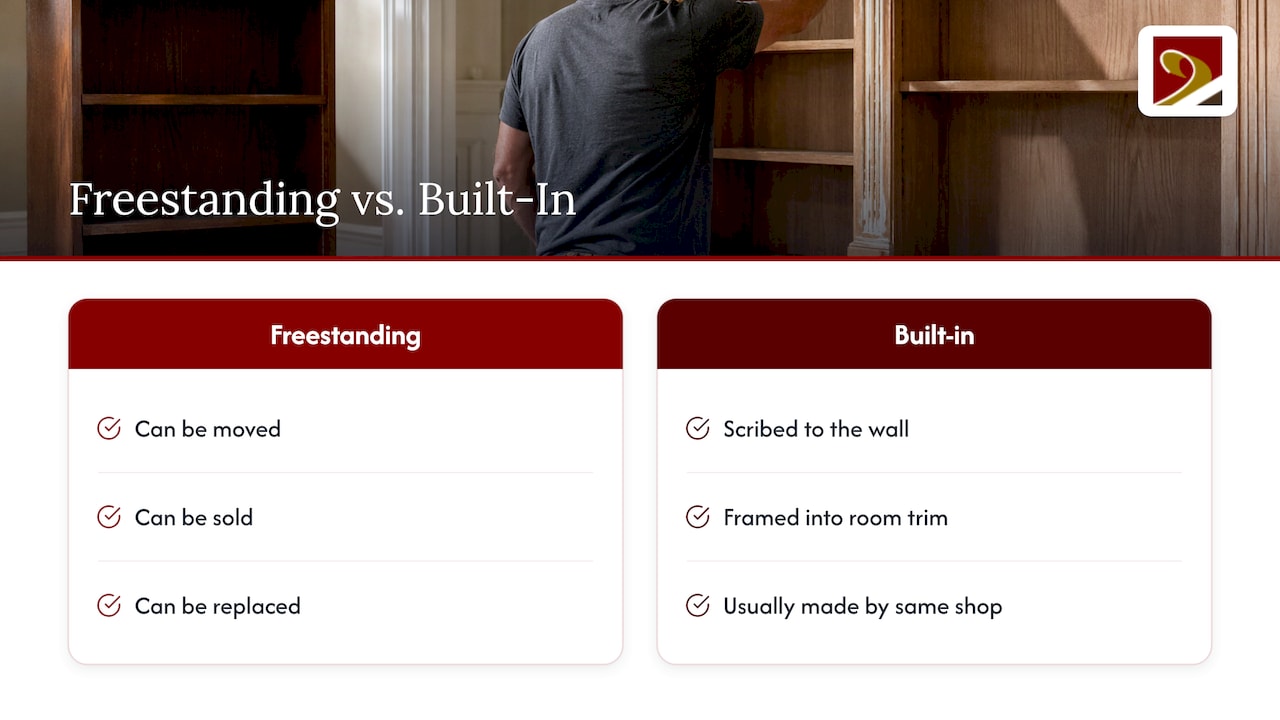
A freestanding bookcase can be moved, sold or replaced. A built-in cannot: it is scribed to the wall, framed into the room’s trim, and usually made by the same shop that produced the mantel, the wainscot and the stair. For that reason the National Park Service lists built-in bookshelves among the architectural details to look for when deciding which interior elements are significant and must be retained or only minimally modified in a rehabilitation.
The guidance behind that is Preservation Brief 18, which recommends retaining and preserving character-defining interior features and finishes, including built-in cabinetry, hardware, woodwork and paint. In practical terms, a bookcase in a principal parlor, library or stair hall is likely to be judged as part of the room’s character, and the treatment you choose should respect that.
The Secretary of the Interior’s Standards state that historic wood features important to a building’s character should be identified, retained and preserved, including their paints, finishes and colors. They are regulatory for federally assisted projects, such as those using the federal historic tax credit, and general guidance otherwise. That distinction tells an owner how much latitude the project has, and it is worth settling with the architect before any scope is priced.
Step 1: Assess the bookcase before touching it
The NPS describes architectural investigation as the critical first step in planning treatment: understanding how a building changed over time and what condition it is in now. The same logic applies at the scale of one bookcase. Understanding a building’s history, its alterations and its deterioration before choosing a treatment keeps the work proportionate to what the building actually is.
A useful assessment sorts every component of the bookcase into four groups:
- Extant and sound: original members that need only cleaning and conservation.
- Extant and repairable: loose joints, lifting veneer, cracked shelves, failed glue lines.
- Beyond repair or missing: rotted bases, lost cornice sections, absent doors, missing shelf pins or hardware.
- Later interventions: added paint, replaced backs, cut shelves, modern fasteners, relocated or altered parts.
Photograph each bay before anything moves, number the components, and note tool marks, nail types and joinery. That record becomes the pattern for any replacement part and the evidence a reviewer will want if tax-credit documentation is involved.
Find the cause, not only the damage
The Standards advise identifying and treating the causes of deterioration, such as water entry, failed joints or seams, and insect or fungus infestation, rather than covering the symptoms. A bookcase with a swollen, stained base on an exterior wall is a roof, gutter or masonry question before it is a woodworking question. A refinished surface over an active leak will fail again, and the repair will have to be repeated.
Look specifically for:
- Staining or softness at the base, the back panel and anywhere the case meets an exterior wall.
- Frass, exit holes or powder, which indicate insects.
- Gaps opening at joints, a sign of movement in the structure behind the case.
- Layers of paint obscuring profiles, which affect both appearance and the later repair.
Step 2: Safety before dust: lead paint in older buildings
The federal government banned the sale of lead-based paint for homes in 1978, and the EPA notes that about three-quarters of U.S. homes built before 1978 still contain some lead-based paint. Sanding, scraping or stripping a painted bookcase can create hazardous dust.
The EPA’s Renovation, Repair and Painting Rule requires that anyone paid to perform work that disturbs painted surfaces in pre-1978 homes, childcare facilities and preschools be certified and use lead-safe work practices. In general the rule does not apply to homeowners working on their own pre-1978 homes, but the hazard is the same for the household. If your building predates 1978, test the paint before the scope is written, and keep children and pregnant occupants out of the work area. Your state health department or a certified lead inspector can advise on testing.
Step 3: Clean gently, and know when to stop
Cleaning is where an irreplaceable surface is most often lost. The NPS Conserve O Gram on wood furniture advises that cleaning beyond dusting requires judgment, because patina, wear, soil and accumulated finish can contribute to the object’s historic value.
The sequence the NPS describes is conservative:
- Dust with a soft cloth or a vacuum with a soft brush.
- Test an inconspicuous area first.
- Clean only a sound, stable clear finish, using mineral spirits.
- Use water sparingly on veneer and dry immediately.
- Do not clean finishes that are embrittled, cracked, raised or flaking.
The last point is easy to overlook. A flaking shellac or varnish is not dirty; it is failing, and wiping it can pull the finish away in sheets. That is a condition for a repair plan, not a cleaning product.
What to avoid is just as clear. Preservation Brief 18 advises against destructive methods such as propane or butane torches and sandblasting, and against harsh cleaning agents that can change historic wood’s appearance. Kentucky Cooperative Extension adds that varnish has no single pure solvent and can be difficult to restore, and that excess moisture near joints can soften the glue holding them.
Step 4: Repair the structure before the surface
The Standards call for stabilizing deteriorated wood before further work and for repairing rather than replacing historic wood features. Limited replacement in kind is appropriate only for extensively deteriorated or missing parts, and when surviving prototypes exist to copy.
Joints and glue
Most built-ins of the nineteenth and early twentieth centuries were assembled with hide glue, which has a useful property: it can be reversed. Bob Flexner, writing in Popular Woodworking, explains that old hide-glue joints can often be separated with hot water, steam or denatured alcohol. The old adhesive should then be removed from the bonding surfaces so the new glue has clean wood to grip. Regluing over residue is a common cause of a repair that opens again within a season or two.
Veneer
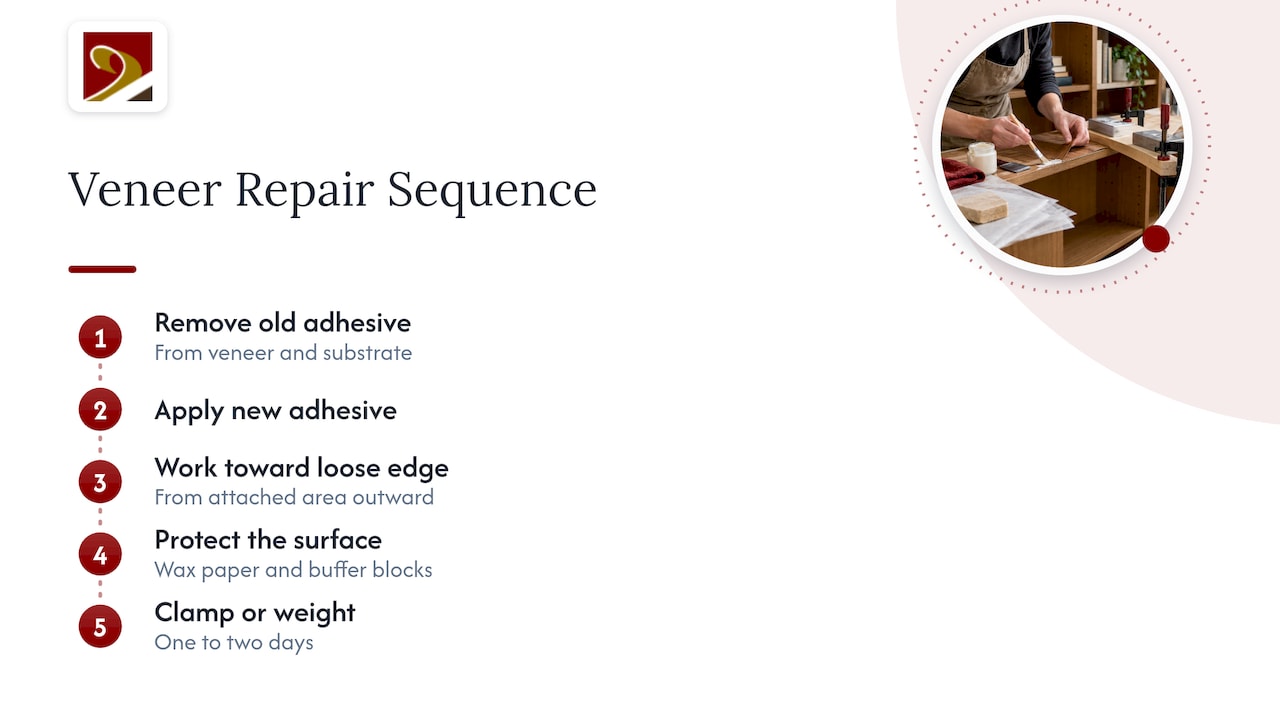
Where a bookcase carries veneered panels or face frames, lifting is typically repaired in place. Guidance from HowStuffWorks describes removing old adhesive from both veneer and substrate, applying new adhesive, working from the attached area toward the loose edge, protecting the surface with wax paper and buffer blocks, and clamping or weighting the repair for one to two days. For a missing section, Popular Woodworking recommends cutting the patch with straight edges and trimming it level once set.
The grain, figure and color of a patch decide whether it reads as repair or as scar, which is why matching the species and cut matters more than the glue chosen.
Hardware
Stripped screw holes in hinges and pulls are common. For slight enlargement, glued toothpicks or thin wood shavings work; for a substantial repair, a glued dowel is installed and redrilled. Distinctive antique hardware should generally be retained and matched rather than discarded. Original catches, hinges and pulls are part of the record of the piece.
Missing and irreparable parts
This is where a millwork shop earns its place on the project. A lost cornice, a rotted plinth, a missing pair of glazed doors or a cracked pilaster has to be made again, from the right species, with the right profile, sized to the existing case. We replicate period features and match them for historic tax credit eligibility, and that includes the moldings and casework that define a room. The documentation from Step 1 is the pattern, and a good replacement is one that a preservation reviewer cannot pick out from the original at arm’s length.
Step 5: Preserve the finish, or refinish with intent
The finish decision is the one most likely to cost a historic interior its character, and it is the one most often made too early.
When to keep the original finish
NPS Technical Preservation Services warns against painting previously unpainted interior woodwork, and its example specifically includes built-in bookcases whose natural finish contributed to a Victorian house’s historic character. Painting is effectively irreversible in practice, because later stripping risks the wood beneath.
Kentucky Extension offers a practical threshold: a dull finish with minor scratches can be restored if it is not badly cracked or blistered. The first job is to identify which of the four common furniture finishes you have, whether shellac, lacquer, varnish or penetrating oil, and to test in an inconspicuous spot before choosing a restoration solvent. Only the right solvent will soften the existing film without damaging it.
When repairs leave new wood next to old, the goal is a match, not a full strip. We have written separately on how to match stain on old trim without stripping sound finishes, and the same principle applies to a bookcase: blend the new into the old and leave the sound finish alone.
When refinishing is justified
Refinishing is reasonable when the finish has failed across the whole surface, when it was already painted in the period, or when the building’s significance and condition, in the words of the Standards, call for it. A bookcase that was painted from the start should be repainted in a compatible system, not stripped to bare wood to suit a modern taste. Document the existing layers before work so that the finish chosen is the finish the case was designed to carry.
A decision table
| Condition of the finish | Recommended direction |
|---|---|
| Sound, dull, light scratches | Clean carefully and restore; keep the original |
| Cracked, blistered or flaking across the surface | Repair structure first, then refinish in a matching system |
| Original natural wood, later painted | Evaluate removal with the architect; document the original beneath |
| Originally painted | Repaint in a compatible system; do not strip to bare wood |
| New replacement parts beside old | Match the new to the existing finish, not the reverse |
Step 6: Reinstall, fit and protect
Built-ins are scribed to walls that have moved over a century, so reinstallation is a fitting job, not a mounting job. Check that the case sits plumb against its wall, that the joints between the case and the trim are tight, and that any returned moldings align with the room’s baseboard, chair rail and crown. Replace shelf pins and supports as needed, keep the original ones if they are sound, and leave room for seasonal movement in solid wood. Protect the finished surface from sunlight, damp and radiators, which are the three most common causes of renewed damage.
Who should do the work
On a historic project, the restoration of a built-in often ties together several trades: an architect specifying treatment, a general contractor sequencing it, and a millwork shop making the parts that no longer exist. That coordination is the reason many owners and architects bring the millwork in early. Our work covers custom design, fabrication and restoration of casework, libraries, built-ins, trim, staircases and balustrades for historic buildings, and it includes replication of period features and matching for historic tax credit eligibility. Our wooden trim projects show the kind of profile-matching work that bookcase cornices and surrounds require.
A note from our shop
Every built-in bookcase we are asked to restore tells us something about the house around it. The joinery shows which hands built it, the moldings show which pattern book or mill catalog the carpenter admired, and the later paint layers show how the family used the room.
Our position is simple: the bookcase should be read before it is repaired. Where original fabric survives, we retain it. Where it is lost, we replicate it in the same species and profile, using authentic materials and techniques, so that the room reads as one piece. That approach is also what makes a project defensible when historic tax credit review is part of the picture.
We take on complex, architecturally significant restoration and custom requests that others may decline, and we would rather be involved while the scope is still being drawn than after a section of cornice has already been discarded.
Gepetto
Bring the bookcase to a millwork shop that restores historic buildings
If your project includes a built-in bookcase, library wall or run of casework in a historic building, we can design, fabricate and restore it to match the period, whether the job is repairing an original, replacing a lost section or building new casework that sits correctly beside the old. Architects, general contractors, builders and owners can start with our custom fabrication page, or reach us through the Gepetto Millworks home page.

We work with projects across Virginia, West Virginia, North Carolina, South Carolina, Maryland and Washington, D.C. The earlier we see the drawings and the building, the more of the original we can keep.
FAQ
Should I paint or stain a built-in bookcase I am restoring?
If the woodwork was originally natural, keep it natural. The National Park Service cautions against painting previously unpainted interior woodwork, and cites built-in bookcases as an example. Paint is appropriate when the case was painted originally or when the finish has failed throughout and the architect agrees.
Can a built-in bookcase be repaired, or does it have to be replaced?
In most cases it can be repaired. The Secretary of the Interior’s Standards favor repairing historic wood over replacing it, and allow replacement in kind only for parts that are extensively deteriorated or missing. Loose joints, lifting veneer and cracked shelves are ordinary repair work.
What should I clean a historic bookcase with?
Start with dusting. Beyond that, the NPS advises testing in an inconspicuous spot and using mineral spirits only on a sound, stable clear finish, with water kept to a minimum on veneer. Do not clean a finish that is cracked, raised or flaking; it needs repair first.
Does lead paint matter on an old bookcase?
It can. Buildings constructed before 1978 may contain lead-based paint, and sanding or scraping it makes hazardous dust. The EPA’s RRP Rule requires certified, lead-safe practices for paid work that disturbs paint in pre-1978 homes, so test the paint before work begins.
Can new casework match an old built-in for tax credit purposes?
It can when it replicates the original in species, profile and finish and when the work follows the Secretary of the Interior’s Standards. We build replacements for lost features and match them for historic tax credit eligibility. Confirm the specific requirements with your architect and the state historic preservation office.
Sources
- NPS Preservation Brief 18: Rehabilitating Interiors in Historic Buildings
- NPS: Identifying Primary and Secondary Interior Spaces
- NPS ITS Number 7: Painting Previously Unpainted Woodwork
- NPS Conserve O Gram 7/1: Cleaning Wood Furniture
- The Secretary of the Interior’s Standards for the Treatment of Historic Properties
- Kentucky Extension: Restoring Existing Wood Finishes and Hardware
- Popular Woodworking: Furniture Restoration Guide
- HowStuffWorks: How to Repair Wooden Furniture Surfaces
- EPA: Lead Renovation, Repair and Painting Program
- Historical Concepts Architecture in Lowcountry Home Design