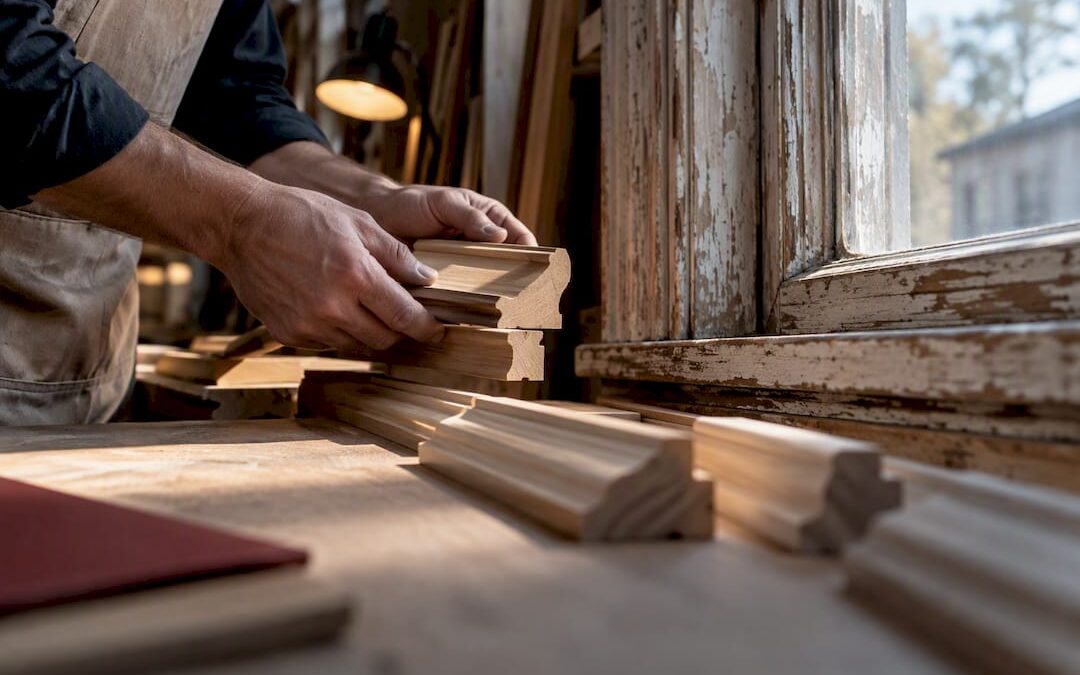
by Matthew Wiley | Sep 30, 2026 | Architectural Millwork
Millwork choices, whether a window sash is repaired or replaced, and whether the shop drawings and sample mockups accompanying that decision meet federal expectations, are among the most decisive factors in HPCA Part 2 acceptance and, by extension, West Virginia credit eligibility. The governing rule is repair first: when a historic window, door, or piece of trim can be stabilized rather than discarded, the Secretary of the Interior’s Standards for Rehabilitation expect that path. When repair truly is not feasible, the replacement must match the original’s design and visual character, and that claim must be proven on paper before a reviewer ever sees the finished work.
TL;DR:
- Meeting detailed measured drawings, photographs, and shop mockups early helps ensure compliance and prevents rejection of certification applications.
- Replacement windows require documented evidence that repair is unfeasible and must match the original profiles exactly, supported by photographic and technical proof.
- A single mismatch or poorly documented feature can jeopardize the entire project’s federal certification and tax credits under the cumulative effect standard.
- Involving a specialized millwork firm during design rather than after demolition allows for accurate field measurements, profile samples, and better review readiness.
- Relying solely on catalog cut sheets or ordering replacement before documentation can result in rejected submissions and certification delays.
Gepettomillworks
Plan Historic Millwork With Confidence
Gepettomillworks creates custom millwork for historic building projects, supporting careful decisions about original details and replacement work.
Explore custom millwork
Table of Contents
Why millwork decisions carry so much certification risk
Two provisions within the Standards do most of the work here. Standard 2 calls for the preservation of distinctive materials and craftsmanship, while Standard 6 governs deteriorated features specifically: repair rather than replace whenever practical, and when replacement becomes necessary, match the old in design, color, texture, and other visual qualities, substantiated by physical, documentary, or pictorial evidence. These are not abstractions for a courthouse in Wheeling or a commercial block in Charleston. They are the yardstick a reviewer applies window by window, door by door.
What makes millwork uniquely risky is the cumulative effect standard: the National Park Service evaluates a project’s rehabilitation work as a whole, and a single feature that fails to conform can jeopardize certification for the entire building, not just that feature.
- A courthouse renovation can restore masonry, roofing, and interior plaster flawlessly and still face denial over mismatched sash profiles.
- Early SHPO and NPS consultation on millwork proposals catches conflicts before construction, not after.
- A denial affects the full rehabilitation tax credit, not a line item.
A recent NPS appeal decision involving 222 Lake Avenue affirmed a denial of certification because replacement windows failed to match the historic originals, despite an otherwise successful redevelopment. That outcome illustrates how one nonconforming window line can undo months of otherwise compliant work.
Documentation you must include in HPCA Part 2 for millwork
Reviewers assessing a West Virginia rehabilitation project need to see, on paper, exactly what existed and exactly what is proposed. NPS guidance on windows documentation for replacement is explicit that manufacturer cut sheets are generally inadequate, since they omit the custom profile and joinery detail a reviewer needs to judge conformance.
A Part 2 submission covering millwork should include:
- Measured elevation drawings of existing conditions, keyed to each opening or unit.
- Full-scale section drawings showing muntin, mullion, sash, and molding profiles for both existing and proposed work.
- Photographs documenting current condition, deterioration, and any features already lost.
- Physical, documentary, or pictorial evidence supporting any proposed replacement.
- Shop drawings and finish mockups submitted early enough for SHPO and NPS review before fabrication begins.
Beyond the drawing set, a few supporting materials strengthen the file:
- Sample profile cuttings that let a reviewer handle the proposed molding alongside a photograph of the original.
- Written condition notes tying each photograph to a specific repair or replacement decision.
- A brief narrative connecting the drawings to the applicable Standard, rather than leaving the reviewer to infer the reasoning.
Architects who treat this as a drafting exercise rather than an evidentiary one tend to submit the least persuasive files. The goal is not to describe the work; it is to prove, feature by feature, that the work satisfies Standard 6 before anyone picks up a chisel.
Repair versus replacement: a field checklist for millwork decisions
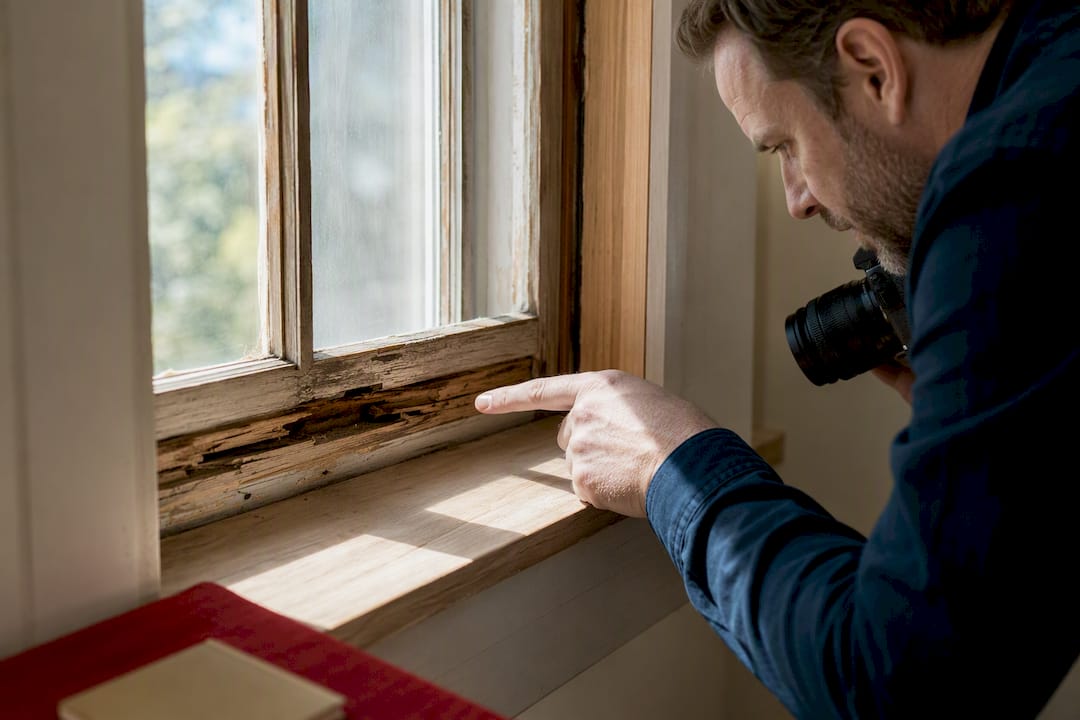
The on-site assessment should happen before a single specification is written. Measure existing profiles with a contour gauge, photograph every face of deteriorated wood, and pull a small sample where rot is suspected so that a millwork shop can assess salvageable stock.
Preservation Brief 9 lays out the repair hierarchy that most West Virginia projects should follow before reaching for wholesale replacement:
- Consolidate sound wood with epoxy where surface deterioration has not compromised structural integrity.
- Splice new wood into a damaged rail or stile rather than discarding the entire sash.
- Replace only the failed component, a sill horn or a single muntin, rather than the whole unit.
- Reserve full sash or door replacement for cases where physical evidence shows repair is genuinely impractical.
Scale matters to the decision. A single Victorian farmhouse window might justify hand-fitted splicing because the labor-to-material ratio favors repair. A commercial block with forty matching openings changes the math: custom knives ground to match the original profile become cost-effective once the setup expense is spread across a full run, an economy of scale Preservation Brief 9 notes directly.
When replacement is the honest answer, the Part 2 narrative should say so plainly and specifically: “The original sash exhibits advanced rot in the lower rail and sill, documented in Photos 4 through 7, and Gepetto Millworks’ shop assessment see internal restoration guidance confirmed repair would not restore structural function; the replacement profile matches the surviving upper sash exactly, per the attached section drawing.”
Pro Tip: Photograph the failure mode, not just the failure, so the Part 2 reviewer sees why repair was ruled out rather than assumed impossible.
Working with a specialized millwork firm: deliverables that satisfy Part 2
A subcontract scope written loosely around “replica windows” invites exactly the kind of vague submission reviewers reject. The scope of work should name each deliverable and tie it to a review checkpoint.
- Field-measured drawings of every existing opening, taken before demolition.
- Full-scale shop section drawings and custom profile knives matched to the historic molding.
- A finish and glazing mockup submitted for SHPO and NPS comment before production begins.
- Performance test reports, air infiltration or structural pressure testing on wooden windows, documented separately from the appearance record so durability claims never get confused with visual conformance.
| Phase |
Deliverable |
Checkpoint |
| Field survey |
Measured drawings, photographs |
Confirms existing profiles before demolition |
| Sample mockup |
Physical profile sample, finish sample |
SHPO and NPS informal review |
| Shop drawings |
Full-scale sections, elevations |
Attached to Part 2 submission |
| Fabrication |
Test reports, final inspection photos |
Closeout documentation for Part 3 |
Where fire codes or accessibility requirements conflict with retaining an original door or window assembly, NPS technical guidance on retaining corridor features points toward compatibility treatments, concealed fire-rated backing or sealed glazing units built behind an unaltered historic face, documented with mockups and test data rather than resolved through wholesale removal.
A practitioner’s view on where millwork submissions go wrong
Four patterns recur across the projects that stumble. Millwork gets specified last, after masonry and mechanical scopes are already locked, leaving no time for profile matching. Drawing sets rely on catalog cut sheets instead of measured sections. Replacement sash gets ordered before anyone photographs what it is replacing. And sample profiles arrive at the SHPO desk without the condition photographs that justify the decision to replace at all.
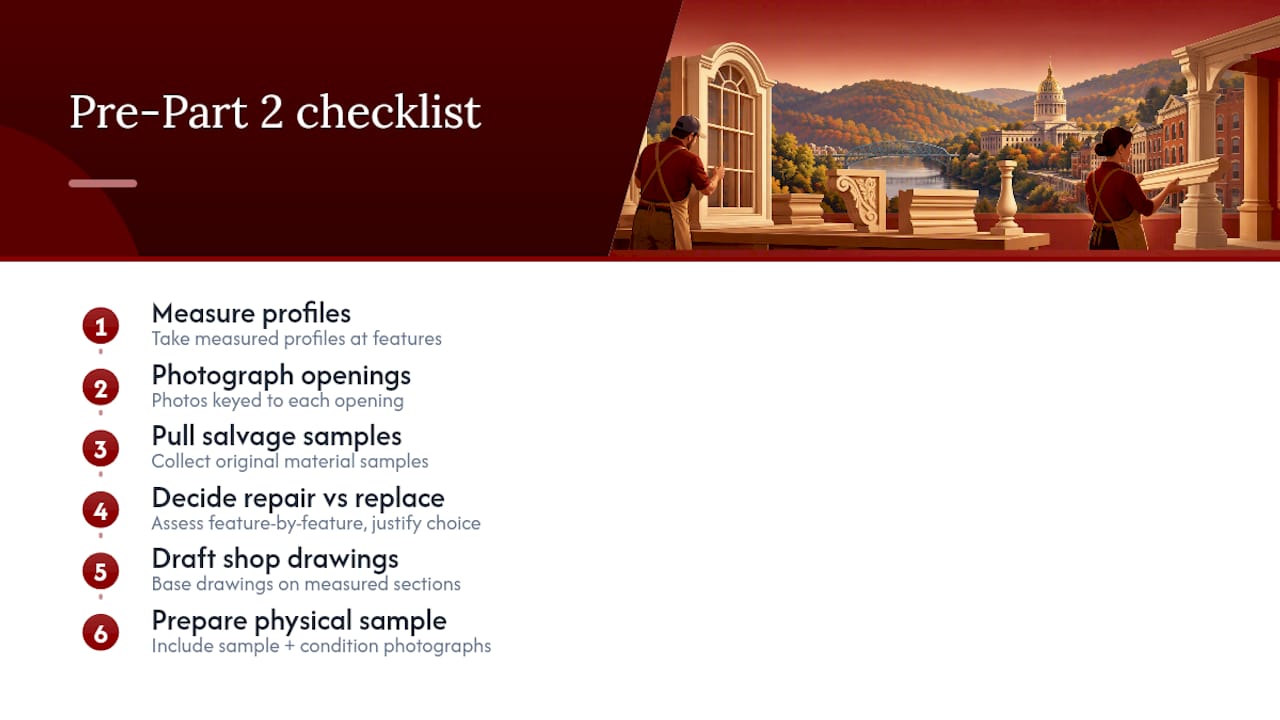
Before filing Part 2, walk the building with a checklist: measured profiles taken, photographs keyed to each opening, salvage samples pulled, repair versus replacement decided feature by feature, a shop drawing set drafted from those measurements, and a physical sample ready for review. Projects that build in mockups and test documentation early rarely face the kind of appeal that undoes an otherwise sound rehabilitation.
— Gepetto
How Gepetto Millworks supports West Virginia rehabilitation projects
A West Virginia rehabilitation moves faster when the millwork subcontractor is brought in during design, not after demolition. Gepetto Millworks works from measured field surveys to produce the shop drawings, profile samples, and finish mockups that a Part 2 submission needs, work that spans historic window restoration, custom replica sash through the Wooden Windows line, and matched doors, casework, and staircases through the firm’s broader custom fabrication services.

When you reach out, come with a starting scope: existing conditions to be surveyed, the profiles you expect to replicate, and the timeline your Part 2 filing is built around.
- Request a field-measured survey before any sash or door leaves the building.
- Ask for a physical profile sample and finish mockup before full production begins.
- Confirm a shop-drawing delivery date that leaves room for SHPO review before fabrication.
Reach Gepetto Millworks through the historic window restoration page to start that conversation.
Keep these on hand while drafting Part 2: the Secretary of the Interior’s Standards for Rehabilitation, the windows documentation guidance, and Preservation Brief 9 for repair technique. For the state side, West Virginia’s Schedule RBIC explains how the state credit ties to federal certification, and the state’s Division of Culture and History is the appropriate first call for SHPO coordination.
FAQ
Can I replace a historic window instead of repairing it?
Only when physical evidence shows repair is genuinely impractical, and the replacement must match the original in design, material, and visual detail. The Secretary of the Interior’s Standards treat repair as the default, so the case for replacement needs documentation, not just a preference.
What drawings does HPCA Part 2 require for millwork?
Reviewers expect measured elevation drawings and full-scale section drawings showing profiles and joinery for both existing and proposed millwork. According to NPS windows documentation guidance, manufacturer cut sheets alone are generally not sufficient evidence.
Can one mismatched window jeopardize an entire tax credit project?
Yes. Under the cumulative effect standard, NPS reviews a rehabilitation’s work as a whole, so a single nonconforming feature can affect certification for the full project rather than just that item.
When should I bring in a millwork subcontractor on a historic project?
Bring in a specialized millwork firm during design, before demolition, so field measurements and profile samples can be taken from the original fabric. Early engagement gives time for shop drawings and mockups to clear SHPO review before fabrication starts.
Does West Virginia’s state credit require federal certification first?
West Virginia’s Historic Rehabilitated Buildings Investment Credit is tied to federal certification, so the Part 2 and Part 3 process described in this guidance applies directly. Details on the state credit are outlined in Schedule RBIC.
Recommended
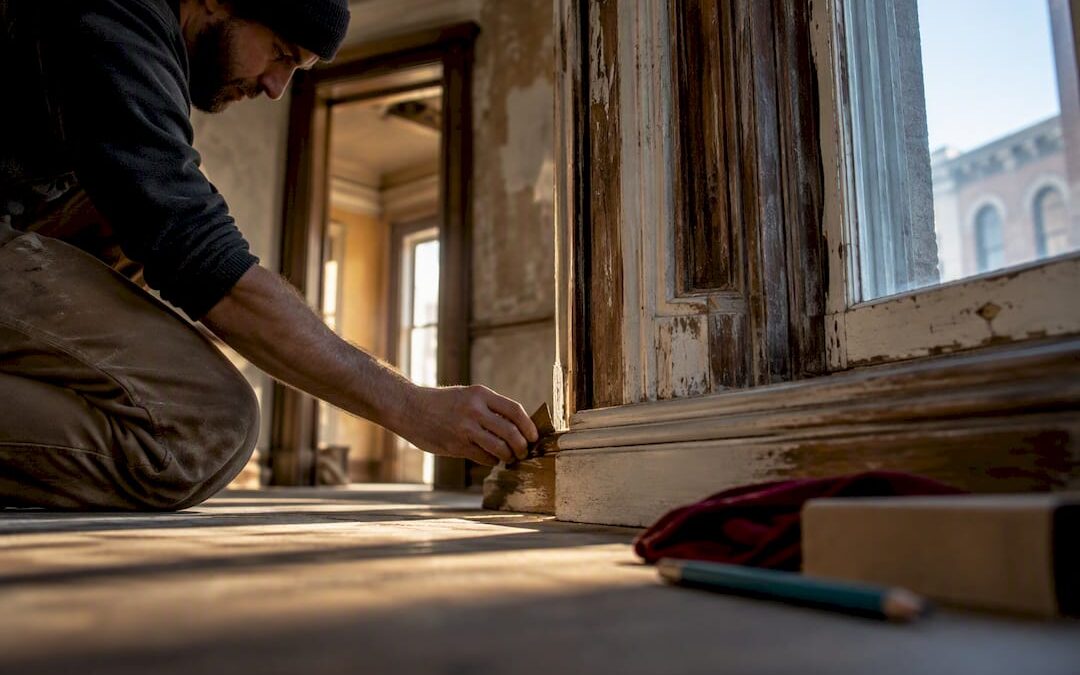
by Matthew Wiley | Sep 30, 2026 | Architectural Millwork
South Carolina property owners rehabilitating a historic structure may draw on the federal 20% rehabilitation credit for income-producing buildings and, at the state level, a 25% homeowner credit or a 10% (or optional 25%) credit for income-producing projects, the latter capped at $1 million per certified structure. The prudent first step, before a single wall is opened or a window removed, is to contact the South Carolina Department of Archives and History and begin assembling the Historic Preservation Certification Application.
TL;DR:
- The federal rehabilitation credit applies only to income-producing historic buildings, offering a 20% credit, with claims spread over multiple years.
- South Carolina’s owner-occupied homes qualify for a 25% state credit, but only if at least $15,000 is spent within 36 months, and this is claimed over three years.
- Income-producing projects can choose between a 10% or an optional 25% state credit, with the latter capped at $1 million per certified structure.
- Proper allocation of expenses between historic preservation and unrelated upgrades is essential to avoid disqualification or audits.
- Meeting the Secretary of the Interior’s Standards is critical, as even minor deviations can lead to certification denial or recapture of claimed credits.
Gepettomillworks
Preserve Historic Character With Custom Millwork
Gepettomillworks creates custom millwork for historic building projects, supporting careful rehabilitation by architects, owners, and restoration professionals.
Explore custom millwork
Table of Contents
At a glance: which credits apply and who qualifies
The federal and state historic tax credit programs serve overlapping but distinct populations, and matching the right credit to the right project saves both time and money.
- The federal credit offers a 20% rehabilitation tax credit for income-producing historic buildings, such as rental properties, offices, or commercial structures generating income.
- South Carolina’s homeowner credit provides a 25% state credit for owner-occupied historic residences, contingent on spending at least $15,000 within a 36-month period.
- Income-producing projects in South Carolina may instead choose a 10% state credit or an optional 25%, though the 25% option is capped at $1 million per certified historic structure.
- Local governments may also offer special property tax assessments, commonly called Bailey Bill programs, and preservation easements can carry their own tax benefits, both of which operate alongside, not instead of, the state and federal credits.
Each program has its own paperwork, its own review body, and its own tolerance for how much of the building’s historic fabric must survive the process intact.
How eligibility diverges between homeowners and income-producing projects
The line between the homeowner credit and the income-producing credits is not simply about who lives in the building. It is about spending thresholds, review pathways, and how mixed-use structures get divided on paper before they are divided by a contractor’s crew.
- Homeowners must spend at least $15,000 on qualifying rehabilitation within a 36-month window, while income-producing projects generally face a substantial rehabilitation test tied to the building’s adjusted basis.
- Listed status matters differently depending on the path: income-producing projects submit through the full HPCA process with SHPO and National Park Service review, while homeowner applications are reviewed by SHPO alone.
- Mixed-use buildings, such as a structure with ground-floor retail and upstairs apartments, can sometimes use both programs concurrently, provided expenses are allocated clearly between the income-producing and owner-occupied portions.
Getting this allocation wrong early tends to cause more delay than any single construction decision later in the project.
Filing the HPCA: what happens at each stage
The Historic Preservation Certification Application, known as the HPCA, is the backbone of both the federal credit and the state income-producing credit, and it unfolds in three distinct parts that correspond to different moments in the project’s life.
- Part 1 documents the building’s historic significance, establishing that it qualifies as a certified historic structure.
- Part 2 describes the proposed rehabilitation work in detail, submitted before construction begins so SHPO and the National Park Service can weigh in on the plan.
- Part 3 documents the completed work, including photographs and final costs, and is required before the rehabilitation can be certified.
Income-producing applications move through an electronic HPCA system with NPS review built into the process, while homeowner applications typically follow a SHPO-only path that may still involve hard-copy submissions.
Parts 1 and 2 are generally reviewed within 60 days of a completed submission, split roughly evenly between the state’s 30-day review and the federal government’s 30-day review. That timeline assumes the application arrives complete. Starting construction before Part 2 approval carries real risk for income-producing projects and will disqualify a homeowner application outright. One further note for anyone filing soon: SCDAH has suspended preliminary and final review fees for applications received during fiscal year 2025 to 2026, running July 1, 2025 through June 30, 2026.
The financial mechanics: percentages, installments, and caps
Understanding how these credits are actually claimed, rather than simply which percentage applies, determines how a project gets financed and when the benefit shows up on a tax return.
- The federal 20% credit for income-producing properties is generally claimed in equal annual installments over several years.
- South Carolina’s 25% homeowner credit is claimed differently: it is taken in equal installments over three years, filed via Form TC-22, with unused portions carried forward according to state rules.
- The income-producing state credit’s 25% option is capped at $1 million per certified historic structure, which matters most on large adaptive reuse projects where qualified expenses could otherwise push the credit well past that ceiling.
- Because credits offset tax liability rather than generate a refund outright in most cases, owners with lighter tax burdens should plan the installment schedule against their expected liability in each of the claim years.
A project’s financing plan should treat these credits as a multi-year cash flow event, not a lump sum arriving the year the paint dries.
Preservation standards, common mistakes, and red flags
Every certified rehabilitation, whether homeowner or income-producing, is measured against the Secretary of the Interior’s Standards for Rehabilitation, which govern methods and materials across the interior, exterior, and site. Failing to meet the Standards on even one significant element can jeopardize certification for the entire project, not just the offending piece.
The most common disqualifying mistakes are avoidable. Homeowners sometimes begin work before SHPO approval, which forfeits the credit regardless of how sensitively the work was done. Others install incompatible replacement windows or doors, keep insufficient documentation of costs and materials, or fail to separate eligible rehabilitation expenses from unrelated upgrades. Early consultation with SHPO, meticulous cost records, and contractors experienced in historic work all reduce these risks substantially.
Pro Tip: Photograph every stage of demolition and construction, not just the finished result. Part 3 review depends heavily on before-and-after documentation.
What restoration contractors bring to a certification review
The Standards are ultimately judged on physical evidence, and the millwork trades often supply the details that make or break a Part 3 review. Historically accurate window sashes, matched muntin profiles, and doors replicated from original hardware and dimensions demonstrate the kind of fidelity SHPO and NPS reviewers look for, especially on facades where a single mismatched sash can raise questions about the whole project.
Contractors who work regularly on historic structures tend to deliver a specific set of documentation alongside the finished product:
- Detailed material specifications tying each element to a historic precedent or salvaged original.
- Shop drawings keyed to the building’s original profiles and dimensions.
- Before, during, and after photographs organized by location and phase of work.
- Change orders and a cost ledger separating eligible rehabilitation expenses from unrelated work.
Gepetto Millworks builds this kind of record into projects involving historic window restoration and custom replication of historic doors, work that gives owners and their tax preparers a paper trail consistent with what SHPO reviewers expect to see. Photo documentation from past restoration projects illustrates the kind of before-and-after evidence Part 3 submissions require.
What happens when a project falls out of compliance
The consequences of an improperly claimed or non-compliant historic tax credit extend well beyond a denied application. If a project fails to meet the Secretary of the Interior’s Standards, NPS review can withhold certification for the entire rehabilitation, not merely the noncompliant portion, which means the owner loses the credit on qualified work that was done correctly alongside work that was not.
For income-producing projects, credits already claimed can be subject to recapture if the property is sold or ceases to qualify within a set period after the work is certified, effectively clawing back the tax benefit years after it was taken. For homeowners, starting construction before SHPO approves Part 2 forfeits eligibility outright, regardless of the quality of the finished work. Misallocating expenses between eligible rehabilitation costs and ineligible new construction or personal upgrades can also trigger a reduced credit or an audit inquiry from the South Carolina Department of Revenue.
The safest posture is treating the certification process as a binding commitment rather than a formality to satisfy after the fact. Owners who document decisions as they are made, keep contractors informed of what the Standards require, and resist the urge to swap in modern materials for convenience tend to avoid these penalties entirely. Those who do not risk losing a credit that, in many cases, was the financial reason the rehabilitation made sense in the first place.
Building a documentation trail SHPO and NPS will accept
Reviewers cannot certify what they cannot see, and the burden of proof rests entirely with the owner. A rehabilitation that meets every standard in practice but lacks documentation is, for certification purposes, indistinguishable from one that does not meet the standards at all.
The strongest documentation packages share a few habits. They photograph the building comprehensively before any demolition begins, capturing details like trim profiles, hardware, and glazing patterns that reviewers will later compare against the finished work. They maintain a running log of materials and methods, noting where original fabric was retained, repaired, or, when necessary, replaced in kind. They keep shop drawings and material specifications for any custom fabrication, since these documents demonstrate that replacement elements match historic precedent rather than approximate it.
Cost records deserve equal attention. Separating eligible rehabilitation expenses from unrelated upgrades in real time, rather than reconstructing the split at tax time, prevents disputes later with either SHPO or the South Carolina Department of Revenue. Owners working with contractors experienced in historic restoration often find this documentation habit is built into the workflow already, since the same photographs and drawings that support a smooth Part 3 submission also protect the contractor against disputes over scope and change orders.
Claiming these credits requires coordination between the certification process and the actual tax filing, and the two run on separate tracks that eventually need to meet.
For the federal 20% credit, the certified rehabilitation must be reflected on the owner’s federal tax return following IRS procedures for the rehabilitation credit, with certification from the National Park Service serving as the necessary proof that the work qualifies. For South Carolina’s homeowner credit, Form TC-22 is filed with the South Carolina Department of Revenue, claiming the 25% credit in equal installments across three years once SHPO has certified the completed work. Income-producing projects claiming the state’s 10% or optional 25% credit file through comparable state procedures tied to their SHPO certification.
None of these filings happen in isolation from the certification timeline. A homeowner cannot file Form TC-22 claiming a credit for work that SHPO has not yet certified, and an income-producing project cannot claim the federal credit without the NPS certification that follows a completed Part 3 submission. Owners should coordinate with a tax advisor familiar with South Carolina’s specific forms well before the rehabilitation is finished, since the certification and the filing deadline do not always align neatly with a calendar tax year.
Who and what actually qualifies for these programs
Eligibility hinges on both the property and the owner’s intended use of it, and the two programs draw the line differently.
For the federal credit, the building must be a certified historic structure, meaning it is individually listed on the National Register of Historic Places or located in a registered historic district and certified as contributing to that district’s significance. The building must also be income-producing, which excludes a primary residence unless a portion is rented or used commercially. For South Carolina’s income-producing credit, the same certified structure standard generally applies, layered on top of the federal eligibility framework.
The homeowner credit, by contrast, is built for owner-occupied residences. The property must be a certified historic structure under the same listing standards, but the qualifying spend threshold, at least $15,000 within 36 months, replaces the substantial rehabilitation test used for income-producing projects. In both cases, the owner bears responsibility for ensuring the property’s listed or contributing status is confirmed with SHPO before assuming the credit applies, since a building’s historic reputation locally does not always translate into the formal certification these programs require.
Combining federal and state credits on the same project
For income-producing properties, the federal and South Carolina credits are designed to work together rather than compete. An owner completing a certified rehabilitation can claim the federal 20% credit and, on the same project, elect either the state’s 10% credit or its optional 25% credit, subject to the $1 million cap on the 25% option. Stacking these credits is one of the more significant financial advantages available to developers taking on adaptive reuse of historic commercial buildings in South Carolina.
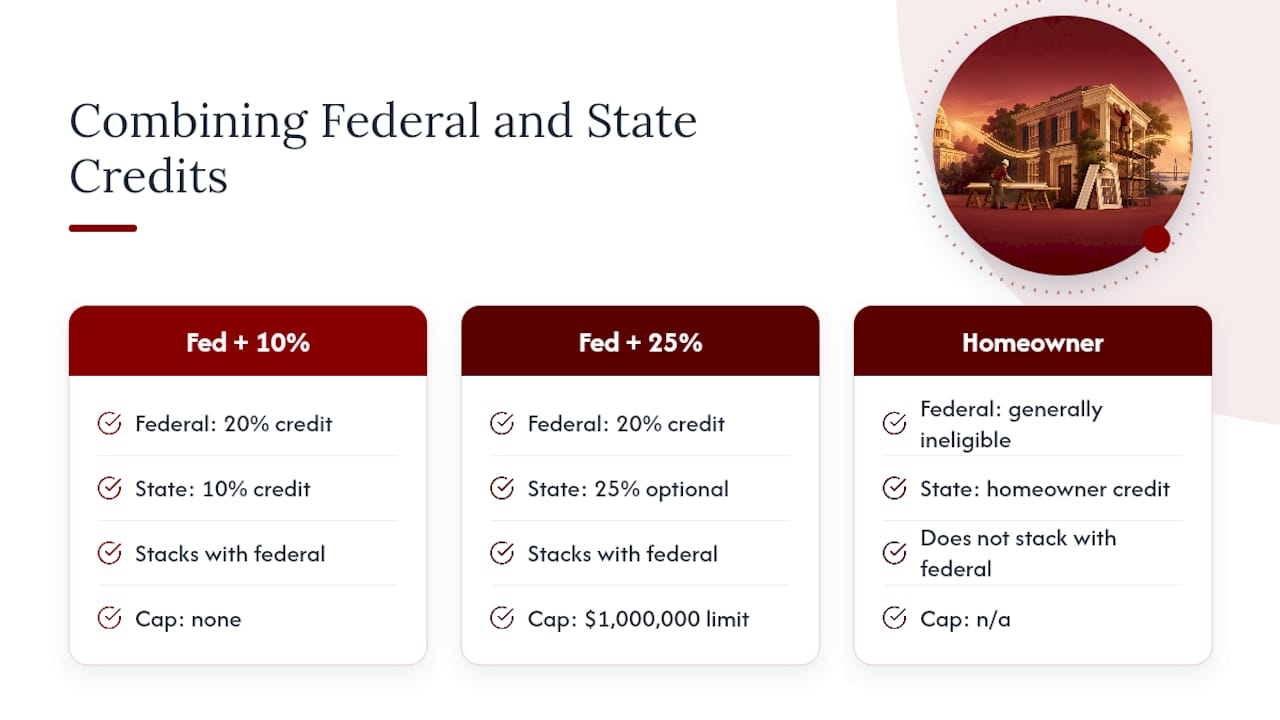
The homeowner credit does not stack with the federal credit in the same way, since the federal 20% credit is reserved for income-producing property and most owner-occupied homes do not qualify as income-producing. An owner who rents out part of a historic residence while occupying the rest may find that expenses need to be allocated between the two uses, with income-producing portions potentially eligible for federal treatment and owner-occupied portions following the state homeowner path. Getting this allocation right, ideally with guidance from both SHPO and a tax professional before construction begins, prevents a project from losing eligibility on either side of the split.
What counts as a qualifying rehabilitation expense
Not every dollar spent on a historic property counts toward these credits, and understanding the boundary matters as much as understanding the percentages.
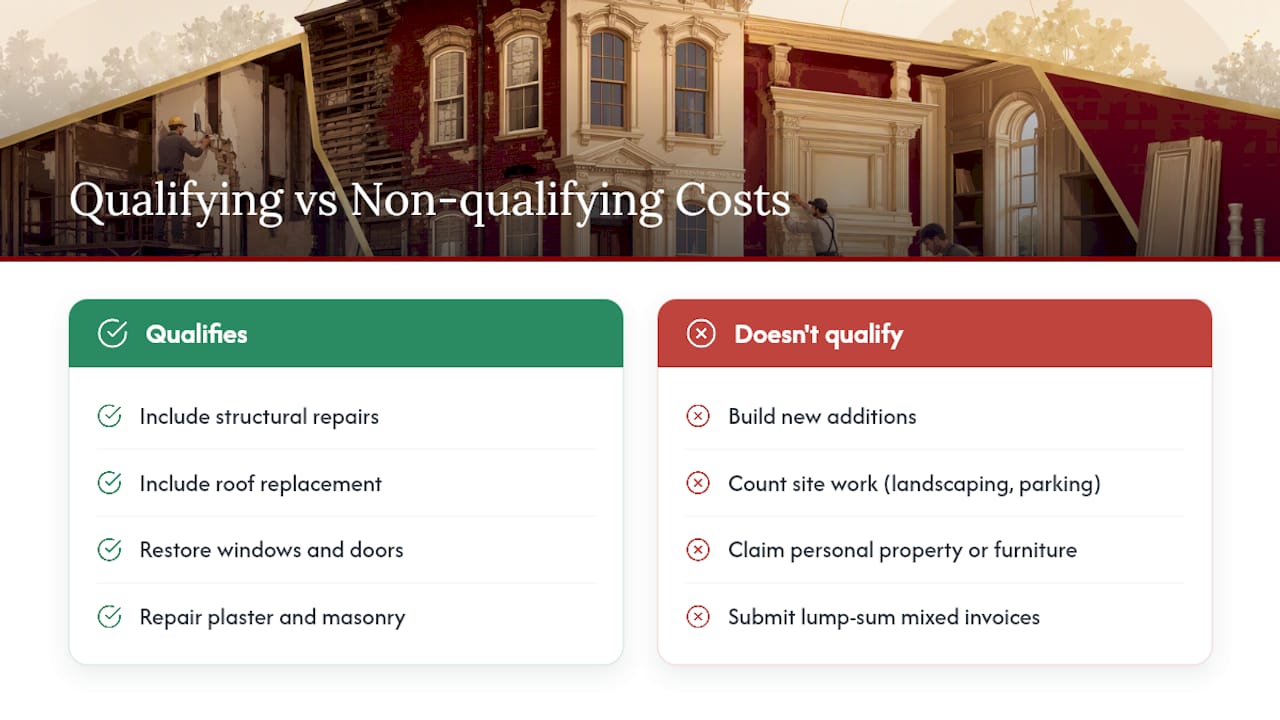
Qualifying expenses generally include costs directly tied to rehabilitating the historic structure itself: structural repairs, roof replacement, restoration of windows and doors, plaster and masonry repair, and mechanical, electrical, and plumbing upgrades necessary to make the building usable. Architectural and engineering fees connected to the rehabilitation typically qualify as well. Costs for a new addition, site work like landscaping or new parking, and personal property such as furniture generally do not qualify, since the credits are built to reward preservation of the existing historic fabric rather than expansion beyond it.
Millwork and finish carpentry sit squarely within qualifying territory when the work restores or replicates historic elements rather than substituting generic modern stock. Custom wooden windows, replicated solid wood entry doors, and matched trim or casework all fall under rehabilitation expenses when they preserve the building’s documented historic character, provided the costs are separated clearly from any unrelated new construction happening on the same site. Owners planning a rehabilitation budget should build this distinction into their contracts from the start, since a single lump-sum invoice covering both eligible and ineligible work creates unnecessary friction during a Part 3 review.
Getting organized early saves months of back-and-forth later. The essential resources sit across three agencies, each responsible for a different part of the process.
- Start with SCDAH’s income-producing program page or its homeowner program page to confirm which credit fits the property.
- Review the NPS application process guidance for the specifics of Parts 1 through 3 before drafting the HPCA.
- Download and review Form TC-22 from the South Carolina Department of Revenue if pursuing the homeowner credit.
- Assemble Part 1 materials, contact SHPO directly, consult a tax advisor familiar with South Carolina’s programs, and set a realistic completion schedule before committing to a start date.
What this process actually rewards, and what it does not
The conventional advice on historic tax credits treats the paperwork as a formality standing between an owner and a check. That framing undersells what the review process is actually built to protect. SHPO and NPS reviewers are not grading intentions. They are grading whether the physical building, down to its window profiles and trim details, still reads as historic after the work is done. A project can be beautifully renovated and still fail certification if the replacement elements do not match what was there before.
What gets underestimated most is the role of the contractor selection made in the earliest weeks of planning, long before Part 2 is submitted. Owners who bring in fabricators capable of matching historic profiles from the outset rarely struggle with Part 3 documentation, because the evidence builds itself as the work proceeds. Owners who choose convenience first, then try to retrofit compliance later, are the ones who end up disputing a denial. The single highest-leverage decision in this entire process is choosing who swings the hammer, not which credit percentage to elect.
— Gepetto
Ready to make your rehabilitation credit-eligible
Choosing the right tax credit is only half the equation. The other half is whether the finished building actually satisfies the Secretary of the Interior’s Standards well enough for SHPO and NPS to certify it, and that outcome depends heavily on the millwork, windows, and doors that define a historic building’s character. Some fabricators specialize in custom design, fabrication, and restoration of wood windows, doors, trim, and staircases for historic buildings, replicating period details that align with certification review expectations.
Whether the project calls for historic window restoration, custom-fabricated shutters, entry doors, or casework, or a full custom kitchen build inside a certified historic structure, having a fabricator who understands both the craft and the documentation reviewers expect removes one of the biggest sources of risk in the entire process. Get in touch to discuss your South Carolina rehabilitation project and start planning the millwork that will carry your HPCA submission through review.
Sources
FAQ
How does a historic tax credit work?
A historic tax credit reduces the amount of tax an owner owes, based on a percentage of qualifying rehabilitation expenses spent restoring a certified historic building. In South Carolina, the federal credit offers 20% for income-producing properties, while state credits add either a homeowner benefit or an income-producing option on top, both requiring certification from SHPO and, for the federal credit, the National Park Service.
Do you get a property tax break at age 65 in South Carolina?
South Carolina offers a homestead exemption for qualifying homeowners, but that program is separate from the historic tax credits discussed here and is administered through local county assessors rather than SHPO or the state’s historic preservation programs. Homeowners should check with their county assessor’s office for the specific eligibility rules and application process for that exemption.
What is the Exceptional SC tax credit and how can I claim it?
Owners looking for the correct program should start with SCDAH’s tax incentives overview to confirm which credit applies to their project.
What tax credits are available in South Carolina?
South Carolina property owners can access the federal 20% rehabilitation credit for income-producing historic buildings, a state homeowner credit of 25% requiring at least $15,000 in qualifying spend within 36 months, and a state income-producing credit of 10% or an optional 25% capped at $1 million per structure. Local Bailey Bill special assessments and preservation easements can offer additional property tax benefits alongside these credits.
Recommended

by Matthew Wiley | Sep 30, 2026 | Architectural Millwork
Yes, Maryland offers state historic revitalization tax credits, and certified projects can typically claim a credit of 20% of qualified rehabilitation costs after certification by the Maryland Historical Trust and filing Form 502S. Start by determining which of the three program tracks fits your project, then contact the Trust early to begin certification and prepare the documentation Form 502S requires at filing time.
TL;DR:
- The Maryland historic tax credit offers 20% of qualified rehabilitation costs, with up to 5% additional if high-performance standards are met.
- Certification is a three-stage process through the Maryland Historical Trust, with an initial application before work begins and final certification after completion.
- The maximum credit caps at $50,000 for homeowner and small commercial projects, but can be up to $5 million for larger commercial rehabilitations.
- Proper documentation, including the approved Part 3 certification and photographs sent to MHT, is crucial to avoid application rejection.
- Engaging experienced historic rehab professionals early, especially architects and millwork specialists, improves certification success and overall project quality.
Gepettomillworks
Millwork That Supports Historic Projects
Gepettomillworks creates custom millwork for historic building projects, supporting the detailed work required in certified rehabilitation.
Explore custom millwork
Table of Contents
The Three Maryland Historic Tax Credit Tracks
Maryland’s Historic Revitalization Tax Credit Program is not a single incentive but a set of three related credits, each calibrated to a different kind of building and owner. The homeowner tax credit applies to owner-occupied residential properties, carries a modest expenditure floor, and is capped at a level designed for household-scale restoration rather than commercial redevelopment. It suits the family restoring a Federal-period rowhouse in Baltimore or a farmhouse in Frederick County, where the rehabilitation touches windows, trim, and structural elements without the scale of an income-producing project.
The small commercial tax credit occupies the middle ground: projects with qualified rehabilitation expenditures falling under a defined small-commercial ceiling, often storefronts, small mixed-use buildings, or modest adaptive reuse projects that do not need the full application weight of a large development.
The competitive commercial tax credit governs income-producing properties, larger redevelopment projects, and buildings where the rehabilitation budget runs into the hundreds of thousands or millions of dollars. This track carries a formal application and certification path through MHT, higher caps, and a more demanding documentation burden, reflecting the scale of the projects it serves. Choosing the correct track early shapes every subsequent step, from the paperwork you file to the deadlines you must track.
Eligibility and MHT Certification: What Counts as a Certified Rehabilitation
Certification by the Maryland Historical Trust is not optional. It is the statutory gateway that determines whether a project qualifies for any of the three credits, and COMAR regulations codify the homeowner, small commercial, and competitive commercial tracks under MHT’s authority. The certification process generally moves through three stages: an initial application describing the property and proposed work, a review during construction, and a final certification once the rehabilitation is complete. This three-part structure mirrors the federal process, though Maryland’s forms and thresholds are distinct.
Substantial rehabilitation thresholds determine whether a project even qualifies for review. Form 502S instructions set the floor at $5,000 in qualified expenditures for a single-family, owner-occupied property, while other property types must meet a threshold equal to the greater of the building’s adjusted basis or $25,000. A modest cottage restoration might clear the homeowner floor with new sash windows and repointed masonry, while a commercial building’s threshold scales with its existing basis, meaning a higher-value property must spend proportionally more to qualify.
Eligible applicants extend beyond individual owners. Nonprofits, trusts, and pass-through entities such as partnerships and limited liability companies can pursue certification, though pass-through entities face specific allocation and filing rules when the credit passes to individual partners or members. Anyone uncertain whether their ownership structure qualifies should raise the question with MHT before submitting Part 1, since a certification granted to the wrong applicant can complicate the eventual Form 502S filing.
Step-by-Step Application: Prepare, Certify, File
The application sequence follows the certification’s three parts, and the order matters because expenditures incurred before Part 1 approval generally will not qualify.
- Submit the Part 1 Certification Application to MHT before beginning work, describing the property’s historic status and the proposed scope of rehabilitation.
- Receive a project number and MHT’s initial approval, which establishes the baseline against which later work is measured.
- Complete Part 2 documentation as the work proceeds, since MHT reviews progress against the approved scope rather than certifying everything retroactively at the end.
- File Part 3 once construction is finished, requesting final certification of the completed rehabilitation.
- Attach the approved Part 3 certification to Form 502S when filing your Maryland tax return, since the Comptroller will not honor the credit without it.
Corporations and pass-through entities generally must file electronically, and the Form 502S instructions direct applicants to send supporting photographs and project documentation directly to MHT at 100 Community Place, Crownsville, Maryland 21032-2023, not to the Comptroller’s office. Confusing these two recipients is one of the more common procedural errors, since the Comptroller processes the tax form while MHT retains authority over the underlying certification.
How the Credit Is Calculated and What Caps Apply
Form 502S walks applicants through a straightforward calculation once certification is in hand: certified qualified rehabilitation expenditures are multiplied by 20%, and an additional 5% may apply if the building meets high-performance standards, bringing the potential credit to 25% of qualified costs for buildings that meet that bar.
A credit calculated at 20% of certified rehabilitation expenditures, with a possible 5% high-performance add-on, forms the backbone of Maryland’s program, according to Form 502S. That percentage applies uniformly across the homeowner and small commercial tracks, though the dollar caps differ by scale of project.
- Homeowner and small commercial projects are generally subject to a $50,000 maximum credit.
- Competitive commercial rehabilitations can claim up to $5,000,000, reflecting the larger scope of income-producing redevelopment.
- The credit is nonrefundable in most circumstances but can typically be carried forward, so a project that generates more credit than the owner’s current tax liability is not necessarily wasted.
- The approved Part 3 Final Certificate must be attached to Form 502S at filing, since the Comptroller’s form treats it as the evidentiary backbone of the claim.
An owner restoring a modest brick town house with $60,000 in qualified window, door, and plaster work would calculate a credit near the $50,000 cap, while a developer converting a former mill building into apartments might approach the $5,000,000 commercial ceiling on a much larger rehabilitation budget.
Timelines and Recapture: Completion Windows and the Five-Year Schedule
Commercial rehabilitations must be completed within an approved timeframe; applicants should coordinate with MHT for any extensions to avoid eligibility loss. Owners who anticipate delays, whether from permitting, material sourcing, or contractor scheduling, should notify MHT before the deadline lapses rather than after, since a documented postponement request preserves eligibility in a way that a missed deadline does not.
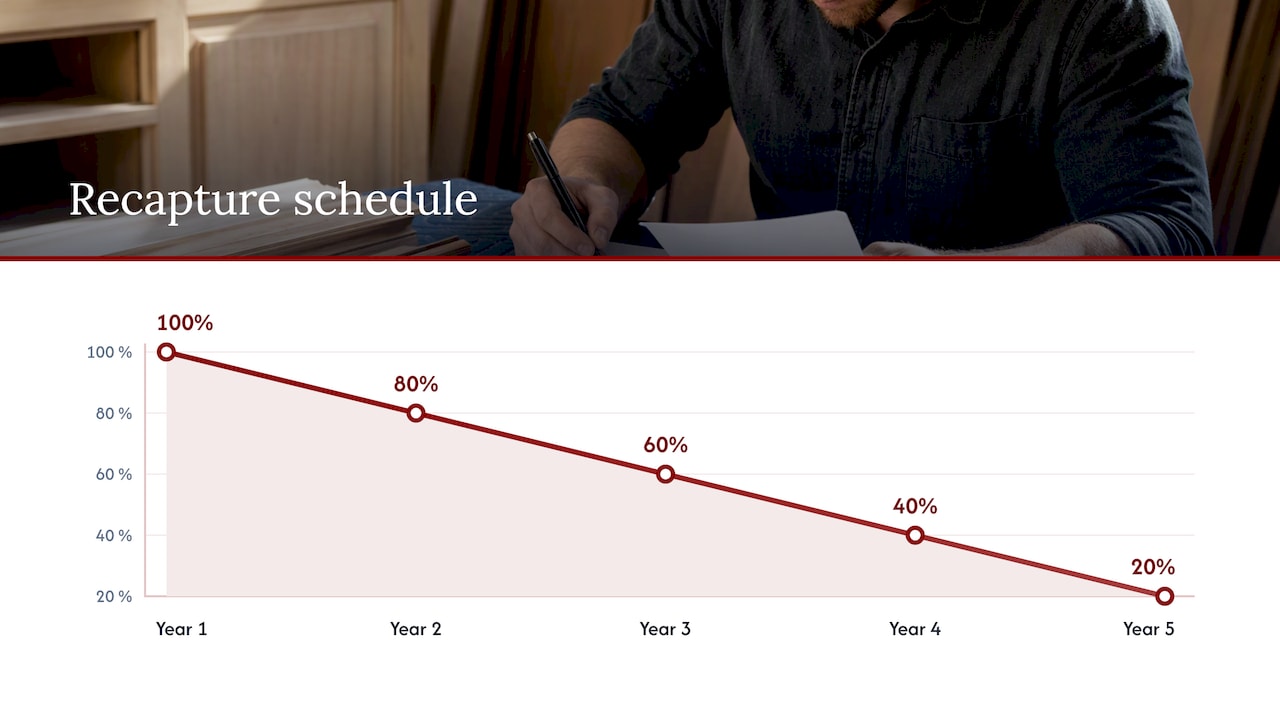
Recapture is the mechanism that claws back credit already claimed if the property is sold or altered in a disqualifying way within five years of certification. The schedule generally reduces the recapture percentage each year: 100% in the first year, tapering to 80%, 60%, 40%, and 20% by the fifth, according to Form 502S. A sale, a demolition of certified features, or work that undoes the approved rehabilitation can all trigger this clawback, so owners planning a sale within that window should factor recapture exposure into their timing.
Documentation and Common Mistakes to Avoid
Strong recordkeeping is what separates a smooth Form 502S filing from a rejected one. Keep itemized invoices tied to each certified expenditure, proof of payment, the MHT-approved Part 3 certification, detailed contractor scopes of work, and photographs documenting conditions before, during, and after the rehabilitation.
- Failing to attach the approved Part 3 certification to Form 502S, which the Comptroller treats as grounds for disallowing the credit outright.
- Sending photographs or project documentation to the Comptroller instead of to MHT at its Crownsville address, delaying review of both the certification and the tax filing.
- Reusing the same certified expenditures across multiple tax years, which invites scrutiny during any subsequent audit.
Pro Tip: Keep a single project folder, physical or digital, that pairs every invoice with its corresponding photograph and MHT correspondence, so an auditor or a future buyer can trace each certified dollar back to its source.
Gepetto’s Practical Guidance for Certified Rehabilitation Claims
Period-accurate windows, entry doors, and interior millwork are commonly accepted as qualified expenditures when the paperwork behind them is airtight. From a fabricator’s perspective, that means shop drawings that reference the historic profile being replicated, change orders that explain any deviation from the original scope, and serial-numbered invoices that tie each sash, muntin pattern, or balustrade run to a specific line item on the certification.
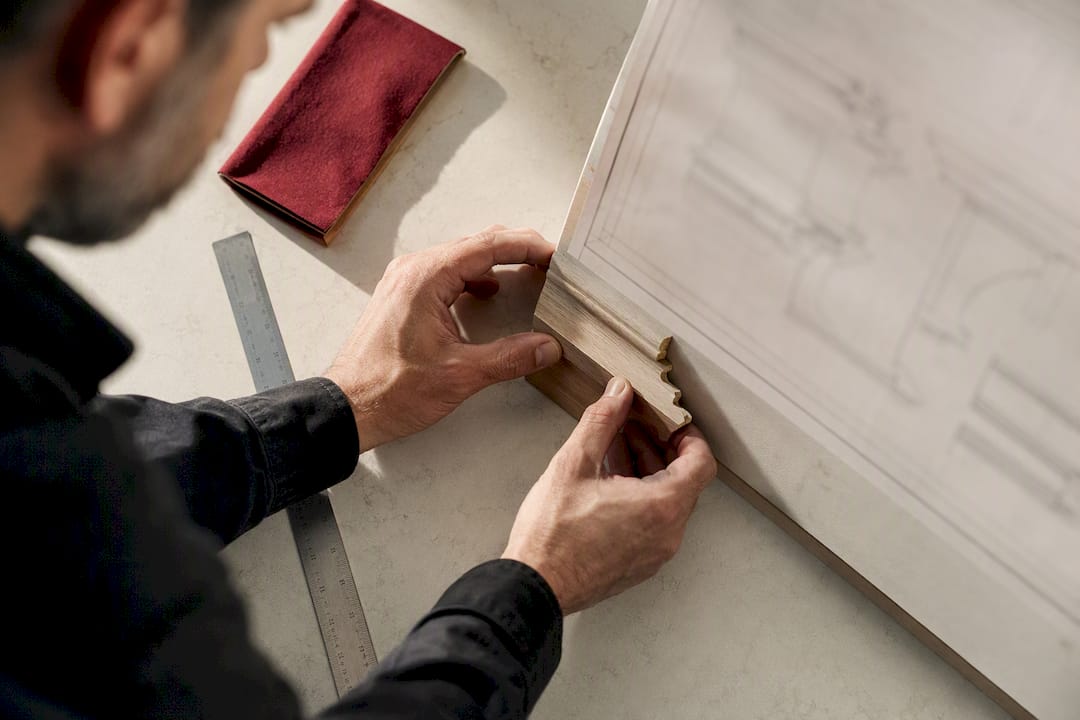
Gepetto Millworks has documented this kind of work through its historic building tax credits guidance and its broader look at how historic tax credit builders approach rehabilitation scopes. Involving a restoration millwork specialist during the design phase, well before Part 2 or Part 3 submission, gives an applicant time to document the existing conditions and match replacement elements convincingly, which strengthens the eventual MHT certification rather than complicating it after the fact.
Benefits and Incentives Beyond the Tax Credit
The state credit is rarely the only incentive available to a Maryland rehabilitation project. Many jurisdictions layer local preservation grants, facade improvement programs, or reduced property tax assessments for designated historic structures on top of the state credit, though the specifics vary by county and municipality. Owners should check with their local planning or historic preservation office to see what complements the state program, since a county-level grant can sometimes be paired with the state credit to offset a different portion of the same project’s costs.
Separately, Maryland’s business tax incentives, such as the One Maryland Project Tax Credit administered by the Department of Commerce, exist for economic development purposes distinct from historic preservation and should not be confused with the Historic Revitalization Tax Credit’s certification requirements. A developer pursuing a large adaptive reuse project might qualify for both, but each program has its own application, its own agency, and its own rules, and conflating them risks an incomplete filing on either side.
The cumulative effect of these overlapping programs is that a well-documented rehabilitation, one that establishes clear qualified expenditures and a certified scope of work, is positioned to draw on more than one source of support, even though the state historic credit itself remains the central incentive for most preservation-driven projects in Maryland.
Maryland’s Credit Versus the Federal Historic Tax Credit
Maryland’s state credit and the federal historic tax credit are separate programs administered by different agencies, and a project can potentially claim both if it meets each program’s independent requirements. The federal credit generally applies to income-producing, certified historic structures and is administered through the National Park Service in coordination with the Internal Revenue Service, while Maryland’s credit is administered by the Maryland Historical Trust and claimed through the state Comptroller’s Form 502S.
The two programs do not automatically track each other. A property listed on the National Register of Historic Places, or located in a registered historic district, is a common starting point for both, but MHT certification of a rehabilitation does not substitute for federal certification, and vice versa. Developers pursuing a large commercial rehabilitation often pursue both certifications in parallel, since the combined credits can meaningfully change a project’s financing picture, but each application, each set of qualified expenditures, and each recapture schedule must be tracked separately. An owner-occupied residential rehabilitation, by contrast, is generally only eligible for the state homeowner credit, since the federal program is largely limited to income-producing property. Understanding this distinction early prevents a developer from assuming federal eligibility automatically confers state eligibility, or the reverse.
Typical Costs and Fees of Applying for Maryland’s Credit
The state does not charge a fee to submit a certification application to the Maryland Historical Trust, but pursuing a certified rehabilitation carries real costs beyond the construction budget itself. Applicants commonly engage an architect or restoration consultant to document existing conditions and prepare the drawings MHT reviews during Part 1 and Part 2, and that professional fee scales with project complexity rather than following a fixed schedule.
Larger competitive commercial projects often retain a historic preservation consultant specifically to manage the certification process, since the three-part application and the documentation MHT expects can be time-consuming for an owner or developer without prior experience. Legal and accounting costs also enter the picture for pass-through entities that need to structure how the credit allocates among partners or members.
None of these costs are set by the state program itself, and they vary widely depending on project scale, the complexity of the historic fabric involved, and whether the owner is pursuing the homeowner track or a multimillion-dollar competitive commercial rehabilitation. A homeowner replacing a handful of windows on a rowhouse faces a far smaller documentation burden, and correspondingly smaller consulting costs, than a developer converting a mill complex into mixed-use space. Budgeting for professional fees alongside construction costs from the outset avoids the surprise of discovering, mid-project, that certification requires more documentation than the owner anticipated.
Choosing Qualified Professionals for a Certified Project
A successful MHT certification depends heavily on the professionals assembled around it. An architect experienced in historic rehabilitation understands how to document existing conditions in the language MHT reviewers expect, and knows which alterations preserve character-defining features versus which risk disqualifying a project midstream. A preservation historian, whether independent or attached to a consulting firm, can strengthen the Part 1 application by grounding the property’s significance in its documented history, which matters most for buildings not already individually listed on a historic register.
Contractors matter just as much as the design team. A general contractor unfamiliar with historic tax credit projects may default to standard replacement materials or techniques that MHT will not accept as consistent with the building’s historic character, jeopardizing certification after work has already begun. Seeking contractors and specialty fabricators with a documented history of historic tax credit projects, people who understand why a millwork profile needs to match an original muntin pattern rather than approximate it, reduces the risk of a Part 2 review flagging work for correction.
Given the stakes, owners and developers benefit from assembling this team before submitting Part 1 rather than after, since an architect or historian brought in mid-project has less ability to shape the documentation that MHT will ultimately review.
Case Examples: How Certified Projects Play Out in Practice
A rowhouse restoration in a Baltimore historic district illustrates the homeowner track in practice: an owner replacing deteriorated wood sash windows and repairing original trim, plaster, and staircase elements can build a qualified expenditure total that clears the $5,000 threshold well before reaching the $50,000 cap, provided the work is certified through MHT’s Part 1 through Part 3 process rather than treated as an ordinary renovation.
A small commercial storefront rehabilitation in a town like Frederick or Cumberland often follows a similar arc at a slightly larger scale, where a business owner restoring a facade, interior trim, and a period staircase documents each phase for MHT review before claiming the credit on Form 502S.
Larger adaptive reuse projects, such as converting a historic mill or warehouse into mixed-use commercial and residential space, illustrate the competitive commercial track’s greater complexity. These projects typically involve a formal application process, phased Part 2 reviews as construction proceeds over many months, and a final certification package substantial enough to support a credit approaching the $5,000,000 ceiling. The common challenge across all three scales is the same: expenditures incurred or documentation created outside the certification window rarely qualify, regardless of how historically appropriate the work itself may be.
Why Maryland’s Program Rewards Early Planning
Maryland’s historic tax credit program does more than offset a rehabilitation budget. It channels private investment into buildings that would otherwise face costly deferred maintenance, and preservation advocates have long argued the program returns measurable community and economic value beyond the credit itself. The owners who benefit most are the ones who coordinate with MHT and their design and construction team before breaking ground, not after, and who keep documentation precise enough to survive both the certification review and the five-year recapture window.
— Gepetto
How Gepetto Millworks Supports a Certified Rehabilitation
Applicants pursuing a Maryland historic tax credit often need documented, invoice-ready millwork that matches a building’s original character, and that is where Restoration millwork specialists engaged during design, before Part 2 or Part 3 submission, can help certification packages reflect accurate profiles and maintain a clean paper trail.
Consider discussing your project’s scope and timeline with a restoration millwork specialist before you file Part 1.
This article is general information, not a substitute for advice from a qualified financial advisor. Consult a qualified financial professional about your own circumstances before acting on anything here.
Sources
FAQ
How does a historic tax credit work?
A historic tax credit reduces the tax an owner owes by a percentage of the money spent rehabilitating a certified historic property. In Maryland, that generally means 20% of qualified expenditures, plus a possible 5% high-performance add-on, claimed on Form 502S once MHT has certified the completed work.
Who is eligible for the $1,000 senior tax credit in Maryland?
That credit falls under a different Maryland property tax program than the Historic Revitalization Tax Credit covered in this guide, and its eligibility rules are set at the county level rather than by MHT. Homeowners should check with their local county tax office for the specific age, income, and residency requirements that apply where they live.
How do I apply for MD’s homestead tax credit?
The homestead tax credit is a separate Maryland property assessment program, distinct from the historic rehabilitation credit, and applicants apply through the State Department of Assessments and Taxation rather than through MHT or Form 502S. It limits taxable assessment increases on a principal residence and has its own application and eligibility criteria unrelated to historic certification.
What are the requirements for receiving the Senior tax credit in Frederick County, Maryland?
Frederick County administers its own senior tax credit program with locally set age, income, and residency thresholds that differ from the state’s historic revitalization credit discussed throughout this guide. Homeowners in Frederick County should contact the county’s finance or tax office directly for the current eligibility requirements and application steps.
Recommended
by Matthew Wiley | Sep 15, 2026 | Architectural Millwork
Choose true divided lite (TDL) when a project demands authentic shadow lines and historic tax credit compliance, and choose simulated divided lite (SDL) when energy performance and budget carry more weight than absolute period accuracy. The reason comes down to construction: TDL separates glass into individual panes held by structural muntins, while SDL applies bars to one continuous insulated pane. That single difference governs cost, thermal performance, and how each window reads from the sidewalk and the sofa alike.
TL;DR:
- True divided lite windows require wider muntins and multiple glass panes, making them more costly and harder to repair but more authentic for historic districts.
- Simulated divided lite options with spacer bars or GBG constructions offer better energy performance, larger sizes, and easier maintenance, at the expense of visual depth and authenticity.
- SDL with spacer bars closely mimics TDL’s look from a distance but features a sealed glazed unit that is more energy-efficient and better suited for modern budgets.
- Expert measurements of sash thickness and rebate depth are crucial to determine if true divided construction is physically feasible or if a hybrid approach is needed.
- Owners should ask detailed supplier questions about bar width, seal failure, and maintenance to ensure the chosen method aligns with project standards and long-term performance.
Gepettomillworks
Match Historic Millwork With Confidence
Gepettomillworks creates custom millwork for historic building projects, helping teams address demanding sash and muntin requirements.
Visit Gepettomillworks
Table of Contents
TDL vs SDL: What True Divided Lite Actually Is
True divided lite construction places separate panes of glass into individual openings, each held by muntins that do real structural work rather than decorative ones. Light hits each pane at a slightly different angle, and the muntins themselves cast a shadow line with real depth. That’s why TDL windows look different up close than they do from across the street, and why architects specifying historic replication almost always start here.
The construction carries a technical constraint that catches many renovation clients off guard: standard insulated glass units conflict with historic muntin widths built for single-pane glazing. A muntin profiled at 7/8 inch in 1890 was never meant to hold two panes of glass and a spacer bar.
- Each pane sits in its own glazing rebate, sealed and puttied or set with bead
- Muntin depth and profile can be replicated to match a building’s original millwork
- Individual panes can be reglazed one at a time without disturbing the whole sash
- Thermal performance depends on the glass itself, since there is no sealed IG unit
TDL remains the right specification for landmark districts, tax credit projects with strict Secretary of the Interior standards, and any sash where the muntin profile itself is part of the building’s documented character.
TDL vs SDL: How Simulated Divided Lite Works
Simulated divided lite flips the construction entirely. A single, continuous insulated glass unit fills the opening, and grid bars are applied to the interior and exterior surfaces to mimic the look of separate panes. SDL construction trades individual panes for one sealed unit with applied trim, which changes almost every performance and cost variable downstream.
Three variants show up in practice, each with a different depth-to-performance ratio:
- Surface-applied SDL bars sit directly on the glass face, the simplest and least expensive option but with the flattest shadow line
- SDL with spacer bars places a matching bar inside the sealed unit between the panes, which restores visual depth closer to TDL while keeping one continuous IG unit
- Grilles between glass (GBG) locates the grid entirely inside the sealed cavity, eliminating any surface bar to clean around
SDL suits large window replacements, additions where energy codes apply, and any project where the owner wants the divided lite look without the maintenance load of dozens of individual panes.
Comparing TDL and SDL Across Seven Decision Factors
The core TDL vs SDL trade-off narrows to seven factors that actually drive a specification decision on a real project.
- Authenticity and visual depth. TDL wins decisively at close range, since real glass edges catch light differently under each muntin. SDL with spacer bars closes most of that gap from ten feet back; surface-applied SDL closes very little.
- Sightlines and muntin width. TDL requires wider muntins to structurally hold glass and glazing putty, often 7/8 inch or more. SDL can achieve narrower profiles since the bar carries no structural glazing load, per Simpson’s documented divided lite construction specs.
- Cost drivers. TDL costs more per opening, since it multiplies glass count, cutting, and labor per pane. SDL’s single IG unit and applied bar reduce fabrication steps substantially.
- Energy performance. SDL and GBG generally outperform TDL because the sealed IG unit provides consistent insulating value, a point Marvin’s technical documentation confirms directly.
- Repairability. TDL allows single-pane reglazing when one section fails. SDL requires full IG unit replacement if the seal fails, since the bars are bonded to one sealed assembly.
- Large openings and transoms. SDL and GBG handle oversized lites and transoms more reliably, since a single IG unit resists wind load better than many small individual panes.
- Long-term cleanability. GBG wins outright here, since there’s no exterior bar to dust or repaint; surface-applied SDL and TDL both require cleaning around every muntin face.
Planning for Lifecycle Costs and Maintenance
Glass count drives most of the TDL vs SDL cost gap. A six-over-six TDL sash means twelve individual panes to cut, glaze, and seal, while an SDL version of the same sash uses one IG unit and a bonded grid. Custom muntin profiles, curved or diamond-pattern lites, and matching an existing building’s exact reveal depth all add fabrication time beyond the basic glass count.
Maintenance schedules diverge just as sharply. TDL glazing putty and glazing points typically need inspection every few years, with reglazing as sealant dries and cracks. SDL introduces a different failure mode: seal failures in insulated glass units show up as fogging or condensation between panes, and spacer bar adhesives can degrade under sustained UV and thermal cycling.
- TDL: periodic reglazing, individual pane replacement, ongoing paint maintenance on exposed muntins
- SDL: IG seal inspection, occasional full-unit replacement, adhesive checks on applied spacer bars
- GBG: minimal exterior maintenance, since bars are sealed inside the unit
Vacuum insulated glass and other thin IG technologies now let some historic projects achieve TDL-style profiles with better thermal performance than traditional single-pane TDL, though the fabrication requires specialist capability and a higher budget line.
Pro Tip: Ask any fabricator quoting SDL with spacer bars to show a cross-section sample, not just a photo. The depth of that internal bar relative to the glass surface is what determines whether the finished sash reads as authentic or flat.
Choosing Between TDL and SDL: A Practical Checklist
Work through these steps before finalizing a specification, in order:
- Confirm the project’s governing standard: is this under a historic tax credit review, a local historic district ordinance, or unrestricted renovation?
- Measure existing muntin width, glazing rebate depth, and sash thickness on any openings being matched.
- Set an explicit energy target (a U-factor or a code requirement) before comparing glass options.
- Request sample cross-sections from any supplier, not marketing photos.
- Ask ten direct questions: What’s the actual bar width? Is the spacer bar structural or cosmetic? What warranty covers seal failure? Can individual panes be reglazed later? How does GBG affect cleaning access? What’s the lead time for custom muntin profiles? Has this exact profile been matched before? What happens if the historic review board rejects the sightline? Is VIG an option for this opening size? What does a failed seal repair cost in five years?
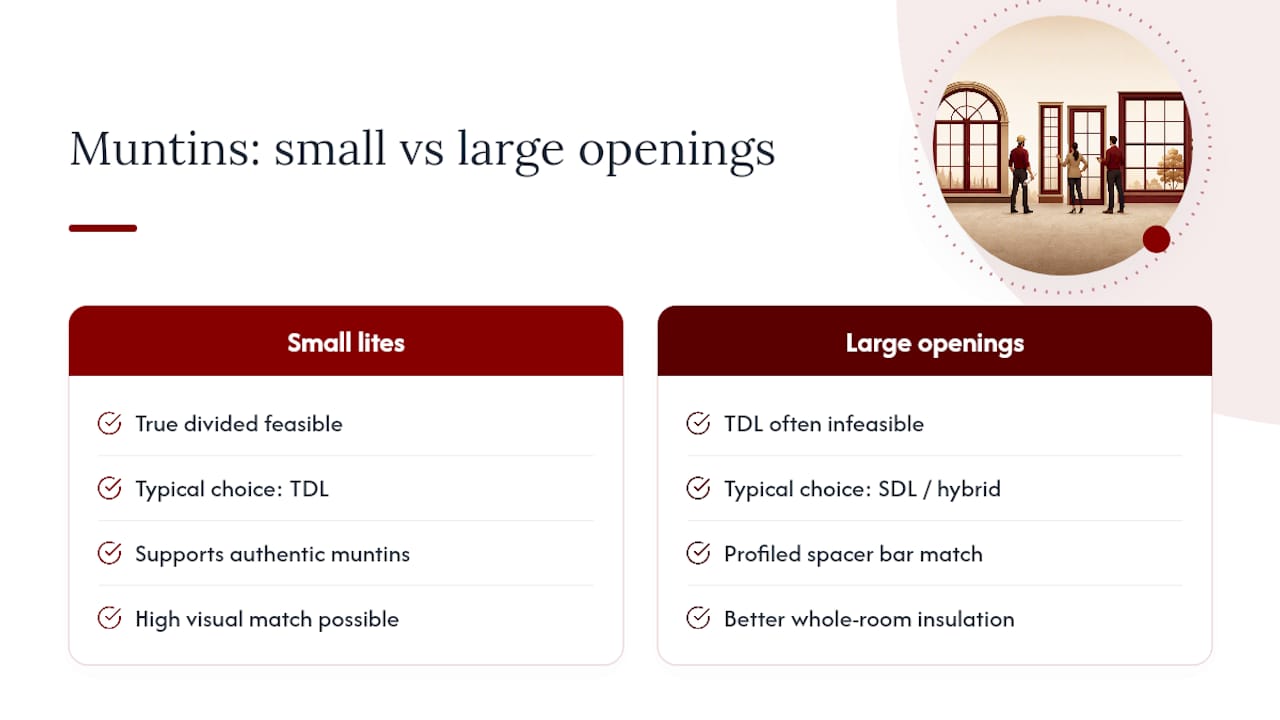
As a rule of thumb, specify TDL for small multi-pane units where shadow lines are part of a documented historic character, and specify SDL with spacer bars or GBG for large insulated openings where energy targets and budget outweigh close-range authenticity. Watch for vendors who claim their SDL “looks exactly like TDL” without offering a physical sample. That claim rarely survives daylight.
What millwork fabricators have learned matching historic muntins
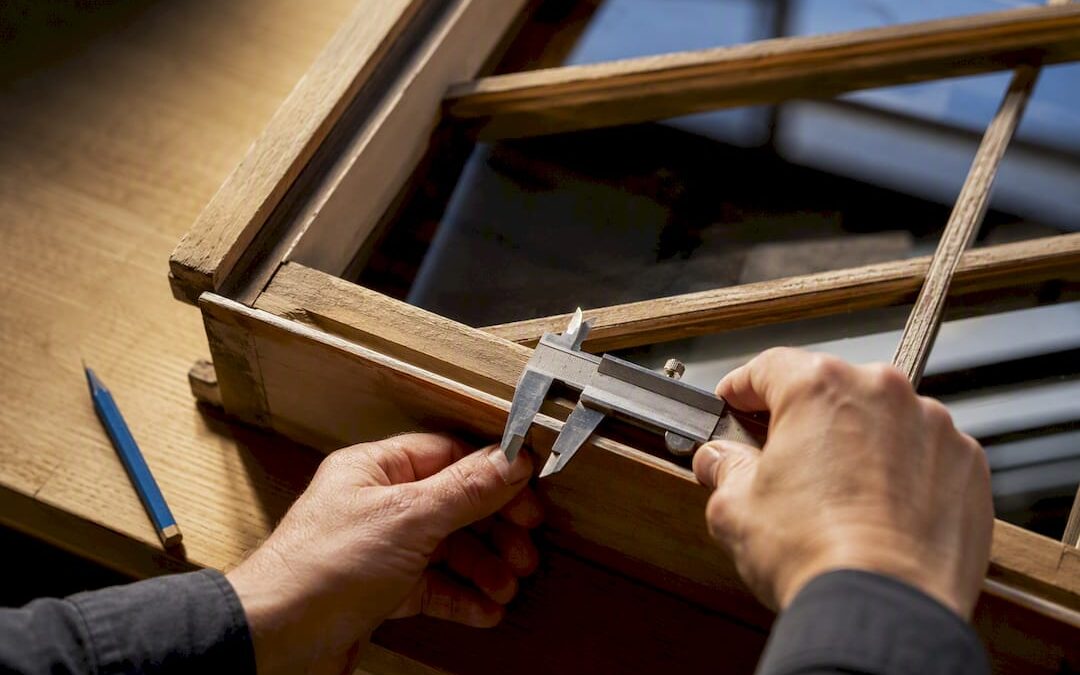
Every glazing decision starts the same way in Gepettomillworks’ shop: measuring the original sash thickness, the glazing rebate shoulder, and the muntin return depth before anyone discusses glass options. That measurement determines whether true divided construction is physically feasible or whether a hybrid approach becomes the honest recommendation.
China cabinet doors and library sash, with their small individual lites, almost always support true divided construction without compromise. Larger openings, particularly where an owner wants insulated performance across a whole room, more often push toward an SDL with spacer bar profiled and painted to match the original muntin proportions. The lesson across these projects has stayed consistent: proportion matters more than method, and a well-matched hybrid outperforms a poorly proportioned TDL every time, which is why coordinating custom millwork with general contractors is crucial for success in these installations (Services – Axenia Construction).
Key Manufacturer and Specialist Resources
For technical drawings and construction specifics, Simpson’s divided lite construction page and Marvin’s divided lites overview cover manufacturer-grade detail on bar widths and IG options.

The instinct to treat TDL vs SDL as a binary choice misses how most historic projects actually get solved. The real question isn’t which method wins in the abstract. It’s whether the specific opening, its proportions, and its rebate depth can physically support true divided construction without forcing a compromise the owner will regret. Millwork fabricators approach every window and door with that measurement first, then recommend the construction method that fits the opening rather than the one that fits a preconceived standard. Sometimes that means true divided glass. Sometimes it means a carefully profiled hybrid that a passerby would never distinguish from the original. Either way, the commitment to matching historic profiles, paired with an honest account of what modern glass options can and cannot do, tends to serve owners better than chasing an ideal that the building’s own dimensions won’t support. Readers restoring a historic building are welcome to bring their measurements to that same table.
— Gepetto
Sources
FAQ
What is the difference between SDL and TDL?
TDL uses separate panes of glass held by structural muntins, while SDL uses one continuous insulated glass unit with bars applied to the surface or set inside the sealed cavity to mimic that look.
Is SDL still being developed?
Yes. Manufacturers continue refining SDL variants, particularly spacer bar and grilles between glass designs, to close the visual gap with TDL while preserving insulated glass performance.
What is a TDL window?
A TDL window is built with individual panes of glass, each set into its own glazing rebate and separated by muntins that do real structural work, rather than decorative bars applied over a single sheet of glass.
What are the differences between simulated divided light and true divided light glass?
True divided lite glass consists of multiple separate panes, each independently glazed and repairable. Simulated divided lite glass is one continuous insulated unit with bars applied on top or sealed inside, trading individual-pane repairability for better thermal performance and lower cost.
Recommended
by Matthew Wiley | Sep 15, 2026 | Architectural Millwork
Base rot confined to the lowest few inches of a column can usually be cut out and repaired. Once decay or insect damage reaches the shaft, or a capital has broken away entirely, replacement becomes the sounder path, and any structural column must be shored before it comes down. Photograph the damage and record basic dimensions before calling a millwork shop, since that documentation shapes both the estimate and the accuracy of the reproduction.
TL;DR:
- Repair is usually possible for base rot confined to the lowest inches of a column, but once decay reaches the shaft or capital, full replacement is necessary.
- Structural issues like leaning, sagging, or soft wood indicate load-bearing damage, requiring engineer consultation and temporary shoring before any repair or removal.
- Reproduction techniques depend on the column profile and function, with hollow stave construction favored for larger columns and composite wraps suitable for non-load-bearing or budget projects.
- Precise measurements, multiple photos, and detailed documentation are essential for accurate reproduction, especially for ornamented capitals and non-standard shapes.
- Full replication typically takes several weeks and involves pattern-making, approval of a mockup, and coordination with shoring and installation, with costs varying based on complexity and site conditions.
Gepettomillworks
Plan Your Historic Column Replication
Gepettomillworks creates custom millwork for historic building projects, helping teams approach complex porch column reproductions with care.
Discuss your column project
Table of Contents
What Determines Whether a Porch Column Can Be Repaired?
Columns that split, lean, sag, or show soft, spongy wood are signaling a structural problem, and the extent of the damage determines whether repair or full porch column replication is the right call. Localized base rot often responds well to targeted repair, including dutchman splices, epoxy consolidation, or a new plinth block, while damage that has migrated up the shaft or destroyed a capital typically forces a complete rebuild.
Run through this before deciding:
- Press a screwdriver into the base, plinth, and shaft at several heights. Soft or crumbling wood beyond the bottom six inches usually means replacement.
- Check for horizontal cracks, visible lean, or separation at the capital. These point to load-bearing compromise, not surface wear.
- If the column carries roof load and you’re uncertain about its condition, bring in a structural engineer before touching it.
- Install temporary shoring (teleposts or jack posts placed outside the column’s footprint) before any column comes out, full stop.
Porches with flat or low-slope roofs concentrate more weight on fewer columns, which raises the stakes of getting this assessment wrong.
Turned Shafts, Stave Construction, or Composite Wraps?
Once repair is off the table, the replication method depends on the column’s profile, its structural role, and how closely it needs to match the original. Millwork shops can reproduce a column profile from a photograph or a single salvaged fragment, reverse engineering the taper and reproducing it on a lathe or CNC pattern.
The main approaches:
- Solid turned shafts work for smaller diameter columns and offer the closest match to traditional wood construction, but they’re heavier and more prone to checking with seasonal movement.
- Hollow stave construction (staves glued and turned into a cylinder) is standard for larger classical columns; it resists checking better than solid stock and sheds weight.
- Dutchman repairs and glued-up sections patch a section of an otherwise sound shaft, saving material and cost when only part of the column is compromised.
- Composite, FRP, or PVC wraps suit non-load-bearing applications or budget-driven projects. These products are weatherproof and insect-proof, and some are sold as complete structural columns rather than decorative sleeves.
Ornament, fluting, and capital detail are typically produced through CNC roughing followed by hand-finishing, which keeps carved detail crisp without sacrificing the speed a lathe or router table provides.
Pro Tip: Ask any shop whether they turn hollow or solid before you commit. A solid shaft on a large Doric or Ionic column is heavier to ship and install, and it’s more likely to develop long checking cracks than a properly vented hollow stave column.
What Do You Need to Measure and Photograph First?
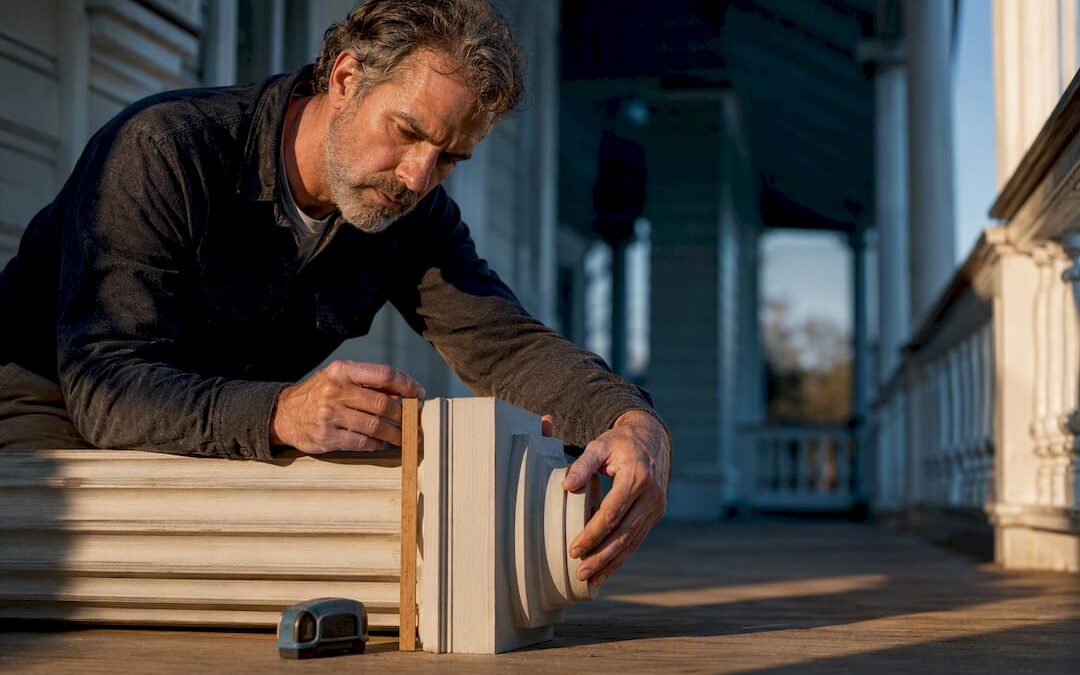
A shop can’t reproduce a column it hasn’t seen in enough detail, and vague measurements are the single biggest cause of a reproduction that doesn’t quite match. Accurate documentation captures diameter at multiple points along the shaft to record the taper or entasis, along with flute count, flute spacing, and capital and base profiles.
Send a shop this, in order:
- Overall height, base diameter, and shaft diameter measured at the top, middle, and bottom.
- Flute count and spacing if the shaft is fluted, measured at both the top and bottom of the shaft.
- Close-up photos of the capital and base from multiple angles, with a tape measure or ruler in frame for scale.
- A wide shot of the full column in context, showing how it meets the porch roof and floor.
- A rough field template (a cardboard or plywood cutout of the profile) if the column has an unusual or non-standard shape.
Shops that specialize in complex reproduction work will often ask clarifying questions once they see your first round of photos, so send them early rather than waiting for a perfect set.
Shoring, Temporary Supports, and Avoiding Repeat Rot
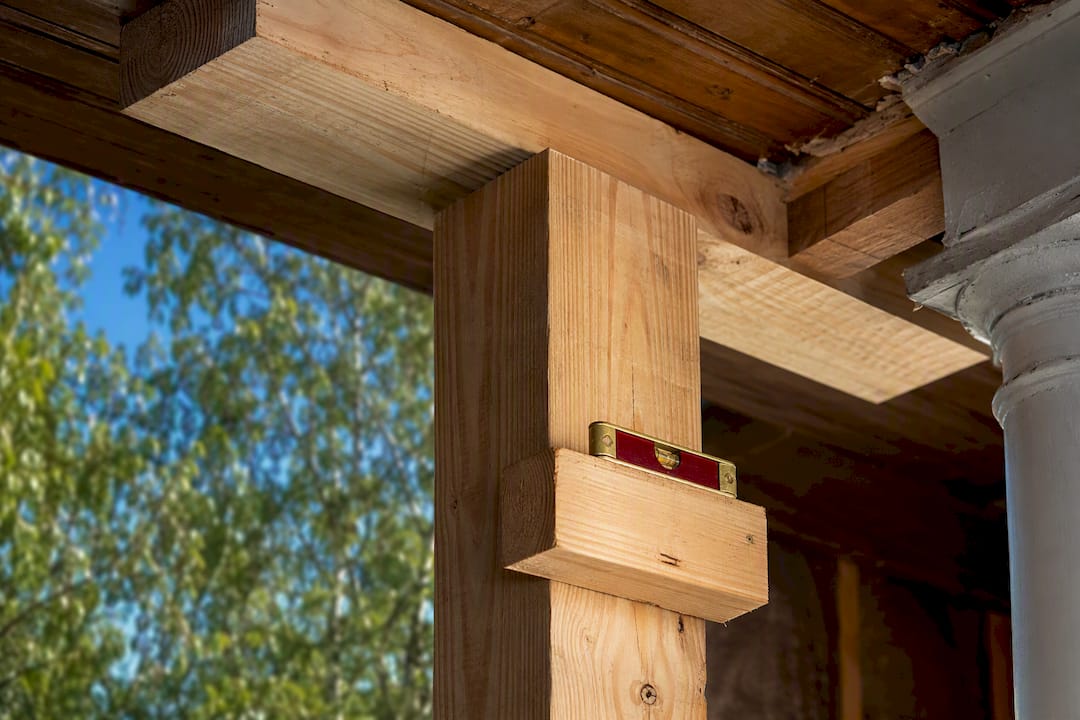
Shoring is not optional when a column carries roof load; teleposts or independent temporary supports need to go in before the old column comes out, positioned so they don’t sit in the path of the new column’s footprint. Get a structural engineer or licensed contractor involved whenever the load path is unclear, particularly on porches with unusual roof geometry or prior modifications.
Rot rarely happens by accident. Common causes worth fixing at the same time as the column:
- Failed or missing flashing where the column meets the porch roof beam.
- Gutters that overflow directly onto the column top.
- Painted end grain at the base, which traps moisture instead of shedding it.
- Ground contact or splash-back from grade that slopes toward the porch.
Vent hollow columns properly and use a treated or composite plinth block at the base. It’s a small detail that prevents the next column from failing the same way.
How Do You Match Capitals, Bases, and Fluting?
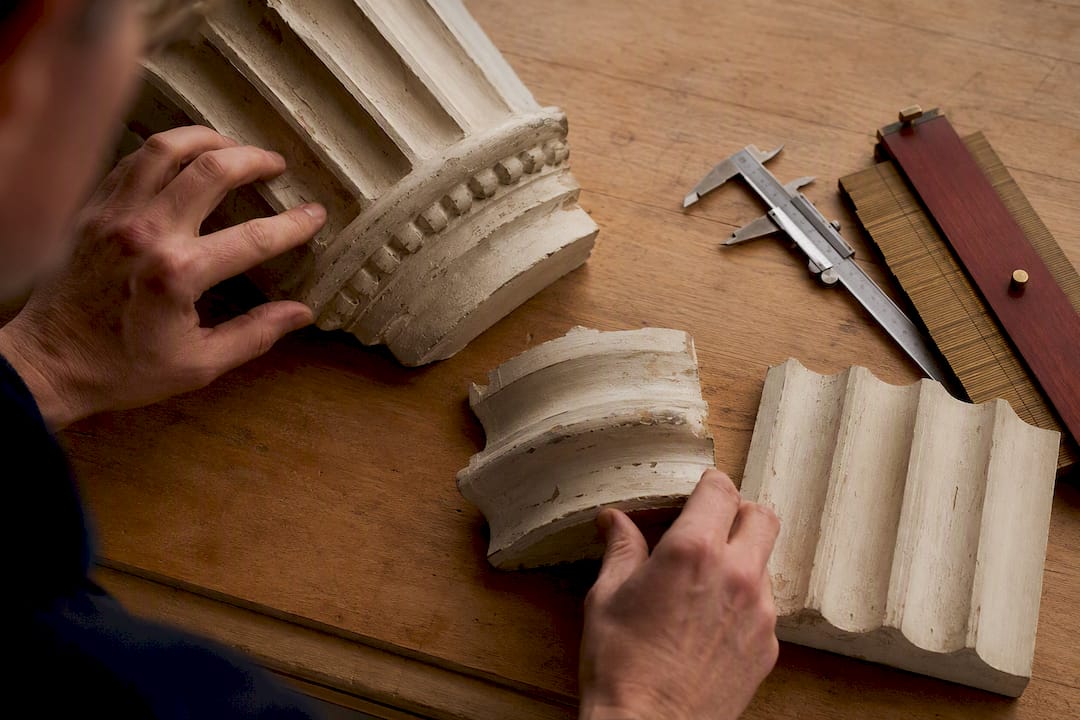
Capitals are usually the hardest element to reproduce because ornament that’s been painted over dozens of times loses crisp detail long before the wood itself fails. A shop typically works from whatever fragment survives, cross-referenced against period photographs, to rebuild the pattern before cutting new stock.
Points worth discussing with your shop:
- If the original capital is missing entirely, a reference from classical architectural pattern books can fill the gap with a historically consistent profile.
- Minor simplification of ornament is sometimes an acceptable compromise when an exact match would be cost-prohibitive; discuss this openly rather than discovering it after fabrication.
- Species selection affects both appearance and durability. Wood species matched to the original generally satisfies preservation review boards better than composite substitutes on historic properties.
- Painted finishes can visually unify a wood repair and a composite wrap on the same porch, though the two materials weather differently over time.
How Long Does Replication Take and What Drives Cost?
Set expectations early: replicating a column is not a same-week fix, even when the shop work itself moves efficiently.
- Targeted base repairs can often be completed in a matter of days.
- Full custom reproduction typically runs several weeks to a couple of months, covering measurement, pattern-making, fabrication, finishing, and installation.
- Cost climbs with site access difficulty, ornamentation complexity, species selection, and any required engineering or permit review.
- Ordering multiple matching columns at once generally lowers the per-unit cost, while elaborate capitals raise it regardless of quantity.
Shipping and crating for large turned shafts can add meaningfully to the total, particularly when the millwork shop is located far from the project site.
Hiring a Millwork Shop: What to Ask Before You Sign
DIY suits a straightforward, non-structural repair. Anything involving a load-bearing column, an ornate capital, or a finish that has to pass a preservation review belongs with a shop that does this work routinely, since attempting complex carpentry without the right shop equipment is where most DIY column projects go wrong.
Before signing a contract, ask:
- What in-house capabilities does the shop have (lathe turning, CNC patterning, hand-carving) versus outsourced work?
- Will they provide a sample section or profile mockup for approval before running the full order?
- What’s the realistic turnaround from signed contract to installed column?
- Are they insured, and who handles the shoring plan and installation scope?
- If the house was built before 1978, is the shop RRP-certified for lead-safe work practices on the existing paint?
Require drawings, a sample approval step, and a written shoring and installation plan as deliverables before work begins, not as an afterthought once fabrication is underway.
How Gepetto Approaches a Porch Column Replication Project
Reproducing a column accurately starts with the same documentation any careful shop asks for: measured diameters, ornament photography, and a fragment or template when one survives. From there, Gepettomillworks moves through pattern-making, lathe and CNC turning, and hand-finished ornament before a piece ever reaches the porch.
What that process looks like in practice:
- Field measurement and photo review to establish taper, flute spacing, and capital detail.
- Pattern-making and turning matched to the original species and profile, drawing on documented replica millwork from past projects.
- A sample or mockup section for client approval before full fabrication runs.
- Coordination with the contractor’s shoring plan and installation schedule, informed by porch column repair case work.
- Finish matching, including paint and texture, so the new column doesn’t read as an obvious patch job.
Restoration-First Recommendations
Repair whenever the shaft and capital are sound. Replicate when they’re not. Document everything, shore before you touch a load-bearing column, and insist on a sample before full fabrication. For anything beyond a straightforward repair, a shop like Gepetto is worth the conversation.
— Gepetto
Ready to Move Forward on Your Column Project?
Gepettomillworks fabricates from scratch, which means a column that’s missing its capital entirely or matches no catalog profile isn’t a dead end, it’s a pattern-making job. That’s the practical difference between a shop that stocks standard sizes and one that builds to what your porch actually needs.

Whether your porch reflects a Mission Revival profile, a bungalow porch column, or a Prairie School design with its own proportions, the process starts the same way: document what you have, shore the column if it carries roof load, and send photos and measurements for a sample approval before committing to full fabrication. If you’re ready to start that process, reach out through Gepettomillworks to request a quote and get a realistic timeline for your specific column.
Sources
FAQ
How Do I Update the Columns on My Front Porch?
Start by inspecting for rot, insect damage, or structural cracking at the base, shaft, and capital, then decide between a targeted repair or a full porch column replication based on how far the damage extends.
What Is the Average Cost to Replace a Porch Column?
Cost depends heavily on species, ornamentation complexity, quantity, and site access, so shops typically quote per project rather than a flat rate; current pricing for a custom replication is available directly from millwork shops.
Are My Porch Columns Load-Bearing?
Most porch columns supporting a roof structure are load-bearing, and any column carrying roof weight needs shoring before removal; if you’re unsure, a structural engineer can confirm the load path.
How Can I Make My Own Porch Column?
DIY works for non-structural PVC or composite wraps assembled on site, but a solid or hollow turned wood column with structural function or ornate detail generally requires lathe or CNC equipment a shop provides.
Recommended
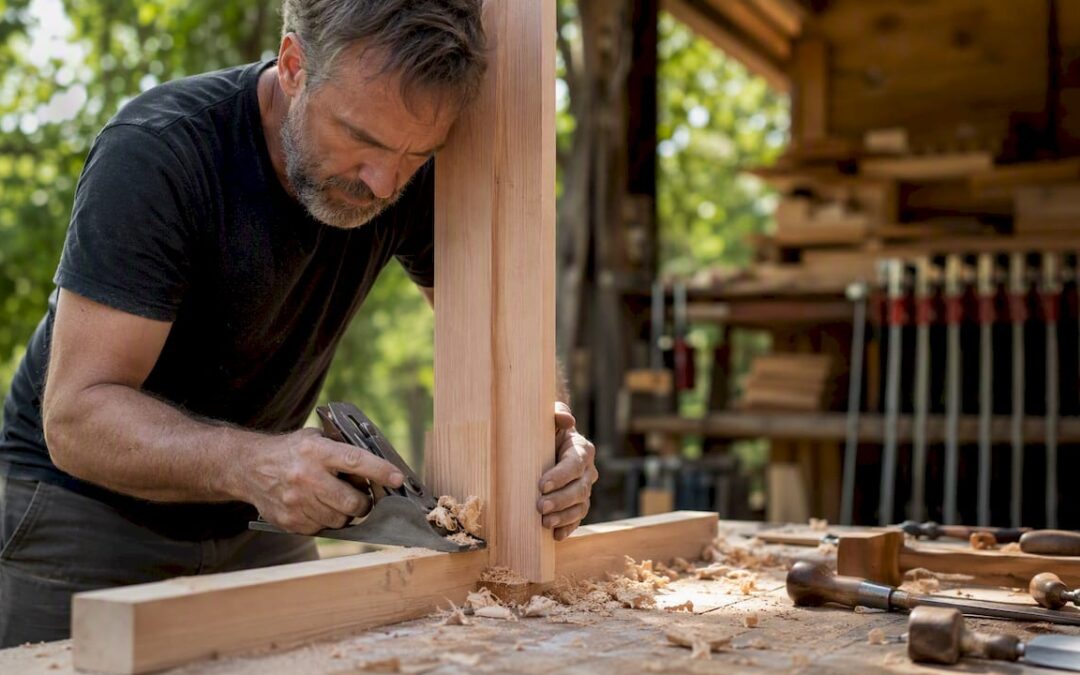
by Matthew Wiley | Aug 8, 2026 | Architectural Millwork
Stile and rail doors are framed panel doors built from two vertical members (stiles) and two or more horizontal members (rails) that together form a structural frame surrounding one or more floating panels. The joinery is typically cope-and-stick or mortise-and-tenon, and the panels sit in grooves rather than being glued, allowing the wood to move seasonally without cracking the frame. This construction method has defined architectural interiors from Georgian townhouses to Craftsman bungalows precisely because it balances structural integrity with visual refinement.
Choose a stile and rail door when your project demands:
- Historic restoration or period-accurate replication, where molded slab doors cannot reproduce the sticking profiles, panel depths, or proportions of the original millwork.
- Custom interiors where panel count, glazing, species, and profile must be specified to match a particular architectural vocabulary.
- High-traffic commercial corridors where frame-and-panel construction distributes stress across the joinery rather than concentrating it in a single slab, extending service life considerably.
Table of Contents
How stile and rail doors are built: anatomy and tolerances
Understanding the named parts of a panel door is the first step toward writing a specification that a millworker can actually execute without ambiguity.
Stiles are the full-height vertical members running the entire length of the door. In traditional “stile-through” construction, the stiles are continuous from top to bottom, placing uninterrupted vertical grain at the hinge line. Fine Woodworking’s analysis of frame-and-panel construction confirms that this arrangement is structurally superior because it prevents levered rail end-grain from causing hinge failure and binding, a detail that matters most on heavy exterior doors.
Rails are the horizontal members. A standard door has a top rail, a bottom rail, and a lock rail positioned at handle height (typically 36"–40" from the floor). Doors with multiple panels add intermediate crossrails. The lock rail must be wide enough to accept the mortise lock hardware without compromising the stile/rail joint.
Panels float in grooves machined into the inside edges of the frame. They are intentionally set 1/16 to 1/8 inch undersized in their grooves, allowing roughly 1/4 inch of seasonal expansion without binding or cracking the frame. Mullions are vertical intermediate members that divide a wide opening into multiple panel bays.
Choosing the right materials and core types
The species and core you specify determine how the door performs over decades, not just how it looks on delivery day.
Solid wood species
White oak offers excellent stability and takes stain evenly, making it the preferred species for Arts and Crafts and Mission Revival interiors. Hard maple machines cleanly and accepts paint without grain telegraphing, though it moves more with humidity than oak. Cherry is dimensionally stable, darkens attractively with age, and is well suited to Federal and Colonial Revival work. Mahogany (genuine Honduran or African khaya) has been the benchmark for exterior stile and rail doors in historic American architecture because of its low shrinkage coefficient and natural resistance to decay. Douglas fir and pine are common softwood choices for painted interior doors, with finger-jointed pine used widely in production-grade work to reduce cost while maintaining appearance.
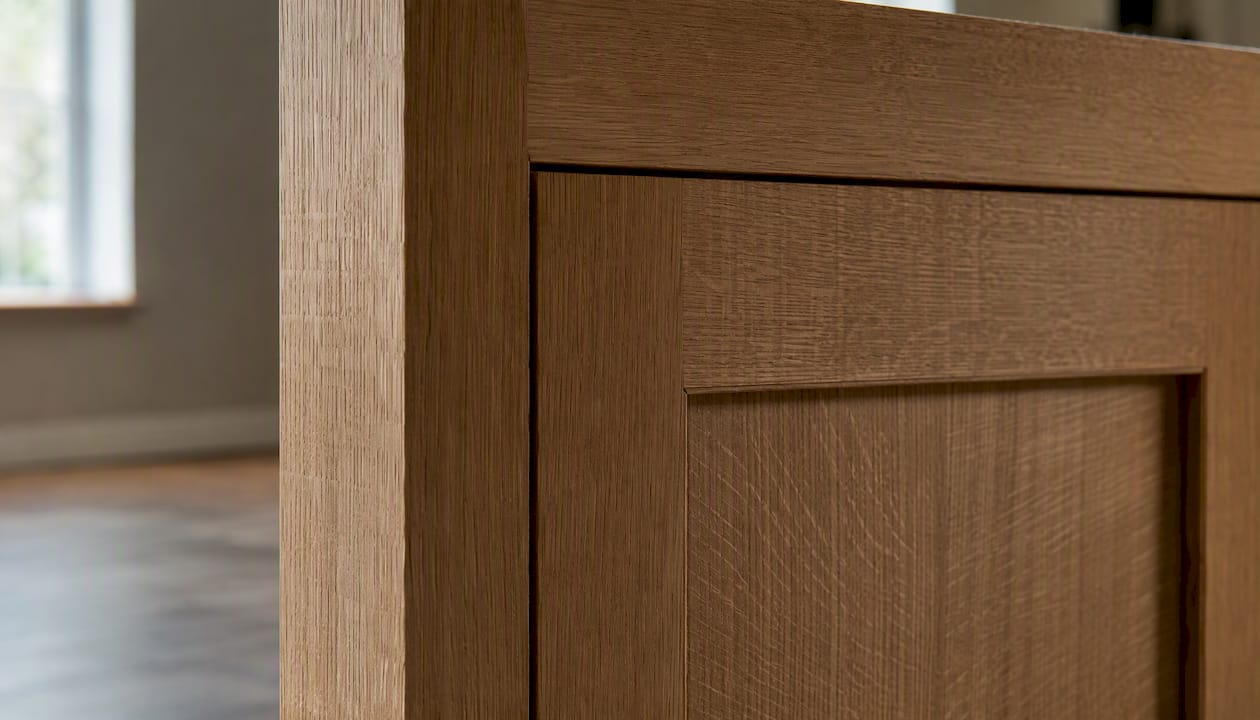
Quarter-sawn stock deserves particular attention for exterior applications. Because the growth rings run perpendicular to the face, quarter-sawn lumber moves primarily in thickness rather than width, reducing the risk of cupping and checking in the stile faces.
Core and construction options
| Core Type |
Stability |
Typical Finish |
Best Use |
Cost Range |
| Solid wood (matched species) |
Moderate |
Stain or paint |
Historic restoration, custom interiors |
High |
| Engineered core (Duracore / solid-core) |
High |
Paint or stain |
Exterior, high-humidity, commercial |
Medium–High |
| MDF stiles/rails |
Very high |
Paint only |
Painted interior doors, production work |
Low–Medium |
| Plywood panel (veneered) |
High |
Stain or paint |
Flat-panel contemporary, cost-sensitive |
Medium |
| Fiberglass composite |
Very high |
Factory finish |
Exterior, high-abuse, low-maintenance |
Medium–High |
Consulting the manufacturer early is not optional when hardware, climate, and finish interact. A solid mahogany door specified for a humid coastal climate without an engineered core may perform beautifully for a decade and then begin to bind as the stiles swell. An MDF core door in the same opening will hold its dimensions but cannot be stained. The decision tree runs: climate first, then finish intent, then species.
Pro Tip: For painted interior doors where budget is a constraint, MDF stiles and rails with a veneered plywood panel deliver excellent dimensional stability and a paint-ready surface. For solid wood interior doors where stain is the intent, specify quarter-sawn stock and discuss the climate data with your millworker before finalizing the core.
How stile and rail doors are fabricated in the shop
The fabrication sequence matters as much as the material choice. Cutting rails before stiles is the standard shop practice because rails can be registered squarely against the router table fence, producing a clean cope cut with no tearout on the show face. The stile bit then profiles the long edges and cuts the groove that receives both the panel and the rail’s stub tenon.
Step-by-step fabrication sequence
- Mill all stock to final thickness (typically 1-3/8" for interior, 1-3/4" for exterior) and allow it to acclimate in the shop for at least 48 hours.
- Cut rails to final length, including the tenon allowance if using full mortise-and-tenon joinery.
- Run the cope cut on rail ends using the cope (rail) bit in the router table, with the workpiece held vertically against a fence and backer board to prevent tearout.
- Run the stile profile on stile edges using the matching stile bit, cutting the decorative profile and the panel groove in one pass.
- Prepare panels to final dimension, undersizing by 1/16"–1/8" per side relative to the groove depth to allow seasonal movement.
- Dry-fit the assembly without glue, checking corner squareness by measuring diagonals. The tolerance is 1/32 inch.
- Glue up, applying adhesive only to the cope-and-stick joint surfaces, never to the panel groove. Use band clamps or pipe clamps in a flat, square jig.
- Check and correct squareness within the first 15 minutes of clamping, before the glue sets.
- After cure, trim stiles to final door height on the table saw for a clean, square bottom edge.
Matched cope-and-stick router bit sets cut the decorative profile and the joinery in a single pass, which reduces setup time and ensures the profile registers consistently. Single-bit sets require a bit change between the cope and stile operations; two-bit sets allow each operation to remain set up independently, which is the better choice for production runs. Both configurations must be run on a router table, never freehand.
Essential tools for shop fabrication:
- Router table with a 3-1/4 HP or larger router (1/2" collet required for stile-and-rail bit sets)
- Matched cope-and-stick bit set (CMT, Freud, or Whiteside are widely used)
- Jointer and thickness planer for stock preparation
- Miter saw or radial arm saw for rail crosscuts
- Band clamps and pipe clamps (minimum four clamps per door)
- Winding sticks and a reliable square for flatness and squareness checks
Pro Tip: Always run a test cope cut on scrap stock before committing to the door parts. Set bit height so the profile shoulder aligns flush with the stile face, then sneak up on the final depth in two passes. A misaligned bit height produces a step at the joint line that requires hand-planing to correct after assembly.
For builders interested in how joinery techniques translate from the shop to historic restoration work, the assembly principles are identical; the complexity increases when profiles must be matched to existing period millwork rather than selected from a standard catalog.
Finishing and hardware: what you need to specify before you order
Finish choice and hardware selection are not afterthoughts. Both affect the stile width you must specify, the core material you should select, and the surface preparation the door requires before it leaves the shop.
Paint vs. stain
Painted doors tolerate MDF stiles and rails because the surface is opaque. MDF holds paint exceptionally well, resists grain telegraphing, and does not require the same careful species matching that a stained door demands. Stained doors require solid wood or a veneer face that matches the species throughout, and the veneer must be thick enough to survive sanding without cutting through to the substrate. Quarter-sawn veneer faces are preferable for stained doors because the tight, consistent grain pattern reads as more refined and moves less with humidity.
Hardware clearances and lock-rail placement
Stile width directly determines whether a mortise lock or exit device can be installed without compromising the stile/rail joint. Standard mortise lock bodies require a minimum stile width of 4 inches; heavy-duty exit devices may require 4-1/2 inches or more. When the architectural design calls for a narrower stile, a lock block (a solid wood insert glued into the stile cavity at lock height) must be specified at the time of fabrication, not added in the field.
Pre-order hardware checklist:
- Confirm mortise lock body dimensions (height, width, depth) with the hardware supplier before finalizing stile width.
- Specify hinge size and weight rating relative to door weight. A 1-3/4" solid mahogany door at 36" x 84" can weigh 80–100 lbs; three 4-1/2" heavy-duty hinges are the minimum.
- Confirm door swing (left-hand or right-hand) and handing before routing hinge mortises.
- For exterior doors, specify weatherstrip allowance (typically 1/8" per side) in the rough opening calculation.
- Confirm fire rating or STC (sound transmission class) requirements before selecting core type, as rated assemblies require specific tested configurations.
Pro Tip: Specify stile width and lock-block reinforcement in the written purchase order, not just verbally. A stile that arrives at 3-1/2 inches when the mortise lock requires 4 inches cannot be corrected without remaking the door.
Stile and rail vs. molded, flush, and slab doors
The decision between construction types is ultimately a question of what the project demands over its full service life, not just what fits the budget at the time of purchase.
When molded or flush doors are the better choice
- Budget-constrained painted interiors where appearance at delivery matters more than repairability over decades. A molded HDF door in a rental unit is a rational choice.
- Contemporary minimalist interiors where a flush MDF door with no visible frame reads as architecturally correct.
- High-volume production where lead time and unit cost must be minimized and custom profiles are not required.
- Moisture-prone utility spaces where a fiberglass or steel slab door outperforms any wood construction.
The decision checklist: if you answer yes to any of the following, specify a stile and rail door.
- Does the project require a specific period profile or panel configuration not available in stock?
- Is the door in a high-traffic location where joint strength and repairability matter?
- Will the door be stained, requiring consistent grain across the face?
- Is the project subject to historic tax credit review, where period accuracy is a compliance issue?
- Does the opening require a non-standard size, radius top, or glazed configuration?
How to specify and order stile and rail doors correctly
A specification written before the door is ordered prevents the majority of field problems. The sequence below applies whether you are ordering from a production millwork shop or commissioning a fully custom door.
- Measure the rough opening and calculate the door size with reveal and gap tolerances. Standard reveals are 3/16"–1/4" per side; the gap at the threshold is typically 3/4" for carpet or 1/8"–1/4" for hard flooring.
- Confirm stile width relative to the specified mortise lock body and hinge size. Note lock-block requirements in writing.
- Specify door swing and handing (left-hand, right-hand, left-hand reverse, right-hand reverse) using the standard convention: stand outside the opening; the hinge side is the hand.
- Select species and core type based on climate, finish intent, and budget. Involve the manufacturer at this stage, not after the order is placed.
- Specify the sticking profile by name or by reference to a period drawing. “Shaker,” “ovolo,” “ogee,” and “bolection” are not interchangeable terms.
- Confirm fire rating or STC requirements with the architect or building official before finalizing core selection.
- Request a production sample or finish mock-up for stained doors, particularly when matching existing millwork.
- Confirm lead time and schedule site delivery to coincide with a controlled interior environment (HVAC running, humidity stabilized).
Additional notes before installation:
- Acclimate doors in the building for 48–72 hours before hanging, with the door standing vertically and air circulating on all faces.
- Seal all six faces (both faces, all four edges) with the specified finish before installation to equalize moisture absorption.
- Check the rough opening for plumb, level, and square before setting the frame.
Early manufacturer consultation is the single most effective way to prevent specification errors that only become visible after installation.
Maintenance and expected lifespan
A properly specified and installed stile and rail door, built from solid wood with appropriate joinery, should last the life of the building. The qualification “properly specified” does real work in that sentence.
Common defects and repairs
Panel binding occurs when the floating panel has been glued into its groove (intentionally or by finish buildup) and cannot move seasonally. The repair is to free the panel by running a thin blade around the perimeter of the groove. Loose joints at the cope-and-stick connection are typically caused by glue failure from moisture cycling. The repair requires disassembly, cleaning the joint surfaces, and re-gluing with a waterproof PVA or epoxy. Warped rails on exterior doors usually indicate that only one face was sealed before installation; the exposed face absorbed moisture and the rail cupped toward the dry face. Correction requires removing the door, equalizing moisture content across both faces, and re-hanging with all faces sealed.

Interior stile and rail doors in climate-controlled spaces typically last 50–100 years with routine maintenance. Exterior doors in exposed conditions, built from mahogany or white oak with an engineered core, typically perform well for 25–40 years before requiring significant refinishing or joint repair.
Pro Tip: When restoring a solid wood door rather than replacing it, check the panel float before refinishing. If the panel is tight in its groove, free it before applying new finish. Trapping the panel with finish is the single most common cause of panel cracking in restored historic doors.
When custom millwork is the right call for complex door projects
Stock doors solve the majority of residential interior openings. The cases where custom millwork becomes necessary are specific, and recognizing them early saves significant cost and schedule disruption.
Historic replica doors present the clearest case. When a building is under historic tax credit review, the replacement door must match the original in profile, panel configuration, species, and finish. A stock six-panel colonial door will not satisfy a preservation officer reviewing a Federal-period townhouse where the original doors had a specific bolection molding and raised burl panels. Gepettomillworks fabricates historic replica millwork to match surviving originals or period drawings, including reproducing sticking profiles that are no longer available from production suppliers.
Radius and archtop doors require bent lamination or steam-bent stiles and rails, which no stock program accommodates. The geometry of a curved stile demands that the cope cut follow the arc, which requires custom tooling or careful hand work at the joint. Gepettomillworks’s round door fabrication archive documents the techniques used for radius work, from full-circle doors to elliptical archtops in Italianate and Federal Revival buildings.
Multi-lite glazed French doors for historic interiors require that the muntin profiles match the existing window muntins in the building, a specification that production glazed doors cannot meet. The glazing bar profile, the glass thickness, and the sight line width are all period-specific.
Additional capabilities Gepettomillworks brings to complex projects:
- Matching existing sticking profiles from physical templates or measured drawings.
- Reproducing period hardware mortise layouts for antique lock sets.
- Fabricating Mission Revival millwork with the square-shouldered profiles and through-tenon details characteristic of the style.
- Coordinating finish matching with the building’s existing painted or stained millwork.
Pro Tip: Budget for custom millwork when the opening is non-standard in any dimension, when the profile must match existing work, or when the project is subject to historic review. The cost difference between a stock door and a custom door is almost always smaller than the cost of a rejected installation.
Key Takeaways
Stile and rail doors outperform molded and slab alternatives in any application where repairability, period accuracy, or structural performance over decades is a genuine requirement.
| Point |
Details |
| Panel float is non-negotiable |
Set panels 1/16"–1/8" undersized per side to allow seasonal movement and prevent cracking. |
| Stile width determines hardware options |
Mortise locks require a minimum 4" stile width; specify a lock block in writing when stiles are narrower. |
| Consult the manufacturer before ordering |
Hardware, climate, and finish type must be resolved before core material and species are finalized. |
| Match profile to period |
Sticking profile (shaker, ovolo, bolection) is the primary period marker; wrong profile undermines the entire restoration. |
| Gepettomillworks for historic and custom work |
Contact Gepettomillworks for historic replica doors, radius work, and period profile matching on preservation projects. |
The specification detail that mass manufacturers won’t tell you
The trade-off that rarely appears in product literature is the one between stile width and visual proportion. Production doors are typically built with 3-1/2" stiles because that width satisfies the most common residential hardware and keeps material cost low. But a 3-1/2" stile on a 36"-wide door looks thin, particularly in a period interior where the original doors had 4-1/2" or 5" stiles. The visual weight of the frame relative to the panel is one of the most legible signals of whether a door belongs in a room or was simply installed in it.
The same logic applies to rail width. A bottom rail that matches the top rail in width reads as a modern convention; historic doors almost universally had a bottom rail that was 1-1/2 to 2 times the width of the top rail, grounding the door visually and providing structural mass at the threshold. Specifying these proportions correctly requires either access to the original drawings or the experience to recognize what the period demanded.
Quarter-sawn stock is another specification that production suppliers rarely offer as a standard option, yet it is the correct choice for any exterior stile on a painted or stained door in a climate with more than 20% seasonal humidity variation. The additional cost is real. So is the difference in performance over 30 years.
Gepettomillworks custom stile and rail doors: next steps
For historic restorations, preservation projects, and architecturally demanding new construction, Gepettomillworks fabricates custom stile and rail doors that stock programs cannot match. The work includes period profile replication, radius and archtop construction, multi-lite glazed French doors, and finish matching to existing millwork in the building.
To request a quote, send measured drawings of the opening, photographs of any existing millwork to be matched, the hardware specification (mortise lock body dimensions, hinge size and weight rating), and the finish intent (paint or stain, species preference). Projects subject to historic tax credit review should include the relevant preservation standards documentation. Gepettomillworks will respond with a scope confirmation and lead-time estimate. For historic replica work and period-accurate restoration, contact Gepettomillworks directly through the website to begin the consultation.
Useful sources and further reading
The sources below support the technical claims in this article and provide additional depth for designers and builders who want to verify specifications or explore period examples.
| Source |
What you’ll find |
| Mastering Rail and Stile Doors: A Woodworker’s Guide |
Fabrication sequence, panel undersize tolerances, clamping and assembly procedures |
| Making Doors with Rail & Stile Bits |
Router table setup, matched bit usage, test cut guidance, and safety notes |
| Frame and Panel Door Construction |
Structural analysis of stile-through construction and hinge performance |
| Conspectus Tech Tips: Stile-and-Rail Wood Doors |
Manufacturer consultation guidance, hardware and climate interaction, core selection |
| What Are Stiles and Rails |
Stile width requirements for hardware installation and lock-block specifications |
| Gepettomillworks Historic Replica Archives |
Portfolio of period-accurate door and millwork fabrication for preservation projects |
| Gepettomillworks Prairie Style Millwork |
Specification notes and portfolio pieces for Prairie-style doors and mullion work |
| Gepettomillworks Round Doors Archive |
Radius and archtop door fabrication techniques and completed project examples |
Recommended