
Historic tax credit documentation is the written and visual record that proves three things to reviewers: the building is a certified historic structure, the proposed work respects its character, and the finished work matches what was approved. For the 20% federal credit, that record is a three-part application, reviewed first by the State Historic Preservation Office (SHPO) and then by the National Park Service (NPS). Most delays do not come from rejected designs. They come from thin photographs, missing window sections and narratives that never explain why a decision was made.
This guide is written for architects, general contractors and owners of historic buildings. It covers what each part must contain, where millwork records decide the outcome, and how to assemble a package that reviewers can approve without a second round of questions.
TL;DR
- The federal credit equals 20% of qualified rehabilitation expenditures and is claimed over five years; it rests on a three-part application submitted through your SHPO.
- Drawings never replace the written narrative. Reviewers need the reasoning behind each decision, keyed to numbered drawings and photographs.
- Replacing a historic window requires proof that it is deteriorated beyond repair, with elevations and vertical and horizontal sections of both the old and new units.
- Seek approval before construction begins. Starting first puts the credit at financial risk.
- Keep dated before, during and after photographs, along with fabrication records for every replicated element.
Table of Contents
- How the three-part application is structured
- Part 1: proving the building qualifies
- Part 2: the proposed work, where most applications are won or stalled
- What counts as qualified expenditure
- Part 3: documenting what was actually built
- Timing, pre-approval and recapture
- Our perspective: millwork is documentation too
- A pre-submission checklist for project teams
- Working with us on credit-eligible projects
- FAQ
- Sources
How the three-part application is structured
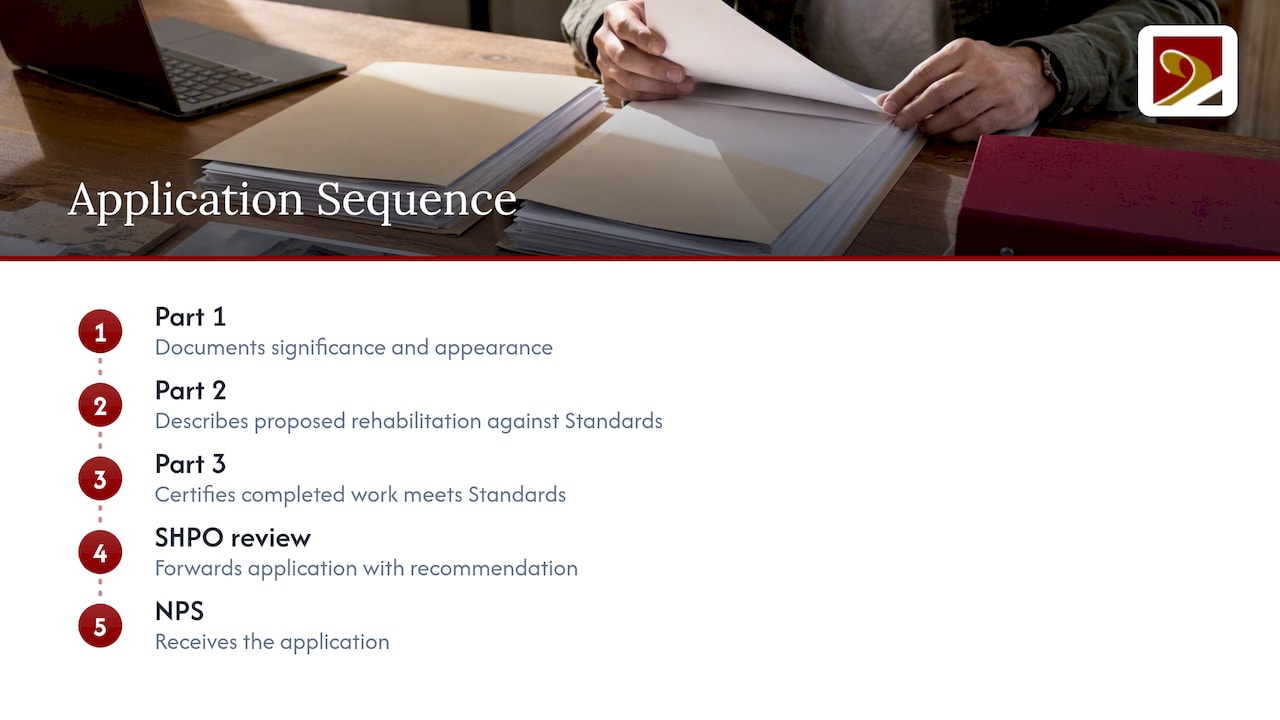
The NPS describes the process as a sequence in which each part answers a different question. According to the NPS application process page, Part 1 documents the significance and appearance of the building, Part 2 describes the proposed rehabilitation in light of the Secretary of the Interior’s Standards for Rehabilitation, and Part 3 certifies that the completed work meets those Standards. The application goes to the SHPO, which forwards it with a recommendation to the NPS.
Two procedural facts matter for planning. Since August 2023, applications must be submitted electronically as individual PDF files, a requirement the Virginia Department of Historic Resources also repeats for its own applicants, along with a hard-copy requirement for the state review. And each part is generally reviewed within 60 days: roughly 30 at the state level and 30 at the federal level, per the NPS page above. A project with four months of mobilization ahead should treat those weeks as part of the schedule, not an afterthought.
The NPS application overview also notes that the credits are available for projects the Secretary of the Interior designates a certified rehabilitation of a certified historic structure. The designation comes first. Everything else depends on it.
Part 1: proving the building qualifies
Before a credit can be claimed, the building must be a certified historic structure. The IRS rehabilitation credit page explains that the credit is found in Internal Revenue Code Section 47, and the NPS evaluates whether a building is individually listed or contributes to a registered historic district.
For Part 1 the documentation is largely evidentiary:
- Photographs of the exterior, interior and setting, showing the building as it stands today.
- A description of its physical appearance and its history, including alterations that have already occurred.
- A statement of significance tied to a period and area of significance. The NPS publishes separate Part 1 documentation requirements for preliminary determinations, which apply when a building is not yet listed or its district boundaries or period of significance are in question.
A frequent error is describing the building as it was originally designed rather than as it exists. Reviewers want to know what survives: original sash, staircases, door surrounds, plaster profiles, hardware. A Part 1 that inventories surviving fabric accurately makes the Part 2 argument far easier, because you can point to features worth saving and features already lost.
Part 2: the proposed work, where most applications are won or stalled
Part 2 is the technical heart of the file. It must describe every element of the rehabilitation clearly enough that a reviewer who has never visited the site can judge whether it meets the Standards.
Narrative first, drawings second
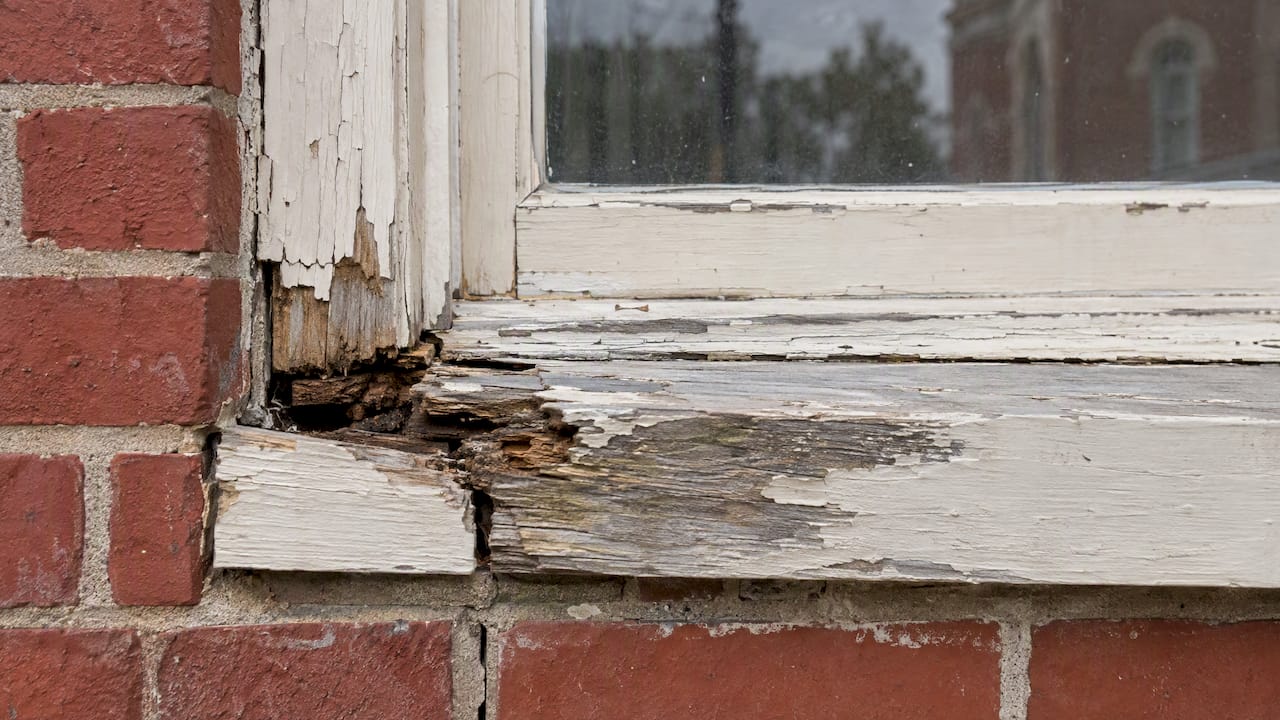
The NPS documentation requirements are explicit that drawings give technical context but cannot stand in for a detailed written narrative. The strongest narratives explain the why: what condition was found, what options were considered, and how the chosen treatment preserves historic character. A sentence such as “windows to be replaced” invites questions. A sentence that records the sill rot, the failed joinery and the proposed profile match answers them in advance.
The Advisory Council on Historic Preservation’s report on the Standards adds useful context: the Standards are meant to be applied reasonably, with economic and technical feasibility in mind. Treat them as principles to be argued from evidence, and bring your SHPO reviewer in early, before the drawings harden.
Drawings and photographs that keep the file moving
Drawings should be numbered and keyed to the narrative, according to the NPS documentation page. Practical guidance drawn from NPS requirements and practitioner experience:
- Isolate each rehabilitation zone on its own sheet rather than submitting one dense set of plans.
- Flatten PDFs and name files according to the NPS electronic submission conventions.
- Key every photograph to a photo plan and to the narrative paragraph it supports.
- State existing deficiencies plainly. The NPS needs to be persuaded that the work is necessary preservation, not elective renovation.
- Avoid redundant sheets. Volume is not detail.
Windows: the most scrutinized element
Windows carry disproportionate weight because they define a facade. Where replacement is proposed, the NPS states that applicants must demonstrate the existing historic windows are deteriorated beyond repair, and must submit detailed drawings of both the historic and the new windows with the Part 2 application. Those drawings must include elevations and vertical and horizontal sections that show the window in relationship to the wall assembly.
In practice, that means a reviewer should be able to compare, in one glance:
| Element | What to document for the existing window | What to document for the proposed window |
|---|---|---|
| Overall unit | Measured elevation, opening size | Matching elevation and opening |
| Sash and frame | Section showing rail, stile and sill profiles | Section showing the same dimensions |
| Muntins and glazing | Muntin width, glass type, lite pattern | Muntin profile, glazing method, glass type |
| Condition | Keyed photos of failures, rot or loss | Not applicable; reference the condition record |
| Wall relationship | Jamb depth, reveal, sill pitch | Same, shown in section |
A muntin that is a few hundredths of an inch wider than the original, or a sill with a different pitch, is the sort of discrepancy that produces a request for more information. The documents need measurements from the surviving window, which is why millwork should be measured and drawn before demolition, not after.
What counts as qualified expenditure
Documentation also supports the dollar figure. The IRS guidance on qualified rehabilitation expenditures generally limits QREs to costs properly chargeable to a capital account for structural and architectural features of a certified historic structure. Eligible items include walls, floors, ceilings, windows, doors, wiring, plumbing, and architect or engineering fees. Acquisition costs, furniture, landscaping, parking lots, sidewalks, signage, and new construction or enlargements are excluded.
The practical consequence: invoices should separate eligible from ineligible work. A millwork invoice that lumps a restored window sash together with freestanding furniture forces an accountant to guess. Itemize by element, and tie each line to the drawing number in your Part 2 file.
Part 3: documenting what was actually built
Part 3 asks the NPS to certify that the completed work matches the approved work. The documentation is mainly photographic. The NPS documentation requirements call for high-resolution color photographs of exterior, interior, site and environment, keyed to a photo plan and the narrative. If the images cannot demonstrate compliance, the application is placed on hold, which delays certification.
A simple discipline prevents this:
- Photograph every room and elevation before work, from marked positions.
- Repeat the shots from the same positions during work, particularly when hidden conditions are exposed.
- Retake them at completion, using the same numbering as the Part 2 photo plan.
- Record any approved field changes in writing, with the reviewer’s acknowledgment, because a change that was never approved is the usual source of a Part 3 conflict.
Timing, pre-approval and recapture
The NPS notes that it is technically possible to apply after construction begins, but owners who do so take on significant financial risk, since the completed work may not be certified if it does not meet the Standards. A contractor who has already removed original sash cannot undo that.
After certification, a different record matters. The credit is subject to a five-year recapture period. The IRS FAQ states that recapture is 100% if the property is disposed of within one full year after being placed in service, and falls by 20 percentage points for each later year. Owners considering a sale or exchange within that window should read how a Section 1031 exchange affects taxable gain and speak with a tax professional before acting, because a disposition can trigger recapture regardless of how perfect the documentation was. The credit itself is claimed ratably over five years on Form 3468, per the NPS page, so your CPA should receive the final certification and expense ledger together.
Our perspective: millwork is documentation too
From the shop floor, a tax credit file is only as strong as the physical objects it describes. We fabricate and restore wood windows, doors, trim, staircases and casework for historic buildings, and we replicate period features so that new work matches what the Standards expect. What we see repeatedly is that the drawings reviewers ask for are the same drawings a craftsman needs to build the piece correctly: a measured section of the original rail, the muntin profile, the sill slope, the joinery type.
That overlap is the argument for involving the millwork shop during Part 2 rather than after approval. When the person who will cut the profile also helps produce the section drawing, the proposed window in the application is the window that arrives on site. Our approach is to repair original fabric wherever it can be saved, and to replicate exactly, in authentic materials and with period techniques, where it cannot. In both cases, we recommend recording the condition evidence that justified the decision, because that is what a reviewer will ask to see.
We also take on architecturally significant and unusual commissions that other shops decline. If the original detail is elliptical, raked, or carries tracery that no catalog offers, a documented replica is possible, provided the measured evidence exists. Gather it before demolition.
— Gepetto
A pre-submission checklist for project teams
Before the package leaves your office, confirm each of these:
- Part 1 certification or preliminary determination is in hand.
- The narrative addresses every room and elevation affected, including the reasons for each treatment.
- Every drawing is numbered and referenced from the narrative.
- Every window or door proposed for replacement has a condition photograph and matching old-and-new sections.
- Photographs are keyed to a plan, high-resolution and in color.
- Files are flattened PDFs, named per NPS conventions, and signed as required.
- Your SHPO reviewer has seen the scope informally.
- The cost ledger separates qualified from non-qualified work.
State programs add their own paperwork. Our own notes on the federal credit and the South Carolina state credit and on window millwork specifications for NPS review cover regional details; for Virginia, consult the Department of Historic Resources directly.
Working with us on credit-eligible projects
If your project includes windows, doors, stairs, trim or casework in a certified historic structure, we can contribute measured field documentation, replication drawings and fabrication in support of your Part 2 narrative. Start with our historic window restoration and wooden windows pages, or see the wider range of custom fabrication, from entry doors and balustrades to period staircases. We work with architects, contractors and owners across Virginia, West Virginia, North Carolina, South Carolina, Maryland and Washington, D.C. Send drawings or photographs of the existing conditions through our site, and we will tell you plainly whether repair or replication is the better path.
FAQ
How long does the NPS take to review each part?
Each part is generally reviewed within 60 days: about 30 at the state level and 30 at the federal level. Incomplete photographs or missing window sections can extend that time, so build the schedule around a complete first submission.
Do drawings replace the project narrative?
No. The NPS treats drawings as technical context and the narrative as the explanation of why each choice respects historic integrity. Submit both, and key them to one another.
Can I start work before approval?
It is technically possible to apply after work begins, but you assume real financial risk, because the completed work may not be certified if it fails the Secretary of the Interior’s Standards. Obtain Part 2 approval first.
What must I show to replace historic windows?
You must demonstrate that the existing windows are deteriorated beyond repair. Submit detailed drawings of both old and new windows, including elevations and vertical and horizontal sections in relation to the wall assembly, with Part 2.
Sources
- Application Process, NPS Historic Preservation Tax Incentives
- Documentation Requirements for Certification Applications, NPS
- Documentation Requirements, NPS Technical Preservation Services
- Historic Preservation Certification Application, NPS
- Part 1 Application Documentation Requirements, NPS
- Rehabilitation Credit, IRS
- Qualified Rehabilitation Expenditures, IRS
- Rehabilitation Credit FAQs, IRS
- Report on Federal Historic Preservation Standards, ACHP
- Historic Rehabilitation Tax Credits, Virginia Department of Historic Resources