
Exterior millwork stays sound when water is shed quickly, allowed to escape as vapor, and never trapped behind a coating or cladding. That means three things working together: drainage details that keep water off windows, doors and trim; a finish that slows moisture exchange without sealing the wood in; and a routine of inspection that finds failure while it is still a repair rather than a replacement. On a historic building, the work is done in matching materials and profiles, so the detailing and the fabrication have to be planned together. We build and restore exterior windows, doors, trim and period features for historic projects, and the sections below set out the principles we would want every architect, contractor and owner to have in hand before a drawing is issued.
TL;DR
- Moisture is the leading cause of deterioration in historic buildings, and the aim is to manage its movement, not to seal it out entirely (NPS Preservation Brief 39).
- Assume every cladding and trim assembly will leak at some point; flash openings and leave a path for water to drain and the wall to dry (Building America Solution Center).
- No coating is moisture-proof. Choose finishes that slow wood’s moisture exchange, and avoid layers that behave as an unintended vapor barrier.
- Fix the cause (flashing, gutters, grade) before replacing wood, then replace only what is beyond repair, in kind.
- Inspect twice a year and repaint on a schedule so small failures never reach the framing.
Table of Contents
- Where the water comes from
- Detailing to shed water and let the wall dry
- Choosing finishes that do not trap moisture
- Inspection and upkeep
- Repairing historic millwork: what the standards ask
- What we make and restore
- Our perspective
- Frequently asked questions
- Sources
Where the water comes from
The National Park Service names uncontrolled moisture as the most prevalent cause of deterioration in older and historic buildings, leading to erosion, corrosion, rot and eventually the loss of materials, finishes and structure (Preservation Brief 39). Its list of sources is wider than rain on a sash. It includes snow, high ambient humidity, high water tables, plumbing and mechanical leaks, moisture generated inside the building by occupants and climate control, and even water used during maintenance or construction.
The South Carolina State Historic Preservation Office puts the matter plainly in its owners’ manual: water is the most destructive agent a building faces day to day. It recommends something any project team can do at no cost: stand outside during a heavy rain and watch where water goes from the roof, gutters, downspouts and site drainage (SC Department of Archives and History). The same manual notes that energy measures such as added insulation, storm windows and tight replacement windows can make it harder for interior moisture to dry out.
For the exterior wood itself, dew and precipitation cause cracking, peeling, discoloration and early paint failure, as the National Park Service’s technical center explains in its guide to traditional and modern paints and stains for exterior wood. The practical conclusion for designers is that millwork rarely fails because of one dramatic event. It fails at the places where water lingers: horizontal surfaces, joints, end grain, and the junctions between wall and opening.
Detailing to shed water and let the wall dry
Assume the cladding will leak
The Building America Solution Center, a U.S. Department of Energy program, advises that all siding, whatever its material, should be assumed to leak at some point in its life. Walls therefore need a means of drainage and drying behind the cladding: a gap created with furring strips, a drainage mat or textured house wrap, between the cladding and the water-resistive barrier, with vents at top and bottom to promote air circulation (BASC exterior siding guide). The same guide adds that wood siding able to dry quickly and spend little time in a high-moisture state resists decay far longer.
On a historic building the original wall may have no such gap, and adding one is a design decision with consequences for trim projection and window reveals. That is the stage at which fabrication matters: casings, sills and returns have to be dimensioned for the wall as it will actually be built, not as it was drawn a century ago.
Flash every opening
Windows, doors and penetrations should not depend on the cladding to keep water out. The Building America guidance calls for flashing at these locations, and the USDA Forest Products Laboratory’s guide to finishing wood exteriors lists the older, proven features that minimize moisture damage (Cassens and Feist, Finishing Wood Exteriors):
- wide roof overhangs, where a 4-foot overhang shields about two-thirds of a conventional one-story sidewall from full sun and a good share of rain;
- metal flashings under shingles at roof edges and at valleys and wall junctions;
- drip caps over window and door frames;
- eave troughs and downspouts kept in working order.
Where roof edges meet gutters, the way the metal is lapped decides whether water runs into the gutter or behind it onto fascia and cornice trim. Roofers describe the difference between the two components in their gutter apron and drip edge guidance, which is worth a look before specifying either one against a historic cornice.
Keep water from standing
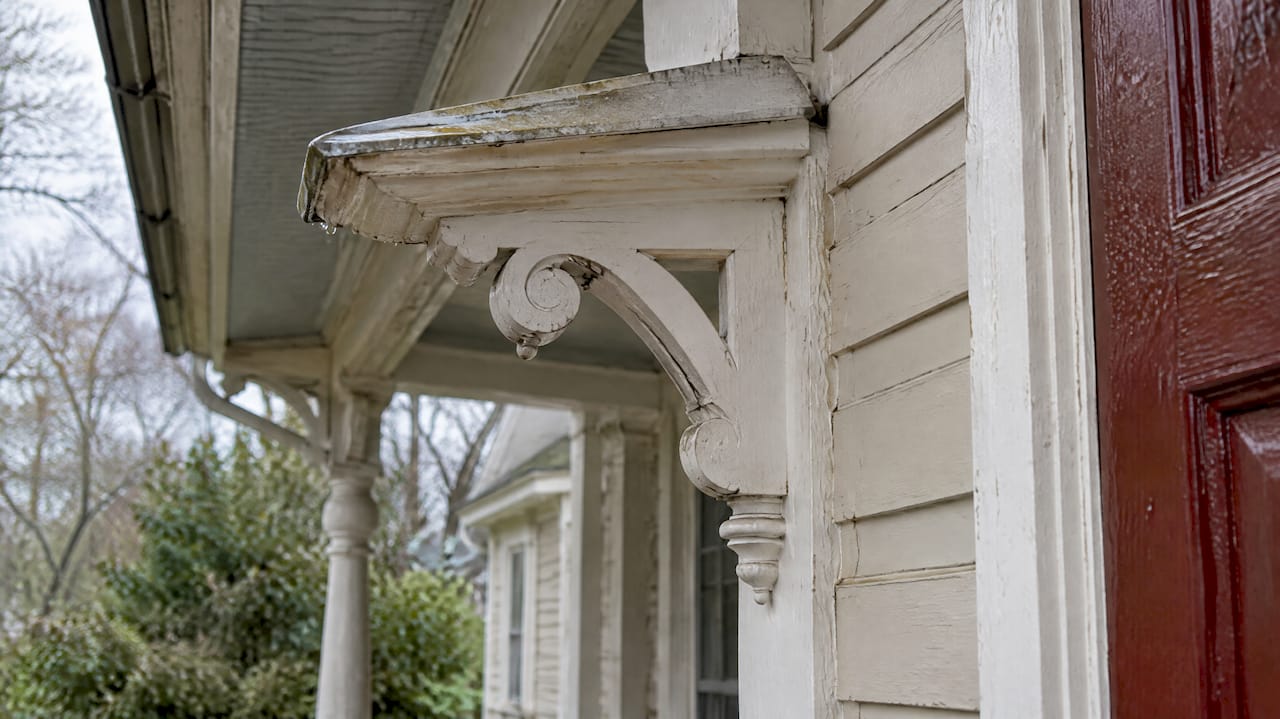
The historic district guidelines of St. Charles, Illinois, direct owners to provide drainage so that water does not stand on flat horizontal surfaces or collect in decorative features (St. Charles residential design guidelines). In practice this means sloped sills with a proper drip, caps that overhang the face below, and carved or applied ornament that can drain rather than hold a pool. The same guidelines observe that correctly installed siding and trim shed storm water and let vapor leave the wall cavity outward, and that peeling paint on an otherwise properly painted surface is early evidence of excess moisture within the wall.
Acclimate before you install
Moisture is also a matter of timing. The Woodwork Institute’s job-site guide recommends that millwork be acclimated for 72 hours before installation at 45 to 65 percent relative humidity and 60 to 90°F, which corresponds to an equilibrium moisture content of 8 to 12 percent. It records a case in which glued veneer paneling, 150 to 160 feet of it, split after absorbing moisture through an unfinished window wall because it was installed before the building was enclosed (Woodwork Institute, Protecting Your Millwork at the Job Site). Exterior pieces are less sensitive than paneling, but the principle carries over: sequence the work so that finished wood is not exposed to wetting before the envelope is complete.
Choosing finishes that do not trap moisture
What a coating can and cannot do
The Forest Products Laboratory is direct on this point: no coating is entirely moisture-proof. A finish slows the rate at which wood gains or loses moisture, and film-forming finishes last longer on dimensionally stable wood. Their effectiveness depends on film thickness, defects, pigment type and resin chemistry, and porous latex or flat oil-based paints (those with a pigment volume concentration above 40 percent) give little protection unless applied over a nonporous primer (Cassens and Feist).
Preservation Brief 39 cautions that waterproof coatings can trap moisture and make an existing problem worse. The lesson is to treat the finish as one layer in a system that also includes the species, the grain orientation, the joinery and the drainage detail.
A sound paint sequence
Purdue Extension recommends that bare or stripped wood receive a paintable water-repellent preservative, followed by an oil-base or stain-blocking latex primer and at least one high-quality acrylic latex topcoat. One topcoat may last four to five years; two may last as long as ten (Purdue Extension, NCR-133).
Old paint and new paint
The Preservation Society’s guidance on exterior wood observes that the oil paint found on many older buildings tends to adhere well to difficult surfaces, whereas several layers of latex can form an unintended impermeable barrier whose surface tension pulls older layers off the substrate. It advises consulting a paint specialist and choosing light colors for exterior walls to reflect heat (Preservation Society, Exterior Wood resilience guidance). When the existing finish is sound, matching it rather than stripping it is often the more conservative course; our note on matching stain on old trim without stripping sound finishes explains the approach, and our Maryland homeowner’s guide to millwork finishing covers finishing choices for a humid mid-Atlantic climate.
Do not seal the wall behind new cladding
The St. Charles guidelines warn that a synthetic veneer over foam underlayment on a wood exterior inhibits moisture escape from the wall cavity, and that fungal decay can continue for years behind such a shell with no visible sign on the surface. They add that concealing original wood siding, trim and architectural elements with aluminum, vinyl or synthetic material is generally not appropriate. Preservation Brief 16 makes a related point for substitute materials generally: their expansion, contraction, moisture resistance and permeability must be weighed against the surrounding historic fabric, or the assembly is put at risk (NPS Preservation Brief 16). Wood replaced with wood of the same character behaves like the wood around it.
Inspection and upkeep
The Preservation Society recommends semi-annual inspection of exterior wood, looking for peeling paint and for dirt veins near the ground that may point to termite activity; an annual wash with a garden hose, detergent and a bristle brush; and repainting every five to eight years (Preservation Society). A useful walk-through looks for these signs:
| What you see | What it often indicates | First response |
|---|---|---|
| Peeling or blistering paint on a well-prepared surface | Moisture moving outward through the wall | Trace the source before repainting |
| Soft wood at sill ends and the bottom of casings | Standing water or a failed drip | Check slope, flashing and grade |
| Open joints at mitres and rails | Repeated wetting and drying | Repair the joint and review the finish |
| Staining below a window head | Failed or missing head flashing | Inspect and replace flashing |
| Dirt veins near the ground | Possible termite activity | Have a pest professional inspect |
Preservation Brief 39 states that most unwanted exterior moisture can be relieved by repairing damaged materials, replacing flashings, rehanging gutters, repairing downspouts, caulking the perimeter joints around windows and doors, and repainting. The order matters: the cause comes first, the wood second, the paint last.
Repairing historic millwork: what the standards ask
The NPS Illustrated Guidelines for Rehabilitating Historic Buildings direct owners to identify, retain and preserve character-defining wood features. Deteriorated parts are repaired by patching, piecing in or consolidating, and replaced in kind only where surviving prototypes exist. Causes such as faulty flashing, leaking gutters, deteriorated caulking, plant growth and infestation are to be treated before any replacement, and protective paint is retained unless it is itself failing (Illustrated Guidelines for Rehabilitating Historic Buildings).
The Secretary of the Interior’s Standards add that historic drainage features, including roof overhangs, gutters and downspouts, must be kept intact and functioning, and that moisture sources such as clogged gutters, leaky roofs and soil held against wood at the foundation must be found and eliminated (Standards for Rehabilitation, 2017 edition). Local review boards commonly require replacement trim to match the original in design, proportion and finish.
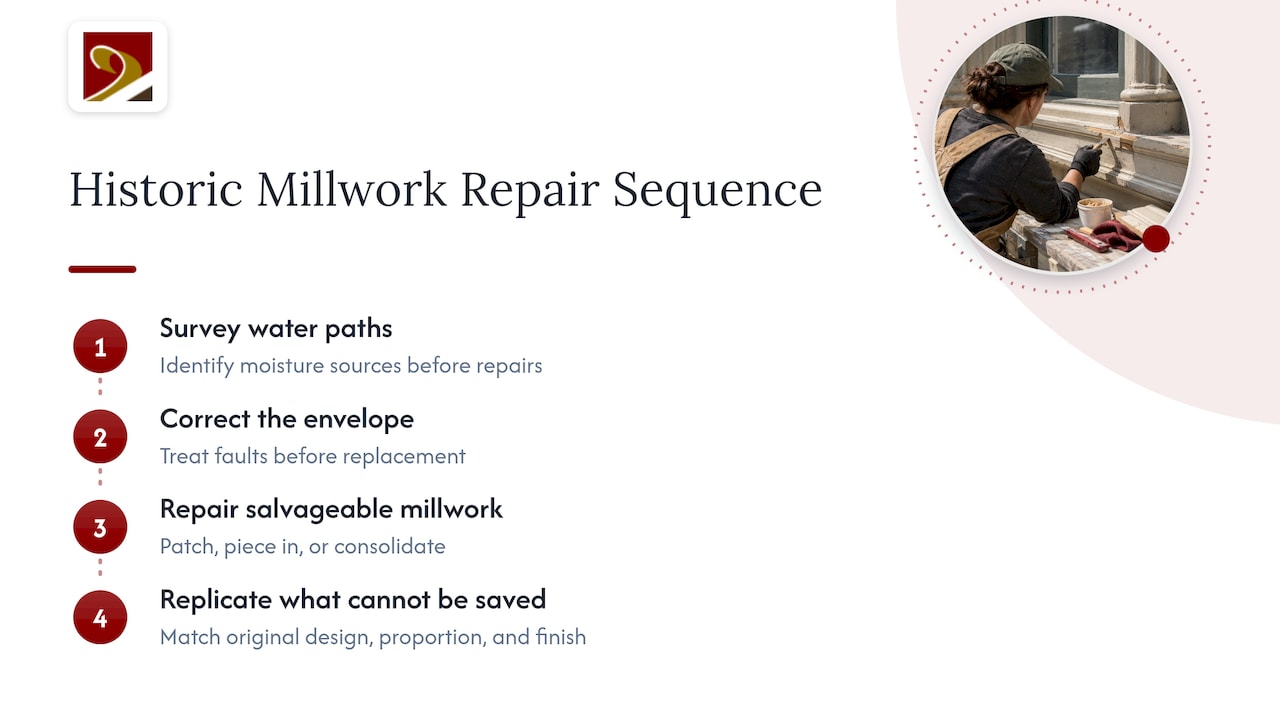
For architects and contractors, this sets the sequence of a sound scope: survey the water paths, correct the envelope, repair salvageable millwork, and replicate what cannot be saved. Projects seeking historic tax credits are reviewed against these same standards, so the documentation of what was repaired and what was replicated has value beyond the building’s longevity. We cover the sample and approval process for one state in our piece on millwork shop samples for West Virginia historic tax credits.
What we make and restore
Gepetto Millworks designs, fabricates and restores wood windows, doors, trim, staircases and architectural millwork for historic buildings, including the replication of period features and matching for historic tax credit eligibility. Where a sash, casing, door or ornamental element has passed the point of repair, we replicate it using authentic materials and techniques. Where it can be saved, our historic window restoration keeps the original fabric in service. New openings and replacement units are available as wooden windows, and entry doors, shutters, casework and balustrades are produced through our custom fabrication work.

If you are planning an envelope repair on a historic building in Virginia, Maryland, North Carolina, South Carolina, West Virginia or Washington, D.C., send us the drawings or the existing conditions and we will talk through the millwork scope at gepettomillworks.com.
Our perspective
Moisture control in historic millwork is, in the end, a question of fidelity. The original joiners understood that a sill must shed water, that a cornice must throw rain clear of the wall, and that a painted surface must be renewed before it fails. When those details are lost to a careless replacement, the wood is blamed, though the detail was at fault.
We approach every exterior commission with that in mind. A replicated sash or casing is only as durable as its profile, its joinery and its relationship to the flashing above and the sill below, so we look at the whole opening, not the single part. Our expertise lies in exact historic replication with authentic materials and techniques, and in taking on architecturally significant and complex pieces that other shops may decline.
That fidelity is also what a preservation reviewer looks for. Millwork that matches the original in proportion and finish, and that is detailed to drain and dry as the original was, satisfies the standards and the weather together. For architects, builders and owners of historic buildings, we regard the choice of a fabricator with that discipline as part of the moisture strategy itself.
Gepetto
Frequently asked questions
Should exterior millwork be sealed completely against moisture?
No. The Forest Products Laboratory states that no coating is entirely moisture-proof, and Preservation Brief 39 warns that waterproof coatings can trap moisture and aggravate existing problems. The goal is to shed water quickly and let the wood dry, using flashing, drainage gaps and a breathable finish system.
How often should exterior wood trim and windows be inspected and repainted?
The Preservation Society recommends inspecting exterior wood twice a year, washing it annually, and repainting every five to eight years. Purdue Extension notes that one topcoat over a proper primer may last four to five years and two topcoats up to ten, depending on conditions.
Is peeling paint a sign of a moisture problem?
Often it is. Guidelines from St. Charles, Illinois, describe peeling of properly applied paint as early evidence of excessive moisture within the wall. Trace the source, such as failed flashing, a leaking gutter or a blocked drainage path, before repainting, or the new coat will fail in the same place.
Can historic wood windows and trim be repaired rather than replaced?
In most cases the standards favor it. The NPS guidelines call for patching, piecing in and consolidating deteriorated wood, with in-kind replacement only for parts too far gone and where surviving prototypes guide the replica. Fix the water source first, then repair or replicate the millwork.
Does air sealing and insulation affect millwork moisture?
It can. The South Carolina historic building owners’ manual notes that tight energy measures such as insulation, storm windows and tight replacement windows can make it harder for interior moisture to dry out. Plan the drying path of the wall together with any upgrade to the envelope.
Sources
- NPS Preservation Brief 39: Holding the Line, Controlling Unwanted Moisture
- Building America Solution Center: Exterior siding guide
- South Carolina Historic Building Owners Manual
- NPS NCPTT: Understanding Traditional and Modern Paints and Stains for Exterior Wood
- USDA Forest Products Laboratory: Finishing Wood Exteriors
- Gutter apron and drip edge guidance
- St. Charles residential design guidelines: wood exteriors
- Woodwork Institute: Protecting Your Millwork at the Job Site
- Purdue Extension NCR-133
- Preservation Society: Exterior Wood resilience guidance
- NPS Preservation Brief 16: Substitute Materials
- NPS Illustrated Guidelines for Rehabilitating Historic Buildings
- Secretary of the Interior’s Standards for Rehabilitation, 2017