
Most porch columns with localized base rot can be repaired in place; full replacement becomes necessary only when the structural core is compromised, decay extends past 18 inches up the shaft, or the inner load-bearing post has lost integrity. Before any cutting or probing begins, shore the roof load off the damaged column entirely.
Safety first: Transfer the roof load to a hydraulic jack and a temporary 4×4 post before touching the column. Lift slowly, install distribution plates to spread the load, and keep redundant shores in place throughout the repair. Never cut into a column that is still carrying load.
Immediate next steps for any field assessment:
- Shore and transfer load before any inspection cuts or probing
- Tap and probe to confirm whether the column is decorative or load-bearing
- Document rot extent with photos and measurements before cutting
- Call a structural engineer if the inner post shows any sign of compromise
Table of Contents
- How do you decide between repair, splice, and full replacement?
- Field inspection: how to test, cut back, and document damage
- Which repair technique is right for the damage you found?
- Materials, preservatives, and moisture control that prevent recurrence
- How do you document historic profiles for exact replication?
- Step-by-step field procedure for a splice or base repair
- What drives timeline and cost in U.S. restoration projects?
- Red flags that require a structural engineer or preservation specialist
- Key Takeaways
- Why field patching alone rarely honors the architecture
- Gepettomillworks: exact-profile replication for porch column projects
- Useful sources for preservation-minded column repair
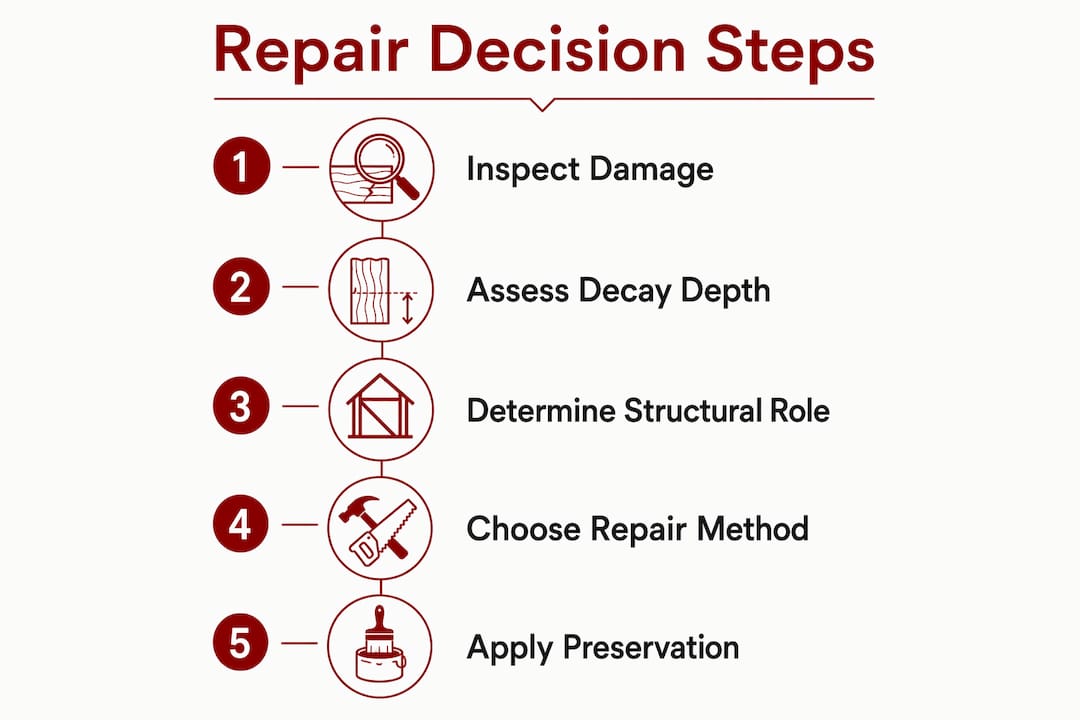
How do you decide between repair, splice, and full replacement?
The decision turns on two variables: how far decay has traveled vertically, and whether the visible column is a decorative wrap or the structural member itself.
Deterioration typically concentrates in the bottom 6–12 inches, where moisture collects between the base and the deck surface. Soft wood confined to that zone is a strong candidate for a splice repair. When softness extends past 18 inches or into the taper transition, replacement of the full column shaft is usually the more defensible specification, both structurally and economically.
Before writing a repair scope, verify whether the column is decorative or structural. Cosmetic patching is unsafe if the internal load-bearing post is compromised. Tap the shaft: a hollow sound in the lower third warrants an inspection port. In bid language, distinguish clearly between “splice repair of decorative column wrap” and “structural post replacement with matching millwork cladding” — conflating the two creates liability and change-order disputes.
Field inspection: how to test, cut back, and document damage
Shoring precedes every other step. Use a hydraulic jack rated for the roof load, a temporary 4×4 post, and steel distribution plates above and below. Install redundant shores before making any cuts.
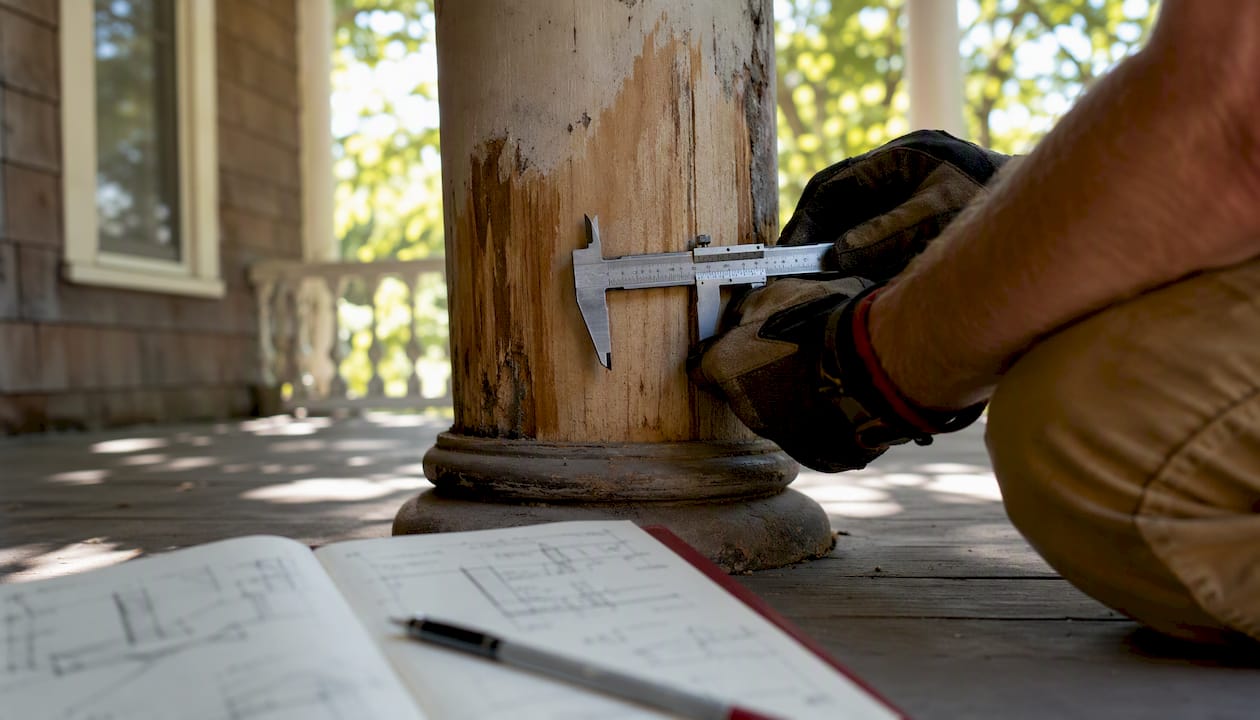
With the load transferred, proceed through this inspection sequence:
- Tap the full column height with a mallet, listening for hollow or dead sounds that indicate internal decay beyond the surface.
- Probe with a screwdriver at the base and any soft spots; sound wood resists penetration, decayed wood yields easily.
- Take moisture meter readings at multiple heights; readings above 19% in wood that appears intact signal hidden fungal activity.
- Open a small inspection port (typically 2–3 inches square) at the suspected decay boundary to confirm core condition.
- Mark the cut line at least 2 inches above the highest visible rot; continue cutting higher until only clean, solid wood remains at the kerf.
- Photograph every stage: the rot extent before cutting, the cut face, the core condition, and all measurements. These images become the basis for your repair spec and any change-order documentation.
Record shaft diameter at the cut line, taper geometry above and below, base profile dimensions, and original species if determinable. That data package is what a millworker needs to fabricate a matching splice block.
Which repair technique is right for the damage you found?
| Condition | Recommended Method | Structural Notes | Preservation Notes |
|---|---|---|---|
| Surface checks, no decay | Two-stage epoxy fill + prime | No structural concern | Reversible; matches paint finish |
| Decay confined to bottom 6–12 in., core sound | Splice block with structural epoxy + fasteners | Verify core before proceeding | Match taper geometry precisely |
| Decay 12–18 in., core intact | Extended splice or base section replacement | Engineer review advisable | Commission matched profile from millworker |
| Decay past 18 in. or into taper | Full column replacement | Structural sign-off required | Replicate profile from measured drawings |
| Inner structural post compromised | Remove and replace structural post; reclad | Engineering sign-off mandatory | Decorative wrap fabricated separately |
Profession-grade consolidants and two-part structural epoxies restore strength in moderate decay cases where core integrity is verified. They are appropriate for surface and near-surface decay but should never substitute for a splice when the cross-section has lost meaningful bearing capacity.
Key cautions by method:
- Epoxy consolidants: effective for moderate decay with a sound core; never use as a cosmetic cover over a structurally compromised section
- Splice blocks: precision in the horizontal cut is critical for tapered columns; even a small angular gap becomes a water trap and causes repeat failure within a few years
- Sistering / sleeving: appropriate when the structural post needs reinforcement but the decorative wrap is largely intact
- Full replication: the correct path when decay or damage has destroyed the historic profile; commission from a millworker with measured drawings in hand
Materials, preservatives, and moisture control that prevent recurrence
Species selection matters as much as technique. For splice blocks on visible faces, match the original species where possible — clear vertical-grain Douglas fir, white oak, or old-growth heart pine are common in pre-1940 work. Pressure-treated lumber is acceptable for concealed structural blocking but should not appear on finished surfaces where color and grain must align with historic fabric.
Preservative application:
- Apply a wood hardener or copper-based preservative to all exposed end grain immediately after cutting; do not allow cut faces to dry before treatment
- Copper-based preservatives penetrate more deeply than surface sealers and arrest residual fungal spores that tapping and probing cannot locate
- Allow full cure before applying adhesive or fasteners
Moisture control at the base:
- Install a metal post base plate (galvanized or stainless) between the column base and the deck to create a capillary break
- Maintain a 1/8-inch air gap between the column base and the plate
- Confirm deck pitch of at least 1/4 inch per foot away from the column; standing water at the base is the primary cause of repeat decay
Fasteners and adhesives: use exterior structural epoxy for the glue line and galvanized or stainless lag screws for mechanical connection. Never use standard interior wood glue or zinc-plated fasteners in an exterior splice.
Finishing: ventilation, waterproofing, and a quality exterior primer are the foundation of long-term performance. For deep cracks or splice seams, fill in two stages — bulk fill first, then a skim coat — and finish with a bonding primer plus two topcoats. Paint the full column face to avoid sheen mismatches at the repair boundary.
Pro Tip: Copper flashing tape at the base-to-deck junction ages appropriately on historic work and often outperforms modern plastic barriers in both longevity and visual compatibility with period materials.
How do you document historic profiles for exact replication?
When decay or damage has destroyed a portion of the historic profile, the quality of your documentation determines whether the replacement reads as a restoration or a substitution. Gather the following before contacting a millworker:
- Full-column elevation photographs from at least two perpendicular angles, with a scale reference in frame
- Measured drawings showing shaft diameter at base, mid-point, and capital; taper rate; base and capital profile sections; and overall height
- Scribe measurements of any applied moldings, flutes, or entasis curves
- Original material notes (species, finish system, evidence of prior repairs)
- A rubbing or template of the base and capital profiles if the column is partially intact
When the visible profile is affected, include a mock-up approval clause in the contract. Specify acceptable dimensional tolerances (typically ±1/16 inch on profile dimensions for historic tax credit work) and require a sample panel or column section for client and preservation officer review before full fabrication begins. Gepettomillworks’s replica millwork archive illustrates the range of period profiles that can be matched from measured drawings alone.
Pro Tip: A full-size cardboard template of the base profile, cut on site from the intact portion of the column, is faster and more accurate than a photograph for communicating taper geometry to the shop.
Step-by-step field procedure for a splice or base repair
- Shore and transfer load: hydraulic jack, temporary 4×4, distribution plates; install redundant shores before proceeding.
- Confirm core status: probe, tap, and open inspection port if needed; stop and call a structural engineer if the inner post is compromised.
- Mark and make the cut: square cut at least 2 inches above the highest visible rot; use a jig or table saw for tapered columns to hold the precise angle.
- Remove decayed material: extract the rot section completely; inspect the remaining shaft face for any residual soft wood.
- Treat exposed grain: apply wood hardener or copper-based preservative to all cut faces; allow full cure per manufacturer instructions.
- Fit the splice block: dry-fit first to confirm bearing and geometry; for tapered columns, the block must be table-sawn or jig-cut to match taper geometry exactly.
- Glue, fasten, and seal: apply exterior structural epoxy to mating faces, draw tight, and secure with galvanized or stainless lags; seal all joints before priming.
- Install post base and flashing: set the metal post base plate with the 1/8-inch air gap; confirm deck pitch.
- Transfer load back: lower the jack slowly and confirm the column seats fully before removing shores.
- Finish and paint: prime with a bonding exterior primer; apply two finish coats; paint the full column face.
Shoring checklist:
- Jack capacity rated at or above the tributary roof load
- Adjustable shores with steel bearing plates top and bottom
- Redundant secondary shore in place before any cutting begins
- No single point of failure in the temporary support system
Post-repair monitoring:
- At one month: check splice joint for any gap opening or paint cracking at the seam
- At six months: probe base area for any moisture infiltration; confirm deck pitch has not settled
- Annual: full tap-and-probe inspection of base zone; check fastener heads for corrosion; repaint as needed
What drives timeline and cost in U.S. restoration projects?
A straightforward splice repair on an accessible column typically runs two to four days from shoring through final paint cure. Add one to two weeks when a structural engineer’s review is required, and four to eight weeks when custom profile replication involves shop fabrication of a matched column section.
Primary cost drivers, in rough order of impact:
- Access and shoring complexity: second-story or portico columns with limited staging access add significant labor
- Profile replication: shop time for exact-match millwork on a non-standard Craftsman, Tuscan, or neoclassical column profile is the single largest variable in a restoration budget
- Species and material: clear vertical-grain old-growth species command a premium over contemporary equivalents; the cost difference is justified when historic tax credit eligibility depends on material authenticity
- Engineering and permits: load-bearing column repairs in many jurisdictions require a permit and a licensed engineer’s stamp; budget accordingly
- Finish matching: achieving a seamless color and sheen match on a weathered historic column often requires full-column repainting rather than spot touch-up
When requesting estimates, ask contractors and millworkers to provide line-item breakdowns separating shoring labor, material costs, shop fabrication, finish work, and engineering fees. A single lump-sum bid on a restoration project makes scope changes and change orders nearly impossible to adjudicate fairly.
Red flags that require a structural engineer or preservation specialist
Certain conditions move a project beyond carpentry repair into structural or historic-preservation territory. Escalate immediately when you observe any of the following:
- Rot extending past 18 inches or into the taper transition of the column shaft
- Hollow sound or visible separation at the beam-to-column connection at the capital
- Visible deflection or settling in the beam or roof structure above the column
- Evidence of insect damage (termite galleries, carpenter ant frass) in the column framing or adjacent sill
- Split or open joints at the column-to-beam connection that suggest the column has shifted under load
- Any sign that the inner structural post, rather than the decorative wrap, has lost cross-sectional integrity
For load-path issues, engage a licensed structural engineer before writing a repair scope. For historically significant elements on National Register properties or tax credit projects, a preservation architect should review the repair methodology. When the visible profile must be replicated, Gepettomillworks provides historic replication services from measured drawings through fabrication and installation support.
When drafting an RFI or emergency scope for a specialist, describe: the column’s position in the structure (corner, intermediate, portico), the approximate extent of visible decay, any observed deflection, the historic period and profile type, and whether the project carries tax credit or preservation officer oversight.
Key Takeaways
Sound wood at the cut face, a metal post base with a 1/8-inch air gap, and exact-profile splice geometry are the three non-negotiable conditions for a durable, preservation-compliant porch column repair.
| Point | Details |
|---|---|
| Shore before you cut | Transfer the roof load to a hydraulic jack and temporary 4×4 before any inspection or cutting begins. |
| Cut to sound wood | Mark the cut line at least 2 inches above the highest visible rot; continue cutting higher until only solid, clean wood remains, and then apply a wood hardener or copper-based preservative to all exposed end grain. |
| Install a capillary break | A metal post base plate with a 1/8-inch air gap and 1/4-inch-per-foot deck pitch prevents moisture recurrence. |
| Commission exact-profile millwork | When the historic profile is affected, provide measured drawings and require a mock-up approval clause in the contract. |
| Gepettomillworks for replication | Engage Gepettomillworks when exact-profile fabrication, measured drawings, or historic tax credit compliance is required. |
Why field patching alone rarely honors the architecture
The conventional wisdom in porch repair holds that epoxy consolidants and a fresh coat of paint constitute a complete restoration. That view underestimates two things: the precision that tapered historic profiles demand at the splice line, and the degree to which moisture management at the base determines whether the repair lasts five years or fifty.
A splice that closes the geometry perfectly but sits directly on a concrete deck without a capillary break will fail again, often faster than the original decay, because the repair wood lacks the old-growth density that slowed the first cycle of deterioration. Conversely, a post base installed with textbook moisture control but a slightly open splice joint becomes a water reservoir at exactly the point where the new wood is most vulnerable.
The repairs that hold are the ones that treat geometry, moisture, and material as a single integrated system rather than three separate line items. For historic columns where the profile itself carries architectural meaning — a Tuscan entasis, a Craftsman taper, a neoclassical base molding — that integration extends into the shop. Field carpentry alone cannot reproduce a period profile to the tolerances that preservation review requires. That is precisely where a millworker with documented experience in historic construction methods becomes not a luxury but a specification requirement.
Gepettomillworks: exact-profile replication for porch column projects
When a porch column repair requires more than field carpentry — when the historic profile must be matched, the taper geometry reproduced, or the material authenticated for tax credit review — Gepettomillworks fabricates to measured drawings with the precision that preservation work demands.

Services directly relevant to column repair and restoration include measured-drawing consultation, custom splice block and full-column fabrication, species-matched material selection, and installation support. The bungalow millwork archive and bungalow supplier pages document period-correct Craftsman and Prairie column profiles available for replication. To begin, prepare your profile documentation package (photographs, measured drawings, and material notes) and request a fabrication consultation at gepettomillworks.com.
Useful sources for preservation-minded column repair
The following references support the procedures, cut-back rules, and material specifications in this guide. Include relevant sources in your project file for preservation compliance or historic tax credit documentation.
- InspectAPedia: Wood Column Repairs — field diagnostic guidance on column defects, rot assessment, and structural evaluation
- This Old House: Replacing a Porch Column Base — ventilation, waterproofing, and finishing recommendations for hollow wood columns
- Craftsman Charm: Craftsman Porch Column Rot Repair — detailed splice geometry, post base installation, and moisture control for tapered columns
- PatioFixes: How to Repair the Bottom of a Porch Post — shoring procedure, cut-back rules, and preservative application
- Front Porch Ideas and More: How to Repair Porch Columns — consolidant and structural epoxy options for moderate decay
- BCA Periodic Structural Inspection guidance — structural inspection protocols relevant to escalation criteria and engineer engagement thresholds