by Matthew Wiley | Oct 26, 2026 | Architectural Millwork
Most antique mortise locks do not need replacing. In the majority of cases the lock case is sound and the fault lies in a worn spring, a dirty mechanism or a misaligned spindle, all of which can be put right on a clean bench with patience and a few hand tools. This guide sets out how to diagnose the problem, take the lock apart without damaging the door, clean and lubricate it, source or make parts, and decide when the work belongs with a specialist rather than in your own workshop.
It is written for owners of historic houses, architects and contractors who have a pre-war or nineteenth-century door with its original hardware and want to keep it working and keep it authentic.
Gepettomillworks
Keep Historic Details Intact
Gepettomillworks creates custom millwork for historic building projects, supporting preservation work where original doors and details matter.
Visit Gepettomillworks
TL;DR
- Most failures come from broken or fatigued springs, gummed old lubricant, loose knobs or a misaligned spindle, not from a ruined lock case.
- Remove the lock from the door carefully: take off the knobs, spindle and cylinder first, then the faceplate, and never pry the case out with a screwdriver.
- Clean with a degreaser, replace every spring while the case is open, and lubricate sparingly with a product suited to the mechanism.
- Older locks were often hand-fitted, so parts rarely interchange; expect to repair or fabricate rather than order a match.
- A general lock change costs far less than careful restoration of a rare lock, but replacement can destroy the historic fabric that makes the door valuable.
Table of Contents
Why restoration usually beats replacement
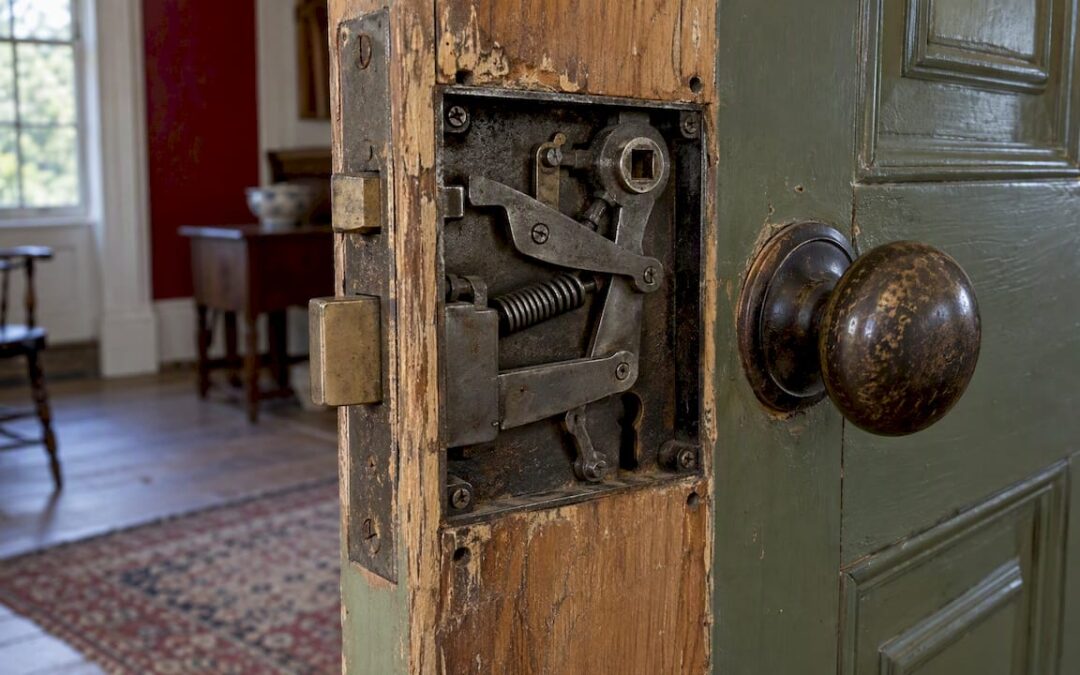
A mortise lock sits inside a pocket cut into the edge of the door stile, and the mechanism is a self-contained case of levers, springs, a latch bolt and often a deadbolt. In a nineteenth-century house, that case is frequently the oldest working machine the occupants touch every day. Its escutcheons, knobs and keyhole covers are part of the room’s character, and on a listed or tax-credit project they may be part of the record the reviewer expects to see preserved.
There is also a practical argument. Older mortise locks could be individually built, with parts hand-filed to fit and no interchange between locks, which means a modern replacement case seldom matches the original pocket. Fitting one usually means enlarging the mortise, and each enlargement removes original wood. Practitioners who service pre-war hardware report that in most calls the case is sound and the fault is a serviceable part or an alignment problem. Repair is therefore not only the more respectful route; it is, in most cases, the more probable one to succeed.
For wider context on repairing rather than replacing original fabric, the National Park Service’s Preservation Briefs are the standard reference that preservation professionals use when they weigh repair against replacement for historic building elements.
Diagnosing what has gone wrong
Before a single screw is turned, find out what the lock is actually doing. Test it with the door open, because a lock that fails in the door may work perfectly on the bench, and the reverse is also true. The common complaints are keys that no longer work, loose or spinning doorknobs, misaligned or damaged components, sticking operation and worn internal mechanisms.
| Symptom |
Likely cause |
First check |
| Knob spins freely, latch does not retract |
Loose set screw, worn spindle or knob shank |
Tighten the set screw; inspect the spindle for rounded corners |
| Latch does not spring back |
Broken or fatigued latch spring |
Open the case and test each spring by hand |
| Knob turns stiffly or sticks |
Hardened grease, dirt, bent lever |
Look for gummed residue and burrs on moving parts |
| Key turns but bolt does not move |
Worn or bent lever, loose internal component |
Check the levers and the bolt tail inside the case |
| Latch catches on the strike |
Door sag or strike misalignment |
Close the door slowly and watch where the latch meets the strike |
Internal wear tends to show itself as broken or fatigued springs that fail to return the latch, corroded or bent internal levers, and components that float loosely within the case. Keep in mind that a door which has dropped on its hinges, or a frame that has moved with seasonal humidity, can imitate a lock fault entirely. If the latch only sticks when the door is closed, look at the hinges and the strike plate before blaming the mechanism.
Removing the lock without harming the door
Many antique mortise locks are handmade, one-of-a-kind pieces, and the door they sit in is usually older and more valuable than any replacement lock. Do not pry them from the door with a screwdriver, which can scratch the hardware and the door alike.
The sequence that protects both runs as follows:
- Photograph everything before you start: the faceplate, the knob arrangement, the escutcheons and the side of the door the lock faces. Note which way the latch bevel points.
- Release the knobs and spindle. Loosen the set screws, withdraw the knobs and the spindle, and keep them together in a labeled bag.
- Take out the cylinder or thumb turn if the lock has one, along with any trim rings.
- Unscrew the faceplate on the door edge. Old screws are often painted over; clear the slot with a pick before turning, so you do not strip the head.
- Slide the lockbox out of the mortise, wiggling it gently. If it resists, look for a paint bridge between faceplate and wood and score it with a thin blade rather than forcing the case.
If a lock has been painted shut over a century of repaints, work slowly, because chipped paint on the door edge is easier to repair than a cracked stile.
Opening the case and keeping track of parts
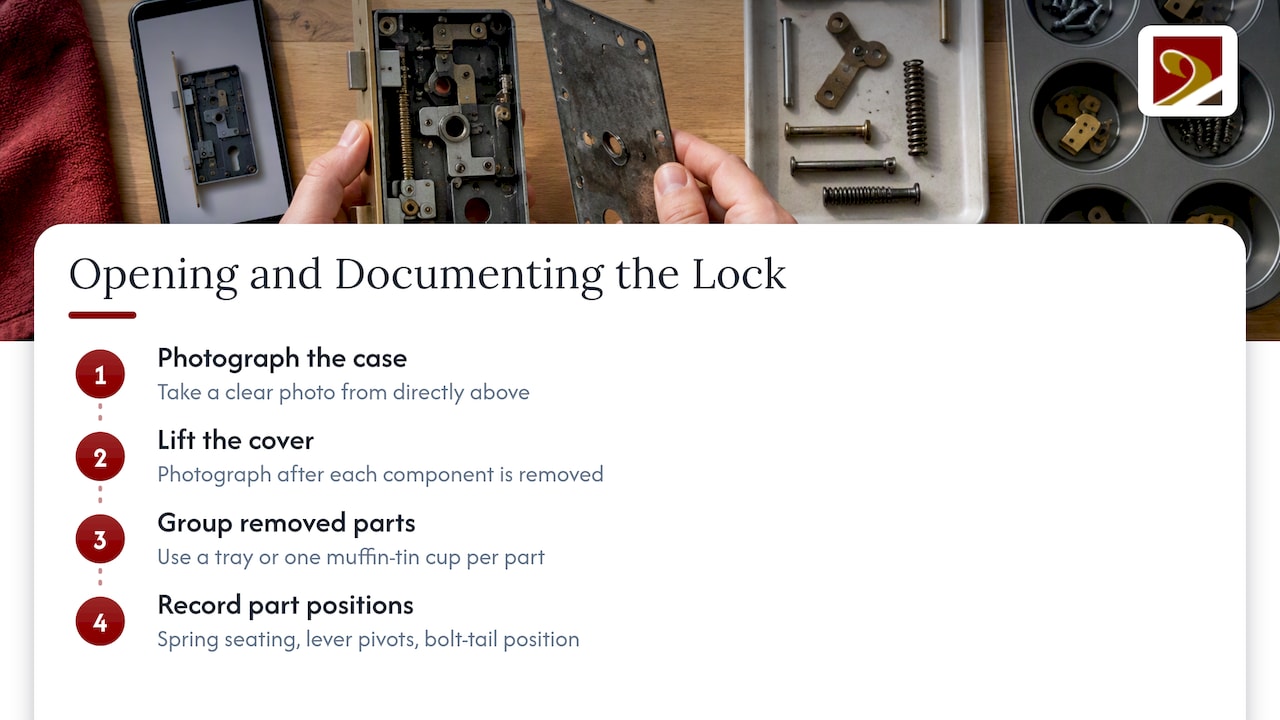
Place the lock on a clean, flat surface under good light, and keep track of small parts, because pieces may fall out when the cover is lifted. A tray lined with a white cloth, or a muffin tin with one part group per cup, prevents the usual losses. Before lifting the cover plate, take a clear photograph from directly above, and then another after each component you remove.
Most cases are closed by a few screws or small rivets. If a cover is riveted, think carefully before drilling; some can be retained and re-secured with screws of matching head type, which is reversible and keeps the original look. Note how each spring is seated, which way each lever pivots and where the bolt tail rides, because the order of reassembly matters more than any single repair.
Cleaning the lock body and internal parts
Hard grease, old oil, rust dust and decades of paint overspray are the real enemies of an old mortise lock. The aim is to remove them without removing metal.
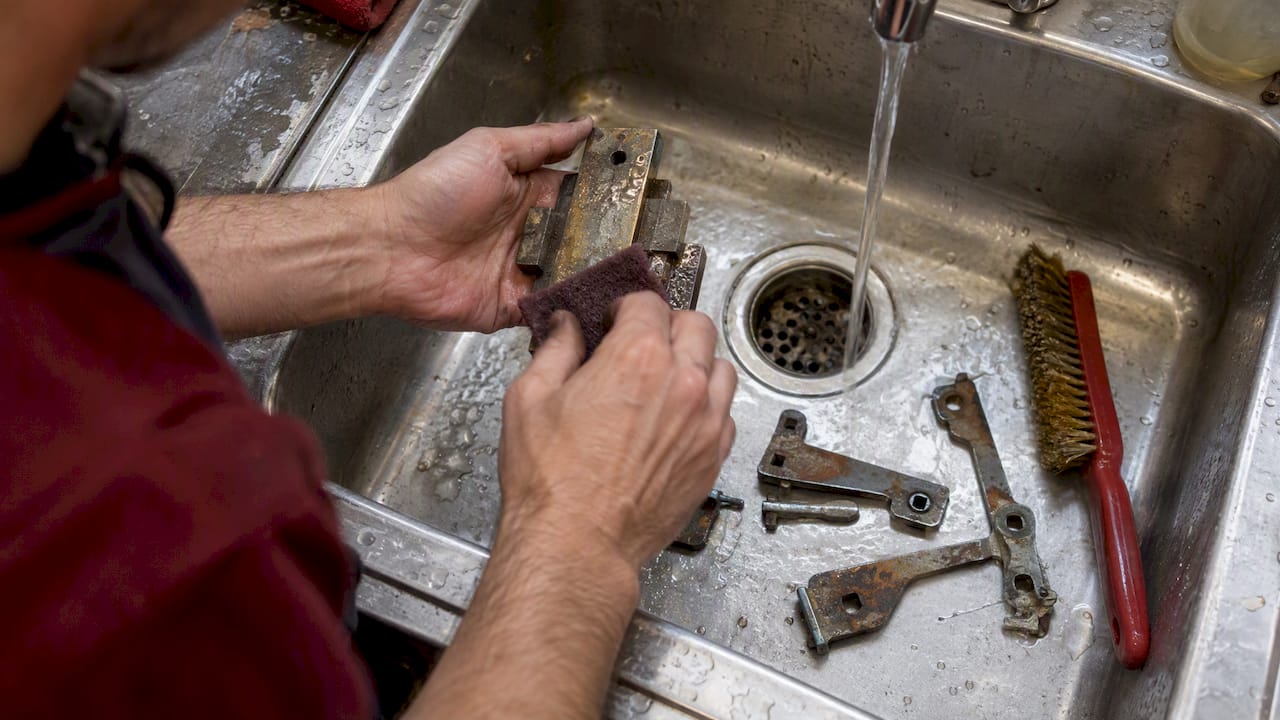
Degrease first. The standard advice is to clean all parts thoroughly with a degreaser. Work part by part, using a soft brush and lint-free rag, and dry everything fully before reassembly. Brass and bronze components tolerate a mild soap bath; steel levers and springs should be dried at once to prevent flash rust.
Treat rust gently. Light surface rust on levers and the bolt can be lifted with fine abrasive pads or a brass brush. Avoid aggressive wire wheels, which round off the edges that engage the levers and change how the lock behaves. Pitted parts are better kept than ground smooth; a little pitting does not stop a lever working.
Leave original finishes alone where you can. Japanned, lacquered or hand-polished exterior hardware has its own patina. Strip and refinish only when the finish has failed, and do not polish bronze to a mirror shine on a historic door if the surrounding hardware is mellowed.
Mind the warnings from practitioners. Among working locksmiths there is real disagreement about sprays: some use light penetrating oil for cleaning, others insist it dries to a gum that attracts dust. The safe approach is to treat any spray as a cleaner, wipe it away completely and then lubricate the clean metal with a purpose-made dry or light lubricant. Never leave a thick, sticky layer in the case.
Springs, levers and hand-fitted parts
Broken springs are the single most frequent cause of a failing mortise lock, and a spring that has not yet broken has usually lost tension. Since the case is already open, replace the full set rather than one at a time. Springs can be made from music wire or spring steel to match the original profile and coil count; a tool-and-die hobbyist or a metalworker with a small coil winder can produce them quickly.
Where a lever is bent, a careful bend back on a soft-jawed vise with light taps can restore it, provided the metal is not cracked. Where a part is missing or broken, consider these routes in order:
- Repair in place: braze, solder or peen a worn edge, then file to the original profile.
- Salvage: take a matching part from a similar donor lock, remembering that, with hand-filed parts, even apparent twins may need fitting.
- Fabricate: cut a new part from the same type of metal using the original as a pattern.
- Reproduction hardware: appropriate for missing knobs, escutcheons and strike plates, less so for the mechanism of a rare lock.
Whatever route you take, keep the discarded original parts, labeled, in a bag taped inside the door’s jamb or filed in the project record. Reviewers and future owners will thank you.
Lubrication, reassembly and testing
Reassemble in the reverse order of your photographs, and operate each component by hand before the cover goes on. The latch bolt should retract fully and snap forward cleanly, and the deadbolt should throw and withdraw without drag.
Apply lubricant sparingly at contact points only: the bolt faces, lever pivots, spring ends and the spindle bearing. Dry graphite is the traditional choice for the case, and a light machine oil suits the key cylinder only if the manufacturer allows it. Avoid heavy grease, which mixes with dust and returns the lock to its former condition within a few seasons.
Two checks save a second removal:
- Spindle height. The spindle should sit at the vertical center of its opening, otherwise the knobs will bind or tilt.
- Test with the door open. Operate the lock several times, then the key, before reinstalling it.
When the lock goes back, tighten the faceplate screws only enough to seat the plate. Then test it with the door closed and listen for the latch meeting the strike. If it catches, adjust the strike plate before you touch the mechanism again.
When to call a specialist
Some jobs reward patience, and others reward experience. Consider a locksmith with historic-hardware experience when the lock is rare, the key mechanism is complex, the original cylinder is worn, or electronic upgrades are involved. Servicing present-day mortise locks, including electronic upgrades and repair of malfunctions, is typically done in a controlled environment such as a cleared workbench.
The door itself is a separate question. Retrofitting a mortise lock into a wood door is labor-intensive and typically requires a specially designed router and brace operated by a specially trained technician. If a mortise pocket has been enlarged by an earlier, careless replacement, if the stile has split around the lockbox, or if a door needs a new mortise cut to take reproduction hardware, that is joinery rather than locksmithing, and it is where a millwork shop is the right call.
What mortise lock work costs
Readers often ask what it costs to replace a mortise lock, and the honest answer depends on what you mean by replace. For general residential lock changes, one cost guide puts full lock replacement at roughly $80 to $225 per door, including parts and labor, with locksmith service calls running $60 to $140. That figure describes common modern hardware, and it is the wrong benchmark for a mortise lock in a historic door, where the case, trim and mortise must all agree.
Restoration of a rare or hand-built lock is priced by the hour and by the complexity of the parts, not by the unit. It can exceed the price of a generic replacement, yet it avoids three hidden costs: enlarging the mortise, losing original hardware that a preservation reviewer may expect to be retained, and replacing matching trim that no longer fits the new lock. On a tax-credit project, those considerations often settle the question before price does.
Our perspective at Gepetto
We spend our days on the wooden side of the lock: doors, stiles, rails, jambs, casings and the mortises that receive the hardware. After years of working on period buildings, one observation holds steadily. A mortise lock rarely fails alone. A sagging door, a swollen stile or a mortise that a previous owner widened for a modern lockbox will defeat even a perfectly rebuilt mechanism.
So we treat the lock and the door as one assembly. When we restore or replicate a historic door, we cut the mortise to the lock the building actually had, we match the stile and rail proportions to the period, and we leave the original hardware in place wherever it can be saved. Where an original door is too far gone, we fabricate a replica using authentic materials and joinery, sized to take the existing lockset, so the hardware can move to the new door without alteration. This is the same approach we take to matching historic features for projects that seek historic tax credit eligibility: the reviewer sees continuity, and the owner keeps what is irreplaceable.
Our advice to architects and contractors is simple. Document the lock before anyone touches it, repair the mechanism before considering replacement, and bring the joiner into the conversation before the locksmith cuts anything new.
— Gepetto
When the door needs more than a lock
If your inspection reveals a split stile, a ruined mortise or a door that cannot carry its hardware any longer, we can restore the door or build an accurate replica that accepts your original lock. See our historic wooden doors or tell us about the project through our custom fabrication services. For the joinery behind a door that will last, our notes on hand hewn mortise and tenon doors show how we build stiles and rails to carry heavy hardware for generations.
Frequently asked questions
Can a mortise lock be replaced?
Yes, but a replacement lock must fit the existing pocket, backset and faceplate, and older doors were often cut for a specific hand-fitted lock. A modern case may force you to enlarge the mortise, removing original wood. Repairing the original is usually less invasive.
How much does it cost to replace a mortise lock?
A general lock replacement averages $80 to $225 per door including parts and labor, though that covers common hardware. Historic or hand-built mortise locks are priced by the work involved, and a fitted replacement often requires woodwork on the door as well.
Why not use WD-40 on locks?
Locksmiths disagree, but the common objection is that light sprays can dry into a gum that holds dust. Use a spray only to clean, wipe it off fully, and then lubricate sparingly with dry graphite or a lubricant meant for the mechanism.
Should I replace all the springs in an old mortise lock?
Usually, yes. Broken springs are the most common reason these locks stop working, and the others in the case have often lost tension. Because the lock is already open, replacing the full set costs little extra and prevents a repeat removal.
Sources
Recommended
by Matthew Wiley | Oct 25, 2026 | Architectural Millwork
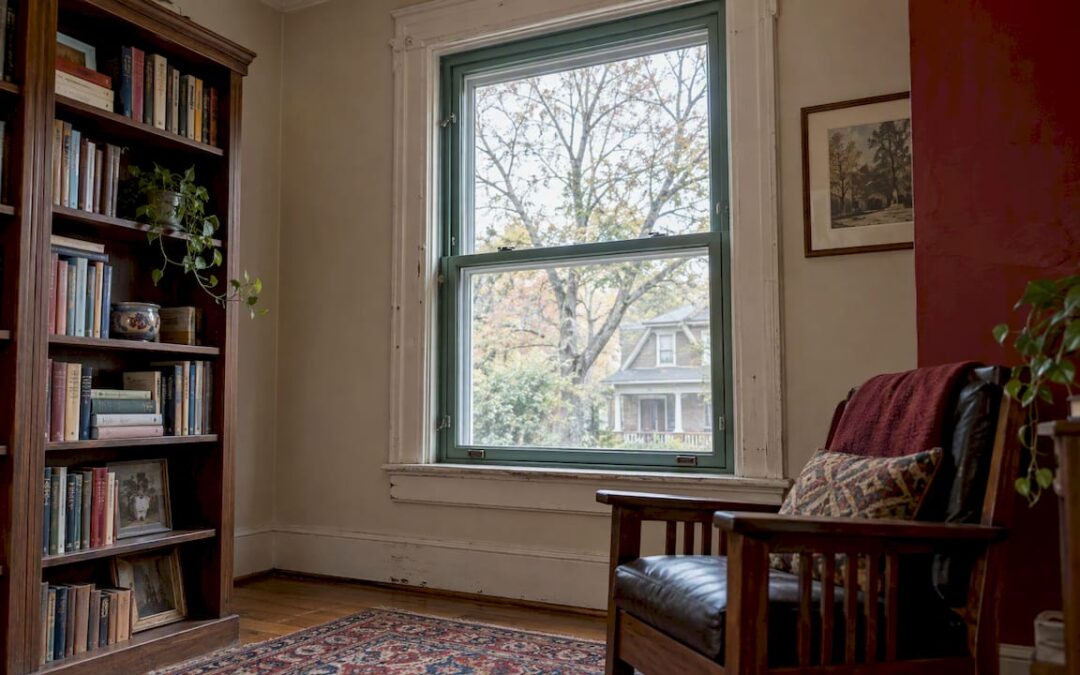
A historic wood window can be brought close to the performance of a modern replacement without losing its muntins, its old glass or its sightlines. The method is a three-part one: repair the sash and frame, seal the air leaks, and add a tight, well-made storm window, preferably with a low-e coating. The sections below cover what each step recovers, where the pitfalls lie, and how the work fits a historic tax credit review.
Gepettomillworks
Preserve Historic Windows, Improve Performance
Gepettomillworks creates custom millwork for historic building projects, supporting work that respects the character of older windows.
Explore custom millwork
TL;DR
- Most heat loss in an old window comes from air leaking around the sash and frame, not only from the single pane of glass, so repair and weatherstripping come first.
- Low-e storm windows cut whole-house heating energy by 19-27% in the Chicago winter study cited below, against 8-18% for clear storms, at a fraction of the cost of replacement.
- Replacement units rely on sealed glass that can fail, while a restored wood sash can be repaired indefinitely.
- Under the Secretary of the Interior’s Standards, energy upgrades are permitted when they do not destroy historic character, which is why early consultation with the reviewing office matters.
- Interior storm windows must be the tighter layer, or condensation will form in the cavity and damage the historic frame.
Table of Contents
What Actually Makes an Old Window Lose Energy
The common assumption holds that the single pane is the culprit, and the glass does contribute. Yet practitioners working with the National Park Service point out that in historic buildings the loss is frequently tied more to air leakage around frames and sash pockets than to the glass itself (NPS, Weatherization of Historic Buildings). A sash that has shrunk with age, a failed glazing putty line, a parting bead that no longer seats, and cord pockets open to the wall cavity together admit far more cold air than a clear pane can radiate away.
The Department of Energy’s expert meeting report adds a useful discipline: window performance is an interaction of thermal conductance (U-factor), air leakage and solar heat gain (SHGC), and the best answer depends on climate and orientation. An improvement that saves energy in January can produce overheating in July (DOE, Windows Options for New and Existing Homes). The report encourages diagnostic work, such as a blower door test, to locate real sources of heat loss before assuming that new windows are the only remedy.
The National Park Service guidance on energy efficiency makes the same point at the scale of the building: assess the existing energy-saving characteristics first, because buildings are more than the sum of their components (Preservation Brief 3). Many historic structures were designed with operable windows, generous daylight and high thermal mass, qualities that whole-unit replacement tends to overlook (NPS Tax Incentives, Energy Efficiency and Sustainability).
Why Replacement Rarely Delivers the Promised Savings
The claim that new windows will cut energy bills in half is widely repeated. The National Park Service characterizes it as inaccurate, and the studies it cites show far more modest whole-house figures from storm windows alone, which already close much of the gap (NPS, Weatherization of Historic Buildings).
Two further considerations belong in any honest comparison.
Service life. Insulated glass units depend on a perimeter seal. NPS practitioners note that seals on replacement windows may fail in as little as 25 years, at which point the assembly is discarded; a restored wood window, by contrast, can be maintained indefinitely (NPS). Researchers at the Politecnico di Milano, writing on heritage buildings, argue that retrofit planning should account for the decay of performance over time, and that repairable components tend to deliver more operating-energy savings across their life than mass-produced units (Lavagna et al., life cycle operating energy saving).
Embodied impact. Manufacturing, shipping and installing a full replacement unit consumes materials and energy that restoration avoids, which is why NPS treats restoration as the preferred sustainability path.
A Boston study of a pre-1940 house compared the life-cycle costs of two residential window systems over time (Shirley, comparative study of cumulative energy use), and the broader literature keeps arriving at the same conclusion: the repaired original window with a storm is competitive on energy and superior on longevity.
The Three-Step Upgrade: Repair, Seal, Add a Storm
NPS recommends that code compliance in a historic rehabilitation can be reached without replacing the windows, through professional restoration of frames and glazing, weatherstripping to eliminate infiltration, and custom, tight-fitting storm windows that follow the profile of the primary sash (Preservation Brief 3).
Step 1: Restore the sash and frame
Restoration here means more than paint. A competent shop will remove the sash, strip failed finishes, consolidate or splice decayed rails and stiles in matching species, reglaze with new putty, rebalance the sash and re-seat the stops. Each of these closes a path for air. Where a sash is beyond repair, an exact replica with the same muntin profiles, glass thickness and joinery preserves the appearance and the tax credit position.

Step 2: Weatherstrip for air tightness
Spring-bronze or compression weatherstripping along the jambs, meeting rail and head addresses the leakage that the single pane never causes. This step is inexpensive relative to its effect, and it is invisible once installed.
Step 3: Add a low-e storm window
The Department of Energy webinar material reports Chicago results for whole-house heating energy over a winter: 8-18% for clear storm windows and 19-27% for low-e storms, with a simple payback of 4-5 years for low-e coated storms (DOE, Cost Effective Triple Pane and Low E Storm Windows). A DOE success story describes low-e storm windows as a cost-effective efficiency measure whose performance has been validated for market acceptance (EERE success story). NPS notes that high-performance attachments can approach the thermal savings of double-pane replacements at under one-third of the cost (NPS).

These figures come from cold-climate testing in Chicago. In the Mid-Atlantic and Carolinas, where our work concentrates, heating loads are lower and cooling matters more, so the solar heat gain of any low-e coating deserves attention on south and west elevations.
Comparing the Options
| Approach |
Typical effect on air leakage |
Effect on historic fabric |
Repairable later? |
| Restoration plus weatherstripping |
Large reduction |
Original sash retained |
Yes |
| Restoration plus low-e storm |
Largest reduction in conductance and leakage |
Original sash retained; storm is reversible |
Yes, both layers |
| Clear storm window only |
Moderate |
Reversible |
Yes |
| Full replacement with insulated glass |
Low leakage when new |
Original sash and often glass lost |
Generally not once seals fail |
The table is qualitative. Actual savings depend on the condition of the existing window, the building envelope and the climate, which is why a diagnostic assessment should precede any specification.
Avoiding the Condensation Trap
Adding an interior storm window improves thermal performance considerably, but it changes how moisture moves. If the interior unit leaks, humid room air enters the cold cavity between storm and sash and condenses on the historic glass and frame. Preservation Brief 3 addresses this directly: in cold climates the interior storm should be the tighter of the two units, with gaskets maintained (NPS Preservation Brief 3).
Three practical rules follow. Gasket the interior storm so that it seals completely. Allow the exterior sash a small path to vent moisture outward where an exterior storm is used. Inspect the gaskets each autumn before the heating season.
Bathrooms and kitchens deserve particular care. A wood window set in a shower wall or beside a tub is exposed to constant moisture, and its sill and surround must be detailed to shed water. A practical guide to shower window waterproofing explains how the surrounding assembly can be sealed so that a restored sash survives in a wet room.
Historic Tax Credits and Energy Upgrades
Owners of income-producing properties and, in Virginia, of qualifying owner-occupied homes often pursue rehabilitation tax credits. The Secretary of the Interior’s Standards for Rehabilitation do not forbid energy improvements. They require that the work not destroy historic character. Solutions that tend to pass review include painting storm windows to match the sash color, aligning the storm’s meeting rail with the historic sash, and choosing unobtrusive interior units (NPS Tax Incentives).
The Virginia Department of Historic Resources notes that the Part 2 application asks for each significant architectural feature and the specific work planned on it, to certify that the proposal appears consistent with the Standards (Virginia DHR, Historic Rehabilitation Tax Credits). Windows are among the features most often scrutinized, so the Part 2 narrative should describe the repair of each sash, the profile of any storm window and the weatherstripping method.
The cost evidence from a steel-window case is instructive. In the Lippincott Press Building rehabilitation, window repair and interior storm installation cost $708,800 within a $12.1 million total budget, and the project met both energy code and the Standards (NPS Preservation Brief 3). The example concerns steel, not wood, but it shows that repair with interior storms is a workable path to code in a certified project.
Perspective: What We See at the Bench
We build and restore windows for historic buildings across Virginia, West Virginia, the Carolinas, Maryland and the District of Columbia, and the pattern in our shop is consistent. A window arrives or is surveyed in place, and the owner is convinced it must go. After the sash is opened, the glass is usually sound and the trouble sits in the joinery, the stops and the weatherstripping, all of which can be corrected with the original wood.
We approach energy performance as part of the restoration drawing rather than as an afterthought. Where a sash is too far gone, we replicate it with authentic materials and techniques, matching the muntin profile and the glazing so that the result satisfies a preservation reviewer. Where an architect needs a storm window detailed to sit behind the original rails, we would rather resolve that at the design stage than at the submission stage.
Our view is that the most energy-efficient window is one that remains in service for another century, and that the most responsible upgrade is the smallest one that achieves the target.
— Gepetto
Working With Us on Historic Windows
If you are an architect, contractor or owner planning window work on a historic building, our historic window restoration service covers repair, reglazing and weatherstripping of existing sash. Where new units or exact replicas are required, our wooden windows are fabricated to period profiles. Bring us in early, ideally before the Part 2 narrative is drafted, so that the window scope, the storm detail and the energy goal are settled together. Our energy efficiency archive collects further notes on the subject.
FAQ
Are historic windows really that inefficient?
A single pane does conduct heat readily, but much of the loss in historic buildings comes from air leaking around frames and sash pockets. Once that leakage is sealed and a storm window is added, the gap to a new window narrows considerably, as the NPS material cited above explains.
Is a low-e storm window worth the cost?
In the DOE’s Chicago figures, low-e storms saved 19-27% of whole-house heating energy over a winter, with a simple payback of 4-5 years. Your own result depends on climate, window condition and fuel cost, so a blower door test or an energy audit will give a sounder estimate than any average.
Will adding storm windows affect historic tax credit approval?
Not if the work respects the building’s character. Reviewers look at whether storm windows align with the sash, match its color and remain unobtrusive. Discussing the proposal with the state historic preservation office before submission reduces the risk of changes later.
Can I install double-pane glass in a historic sash?
Sometimes, but the heavier insulated unit may require wider muntins or a modified sash, which can conflict with the Standards. It is a decision to take with your preservation reviewer and a millwork specialist, not a default.
How long will a restored wood window last?
With regular painting, glazing upkeep and gasket checks, a restored wood window can be maintained indefinitely, according to NPS practitioners, whereas sealed glass units in replacements can fail in as little as 25 years.
Sources
Recommended
by Matthew Wiley | Oct 24, 2026 | Architectural Millwork
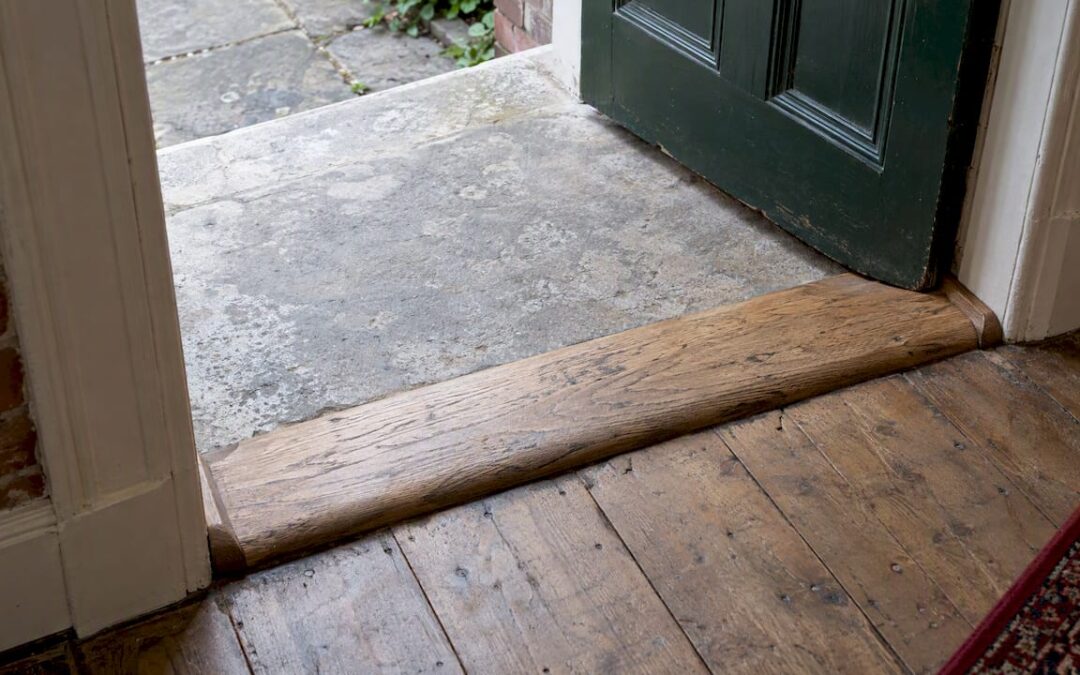
A custom historic door threshold is a piece milled to the measured profile of an existing sill and doorway, in a species and section that match the period fabric, and fitted so that it sheds water and air while remaining acceptable to a preservation reviewer. Catalog thresholds of aluminum or stock pine rarely satisfy all three conditions. This guide sets out how architects, contractors and owners of historic buildings should specify one, what the documentation should contain, and where thresholds most often fail.
Gepettomillworks
gepettomillworks.com
Match Historic Doors with Custom Millwork
Gepettomillworks creates custom millwork for historic building projects, supporting the fit and character of a historic doorway.
Explore custom millwork
TL;DR
- A threshold is not the sill. The sill is the bottom member of the door frame, while the threshold is the separate, usually sloped piece capping it, so decide first which of the two you are actually replacing.
- Custom means measured: profiles should be traced from the existing opening and supported by photographs and scaled sections, which is what tax credit reviewers expect.
- Height matters. The U.S. Access Board permits existing or altered thresholds up to 3/4 inch with a beveled edge, and the NPS suggests bevels or removal where a historic threshold is too high.
- Correct the water path before milling the final piece, or the new threshold will simply rot at the same joint.
- Treat the threshold as part of the doorway assembly of frame, trim, sill and door, not as an accessory.
Table of Contents
Sill, threshold and saddle: getting the terms right
Specifications go wrong at the vocabulary stage. In a traditional door assembly the frame comprises the head, the jambs and the sill, and the sill sits at the bottom of the frame while the threshold is a sloped piece installed over it to help keep water and drafts out. Trade usage also offers “saddle” and, in some regions, “door stool”, and these are not consistent from one shop to the next.
The practical consequence is that a request for a “custom threshold” may mean any of three different jobs:
- A new capping threshold over a sound existing sill, the simplest case.
- A new sill with an integral threshold profile, common on nineteenth-century entrances where the sill itself is a heavy, shaped timber, often with the door’s bottom rail designed to meet it.
- A sill and threshold replaced together because rot has reached the frame, which then involves the jamb feet and the trim, and sometimes the door.
A site visit should settle which of these applies before any drawing is made. When the sill is only worn, repair comes first. NPS guidance on rehabilitating historic buildings sets an order of protecting character-defining materials, then repairing, and replacing only when deterioration is too extensive. A threshold swapped out when a dutchman or epoxy consolidation would have sufficed is a difficult choice to defend in a review.
What a historic threshold actually looks like
The profile of a period threshold tells the story of the building. Federal and Greek Revival entrances in Virginia and the Carolinas often carry a wide, shallow, gently pitched oak or heart pine sill, worn into a shallow dish by two centuries of traffic. Victorian porches tend to carry a thicker, more heavily molded piece, frequently with a drip groove and a rabbet that receives the door’s bottom rail. Early twentieth-century bungalows may use a modest, flat-topped oak saddle with an under-cut nose, quite different from a Palladian doorway with its flanking sidelights and a deep stone or timber stoop.
The details worth recording before anything is removed include:
- Overall width, thickness and length, including how far the piece runs into the jamb returns.
- The slope of the top surface and the location of any drip groove or weather check.
- The shape of the nose, whether bullnosed, square, or eased by hand.
- The notches, or coping, where the threshold meets the jamb, casing and any door stop.
- The species, grain orientation and growth-ring density where it can be judged.
- The relationship to the finished floor inside and the landing, porch or step outside.
The reason is straightforward. The Oklahoma SHPO tax credit manual states that historic doorways are more than the doors alone, and that where elements cannot be retained, replacements must replicate the historic features and detailing, supported by documentation such as photographs and scaled sections. Although that is one state’s manual, it reflects the way federal reviewers think, and it is a sensible standard to apply anywhere.
Why stock thresholds fail on historic openings
Search results for this subject are dominated by stock products: an extruded aluminum threshold at 1/4 inch by 8 inches by 96 inches, a corrugated saddle seven inches wide, a knotty pine reproduction sill with fixed dimensions. These are legitimate hardware for ordinary doors. On a historic opening they fall short for three reasons.
They do not match the opening. Old frames are seldom square, plumb or level. A stock piece of fixed width will leave gaps at the jamb returns, and these gaps are exactly where water finds its way in.
They change the character of the entrance. A bright mill-finish aluminum strip beneath a paneled six-foot door is visible to anyone who stands on the porch, and a reviewer will see it as well.
They cannot be notched to a period casing. Historic trim often runs down to the floor on plinth blocks or returns past the sill. A custom threshold is coped around each of these details individually.
Fitting the piece: templates, contours and notches
Trade guidance on this is consistent. This Old House describes measuring the opening, cutting the threshold to length, beveling and easing the edges, sealing exposed grain, and notching around the stops for a tight seal. In an old opening with a crooked frame, a contour template is more reliable than a tape measure, and Fine Homebuilding’s threshold guide discusses getting a tight fit on both sides of the jamb, which it calls a time-consuming challenge.
For readers who want the general principles of how a door bottom threshold seals and why the fit is so unforgiving, this explanation of the door bottom threshold covers the basics of the seal between door and floor. The principles are the same for a nineteenth-century paneled door, although the materials and tolerances are not.
A typical custom fabrication sequence looks like this:
- Document the opening. Photograph, measure and trace the existing threshold and the jamb returns. Retain the old piece as a pattern even if it is badly decayed.
- Verify the substrate. Check the sill line, the floor or slab flatness, the frame bearing and any visible water source.
- Select the stock. Choose a species matched to the original, with straight, tight grain and suitable moisture content.
- Mill the profile. Cut the slope, drip groove, nose and rabbets to the traced section.
- Cope and test-fit. Notch around jambs, stops and casing, then dry-fit before any finish is applied.
- Seal and finish. Seal every cut surface, including the end grain, before installation.
- Install over a prepared water barrier. Bed and fasten the piece, and flash the intersections.
Water first, wood second
The most common cause of a failed threshold is not poor joinery but unresolved moisture. NPS Preservation Brief 47 on maintaining exteriors of small and medium-size historic buildings calls for inspecting wall openings from inside and out, and the maintenance guidance flags slipped or tipped thresholds and poorly performing seals and intersections as sources of deterioration.
For this reason an experienced shop diagnoses before it mills. Questions to answer on site:
- Does the porch floor or landing slope toward the door?
- Is there flashing under the sill, and is it intact?
- Has the sill sunk, or has the jamb foot rotted?
- Is rain driven under the door from a wide exposure, or does it enter through the masonry beside it?
The District of Columbia’s door repair and replacement guidelines describe doors as a principal ornamental and architectural feature of historic buildings, which is a good reason to resolve the opening’s condition thoroughly rather than patch it. If the sill line is not in plane, a perfectly milled threshold becomes a patch, and rot returns at the interface.
Concrete landings and nearly flush sills
Where a historic door opens onto a concrete or raised exterior landing, the threshold cannot be the only barrier. ArchitectureCourses.org notes that a nearly flush threshold removes the tolerance you would otherwise rely on, and cites the 2021 International Residential Code framework: exterior landing slope limited to a quarter inch in 12, with an egress door landing generally no more than 1½ inches below the top of the threshold, subject to exceptions. Your local jurisdiction’s adopted code governs, so confirm it with the building official before fixing the finished heights. In practice this pushes the design toward sill pans, flashing and drainage details beside the threshold itself.
Height, accessibility and the preservation reviewer
Historic entrances often have thresholds that are too high for current accessibility standards, and the conflict is a frequent source of well-meant but damaging substitutions. The facts are these.
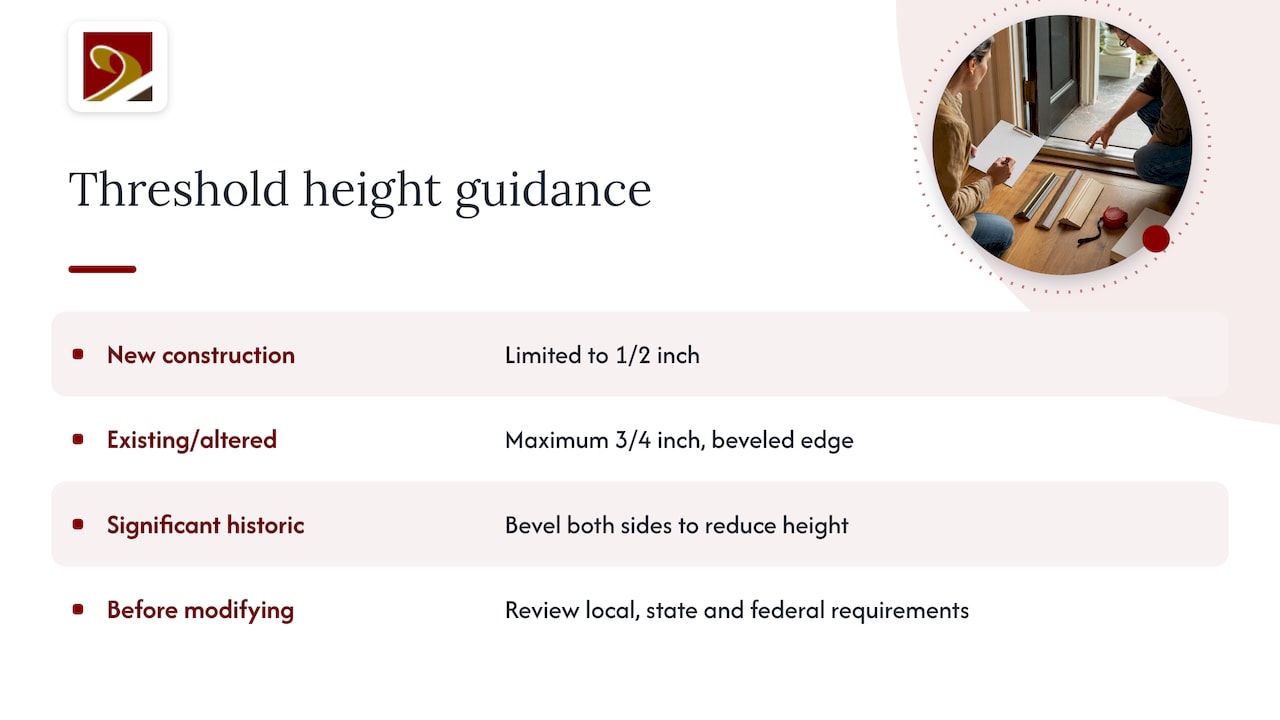
The U.S. Access Board’s guidance on ADA entrances states that thresholds are limited to 1/2 inch in new construction, with a maximum of 3/4 inch permitted for existing or altered thresholds that have a beveled edge. For historic properties, NPS Preservation Brief 32 says that a threshold exceeding the allowable height may be altered, removed, or replaced with a compliant one, and that where the threshold is deemed significant, a bevel can be added on each side to reduce its height while keeping it compatible. The same brief advises reviewing all applicable local, state and federal accessibility requirements before any modification.
Two practical points follow. First, a custom beveled threshold can often satisfy both the code and the reviewer, whereas a stock aluminum ramp strip seldom does. Second, accessibility obligations differ by building type and jurisdiction, so an architect or accessibility specialist should confirm which standard applies to your particular building before the profile is finalized.
Thresholds and the 20% historic tax credit
For income-producing certified historic structures, the federal credit is substantial. The NPS tax incentives brochure explains that the 20% credit equals 20% of the amount spent on a certified rehabilitation of a certified historic structure, and that, within a 24-month period chosen by the taxpayer, rehabilitation expenditures must exceed the greater of $5,000 or the adjusted basis of the building. That brochure is dated 2012, so confirm current figures and procedures with your State Historic Preservation Office and the NPS before relying on them.
A threshold is a small line in a budget, but it is part of the doorway, and a doorway is commonly a character-defining feature. The practical approach for the application is to:
- Photograph the existing threshold and sill in place before work begins.
- Provide scaled sections of both the existing and the proposed profile.
- State the species, finish and method in the specification.
- Explain any height modification and its basis, whether accessibility or drainage.
- Show that repair was considered before replacement.
We discuss the same logic for sash and frames on our page about window millwork specifications for the 20% rehabilitation credit, and the principle of evidence-based replication carries over directly to doors.
Our perspective
We regard the threshold as the most underestimated part of a historic doorway. Owners notice the door, the fanlight and the casing, while the threshold quietly takes the weather and the foot traffic, and when it fails it takes the sill and the jamb foot with it.
Our work centers on exact replication using authentic materials and techniques, and that discipline is what makes a threshold behave. We begin with the opening, not the catalog: the old piece is traced, the sill line is checked, and the profile is drawn from evidence. We also accept the awkward requests, such as an out-of-square opening, an unusual period section or a door that must meet an accessibility height without losing its character, which stock suppliers decline.
Our advice to architects and contractors is to bring the millwork shop into the project before the door schedule is closed. A threshold specified at the last moment is one specified by guesswork, and guesswork is what reviewers and weather both find out.
— Gepetto
Specifying a custom threshold with us
We design, fabricate and restore wood doors, windows, trim, staircases and other architectural millwork for historic buildings, and a threshold is made as part of the doorway it belongs to. Our historic wooden doors page shows the kind of period entrances we build, and our solid wood door maker in Virginia page covers entry doors made to order. For the full range of made-to-order work, see custom fabrication, or contact us through the main site with photographs and measurements of your opening. We work in Virginia, West Virginia, North Carolina, South Carolina, Maryland and the District of Columbia. We do not publish prices, since each project is quoted individually.
What to send a millwork shop
A useful inquiry shortens the path to a quote. Include:
| Item |
Why it matters |
| Photographs of the door from inside and out |
Shows the threshold, trim returns and exposure |
| Close photographs of the sill and jamb feet |
Reveals rot, slippage or previous repairs |
| Measured width, depth and opening height |
Establishes the baseline for the profile |
| Building date and style |
Guides species and profile choice |
| Tax credit or review status |
Determines documentation needs |
| Landing or floor condition inside and out |
Affects height and water details |
If the building is under review, share the SHPO or design review comments as well, since they may restrict materials or finish.
FAQ
Can I get a custom door threshold made?
Yes. A millwork shop can mill a threshold to a traced profile, with notches and bevels cut to fit your jambs and stops. For a historic opening, supply photographs and measurements of the existing piece so the replica follows the evidence rather than a similar style.
What is the wood under a door threshold called?
It is typically the sill, the bottom member of the door frame. The threshold is the separate, often sloped piece installed on top of it to manage water and drafts. On some historic doors the two are combined in a single heavy timber.
Can I install an exterior threshold on concrete?
Yes, but the threshold should not be the only barrier against water. Landing slope and drainage affect how the detail works, and the 2021 IRC framework cited above limits landing slope and the drop below the threshold, so confirm local code. Sill pans and flashing usually do much of the work.
How high can a historic threshold be under accessibility rules?
The U.S. Access Board allows up to 3/4 inch for existing or altered thresholds with a beveled edge, against 1/2 inch in new construction. NPS suggests bevels on a significant historic threshold as a way to reduce height. Confirm the standard applicable to your building with an architect.
Sources
- Door Anatomy | Guide to Parts, Terms and Functions
- Guidelines on Rehabilitating Historic Buildings, NPS
- Rehabilitating Historic Properties for Federal Investment Tax Credits, Oklahoma SHPO
- How to Make an Exterior Door Threshold, This Old House
- Replacing a Door Threshold, Fine Homebuilding
- Preservation Brief 47: Maintaining the Exteriors of Small and Medium Size Historic Buildings
- Door Repair and Replacement Guidelines, DC Office of Planning
- Indoor-Outdoor Living Spaces, ArchitectureCourses.org
- Guide to the ADA Accessibility Standards: Entrances, Doors, and Gates, U.S. Access Board
- Preservation Brief 32: Making Historic Properties Accessible, NPS
- Historic Preservation Tax Incentives, NPS
Recommended
by Matthew Wiley | Oct 23, 2026 | Architectural Millwork
Egress rules apply to a historic window when a project triggers them, and the authority having jurisdiction (AHJ) decides how far. No blanket exemption protects an old sash from a modern code. The rules do bend for historic buildings, though. The International Existing Building Code (IEBC) and the Secretary of the Interior’s Standards give architects, contractors and owners several ways to keep an original window and still satisfy life safety. This guide sets out the sizes the code asks for, the situations that trigger them, the alternatives that preserve historic fabric, and what to do when replacement cannot be avoided.
Gepettomillworks
Preserve Historic Windows With Custom Millwork
Gepettomillworks creates custom millwork for historic building projects, supporting architects and owners weighing options for original windows.
Explore custom millwork
TL;DR
- There is no automatic grandfathering for egress. Significant alteration, a change of occupancy or a major renovation can bring the requirement into play, and the AHJ rules case by case.
- New-construction escape openings under IRC R310 are measured by net clear opening, not by the size of the frame or sash.
- IEBC Chapter 12 lets the AHJ accept existing openings and alternative safety measures, such as sprinklers, when a historic feature cannot meet current dimensions.
- Under the Secretary of the Interior’s Standards, egress alone is not a reason to replace a historic window, and any replacement must match the original’s appearance and materials.
- Meet the code official early, with a written Historic Building Report, before the drawings harden.
Table of Contents
What the egress code asks of a window
The term “egress window” usually refers to what the International Residential Code calls an emergency escape and rescue opening. IRC R310.1 requires such an opening in each bedroom, and it must open directly to a public way or to a yard or court that reaches one.
The dimensional minimums are well known. In the 2006 edition of the IRC, the net clear opening is 5.7 square feet, with a minimum clear height of 24 inches and a minimum clear width of 20 inches. Grade-floor openings are allowed 5 square feet. Window wells serving openings below grade must provide at least 9 square feet of horizontal area, with a 36-inch projection. States adopt different editions and amend them, so confirm the figures against the code actually in force where the building stands.
Two points catch restorers out:
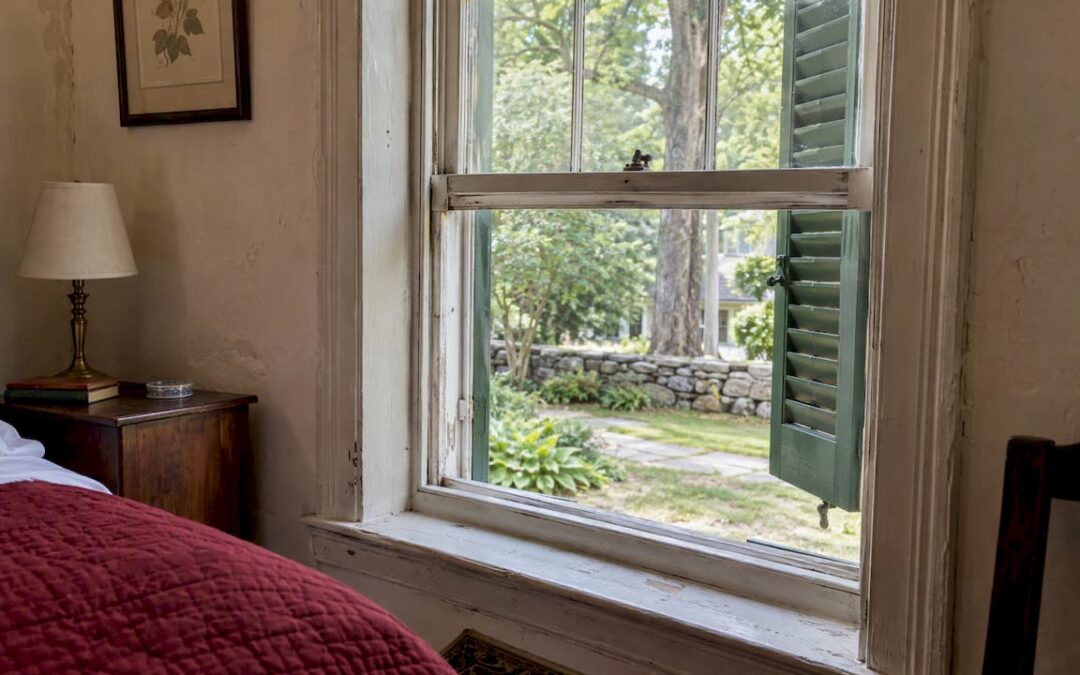
- The figure is the net clear opening. It is the unobstructed area with the sash fully open and, for a double-hung, with the lower sash raised. It is not the glass size or the rough opening. A handsome six-over-six sash that measures 32 by 56 inches overall may leave a net clear opening well under the minimum, once the meeting rail, the stops and the sash thickness are deducted.
- Both dimensions must be met together. A window can pass on height and width yet fail on area, or the reverse.
A 36 by 48 inch window, a size readers often ask about, can pass in some configurations and fail in others. A casement of that size opens nearly to its full clear dimensions. A double-hung of the same overall size exposes only about half its height. The operating type matters as much as the frame size.
Why a historic window is not automatically exempt
The word “grandfathered” circulates widely, and it misleads. Preservation guidance from the National Park Service, Preservation Brief 51, notes that compliance is generally triggered by significant alterations, a change of occupancy or renovation, and that the AHJ makes the final determination case by case. An unaltered house with original windows, used as before, generally sits outside the question. A rehabilitation that converts a third-floor storage room into a bedroom, or a warehouse into apartments, does not.
The common triggers are:
- Change of occupancy. A single-family house becoming a bed-and-breakfast, a school building becoming apartments.
- New sleeping rooms. An attic or basement finished as a bedroom, which then needs a compliant escape opening.
- Substantial renovation. Work classed as a Level 2 or Level 3 alteration under the existing-building code in force.
- Window replacement itself. Some jurisdictions apply escape-opening provisions to replaced windows. Provisions of this kind appear, for example, in Oregon’s amendments to IEBC Section 505, which set conditions on operable windows replaced complete with sash and frame. Local amendments differ widely, so check yours.
The practical consequence is that the earliest design decision, what the building will be used for, often determines the egress outcome more than the windows themselves.
The flexibility built into historic building codes
Chapter 12 of the 2021 IEBC is devoted to historic buildings. According to Preservation Brief 51, it supplies compliance pathways that allow alternatives to the standard egress requirements, provided original features are preserved, with the AHJ determining what is acceptable. The same document explains that existing door and window widths may be approved where they have sufficient passage capacity for the occupant load.
The operative idea is equivalent protection. Instead of enlarging the opening, the design team shows that occupants are no less safe by other means. Fire protection practice under NFPA 914, the code for fire protection of historic structures, is built on the same logic of protecting the structure and its occupants without stripping the fabric that makes it historic.
Which compensating measures are accepted is for the AHJ to decide. Those most often negotiated include:
- An automatic sprinkler system throughout the building, which is the most commonly accepted trade for leaving original windows in place.
- Interconnected smoke alarms, and in some cases a monitored detection system.
- A secondary means of escape, such as a rear stair or a door at an upper landing.
- Rated separation of sleeping rooms from the corridor, giving occupants more time.
- Limits on occupant load or on the use of a given floor.
None of these is a right. Each is a proposal, and it succeeds when the documentation is persuasive.
Keep the window: options that preserve original sash
The National Park Service guidance on evaluating historic windows starts from Standard 6 of the Secretary of the Interior’s Standards for Rehabilitation: deteriorated historic features are repaired rather than replaced. Replacement is considered only where the severity of deterioration is documented. The same guidance advises designers not to treat code mandates as an automatic reason to replace, and to look first at improvements such as weatherstripping and storm windows.
For egress, the retention options run roughly from least to most intrusive.
Accept the existing opening with compensating safety
If the AHJ accepts the existing size, the sash is restored in place. The work then consists of repair: dutchman patches in sills and rails, reglazing, new cords or chains, and weatherstripping. A window that opens easily without tools is itself a life-safety asset, since a painted-shut sash cannot serve as an escape. Restoring operation can be part of the argument made to the code official.
Alter the operation without altering the appearance
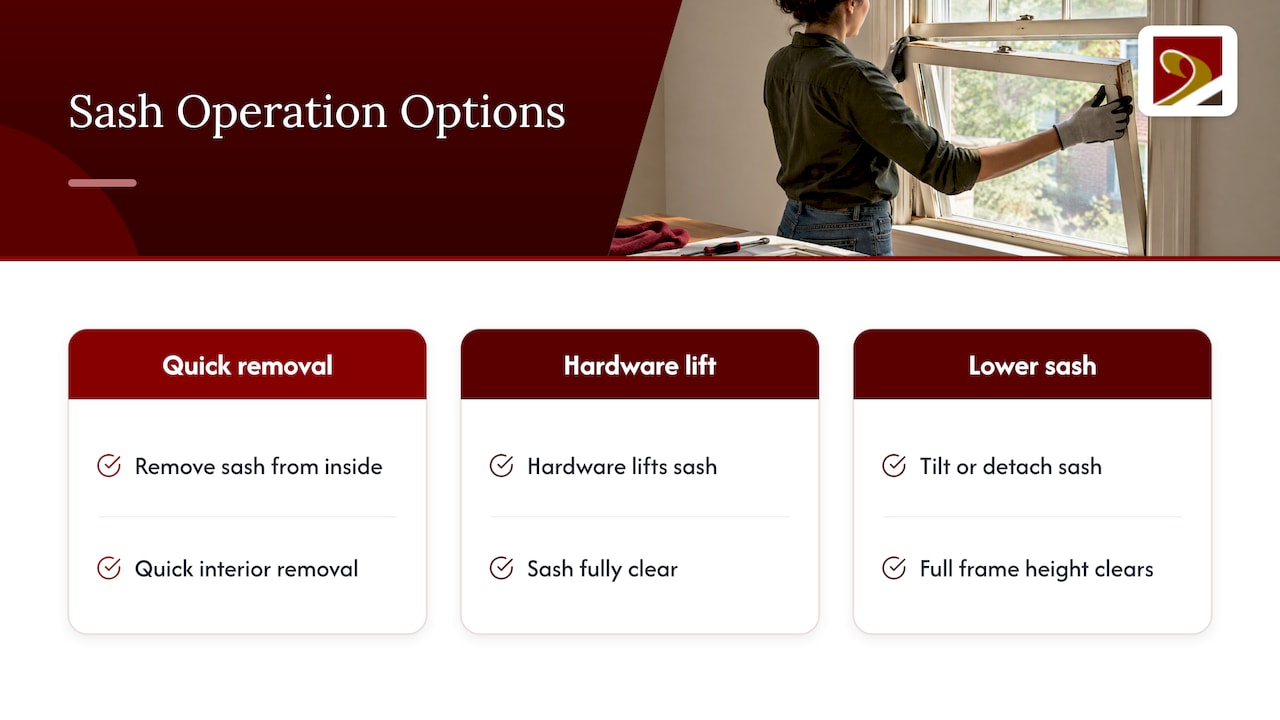
Sometimes the problem is the clear opening of a double-hung. Options a restorer can examine include sash that can be removed quickly from the interior, a hardware arrangement that lifts the sash fully clear, or a lower sash fitted so that the full height of the frame becomes clear when it is tilted or detached. Whether any of these satisfies a given code official is a local question, and the solution must be reviewed against the operable-without-tools provisions in force.
Use a doorway or secondary opening
At a rear or side elevation, a compliant opening can sometimes be created or a door substituted, leaving the principal elevation untouched. The character hierarchy of the building guides where such change is least harmful: the street facade first, secondary elevations next, rear and side wings last.
When replacement is unavoidable
Sometimes the sash is lost, or the room cannot be saved by any compensating measure. The NPS guidance on replacement windows that meet the Standards divides the decision into two tracks, depending on whether historic windows remain in place or none survive. Where a window must be replaced, the replacement should match the historic window in visual qualities and materials. On less visible secondary elevations, the guidance allows a match in configuration and general characteristics at a minimum.
In practice that means:
| Elevation |
Typical expectation |
Egress consequence |
| Street-facing, primary |
Exact match of profile, muntin dimensions, glass character and material |
Seek AHJ approval of the largest functional sash that fits the original frame |
| Secondary, side |
Match of configuration and general characteristics |
Greater room to enlarge or change the operating type |
| Rear, not visible |
Compatible design, with more latitude |
Compliant opening is usually easiest to achieve here |
Practitioners often cite replacement in kind, or the largest standard size that fits the existing frame, as the point at which a code official may stop requiring full dimensions. Whether a jurisdiction recognizes that approach depends on the local amendments and on the official. Present it as a request with supporting drawings.
Two cautions for tax credit projects. First, the National Park Service reviews windows as a character-defining feature, and an egress enlargement on a prominent elevation can put certification at risk. Second, the sequence matters: describe the code constraint in the Part 2 application, along with the proposed solution, rather than discovering it during construction.
Working with the code official
Preservation Brief 51 recommends preparing a Historic Building Report early in design, documenting the code challenges and the equivalent solutions proposed. The aim is to show the AHJ that the project meets the spirit and intent of the life-safety provisions while protecting the historic fabric. A useful report is short and specific:
- A window schedule recording every opening: location, type, overall size, measured net clear opening, condition and significance.
- The use and occupant load proposed for each room, and which rooms need an escape opening.
- Photographs and measured sections showing why enlargement would harm the building.
- The compensating measures offered, such as sprinklers, detection or a secondary exit.
- A fallback: the closest-compliant replacement, drawn to match the original.
Bring the report to a meeting before submitting permit drawings. Code officials are more receptive to a problem presented with a solution than to one discovered at inspection.
Who pays when the code forces a change
Egress upgrades are a recognized source of unplanned cost in older buildings, and owners often assume their property insurance will absorb them after a loss. That depends on the policy. Coverage for the added expense of bringing a damaged building up to current code is a separate provision, and its limits and wording vary. A practical overview of ordinance or law coverage explains how it works, and it is worth reading before a loss occurs, since a historic building rebuilt after a fire may meet a code requirement for escape openings that its original windows never had to satisfy.
Our perspective: the window as evidence
We build and restore wooden windows for historic buildings, and egress is a conversation we have often with architects and contractors. Our view is that the debate is rarely between safety and preservation. It is a matter of sequence and evidence.
An original sash carries information that a replacement cannot: the section of its muntins, the profile of its meeting rail, the character of its glass and the joinery of its corners. Once it is removed, that evidence is gone. For that reason we begin with the question of whether the opening can be accepted as it is, with a restored and freely operating sash, and only then ask what a replacement would have to be.
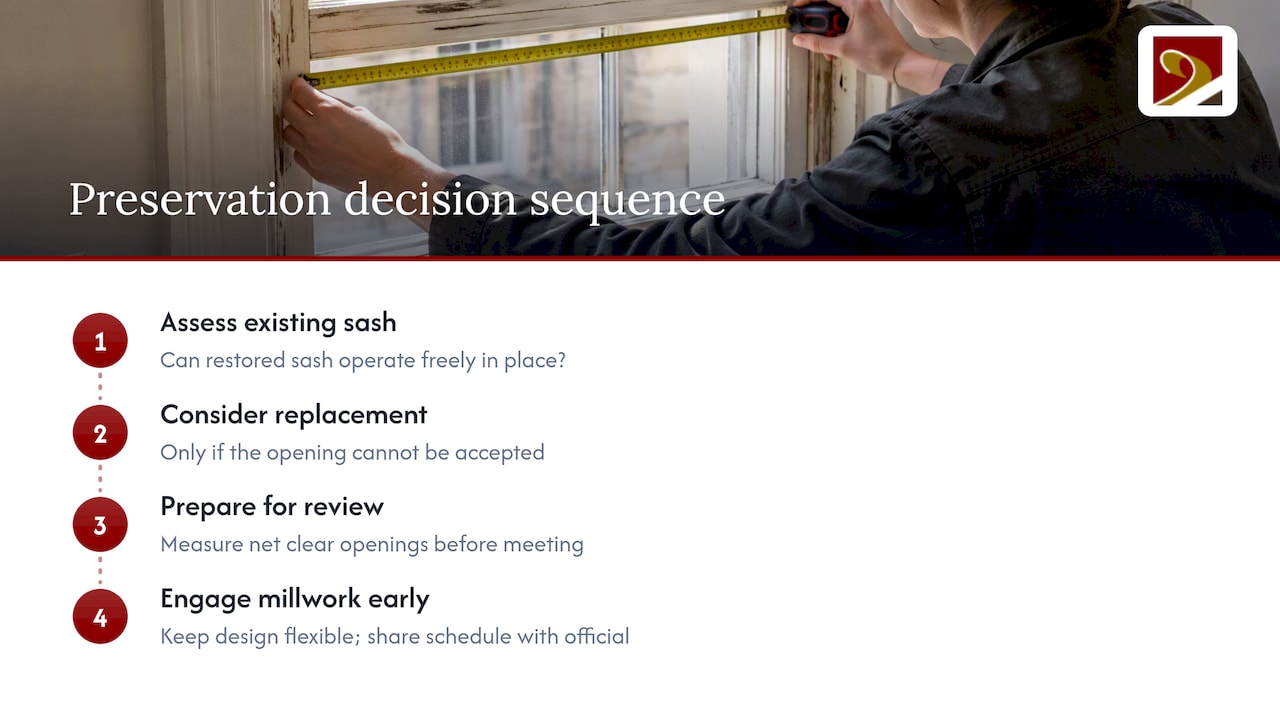
When replacement is the only route, the work is an exercise in replication. Our approach to exact historic reproduction, using authentic materials and period techniques, is intended to keep a project eligible for historic tax credits, and we are glad to take on windows of unusual geometry that other shops decline. We treat the largest functional sash that fits an original frame as a design problem: sash stiles slimmed to the historical dimension, hardware chosen to maximize the clear opening, and the visible profile left unchanged.
Our counsel to project teams is to measure the net clear openings before the first meeting, put the schedule in front of the code official, and bring the millwork conversation in while the design is still flexible.
— Gepetto
Restoration and replica work from Gepetto Millworks
We restore original sash and frames through our historic window restoration service, and where a window cannot be saved we fabricate wooden windows to match the original profile, with options for dual pane glazing. If your project needs a code-conscious window schedule, send us the drawings and the measured openings, and we will tell you what can be restored and what must be replicated. You can reach us through our main site.
FAQ
Are historic windows grandfathered for egress?
Not as a general rule. Existing conditions are often left alone when nothing changes, but a significant alteration, a change of occupancy or a renovation can trigger current requirements. The AHJ then decides, case by case, whether to accept the existing opening, require compensating measures or require a compliant replacement.
Does a 36 by 48 inch window meet egress?
It depends on the type and on the net clear opening. A casement of that size can open close to its full dimensions, while a double-hung exposes about half its height. Measure the unobstructed opening with the window fully open, and compare it with the area, height and width minimums in the code your jurisdiction has adopted.
Do all bedrooms need an egress window?
In new construction under the IRC, yes: R310.1 requires an emergency escape and rescue opening in each bedroom. In an existing historic building, the AHJ may accept alternatives under the historic provisions of the existing-building code, such as sprinklers.
Can I replace a historic window for egress and still qualify for the federal tax credit?
Potentially, but the Standards set conditions. Replacement is considered only where deterioration is severe and documented, and the new window must match the historic one in visual qualities and materials. Secondary elevations allow more flexibility. Raise the issue with your State Historic Preservation Office and the National Park Service before work begins.
Sources
Recommended
by Matthew Wiley | Oct 22, 2026 | Architectural Millwork
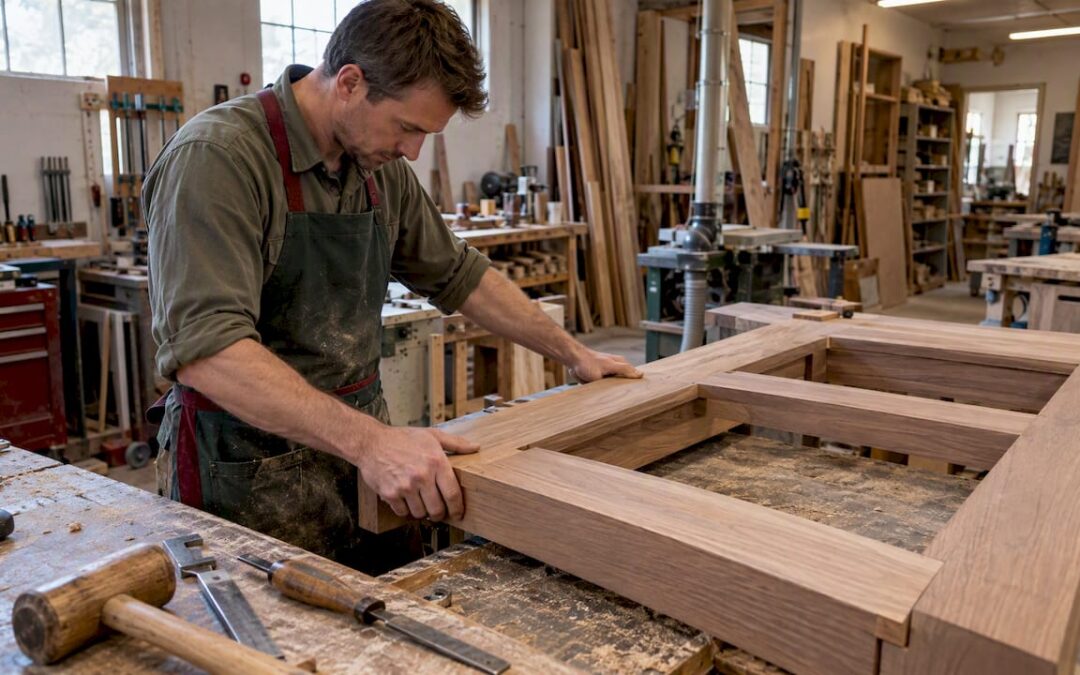
A custom wood door lasts when four things agree: a frame joined with mortise and tenon, a species suited to weather, a design that keeps water away from end grain, and a maker who will document all three. Glue lines, veneers and dowels can imitate the look of a good door for a few seasons. Only sound joinery in solid stock, protected by a sealed finish and a sensible opening, carries one across generations. This guide is written for architects, contractors and owners of historic buildings who are specifying doors and need to judge a door maker on evidence rather than on photographs.
Gepettomillworks
Choose a Door Maker for Historic Projects
Gepettomillworks creates custom millwork for historic building projects, including solid wood doors, historic replications and restorations.
Explore Gepettomillworks
TL;DR
- Frame-and-panel doors with mortise-and-tenon joints keep end grain exposure to the top and bottom of the stiles, which is where moisture does its damage, according to the National Park Service.
- Joinery cannot defeat moisture alone. Sealed surfaces, drip details and protective overhangs decide the real service life.
- On a tax-credit project, a replacement door should replicate the original’s material, dimensions and paneling pattern, so the maker must work from measured documentation.
- Ask any door maker about species, lumber grade, panel float, finish schedule and who is responsible for site humidity before signing.
- We build solid wood doors, historic replications and restorations in Virginia and across the Mid-Atlantic and Carolinas.
Table of Contents
What “built to last” means in a wood door
The phrase is easy to print and hard to prove, so it helps to define it in terms a contractor can check. A door built to last keeps its geometry, so that it closes without binding, and it keeps its joints tight through repeated cycles of swelling and shrinking. Its finish can be renewed without stripping failed layers, and any single component, a bottom rail or a panel, can be repaired without scrapping the leaf.
Stile and rail construction meets these requirements better than any alternative, which is why it has been the standard from Georgian townhouses to Craftsman bungalows. Two vertical stiles and two or more horizontal rails form a frame, and the panels float in grooves rather than being glued in, so the wood can move seasonally without splitting the frame. Our own guide to stile and rail doors covers anatomy, styles and tolerances in more detail.
The Architectural Woodwork Institute makes the same point in its door standards: stile and rail doors have performed for centuries, but their longevity in modern projects depends on keeping surfaces painted or sealed and on shelter from architectural elements such as deep overhangs or recesses. A door is a system, and the joinery is only one member of it.
A mortise is a rectangular cavity cut into one member. A tenon is the matching tongue cut on the end of another. When the tenon is fitted snugly, pinned or wedged, and glued where the design calls for it, the joint resists racking, the force that pulls a heavy door out of square over decades of swinging on its hinges.
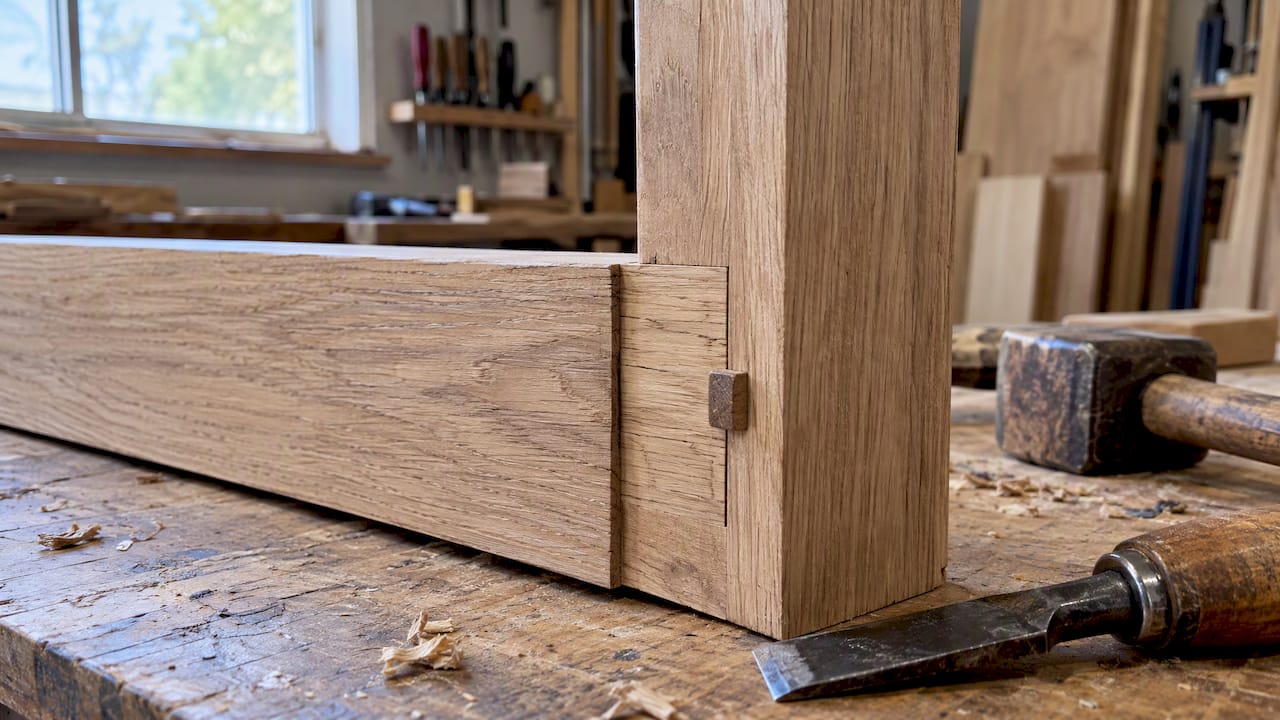
The National Park Service handbook on historic lighthouse doors, written for some of the most weather-beaten entrances in the country, notes that frame-and-panel doors with mortise-and-tenon joints limit end grain exposure to the top and bottom of the stiles. That detail matters because end grain absorbs water far faster than face grain. A joint design that hides most end grain inside the assembly gives rain fewer places to enter.
What a good joint looks like in practice
When you review shop drawings or visit a shop, look for the following:
- Through stiles. Continuous vertical members place uninterrupted grain at the hinge line, so the weight of the leaf is carried by long fibers and not by rail ends.
- Tenon depth and thickness. Deep, properly proportioned tenons on the lock and bottom rails, which carry the most stress. Ask for dimensions rather than reassurance.
- Floating panels. Panels should sit in grooves with room to move. Panels glued rigidly into the frame are a warning sign of future cracking.
- Hand-hewn or hand-fitted work where the period demands it. On some historic projects the tooling marks and proportions are part of the character. We document this approach on our page about custom wood doors with hand-hewn mortise-and-tenon joinery.
Where engineered shortcuts fail
Engineered products have a place in millwork. Industry literature summarized in the AWI standards acknowledges that they reduce cost and speed production, yet it also cautions that nonconforming engineered products may not resist the high-use and environmental stress that traditional solid wood joinery has withstood for generations. On an exterior entrance, particularly one facing weather, that caution deserves weight.
There is one honest exception. For paint-grade interior or protected trim, some professionals specify medium density overlay because its surface takes enamel without grain raising or visible joint lines. That is a judgment about surface stability on specific components, not a reason to build a front door from sheet goods. A reputable maker will tell you which parts of a project suit each material and why.
Moisture is the real adversary
The National Park Service identifies moisture penetration, from rain, standing water on sills and interior condensation, as the primary cause of door deterioration, and notes that damp climates where wood cannot dry between storms accelerate rot. Much of Virginia, the Carolinas and the Chesapeake shoreline, including island communities such as Deal Island, fits that description for much of the year.
Two practical consequences follow for specifiers.
Water must be shed, not merely resisted. A sloped sill, a drip kerf or cap on the bottom rail, a properly flashed head and a deep porch or overhang do more for a door than any additional coat of varnish. The AWI standards point to protection from recesses and overhangs for that reason.
End grain at the base of the stiles needs attention. Water wicks upward through the bottom of a stile and can rot the core long before the surface shows anything. The NPS guidance recommends gentle diagnostic probing with an awl or similar tool in an inconspicuous spot: long, fibrous splinters suggest sound wood, while short, irregular pieces suggest structural breakdown. For an owner, a yearly probe along the bottom six inches of each stile is the cheapest insurance a door can have.
Pests belong in the same conversation, because damp wood invites them. If you are buying or selling an older Virginia property, this overview of termite inspections in Virginia explains what the process involves and what both parties should expect, which helps you plan door and sill repairs around the findings.
Species, grade and treatment
For exterior work the AWI lumber standard sets a clear rule: unless the species is classified as resistant or very resistant to decay in the USDA Forest Products Laboratory Wood Handbook, lumber must be preservative-treated in accordance with WDMA I.S. 4-15. The same AWI lumber requirements also reject standard lumber-association grading for architectural quality, because even the highest of those grades permit defects unacceptable in finished millwork and are based on a percentage of the board rather than the whole board.
In plain terms, that gives you three questions for a door maker:
- Which species is proposed for each component, and is it rated resistant or very resistant to decay?
- If the species is not rated that way, what preservative treatment is specified, and to which standard?
- How is the lumber graded, and is the grading based on the use of the whole board?
A maker who answers these without hesitation has probably been through a specification review. One who answers with brand names and adjectives has probably not.
Doors on historic buildings: the replication question
Historic work adds a second test beyond durability: fidelity. The National Park Service technical note on inappropriate replacement doors states that when a missing door is replaced, the new unit should replicate the original’s material, dimensions and paneling pattern, and that an inappropriate substitute can damage a building’s historic integrity. The same document recommends consulting a historical architect or building conservator to prepare contract documents so that treatments follow the Secretary of the Interior’s Standards.
A companion NPS note on entrance treatments shows the practical version of this: replacing an ornamental steel door with a six-panel wood door, and reproducing the historic sidelights and transom from photographic documentation. Evidence comes first, and the door follows from it.
Tax credits and who approves what
In Virginia, the Department of Historic Resources administers both the federal and state rehabilitation tax credit programs, and the state program requires compliance with the Secretary of the Interior’s Standards for Rehabilitation. Work outside those standards puts the credit at risk, so a door that is merely handsome is not enough. Confirm the current rules and your project’s status with the DHR, your State Historic Preservation Office in other states, and your tax adviser before you commit to a design.
For the door maker, this means three deliverables: measured drawings of the existing or documented original, a species and finish proposal consistent with the period, and the ability to show a reviewer how each detail matches. Muntin profiles, panel moldings, stile widths and hardware mortises should be recorded, because reviewers read details.
Repair before replace
Preservation guidance favors the gentlest means possible. If probing shows sound wood, a door can often be repaired with dutchman patches, new bottom rails or consolidated joints rather than replaced. Restoration keeps original fabric, which is what a historic review values most. Where decay has gone through the structure, replication becomes the correct path, and the joinery you specify decides how long the second door will last. Our archive on restoring solid wood doors shows how this plays out on actual projects.
Who is responsible when a door moves
Wood changes dimension with humidity, and a high-quality door is not immune. The AWI care and storage standard divides responsibility by project phase: design choices that ignore movement fall to the architect, failure to control site humidity during installation falls to the general contractor, and lack of environmental control after occupancy falls to the owner.
That division is worth discussing at the preconstruction meeting rather than after a door sticks in August. Practical agreements include:
- Delivering doors only to a building that is enclosed and conditioned within a stated humidity range.
- Sealing all six faces, including top and bottom edges, before hanging.
- Writing the finish schedule and re-coat interval into the owner’s maintenance manual.
- Recording clearances at hinge, strike and head so seasonal movement does not become a dispute.
How to vet a custom door maker
Because pictures flatter every shop, ask for the following before awarding the work.
| Question |
What a strong answer sounds like |
| How are the frames joined? |
Mortise and tenon, with tenon dimensions given on drawings |
| How do panels sit? |
Floating in grooves, with allowance for seasonal movement |
| What species and grade? |
Named species, decay resistance stated, whole-board grading |
| How is end grain protected? |
Sealed before assembly, drip detail on the bottom rail |
| Can you work to a historic standard? |
Measured drawings, period profiles, documentation for reviewers |
| What is the finish and maintenance plan? |
A written schedule, with re-coat intervals |
| What do you decline? |
An honest list of jobs outside the shop’s scope |
The last row sounds odd but tells you a great deal. A shop that accepts every job has either enormous capacity or very little discipline.
Our perspective
We have found that most door failures we see trace back to water at the bottom of the door rather than to a failed joint in the middle of it. The joinery is usually fine; what fails is the detail that let moisture reach end grain and stay there. For that reason we start a door conversation with the opening itself: its exposure, its sill, its overhang, and what the building’s period would have done about each.
Our work centers on historic projects, so we approach every door as an exercise in matching evidence: the original’s proportions, its panel moldings, its species where it can be determined, and the tooling of its era. When a project needs a replica to meet the standards behind historic tax credits, we use authentic materials and traditional techniques so that the reviewer sees what the building actually had. We also take on complex, architecturally significant requests that other shops decline, and we would rather tell you early that a design will not age well than build it and watch it fail.
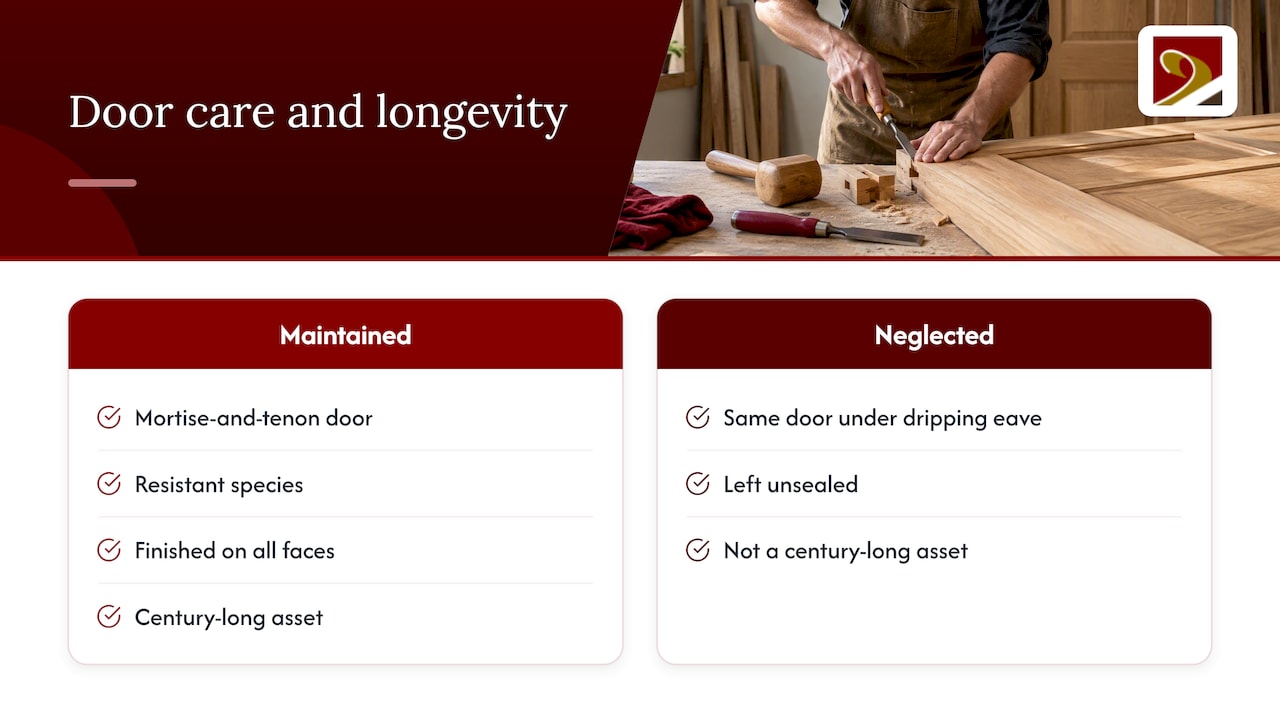
Solid wood is not forgiving of neglect, and we say so plainly. A mortise-and-tenon door in a resistant species, finished on all faces and maintained, is a century-long asset. The same door left unsealed under a dripping eave is not.
— Gepetto
Working with Gepetto Millworks
If you are specifying doors for a historic building, a restoration or a high-end new build, our solid wood door manufacturing page describes how we build, and our historic wooden doors page shows period work. We serve projects in Virginia, West Virginia, Virginia Beach, North Carolina, South Carolina, Washington, D.C. and Maryland, including the Deal Island Historic District. Architects and contractors can bring drawings, photographs or a field survey to our custom fabrication team and we will tell you what the opening, the budget and the review standards allow.
Questions readers ask
Is solid wood always better than an engineered door?
For an exterior entrance exposed to weather, traditional solid wood joinery has the longer track record, and the AWI standards caution that engineered substitutes do not always match its performance. Engineered or overlay materials can suit protected, paint-grade components. The right answer depends on exposure, finish and the standard the project must meet.
How long should a custom solid wood door last?
No honest maker can promise a number without knowing exposure and maintenance. Well-built mortise-and-tenon doors have served for centuries when kept sealed and sheltered, but the NPS identifies moisture as the primary cause of deterioration. Inspect the base of the stiles each year and renew the finish before it fails.
Can a new door qualify for historic tax credits?
It can if it replicates the original’s material, dimensions and paneling pattern and fits the Secretary of the Interior’s Standards, per the NPS guidance on replacement doors. Approval rests with the reviewing agencies, not the door maker, so confirm requirements with your State Historic Preservation Office before ordering.
Should I repair a historic door or replace it?
Probe inconspicuous areas first. Fibrous splinters suggest sound wood that can often be repaired, while short, brittle fragments indicate structural decay. Preservation guidance favors the gentlest effective treatment, and replication is the choice when the original cannot be saved.
Sources
Recommended