
by Matthew Wiley | Oct 16, 2026 | Architectural Millwork
If your property sits in a local historic district, exterior work may require a Certificate of Appropriateness (COA) in addition to a building permit, because Code of Virginia §15.2-2306 lets localities require one. Confirm your designation and the local COA rules with city preservation staff or the Virginia Department of Historic Resources before you order materials or schedule a crew.
TL;DR:
- National Register listing alone usually does not trigger design review; local designation does, and an approved COA remains separate from any building permit.
- Guidelines favor repair, then replacements matching original material, dimensions, and detail; rear elevations hidden from the street often receive more flexibility.
- Tax credit certification has three stages: establish significance, submit the rehabilitation plan before work begins, then document completed work for final certification.
- Minor, in kind work may qualify for administrative approval, while major alterations and demolition usually go to a board; ask staff before scheduling.
- Photograph every elevation, window, and door opening before work, and include existing and proposed drawings plus an element by element treatment narrative.
Gepettomillworks
Plan Historic Millwork With Care
Gepettomillworks creates custom millwork for historic building projects, supporting owners and professionals planning restoration work.
Visit Gepettomillworks
Table of Contents
What do Virginia local historic district design guidelines cover?
Local guidelines regulate how a building looks from the public realm, not how it functions inside. Reviewers on an architectural review board (ARB) or historic preservation commission (HPC) concentrate on exterior character, and the guideline manual is their yardstick. Many of these manuals, Lynchburg’s residential review guidelines among them, pair element-by-element rules with illustrated examples and definitions, which is why reading yours before you draw anything can help you plan.
Elements most guidelines address:
- Street-facing facades and their composition
- Windows, including sash, muntin layout and glazing
- Doors, surrounds and hardware
- Porches, columns, railings and steps
- Roof form, pitch and visible materials
- Siding and exterior finishes
- Storefronts and signs
- Fences and walls
- Demolition and relocation
The philosophy is preservation first. Repair is preferred over replacement, and where replacement cannot be avoided, the standard is “replace in kind,” meaning the new piece matches the original in material, dimensions and detail. Character-defining features get the closest scrutiny. Rear elevations, out of sight from the street, usually enjoy more flexibility, though you should confirm that in your own manual rather than assume it.
When do you need a Certificate of Appropriateness, and how does review work?
Start with a distinction that trips up many owners: National Register listing is largely honorary, while only local designation typically triggers design-guideline compliance, as DHR’s explanation of the registers makes clear. A building permit is also not a substitute. Loudoun County’s guidance notes that an approved COA is a legally distinct prerequisite, obtained in addition to building permits.
Major alterations, material changes and demolition routinely go to the board. Minor, in-kind work, such as like-for-like roofing, shutters or small signs, is often eligible for administrative approval where local code allows, as Leesburg’s COA process illustrates.
A typical review runs like this:
- Contact preservation staff and share a concept before you submit.
- Confirm whether staff can approve the work administratively.
- File a complete application by the posted submission deadline.
- Staff prepares a report, and public notice goes out for board cases.
- The ARB or HPC hears the case and approves, conditions, defers or denies it.
- Appeals follow the process your local ordinance sets out.
Meeting cycles drive your schedule, so work backward from the next deadline. Demolition carries an extra wrinkle.
Demolition stay: Under state code, a locality may stay a razing or demolition permit for up to 30 days following a final local decision on a historic building.
How do local guidelines relate to the Secretary of the Interior’s Standards and the DHR tax-credit process?
Many Virginia localities build their guidelines on the Secretary of the Interior’s Standards for Rehabilitation, which Virginia codifies as ten principles governing the treatment of historic materials and features. Local manuals then adapt those principles to neighborhood character, so a COA reviewer and a tax-credit reviewer often ask similar questions in different formats.
The tax-credit path is separate and runs through the state. To qualify, a project must be certified by DHR in three parts through its Historic Rehabilitation Tax Credits program, and some state filings still require hard copies. DHR’s Detailed Application Process notes that Part 2 is the most complex and that submitting early can be critical to a project’s success.
| Stage |
What it establishes |
Timing |
| Part 1 |
Significance and contributing status |
Before design is locked |
| Part 2 |
Description of the proposed rehabilitation |
Before work begins |
| Part 3 |
Certification of the completed work |
After construction |
What this means in practice:
- File Part 1 and Part 2 before major work starts. Starting early protects eligibility and avoids the risk of recapture.
- Local approval and tax-credit approval are independent. A COA does not certify your project, and DHR certification does not replace a COA.
- DHR publishes a sample Part 2 narrative that shows the format reviewers expect.
What should a COA application package include?
A complete package can make the review process smoother; check the local requirements to avoid delays. The checklist below follows DHR’s application checklist, which many local reviewers resemble, though your city’s form controls.
- Photographs. Color prints showing context and every elevation, tied to a photo key.
- Narrative. An element-by-element description of existing conditions and proposed treatments, modeled on DHR’s sample narrative.
- Drawings. Existing and proposed elevations, plus floor plans where the work touches the layout. Check whether your locality accepts not-to-scale drawings.
- Maps. An aerial or site map locating the property.
- Administrative items. Fees and the required number of copies. For tax credits, the state program asks for one copy and federal submissions generally two.
- Part 3 extras. Completed-work documentation, following the program’s requirements.
Pro Tip: Photograph every elevation and every window and door opening before you touch anything. Taking photographs before work begins can help document existing conditions.
What do guidelines typically require for windows, doors, porches, signs, fences and demolition?
Requirements differ by city, but the patterns are consistent enough to plan around.
- Windows: Repair first. If replacement is unavoidable, match profiles, muntin layout and visible materials. Some localities permit storm windows, so check yours. Our pages on solid wood historic replica windows and wooden windows show what profile matching looks like in the shop.
- Doors: Preserve primary historic doors. A matched replacement should mirror material, paneling, glazing and hardware wherever it is visible from the street. If you are weighing a modern interior door for comfort, a partner’s article on door upgrades and energy efficiency in older homes covers tradeoffs, though exterior doors in a district follow the review rules above.
- Porches and rooflines: Keep the scale, columns and roof form. Additions should read as compatible and generally subordinate to the original.
- Signs and fences: Expect controls on size, placement and material. Rear-yard mechanicals and landscaping often get more latitude.
- Demolition: Expect strong documentation and public review. Check your locality’s rules and potential consequences before undertaking demolition.
How can you work with preservation staff and boards to speed approval?
Staff are your best resource, not your gatekeepers. Call before you draw, present a concept, and ask which concerns the board is likely to raise. Verify whether your scope qualifies for administrative approval, because practitioner guidance suggests that route can significantly shorten timelines compared with a full board hearing.

If tax credits are a goal, write your narrative in DHR’s sample format and attach thorough pre-rehab photos. Thin documentation is a common cause of denial. And never start visible exterior work before the COA is in hand; doing so invites remedial orders and penalties that cost far more than the wait.
Pro Tip: Bring product samples, profile drawings and a one-page scope summary to your pre-application meeting. Showing staff the material can help clarify questions.
A millworker’s perspective: why accurate millwork eases approvals
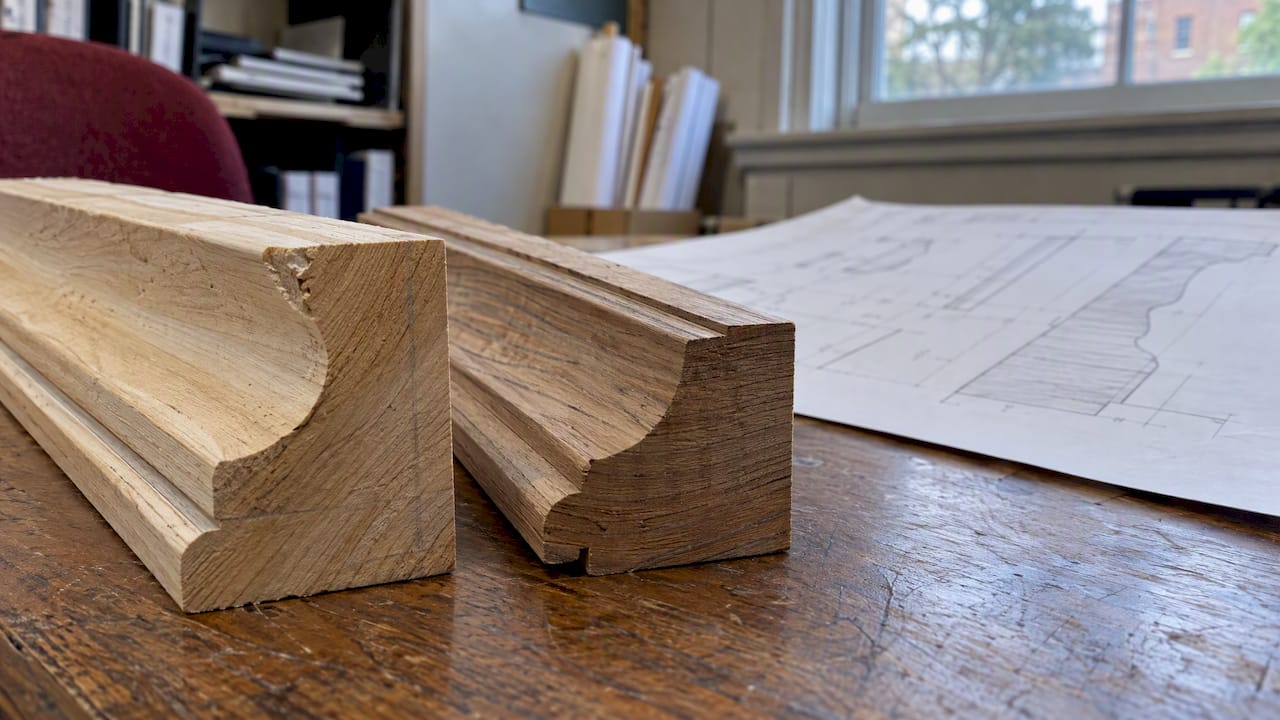
Boards rarely reject a project because it is historic enough. They reject it because the details are vague. Exact profiles, correct species, and a repair-first plan documented in measured drawings and shop mockups answer most objections before they are raised, and those same drawings feed a Part 2 narrative. Our own historic wooden windows show that accuracy and performance are not a tradeoff.
— Gepetto
How we support COA-ready restoration
If you would rather hand off the millwork side of a COA or tax-credit project, we can manage it with you. Our Historic Window Restoration service supports restoration of historic windows and millwork.
Request a consult through our Historic Window Restoration page, or browse our Virginia restoration projects to see work similar to yours.

FAQ
What does a local historic district regulate?
A local historic district regulates exterior changes that affect the character of the district, such as windows, doors, porches, roofs, signs, fences and demolition. Authority comes from Code of Virginia §15.2-2306, and each locality sets its own details in its guidelines.
Do I need a COA if my home is on the National Register?
Not necessarily. National Register listing is largely honorary, and local designation is what typically triggers design review. Check your parcel’s local status with city preservation staff.
What are the best historic towns to visit in Virginia?
That depends on your interests, but towns with active local districts, such as Lynchburg, Danville and Leesburg, publish design guidance that explains why their streetscapes look the way they do. Their guideline manuals double as a field guide to local architecture.
Do deck stairs need to meet building code in a historic district?
Check with your locality about applicable building-code requirements as well as historic-district review. Visible deck or porch work may need a COA and a building permit, so confirm both with your locality.
Sources
Recommended
by Matthew Wiley | Oct 15, 2026 | Architectural Millwork
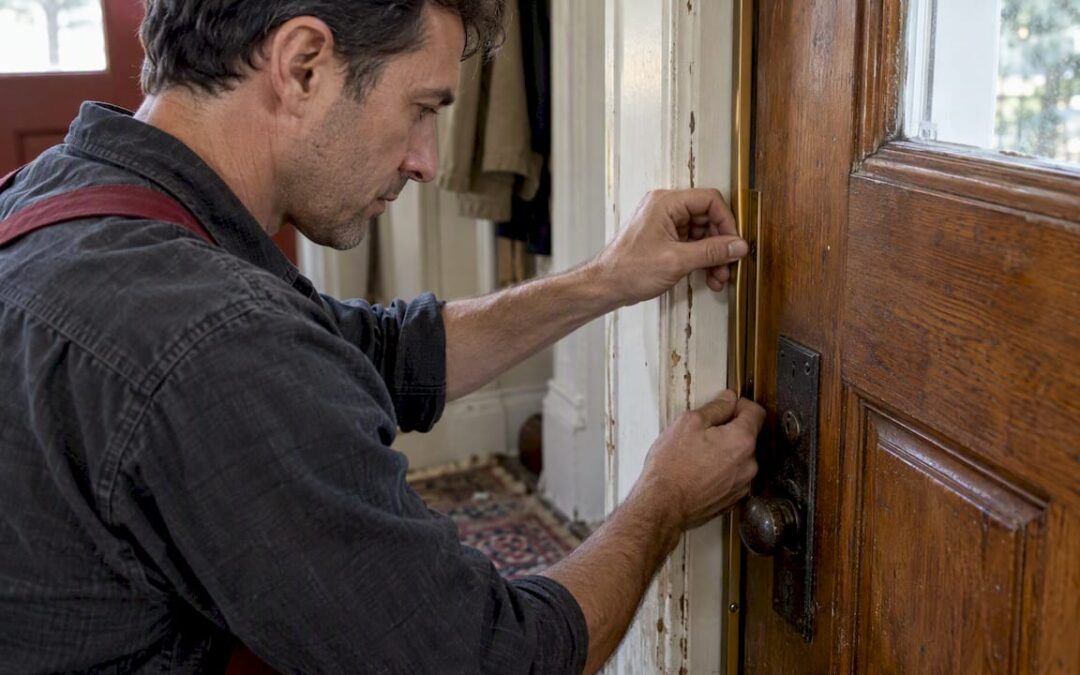
For many exterior wood doors, kerf-in silicone or vinyl weatherstripping paired with a durable, adjustable door sweep can provide a reliable long-term seal. Before installing anything, measure the gaps at the sides, head, and bottom, and check that hinges and strike plates hold the door square in its frame. Sealing the rough opening behind the jamb matters just as much as the visible weatherstripping, since both work together to cut drafts and protect the wood from moisture.
TL;DR:
- Measure the widest gap at the sides, head, and bottom; choose a seal that contacts the full jamb while allowing seasonal wood movement.
- Kerf in strips need a 1/8 inch groove, while loose hinges or a shifted strike plate should be corrected before installation.
- Seal the hidden gap between the jamb and rough opening with caulk, low expansion foam, or backer rod; fibrous insulation alone will not block drafts.
- For historic doors, choose discreet silicone or spring bronze seals, and place alternatives behind the stop when molding makes a groove impractical.
- Use an adjustable sweep or door shoe at the bottom, then set its glides to stop daylight without making the door drag.
Gepettomillworks
Preserve Character While Improving Door Fit
Gepettomillworks creates custom millwork for historic building projects, supporting careful work on doors where details matter.
Explore custom millwork
Table of Contents
Types of weatherstripping and where each works best on wood doors
Wood doors move with the seasons, and the right weatherstripping material accounts for that movement rather than fighting it. Kerf-in strips, made of silicone, vinyl, or nylon, insert into a milled groove along the jamb and can be a durable option for exterior wood doors because they stay anchored under repeated opening and closing. Tubular and bulb-style seals, often rubber, vinyl, or silicone, compress against the door face and suit both jambs and door bottoms, though their lifespan depends on how much daily compression they absorb.
For period-appropriate or especially durable sealing, V-strip tension seals and spring bronze or metal-leaf options are frequently recommended for wood doors and windows, since they hold up over decades with minimal visible profile. Adhesive-backed foam has its place too, but mainly on small, even gaps in interior applications, where exposure and movement are limited. When a jamb cannot be kerfed, whether due to existing trim profiles or structural limits, nail-on or screw-on mechanical strips offer a workable alternative.
- Kerf-in silicone, vinyl, or nylon: best for exterior wood doors with milled jamb grooves.
- Tubular or bulb seals: flexible compression fit for jambs and bottoms.
- V-strip, spring bronze, or metal-leaf: durable, low-profile options suited to historic finishes.
- Adhesive-backed foam: acceptable for small, even interior gaps only.
- Nail-on or screw-on strips: a practical fallback when kerfing isn’t possible.
How to choose by gap size, wood movement, and door location
Measure the largest gap at several points along each side, the head, and the bottom rather than relying on a single reading, since wood doors rarely sit perfectly parallel to their frames. The widest gap you find determines which profile will actually make contact across the full length of the jamb.
Kerf-in weatherstripping typically relies on a 1/8-inch kerf cut into the jamb; check whether your door already has this groove from the factory or whether a kerfing tool will be needed to create one. Because wood expands in humid months and contracts in dry ones, choose a compression range with enough give to seal in winter without binding in summer.
- Measure gaps at the top, middle, and bottom of each side and the head jamb.
- Confirm or cut a standard 1/8-inch kerf before ordering kerf-in strips.
- Select a compression range that accounts for seasonal wood movement.
- Consider adjustable screw-slot strips or threshold systems when kerfing isn’t practical.
Pro Tip: Cut a test kerf on a scrap piece of matching wood before committing to the jamb itself, especially on a historic or custom door.
Step-by-step installation for kerf-in, adhesive, and nail-on methods
A durable seal starts with the door itself, not the weatherstripping. If hinges are loose or the strike plate has shifted, tighten or reset them first, since weatherstripping cannot compensate for a door that isn’t hung square in its frame. Plane or shim as needed to create an even gap all the way around.
- Remove any old or deteriorated weatherstripping and clean the jamb surface.
- For kerf-in strips, cut or confirm the 1/8-inch kerf, then insert the strip without stretching it, working from one end to the other.
- At the head jamb, notch the side pieces to create a tight butt joint rather than overlapping them.
- For adhesive-backed strips, clean the surface thoroughly, press firmly along the full length, and avoid gaps caused by wrinkled or stretched material.
- For nail-on or screw-on strips, drill pilot holes to avoid splitting the wood and use slotted holes where available so the strip can be adjusted later.
- For a door sweep or shoe, rout a shallow dado if a recessed fit is desired, finish any exposed wood to match the door, then install the channel and attach the sweep with its glides loose.
- Close the door and check for daylight along every edge, then adjust glides, fasteners, or strip position until contact is even and the door still swings freely.
A well-sealed exterior door requires weatherstripping along both sides and the top, plus a sweep across the bottom, with full contact against the threshold confirmed before the job is considered finished. Even a 1/8-inch gap left unsealed around an entry door is roughly equivalent to a 5 1/2-inch-diameter hole cut straight through an exterior wall, which makes the final daylight check worth the extra few minutes.
Door bottoms and thresholds: sweeps, shoes, or gasketed systems
Air and water can get through the bottom of a wood door, so this is not a spot to treat as an afterthought. Inswing and outswing doors call for different threshold approaches, since the sweep or shoe must clear the threshold on the swing side while still sealing against it when closed.
Measure the clearance between the door bottom and the threshold, using roughly 1/2 inch as a common reference point when sizing a shoe or adjustable threshold, then adjust from there based on your actual gap. If you’re routing a dado for a recessed sweep, finish or paint any exposed wood before installing the channel and end caps to protect it from moisture.
- Choose a door shoe or gasketed threshold for high-traffic exterior doors with uneven wear.
- Size clearance against the threshold using a 1/2-inch reference, then fine-tune to the actual gap.
- Finish exposed wood before installing channels, sweeps, or end caps.
- Adjust sweep glides until daylight disappears without creating excessive drag on the door.
- In wet climates, pair the threshold choice with adequate roof or porch overhang to limit standing water at the sill.
Sealing the rough opening before the weatherstripping goes in
Weatherstripping only seals what’s visible, so the gap between the door jamb and the rough opening behind it deserves attention first. Building Science Education guidance recommends sealing this gap with caulk, low-expansion foam, or backer rod, and cautions against relying on fibrous insulation alone to block air movement there.
This hidden layer works alongside the visible jamb weatherstripping rather than replacing it, closing off drafts that would otherwise bypass even a perfectly installed strip. A simple smoke pencil test near the trim can reveal leaks you can’t feel by hand, and for a fuller picture of whole-house air leakage, a professional blower-door test is worth considering.
- Seal the rough opening gap with caulk, low-expansion foam, or backer rod.
- Avoid relying on fibrous insulation alone to stop air infiltration at this joint.
- Use a smoke pencil for a quick visual check of hidden drafts near the trim.
- Call in a professional for blower-door testing if drafts persist after sealing.
Maintenance schedule and signs it’s time for a fix
Inspect weatherstripping at least once a year for compression set, tears, and fasteners that have worked loose, ideally before the coldest months set in. A damp cloth clears dirt and debris, while a light lubricant on metal strips like spring bronze keeps them flexing smoothly instead of cracking.
Visible daylight or a draft that persists after adjustment usually means the strip has lost its memory and needs full replacement rather than another tweak. If the door binds or contacts unevenly right after installation, recheck hinge alignment before assuming the weatherstripping itself is at fault.
- Check seals annually for compression set, tearing, or loose fasteners.
- Clean with a damp cloth and lubricate metal strips periodically.
- Replace strips once daylight or drafts return despite adjustment.
- Recheck hinges and strike plates first if a new installation binds unevenly.
Pro Tip: Keep a small offcut of your installed weatherstripping on hand. It makes matching replacement material years later far easier.
Why precise millwork makes weatherstripping work better
A door that’s been fabricated or restored with accurate joinery may need less aggressive weatherstripping, and what’s installed may perform better for longer. Custom and restored wood doors can hold their fit through seasonal movement, helping the seal stay consistent. Preserving historic fabric and sealing it well aren’t competing goals. For a door with real architectural significance, consulting a specialist on fit and finish before reaching for weatherstripping products is worth the conversation.
— Gepetto
Weatherstripping historic wood doors without losing their character
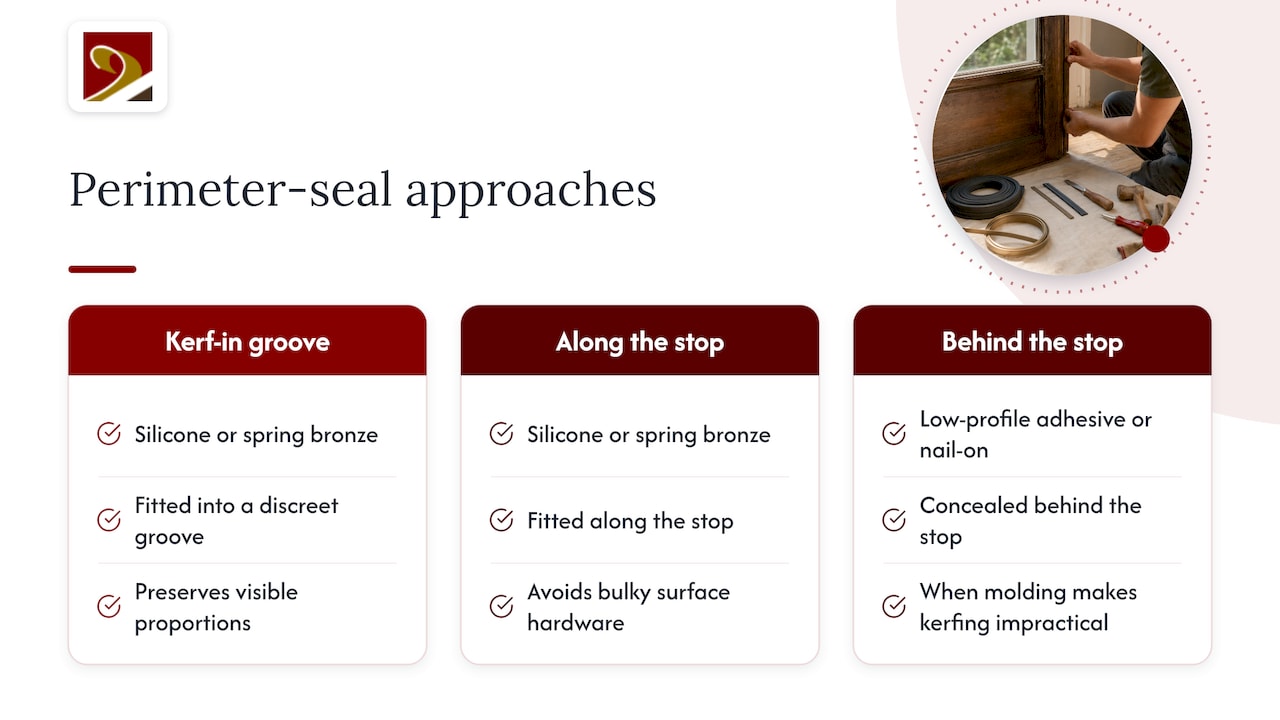
Historic wood doors call for a different calculus than a standard exterior replacement, since the goal is sealing performance without disturbing original material, period hardware, or finishes that carry the building’s history. Kerf-in strips in silicone or spring bronze tend to suit these doors well, since both can be fitted into a discreet groove or along the stop without altering visible proportions or requiring bulky surface-mounted hardware.
When a historic door’s casing or molding profile makes kerfing impractical, a low-profile adhesive or nail-on strip set behind the stop, rather than across a visible face, keeps the original lines intact. Finishing any new wood or hardware to match existing patina also goes a long way toward keeping the seal invisible. For doors tied to historic restoration work or museum-quality preservation standards, matching weatherstripping choices to the original material palette protects both the building’s character and its eligibility for preservation-related considerations.
Seal your doors well, then let craftsmanship do the rest
Weatherstripping only performs as well as the door it’s attached to, which is why we focus on getting the fit right before a single strip goes in. Our Historic Wooden Doors work includes replicating period profiles and joinery for historic buildings. For entryways that call for a new solid wood door rather than a repair, our Solid Wood Entry Doors are made to order.
If your current sealing struggles trace back to a door that’s warped, out of square, or simply reaching the end of its service life, reach out through our Historic Doors page to talk through restoration or replacement options suited to your building.
FAQ
What is the best way to seal an exterior wood door?
Kerf-in silicone or vinyl weatherstripping on the sides and head, combined with an adjustable door sweep or gasketed threshold at the bottom, can provide a durable seal on a wood exterior door. Before installing any of it, confirm the door is square and the hinges and strike plate are tight, since weatherstripping cannot fix a poorly hung door.
What are the three types of door weather stripping?
Door weatherstripping commonly falls into tension seals like V-strip, compression seals like tubular or bulb styles, and kerf-style strips set into a milled groove. Felt and spring bronze are also widely used, with felt offering a lower cost but a shorter service life compared to the others.
How can I weatherproof my wooden door?
Start by measuring gaps at the sides, head, and bottom, then choose weatherstripping sized to the widest gap you find so it seals without binding the door shut. Seal the rough opening behind the jamb with caulk or low-expansion foam as well, since that hidden gap can leak air even after the visible weatherstripping is installed.
What to use instead of weather stripping?
There isn’t a true substitute for weatherstripping on an exterior door, since it’s the layer that seals the moving joint between door and frame. A storm door or well-fitted threshold can reduce the load on the primary seal, but sealing the door itself still does most of the work in cutting air infiltration and protecting the wood from moisture.
How often should I replace door weatherstripping?
There’s no fixed replacement interval, since wear depends on climate, material, and how often the door is used, but an annual inspection catches compression set, tears, and loosened fasteners before they cause drafts. Visible daylight around the door or a draft that persists after adjustment is the clearest sign it’s time to replace the strip rather than continue adjusting it.
Sources
Recommended
by Matthew Wiley | Oct 14, 2026 | Architectural Millwork
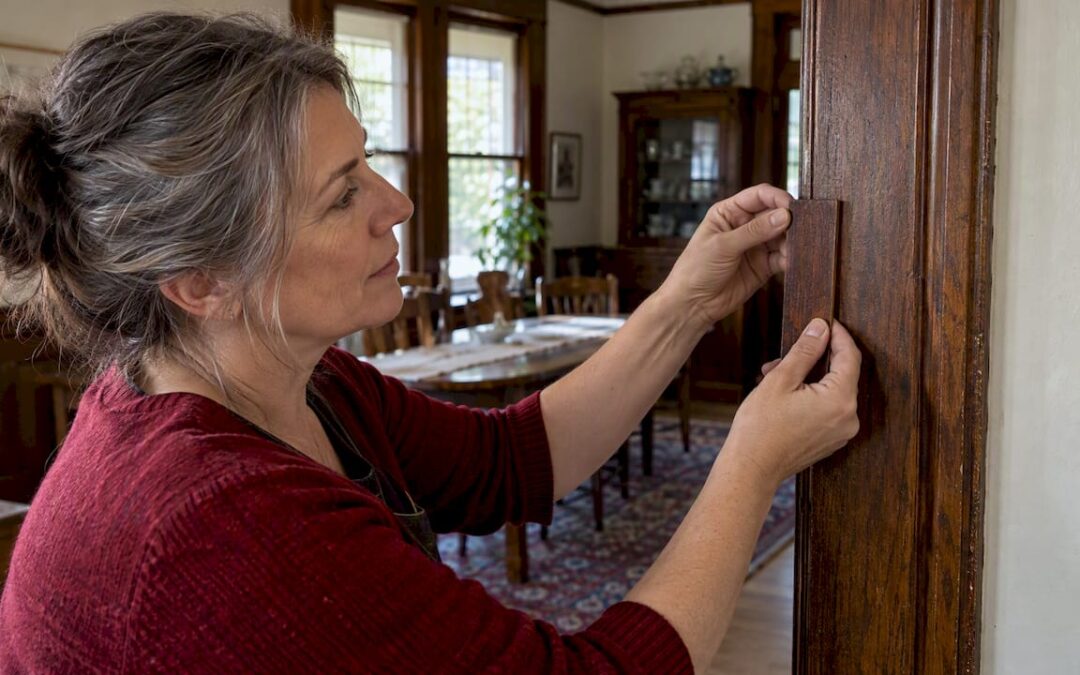
The most reliable way to match stain on old trim is to identify the existing finish first, then build color in controlled layers rather than reaching for a single can of stain. Confirm whether shellac, lacquer, varnish, or penetrating oil coats the wood, scuff-sand instead of stripping when the finish is sound, and layer a dye or wiping stain under a gel stain or glaze before sealing to the surrounding sheen.
TL;DR:
- Test a hidden spot with denatured alcohol, then lacquer thinner: softening identifies shellac or lacquer, while neither reaction points to varnish or penetrating oil.
- For sound finishes, clean and scuff sand flats using 220 grit, hand sand profiles, and strip only failed areas or wood that must be lightened.
- Build color on matching scrap, record product ratios, and correct red or yellow undertones with tiny green or violet additions instead of simply darkening stain.
- Once the base color is close, apply glaze over a thin dewaxed shellac seal coat, then judge cured satin or semigloss samples in the room.
- Call a restoration shop for historically significant trim, carved profiles, suspected lead paint, or rot, and bring natural light photos plus solvent test results.
Gepettomillworks
Preserve the Character of Historic Trim
Gepettomillworks creates custom millwork for historic building projects, supporting work where matching old trim and preserving its character matter.
Explore custom millwork
Table of Contents
How to identify the existing finish and its condition
Every historic finish behaves differently under a brush, so identifying what coats the wood determines whether we restore, recoat, or strip. A simple solvent test resolves most ambiguity: dab denatured alcohol on a hidden spot, and if the finish softens or lifts, it is shellac. If the alcohol has no effect, try lacquer thinner; softening there points to lacquer, while no reaction from either solvent usually means varnish or a penetrating oil finish.
- Shellac softens under denatured alcohol and often indicates an older, repairable finish.
- Lacquer softens under lacquer thinner and typically tolerates a fresh topcoat once cleaned.
- Varnish or penetrating oil resists both solvents and usually needs mechanical scuffing before any new product adheres.
Condition matters as much as chemistry. An intact finish that is merely dull or lightly scratched can often be revived through cleaning and a light recoat rather than full removal, which preserves the original patina that gives old trim its character. A failing finish, by contrast, with flaking, alligatoring, or bare wood, forces a different path: limited stripping, targeted repair, and rebuilding color from a cleaner base.
Surface prep that preserves historic profiles: cleaning, repair, and gentle sanding
Profile detail on historic trim is unforgiving once it is sanded away, so preparation has to protect the molding’s edges before any color work begins. Cleaning comes first: wipe down the surface with turpentine or a mild solvent recommended for the finish type to remove decades of wax and grime that would otherwise trap new stain unevenly.
- Clean thoroughly. Remove accumulated wax and surface grime before testing anything, since residue skews both solvent tests and stain absorption.
- Repair damage appropriately. Fill dents and gouges with a stainable wood filler on bare sections, or use a color-matched putty where the surrounding finish is intact and only cosmetic repair is needed.
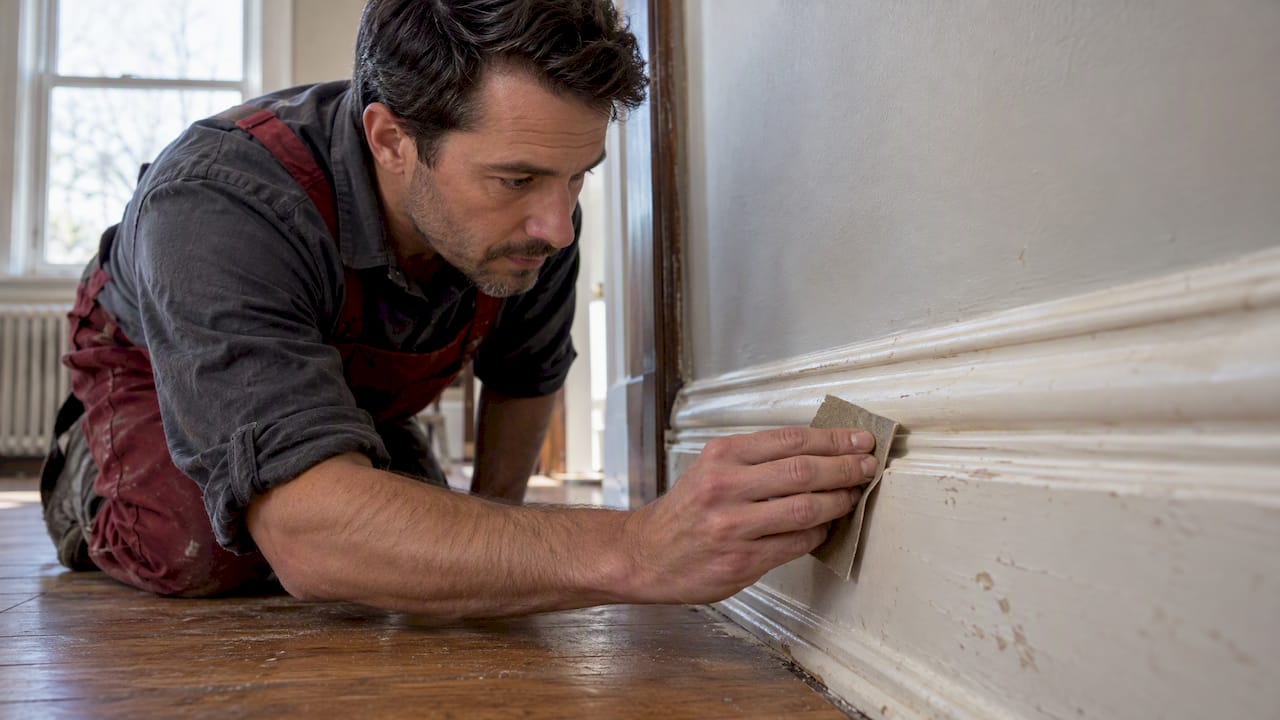
- Sand conservatively. Scuff-sand flats with 220-grit paper to open the surface for adhesion, and hand-sand curves and profiles with folded paper or a flexible sanding sponge to avoid rounding crisp edges.
- Strip selectively, only when necessary. A gel-type stripper clings well to vertical surfaces and reduces gouging on detailed molding, which matters because stain can only darken wood: lightening an existing finish requires removing it first.
Pro Tip: Test every cleaner, filler, and stripper on a hidden section of the same trim run before committing, since even a mild solvent can leave a halo on aged shellac.
Power sanders flatten profiles in seconds and are difficult to control on ogee or bead details, so reserve them for broad, flat surfaces and keep hand tools close by for everything else.
Make test swatches and record mixes: practical step-by-step mixing and iteration
A reliable stain match is built on paper before it ever touches the trim. Cut a test substrate from the same species as the original woodwork, or from a clear hardwood scrap when matching species is not practical, since grain structure and porosity change how pigment and dye absorb.
Start with a light wiping stain or dye as the base layer, then adjust toward the target with a gel stain, an oil-based wiping stain, or small additions of universal pigment. Each adjustment should be minor: a tablespoon-scale change in ratio can shift a sample from a warm honey tone to a muddy brown, so patience at this stage saves rework later.
- Label every sample with the exact product names, mix ratios, and drying time so a result can be reproduced weeks later.
- Note the ambient conditions (temperature, humidity, lighting) since they affect how a stain levels and dries.
- Keep a labeled sample card for each attempt, ideally photographed after sealing, following the practice professionals use to build a recipe swatch book for repeatable results on a single project.
Undertone correction often matters more than overall darkness. Old trim frequently carries a reddish or yellow cast from decades of oxidation and prior finishes, and simply applying a darker stain rarely corrects that. Small, controlled additions of pigment or dye neutralize the dominant cast: a touch of green dampens an overly red tone, while a trace of violet counters a strong yellow bias. These adjustments work in tiny increments, and over-layering opaque colorants obscures the grain, which is a mistake that usually means starting over on stripped wood.
Glazing comes last in the build-up, after the base color is close, because a glaze reproduces the soft shading and wear patterns that accumulate in corners and along edges rather than solid color. A thin, dewaxed shellac seal coat between the base stain and the glaze prevents the glaze solvent from disturbing the color underneath, a sequence that professional finishers rely on when reproducing complex historic tones.
How to apply the matched recipe so new trim blends with aged woodwork
Application technique determines whether a correct recipe actually reads as a seamless match or sits as an obvious patch. The goal at every seam is a gradual transition rather than a hard line between old and new material.
- Feather the edges. Apply stain more thinly as you approach a seam or joint, working the brush or rag in overlapping passes so no sharp boundary forms where new trim meets old.
- Build depth in thin layers. Several light coats produce more even, controllable color than one heavy application, and each layer can be checked against the original before moving forward.
- Add a glaze for worn undertones. A thin glaze wiped into corners and recesses, then softened on the flats, mimics the uneven darkening that decades of handling and light exposure leave behind.
- Match the topcoat sheen. A satin finish reads differently than semi-gloss even when the color underneath is identical, so the final clear coat has to match the surrounding sheen, not just the stain color.
Pro Tip: Apply the topcoat to a test board and let it cure fully before judging the final color, since some sealers shift tone slightly as they dry.
Seal, test in place, and final verify the match under room light
Sheen changes how a color reads even when the pigment underneath is identical, which is why the sealing step is not just protective, it is part of the color match itself. A satin topcoat mutes contrast and deepens perceived tone, while semi-gloss sharpens highlights and can make the same stain look lighter.
- Test both satin and semi-gloss samples side by side before committing to a topcoat for the whole run.
- Let samples cure fully, then check them in the actual room under its own lighting, since a match that looks correct under shop light can shift noticeably under incandescent or daylight conditions at home.
- Expect to make minor tweaks, such as a light glaze touch-up, after seeing the cured sample in place.
- If the gap between old and new remains visible after reasonable adjustment, that is usually the point to bring in a restoration shop rather than keep reworking the same section.
Our approach favors conservation over removal whenever a finish is sound enough to support it, reserving stripping for cases where the wood needs to go lighter or an old glaze layer has to come off entirely. In practice, that means applying seal coats between color layers, using stains for controlled darkening on vertical profiles, and glazing applied in small, tested increments rather than broad strokes.
The best match is the one you can reproduce on the next piece of trim, not just the one that looks right today.
Readers curious about how this plays out on a full project can look through our historic cabinet restoration case notes or browse examples in our 19th century home archives.
When to hire a pro: complexity signals and what pros deliver
Certain signals favor calling a restoration shop rather than continuing to test on-site: documented historic significance, deeply carved or compound profiles, or any suspicion of lead paint or structural rot beneath the finish. A professional shop brings profile replication tooling, tested color recipes, and a controlled finishing environment that is difficult to reproduce in a garage. Before reaching out, photograph the trim in natural light, save a small sample if any piece is removable, and note the results of your own solvent tests.
— Gepetto
When a match calls for replicated profiles, new sashes, or full restoration rather than another round of test swatches, our shop takes on the fabrication work directly.
- Historic trim and window restoration, including finish matching tied to tax credit requirements.
- Custom casework and millwork replication when a damaged section needs a profile-matched replacement piece.
- Residential woodworking services for homeowners managing a single room or a full historic renovation.
Review a few project examples, gather your samples and photos, and reach out through our Historic Window Restoration page to request an estimate.
FAQ
How to match an old stain?
Identify the existing finish with a solvent test, then build color gradually using a dye or wiping stain as a base, adjusting with gel stain or small pigment additions until the undertone matches. Keep a labeled sample board for every mix so the final recipe can be reproduced across the whole trim run.
Can you get wood stain color matched?
Yes, through iterative test swatches on scrap wood of the same species, adjusting ratios of dye, stain, and glaze until the sample matches the original under the room’s actual lighting. Many finishers also consult general color-matching and test-swatch principles developed for refinishing other wood surfaces, since the testing logic carries over.
Is stained trim outdated?
Stained trim is not outdated; it remains standard in historic and traditional interiors, though some homeowners now mix painted and stained elements for contrast rather than matching everything. That design choice is a matter of preference, not a sign that stain itself has fallen out of favor.
How to match existing cabinet stains?
Use the same identify-then-layer approach as trim: confirm the existing finish type, test a dye or stain base on a matching scrap, then refine with gel stain and glaze until the sheen and undertone align. Cabinet doors often show more visible wear patterns than trim, so glazing in corners and edges tends to matter more for a convincing match.
What causes stain to look different on old versus new wood?
Aged wood has oxidized, picked up ambient light exposure, and often carries residue from old finishes, all of which shift its undertone compared to fresh lumber. This is why undertone correction through small pigment adjustments usually succeeds where simply choosing a darker stain color does not.
Sources
Recommended
by Matthew Wiley | Oct 13, 2026 | Architectural Millwork
Repair is preferred under preservation standards, and when a baluster is too deteriorated to save, professional baluster replication is the surest way to preserve both visual integrity and eligibility for preservation incentives. Simple, unadorned stock profiles are reasonable candidates for a careful do-it-yourself approach. Historic, highly detailed, or tax-credit-sensitive projects call for a specialist shop such as Gepetto Millworks, where turning, scanning, and finishing work is matched to the original by trade.
TL;DR:
- Repair minor splits or loose tenons with epoxy or veneer shims; historic replacements need photographic or physical evidence to support preservation incentive eligibility.
- Hand turning suits carved twists and undercuts; duplicators work best with an intact sample and plain profiles, while scanning helps when originals are fragile.
- If the original species is impractical, choose a substitute that matches its visual and physical properties, and test the finish on a sample first.
- A useful quote package includes a surviving sample, profile tracing, photos, caliper readings at several points, rail angle, and each baluster’s finished length.
- Dry fit each baluster before fastening, ensure its tenon seats without force, and keep gaps no wider than four inches under most residential codes.
Gepettomillworks
gepettomillworks.com
Match Historic Balusters With Care
Gepettomillworks creates custom millwork for historic building projects, supporting careful replication when deteriorated balusters cannot be saved.
Visit Gepettomillworks
Table of Contents
When to Repair Versus When to Replace a Baluster
The Secretary of the Interior’s Standards for Rehabilitation hold that deteriorated features should be repaired rather than replaced, and that when replacement becomes necessary, the new piece must match the old in design, color, texture, and visual qualities under Standard 6. In practice, that principle translates into a few clear field signs.
- Surface checking, minor splits, or a loose tenon usually respond to epoxy consolidation or a wood-veneer shim rather than full removal.
- Rot that has reached the core, a snapped baluster, or a missing element generally requires fabrication of a new piece.
- Any replacement on a documented historic property should be substantiated with photographs or physical evidence before fabrication begins, a requirement the Standards attach to tax-credit eligibility.
A typical shop timeline runs from on-site inspection and documentation, through pattern-making and fabrication, to finishing and install, often spanning several weeks depending on the complexity of the turning and the finish schedule.
Replication Methods: Lathe Turning, Duplicators, CNC, and 3D Scanning
The right production method depends on how much three-dimensional detail the original carries and how intact the sample is. Hand turning on a traditional lathe remains the standard for balusters with carved rope twists, barley-sugar spirals, or other undercut ornament that a machine cannot trace in one pass. A lathe duplicator, by contrast, copies a straight profile quickly from an intact sample, which makes it efficient for plain colonial or Federal-style spindles but limited when rope or deep carving is involved.
- Hand turning on a lathe suits complex, three-dimensional ornament that duplicators cannot reproduce.
- Lathe duplicators excel at fast, accurate profile copying when a sound sample exists.
- CNC turning and 3D scanning paired with printing or machining become the practical route when the original is too damaged to use as a direct pattern, as documented in a historic baluster replication project that combined laser scanning and 3D printing to reproduce spiral balusters too fragile to copy by hand.
Pro Tip: Bring a damaged original to a shop even if it looks unusable; scanning can often extract enough geometry for an accurate digital pattern that a lathe or CNC can then execute.
Cost and turnaround generally favor duplicators for simple runs, hand turning for ornamental work in smaller quantities, and scanning-based methods for one-off replication where no sound sample survives.
Matching Materials: Species, Finishes, and Acceptable Substitutes
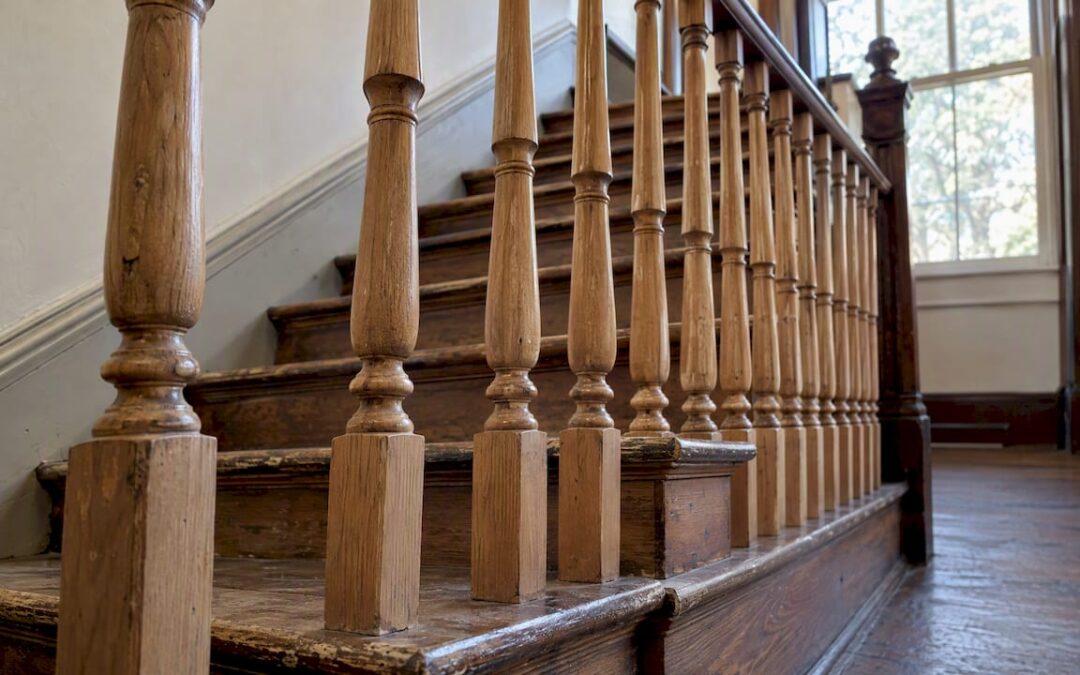
Species selection affects grain pattern, paint absorption, and long-term durability as much as appearance. Older stair sets were commonly turned from poplar, white oak, mahogany, or heart pine, and matching the original species keeps the grain and the finish behaving the same way over time.
- Poplar and similar close-grained woods paint cleanly and resist warping in interior stair runs.
- Oak and mahogany carry a more pronounced grain that should be matched when the original is left in a clear or stained finish.
- Heart pine appears in many older Southern staircases and takes stain differently than modern dimensional lumber.
NPS guidance on evaluating substitute materials permits a substitute when the original species is economically or technically infeasible, provided the substitute closely matches the visual and physical properties of the historic material, a standard that weighs location, physical compatibility, and expected performance over time. Before committing a full run to any species or finish, shops typically produce a test piece: a sanded sample finished with shellac or a gel stain to even out color and texture differences against the aged original.
How to Prepare and Order a Replica: Measurements, Samples, and Lead Times
A clean, well-documented submission shortens both the quoting process and the fabrication timeline. Shops that replicate balusters for a living generally ask for the same core package of information before cutting any wood.
- Trace the profile onto manila paper or heavy cardstock to capture the silhouette accurately, a technique documented in professional restoration how-tos.
- Record diameters at several points along the baluster with calipers, since a single measurement rarely captures a tapered or turned profile.
- Photograph the top, bottom, and side of a representative baluster, including any carved or turned detail.
- Measure the sliding bevel angle where the baluster meets a sloped handrail, since rake angles vary by stair pitch.
- Note the finished length for each position on the run, since treads on a sloped stair often require a different length baluster at each step.
Most shops also expect a sample baluster when one survives, a minimum order per project, and sometimes a customization fee for one-off profiles; lead times vary with turning complexity and finish schedule.
Installing Replicated Balusters: Fit, Fasten, and Finish
Installation is where a well-made replica either disappears into the original run or stands out. The sequence below follows standard trade practice for dowel or tenon-based balusters.
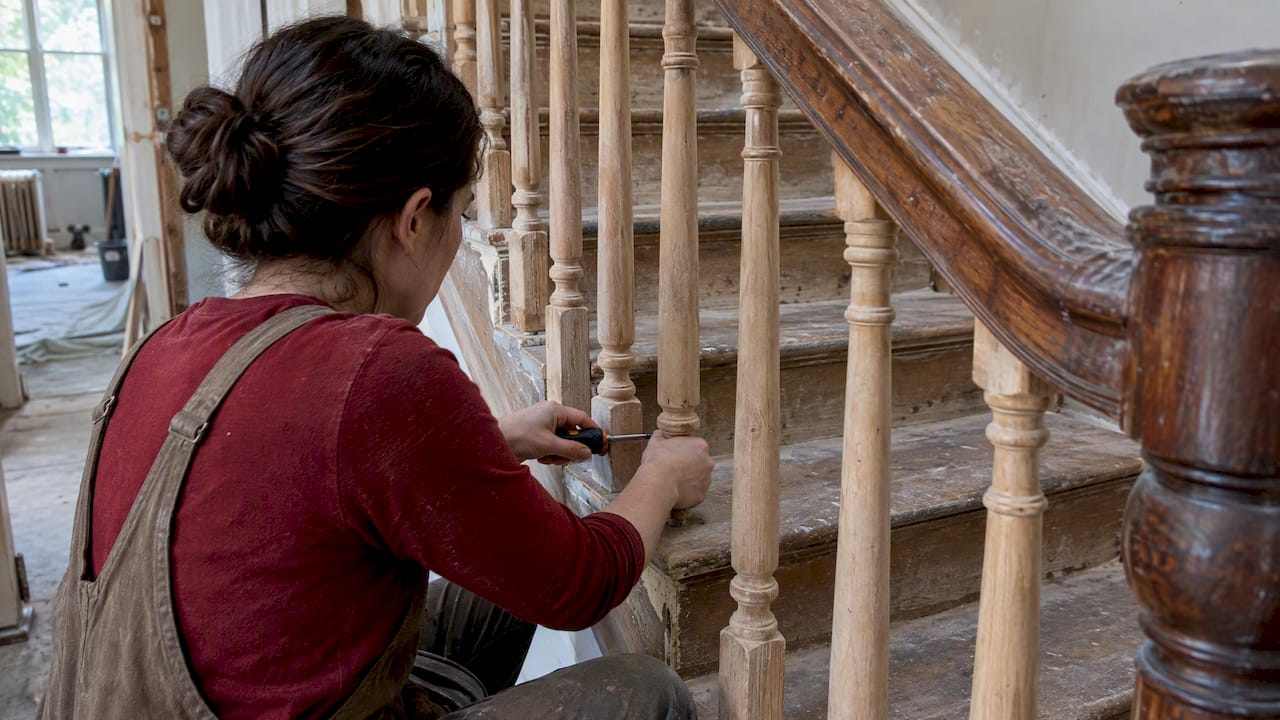
- Dry-fit each piece in position before any glue or fasteners go in, checking that the tenon seats fully in its mortise.
- Trim the baluster to finished length using the bevel angle recorded during measurement.
- Shape or adjust the tenon or dowel so it seats without force; a tight dry fit prevents future rattling.
- Set the piece with wood glue and a pilot-drilled screw or finish nail, then countersink and fill with matching putty.
- Sand, prime, and finish to match the surrounding balusters, using the test piece developed during material selection as the reference.
Pro Tip: A loose tenon on an older original can often be saved by wrapping it in thin wood veneer or a tapered shim rather than enlarging the mortise, a reversible fix that preserves more of the original fabric.
Spacing matters structurally as well as visually: most residential codes cap the gap between balusters at roughly four inches to prevent a small child from passing through, and any replacement run should preserve that spacing along with secure attachment at both the top rail and the tread.
How Gepetto Millworks Documents and Executes a Replication Project
We approach every baluster replication the same way we approach any historic millwork commission: document first, fabricate second. A typical project moves through on-site measurement and photography, species and finish selection matched to the original fabric, turning or CNC and scanning work sized to the complexity of the profile, and a finish schedule that brings the new piece into visual alignment with its neighbors before installation.
- We request the same baseline package described above: a physical sample when one exists, profile tracings, caliper measurements, and photographs of the original in place.
- For tax-credit or landmark-review projects, we document replacement with the photographic and physical evidence that certified rehabilitation review expects.
- Past replication work, along with examples from our broader replica millwork and complex wood manufacturing archives, shows how a shop-level process holds up across different stair styles and periods.
Why Craftsmanship Matters for an Honest Historic Match
A baluster run is one of the more visible pieces of joinery in an older house, and a mismatched profile or the wrong sheen reads as wrong from across the room even to an untrained eye. We accept a close substitute material when the original species is no longer practical to source or finish safely, but we insist on in-kind turning and profile accuracy wherever the detail is visible. When a project sits near that line, a conversation with a specialist before fabrication begins saves far more time than a second attempt after installation.
— Gepetto
Commissioning a Custom Replica from Gepetto Millworks
We fabricate custom balusters, balustrades, and the full range of period stair cases that surround them, alongside our wood turning work for other turned architectural elements. We also take on the custom casework, entry doors, and windows that round out a full restoration scope, so a single project brief can cover more than the staircase alone.
To quote a baluster replication, we need the same package outlined above: a sample baluster where one survives, profile tracings or photographs, caliper measurements, and a short note on the project’s scope and any preservation review it needs to satisfy. For intake measurement, some trades now lean on digital scanning for accurate fit, and we welcome scanned data alongside traditional templates when it’s available. Reach out through our residential woodworking page to start a quote, or browse our custom fabrication services for the rest of your project scope.
FAQ
Is it difficult to replace balusters?
Replacing a simple, undamaged baluster with a matching stock profile is a manageable weekend project for an experienced do-it-yourselfer with a caliper and a bevel gauge. Matching a carved or historic profile, sloped-rail angles, or multiple lengths per tread is considerably harder and is where most homeowners bring in a specialist shop.
What’s the difference between balusters and spindles?
In most trade usage, “baluster” and “spindle” refer to the same vertical stair element, with “spindle” used more often for slender, turned pieces and “baluster” used more broadly for any upright supporting a handrail. The terms are largely interchangeable in residential stair work.
How far apart should balusters be spaced?
Most residential building codes require no more than a four-inch gap between balusters to prevent a small child’s head or body from passing through. Always confirm the exact figure with your local code, since requirements can vary by jurisdiction.
How do you make your own balusters?
Making a basic baluster starts with tracing the original profile onto manila paper and capturing diameters with calipers, then reproducing that profile on a lathe or lathe duplicator. Published how-to guidance covers template-making, turning, and the finishing steps needed to match an aged surface, though carved or three-dimensional detail usually exceeds what a hobbyist lathe setup can achieve.
Sources
Recommended
by Matthew Wiley | Oct 12, 2026 | Architectural Millwork
Deal Island Historic District is listed on the National Register of Historic Places, and that designation alone does not trigger local design review for exterior work. Standard Somerset County building permits still apply to most projects, and federal or state funding, along with historic tax-credit work, can add a separate layer of review. For owners weighing a window, door, or trim project against these rules, Gepetto Millworks works as a nearby specialist in historic millwork and restoration documentation.
TL;DR:
- Privately funded, like for like repairs generally follow Somerset County’s ordinary permit process, while floodplain, zoning, and building rules still apply independently.
- The Maryland rehabilitation tax credit requires review against the Secretary of the Interior’s Standards before and after construction, with photographs and material specifications.
- Federal or state funding, flood insurance programs, and certain wetlands permits can trigger separate historic review, so owners should confirm requirements before scheduling contractors.
- Photograph muntin profiles, hardware, and existing conditions before work begins, since missing records can undermine a later tax credit application.
- Repairing sash cords, reglazing cracked putty, and splicing decayed wood can preserve original windows and doors better than replacing whole assemblies.
Gepettomillworks
Plan Historic Millwork With Care
Gepettomillworks creates custom millwork for historic building projects, supporting owners and professionals working on restoration and repair.
Visit Gepettomillworks
Table of Contents
What NRHP listing means for Deal Island owners
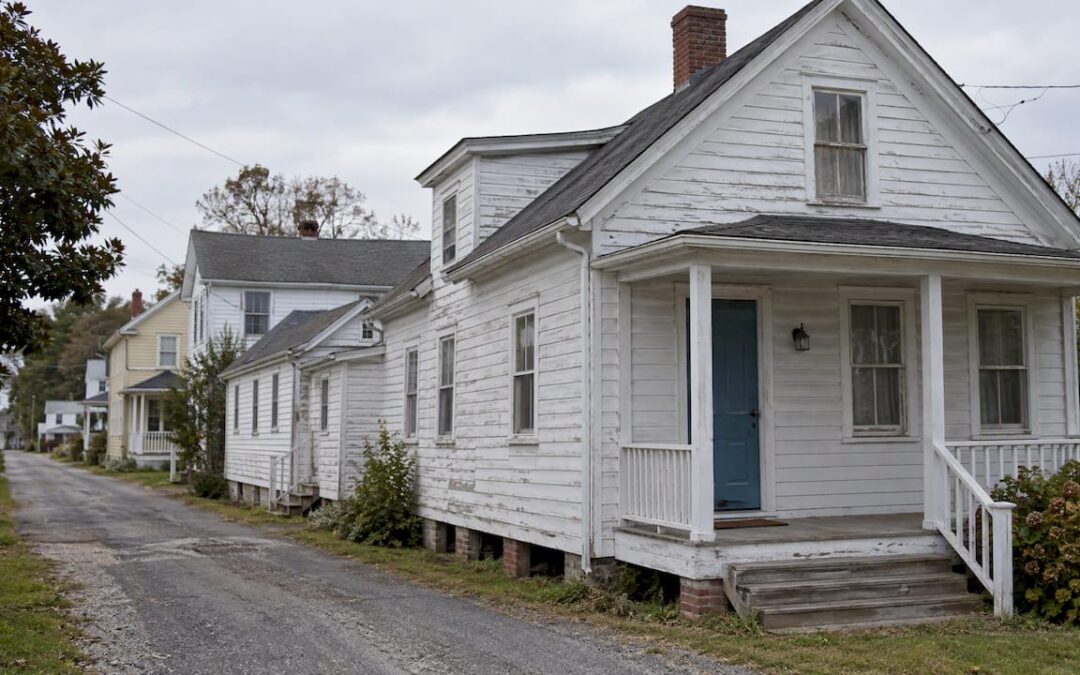
The Deal Island Historic District registration took effect on September 6, 2006, covering roughly 433 acres and 81 contributing buildings within a period of significance stretching from about 1815 to 1954. That span captures the island’s vernacular maritime building tradition, including telescope houses and the Federal and Greek Revival influences documented in the NPS asset record for the district.
National Register status is largely honorary. It recognizes architectural and historical significance, but it does not, by itself, impose a Certificate of Appropriateness requirement on exterior alterations the way a locally designated historic district would. An owner replacing siding, re-glazing a sash, or rebuilding a porch rail generally answers to the county’s standard building code rather than to a design review board.
That changes under a few conditions:
- Projects funded in whole or part by federal or state dollars generally invoke Section 106 review or a comparable state-level historic review process.
- Owners pursuing the Maryland historic rehabilitation tax credit must document work against the Secretary of the Interior’s Standards, which effectively creates a review step even without a local ordinance.
- Somerset County may apply its own zoning, floodplain, or building code provisions independent of historic status, and those still govern permits regardless of NRHP listing.
Local provider shortlist for millwork and historic woodworking
Finding a contractor who understands period construction matters more on Deal Island than the absence of a design review board might suggest, because tax-credit eligibility and long-term material performance both depend on getting the details right the first time.
We work with historic window restoration, custom wooden windows, solid wood entry doors, and trim replication, drawing on project documentation practices suited to tax-credit review and preservation record-keeping. Our focus on in-kind repair and period-accurate joinery makes us a relevant resource for owners working within the district’s c.1815-1954 period of significance.
| Provider |
Google rating |
Core services |
Best for |
| Gepetto Millworks |
3.6★ (5 reviews) |
Historic window restoration, custom wooden windows, solid wood doors, trim and casework replication |
Period window and door replication, preservation documentation for tax-credit projects |
When evaluating any millworker for a Deal Island project, ask for specifics rather than general assurances:
- Request examples of completed period replication work, including species selection and joinery methods used.
- Ask how the shop documents existing conditions and treatment choices for tax-credit or grant submissions.
- Confirm insurance coverage, a written contract with a defined scope, and a realistic timeline that accounts for coastal humidity and seasonal weather windows.
How to plan a compliant exterior restoration or alteration
A methodical sequence saves owners from redoing work that a review board or lender later questions.
- Gather the NRHP registration form, existing photographs, and any measured drawings of the structure before touching a single sash or board.
- Confirm with Somerset County which standard permits your project needs, then check separately whether federal or state funding, or a tax-credit application, adds a review requirement.
- Select contractors and millworkers who demonstrably follow the Secretary of the Interior’s Standards and can perform in-kind repair rather than wholesale replacement.
- Photograph existing conditions from multiple angles, record material specifications, and keep sampling notes such as paint scrapes or wood species identification.
- Complete the work, then compile a final documentation packet, before-and-after photos, materials list, and contractor invoices, in case a future tax-credit or grant claim requires it.
Pro Tip: Photograph every character-defining feature, including muntin profiles and hardware, before demolition begins; a missing “before” image can derail a tax-credit application months after the work is finished.
Our restoration archives show how this kind of documentation looks in practice across similar coastal projects, and our project management resources walk through coordinating contractors on a historic timeline.
Procedures for submitting applications for architectural review or approvals locally
Because Deal Island carries no local historic district ordinance, there is no Certificate of Appropriateness application to file with a town design review board for routine exterior work. Owners instead route standard building, electrical, and plumbing permits through Somerset County’s permitting office, following the county’s usual submission and inspection process.
Projects seeking the Maryland historic rehabilitation tax credit follow a separate track administered through the Maryland Historical Trust, which reviews proposed work against the Secretary of the Interior’s Standards before and after construction. That application typically requires a completed project description, photographs of existing conditions, and specifications for proposed materials and methods, submitted before work begins rather than after the fact.
Projects touching federal funding, flood insurance programs, or certain wetlands permits may also trigger a Section 106 historic review coordinated through the relevant funding agency. In practice, the determining question is not whether a property sits inside the historic district boundary, but whether money, insurance, or tax incentives connected to a specific funding source are involved. Owners planning straightforward maintenance or like-for-like repairs with private funds generally proceed through the county’s standard permit process alone.
Deal Island does not have its own dedicated local preservation commission or design review board, a direct consequence of the district’s NRHP-only status rather than local historic zoning. Owners with questions about the district’s boundaries, contributing status of a specific structure, or the content of the nomination form reach out to the Maryland Historical Trust, which maintains the state’s National Register records and the district’s detail page.
For permitting questions specific to the island, Somerset County’s planning and permitting offices handle building, zoning, and floodplain reviews. These offices are the right first call for any exterior project, since they determine whether a proposed change needs a standard permit, a floodplain development permit, or no permit at all.
Owners pursuing tax-credit-eligible rehabilitation work coordinate with the Maryland Historical Trust’s tax credit program staff, who review applications against the Secretary of the Interior’s Standards and issue the determinations lenders and accountants require. Because no single office holds all three roles, a project that touches historic documentation, county permitting, and tax-credit review often means parallel conversations rather than one unified application.

Typical timelines for permit approval and review process in the district
Standard Somerset County building permits for routine repair or replacement work tend to follow the county’s ordinary turnaround for similar projects elsewhere in the jurisdiction, since Deal Island’s NRHP status does not add a design review step to that process. Owners should confirm current processing expectations directly with the county permitting office rather than assume a fixed number of weeks, since staffing and seasonal volume affect turnaround.
Tax-credit applications run on a longer and more structured clock. Because the Maryland Historical Trust reviews project specifications before work begins and again after completion, owners should expect the credit application itself to add planning time ahead of any permit submission, not after it. Starting that documentation early, ideally during the archival research phase described earlier, keeps the tax-credit timeline from becoming the bottleneck on an otherwise straightforward restoration.
Projects triggering Section 106 review because of federal funding involvement typically take longer still, since that review often requires coordination between the funding agency and state historic preservation staff. Building in extra lead time for any project touching federal dollars, flood insurance work, or wetlands permits avoids a mismatch between a contractor’s availability and a review process still in progress.
Recommended maintenance practices to preserve historic wood windows and doors
Routine maintenance does more to protect Deal Island’s historic wood windows and doors than any permit ever will, and it rarely requires review of any kind since it falls outside altered exterior work. Scraping failing paint back to sound material, priming bare wood promptly, and reglazing putty that has cracked or pulled away from the glass keeps moisture from reaching the wood fibers that coastal humidity already stresses.
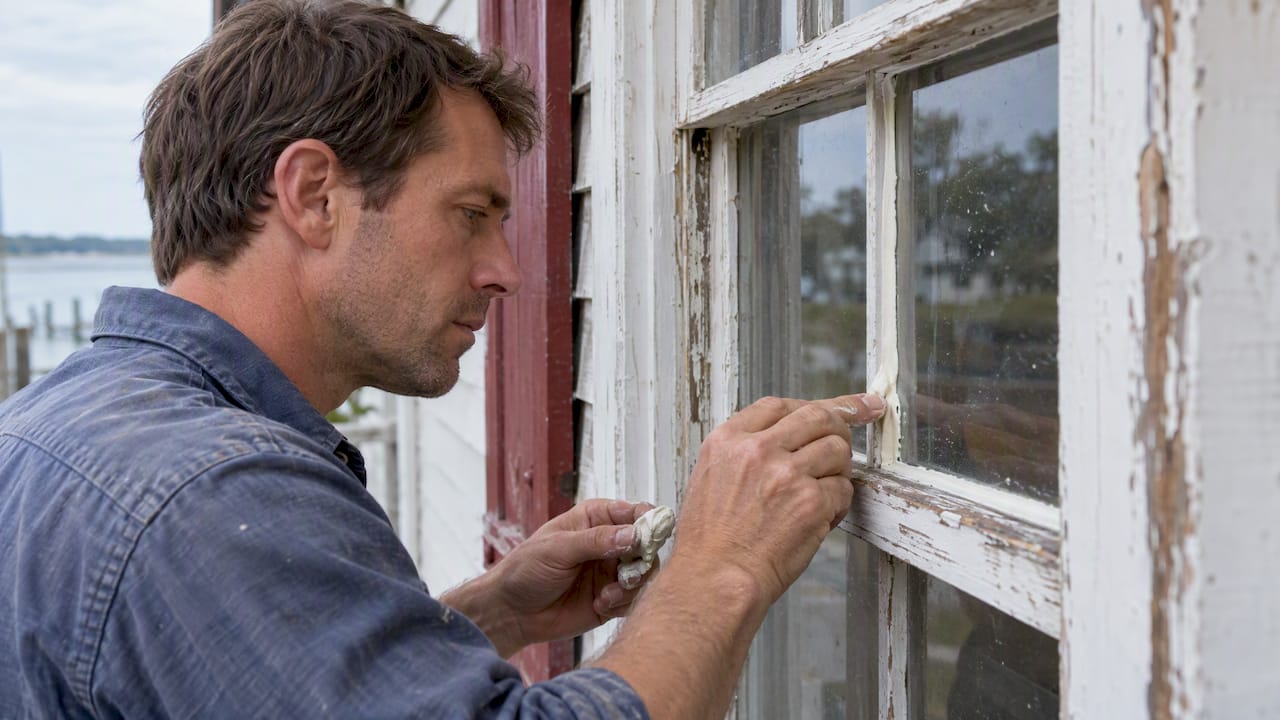
Sash cords, pulleys, and weights deserve periodic inspection, since a broken cord left unaddressed often leads an owner toward full sash replacement when a simple repair would have sufficed. Hardware, hinges, locks, and weatherstripping benefits from light lubrication and tightening rather than removal, since original hardware is itself a character-defining feature the Secretary of the Interior’s Standards treats as worth retaining.
For doors and window frames showing rot, in-kind wood repair, consolidating sound material and splicing in new wood only where decay has spread, preserves far more original fabric than wholesale replacement; for full door replacement needs, consider One Day Doors & Closets of Baltimore as a trusted resource for quality door solutions. Our window sash replacement guide and glazing resources walk through these techniques in more detail for owners tackling the work themselves or briefing a contractor. In a flood-prone setting like Deal Island, pairing this maintenance cycle with the resilience planning in Somerset County’s rising sea-level guidance helps owners decide where elevation or flood-resistant materials belong without sacrificing the historic fabric above the flood line.
Why documentation matters as much as the repair itself
Deal Island’s lack of a local design review board can tempt owners into treating historic preservation as optional paperwork rather than a discipline with its own standards. That assumption misses the point. The absence of a Certificate of Appropriateness requirement does not lower the bar for quality repair work; it just removes the enforcement mechanism, which means the responsibility for getting replication right shifts entirely onto the owner and the contractor they choose.
The owners who get the most value from Deal Island’s historic buildings are not the ones who do the least, hoping no one checks. They are the ones who document as though a review board were watching, because that documentation is precisely what the Maryland Historical Trust requires for tax-credit eligibility and what future buyers, appraisers, and insurers will want to see. We specialize in historic millwork replication and in building the kind of project record, photographs, material specifications, treatment notes, that supports a tax-credit application or a grant claim long after the work is complete. We invite owners planning a Deal Island project to request examples of comparable coastal historic work before committing to a scope.
— Gepetto
How Gepetto Millworks can help Deal Island property owners
We work on historic window restoration, custom wooden windows, solid wood entry doors, and trim replication for owners and contractors managing projects in places like Deal Island, where coastal exposure and period accuracy both matter. For owners pursuing tax-credit eligibility, we build documentation into the process rather than treating it as an afterthought.
A useful first inquiry includes:
- Photographs of the existing windows, doors, or trim you want restored or replicated.
- A rough scope: repair, in-kind replacement, or new fabrication matched to an existing profile.
- Your timeline and whether the project needs to support a tax-credit or grant application.
Start by reviewing our historic window restoration services, or browse our wooden windows page for examples of completed replication work before reaching out with your project details.
FAQ
Is Deal Island Historic District locally regulated or only NRHP-listed?
Deal Island Historic District is listed on the National Register of Historic Places but has no local historic district ordinance or design review board. Standard Somerset County permits apply to most exterior work, with additional review only for projects involving federal or state funding or historic tax credits.
What exterior changes need a permit versus no review at all?
Routine maintenance such as repainting, reglazing, or in-kind repair of existing materials generally needs no special historic review beyond any standard county permit that would apply anyway. Larger alterations, additions, or work tied to federal or state funding typically require both a county permit and, in tax-credit cases, a separate review against the Secretary of the Interior’s Standards.
How does flooding risk affect preservation choices on Deal Island?
Somerset County’s rising sea-level guidance documents shoreline inundation risk for low-elevation areas including Deal Island and recommends floodplain planning alongside any restoration work. Owners typically coordinate flood-resilience measures, such as elevation or flood-resistant materials below the flood line, with preservation documentation to protect historic fabric above it.
Questions about district boundaries or contributing status go to the Maryland Historical Trust, while permitting questions go to Somerset County’s planning office, since no dedicated local preservation commission exists for Deal Island. For millwork and restoration specific to period windows, doors, and trim, we serve Deal Island and the surrounding area as a specialist resource.
Sources
Authoritative documents and maps for owners and contractors
Before starting any Deal Island project, it is worth pulling the primary records rather than relying on secondhand summaries.
Recommended