
Crown molding restoration begins with a diagnosis, not a tool. Before anyone caulks a gap or reaches for a nail gun, the cornice must be identified as wood or ornamental plaster, its failure traced to a cause (structural movement, water, or a fastening that has simply given way), and its profile recorded so that anything lost can be reproduced exactly. In a historic building, that sequence separates a sound, reviewable restoration from a cosmetic patch that fails again within two winters.
TL;DR
- Identify the material first: wood and ornamental plaster fail differently and are repaired by different trades.
- Find the cause before the cure. The National Park Service names structural movement and water intrusion among the most damaging causes of plaster deterioration, and the same logic applies to wood.
- Repair what is sound, replicate what is lost, and trace the existing profile so new sections match it exactly.
- Ornamental plaster repair is a craft the National Park Service says owners should not attempt themselves.
- On projects that must satisfy a preservation review, document the existing cornice and its replacement profile before any work begins.
Table of Contents
- Why the cornice deserves a careful hand
- Identify the material before anything else
- How to assess the damage
- Repair or replace: the deciding line
- Fixing molding that has pulled from the wall or ceiling
- Recreating missing sections while keeping the original profile
- Preparation and finishing in a historic room
- Documenting the work for a preservation review
- Working with us on cornice and trim
- FAQ
- Sources
Why the cornice deserves a careful hand
The cornice is where wall meets ceiling, and in the Federal, Greek Revival, Italianate and Queen Anne houses common across Virginia, the Carolinas and Maryland it is often the most deliberate piece of ornament in a room. Egg-and-dart, dentil and cavetto profiles were not decoration added late; they were proportioned to the room’s height and the order of the architecture. Remove or flatten them, and the room loses its scale.
That is why restoration, as distinct from the stock-molding repair advice that dominates search results, treats the existing cornice as evidence. The profile, the way the sections are joined, the layers of paint and the nail pattern all record how the room was built. A restorer reads that record before disturbing it.
Identify the material before anything else
Crown molding in an older building is one of three things, and sometimes a combination.
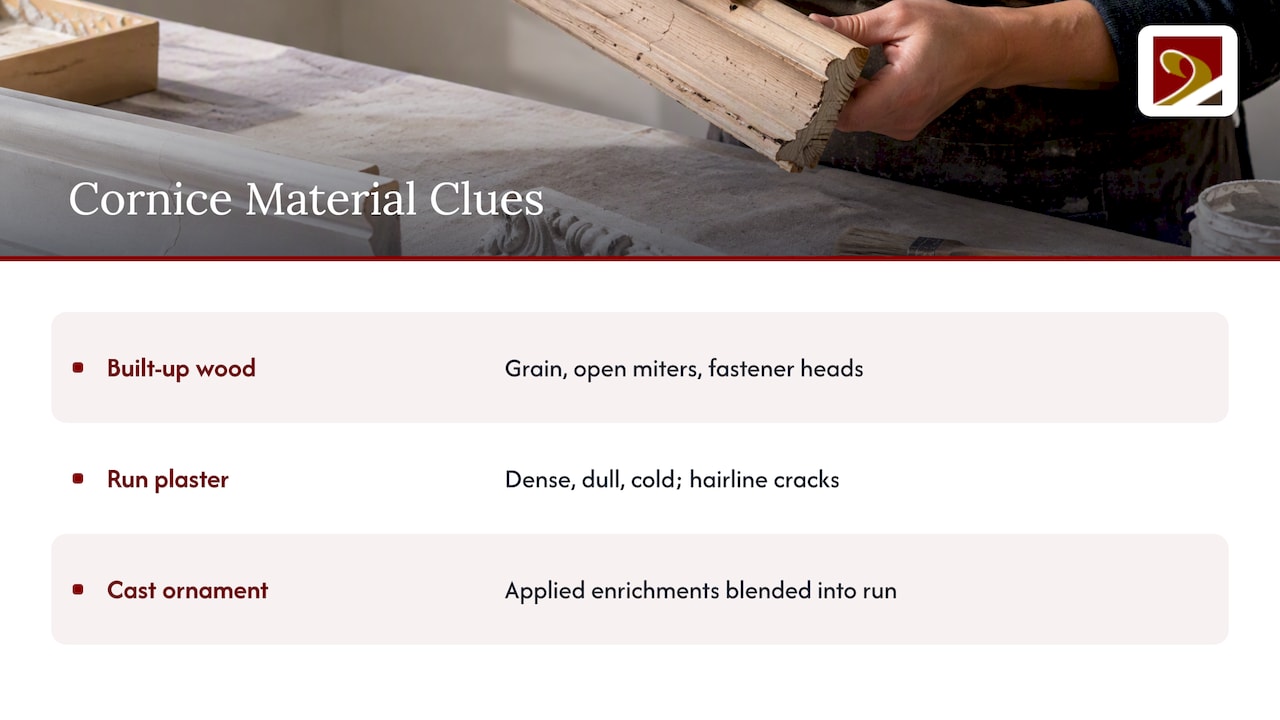
Solid or built-up wood. Common in houses where the cornice was assembled on site from several stock members, a crown, a bed molding, a fascia board and sometimes a frieze, each nailed to blocking in the wall and ceiling framing.
Run plaster. In many nineteenth and early twentieth century interiors the cornice was formed in place or on a bench with a profiled sheet-metal template drawn through wet gypsum or lime plaster. The National Park Service describes this running of moldings with sheet-metal templates in Preservation Brief 23 on ornamental plaster.
Cast ornament. Enrichments such as modillions, rosettes and leaf bands are frequently cast and applied, then blended into a run cornice.
A tap and a close look usually tell them apart: plaster sounds dense and dull, shows hairline cracking along its field, and will feel cold and heavy. Wood shows grain under thin paint, open joints at miters and fastener heads. Where the answer is unclear, a preservation professional can confirm it with a small, discreet probe. The distinction matters because a wood cornice is repaired by a millwork shop, while ornamental plaster belongs to a plasterer who runs and casts.
How to assess the damage
A sound assessment asks three questions in order: what is failing, why, and how far has it spread.
Look for cause, not just symptom
The National Park Service states that structural movement and water intrusion are among the most deleterious causes of ornamental plaster deterioration, according to Preservation Brief 23. Its companion guidance on flat plaster adds that structural movement often produces stress cracks and may require structural repairs before the plaster finish is addressed, as set out in Preservation Brief 21. The lesson is plain: a crack that reappears after patching is telling you the building is still moving, or still wet.
For a wood cornice, the same discipline applies. Check the roofline, gutters, flashing and any plumbing above the room. A stained, soft or darkened section of molding almost always sits beneath a leak that must be found and stopped, or the replacement will rot in turn.
Inventory the cornice, run by run
The National Park Service advises that a qualified professional should inventory which details can be repaired in place and which must be removed for repair or remanufacture. Treat that as a template for any cornice survey:
- Photograph each wall in full, then every damaged section in raking light.
- Mark and number each run on a plan of the room.
- Note the condition of each run: sound, loose, cracked, missing, painted over, or previously patched with an incompatible material.
- Record moisture evidence: staining, efflorescence, blistered paint, spongy or discolored wood.
- Probe suspect wood gently with an awl. Wood that crumbles or gives easily has lost its internal structure.
- Record the profile of every distinct molding, even those that appear intact, before work begins.
The last step is the one most often skipped, and it is the one a preservation reviewer will ask about.
What the findings mean
Loose sections with sound wood point to a fastening problem. Open miters across a whole room point to seasonal movement or settlement. Cracking that follows the line of a wall points to structure. Staining and softness point to water. Each finding leads to a different repair, which is why we group them before proposing a scope. Our own guide to wood cornice restoration, from assessment through repair and replication walks through the same triage for wood.
Repair or replace: the deciding line
The general principle in preservation practice is to repair rather than replace wherever the material is sound, and to replicate exactly where it is not. For plaster, the National Park Service technical note ITS 19 on deteriorated plaster finishes states that leaving historic plaster in a deteriorated, ruined condition is not a recommended rehabilitation treatment under the Secretary of the Interior’s Standards. Deterioration is not character-defining; it must be addressed so the space keeps its historically finished appearance.
In practice, the decision falls along these lines:
| Condition | Typical course |
|---|---|
| Sound wood, loose fastening or open joints | Repair in place: re-secure to framing, close joints, fill and refinish |
| Localized rot or insect damage in otherwise sound wood | Cut out and splice in a new section of matching species and profile |
| Missing runs or lost enrichments | Replicate from a traced profile, using the original as the pattern |
| Wood that is rotted through, structurally unsound or severely warped | Replace the affected members with exact replicas |
| Plaster with isolated cracks or small losses | Specialist plaster repair, often keeping the cornice in place |
| Plaster that has delaminated, collapsed or lost its attachment | Remove for repair or remanufacture by a qualified plasterer |
The boundary is a judgment call, and it is made on site by someone who has seen both outcomes. Replacement is not a failure of preservation when the alternative is retaining a member that can no longer do its job. What matters is that the replacement reproduces the original in species, dimension and profile, so the room reads as it did.
Fixing molding that has pulled from the wall or ceiling
Separation is the most frequent complaint in homeowner forums, and in wood it is usually a fastening or movement problem rather than a material one. Older cornices were nailed into blocking or plates; decades of humidity cycling loosen those nails, and later paint layers conceal the gap until it opens.
A careful repair proceeds in this order:
- Find the cause. If the movement is recent and progressive, resolve any settlement or leak first, following the principle that structural repairs come before the finish.
- Locate the solid framing behind the molding, such as the wall plate or ceiling joists, rather than relying on drywall or plaster alone.
- If the section is sound, re-secure it into that framing, and use adhesive on the back only where it will not trap or harm historic material.
- Close hairline joints with a flexible, paintable filler that can follow minor seasonal movement, saving rigid fillers for stable areas.
- Re-prime and repaint the repaired run, feathering the new paint into the surrounding finish.
For run plaster, the situation differs. The National Park Service notes in Preservation Brief 23 that ornamental plaster units are often attached with plaster itself as the adhesive, and that deterioration beyond simple patching usually calls for professional removal and matching. It goes further, describing the repair of ornamental plaster as a craft requiring years of training that property owners should not undertake. A loose plaster cornice is also a falling hazard, which is one more reason to bring in a specialist rather than experiment.
Recreating missing sections while keeping the original profile
When a run is lost to rot, a past renovation or a fire, the aim is a replacement indistinguishable from what remains. The method is old and reliable.
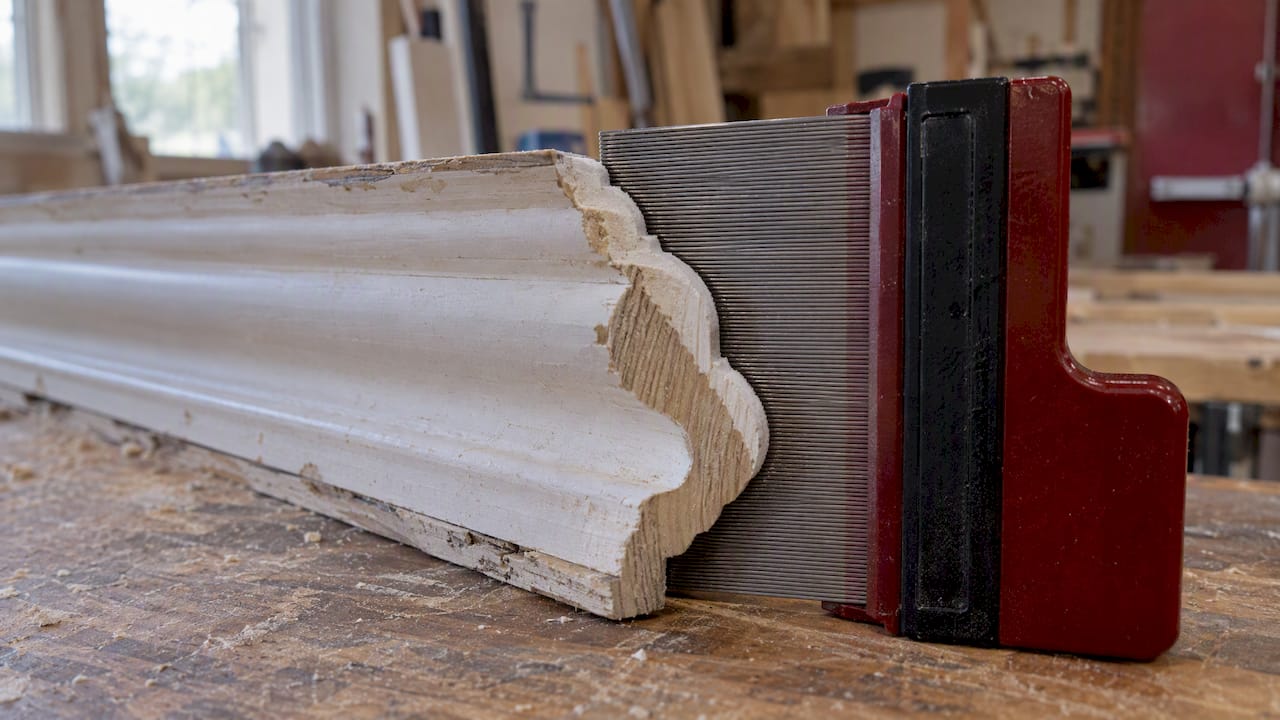
Capture the profile. For plaster, the National Park Service describes tracing the cross-section onto a sheet-metal template, then using that template at a bench to run new lengths matching the historic profile. The same record serves wood: a contour gauge, a tracing of a clean end-grain section, or a cast of the profile gives a millwork shop what it needs to grind knives.
Find the best surviving section. Paint buildup softens profiles. The most accurate section is often in a closet, above a later soffit or behind a cabinet, where it escaped repainting. Stripping a small test area reveals the true edges.
Match species and grain direction. Old-growth heart pine, poplar and mahogany behave differently from modern plantation stock. A replica cut from properly seasoned lumber of a compatible species moves and takes paint more like the original.
Build it as it was built. If the original was a built-up assembly of three members, the replica should be, too. A single piece cut to the overall silhouette will look flat and shadow differently.
The National Park Service observes that partial restoration is often a more accurate term than repair for ornamental plaster, because damaged pieces have to be matched exactly. The same is true of wood. Where the work is matching, not patching, the quality of the template decides the quality of the result.
Preparation and finishing in a historic room
A good finish hides the repair without hiding the molding. A few practices serve most rooms:
- Test before stripping. Painted surfaces in buildings from before 1978 may contain lead, so confirm with testing and follow lead-safe practices before sanding or scraping. An abatement or lead-safe contractor should handle disturbed surfaces in occupied homes.
- Clean out old caulk and failed fillers so new material bonds to sound substrate.
- Prime bare wood and new patches with a primer suited to the existing coating system.
- Choose finish by condition. A cornice with many small flaws usually looks best in a durable paint whose sheen does not magnify surface defects, instead of a high gloss that exaggerates them.
- Paint replacement sections before installation when ceiling access will be awkward, then touch up the joints afterward.
- Caulk the perimeter where the cornice meets plaster walls and ceilings with a paintable, flexible product to absorb minor movement.
On plaster cornices, the finishing step belongs to the plasterer and the painter together, since the paint system must be compatible with the lime or gypsum below it. As the National Park Service stresses, replacement plaster pieces should exactly match the existing historic plaster.
Documenting the work for a preservation review
Where a project seeks historic tax credit review or must satisfy a local historic commission, the cornice is part of the evidence of a faithful rehabilitation. Reviewers want to see that features were retained where possible, and that replacements match the old in material, design and finish. Useful submissions include the pre-work photographs, the numbered plan, a profile drawing of each molding, and a short note explaining why each replaced run could not be saved. Architects and contractors who gather this before demolition rarely face redesign later. Requirements differ between state offices and local boards, so confirm current expectations with the relevant review body before the scope is finalized.
The view from the shop
We approach a cornice the way we approach a window sash or a stair rail: as a piece of period joinery that carries information. The first visit is for reading, not quoting. Where a profile has been buried under a century of paint, we look for the clean section that survived, and we build the replica from that evidence.
Our work is exact historic replication in authentic materials and with period techniques, and we are glad to take on the architecturally significant and awkward requests that other shops decline. That is why architects bring us in early, before the scope hardens, so that the cornice, the casing and the baseboard are specified together and read as one design.
A restored cornice should look as though no one had ever touched it. When it does, the room has been returned to its original proportions, and the project team has a defensible record of how that was done.
Gepetto
Working with us on cornice and trim
Gepetto Millworks designs, fabricates and restores wood windows, doors, trim, casework, staircases and architectural millwork for historic buildings, including the replication of period features and matching for historic tax credit eligibility. For a cornice, that means profile capture, replica fabrication in a species suited to the building, and coordination with the architect or contractor on the wider trim package.

If you are scoping a restoration in Virginia, the Carolinas, Maryland or the District of Columbia, send us your photographs and drawings through our custom fabrication page, or see the full range of work on the Gepetto Millworks home page. Where window and door work runs alongside the trim, our historic window restoration service is handled by the same shop.
FAQ
Can I repair a plaster crown molding myself?
For minor cosmetic cracks in sound plaster, a careful owner may handle paint touch-ups. Anything beyond that is a different matter. The National Park Service describes ornamental plaster repair as a craft requiring years of training that owners should not attempt, and loose sections can fall. Call a qualified plasterer or preservation professional.
How do I know if my crown molding is wood or plaster?
Tapping tells you a good deal: plaster sounds dull and dense, wood sounds lighter and hollow-edged. Wood shows grain beneath thin paint and visible nail heads at its joints, while plaster tends to show fine cracks and rounded, continuous profiles. A small test opening, made by a professional, confirms it without guesswork.
Is separated crown molding a sign of a structural problem?
It can be, but often it is a loosened fastening or seasonal movement. Cracks that recur after patching, widen over time or follow a wall line suggest ongoing movement, which the National Park Service says may need structural attention before the finish is repaired. Have an engineer or preservation specialist look at progressive cases.
When should historic crown molding be replaced rather than repaired?
Replace it when the wood is rotted through, structurally unsound or badly warped, and repair when the material is sound. Replacement should be an exact replica in species, dimension and profile. Under the Secretary of the Interior’s Standards, leaving deteriorated plaster in ruined condition is not a recommended treatment, so a lost or failing run needs to be repaired or replicated.
Can a new cornice match an old profile exactly?
Yes, when the original is recorded carefully. A traced or gauged cross-section from the best-preserved area gives a shop the pattern for knives or a plaster template, and building the replica the same way the original was built keeps shadow lines true.
Sources
- Preservation Briefs 23: Preserving Historic Ornamental Plaster, National Park Service
- Preservation Briefs 21: Repairing Historic Flat Plaster, National Park Service
- ITS Number 19: Deteriorated Plaster Finishes, National Park Service