
Window sash replacement is the process of removing and installing the movable framed panel that holds the glass in a window, leaving the surrounding frame, sill, and jambs intact. For homeowners in West Virginia’s historic districts, from Harpers Ferry to Charleston, this approach preserves the original architectural character of double-hung and casement windows while restoring function and energy performance. Sash replacement costs typically range from $150 to $500 per window, compared to $400 to $1,200 for a full window replacement. That cost difference makes sash replacement the first option worth evaluating before committing to full frame removal.
Is window sash replacement right for your historic windows?
Sash replacement is appropriate only when the surrounding frame structure remains sound. Sash replacement is recommended when the existing frame, sill, and jambs are free of rot, water damage, and warping. Press a screwdriver blade firmly into the sill and jamb corners. If the wood resists without giving, the frame is structurally viable for a sash-only approach.
Several conditions signal that the sash itself, not the frame, is the problem:
- Fogging or cloudiness between panes: A failed insulated glass seal causes this, and replacing the sash restores clarity and thermal performance without touching the frame.
- Surface rot confined to the sash rail or stile: When decay has not migrated into the frame, wood sash repair or full sash replacement stops the damage at its source.
- Cracked or broken glazing: Individual pane failure in a historic single-glazed sash is a straightforward case for sash replacement.
- Operational failure: A sash that no longer slides, locks, or seals properly often has worn hardware or swollen wood, both correctable through sash replacement.
Replacing only the sash preserves original architectural character in ways that full frame removal cannot. Historic moldings, brick molds, and interior casing profiles are rarely replicable with standard modern units. Destroying them to install a replacement window unit is an irreversible loss.
Pro Tip: Before ordering a replacement sash, probe all four corners of the frame with a pick tool. Soft or spongy wood anywhere in the frame means rot has spread beyond the sash, and full frame replacement becomes necessary.
What tools and materials do you need before starting?
Preparation determines whether the project takes two hours or two days. Gathering the correct tools and materials before touching the window prevents mid-project delays and protects fragile historic woodwork.
Required hand tools
- Flathead and Phillips screwdrivers
- Utility knife with fresh blades
- Stiff putty knife and a flexible glazing knife
- Pry bar (a thin, low-profile bar protects historic trim)
- Measuring tape and a folding rule for redundancy
- Hammer and a nail set
- Cordless drill with bits
Materials checklist
- Replacement sash (custom or standard, matched to existing dimensions)
- Foam or pile weatherstripping sized to the channel width
- Glazing compound (for single-pane historic sashes)
- Sash cord or spiral balance hardware, depending on window type
- Wood primer and paint matched to existing finish
- Painter’s tape and drop cloths
Precise sash measurement is the most critical preparation step. Measure width at three points across the sash opening and record the narrowest dimension. Measure height on both sides and use the shorter figure. Note the glass thickness, particularly in historic windows that may carry original cylinder or crown glass. Standard sash kits rarely fit legacy windows with non-standard profiles or glass rebate depths.
Sourcing custom sashes from specialized millworks is often the only reliable path for historic window dimensions. Gepettomillworks fabricates custom wood sashes matched to original profiles, including those with narrow muntins, ovolo moldings, and period-correct glass rebates common in West Virginia’s 19th-century residential stock.
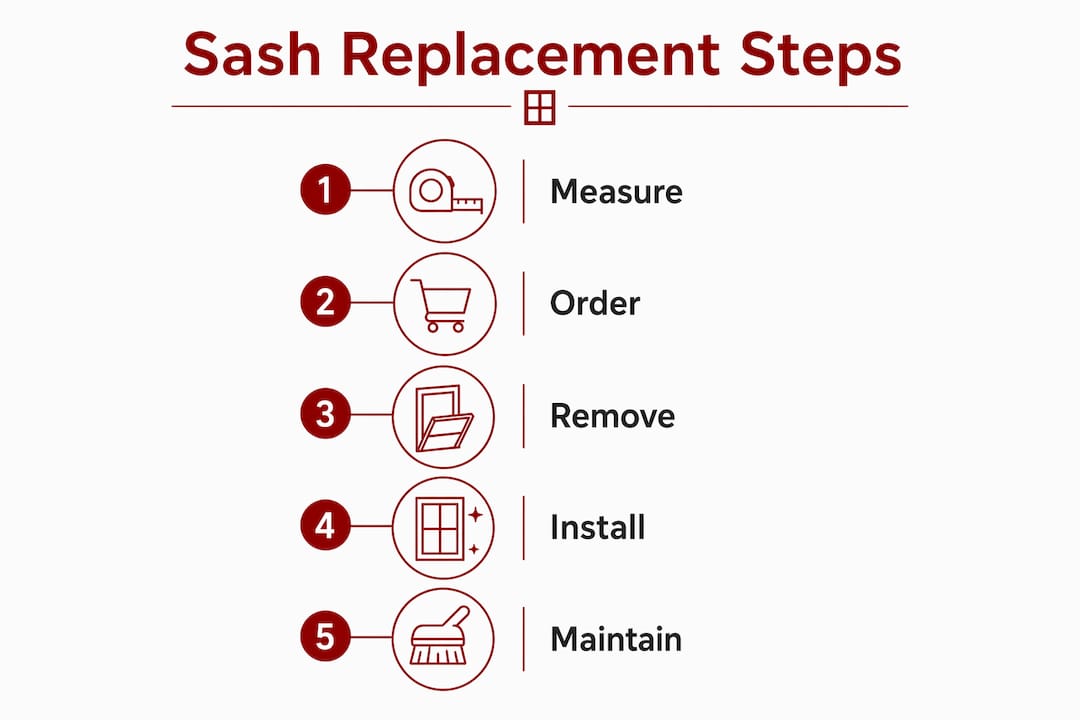
Pro Tip: Order your replacement sash before removing the old one. Historic windows often sit in openings with non-standard dimensions, and lead times for custom millwork can run several weeks.
How do you remove and install sashes in historic double-hung windows?
Historic double-hung windows operate on a rope-and-pulley system, with cast iron or lead weights concealed in the wall cavity on each side of the frame. The process differs meaningfully from modern tilt-in windows, which take approximately 20–40 minutes per window. Historic windows with rope-and-pulley systems require 2–4 hours and moderate carpentry skill.
Step-by-step sash removal and installation
- Score the paint film. Run a utility knife along all four edges of the interior sash stop. Paint bridges the joint and will tear the wood if you skip this step.
- Remove the interior sash stop. Pry gently from the center outward, working in short increments. Historic stops are often thin and brittle.
- Tilt and lift out the lower sash. Once the stop is clear, the lower sash swings inward. Support its weight with both hands.
- Disconnect the sash cords. Knot the cord before releasing it from the sash groove. This prevents the weight from dropping into the wall cavity.
- Secure the sash weights. Hold the sash weight firmly before disconnecting the cord. Dropping a weight into the cavity requires opening the wall to retrieve it, a costly repair.
- Remove the parting bead. This thin strip separates the upper and lower sash channels. Pull it straight out with pliers after scoring the paint.
- Remove the upper sash using the same cord-knotting procedure.
- Install the new upper sash first. Thread new sash cord over the pulley, attach to the weight, and secure in the sash groove. Test the weight travel before closing the parting bead.
- Reinstall the parting bead and set the new lower sash in its channel.
- Reattach the interior sash stop. Set it snug but not tight. The sash must slide without binding.
- Realign the lock keeper. The strike plate on the meeting rail must align precisely with the sash lock. Adjust its position before final fastening.
- Test operation at least five times before sealing or painting. Improper hardware alignment is the most common failure point, causing binding and latching problems that are far easier to correct before the paint dries.
New sashes feel noticeably tight during the first weeks of operation. This is the result of new weatherstripping compressing against the channel, not a sign of incorrect installation. Normal operation smoothness typically develops over a few months as the weatherstripping seats itself. Do not force the sash or plane the edges prematurely.
Pro Tip: Photograph the rope routing and weight attachment before disconnecting anything. Historic pulley configurations vary, and a clear reference image prevents reassembly errors.
How do you maintain historic window sashes after replacement?
A well-installed wood sash in a historic window can last decades with consistent, modest maintenance. The goal is to catch small problems before they become structural ones.
- Inspect glazing annually. Cracked or missing glazing compound allows water to migrate behind the glass and into the sash rail. Repoint with linseed oil putty or a period-appropriate glazing compound each spring.
- Check weatherstripping each fall. Pile or foam weatherstripping compresses over time. Replace it when visible gaps appear or when drafts return.
- Repaint on a five-year cycle. Paint is the primary moisture barrier for wood sashes. Sand lightly, prime bare wood, and apply two finish coats. Never paint the sash channel itself, as this causes binding.
- Test hardware seasonally. Sash locks, lifts, and pulleys should operate without force. Lubricate pulleys with a dry graphite lubricant rather than oil, which attracts dust.
- Address rot immediately. Small areas of surface decay respond well to wood sash repair using epoxy consolidant and filler, preserving the original wood profile without full sash replacement.
Preserving the architectural millwork of historic windows, including their molding profiles, glass rebates, and muntin geometry, requires using materials that match the original. Modern vinyl or aluminum weatherstripping often conflicts with the tolerances of historic wood channels. Pile weatherstripping, the type used in original double-hung windows, remains the most compatible choice for wooden sash repair and ongoing maintenance.
Pro Tip: Apply a thin coat of paste wax to the sash channel faces each year. Wax reduces friction without swelling the wood the way oil-based lubricants can, and it does not interfere with paint adhesion on adjacent surfaces.
Key Takeaways
Sash replacement is the most cost-effective and preservation-conscious approach to restoring historic windows when the surrounding frame remains structurally sound.
| Point | Details |
|---|---|
| Assess the frame first | Probe sills and jambs for rot before ordering any replacement sash. |
| Measure three times | Record width and height at multiple points; use the smallest dimension to order. |
| Secure weights during removal | Hold sash weights before disconnecting cords to prevent costly wall cavity damage. |
| Expect initial tightness | New weatherstripping requires weeks to seat; do not plane edges prematurely. |
| Match historic profiles | Source custom sashes when standard kits do not fit legacy window dimensions. |
What I have learned from years of historic sash work
West Virginia homeowners often underestimate how much the frame condition determines the outcome of a sash replacement project. I have seen beautifully fabricated custom sashes installed into frames with concealed rot at the sill corners, and within two seasons the new sash is absorbing moisture from the decayed wood beneath it. The frame inspection is not a formality. It is the decision point.
The other pattern I observe consistently is the impulse to replace the entire window when a sash replacement would have been sufficient. Full frame removal in a historic home destroys the brick mold, the interior casing, and often the plaster reveal. The cost savings of sash replacement, typically 30–60% less than full replacement, are real, but the preservation argument is equally compelling. Original window frames in West Virginia’s antebellum and Victorian residential stock carry proportions and material qualities that no modern unit replicates.
Patience during the settling period matters more than most homeowners expect. The first month after installation, a new sash with fresh weatherstripping will feel stiff. Homeowners who force the operation or plane the edges too early create gaps that undermine the energy efficiency gains they installed the sash to achieve. Wait. The wood and weatherstripping will find their equilibrium.
Investing in quality custom millwork for legacy windows is not an indulgence. It is the only way to ensure the replacement sash performs and looks as the original did, and that the window continues to serve as the visual and symbolic link between the building’s past and its present use.
— Gepetto
Gepettomillworks and your historic window project
Historic window restoration in West Virginia requires sashes built to the original dimensions and profiles of the building, not adapted from a standard catalog.

Gepettomillworks fabricates custom wood sashes matched to the exact width, height, glass rebate depth, and molding profile of your existing windows. Whether your home carries Federal, Greek Revival, or Craftsman windows, the millwork is produced to period-correct specifications. For projects requiring full architectural documentation, Gepettomillworks also offers architectural millwork drawings to support restoration planning. Contact Gepettomillworks directly to discuss your window dimensions and receive guidance on the right sash specification for your project.
FAQ
What is a window sash?
A window sash is the movable framed panel that holds the glass panes within a window opening. It slides, pivots, or swings independently of the fixed surrounding frame.
When should I replace only the sash instead of the whole window?
Replace only the sash when the frame, sill, and jambs are structurally sound and free of rot. Sash replacement costs $150–$500 per window versus $400–$1,200 for full replacement.
Can I do lower window sash replacement myself?
Lower sash window replacement on modern tilt-in windows takes 20–40 minutes with basic tools. Historic double-hung windows with rope-and-pulley systems require 2–4 hours and moderate carpentry skill.
How do I find replacement sashes for a historic window?
Standard sash kits rarely fit legacy window dimensions. Sourcing custom sashes from a specialized millwork supplier is the most reliable approach for matching historic profiles and glass rebate depths.
Why does my new sash feel stiff after installation?
New weatherstripping creates a tight fit that requires several weeks to seat properly. This initial resistance is normal and does not indicate a defect or installation error.