by Matthew Wiley | Nov 10, 2026 | Architectural Millwork
Historic restoration in Lynchburg runs on three things done in the right order: a documented assessment of the building, design review by the city’s Historic Preservation Commission, and fabrication that matches the original fabric in design, material and configuration. Get the sequence right and a project moves through review with fewer revisions and keeps its eligibility for historic tax credits. This guide is written for architects, general contractors, builders and owners of historic property who need to commission that work, and it explains where custom millwork fits.
Gepettomillworks
Preserve Historic Character with Custom Millwork
Gepettomillworks creates custom millwork for historic building projects, supporting architects, owners, builders and restoration professionals.
Visit Gepettomillworks
TL;DR
- Begin with a Historic Structures Assessment or Historic Structure Report, prepared before design decisions are fixed, so repair and replacement follow documented condition.
- Exterior work in Lynchburg’s local historic districts generally needs a Certificate of Appropriateness; routine repairs in like materials and like designs may be approved by the HPC Secretary.
- Preservation standards favor repair over replacement; where a feature is beyond repair, the new element must match the original in design, material, texture and configuration.
- Virginia’s state credit is 25% of eligible rehabilitation expenses and the federal credit is 20% for income-producing buildings, but both depend on work that meets the Secretary of the Interior’s Standards.
- Windows, doors, trim, stairs and casework are where authenticity is most visible, and where custom fabrication matters most.
Table of Contents
What makes Lynchburg a distinct restoration setting
Lynchburg’s downtown and neighborhoods hold a dense record of American building: Federal and Greek Revival houses, Victorian commercial blocks, Art Deco towers such as the Allied Arts Building, and the mill and warehouse stock along the James River. The city treats this fabric as part of its planning. According to its Historic Preservation Overview, the community works to protect downtown historic buildings as part of the City of Lynchburg Comprehensive Plan, and rehabilitation creates more local jobs than new construction.
That last point has a practical consequence for owners and builders. The same city page notes that rehabilitation is labor-intensive, often dedicating 60 to 70 percent of costs to labor, which keeps investment dollars in the local economy rather than with outside material suppliers. For a project team, that means the budget is shaped less by purchased product and more by skilled hours: surveying, carpentry, joinery, finishing. It also means the choice of fabricator deserves the same scrutiny as the choice of architect.
The city’s Residential Design Review Guidelines explain the purpose of local designation: it protects property investments from inappropriate construction, remodeling or demolition, and reuse of historic buildings makes use of existing public infrastructure. Owners are therefore not merely complying with a rule; they are protecting the value of the street their building stands on.
Step one: assess before you design
The most expensive mistakes in historic work are made before a single sash is removed. A building that is drawn, specified and priced without a proper condition record invites change orders, and often invites the wrong remedy, such as replacing what could have been repaired.
Guidance from preservation agencies is consistent on this. A Historic Structures Assessment, prepared by an architect, documents the resource’s physical condition, character, significance and intended use, and the resulting plan prioritizes the building’s needs before programmatic needs. The National Park Service goes further in Preservation Brief 43: projects often begin with a Historic Structure Report that documents existing conditions, determines significance and identifies the causes of deterioration.
The last phrase matters. A rotted sill is a symptom; failed flashing, a clogged gutter or rising moisture is the cause. If the cause is not corrected, a new sill, however well made, will follow the old one.
As the National Trust for Historic Preservation advises on planning a restoration, an architect can assess existing conditions, develop concepts from the owner’s program and weigh each design’s effect on the historic character of the house. For millwork, the assessment should inventory every window, door, stair, run of trim and built-in, and record for each:
- the original profile, species and construction method, where it can be determined;
- the degree of deterioration and its cause;
- whether the element is original, a documented later alteration, or a modern substitute;
- the recommended treatment: retain, repair, or replace in kind.
That inventory becomes the shared language between architect, contractor, fabricator and reviewer.
Design review in Lynchburg’s historic districts
The city’s Historic Districts Ordinance requires the Historic Preservation Commission to issue a Certificate of Appropriateness before a building in a historic district is erected, reconstructed, restored, demolished or altered in any way that affects its external appearance. Certain changes to grounds and signs are also covered. Decisions rest on the Lynchburg Historic Districts Design Review Guidelines.
The same city page describes a lighter path for minor actions that do not permanently affect the character of the property or district. Examples it gives include repainting, adding or changing storm windows or doors, and repairs using like materials and like designs; these still require approval from the HPC Secretary. A well-documented repair scope therefore has a practical advantage: the more clearly a drawing shows that existing profiles, species and dimensions are retained, the easier it is for staff to see that the work belongs in this category.
The design guidelines themselves emphasize preservation over replacement. Deteriorated features should be repaired, and where replacement cannot be avoided the new element should match the original in design, material, texture and configuration. Lynchburg’s guidelines also stress that repair is a multi-stage, site-specific process requiring diagnostic investigation, and that rushing to replace can accelerate the loss of original fabric.
Practical advice for submissions:
- Confirm early whether the property lies in a local district, a National Register district, or both. They are different regimes with different consequences.
- Submit measured drawings and photographs of existing elements alongside proposed work.
- Show profile sections of any millwork to be replicated, so reviewers can compare new against old.
- Specify materials by species and grade, not by generic description.
- Contact HPC staff before filing; a short conversation can tell you which scope qualifies for administrative approval.
Current forms, meeting schedules and fees are published by the city, so rely on its COA page rather than any secondhand summary.
Reconciling accessibility, code and character
Historic entrances, narrow stairs and raised thresholds often collide with accessibility and life-safety requirements. Federal accessibility and rehabilitation standards recognize this tension and allow alternative solutions in historic buildings, so a conflict rarely means a choice between compliance and preservation. Typical resolutions include a rear or side accessible entrance, a ramp designed as a sympathetic secondary element, or a discreet threshold modification that leaves the original door and frame intact. The surfaces of approach routes matter as well, and guidance on wheelchair-friendly path surfaces is useful when planning the exterior approach to a historic entrance.
Millwork has a role here too. A new accessible door can be built to the proportions, panel layout and hardware of its historic neighbors, so that the addition reads as part of the original composition.
Traditional materials and methods in historic restoration
Restoration services for historic buildings generally fall into a few categories: structural and envelope work (masonry repointing, roofing, flashing), mechanical upgrades concealed within the fabric, and the finish carpentry that gives a building its character. This last category is where millwork specialists work.
The common thread is fidelity. A well-documented example is Thomas Jefferson’s retreat near Lynchburg. In the restoration of Poplar Forest, craftsmen made hand-molded classical trim using antique tools and Jefferson-era poplar lumber, then applied traditional finishes, with specialists in historic architecture guiding the work. Few projects have a museum’s resources, but the principle scales: match the species where possible, reproduce the profile exactly, and finish in a manner consistent with the period.
In practice, that principle takes concrete forms:
- Windows. Old-growth sash are often repairable: dutchman repairs to rotted rails, reglazing with glazing putty, replacement of sash cords or installation of weatherstripping. Where a sash is beyond saving, a new sash replicates the muntin profile, the glass lite division and the meeting rail.
- Doors. Paneled doors are reproduced with the stile and rail dimensions, panel raise and molding profile of the original, joined with mortise and tenon rather than modern shortcuts.
- Trim and casings. Back bands, crown, chair rail and baseboard are run from custom-ground knives cut to a profile traced from surviving fragments.
- Stairs and balustrades. Newel posts, balusters, handrails and stringers are reconstructed to match period proportions, then fitted to existing framing.
- Casework and built-ins. Libraries, cupboards and wainscot are drawn from the building’s own details so that new work does not read as an intrusion.
Each of these maps to the in-kind standard the city applies, which is why architects specifying millwork for a Lynchburg project benefit from a fabricator who works from profile drawings and period references rather than from catalog stock.
Money: tax credits and what they require of the work
For eligible projects, the financial case is substantial, and it is tied directly to the quality of the millwork. According to the Virginia Department of Historic Resources, rehabilitation work must comply with the Secretary of the Interior’s Standards for Rehabilitation to qualify. The federal credit is 20% of eligible rehabilitation expenses and the state credit is 25%. The federal credit cannot be claimed all at once; it is taken over at least five years in increments of 20% of the total credit.
The department’s program page also sets thresholds. For owner-occupied residential buildings, eligible expenses must be at least 25% of the building’s assessed value for local real estate tax purposes in the year before work began. Because rules, caps and application procedures change, confirm current terms with the department and with a tax professional before committing to a budget.
What this means for millwork is straightforward. Reviewers of tax credit applications look closely at windows, doors and other character-defining features. Replacing original sash with modern units, or substituting stock doors for original ones, is a common reason that work fails to meet the Standards. Replication that matches the original in material, profile and configuration protects both the Certificate of Appropriateness and the credit.
Our perspective
In our shop, historic work begins with the building, not with a catalog. When an architect or owner brings us a Lynchburg project, we want the profile drawings, the photographs of what survives and, where it exists, the assessment, because exact replication is only as good as the record it is drawn from.
We build windows, doors, trim, stairs, balustrades, casework and built-ins using authentic materials and traditional techniques, and we take on complicated, architecturally significant requests that others may decline. We do this because the details are what a reviewing commission, and a tax credit reviewer, actually read: the muntin profile, the panel raise, the species of the lumber.
Our view is that the best restoration is a collaboration. A general contractor who brings us in during design rather than after bid can avoid redrawing, an architect can see a mock-up of a profile before it is run in volume, and an owner can see where repair preserves original material and where an in-kind replacement is the honest answer. Careful millwork is what lets a restored building look as though nothing was done to it.
Gepetto
Working with a millwork fabricator on a Lynchburg project
The fabricator’s involvement is most valuable early. Several points of coordination repay the effort.
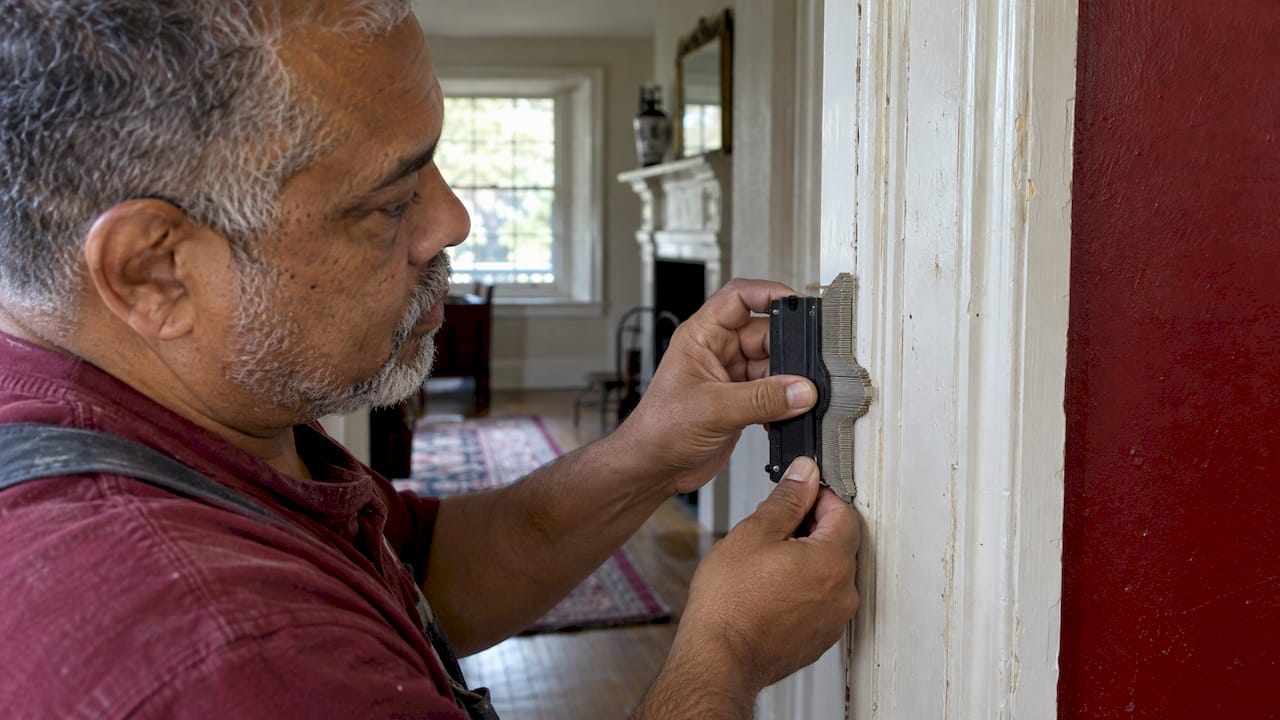
Bring the fabricator in at the assessment stage. A site visit while the building is still open lets the fabricator take profiles, record joinery and flag elements that can be retained. This also prevents the common error of ordering replacements for items that could have been repaired.
Separate repair from replication in the bid. Ask for the scope in two lines: elements to be restored, and elements to be replicated. This mirrors the way the city’s guidelines are written and makes review easier.
Agree on species and finish. Old-growth heart pine, poplar, oak and mahogany each behave differently in a given exposure. Specify the species, the grade, and the finish system, and note any traditional finishes the commission has asked for.
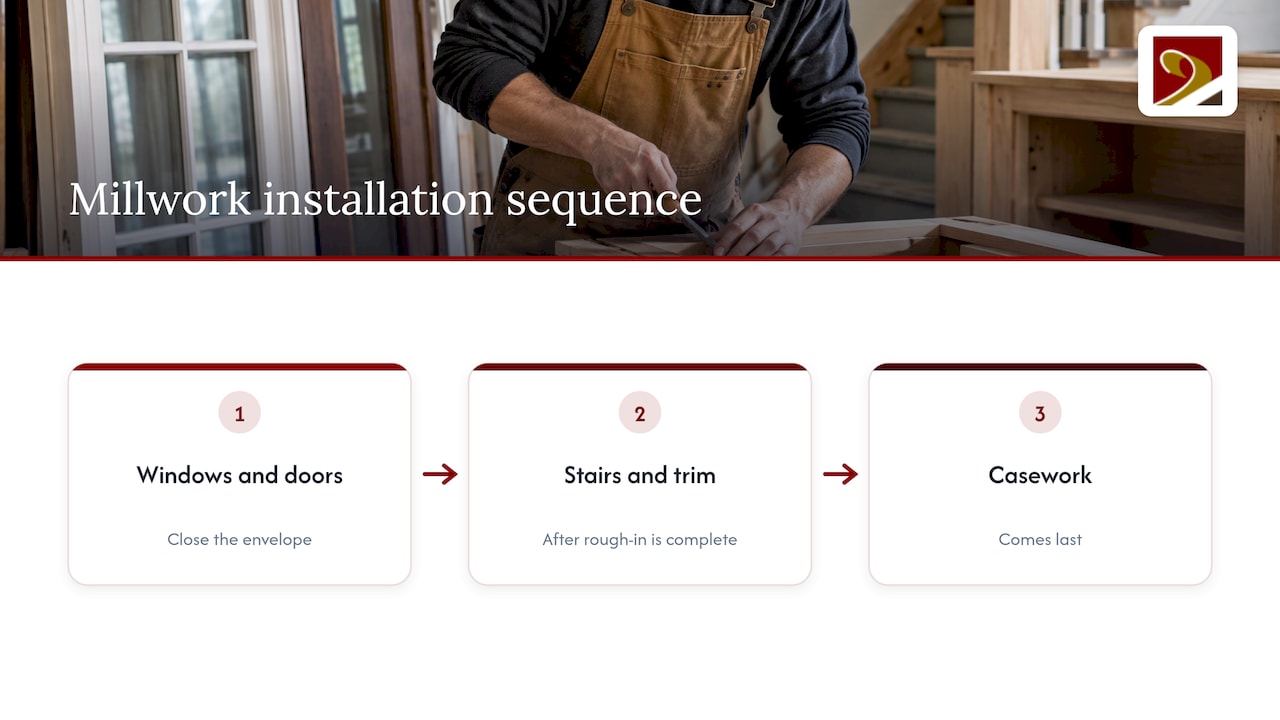
Plan the sequence. Windows and exterior doors usually come first to close the envelope; stairs and interior trim follow once rough-in is complete; casework comes last. Lead times for custom work are longer than for stock products, so the fabricator’s calendar should be part of the project schedule from the outset.
Document as you go. Keep photographs and shop drawings of every replicated element. They are useful for the commission, for tax credit documentation, and for whoever maintains the building in fifty years.
What Lynchburg’s recent projects teach
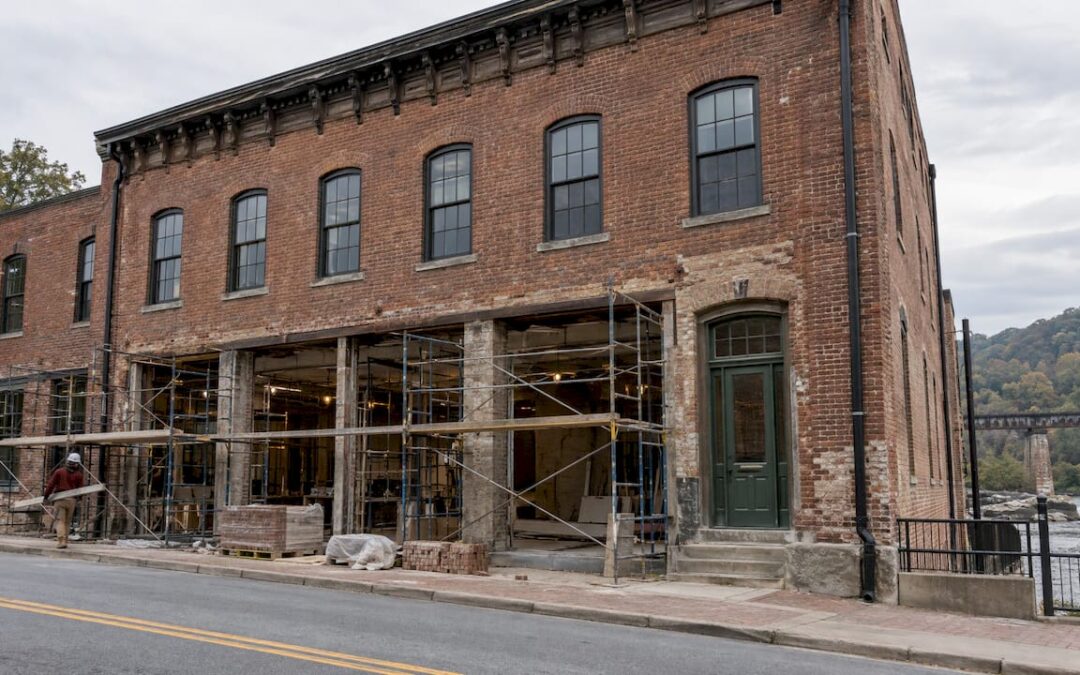
Recent downtown rehabilitations show the same pattern at larger scale. Adaptive reuse of vacant commercial buildings into housing and civic space has relied on keeping the historic envelope, including storefronts, upper-story windows and cornices, while adapting interiors to new use. For smaller owners the lesson is the same: the exterior is where the public, the commission and the credit reviewer look, so it is where fidelity pays.
Poplar Forest adds a second lesson. Its restoration involved historians, architects and craftsmen working together and using period materials and techniques for features and finishes. A private owner’s house is a different scale, but the working method, in which specialists share a record and agree on treatments before work, translates directly.
Restoration and millwork services from Gepetto Millworks
Gepetto Millworks designs, fabricates and restores wood windows, doors, trim, cabinetry, staircases and architectural millwork for historic buildings, including replication of period features and matching for historic tax credit eligibility. We serve projects across Virginia and neighboring jurisdictions, and our approach to local work is described on our Lynchburg historic window services page.

For sash repair and reglazing, see our historic window restoration service; for new units built to a historic pattern, see our wooden windows. Doors, stairs, balustrades, casework, libraries and built-ins are described under custom fabrication, and commercial adaptive-reuse interiors under commercial millwork. To discuss a project, begin at gepettomillworks.com and send us your drawings, photographs and assessment.
FAQ
Do I need approval to restore windows on a historic Lynchburg building?
If the building is in a local historic district, work that affects its external appearance generally requires a Certificate of Appropriateness from the Historic Preservation Commission. Minor actions, such as repairs using like materials and like designs, may be approved by the HPC Secretary instead. Check with city preservation staff before you order anything.
What does in-kind replacement mean?
It means that when a feature is too deteriorated to repair, the new element matches the original in design, material, texture and configuration. For a window, that includes the muntin profile, the glass division and the species of wood. Lynchburg’s design guidelines treat it as the fallback, with repair preferred wherever possible.
Can millwork work count toward historic tax credits?
Eligible rehabilitation expenses can generate credits, provided the project meets the Secretary of the Interior’s Standards. Virginia’s credit is 25% of eligible expenses and the federal credit is 20% for income-producing buildings. Confirm eligibility with the Department of Historic Resources and a tax adviser before work begins.
When should the millwork fabricator get involved?
As early as the assessment stage. Early involvement lets the fabricator take profiles and record joinery while the building is open, and it helps the team decide what to repair and what to replicate before drawings are submitted for review.
Sources
by Matthew Wiley | Nov 9, 2026 | Architectural Millwork
A historic porch railing is built correctly when it follows the evidence the house itself provides: surviving profiles, ghost lines on the wood, old photographs, and the vocabulary of its style and period. The right builder reads that evidence first, then fabricates balusters, rails and newel details in a compatible species, to the original dimensions, and resolves modern guard-height questions without erasing the porch’s character. What follows is written for architects, contractors, preservation professionals and owners who are commissioning that work.
Gepettomillworks
Preserve Your Porch’s Historic Character
Gepettomillworks creates custom millwork for historic building projects, supporting porch details that suit the character of older homes.
Visit Gepettomillworks
TL;DR
- Repair is the preferred approach for historic railings. Replace only what is beyond repair or missing, and base every new part on documentary, physical or pictorial evidence.
- Baluster and rail patterns differ sharply by era: turned, flat pattern-sawn, fret-sawn and rectangular forms each belong to particular periods and house types.
- Replacement parts should match original design, dimensions and material; a more decay-resistant species or vertical-grain stock can improve longevity without altering appearance.
- Code heights and openings, and local historic-district review, must be settled at design stage, because they can conflict with period proportions.
- Choose a builder who can turn custom profiles, mill rails to a drawn section, and document the work for review boards and tax-credit files.
Table of Contents
Reading the Porch Before Drawing the Railing
Every sound specification begins with an inquiry into what the porch originally had. Preservation guidance across the country converges on the same hierarchy of evidence: the building itself first, then photographs and drawings, then comparable houses.
The design guide for the Houston Heights historic district sets this out plainly. Where an entire original porch is missing, replacement design should rest on historical evidence, such as the ghosting of post profiles remaining on wood surfaces, or photographs. If no photographs exist, the guide points to houses of the same style in the surrounding context, using simplified versions of their porch elements.
In practice, the physical evidence tends to be more informative than owners expect:
- Ghost lines and paint shadows on the porch frieze, posts and floor edge often reveal the original height of a top rail and the layout of its balusters.
- Mortises, nail holes and plugs in the underside of a surviving top rail or the top of a bottom rail record baluster spacing, even when every baluster is gone.
- Heavy paint buildup can obscure true dimensions. Preservation Brief 45 advises removing it to establish the original size and profile.
- Neighboring houses by the same builder frequently retain the pattern you are missing, particularly in rows and speculative developments such as those found in Richmond’s Fan District or Virginia’s older streetcar suburbs.
A caution from historic-district guidelines in New Jersey is worth keeping in mind: the West Bergen–East Lincoln Park guidelines note that it is important to understand the building’s history before recreating features that may never have existed. A railing added in 1925 to a porch that was open in 1885 is not necessarily the one a review board will want you to reproduce.
Where evidence is truly absent, Roanoke’s porch guidance is pragmatic: a missing handrail with no record of its appearance should be replaced with a new feature of appropriate design, meaning one that repeats the form, scale and detailing of the porch it serves.
How Railing Design Changes by Era
Porch railings are one of the most period-sensitive elements on a historic façade, and a convincing replica depends on knowing which tradition the house belongs to.
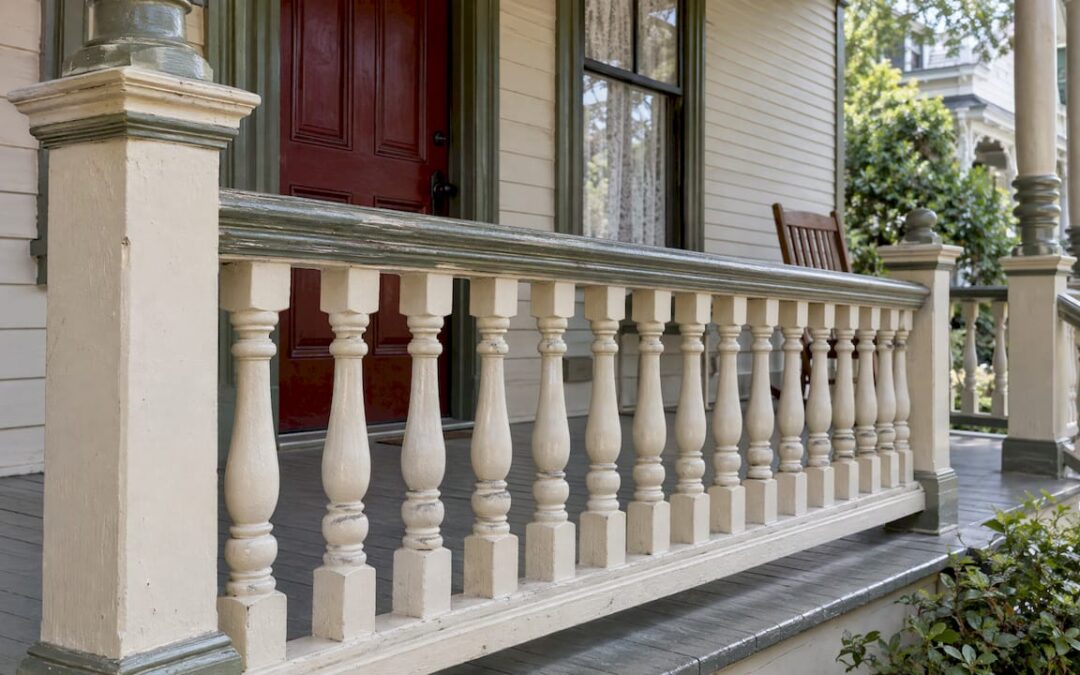
According to Old-House Online’s survey of porch details, early classical porches were often built without railings at all. By the 1880s railings had become practical, typically wide rails carried on turned, classically molded balusters. The Victorian decades then multiplied the vocabulary: Eastlake-influenced pencil-thin spindles, Swiss-chalet-inspired flat fret-sawn boards, and the narrow horizontal and vertical rail patterns of the Chinese-Chippendale tradition.
The same source offers useful proportions. Inexpensive railings under 4 inches square in section were often milled from a single piece of wood and paired with plain balusters around 1.5 inches square. Upscale Colonial Revival houses, by contrast, often used balusters 4 to 5 inches in diameter beneath a proportionately broad top rail 8 to 10 inches wide.
Fine Homebuilding makes the same point from the builder’s side: one of the first tasks in adding or remodeling a porch is to determine the appropriate style, with drawings that show how details vary among Classical Revival, Craftsman and Victorian houses.
| Tradition |
Typical railing character |
Fabrication implications |
| Classical and Colonial Revival |
Broad top rail, large turned balusters, classically molded profiles |
Lathe work in large diameters, molded rail sections |
| Victorian |
Eastlake spindles, fret-sawn panels, turned balusters, decorative brackets |
Pattern sawing, small-diameter turning, intricate millwork |
| Craftsman and Bungalow |
Simple, sturdy rectangular balusters and substantial rails |
Precise stock milling, robust joinery |
| Modest vernacular |
Plain square balusters, single-piece milled rails |
Accurate milling, correct spacing and section |
If your project falls in one of these families, our archives on Victorian architecture, classical architecture and bungalow millwork show the kinds of period detail we study and fabricate.
Materials, Profiles and Baluster Patterns
The National Park Service’s Preservation Brief 45 is the standard reference for wood porches. It specifies that missing balusters should match the historic ones in design and material, and it identifies three general baluster styles to replicate: simple rectangular, flat pattern-sawn, and turned. Each calls for a different shop process, which is one reason the builder’s capabilities matter as much as the drawing.
Species and finish
Municipal standards give concrete direction. The City of Kalamazoo lists cedar, redwood and cypress as approved handrail materials, noting that treated lumber may be acceptable on rear applications. Roanoke asks that wood handrails repeat the form, size, detailing and color of the existing railing, and acknowledges that metal may be acceptable in some cases.
Preservation Brief 45 adds that when replacement is necessary, selecting a more decay-resistant species or vertical-grain lumber can reduce warping and checking and lower long-term maintenance. That is a sound allowance: the profile, proportion and appearance remain historic, while the material performs better outdoors.
Profiles that read correctly
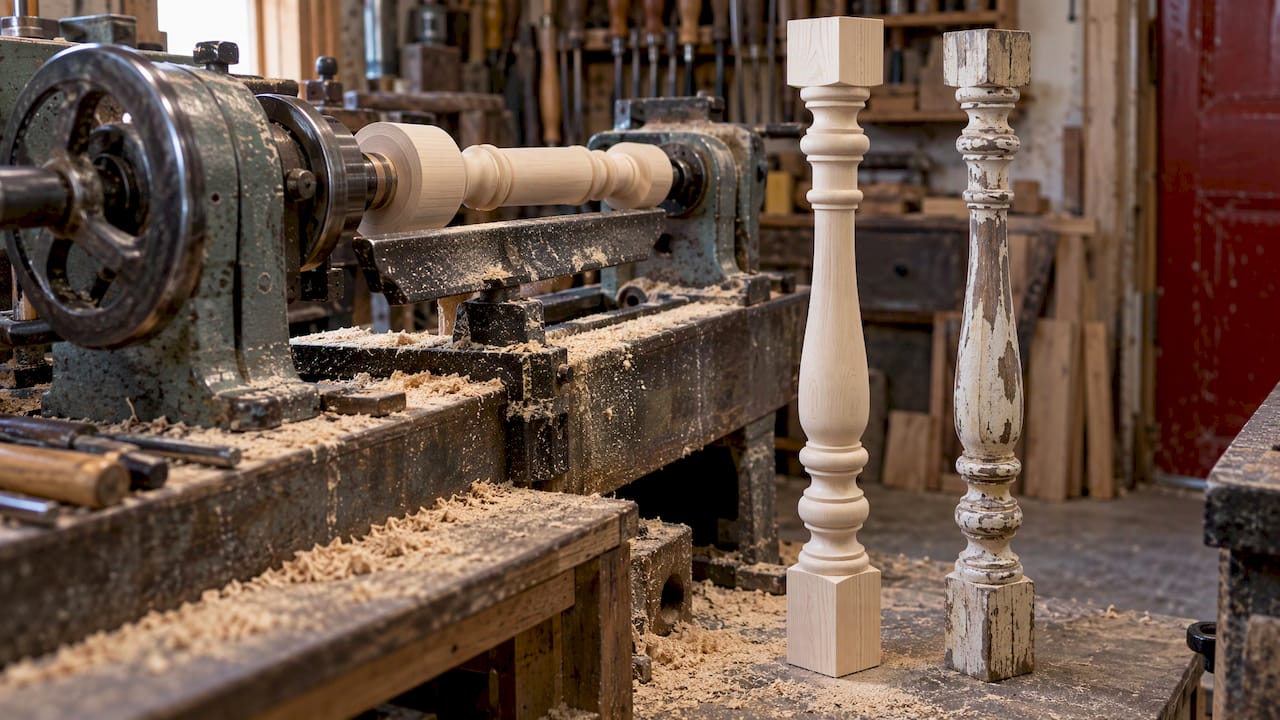
A turned baluster is more than a cylinder. Its swelling, fillets, beads and necks must follow the original template, or the railing reads as a catalog substitute from the street. Likewise, a top rail’s section, with its cap, throat and underside, determines how light falls across the porch. This is where custom wood turning and millwork earns its place: a lathe operator working from a measured baluster, rather than from a stock profile, produces a faithful reproduction.
Repair, Reproduce or Replace
The hierarchy is consistent in every official source. Preservation Brief 45 states that repair is always the preferred approach for historic balustrades and railings, and that loose or broken elements should be repaired as soon as possible. Replacement is appropriate only for balusters beyond repair or missing.
The Secretary of the Interior’s Standards for Rehabilitation frame this as a sequence: maintain what is intact, repair what has deteriorated, and replace only what cannot be repaired. Missing features are reconstructed from documentary, physical or pictorial evidence. Local programs echo the principle; Baltimore’s guidance, for example, favors repair whenever possible and permits compatible synthetic materials only where in-kind replacement is not feasible, subject to approved samples.
A useful working rule for a project team:
- Intact and sound: maintain, clean, repaint, and keep the fabric.
- Loose or broken fasteners, sound wood: re-fasten. Preservation Brief 45 recommends hot-dipped galvanized or stainless steel nails or screws, heads set below the surface and covered with wood filler.
- Partially deteriorated: repair or splice in matching wood where the section can be preserved.
- Beyond repair: replicate that element from the original, keeping the remaining historic pieces as the pattern.
- Entirely missing: reconstruct from evidence, in the order described above.
This matters commercially as well as aesthetically. For projects pursuing federal or state historic tax credits, reviewers look for exactly this logic, and a file that documents why each element was repaired or replicated is far easier to approve.
Measuring and Building the Railing
Preservation Brief 45 describes a straightforward method for baluster measurement: take the dimension from the bottom surface of the top rail to the top surface of the bottom rail, and fabricate the new baluster one-half inch longer than needed at both ends, so it can be fitted precisely. To learn the size and shape of a missing baluster, use an adjacent one, or temporarily remove an existing one to study it.
Other details that separate a durable replica from a short-lived one:
- Seal the end grain and joints before fastening, since moisture enters porch railings there first.
- Maintain original spacing, section and profile. The Hastings, Minnesota residential guidelines require this in repair or replacement, and caution against nailing balusters directly to the step or deck.
- Match height, dimension and pattern as closely as possible. Kalamazoo’s standards require this of replacement guardrail material.
- Provide a drawn shop template for each unique profile, so that repairs a decade from now can be matched.
For architects, a shop drawing that fixes baluster centers, rail sections and newel detailing, reviewed before milling, avoids the most costly error in this work: a beautiful railing cut to the wrong dimension.
Building Codes, Heights and Historic Review
The tension in nearly every porch project is that modern code assumptions are not historic proportions. Roanoke’s guidance notes that traditional front and rear porch rails commonly stand between 29 and 32 inches, while rear decks should meet the building-code height of 36 inches.
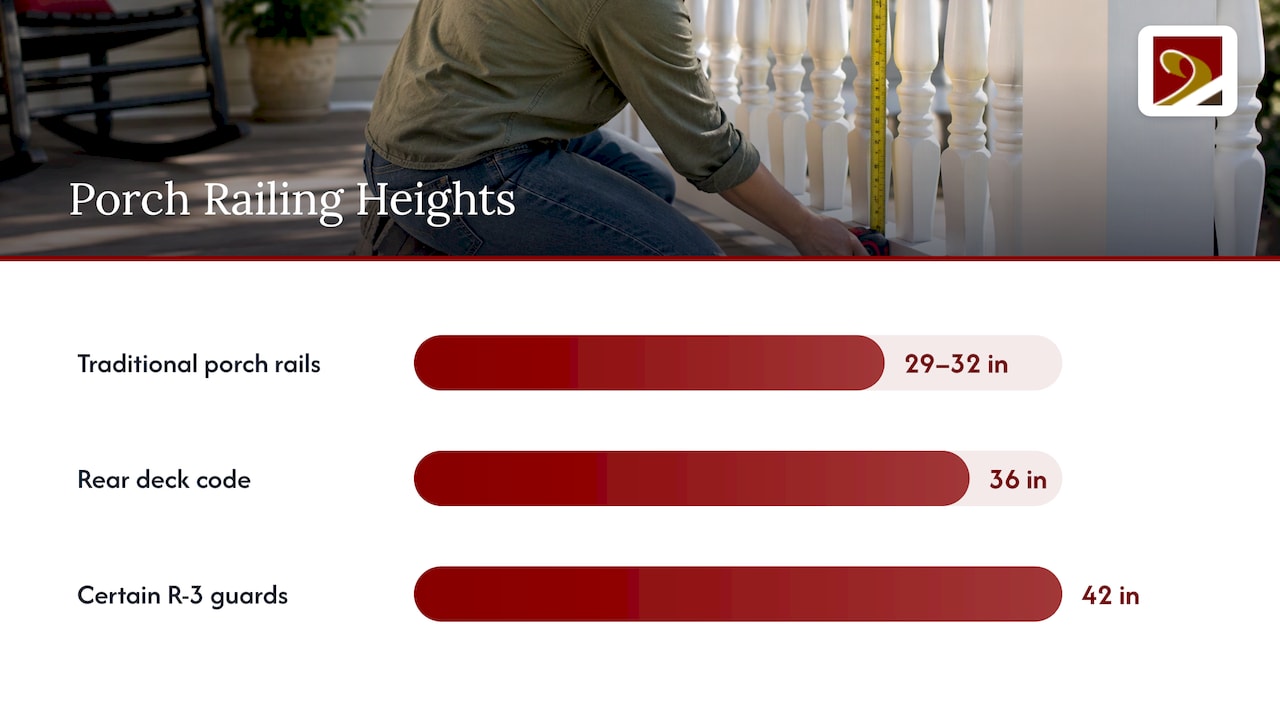
Codes vary by state and jurisdiction, but Massachusetts offers a clear illustration of what such rules look like. Its regulation 105 CMR 410.520 requires guards at least 36 inches high around porches and similar places 30 inches or more above ground, with 42 inches for certain R-3 conditions, and limits openings to a 4-inch sphere (6 inches for construction predating August 28, 1997). It also prohibits ornamental work that creates a ladder effect on post-1997 construction. That is a Massachusetts rule, not a universal one; projects in Virginia, the Carolinas, Maryland or the District of Columbia must follow the code adopted locally, and the building official and the historic review board both have a say.
Several strategies help reconcile the two:
- Treat steps separately. Kalamazoo allows handrails for steps to be added to meet modern code needs, designed to complement or match the porch railing as closely as possible.
- Raise the guard discreetly with a rail profile that echoes the original, rather than replacing the entire balustrade.
- Seek an alternative-compliance pathway. Accessibility rules commonly make allowances for qualified historic buildings. Georgia’s code, for instance, permits alternative requirements where full compliance would threaten or destroy historic significance, and other states have comparable provisions. Confirm the local procedure with your code official.
Raise these questions at the design stage, with the historic review office and the building department in the same conversation. Late discovery is what turns a code issue into a redesign.
Choosing a Porch and Handrail Builder
A railing project sits between several trades: carpentry, turning, pattern sawing, finishing and sometimes masonry or metalwork. A stair builder or hobbyist with a lathe can make spindles, as homeowners on forums often observe, but the rails, with their long molded sections and joinery, are the difficult part. When you vet a builder, look for:
- Experience with historic work specifically, including familiarity with preservation briefs, district guidelines and review submissions.
- In-house milling and turning, so profiles are cut from your template and not approximated.
- Willingness to document: measured drawings, photographs of existing conditions, and a record of what was repaired versus replicated.
- Range: the ability to carry the work into adjoining elements such as columns, brackets, stairs, doors and windows so that the porch reads as one composition.
- Coordination with your team, whether you are an architect issuing details or a contractor needing a reliable millwork scope.
If you are starting from the beginning and need to see who offers construction and millwork in your area, you can compare local service providers by service type and ZIP code, then shortlist those with preservation experience.
Our Perspective
We approach a porch railing as a piece of evidence before we treat it as a piece of carpentry. The balusters, the rail section and the newel proportions record how the original builders understood their own street, and our work begins by reading that record: what survives, what the paint has hidden, and what neighboring houses still show.
Our position is that exact replication, using authentic materials and period techniques, is the surest route to a railing that satisfies a review board, supports tax-credit eligibility and looks right from the sidewalk. We design, fabricate and restore wood windows, doors, trim, staircases, balustrades and architectural millwork for historic buildings, and we take on custom requests that others may decline. A railing is often the first of these that a project team commissions, because it is so visible and so unforgiving of approximation.
For architects and contractors, that means a single shop able to carry a profile from measured drawing to finished piece, and to match it again when a later phase calls for more. For owners, it means a porch that reads as the house always intended, not as a catalog compromise.
Gepetto
Commissioning Period Railings from Gepetto Millworks
If your project calls for balustrades, turned balusters, newels or a complete porch in a period style, our shop fabricates them as custom work for historic buildings across Virginia, West Virginia, North Carolina, South Carolina, Maryland and the District of Columbia. Our custom fabrication page describes our staircases, balustrades, casework and doors, and our replica millwork archive shows the kind of period matching we do.
Send us your drawings, photographs or a measured sample from the existing railing through our main site, and we will discuss how to approach the replication for your project.
FAQ
Should a historic porch railing be repaired or replaced?
Repair is the preferred approach. Preservation Brief 45 recommends fixing loose or broken elements promptly and replacing only balusters that are missing or beyond repair. Any replacement should match the historic design and material, based on physical, documentary or pictorial evidence.
What wood is appropriate for a historic porch railing?
It should match the original in design and material. Municipal standards such as Kalamazoo’s list cedar, redwood and cypress, and Preservation Brief 45 notes that a more decay-resistant species or vertical-grain stock can reduce warping and maintenance. Your local historic commission has the final word.
How high should a historic porch railing be?
It depends on the jurisdiction. Roanoke cites 29 to 32 inches as typical for traditional porch rails, while code heights for guards are commonly 36 inches or more, as in the Massachusetts regulation above. Confirm requirements and any historic exceptions with your building official before drawing.
What if no photographs of the original railing exist?
Look for physical evidence on the porch, such as ghost lines and fastener holes, then study houses of the same style nearby. Houston’s Heights guidance supports using simplified versions of porch elements from comparable houses where no photographs survive.
Sources
Recommended
by Matthew Wiley | Nov 8, 2026 | Architectural Millwork
The Secretary of the Interior’s Standards for Rehabilitation ask one thing of a historic window above all: that it be repaired rather than replaced. Standard 6 states that deteriorated historic features are repaired, and that where a distinctive feature is too far gone, the new one matches the old in design, color, texture and, where possible, materials. For an architect, contractor or owner, that single principle shapes the survey, the drawings, the review submission and, ultimately, the millwork order.
Gepettomillworks
Match Historic Windows With Custom Millwork
Gepettomillworks creates custom millwork for historic building projects, supporting work where replacement windows must respect original character.
Explore custom millwork
TL;DR
- Standard 6 is the governing rule for windows: repair deteriorated sash and frames first, replace only when repair is not practical, and match what you replace.
- The Standards are regulatory only for certain federally assisted projects, including those in the Historic Preservation Tax Incentives program review. Elsewhere they serve as general guidance, though many state and local reviews borrow them.
- A replacement window submitted for review needs photographs, elevation drawings and full-size section profiles, not a manufacturer’s cut sheet.
- Energy goals are met first by sealing air leaks and adding tight-fitting storm windows, not by discarding original sash.
- Missing windows are rebuilt from documentary and physical evidence, which is where custom millwork becomes the practical answer.
Table of Contents
What the Standards are, and where they bind
The Standards for the Treatment of Historic Properties distinguish four treatments: preservation, rehabilitation, restoration and reconstruction. Most windows work in practice falls under rehabilitation, which allows a building to be adapted to a compatible use while retaining the features that convey its historic character. The National Park Service sets out the ten rehabilitation standards on its Standards for Rehabilitation page, and the full treatment guidelines are published in the 2017 Guidelines for Preservation and Rehabilitation.
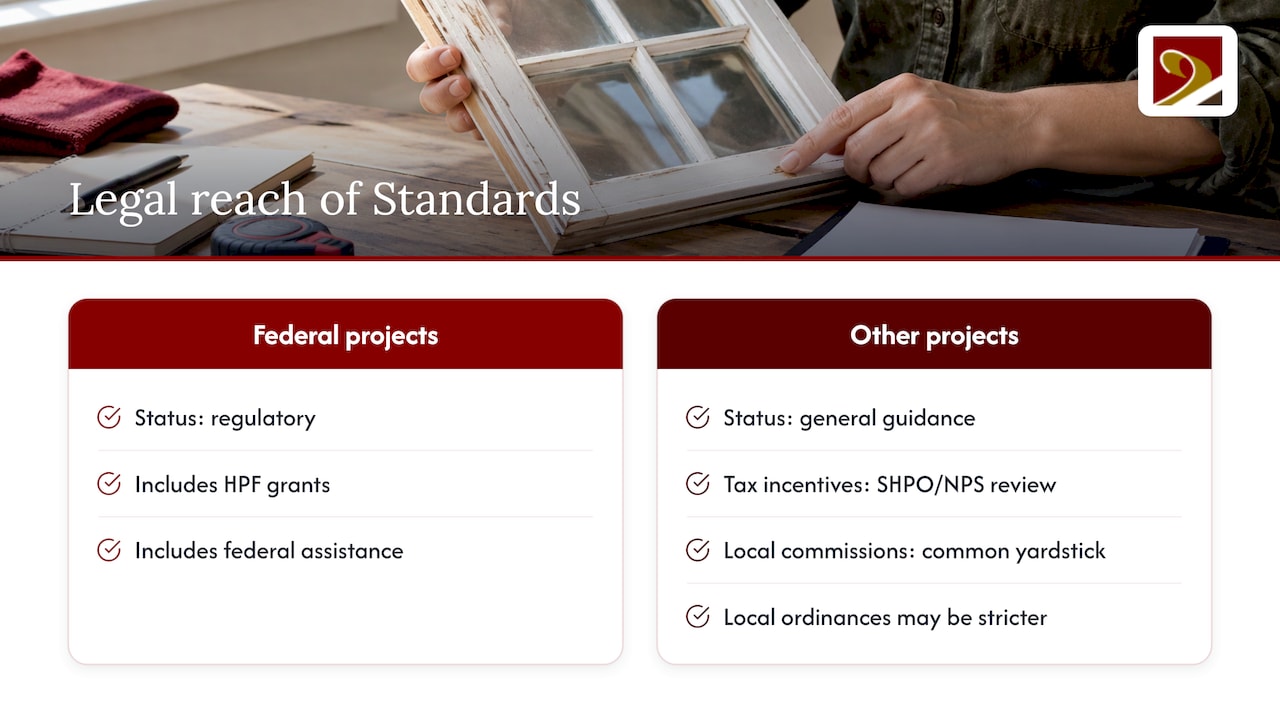
A point that is frequently misunderstood is their legal reach. According to the same NPS guidelines, the Standards are regulatory only for projects receiving Historic Preservation Fund grant assistance and for other federally assisted projects; otherwise the Guidelines offer general guidance. In practice the distinction matters less than it sounds, because the Standards have become the common yardstick. A project seeking historic tax incentives is reviewed against them by the State Historic Preservation Office and the National Park Service, and local historic commissions commonly use the same language when they evaluate a certificate of appropriateness. Check with your own commission, since local ordinances differ and can be stricter than the federal text.
Standard 6 and the historic window
The NPS guidance on evaluating historic windows for repair or replacement opens with Standard 6, and it also repeats the neighboring principle that removing historic materials or altering features and spaces that characterize a property is to be avoided. Both ideas bear on windows because a window is rarely just an opening. The sash, the muntin profiles, the glass, the frame and the trim together describe a period, a building type and often a regional building tradition.
Consider what a window carries in a Federal rowhouse as against a Queen Anne villa. In the first, narrow muntins divide small panes into a disciplined grid; in the second, a large lower sash may sit beneath a decoratively divided upper one. The proportions are not incidental. They are the architectural statement, and a replacement that alters them, even slightly, alters the facade.
Repair first: what the guidance means by repair
The NPS treats repair as the first option, and it defines repair broadly. The guidance lists renewal of finishes, material repair such as the use of epoxies, replacement of component parts, and the addition of weatherstripping. Repair therefore does not mean leaving a rotted sill in place. It means a graduated approach in which the least intervention that returns the window to sound service is chosen.
In a typical wooden double-hung window, that graduated approach often looks like this:
- Finishes: paint is stripped locally or fully, the glazing putty is renewed and the wood is primed and repainted.
- Material repair: softened or checked areas of sash rails, stiles or sills are consolidated and filled with epoxy repair compounds.
- Component replacement: a failed meeting rail, bottom rail or sill is spliced out and replaced with new wood of matching species and profile, while the rest of the sash stays.
- Weatherstripping: appropriate contemporary weatherstripping is installed. Preservation Brief 9 describes it as an integral part of the repair process and cautions that felt may absorb and hold moisture.
This is the territory of our historic window restoration work, where the objective is to retain as much original fabric as the condition of the wood allows.
When replacement is justified
Standard 6 does not forbid replacement; it conditions it. Replacement becomes appropriate when the severity of deterioration requires replacing a distinctive feature, and NPS guidance also recognizes situations in which code constraints make compliant occupancy impossible with the historic windows in place. The NPS windows guidance frames the threshold as deterioration beyond a level at which repair remains practical or reasonable.
It is worth noticing what the threshold is not. It is not age, it is not a drafty room, and it is not the inconvenience of a painted-shut sash. Those conditions are typically addressed through repair and weatherization. A window earns replacement through condition, and the reviewing office will expect the survey to show it: a window-by-window inventory with photographs of the actual damage.
Surveying before deciding
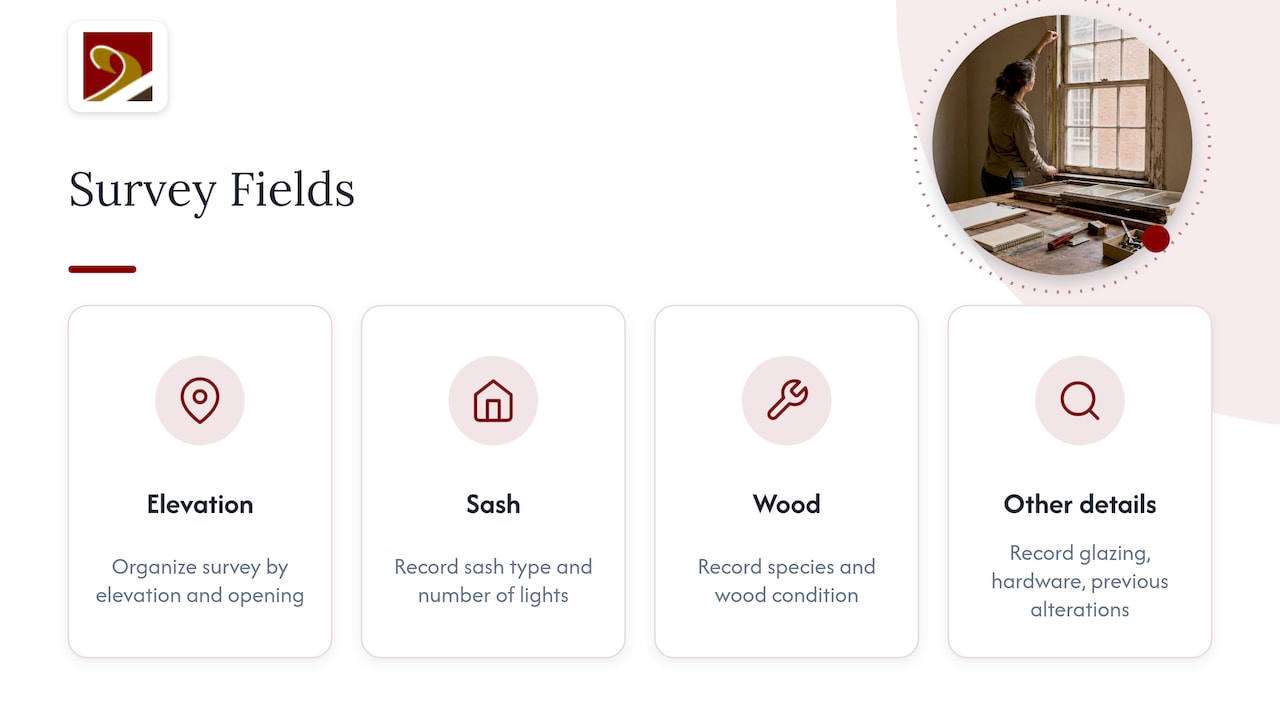
A defensible survey is organized by elevation and records, for each opening, the sash type, the number of lights, the species and condition of the wood, the state of the glazing, the hardware and any previous alterations. Where deterioration is localized, the finding will usually be repair. Where it is pervasive, the survey is the evidence that justifies in-kind replacement.
Matching: design, color, texture and materials
When replacement of a distinctive feature is necessary, the new one must match the old in design, color, texture and other visual qualities and, where possible, materials. The replacement of a missing feature, meanwhile, must be substantiated by documentary, physical or pictorial evidence rather than conjecture about what would look suitably old.
For windows, matching resolves into a short list of items that reviewers examine closely:
| Element |
What the review looks for |
| Sash and frame profiles |
Section dimensions and moldings that replicate the original, including stile and rail widths |
| Muntins and mullions |
True divided-light proportions and profile, matching the historic pattern |
| Glass |
Visual character consistent with the original glazing, set in glazing compound as it was historically |
| Relationship to the wall plane |
Setback and reveal that reproduce the shadow lines of the original opening |
| Materials |
Species and finish matching the historic window where possible |
| Operation |
Sash that moves as the original did, whether double-hung, casement or fixed |
This is where off-the-shelf windows commonly fall short. A catalog unit may match the rough opening and the sash count while departing from the original in profile depth, muntin width or meeting-rail height. The first-ranking explanations of the Standards make the same observation: replacement windows that do not replicate the original in all details are the usual cause of an unfavorable review. Custom fabrication from measured drawings of the original, such as the wooden windows and historically accurate windows we build, exists to close that gap.
Documentation that reviewers expect
For conformance review of proposed replacement windows under the Historic Preservation Tax Incentives, NPS states the minimum documentation that the State Historic Preservation Office and the National Park Service need. The detail is set out in its documentation requirements for proposed window replacement, and the topic is also listed under the rehabilitation Standards in its guidance on planning successful rehabilitation projects.
The package comprises:
- Clear photographs of the existing windows.
- Drawings showing elevations and horizontal and vertical sections of both the existing and the proposed windows, including muntins, mullions, transoms and the sash and frame profiles.
- Evidence that the replacement drawings accurately replicate the historic appearance and show the window’s relationship to the wall plane.
NPS also cautions that a manufacturer’s standard cut sheets are usually not sufficient for detailed review. The practical consequence is that the fabricator’s shop drawings are part of the submission, not an afterthought. Architects who involve the millwork shop at the schematic stage tend to avoid the rework that follows a request for additional information.
Energy efficiency without losing the sash
The commonest argument for discarding historic windows is energy. The NPS addresses it directly in its guidance on weatherization of historic buildings: the claim that replacement windows will save as much as 50 percent in energy costs is described there as simply not true, and historic windows, with regular maintenance, usually outlast their replacements.
The recommended order of work is more modest and more effective:
- Seal air leaks with caulking, weatherstripping and renewed glazing compound. Understanding where air and heat actually escape, including at junctions where thermal bridging and heat loss occur, helps prioritize which leaks to chase first.
- Add storm windows, interior or exterior. NPS notes that studies show storm windows over historic windows can achieve thermal performance similar to low-E vinyl replacement windows, provided they are tight fitting and compatible with the historic appearance.
- Consider replacement only after the first two steps, and only for windows that fail the Standard 6 test.
Preservation Brief 3 adds a useful figure: a single-glazed storm window can raise a single-pane window’s thermal resistance to R2, twice as good as the single-glazed window alone. Preservation Brief 9 likewise says a repaired window should be made as energy efficient as possible with appropriate weatherstripping.
Our perspective
Most of the windows that reach our shop are not hopeless. They are neglected, over-painted, and carrying one or two failed members. Standard 6 describes the right instinct: keep what is sound, and rebuild precisely what is not.
Where a sash or an entire unit has to be made new, we approach it as replication, not substitution. That means measuring the surviving examples, recording the muntin and rail profiles, working in authentic materials and traditional joinery, and producing drawings that can stand beside the existing windows in a review submission. Our position is that a replacement window should be indistinguishable from the original at the scale of the street and of the hand.
We accept the commissions that others decline: elliptical heads, tracery, unusual lights, a single missing sash for a ten-window elevation. Matching for historic tax credit eligibility is part of how we think about the work from the first drawing, since a window that fails review is a window built twice.
Our counsel to architects and contractors is simple: bring the fabricator in before the submission is drawn, not after the comments arrive.
Gepetto
From survey to installed sash
The sequence that serves most historic window projects, whether tax incentive, grant-funded or locally reviewed, runs as follows:
- Inventory and photograph every opening, noting condition and any later alterations.
- Classify each window as repairable, repairable with component replacement, or beyond practical repair.
- Research missing or altered windows through historic photographs, early drawings and surviving examples elsewhere in the building.
- Draw full sections of the existing and proposed work, showing profiles and the relationship to the wall plane.
- Submit to the reviewing body with photographs and drawings, and respond to comments.
- Fabricate and restore in the approved scope, with weatherstripping and storm windows addressed as part of the same package.
- Document the completed work for the project file.
Working with Gepetto Millworks
Gepetto Millworks designs, fabricates and restores wood windows, doors, trim, staircases and architectural millwork for historic buildings, including the replication of period features and matching for historic tax credit eligibility. We work with architects, general contractors, builders and historic homeowners in Virginia, West Virginia, North Carolina, South Carolina, Maryland and the District of Columbia.
If a window survey has identified sash to repair or units to replicate, begin with our historic window restoration page, or contact us through Gepetto Millworks with your drawings and photographs.
FAQ
Do the Standards apply to my house if I am not claiming a tax credit?
Not as federal law, in most cases. NPS states that the Standards are regulatory only for Historic Preservation Fund grant projects and other federally assisted projects; otherwise they are general guidance. Local historic districts, however, frequently apply them or adapt them, so confirm the rule with your own commission before ordering work.
Can I replace original windows if they are drafty?
Drafts alone do not meet the replacement threshold. NPS guidance recommends sealing air leaks with weatherstripping, caulk and new glazing compound and adding tight-fitting storm windows first. Replacement is reserved for features whose deterioration makes repair impractical.
What must a replacement window match?
The new window must match the old in design, color, texture and other visual qualities and, where possible, materials. Where a window is missing entirely, the replacement must be supported by documentary, physical or pictorial evidence.
What drawings does a reviewer need for replacement windows?
Photographs of the existing windows, plus elevations and horizontal and vertical sections of existing and proposed windows, showing muntins, mullions, transoms and sash and frame profiles. NPS notes that standard manufacturer cut sheets are usually not enough.
Sources
Recommended
by Matthew Wiley | Nov 7, 2026 | Architectural Millwork
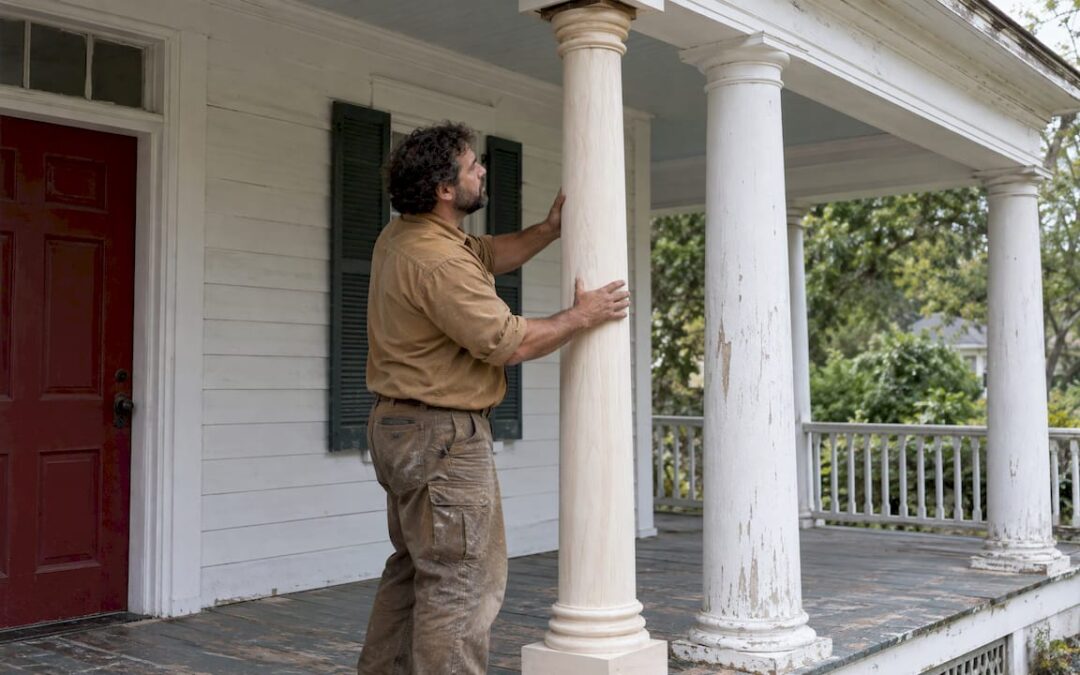
A historic column should be replaced only when assessment shows that repair cannot restore it. When it must be replaced, the builder you want is one who documents the original, matches it in profile, proportion and material, and works alongside a structural engineer where the column carries load. This guide sets out how that decision is made, what the record should contain, which materials can honor a period design, and what to ask of a builder before a contract is signed.
Gepettomillworks
Match Historic Columns to the Original
Gepettomillworks creates custom millwork for historic building projects, supporting column replacements that respect a building’s original design.
Explore custom millwork
TL;DR
- The federal preservation standards favor the least intervention: maintain, repair, then replace in kind, and only then use a compatible substitute material.
- Document before you remove: measurements, profiles, materials, joinery and photographs make an exact reproduction possible and protect tax credit eligibility.
- Many porch columns carry roof load, so shoring and structural review belong to the plan from the start.
- Replacement parts must match the original in design, size, shape, color and texture. A more decay-resistant species is a legitimate upgrade.
- Choose a builder who can fabricate the column, not just install a catalog product, and who can coordinate with your architect and preservation office.
Table of Contents
When a Column Is Beyond Repair
The Secretary of the Interior’s Standards for Rehabilitation do not recommend replacing a feature that could reasonably be repaired. Repair begins with the least degree of intervention, such as patching, piecing in, splicing, consolidating or reinforcing, and it includes limited replacement of extensively deteriorated or missing parts when surviving prototypes exist. Where a whole feature is too far gone, replacement in kind is preferred, and a compatible substitute is considered when the original material is not technically or economically feasible.
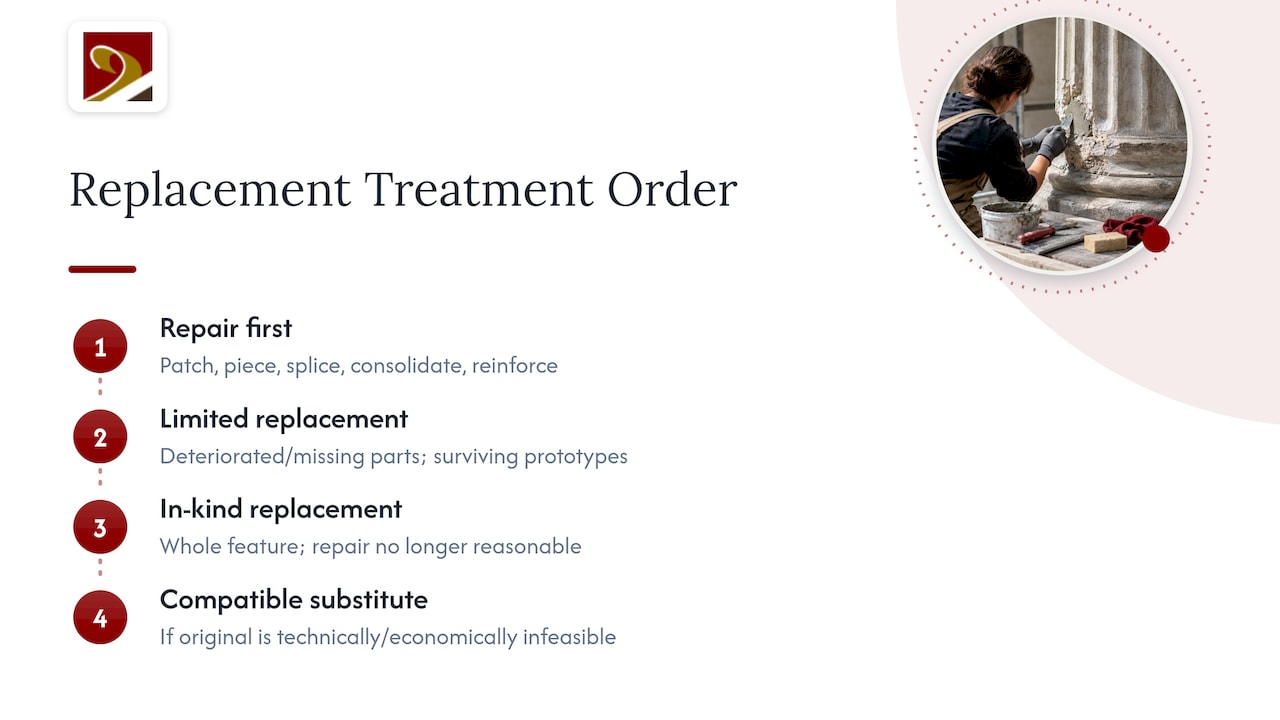
That order of preference is the logic every competent assessment follows. In practice, the signs that move a column from the repair column to the replacement column are fairly consistent: visible leaning, crushing at the base or cap, sagging of the beam above, splits running through the shaft, a hollow sound when a solid column is tapped, and moisture accompanied by deep decay. Any of these calls for a structural look before anyone cuts anything.
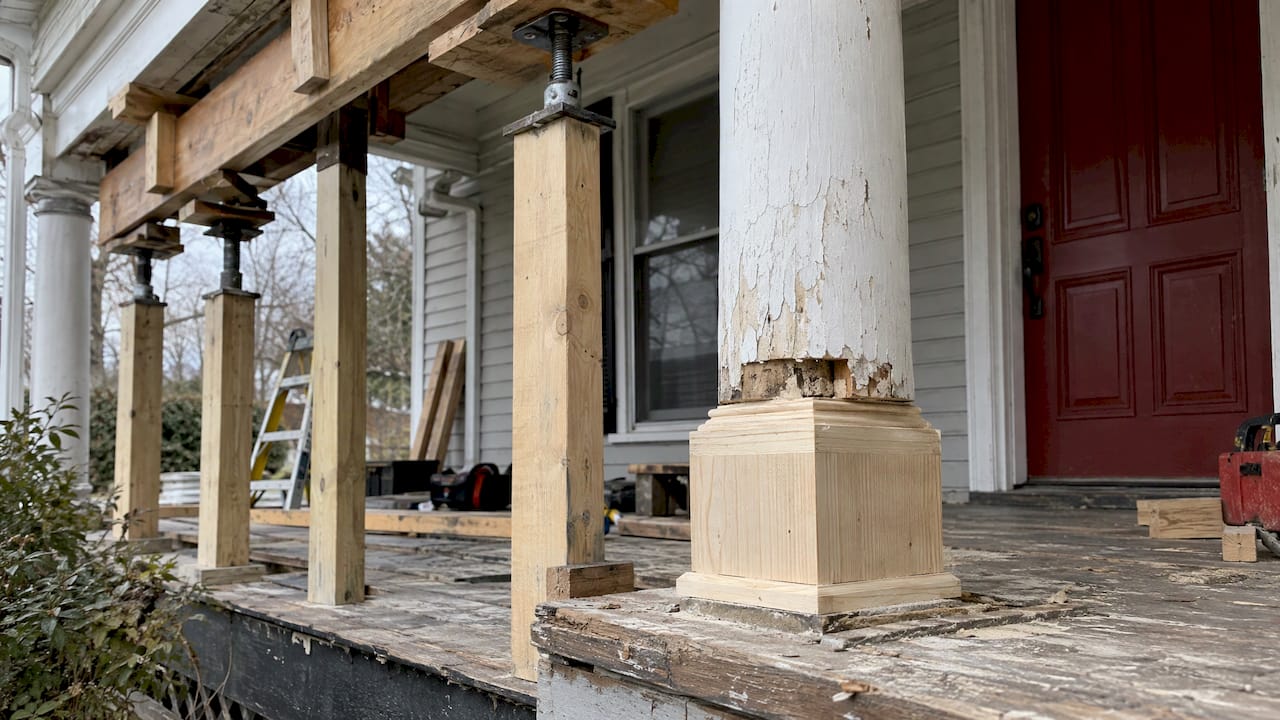
Partial replacement is often the honest answer. Preservation Brief 45, published by the National Park Service, notes that when plinths and bases have deteriorated beyond repair they can be replaced without replacing the column shaft, which may still be sound. That work involves temporary shoring of the roof, and where many bases have failed, bases made of rot-resistant materials can make economic sense, provided every visual quality of the historic part is matched.
For a field method, our own guide to testing, cutting back and documenting damage walks through what to probe and where. The companion section on choosing between repair, splice and full replacement covers the decision itself.
Why internal rot changes the calculation
Surface fillers and epoxies can serve minor, non-structural damage, but they do not arrest internal rot once it is established. Stave-built columns, which are assembled from tapered boards around a hollow core, are particularly hard to repair cleanly, and a column whose inner staves have softened may look acceptable from the street while its capacity has quietly gone. This is the situation in which a measured, reasoned replacement serves the building better than another coat of paint over a failing shaft.
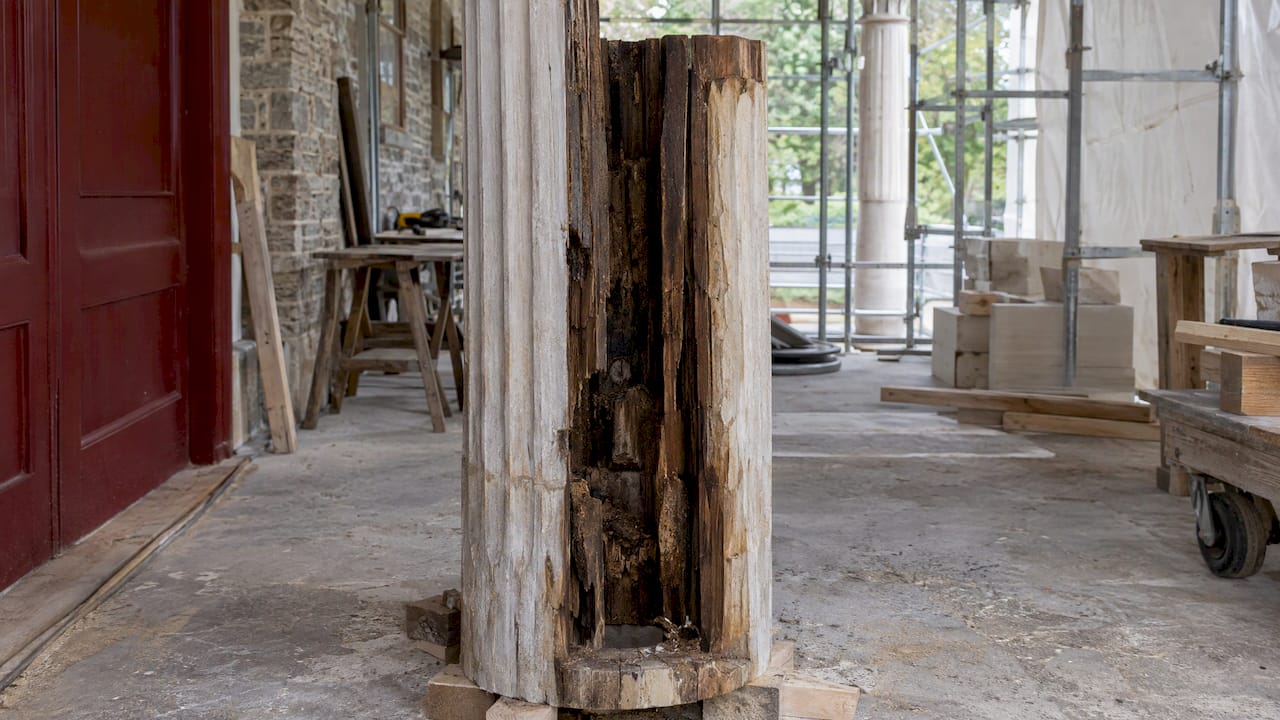
Loads you may not have counted
Homeowners frequently assume a porch column is ornamental. In many houses it is structural, carrying the porch roof and sometimes a balcony or the floor framing above. Treat every column as load-bearing until a qualified person confirms otherwise. The practical consequence is that removal requires temporary shoring, and the order of operations matters.
Document the Original Before It Comes Out
A reproduction is only as accurate as the record it is built from. Demolition specifications for projects that involve reproducing removed elements typically require a permanent record of measurements, materials and construction details needed for exact reproduction, along with preconstruction photographs and an inventory of the condition of items to be removed and salvaged. Owners and architects can borrow that discipline for any column project.
A sound record for a column includes:
- Overall dimensions: height, shaft diameter at the base, at the swell (entasis) and at the neck, and the overall cap and base heights.
- Profiles: full-scale templates or tracings of the base moldings, astragal, capital, abacus and any fluting, taken from the original rather than from a catalog drawing.
- Construction: whether the column is solid, glued up or stave-built, the joinery, the wood species where identifiable, and any internal reinforcement or hardware.
- Location: the position of each column on the porch, since columns on old porches are rarely identical, and photographs showing the column in context.
- Condition: photographs of every area of decay, with notes on where moisture entered.
Local design guidelines ask for the same thing. The Houston Heights design guide says that before an architectural element is removed, its location should be documented with photographs and sketches so it can be reinstalled correctly. When an element is too deteriorated to repair, it may be replaced with an accurate replica, and if no source element survives, the design should be substantiated by physical or pictorial evidence so that the replacement does not misrepresent the building’s history. The City of Anderson, South Carolina states a similar rule: use the same kind of material as the original where feasible, and base the design on physical or pictorial evidence.
When the column is already gone, the evidence moves elsewhere: ghost marks on the porch deck and entablature, paint lines, early photographs, insurance maps, a neighbor’s surviving twin from the same builder’s pattern book. This is where a fabricator with period experience earns the fee, because reading that evidence into a drawing is a skill separate from turning wood.
Assessment and Qualifications Before the Work
Preservation practice treats the structural system as part of a building’s character. The Rehabilitation Guidelines note that exposed structural features such as columns, posts and beams may help define a building’s historic character, and that the structural system should be examined early to establish both its condition and its importance to the building’s significance.
Where the question is whether a column can still carry its load, the National Park Service’s guidance on structurally deteriorated historic buildings says the condition is usually documented through a qualified structural engineer familiar with the archaic system and materials involved. The examination should establish the extent of deterioration, the principal causes of failure and the technical feasibility of repair, and it should be supplemented with cost estimates. A structural condition report of that kind describes the structural system, classifies components by intactness and load-carrying capacity, and keys photographs to plans or sketches, including vertical supports such as columns and posts.
For larger projects, a Historic Structure Report is the planning instrument. Preservation Brief 43 describes it as a document based on research and investigation that records a property’s history and condition, supports the choice of treatment and outlines recommended work, often including a condition survey, record photography and selected materials studies. It also stresses that recommendations must account for applicable laws, codes and functional requirements, among them life safety, fire protection and accessibility.
Red flags that bring in an engineer
Certain conditions turn a column job into a structural one: the column carries roof load, the porch roof has shifted, decay extends into beams or floor framing, several columns are failing at once, or the original design must be recreated accurately. Our guide lists the red flags that require a structural engineer or preservation specialist. Requirements for who may certify capacity differ by state and municipality, so confirm the rules where the building stands.
Pricing the decision with real data
Owners, architects and general contractors comparing repair against replacement need credible numbers, and those come from past jobs rather than rule-of-thumb estimates. Estimators who keep a historical cost library of completed work can price a column replacement, a base splice or a full set of porch columns against what similar scopes actually required, which makes the repair-versus-replace comparison far less speculative. Our own notes on what drives timeline and cost in U.S. restoration projects outline the variables to price.
Materials That Can Honor the Original
The standard is a close match. Preservation Brief 45 asks that replacement parts match the historic component as closely as possible in material, design, color, texture and other qualities. It also observes that replacing an element can be a good opportunity to upgrade the wood to a more decay-resistant species, or to one with vertical grain that resists cupping and splintering. In limited cases a substitute material may be appropriate, as long as it conveys a close visual match.
Wood: in kind, and better
Replacement in kind remains the benchmark. A column turned or built up from well-selected, rot-resistant stock, primed on all faces including end grain before assembly and detailed so water sheds rather than lodges, can outlast the original while looking identical to it. Species choice, grain orientation and joinery all contribute. Our guidance on materials, preservatives and moisture control that prevent recurrence explains what keeps a new column from repeating the failure of the old one. Turned shafts and balusters are within the scope of our wood turning work.
Reclaimed lumber can supply old-growth density and an authentic look for certain repairs, but it should be matched to the job: sound, dry, and of a species and grain suited to the exposure. The reproduction must still match the original in design, size, shape, color and texture whatever the stock.
Substitute materials and their proper use
Where wood is not technically or economically feasible, preservation guidance allows compatible substitutes, with conditions. The City of Anderson guidelines accept a substitute if its size, shape, texture and finish convey the visual appearance of the original and, for a fiberglass column, if the style and detail match the historic model. Review boards in your jurisdiction may be stricter, and a project seeking federal historic tax credits is reviewed against the Standards, so settle the question with the preservation office before ordering.
A short comparison of the options commonly discussed for column work:
| Material |
Where it fits |
Structural note |
| Rot-resistant wood, built to the original profile |
Replacement in kind of shafts, bases, capitals |
Can carry load when sized and detailed by the engineer |
| Reinforced cast stone |
Masonry-style or classical columns |
Can be reinforced with steel for structural applications |
| GFRC (glass fiber reinforced concrete) |
Ornament, capitals, detailed elements |
Typical ornament is about ¾ inch thick, valued for fine texture and low shrinkage |
| Fiberglass |
Large-scale columns where a close visual match is acceptable |
Light and easy to handle, but a substitute for a structural column needs a structural core or a rated design specified with an engineer |
The Traditional Building product report cited above describes fiberglass units as light and manageable, and GFRC as popular for replicating historic ornament. Whatever the material, the visual test governs: if the proportions, shadow lines and surface differ from the original, the substitute fails the standard however well it performs structurally.
Permits, Reviews and Tax Credit Eligibility
A column replacement on a historic property can touch several layers of review: a local historic district commission, a state historic preservation office, building code officials and, for income-producing buildings seeking federal credits, the National Park Service. The Secretary of the Interior’s Standards for the Treatment of Historic Properties frame the decision. Choosing a treatment requires careful judgment about the building’s significance, level of designation and physical condition. Rehabilitation is the most commonly used treatment, and Preservation suits buildings whose distinctive materials, features and spaces are essentially intact. The same document recommends beginning with the least degree of intervention and keeping all work physically and visually compatible.
Two practical habits help. First, bring the preservation office the documentation described above before work begins, because an approved replica based on measured evidence moves faster than a proposal built on a catalog photograph. Second, keep the record afterward: photographs of the removed column, the templates, the engineer’s letter and the material specifications. They are the file that supports an application or an audit later.
Choosing a Replacement Builder
The NPS brief on porches offers a useful caution: some contractors routinely recommend replacing all columns because a clean repair is difficult, or because replacement is simply the simpler job. The corrective is a builder who is capable of both repair and fabrication, and whose recommendation therefore follows the building’s condition rather than the shop’s convenience. When evaluating a builder, look for these qualities.
- An assessment before a quote. The builder should probe, measure and document, then explain in writing which columns need repair, which need partial replacement and which must be reproduced.
- In-house fabrication. Reproducing a swelled, fluted or built-up column requires profiling and turning capacity, not just assembly.
- Comfort with engineers and review boards. Shoring plans, load paths and submittals are part of the work.
- A record of period work. Ask to see completed historic projects and how they were documented.
- Material fluency. The builder should be able to discuss species, grain, joinery and finishes, and also explain when a substitute is defensible under your local guidelines.
- Regional knowledge. Climate, moisture exposure and local district rules differ across the mid-Atlantic and Southeast.
Our Perspective
A column is among the first elements a passerby reads on a historic façade. Its swell, its fluting, the depth of its base molding and the proportion of its capital say as much about the house’s period and builder as the windows do. That is why we approach replacement as an act of replication rather than substitution.
We begin with the building. We measure the surviving columns, read the evidence of those that are lost, and draw the reproduction before any lumber is cut. Our work centers on exact historic replication using authentic materials and techniques, and that discipline is what allows a project to meet the expectations of preservation reviewers and historic tax credit eligibility.
We favor repair where repair will serve, and we fabricate in kind where it will not. Architects and general contractors bring us projects that other shops decline: unusual profiles, stave-built shafts, lost designs recovered from old photographs. Those are the commissions our shop is built for.
Gepetto
Work With a Shop That Builds to the Original
Gepetto Millworks designs, fabricates and restores wood windows, doors, trim, staircases, balustrades, casework and architectural millwork for historic buildings, including replication of period features. For porch and entry elements, our custom fabrication work covers balustrades, period staircases and related built elements that sit alongside your columns, so the porch can be treated as one coherent restoration.
We serve architects, contractors, builders and owners across Virginia, West Virginia, North Carolina, South Carolina, Maryland and the District of Columbia. If you are planning a project in Virginia, our overview of 19th-century building preservation services shows the kind of work we take on, and our notes on sustainable historic preservation explain how millwork and conservation fit together. To discuss a column project, contact us through gepettomillworks.com.
FAQ
Can a historic column be replaced without replacing the whole porch?
Yes. When only the base or plinth has failed, it can be replaced while the sound shaft stays, using temporary shoring to carry the roof. The replacement must match the original in design, size, shape, color and texture. A structural review confirms which parts are sound.
Do I need an engineer to replace a porch column?
If the column carries roof or floor load, or the work requires shoring or cutting into the load-bearing part, a qualified structural engineer should review it. Federal guidance on deteriorated historic buildings describes documentation of structural condition as usually done by an engineer familiar with archaic systems. Local rules on who must certify differ, so check with your building department.
Is a fiberglass column acceptable on a historic home?
Sometimes. Preservation guidance allows a substitute material in limited cases where it conveys a close visual match, and where its style and detail follow the historic model. Fiberglass alone is not a structural member, so a load-bearing application needs a structural core or a rated design. Confirm acceptability with your local review board or preservation office before ordering.
What should I document before a column is removed?
Record full dimensions, profile templates, construction type, species where known, the column’s exact location and photographs of its condition. This record supports an exact reproduction and any review or tax credit file. If the column is already lost, gather early photographs and physical evidence of its design.
Sources
Recommended
by Matthew Wiley | Nov 6, 2026 | Architectural Millwork
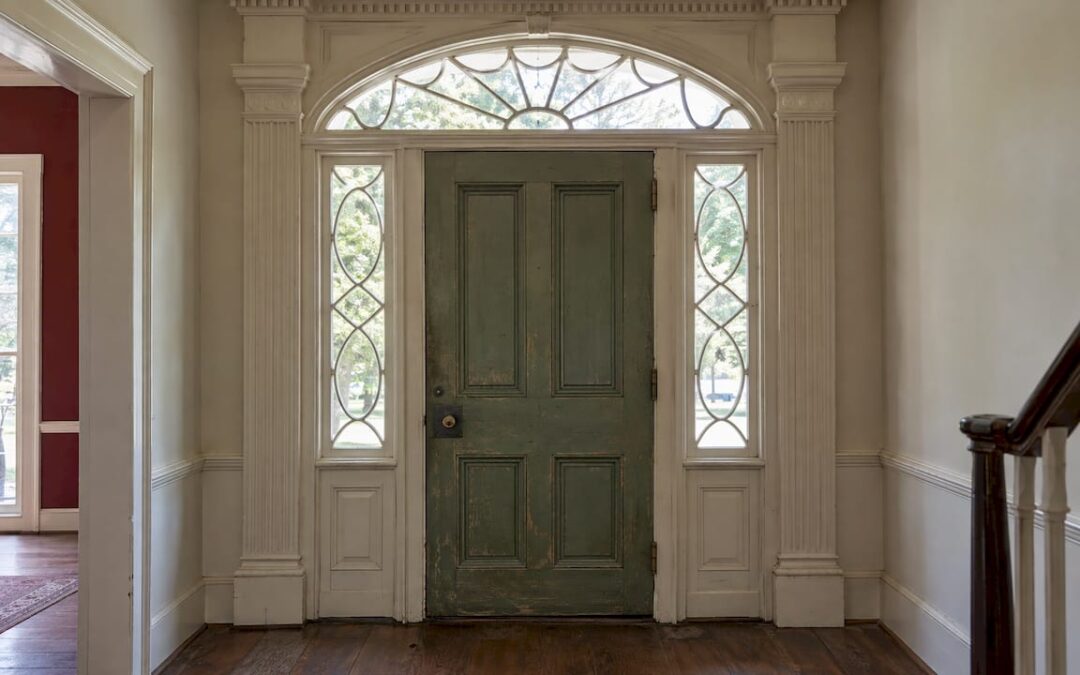
Restoring a transom and sidelights begins with a principle rather than a tool: the historic entrance should be retained and repaired whenever possible, and any element that is truly missing should be rebuilt to match documented evidence. The work itself follows a predictable sequence of assessment, careful paint release, repair of frame and sash, reglazing or leaded-glass conservation, safe paint removal and a finish that protects the wood. This guide walks through each stage for architects, contractors and owners of historic buildings.
Gepettomillworks
Preserve the Character of Historic Entrances
Gepettomillworks creates custom millwork for historic building projects, supporting entrances where transoms, sidelights and doors form one composition.
Explore custom millwork
TL;DR
- Treat the door, transom and sidelights as one composition. The National Park Service advises retaining and repairing the historic entrance and replacing a missing element only to match documented evidence.
- Paint failure is not wood failure. Blistered or peeling paint marks where water is getting in, and the wood beneath is often repairable.
- A transom painted shut should be released by cutting the paint bond with a knife, never by prying or force.
- Leaded and stained glass that is bulging, sagging, or more than 5% broken needs bench conservation, not repair in place.
- Pre-1978 paint may contain lead. Lead-safe repairs fall under the EPA RRP Rule and call for a licensed professional.
Table of Contents
Why the transom and sidelights are read as one composition
In the Federal, Greek Revival and Georgian Revival houses of the Mid-Atlantic and the South, the entrance was the architectural statement of the façade. A rectangular transom or an elliptical fanlight sat above the door, flanking sidelights echoed its muntin pattern, and pilasters and an entablature framed the whole. Preservation guidance reflects that logic: the Mandeville, Louisiana design guidelines describe an entrance as a collective composition of doors, transoms, sidelights, shutters, pediments and surrounds.
This matters for the work plan. Restoring the transom alone while a vinyl-clad replacement door stands beneath it flattens the proportions the original joiner intended. Planning the whole entrance, even if only one element is funded in the first phase, keeps later decisions consistent: muntin profiles, glass type, paint colors and hardware finishes should be settled once and applied across every component.
Assessing condition and original design
Before a single screw is turned, document what exists. The National Park Service’s Preservation Brief 9 recommends that any evaluation of a historic window note, at a minimum, the location, paint condition, frame and sill, sash, glazing problems, hardware and overall condition of the unit. The same list serves well for transoms and sidelights, with a few additions specific to entrances.
What to record
- Pattern and profile: muntin width and profile, the number of lights, any curved or elliptical members, and the glass type (crown, cylinder, or later plate).
- Operation: hinge mortises, pivot pins, chain or rod hardware and screw holes in the head of the frame often reveal whether a transom was built to open. Paint-filled mortises with no hardware are a strong clue that something once operated there.
- Moisture history: look for staining below the sill of the sidelight and at the base of the stiles, where water collects and end grain draws it in.
- Later alterations: infilled panels, added storm units, or a sign covering the transom glass. Piqua, Ohio’s historic buildings standards, for instance, call it undesirable for transom glass to be covered by a sign.
Reading paint failure correctly
Preservation Brief 9 states that moisture is the primary contributing factor in the decay of wooden windows, and that blistering, cracking, flaking and peeling paint usually identifies points of water penetration. It also cautions that paint failure should not be mistaken for a sign that the wood is irreparable. A probe with an awl or screwdriver, taken at the sill, the bottom rail and the joints, separates cosmetic failure from true rot.
If the wood has been repeatedly repainted, moisture content is worth knowing before any new coating goes on; a short guide on checking wood moisture before priming explains why primer applied over damp wood fails early.
Freeing a transom that is painted shut
Most transoms found in old houses have not failed mechanically. They are simply sealed by several generations of oil and latex paint. This Old House notes that paint buildup is a common culprit for stuck windows in older homes, and that humidity and temperature swings can swell and shrink the wood enough to cause warping and sticking.
The sequence that protects the historic fabric:
- Break the paint bond first. Preservation Brief 9 advises running a utility knife along the seam where the interior stop and parting bead meet the jamb, cutting through the paint film before any movement is attempted.
- Work the joints. This Old House suggests sliding a stiff putty knife, four to six inches wide, between sash and stop and driving it into the joints at the top and bottom to sever dried paint, then applying gentle pressure. The same guide warns against forcing a stuck sash with a pry bar, a 2×4 or brute strength, which splits rails and snaps muntins.
- Use a paint-seal tool where the sash is accessible. Columbia, South Carolina’s historic wood windows guide recommends a window zipper to break paint seals and removing the stop on one side to release the sash.
- Treat every scraped surface as lead-suspect until proven otherwise (see the lead section below).
If the transom was never meant to open, nothing is gained by forcing it. Many historic transoms were fixed lights from the start, and a fixed transom restored faithfully is a correct restoration. Where evidence shows it operated, restoring the hardware and the operation is the more complete outcome, and is one that a millwork shop can reproduce from the surviving pivots, mortises and ghost marks.
Repairing frames, sash, putty and hardware
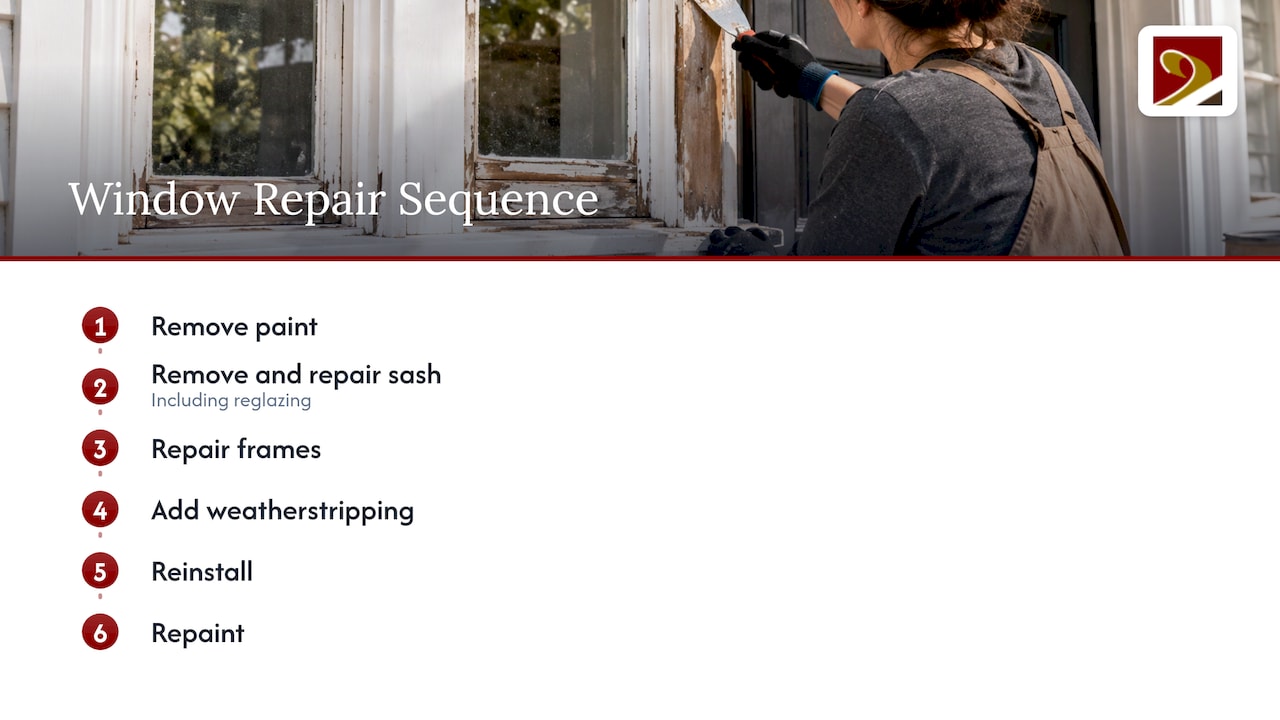
Preservation Brief 9 describes the routine work needed to bring a historic window to like-new condition: some paint removal, sash removal and repair including reglazing, frame repairs, weatherstripping, reinstallation and repainting. Transom sash and sidelight frames follow the same logic, usually with simpler hardware and more delicate muntins.
Wood repair
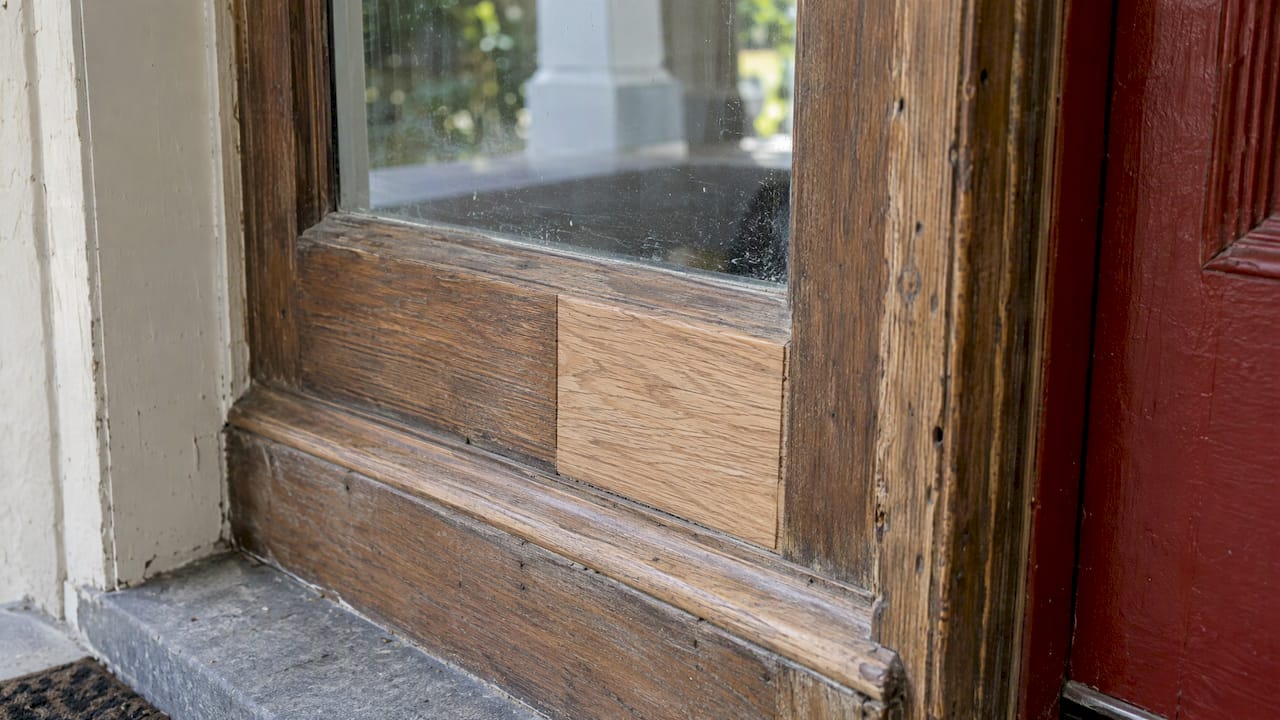
Sound wood stays. Localized decay at a sill, a bottom rail or a muntin joint is cut back to solid material and repaired by a Dutchman (an inset piece of matching species and grain) or by consolidant and filler where the loss is small. Old-growth heart pine, cypress and white oak, common in pre-1900 entrances, have decay resistance that modern framing lumber lacks, so matching species is not a matter of taste but of longevity. Where a muntin or a section of frame is gone, a new member must be milled to the original profile, not approximated with a stock molding.
Glazing putty
The Brief’s guidance on putty is specific. Deteriorated putty should be removed by hand without damaging the wood along the rabbet; hardened putty may be softened with a soldering iron at the point of removal, and putty on the glass can be softened by soaking the panes in linseed oil. Before the glass is set again, a bead of glazing compound or linseed oil putty is laid around the rabbet. This detail is easy to skip and it is the one that keeps water out of the joint for decades.
Hardware and stops
The Preservation Dallas window repair guide states that windows should operate smoothly and easily when work is complete, that damaged or missing stops are replaced in kind, and that historic hardware should be retained and cleaned, with new hardware matching the existing as closely as possible.
Owners often ask whether restoring a transom means accepting drafts. The Pawtucket, Rhode Island Historic District Commission standards state that properly repaired, caulked and weatherstripped historic wood windows with well-fitted storm windows can be as energy efficient as new double-glazed units. A discreet interior or exterior storm panel over a restored transom is the conventional answer.
Matching glass and muntins
Glass is the character of a transom. Kennebunk, Maine’s entrance guidelines are a useful model of how review boards think: in repairing sidelights, the type, style and size of glass and the muntin profile should match the original, and stained or leaded glass should not be introduced in transoms, sidelights or door lights unless evidence documents its original use. In practice this means that a decorative leaded pattern added in 1985 is a candidate for removal in a rehabilitation, whereas a documented original leaded fanlight is a candidate for conservation.
For historic glass, the visible imperfections (waviness, seeds, slight distortion) are part of the building’s age. Where a pane has failed, replacement glass with similar character is selected so that the new light does not read as a flat modern patch among the originals.
Stained and leaded transoms: conserve, do not remake
Many Victorian and early twentieth-century entrances carry leaded or stained glass in the transom and sidelights. The relevant standard is NPS Preservation Brief 33. It states that when waterproofing has failed, the window should be removed and waterproofed on a bench, because leaded glass cannot be adequately waterproofed in place. The same brief says a window cannot be properly repaired in place if it is bulging or sagging far out of plane, if more than 5% of the glass is broken, or if solder joints are failing.
The waterproofing itself is a compound rubbed over the window, preferably while it lies flat on a table, and pressed under the came flange to form a watertight bond between lead and glass. Traditionally it was made of linseed oil, whiting and a coloring agent, per the same Brief.
The ethics are stated plainly there too: the Stained Glass Association of America’s cardinal rule is “DO NO HARM.” Original fabric is re-used, the work is documented for future custodians, methods are reversible unless imminent loss requires otherwise, and the windows remain in their original architectural context. For a project seeking tax credit approval, that documentation is also useful in the application narrative.
A practical sequence for a leaded transom:
- Photograph and rubbing-trace the panel before removal, numbering the pieces.
- Remove the panel along with its frame or stops, supporting it flat during transport.
- Clean, repair cracks and replace only the glass that cannot be saved.
- Re-solder weak joints, waterproof on the bench, and add protective glazing outside if the exposure warrants it.
- Reset in a repaired frame that has been primed and painted before the panel returns.
Paint removal and lead safety
The temptation with a transom frame buried in paint is to strip everything. Preservation Brief 10 advises the opposite: apart from cleaning, light scraping and hand sanding as routine maintenance, paint removal should be avoided unless absolutely essential, and the general approach is to remove paint to the next sound layer with the gentlest means possible, then repaint.
The means matter as much as the extent. Preservation Brief 47 notes that care is needed with historic materials containing lead-based paint, that damp methods can minimize airborne particles, and that heat removal carries safety concerns, including the risk of igniting debris within walls; torches, open flames and high heat should be avoided.
Lead-safe practice
For entrances built before 1978, assume lead until a test says otherwise. The Newport Restoration Foundation advises that although small lead hazards can be addressed by an owner, it is advisable, and in most cases required, to hire a licensed lead professional experienced in historic restoration. Lead-safe repairs fall under the RRP Rule and must be performed by a licensed individual or firm. The same guide explains that lead hazards in historic windows can be mitigated safely, and a lead inspection passed, without replacing the windows.
For owners and contractors, this has a practical consequence: the transom and sidelight frames are often best removed and worked in a controlled shop environment, with containment and HEPA filtration, rather than stripped in place above a front step. Keeping the stripping off site protects the occupants, the neighbors and the plaster around the opening.
When specialist help or replacement is warranted
The preservation hierarchy is consistent across jurisdictions: repair first, replace in kind only when repair is not possible. The Piqua, Ohio standards state that where a transom is missing or too deteriorated to repair, a replacement should match the original as closely as possible. The NPS entrance treatment bulletin adds that a missing element is replaced to match when physical, pictorial or photographic evidence documents its appearance.
Specialist fabrication becomes the right path when:
- the transom or sidelight frame is too decayed to splice, and a new frame must be milled to the original section;
- an elliptical, arched or fanlight sash requires curved muntins that stock suppliers do not make;
- the entrance is part of a certified rehabilitation and the new work must match historic profiles, species and joinery to satisfy review;
- the paint contains lead and the components need controlled shop removal.
Before starting, check which reviews apply. A local historic district commission, a state historic preservation office and, for tax-credit projects, the National Park Service each have their own submission requirements, and their approvals should precede fabrication, not follow it. Local preservation non-profits are, as the Newport guide suggests, a good source of referrals for contractors experienced with historic properties.
Perspective
Most of the transoms and sidelights that come through a historic millwork shop are not beyond saving. They are buried: under paint, under later storm units, under the assumption that the original joinery is gone. In our experience, the first discipline is patience, because an elliptical fanlight or a set of slender sidelight muntins carries the proportions of the entire façade.
We build and restore these components as an extension of the building’s own history. That means studying the surviving profile, matching species and joinery, and making new members only where the old ones are truly lost. It also means producing drawings that architects and review boards can follow, since a rehabilitation seeking historic tax credit eligibility must be able to show that new work replicates the old.
Our view is that the best result is rarely the cheapest-looking shortcut, and rarely a wholesale replacement. It is a repaired original wherever one exists and an exact replication where one does not, delivered by a shop that treats a mullion the way a conservator treats a brushstroke.
Gepetto
Working with Gepetto Millworks on your entrance
Gepetto Millworks designs, fabricates and restores wood windows, doors, trim and architectural millwork for historic buildings, including replication of period features and matching for historic tax credit eligibility. For a transom and sidelights project, that can mean repairing the original sash, milling a new frame to the surviving profile or reproducing a missing fanlight from documentary evidence. Our historic window restoration service is the starting point for sash and frame work, and our custom fabrication offerings cover solid wood entry doors, historic-pattern doors and the casework around them.
We work with architects, general contractors, builders and owners across Virginia, West Virginia, North Carolina, South Carolina, Maryland and the District of Columbia. Send drawings, photographs or measurements of your entrance through our site and we will discuss scope and approach.
FAQ
Can a painted-shut transom be made to open again?
Usually, yes, if it was built to open. Cut the paint bond along the stops with a utility knife, work a wide putty knife into the joints and apply gentle pressure, never a pry bar. If the hinge or pivot hardware is missing or the frame has decayed, a millwork shop can restore operation with matching hardware and repaired members.
Should I replace cracked glass in a transom with modern glass?
Only when the pane cannot be saved. Guidance such as Kennebunk’s entrance standards calls for replacement glass that matches the original in type, style and size, with the original muntin profile retained. For leaded or stained glass, conservation by an experienced glass specialist is preferred over re-creating the panel.
Is it safe to scrape and sand old transom paint myself?
Not without testing for lead first. Entrances predating 1978 may carry lead-based paint, and lead-safe repairs fall under the EPA RRP Rule, which requires a licensed individual or firm. Damp methods and HEPA vacuums reduce airborne dust, and open flames and high heat should be avoided.
When does a leaded glass transom need to come out of the opening?
When its waterproofing has failed, because leaded glass cannot be adequately waterproofed in place. NPS Preservation Brief 33 also says a panel cannot be properly repaired in place if it is bulging or sagging, if over 5% of the glass is broken, or if solder joints are failing.
Can a missing transom or sidelight be rebuilt?
Yes. The Secretary of the Interior’s Standards for Rehabilitation support replacing a missing element to match when physical, pictorial or photographic evidence documents it. Old photographs, neighboring houses of the same period and ghost lines in the masonry or trim are the usual evidence.
Sources
- ITS Number 26: Entrance Treatments, National Park Service
- Preservation Brief 9: The Repair of Historic Wooden Windows, National Park Service
- Preservation Brief 10: Exterior Paint Problems on Historic Woodwork, National Park Service
- Preservation Brief 33: The Preservation and Repair of Historic Stained and Leaded Glass, National Park Service
- Preservation Brief 47, National Park Service
- Entrance Surrounds and Doors, Kennebunk, Maine
- Historic Wood Windows and Doors, Columbia, South Carolina
- How To Open Jammed Windows, This Old House
- Guide to Window Repair and Replacement, Preservation Dallas
- Historic District Commission Standards and Guidelines, Pawtucket, Rhode Island
- Preserving Historic Windows While Remediating Lead Hazards, Newport Restoration Foundation
- Historic Buildings Design Standards, Piqua, Ohio
- Mandeville Design Guidelines, Mandeville, Louisiana
- Checking wood moisture before priming